
Create a new Android application (File → New → New Project...). Select the Empty Activity template and click Next.
Configure your project as shown in Figure 20.3: Name the application PhotoGallery. Make sure the Package name is com.bignerdranch.android.photogallery and the Language is Kotlin. Select API 24: Android 7.0 (Nougat) from the Minimum SDK dropdown.
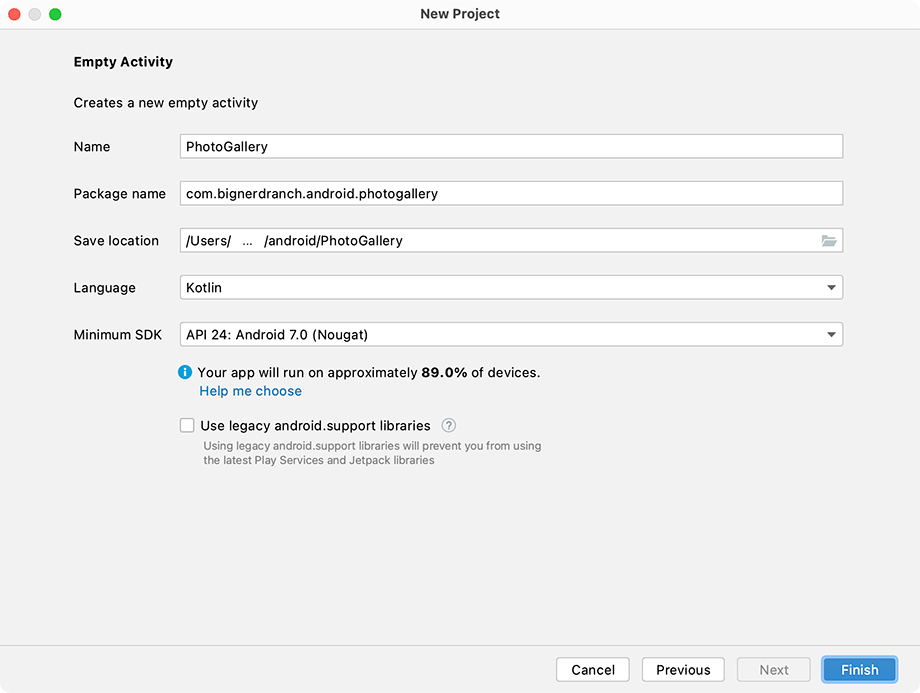
Click Finish to generate the project.
Many of the initial steps to set up this project will look familiar from your earlier projects. Once again, you will use libraries and tools like the Fragment class, the ViewModel class, the RecyclerView component, and View Binding. Start by opening the app/build.gradle file (the one labeled (Module: PhotoGallery.app)) to add the dependencies you will need and to enable View Binding.
Listing 20.1 Setting up your project’s build (app/build.gradle)
...
android {
    ...
    kotlinOptions {
        jvmTarget = '1.8'
    }
    buildFeatures {
        viewBinding true
    }
}

dependencies {
    ...
    implementation 'androidx.constraintlayout:constraintlayout:2.1.3'
    implementation 'androidx.fragment:fragment-ktx:1.4.1'
    implementation 'androidx.recyclerview:recyclerview:1.2.1'
    implementation 'androidx.lifecycle:lifecycle-viewmodel-ktx:2.4.1'
    implementation 'androidx.lifecycle:lifecycle-runtime-ktx:2.4.1'
    testImplementation 'junit:junit:4.13.2'
    ...
}
Do not forget to sync your files after you have made these changes. Now, on to the code.
Create the fragment that will display when the app launches. PhotoGallery will display its results in a RecyclerView, using the built-in GridLayoutManager to arrange the items in a grid. The Kotlin class will be named PhotoGalleryFragment, so first right-click the res/layout folder in the project tool window and select New → Layout resource file. Name this file fragment_photo_gallery.xml and enter androidx.recyclerview.widget.RecyclerView as the root element.
Click OK. The generated file is mostly correct. Just add an ID so that you can reference the RecyclerView within your Kotlin code.
Listing 20.2 Adding an ID (res/layout/fragment_photo_gallery.xml)
<?xml version="1.0" encoding="utf-8"?>
<androidx.recyclerview.widget.RecyclerView
    xmlns:android="http://schemas.android.com/apk/res/android"
    android:id="@+id/photo_grid"
    android:layout_width="match_parent"
    android:layout_height="match_parent">

</androidx.recyclerview.widget.RecyclerView>
Next, create a Kotlin file for the PhotoGalleryFragment class. In the project tool window, right-click the com.bignerdranch.android.photogallery package and select New → Kotlin Class/File.
Subclass the Fragment class and inflate and bind your layout using View Binding.
While you are at it, set the recycler view’s layoutManager to a new instance of GridLayoutManager.
Hardcode the number of columns to 3.
Listing 20.3 Setting up the fragment (PhotoGalleryActivity.kt)
class PhotoGalleryFragment : Fragment() {
    private var _binding: FragmentPhotoGalleryBinding? = null
    private val binding
        get() = checkNotNull(_binding) {
            "Cannot access binding because it is null. Is the view visible?"
        }

    override fun onCreateView(
        inflater: LayoutInflater,
        container: ViewGroup?,
        savedInstanceState: Bundle?
    ): View {
        _binding =
            FragmentPhotoGalleryBinding.inflate(inflater, container, false)
        binding.photoGrid.layoutManager = GridLayoutManager(context, 3)
        return binding.root
    }

    override fun onDestroyView() {
        super.onDestroyView()
        _binding = null
    }
}
With the skeleton of your PhotoGalleryFragment class complete, include it in the MainActivity using a FragmentContainerView.
Listing 20.4 Adding a fragment container (res/layout/activity_main.xml)
<?xml version="1.0" encoding="utf-8"?><androidx.constraintlayout.widget.ConstraintLayoutxmlns:android="http://schemas.android.com/apk/res/android"xmlns:app="http://schemas.android.com/apk/res-auto"xmlns:tools="http://schemas.android.com/tools"android:layout_width="match_parent"android:layout_height="match_parent"tools:context=".MainActivity"><TextViewandroid:layout_width="wrap_content"android:layout_height="wrap_content"android:text="Hello World!"app:layout_constraintBottom_toBottomOf="parent"app:layout_constraintLeft_toLeftOf="parent"app:layout_constraintRight_toRightOf="parent"app:layout_constraintTop_toTopOf="parent" /></androidx.constraintlayout.widget.ConstraintLayout><androidx.fragment.app.FragmentContainerView xmlns:android="http://schemas.android.com/apk/res/android" xmlns:tools="http://schemas.android.com/tools" android:id="@+id/fragment_container" android:layout_width="match_parent" android:layout_height="match_parent" android:name="com.bignerdranch.android.photogallery.PhotoGalleryFragment" tools:context=".MainActivity" />
Run PhotoGallery to make sure everything is wired up correctly before moving on. If all is well, you will have a very nice blank screen.