
54. Android Explicit Intents – A Worked Example
The chapter entitled “An Overview of Android Intents” covered the theory of using intents to launch activities. This chapter will put that theory into practice through the creation of an example application.
The example Android Studio application project created in this chapter will demonstrate the use of an explicit intent to launch an activity, including the transfer of data between sending and receiving activities. The next chapter (“Android Implicit Intents – A Worked Example”) will demonstrate the use of implicit intents.
54.1 Creating the Explicit Intent Example Application
Select the Start a new Android Studio project quick start option from the welcome screen and, within the resulting new project dialog, choose the Empty Activity template before clicking on the Next button.
Enter ExplicitIntent into the Name field and specify com.ebookfrenzy.explicitintent as the package name. Before clicking on the Finish button, change the Minimum API level setting to API 26: Android 8.0 (Oreo) and the Language menu to Java.
54.2 Designing the User Interface Layout for MainActivity
The user interface for MainActivity will consist of a ConstraintLayout view containing EditText (Plain Text), TextView and Button views named editText1, textView1 and button1 respectively. Using the Project tool window, locate the activity_main.xml resource file for MainActivity (located under app -> res -> layout) and double-click on it to load it into the Android Studio Layout Editor tool. Select and delete the default “Hello World!” TextView.
Drag a TextView widget from the palette and drop it so that it is centered within the layout and use the Attributes tool window to assign an ID of textView1.
Drag a Button object from the palette and position it so that it is centered horizontally and located beneath the bottom edge of the TextView. Change the text property so that it reads “Ask Question” and configure the onClick property to call a method named askQuestion.
Next, add a Plain Text object so that it is centered horizontally and positioned above the top edge of the TextView. Using the Attributes tool window, remove the “Name” string assigned to the text property and set the ID to editText1. With the layout completed, click on the toolbar Infer constraints button to add appropriate constraints:
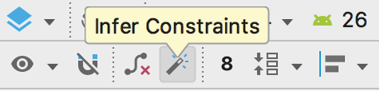
Figure 54-1
Finally, click on the red warning button in the top right-hand corner of the Layout Editor window and use the resulting panel to extract the “Ask Question” string to a resource named ask_question.
Once the layout is complete, the user interface should resemble that illustrated in Figure 54-2:

54.3 Creating the Second Activity Class
When the “Ask Question” button is touched by the user, an intent will be issued requesting that a second activity be launched into which an answer can be entered by the user. The next step, therefore, is to create the second activity. Within the Project tool window, right-click on the com.ebookfrenzy.explicitintent package name located in app -> java and select the New -> Activity -> Empty Activity menu option to display the New Android Activity dialog as shown in Figure 54-3:
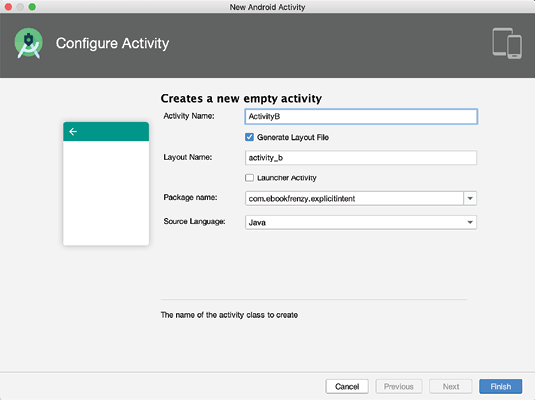
Enter ActivityB into the Activity Name and Title fields and name the layout file activity_b and change the Language menu to Java. Since this activity will not be started when the application is launched (it will instead be launched via an intent by MainActivity when the button is pressed), it is important to make sure that the Launcher Activity option is disabled before clicking on the Finish button.
54.4 Designing the User Interface Layout for ActivityB
The elements that are required for the user interface of the second activity are a Plain Text EditText, TextView and Button view. With these requirements in mind, load the activity_b.xml layout into the Layout Editor tool, and add the views.
During the design process, note that the onClick property on the button view has been configured to call a method named answerQuestion, and the TextView and EditText views have been assigned IDs textView1 and editText1 respectively. Once completed, the layout should resemble that illustrated in Figure 54-4. Note that the text on the button (which reads “Answer Question”) has been extracted to a string resource named answer_question.
With the layout complete, click on the Infer constraints toolbar button to add the necessary constraints to the layout:

54.5 Reviewing the Application Manifest File
In order for MainActivity to be able to launch ActivityB using an intent, it is necessary that an entry for ActivityB be present in the AndroidManifest.xml file. Locate this file within the Project tool window (app -> manifests), double-click on it to load it into the editor and verify that Android Studio has automatically added an entry for the activity:
<?xml version="1.0" encoding="utf-8"?>
<manifest xmlns:android="http://schemas.android.com/apk/res/android"
package="com.example.explicitintent">
<application
android:allowBackup="true"
android:icon="@mipmap/ic_launcher"
android:label="@string/app_name"
android:roundIcon="@mipmap/ic_launcher_round"
android:supportsRtl="true"
android:theme="@style/AppTheme">
<activity android:name=".ActivityB"></activity>
<activity android:name=".MainActivity">
<intent-filter>
<action android:name="android.intent.action.MAIN" />
<category android:name="android.intent.category.LAUNCHER" />
</intent-filter>
</activity>
</application>
</manifest>
With the second activity created and listed in the manifest file, it is now time to write some code in the MainActivity class to issue the intent.
The objective for MainActivity is to create and start an intent when the user touches the “Ask Question” button. As part of the intent creation process, the question string entered by the user into the EditText view will be added to the intent object as a key-value pair. When the user interface layout was created for MainActivity, the button object was configured to call a method named askQuestion() when “clicked” by the user. This method now needs to be added to the MainActivity class MainActivity.java source file as follows:
package com.ebookfrenzy.explicitintent;
import androidx.appcompat.app.AppCompatActivity;
import android.os.Bundle;
import android.content.Intent;
import android.view.View;
import android.widget.EditText;
import android.widget.TextView;
public class MainActivity extends AppCompatActivity {
@Override
protected void onCreate(Bundle savedInstanceState) {
super.onCreate(savedInstanceState);
setContentView(R.layout.activity_a);
}
public void askQuestion(View view) {
Intent i = new Intent(this, ActivityB.class);
final EditText editText1 = findViewById(R.id.editText1);
String myString = editText1.getText().toString();
i.putExtra("qString", myString);
startActivity(i);
}
}
The code for the askQuestion() method follows the techniques outlined in “An Overview of Android Intents”. First, a new Intent instance is created, passing through the current activity and the class name of ActivityB as arguments. Next, the text entered into the EditText object is added to the intent object as a key-value pair and the intent started via a call to startActivity(), passing through the intent object as an argument.
Compile and run the application and touch the “Ask Question” button to launch ActivityB and the back button (located in the toolbar along the bottom of the display) to return to MainActivity.
Now that ActivityB is being launched from MainActivity, the next step is to extract the String data value included in the intent and assign it to the TextView object in the ActivityB user interface. This involves adding some code to the onCreate() method of ActivityB in the ActivityB.java source file:
package com.ebookfrenzy.explicitintent;
import androidx.appcompat.app.AppCompatActivity;
import android.os.Bundle;
import android.content.Intent;
import android.view.View;
import android.widget.TextView;
import android.widget.EditText;
public class ActivityB extends AppCompatActivity {
public void onCreate(Bundle savedInstanceState) {
super.onCreate(savedInstanceState);
setContentView(R.layout.activityb);
Bundle extras = getIntent().getExtras();
if (extras == null) {
return;
}
String qString = extras.getString("qString");
final TextView textView = findViewById(R.id.textView1);
textView.setText(qString);
}
}
Compile and run the application either within an emulator or on a physical Android device. Enter a question into the text box in MainActivity before touching the “Ask Question” button. The question should now appear on the TextView component in the ActivityB user interface.
54.8 Launching ActivityB as a Sub-Activity
In order for ActivityB to be able to return data to MainActivity, ActivityB must be started as a sub-activity of MainActivity. This means that the call to startActivity() in the MainActivity askQuestion() method needs to be replaced with a call to startActivityForResult(). Unlike the startActivity() method, which takes only the intent object as an argument, startActivityForResult() requires that a request code also be passed through. The request code can be any number value and is used to identify which sub-activity is associated with which set of return data. For the purposes of this example, a request code of 5 will be used, giving us a modified MainActivity class that reads as follows:
public class MainActivity extends AppCompatActivity {
private static final int request_code = 5;
@Override
public void onCreate(Bundle savedInstanceState) {
super.onCreate(savedInstanceState);
setContentView(R.layout.main);
}
public void askQuestion(View view) {
Intent i = new Intent(this, ActivityB.class);
final EditText editText1 = findViewById(R.id.editText1);
String myString = editText1.getText().toString();
i.putExtra("qString", myString);
startActivity(i);
startActivityForResult(i, request_code);
}
}
When the sub-activity exits, the onActivityResult() method of the parent activity is called and passed as arguments the request code associated with the intent, a result code indicating the success or otherwise of the sub-activity and an intent object containing any data returned by the sub-activity. Remaining within the MainActivity class source file, implement this method as follows:
protected void onActivityResult(int requestCode, int resultCode, Intent data) {
if ((requestCode == request_code) &&
(resultCode == RESULT_OK)) {
TextView textView1 = findViewById(R.id.textView1);
String returnString =
data.getExtras().getString("returnData");
textView1.setText(returnString);
}
}
The code in the above method begins by checking that the request code matches the one used when the intent was issued and ensuring that the activity was successful. The return data is then extracted from the intent and displayed on the TextView object.
54.9 Returning Data from a Sub-Activity
ActivityB is now launched as a sub-activity of MainActivity, which has, in turn, been modified to handle data returned from ActivityB. All that remains is to modify ActivityB.java to implement the finish() method and to add code for the answerQuestion() method, which is called when the “Answer Question” button is touched. The finish() method is triggered when an activity exits (for example when the user selects the back button on the device):
public void answerQuestion(View view) {
finish();
}
@Override
public void finish() {
Intent data = new Intent();
EditText editText1 = findViewById(R.id.editText1);
String returnString = editText1.getText().toString();
data.putExtra("returnData", returnString);
setResult(RESULT_OK, data);
super.finish();
}
All that the finish() method needs to do is create a new intent, add the return data as a key-value pair and then call the setResult() method, passing through a result code and the intent object. The answerQuestion() method simply calls the finish() method.
Compile and run the application, enter a question into the text field on MainActivity and touch the “Ask Question” button. When ActivityB appears, enter the answer to the question and use either the back button or the “Submit Answer” button to return to MainActivity where the answer should appear in the text view object.
Having covered the basics of intents in the previous chapter, the goal of this chapter was to work through the creation of an application project in Android Studio designed to demonstrate the use of explicit intents together with the concepts of data transfer between a parent activity and sub-activity.
The next chapter will work through an example designed to demonstrate implicit intents in action.