
This chapter is designed to get you up and running with F# as quickly as possible. You’ll learn how to obtain F#, and how to install it on Windows, Apple OS X, and Linux. There are many ways to edit and build F# projects on the various supported platforms. Rather than cover every permutation, I’ll concentrate on the most straightforward route to get you up and running with an IDE on each platform. If you have a favorite editor that I don’t cover, such as Emacs, Vim, or Visual Studio Code, rest assured that these programs have bindings to let you use F# effectively. The F# website, fsharp.org, has up-to-date information on the various options.
Obtaining F# on Microsoft Windows
The most common IDE in use for Windows .NET projects is Visual Studio. Visual Studio comes in many editions depending on your requirements (and budget!), but all of them from the free Community edition upwards support F#. (F# is not supported by Visual Studio Express.) Search on www.visualstudio.com and download the edition that suits you. During the install you can select F# as one of the languages you want to work with. However, if you do not do this, or if you already had Visual Studio installed without having selected F#, don’t worry. As soon as you create or open an F# project, an on-demand install will occur.
The next step is to install the Visual F# Power Tools. This is a suite of enhancements for Visual Studio that make it much easier to work with F# code. Although it’s sometimes treated as an optional extra, you should definitely install Visual F# Power Tools. Without it you won’t have basics such as “Go to definition” and “Refactor Rename.” To install Power Tools, run Visual Studio and go to Tools ➤ Extensions and Updates ➤ Online, then search for FSharp Power Tools. You can also find the Power Tools in the Visual Studio Gallery. Once Power Tools is installed, exit from Visual Studio and rerun it as Administrator. You can do so by right-clicking the Visual Studio icon while holding down the Shift key, and selecting “Run as administrator” (see Figure 2-1).
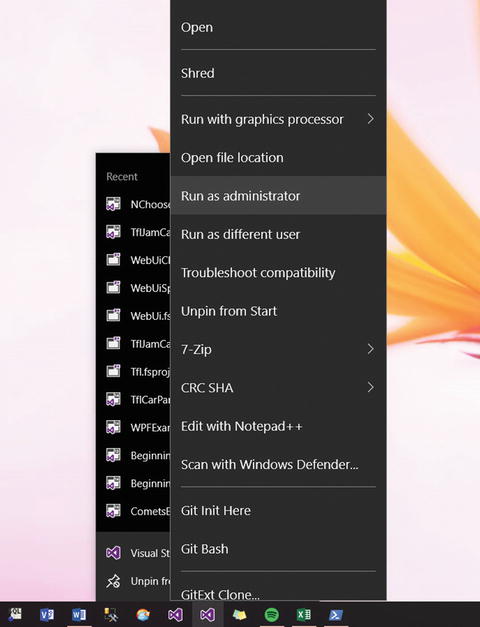
Figure 2-1. Running Visual Studio as Administrator
Once Visual Studio is running as Administrator, go to Tools ➤ Options ➤ F# Power Tools ➤ General and turn on all the options (see Figure 2-2). Restart Visual Studio so that the changes come into effect. If any of the Power Tools behaviors aren’t compatible with your workflow, you can always come back to this dialogue and turn them off, but most of them are stable, useful, and unobtrusive.
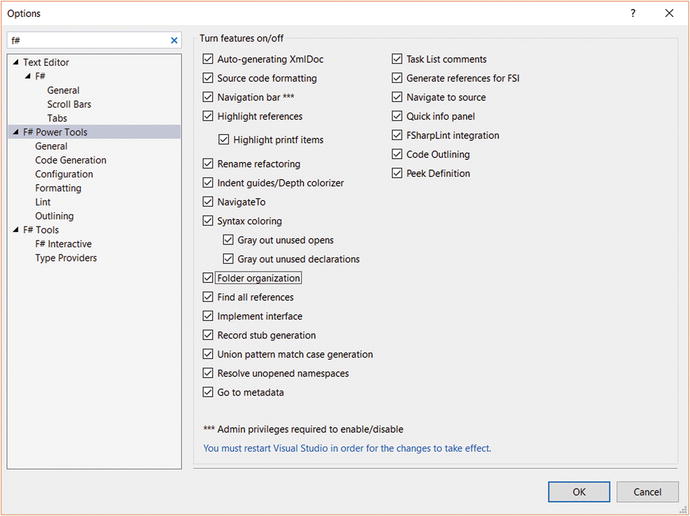
Figure 2-2. Configuring Visual F# Power Tools
Verify your setup by going into Visual Studio and selecting File ➤ New ➤ Project. You should be able to find a number of F# project templates under Installed ➤ Templates ➤ Visual F# or Installed ➤ Templates ➤ Other Languages ➤ F# (Figure 2-3).

Figure 2-3. The F# project templates in the New Project dialog in Visual Studio
If for some reason you don’t want to use Visual Studio on your Windows platform, there are several alternatives. The simplest of these is to install Xamarin Studio. You can download a Windows version from www.xamarin.com . The installation is fairly self-explanatory but you should be prepared for the setup process to download and install a number of other dependences such as the Android SDK and GTK#. You can also set up Emacs or Vim to work nicely with F#.
Obtaining F# on Apple OS X
The most straightforward way to start working with F# on Apple OS X (including targeting other platforms such as iOS and Android) is to install Xamarin Studio. Note that Xamarin Studio currently requires you to be running at least version 10.10 of OS X.
To install Xamarin Studio, go to www.xamarin.com and download Xamarin Studio for OS X. Run the installation and follow the prompts.
If you want to target iOS (Apple iPhone) applications, you also need to set up an Apple Developer Account and install the Apple IDE XCode. The Xamarin Studio install will prompt you about this but you can safely continue and add XCode and a developer account later if necessary (Figure 2-4).

Figure 2-4. XCode is required by Xamarin Studio to create iOS apps
Verify your installation by going to File ➤ New ➤ Solution. Under Other ➤ .NET ➤ and Other ➤ Miscellaneous you should see a number of F# project types including Console Project and Library (see Figure 2-5).

Figure 2-5. The F# project templates in the New Project dialog in Xamarin Studio
Obtaining F# on Linux
The choice of development environment on Linux is less straightforward than for Windows and Mac. In fact, you’re spoilt for choice. Most professional Linux-based developers wanting to use F# and C# tend to gravitate towards one of the long-established editors such as Emacs and Vim, both of which can be set up to work with the F# language and compiler. A further complication is the variety of existing Linux distributions; the steps you need to follow to get F# installed vary between distributions. You can find a certain amount of getting-started information for various distributions and editors on the F# web site, fsharp.org.
To keep things simple for this beginners guide, I’m going to focus on one Linux distribution, Ubuntu, and one environment, MonoDevelop. MonoDevelop provides a very pleasant development environment including code editing, compilation, debugging, and interactive evaluation through F# Interactive. Another advantage, from the point of view of the material in this book, is that MonoDevelop’s command tree is very similar to those of Visual Studio on Windows and Xamarin Studio on Windows and OS X.
To install F# with MonoDevelop on Ubuntu, enter the following commands into the console, entering your password when prompted. (These commands are listed on fsharp.org if you want to save yourself some typing.)
sudo apt-key adv --keyserver keyserver.ubuntu.com --recv-keys 3FA7E0328081BFF6A14DA29AA6A19B38D3D831EF
echo "deb http://download.mono-project.com/repo/debian wheezy main" | sudo tee /etc/apt/sources.list.d/mono-xamarin.list
sudo apt-get update
sudo apt-get install mono-complete fsharp
sudo apt-get install monodevelop
Now run MonoDevelop:
monodevelopWhen MonoDevelop has started up, go to Tools ➤ Add-in Manager ➤ Gallery, and enter “F#” into the search box at the top right (see Figure 2-6). In the results you should see an item called F# Language Binding. Select this and click the Install button. When the installation finishes, close the Add-in Manager. Now close MonoDevelop and start it again.

Figure 2-6. Installing the F# Language Binding in MonoDevelop
Verify your installation by going to File ➤ New ➤ Solution. Under Other ➤ Miscellaneous ➤ General you should see a number of F# project types including F# Console Application and F# Library (see Figure 2-7).

Figure 2-7. The F# project templates in the New Project dialog in MonoDevelop
The Examples in This Book
Some of the examples in this book have been written to be run in F# Interactive, and others, generally the longer examples, need to be added to a full solution and compiled and executed accordingly. Where a solution is required, I give instructions on how to set it up. For the shorter examples that can be run in F# Interactive, I give instructions below.
F# Interactive is a console-like window where you can send or type code to define and evaluate functions and other code. A more general term for this concept is REPL, or read-evaluate-print loop. Code samples in this book that are primarily intended to be run in F# Interactive begin like this:
#if INTERACTIVE
#r "System.Xml.dll"
#else
module Rss
#endif
This has the effect of including a reference to one or more DLLs (files containing other functions you want to use) when the code is run in F# Interactive. (When the code is compiled as part of a project, the reference is included at the project level). On the other hand, the module declaration is only included when the code is compiled, since a module declaration isn’t supported in F# Interactive. So if you do want to include the sample in a compiled project, you should be able to do so without change.
If your project includes references that you have added via NuGet or another package manager, and you want to execute code that depends on them in F# Interactive, you need to reference the DLLs using their paths, thus:
#if INTERACTIVE
// You may have to alter this path depending on the version
// of FSharp.Data downloaded and on you project structure
#r @"../packages/FSharp.Data.2.2.5/lib/net40/FSharp.Data.dll"
#else
module UndergroundHTML
#endif
In the examples I use forward slashes in the paths. This works on either Windows or Mono platforms , whereas backslashes will work only on Windows.
To run an example in F# Interactive, take the following steps. (The screenshots shown are for Visual Studio but for Xamarin and MonoDevelop you should see very similar screens.)
Create a new file in your IDE (Visual Studio, Xamarin Studio, MonoDevelop, or another editor configured to use F#). If your IDE supports the concept of projects, you may want to create a project of type F# Library, in which case a file called something like Library.fs will be created for you (Figure 2-8).

Figure 2-8. Creating a new project
Paste the code for the example, including the #if INTERACTIVE construct describe above, into the code file, completely replacing its contents (Figure 2-9).

Figure 2-9. Placing some sample code in an .fs file
When you want send the code to F# Interactive, select the relevant lines, maybe the entire file, and select “Execute in Interactive” in Visual Studio, or “Send selection to F# Interactive” on MonoDevelop and Xamarin Studio. You’ll find “Send to Interactive” on the right-click menu, and on a shortcut. By default the shortcut is Alt+Enter in Visual Studio, Ctrl+Enter in MonoDevelop, and Command+Enter in Xamarin Studio on a Mac (Figure 2-10).

Figure 2-10. Sending code to F# Interactive
Note that sending code to F# Interactive doesn’t necessarily make the F# Interactive window visible or even give it focus. If you can’t see it, you need to find the menu option to view it. In Visual Studio, this is View ➤ F# Interactive, or View ➤ Other Windows F# ➤Interactive. In MonoDevelop and Xamarin Studio, it is View ➤ Pads ➤ F# Interactive.
If your code just defines a function and doesn’t call it, you can call the function by typing its name and any arguments directly into F# Interactive and following them with two semi-colons (Figure 2-11).

Figure 2-11. Running a function by typing into F# Interactive
The samples can be downloaded from http://github.com/beginningfsharp . The examples were written in version 4.0 of the F# language. However, the syntactical differences between F# 4.0 and F# 3.0 and 3.1 are comparatively minor, so if for some reason you are limited to an earlier version of the language, you should be able to run most of them unchanged, or at worst with minor changes,. Likewise, the examples should generally run on all the platforms supported by F#.
Summary
This chapter described how to install and run F# on the various platforms that are available. It also showed you how to use F# Interactive to run the simpler code examples in the rest of the book. The following chapters will explain how to program with F#, starting in Chapter 3 with functional programming in F#.