
So far, you have drawn by hand. Now you will let the computer draw!
Type this:
GRAPHIC 2,1
Press RETURN.
The result looks like this:

You have switched the computer into the graphics mode.
Now, you can type this:
BOX 1,0,0,100,100
Press RETURN.
Take a look at the result:
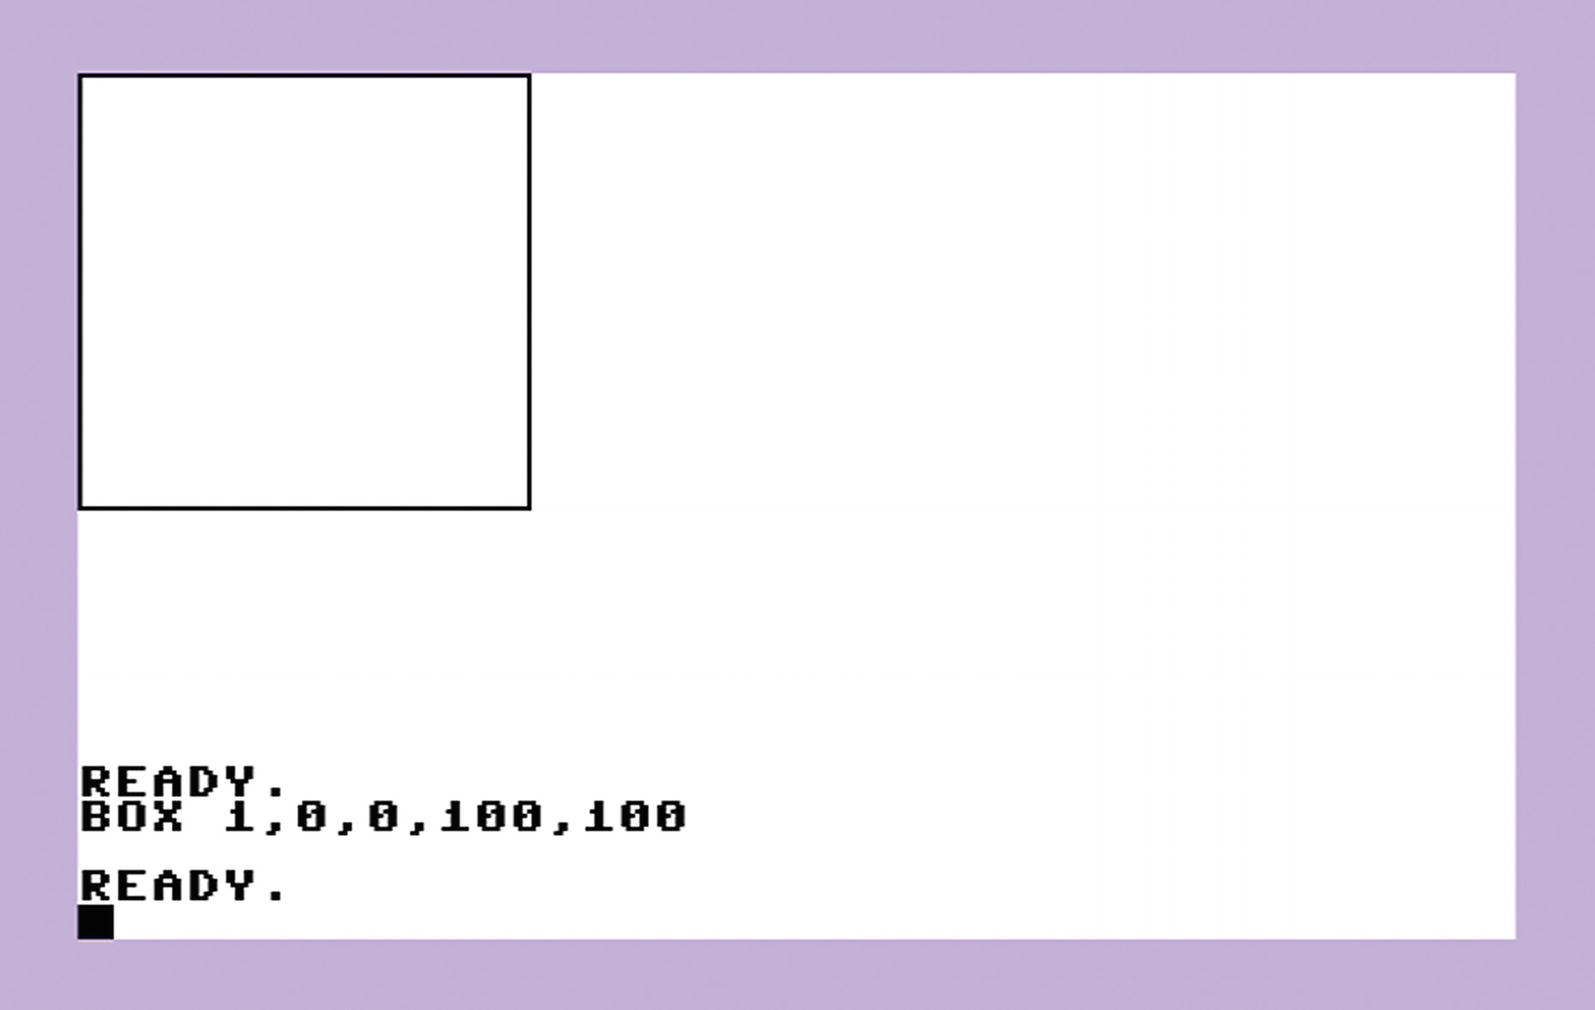
A box! But the command BOX takes so many numbers!
How does this work?
Let’s take a look again. The command was as follows:
BOX 1,0,0,100,100
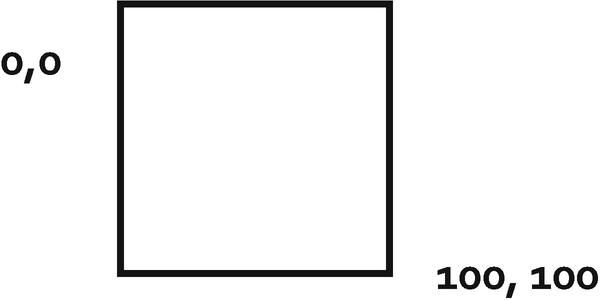
The first number of BOX is 1. A 1 means draw in black, and a 0 means draw in white.
The second number is 0. This number tells the computer how far to the right the upper-left corner of the box should be. 0 means all the way to the left, and 320 is all the way to the right.
The third number is also 0. This number tells the computer how far to the bottom the upper-left corner of the box should be. 0 means all the way up, and 160 is all the way to the bottom.
The fourth number is 100. This number tells the computer how far to the right the lower-right corner of the box should be. 0 means all the way to the left, 320 is all the way to the right, and 100 is somewhere in between.
The fifth number is 100. This number tells the computer how far to the bottom the lower-right corner of the box should be. 0 means all the way up, 160 is all the way to the bottom, and 100 is somewhere in between.
Complicated? Let’s play with it!
Try this:
BOX 1,101,0,201,100
Press RETURN.
Look at the result shown here:
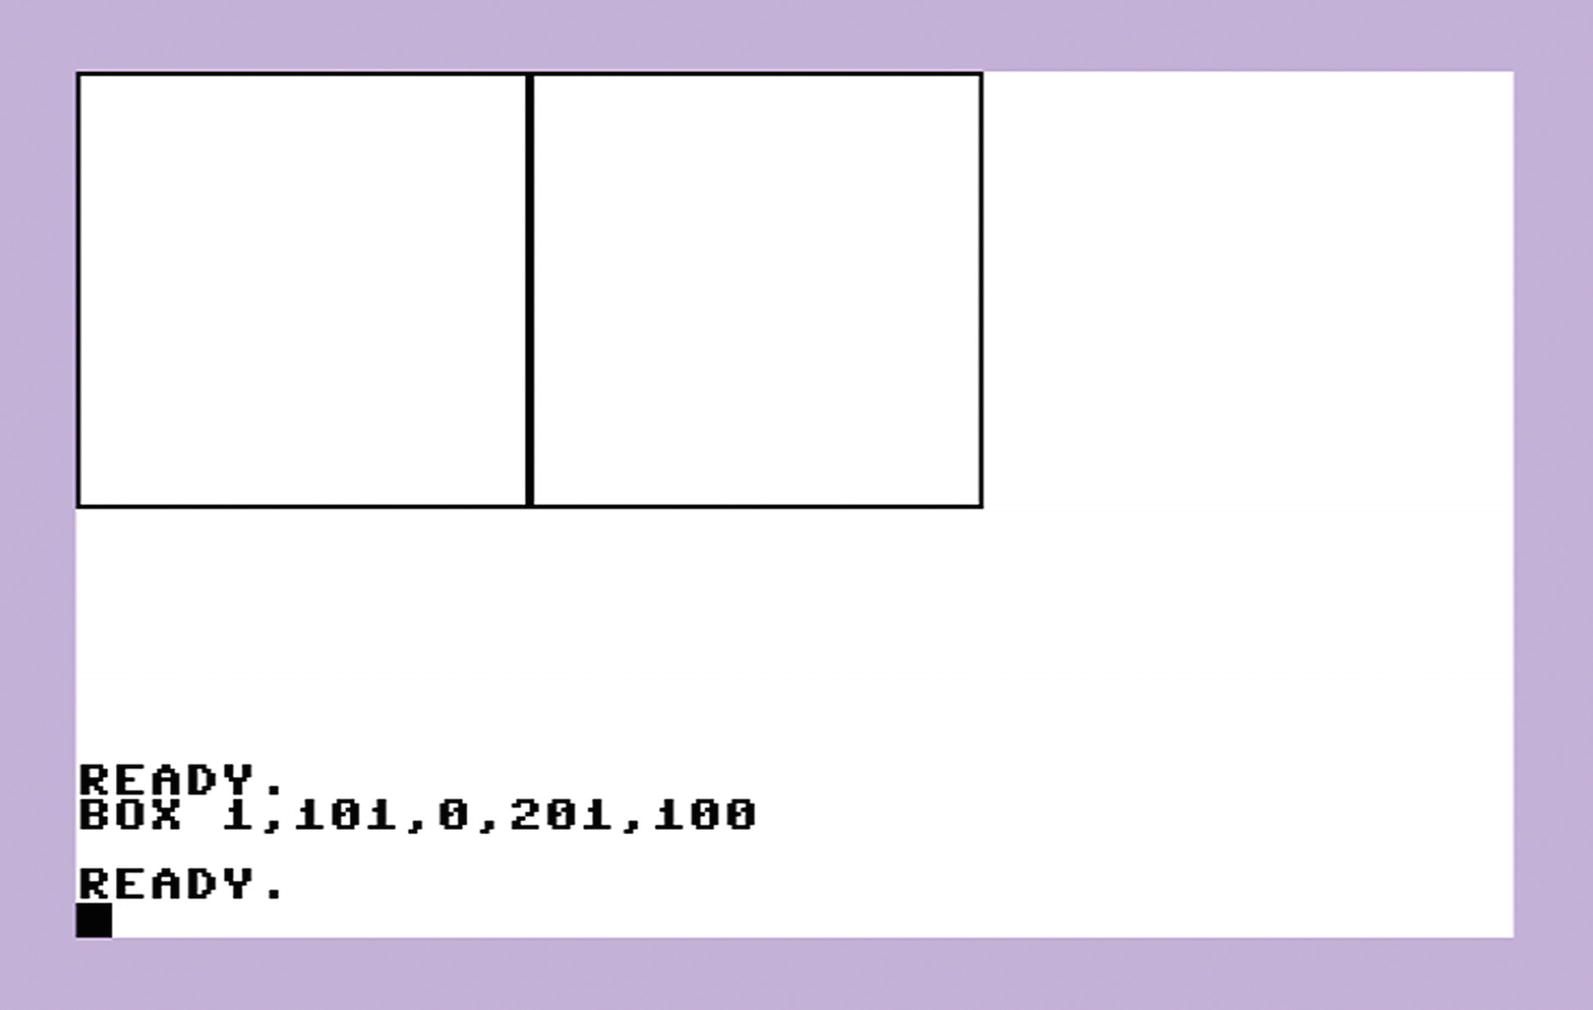
This command added a second box next to the first one.
What are the numbers?
The first number is 1 again, for drawing in black.
The second number is 101. Remember the third number of the first box was 100? The third number of the first box was how far right the bottom corner of the first box is. You want to start your new box just right of that, so you add 1, as in 100+1=101.
The third number is 0 again, just like in the first box. This is so that the upper-left corner of the second box starts at the same height as the first one.
The fourth number is 201. The fourth number indicates how far to the right the lower-right corner of the box should be. Well, the first box ended at 100. You want the second box to have the same size. So, you add 100 to the start of the second box, which is 101. 100+101=201.
The fifth number is 100 again because you want the lower-right corner of the box to be at the same height level as the lower-right corner of the first box.
Let’s try one more:
BOX 1,202,0,302,100
Press RETURN.
Look at the result:
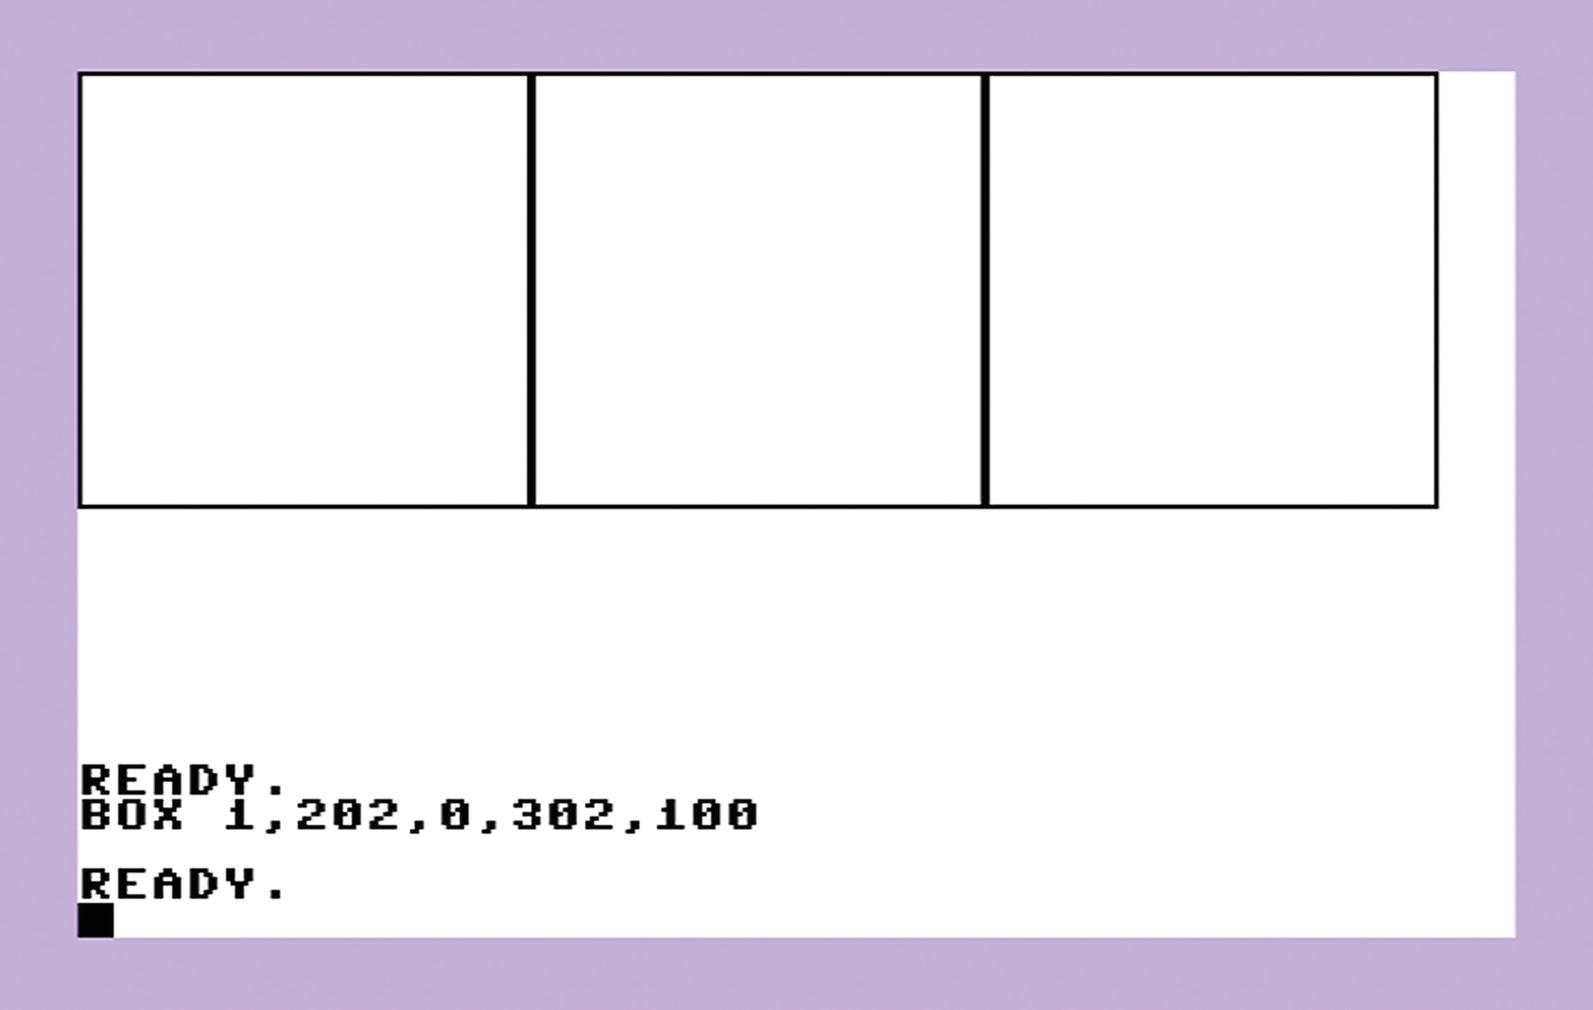
Can you explain it?
Let’s try one last one:
BOX 1,0,101,302,150
Press RETURN.
Look at the result and explain it!
Here is the result:

There are many other graphics commands that do cool things. It would take many pages to explain them, so it’s best if you experiment with them on your own. You will need basic addition and subtraction. The first number always indicates draw in black (1) or draw in white (0). Draw in white can be used to erase. The second number always indicates how far to the right. The third number always indicates how far to the bottom. Try another command.
Type this:
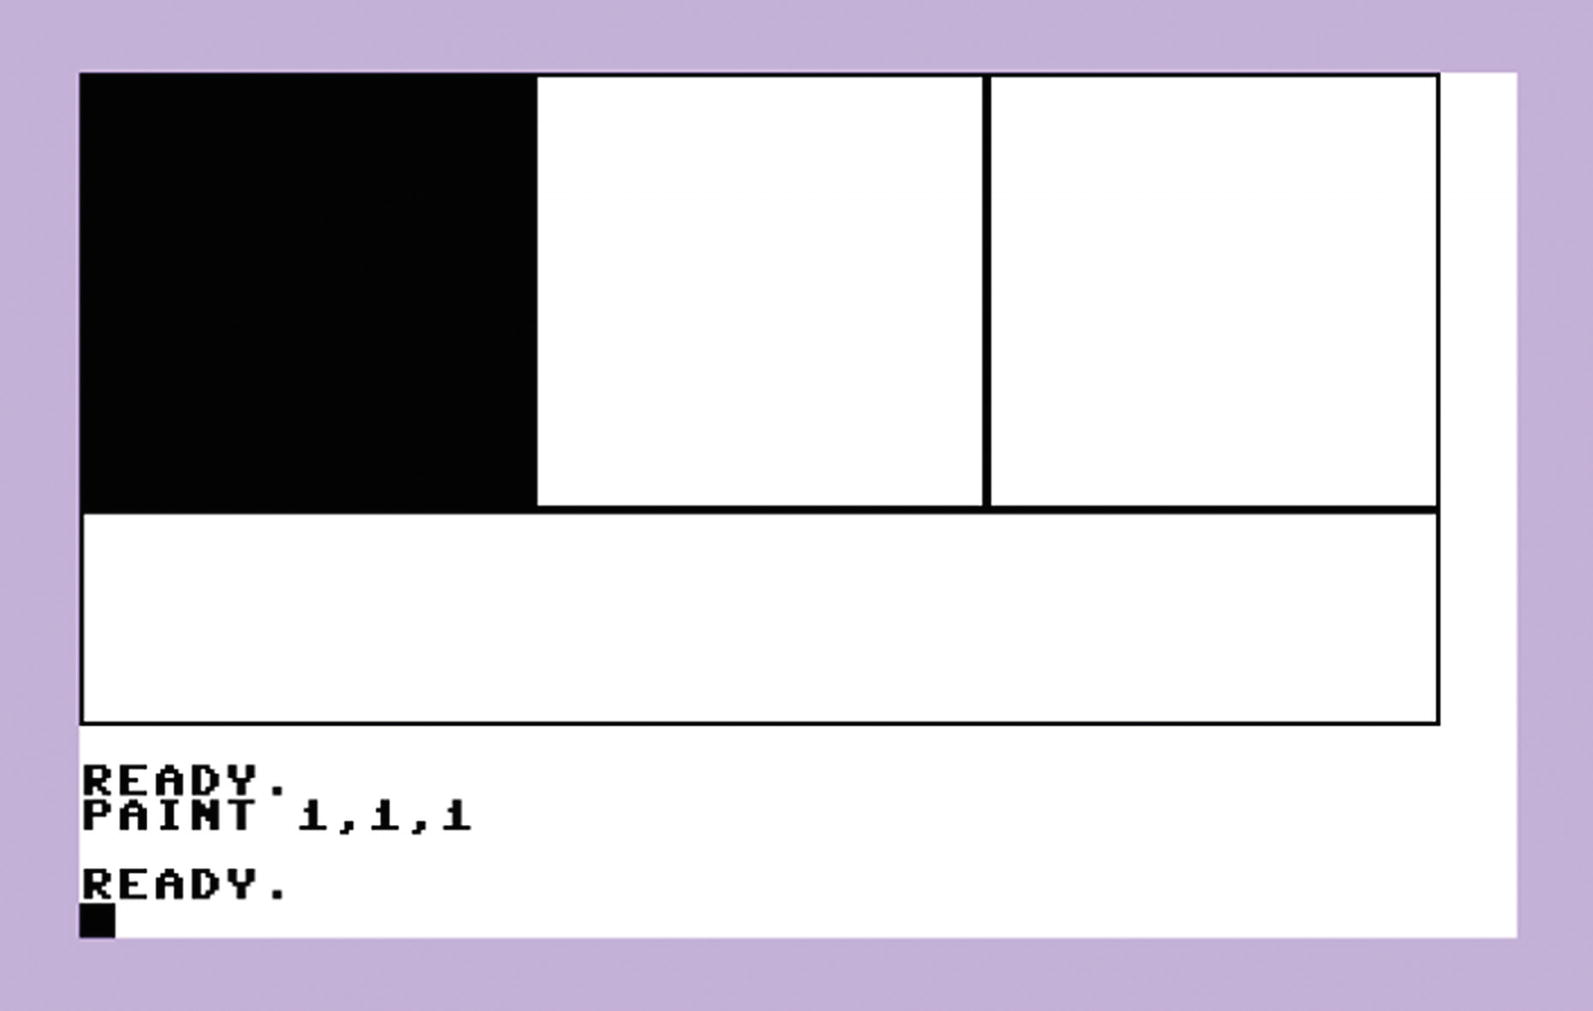
PAINT 1,1,1
Press RETURN.
The PAINT command colors a structure.
This is the result:
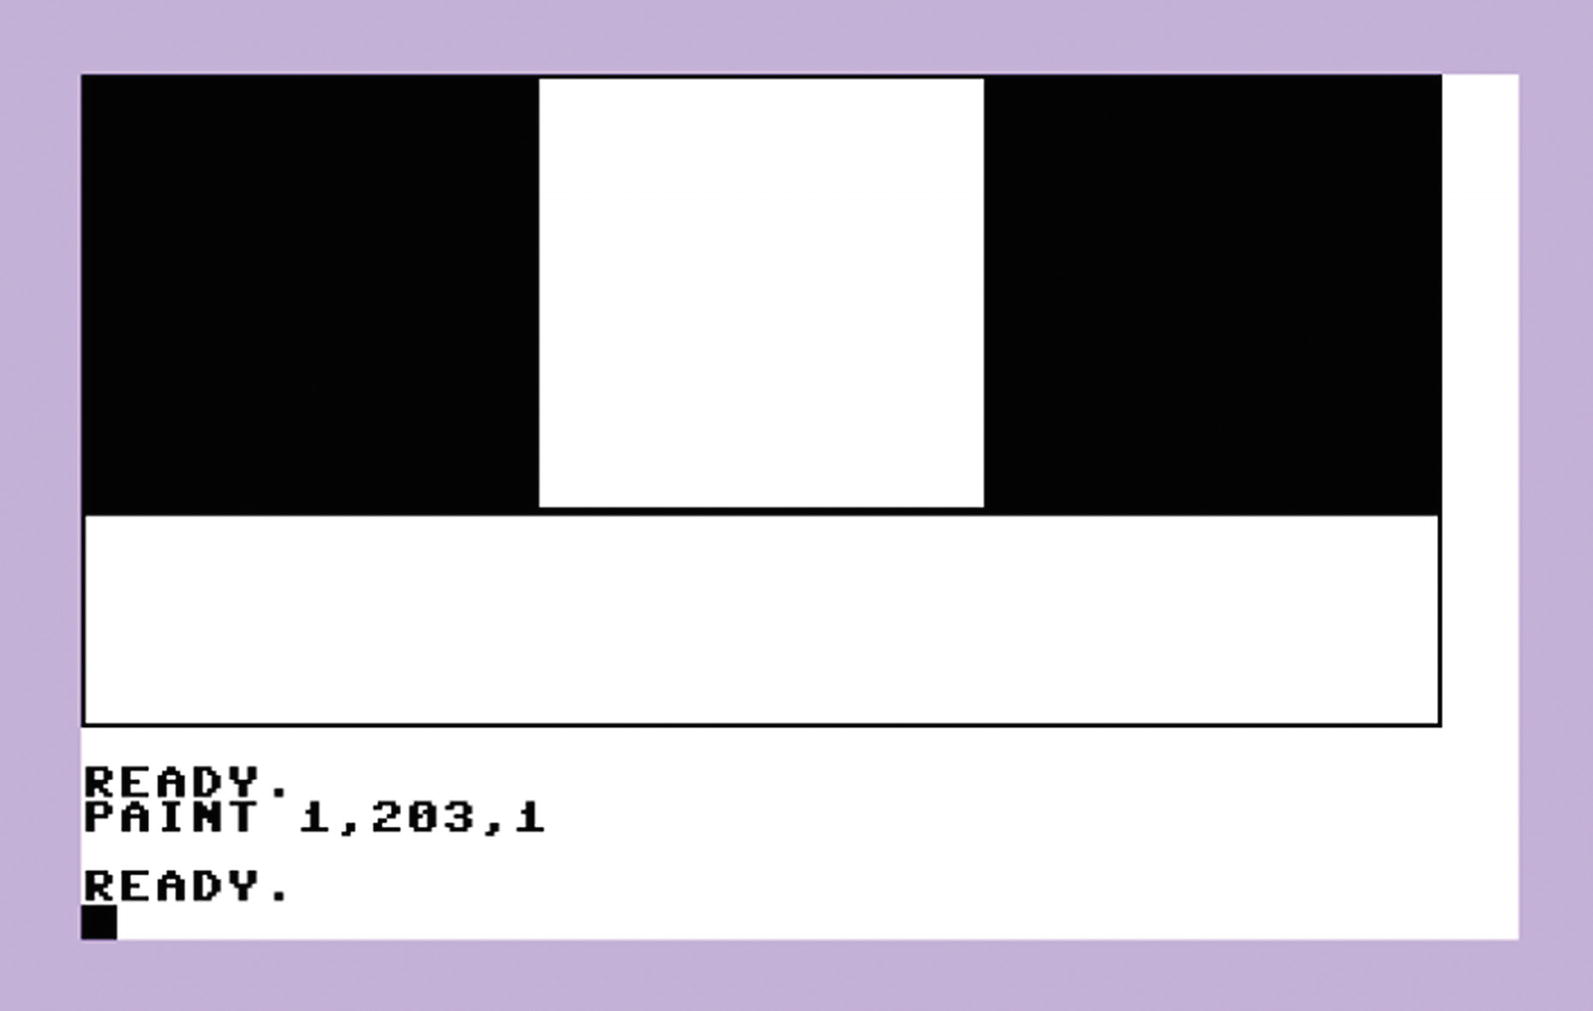
Let’s fill the third rectangle.
Type this:
PAINT 1,203,1
Press RETURN.
This is the result:
Can you fill the other rectangles too?
There’s one more command to play with!
Type this:
CIRCLE 1, 150, 125, 150, 25
Press RETURN.
What is the result?
Summary
You learned that the computer can draw boxes and circles automatically. Numbers tell the computer the position on the screen.