I’ll admit, I was one of them. I was a data access purist: I like my DAOs chilled, my PreparedStatements prepared, and my SQL handwritten with the care and tenderness of a lover. The world moved on to Hibernate, Java Persistence API (JPA), and everything in between; I clung to my “SQL IS THE LAW” doctrine. Then came Spring Boot Data JPA. And even then I relished in making my own life difficult. Not for nothing though, I still believe in raw SQL – a well-crafted SQL statement will outperform Object-Relational Mapping (ORM).
NoSQL storage like MongoDB and DynamoDB
Message brokers like Kafka and AMQP
Plain Java Messaging Service (JMS) brokers like RabbitMQ and ActiveMQ
Panache: Say what you will about the Quarkus framework, but the authors know how to name a product! Panache is a collection of augmentations that Quarkus adds to standard ORM structures, aimed at reducing the amount of code you need to write. If you’re familiar with the Active Record pattern, that’s about the gist of it.
Reactive SQL: A CPU-efficient, event-driven approach to dealing with results from a database query. Exquisite.
I’ll start with the fundamentals before we get to the good stuff.
SQL Data Sources
MySQL: Add the jdbc-mysql extension.
MSSQL: Add the jdbc-mssql extension.
PostgreSQL: Add the jdbc-postgresql extension.
Embedded databases – H2, MariaDB, and Derby: Add the jdbc-h2, jdbc-mariadb, and jdbc-derby extensions, respectively.
“Other ”
- 1.
Pull the official PostgreSQL version 10.5 image into your local machine
- 2.
Configure it with the username and password passed to POSTGRES_USER and POSTGRES_PASSWORD environment variables
- 3.
Create a database passed to POSTGRES_DB
- 4.
Map port 5432 on your local machine to port 5432 in your PostgreSQL docker container
All in one move. Smooth.
Configure a JDBC Connection Pool Manager
Rule of thumb: You need a connection pool in your life. You shouldn’t deploy anything production-grade without using a connection pool and, hence, a connection pool manager. A connection pool is any configured number of resource connections that are pre-created and kept in memory. The idea is that whenever client code needs access to that resource, the running code just picks up a warm connection and goes. In general, creating connections of any kind tends to be expensive and time-consuming. Pooling those connections ahead of time translates into significant latency improvements and even throughput gains.
Property | Description |
|---|---|
quarkus.datasource.jdbc.initial-size | How many connections should the connection pool start out with? Too many would be wasteful and eventually be a resource drag. To few and you might as well not have a connection pool at all. |
quarkus.datasource.jdbc.min-size | After the pool has been started, how many connections should be maintained at any point? |
quarkus.datasource.jdbc.max-size | What’s the most number of connections to be held in the pool at any point? |
quarkus.datasource.jdbc.acquisition-timeout | How long should the connection pool manager wait to acquire a connection? |
quarkus.datasource.jdbc.background-validation-interval | At what interval should the connection pool manager validate the connections in the pool? Validation is the act of checking that a connection is viable and active. |
quarkus.datasource.jdbc.validation-query-sql | An SQL query that the connection manager can use to validate that the database is simple. Literally, a simple query you can guarantee to always return a result to indicate things are going well. |
quarkus.datasource.jdbc.leak-detection-interval | At what interval are we checking for leaks in the connections in the pool? |
I know, it’s a bit of an acquired taste.
Is Your Data Source Healthy?

The response from my custom health check metric
You can disable this endpoint with the quarkus.datasource.health.enabled property set to false. This becomes important as you’ll see.
- 1.
I inject an instance of io.quarkus.agroal.runtime.health.DataSourceHealthCheck, the health check class that Agroal provides. @Readiness is there to reduce the chances of CDI injection errors due to ambiguity with any other health check class available.
- 2.
I use the Quarkus lifecycle event class StartupEvent to be notified when the application is starting.
- 3.
Using the health check class, I run the health check myself and obtain a HealthCheckResponse.
- 4.
I can then interrogate the HealthCheckResponse object for the status of the health check and a bunch of useful information. If the status is “DOWN”, I throw an exception with my desired message. The exception will terminate any startup in progress, saving any runtime embarrassment.
This is how I can save myself from any runtime embarrassment due to misconfiguration.
This isn’t an officially documented feature of Quarkus. It’s possible, though unlikely, that the bean that enables this is removed without warning in future releases.
Using SQL Data Sources
I’ve configured an SQL database; now to use the darn thing.
With @DataSource, I can inject the specific data source named “users”. Now, shall we try some ORM on for size?
With Object-Relational Mapping
If you’re an old fuddy duddy like I am, you’re still a fan of artisanal, responsibly sourced, fair-trade SQL. Then there’s Object-Relational Mapping (ORM) that will save you a bunch of time. IF you’re already comfortable with the principles of ORM, you can skip this bit and GOTO the Spring Data JPA section; else, IF you’re familiar with that too, GOTO the Panache! bit. Otherwise, here’s a quick primer on ORM.
The fundamental purpose of ORM is to abstract the database layer away behind Java classes. Java classes for everything. Ideally, you’ll never have to deal with raw or vendor-specific SQL anymore. Instead of manually querying the database, picking off results from the ResultSet and then possibly constructing a value object, you use an ORM layer.
Hibernate: Use the quarkus-hibernate-orm extension.
Java Persistence API (JPA).
The Java Persistence API is a specification from JavaEE that defines components, behaviors, and annotations that make up an ORM layer. The specification is then adopted and implemented by vendors like Eclipse.
It used to be that Hibernate had only its own set of annotations and components. Hibernate then implemented the JPA specification, so now, it’s more common to have JPA-looking classes used with the Hibernate engine. I’m not going to explore either JPA or Hibernate separately – that’s out of the scope of this book – rather, I’ll show you how well they both gel.
- 1.
@Entity marks this class as a unit that Hibernate should manage. Typically, Hibernate will automatically match class name to the database table name. You can still specify the table name with the @Table annotation if you have specific naming requirements for your tables. Otherwise, Hibernate can infer the table name from the class name.
- 2.The @Id annotation marks this field as the primary key for this entity class. It will map this field to whatever the primary key column on the database table is. @GeneratedValue bootstraps a default key generation mechanism (or sequence). Hibernate will thus use the existing sequence on my table to handle the generation of the next ID to use for an insert. At least, that is how it’s supposed to work. There’s some hibernate weirdness I experienced here:
- a)
Ideally, you should be able to set strategy to AUTO and Hibernate will pick up on the sequence that I configured for the ID column. This is not what happened for me. Due to an inconsistency between Hibernate and PostgreSQL, what I got instead were negative numbers in the ID column. This is not the case with MySQL based on my testing.
- b)
I had to set strategy to IDENTITY and then provide the name of the PostgreSQL sequence in the generator attribute. To be clear, this is because of a disconnect between Hibernate and PostgreSQL, not a Quarkus thing.
- a)
- 3.
@Column specifically maps this field on this class, to the database table column in the name attribute.
- 4.@ManyToOne designates this field as one to be used to establish a many-to-one join to a different table and its associated entity. The fetchType attribute stipulates whether this field should be populated with the related entity instance immediately or only when that field is called for. @JoinColumn will designate that field as a join field. From this, it will look up the referenced class and use the @Id column in that class as a primary key. It therefore automatically establishes a foreign key-primary key relationship between the two classes. This in turn lets Hibernate supply instances of the linked class as entities loaded from the corresponding database table:
- a)
FetchType is set to LAZY here as well, for pretty much the same reasons. Also it helps to watch out for the famous N+1 problem in SQL, where one executes an additional query to retrieve data that could have been retrieved in an earlier query.
- a)
- 5.
@OneToMany helps to establish the other end of the relationship. AnagramSource will have many Anagrams. Here, I definitely don’t want all associated Anagrams eagerly loaded every time I pull the AnagramSource – for complex or large objects, that could be a long-running query. The JPA spec has some more sophisticated componentry to handle complex table relationships; check them out.
At this point, all I have is the vehicle to extract data from my PostgreSQL database . A value object. What I need now are the actual CRUD3 components. If you’re already familiar with Hibernate, rejoice! You can just start using everything you’re already used to: the EntityManager, SessionFactory, Session, and .hbm.xml file (eww), all of these are welcome in Quarkus.
If you’re not familiar with either raw Hibernate or raw JPA, well hello there! Today’s your lucky day, bud: you get to see how easy it can be to pull data with Hibernate and JPA together, courtesy of our old “friend,” Spring. Learning ORM with Hibernate + JPA together is a great start that will help you get a production-grade application going very quickly.
Both Eclipse and IntelliJ provide JPA entity generation plugins. With their respective plugins, you can generate entity classes from an existing SQL database.
Configure Database Loading
create: On Quarkus startup, Hibernate will drop tables and then create them.
validate: Hibernate will validate that the underlying database schema matches the expectations of the Java-side entity classes. It’ll throw an exception otherwise.
drop-and-create: On startup, your Quarkus app will drop and recreate an entire database.
update: On startup, your Quarkus app will perform an update on an existing database, using the entity classes as a reference. If the database tables have deviated from what the entity classes represent, the update will be performed.
no-file: On startup, your Quarkus app will do nothing.
Put that in your import.sql and let’s roll!
With Spring Data JPA
org.springframework.data.repository.Repository
org.springframework.data.repository.CrudRepository
org.springframework.data.repository.JpaRepository
org.springframework.data.repository.PagingAndSortingRepository
- 1.
I extend CrudRepository with the entity type I’m looking to CRUD, plus the primary key type. This simple act grants my code a lot of power implicitly. I’ll show you what I mean shortly.
- 2.
This method definition is a stub I plan to use for, well, searching anagrams by their strings. Don’t worry about the implementation for now – and forever.
I can now…use the interface as is?
Those methods do exactly what they’re named for. Spring Boot – and Quarkus by extension – has a lot of plumbing in place so that this interface and any other that extends it is plug-n-play. So, by default, you get all the CRUD operations for free. It gets even better: the findByAnagramText method works without me having to implement the method in a class. This is possible because Spring Boot can infer what kind of query I’m trying to execute, given a string value that matches a database column or class attribute. Defining methods named find...By..., count...By..., findDistinct...By, or even find...By...IgnoreCase will cause the Spring Data JPA module to infer the correct query and deliver results.
Future return type support; no async queries then
QueryDSL API support
Native queries – can’t supply raw SQL to @Query
QueryByExampleExecutor
With Panache!
The Panache toolkit is Quarkus’ own data access API. It’s similar enough to the Spring Data JPA API that if you’re familiar with the latter, you can jump straight into the former.
Start by adding the quarkus-hibernate-orm-panache extension .
- 1.Extending PanacheEntityBase enriches my entity class with the following methods, among others:
- a)
find, list – Use list for smaller datasets.
- b)
update
- c)
delete
- d)
persist
- e)
stream
- a)
- 2.
I’ve set the fields on my entity to public access, instead of private. The Quarkus team recommends making fields non-private wherever possible to improve the performance of the framework.
- 3.
I’ve gotten rid of the getters and setters – Quarkus will generate them on the fly.
- 4.In addition to the static methods that I inherit from PanacheEntityBase , I can now implement methods unique to this entity, reusing the inherited methods to
- a)
Paginate
- b)
Sort
- a)
This approach avoids an unnecessary database trip to first retrieve the referenced entity.
It’s basically the same features as PanacheEntity, but separated out into an interface, in the style of Spring Data JPA repositories. One difference here is that I don’t inject the just repository interface; I need to implement the PanacheRepository on my entity. As a result, I lose the benefit of Quarkus generating query methods for me, but I gain more control over what my queries do. On the PanacheQuery you get a ton of methods that help you do a lot of manipulation over your query results. For now, I’m interested in just the single result.
I think that’s about it for Panache, for now. Do explore the PanacheEntityBase class and PanacheEntityRepository interface, for a look at the full power that ships with those two components.
With Reactive SQL
Scalability
Resilience
Message-driven programming
It’s the programming model built for high-throughput, event-driven, and highly tunable architectures. Reactive SQL (rxSQL) delivers on that by letting you write high-performing database access code. You can treat the data being fetched from the database as events and react to them with event handlers. Reactive SQL (and really, most of reactive programming) is heavily based on functional interfaces – lambda functions. If you’re comfortable with lambda functions in Java...still give this next section a look-see. I promise, I’ll make it worth your while ;).
The Tools of the Reactive SQL Trade
- 1.
Right after creating a Uni to wrap the string “aString”, I’m calling one of its lambda-accepting functions. map is a common operation found in pretty much every reactive and functional programming API in the Java world and beyond. It’s in the JDK’s stream API. So, map will accept any naked java method body or function call. Inside the map method, I expect a string to be available as a variable named “theString”. From there, I’m using the scramble utility to convert the passed in string to an anagram.
- 2.
To actually execute anything in the chain of functions of the reactive API, I must call the subscribe method. Any method call before a subscribe call is lazily evaluated – nothing will actually be invoked until subscribe is called. This is what’s known as a terminating function in rx programming parlance.
- 3.
The object returned by the subscribe function offers the with function. with accepts two lambda expressions: one for when the operation was successful; another for when the operation failed. As you can see, they’re fully fledged method bodies as well. Contrast that with what I passed to the map function. This demonstrates two of the options available for passing lambda expressions to functions. It can be a very succinct function call like Scrambler#scramble; or a full method body like what I’ve supplied to with.
Consumer: a lambda function that accepts arguments and doesn’t return any value. The lambda functions I passed to with are examples of consumers. They each accept arguments (a string object and an exception object respectively) but don’t return a value.
Function: a lambda function that accepts arguments and returns a value. map accepts only functions. Data is fed in from the preceding function item and I apply the scramble function to that data, returning the result for the next step.
Supplier: a supplier doesn’t accept arguments, but returns a value
With rxSQL, there are going to be a lot of other reactive types, typically based on the Uni and Multi classes. Also bear in mind that for single row results, you’ll be dealing with some variant of Uni; for multi-row results, you’ll be dealing with a variant of Multi. In some scenarios, it might be useful or even necessary to convert a Uni to a Multi and vice versa, so stay frosty!
- 1.
I’ve had to replace the standard Quarkus JDBC url property with this reactive-specific version.
- 2.
I’ve had to disable basic JDBC. Raw JDBC and rxSQL currently cannot coexist enabled for the same data source.
- 1.
I obtained an instance of io.vertx.mutiny.pgclient.PgPool client (io.vertx.mutiny.pgclient.MySQLPool for MySQL). This is the entry point into the rx SQL world.
- 2.
I use the pool object to prepare an SQL query. The $1 notation is a positional marker for supplying query parameters. This way, I’ve indicated that I’ll be supplying a single query parameter.
- 3.
The execute method is where I get to supply my optional query parameter. The onItem method is where I kick off the processing of any probable results from the query.
- 4.The onItem function produces a Uni of that wraps the output from the operation before it. In this case, onItem will give me a Uni<RowSet<Row>>, a Uni containing a rowset of rows. Because I’m expecting multiple rows from this query, I’ve decided to call the produceMulti function on the Uni produced by the query. This function allows me to pass in a lambda function that I can use to split the Rowset object that I get from executing the query.
- (a)
optionally, I can specify a custom executor to process the results on multiple threads, for a performance boost on a large number of results
- (a)
- 5.
For each row/item that I produce from the produceMulti function, I log the value of one column from the SQL query. I also create an instance of AnagramResponse. For this, I just call a static function I’ve added to the AnagramResponse class to create an instance from a Row object. It’s important to pay attention to the type of object you’re going to have available inside your lambda function.
- 6.
All the previous steps properly arranged, I call the subscribe method. Remember: without a call to subscribe or some other terminating function, none of the previous steps will be executed. Here, I want my subscription to yield a java Stream.
- 7.
From my stream, I can then gather the results into a list, using standard JDK stream collectors.
I’m supplying the AnagramResponse#fromRow function with a different style, to the apply function, but it’s still a lambda-style function call. Following that, I still want to print the generated AnagramResponse, but I return the object unmodified and send it down the chain to be collected with collectItems.
If this feels like the Streams API in the stock JDK, you’re not far off – they’re really close in feel. Without getting into too many specifics, one key difference between JDK streams and the reactive code: Streams are pull-based, while reactive code is push-based. In this example, the query results will be pushed into the handling code.
One thing to note is that you currently can’t combine reactive SQL and standard JDBC, for the same data source. So you’ll need to configure quarkus.datasource.jdbc=false for each data source you want to interact with reactively. I have seen whispers of removing this barrier in pull requests on the Quarkus repo, so I envisage this might not be a thing for long.
With the rxSQL API, I can control the rate at which new rows come in with backpressure. I can add error handlers and other custom logic as part of handling the results from the query. Behind the scenes, there’s efficient task switching that happens to make this a very efficient use of CPU cycles. All told, you wind up with a super scalable, resource-efficient SQL business logic. But wait! There’s more!
Reactive ORM with Hibernate
Yass! There’s currently experimental support for reactive sql with Hibernate. It goes a little something like this: first, I’ll add the quarkus-hibernate-reactive extension.
- 1.
I need to obtain a reactive instance of a Hibernate session. This already presents a minor challenge, because instances of REST resource classes are singletons by default. What this means is that the same instance of AnagramResource will be used to serve multiple requests in parallel. Hibernate sessions are famously thread-unsafe, so they can’t be shared between parallel requests. The only alternative is to configure Quarkus to provide a new REST resource object per request. That’s strike one.
- 2.
With the injected ORM session, I can reactively execute a query. Pretty straightforward.
- 3.
The resulting Uni offers a ifNull function to handle scenarios where no results are available for an operation.
3a. Should there be no results, I can use the failWith function to supply an appropriate exception.
- 4.
I then apply my transformation function, converting Anagrams returned by Hibernate, to AnagramResponses that I’ll be sending in the HTTP response. The await method is another way of terminating the reactive flow. With this method call, I indicate that I’ll wait for the completion of the execution of steps before this; I have the option to specify a timeout, or wait indefinitely, as I’m doing here.
- 5.
Finally, because I want control over the HTTP response being returned, but I also want to use the reactive Mutiny API, I build a javax.ws.rs.core.Response object. I then wrap the Response object in a Uni of its own. Quarkus is going to be very chill about the whole thing.
So that’s rxSQL5 in a nutshell. And now, we’ve come to the end of my second favorite part of this book? Noooooooo...
NoSQL Data Sources
SQL and relational database management systems (RBDMS) are great for the majority of use cases. They’re especially well-suited for analytical work, known as Online Analytical Processing (OLAP). With OLAP, you get to select rows based on any filter criteria you want: complex reporting, rollups, and so on. When you need fine-grained access to data, SQL is your Man Friday.
No schema: An RDBMS will need you to define a rigid schema – a collection of tables, columns, sequences, and so on that define the structure of your data storage. A NoSQL database doesn’t need that much upfront work. To start using a NoSQL database, all you’ll really need is a table. After that, you can store objects in it, with any number of fields and any internal structure. You don’t need to know too much about the data upfront is what I’m saying.
Performance at scale : For an RDBMS to start serving millions of hits, you need to carefully plan your database – the queries, the indices, partitioning tables, and so on. The underlying storage needs to be tuned for throughput and reliability. With NoSQL, you really only need to worry about how much compute capacity you’ll need; in a cloud environment, your cloud provider will take care of the scalability and resource optimization.
No query language : There is no standard query language (yet) for NoSQL. It’s right there in the name – no Structured Query Language.6 The access API is highly vendor-dependent.
There are a couple of players in this space: Neo4J, MongoDB, Redis, and a couple others. They usually can sit in the cloud; you’re just going to be responsible for managing the installation. A cloud service provider could also provide NoSQL databases as a managed service, so yeah, probably go with that instead. I’m going to pick a “random” cloud provider and demonstrate how to use NoSQL in Quarkus.
With AWS DynamoDB
Full service management. You’ll never need to manage a server, back up your own data, or security patch anything.
Your data can be encrypted at rest.
Cross-region replication of your data, for fault tolerance.
Backup and recovery of data.
Configurable content expiry.
- 1.
Pull the latest official DynamoDB image named amazon/dynamodb-local to your local Docker repository and attempt to start a local DynamoDB container.
- 2.
Expose port 8001 on the container using publish, mapping port 8000 on your host machine to the container’s 8001.
- 3.
Process the arguments you supply to configure the DynamoDB container. The DynamoDBLocal jar file is what processes the flags that come after it. Don’t worry; the file is bundled with the image.
- 4.
Instruct the DynamoDB instance to keep all its data in memory with inMemory. Should you terminate the container, all the data is lost. Use -sharedDb so that the in-memory data is shared between all clients that connect to this instance of Dynamo. With persisted data, you can use -dbPath to point to the location of the database file (named shared-local-instance.db by default) on subsequent startups.
- 5.
Configure DynamoDB to listen on port 8001 for connections, using port; 8000 is the default, I just want to shake things up a bit.
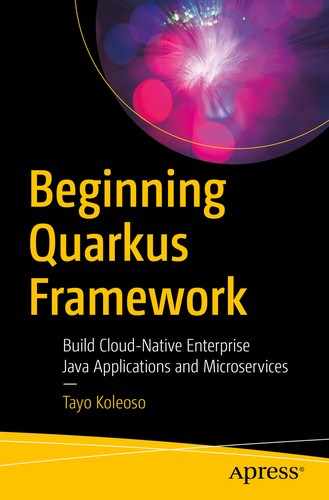
The bundled JavaScript shell for interacting with DynamoDB
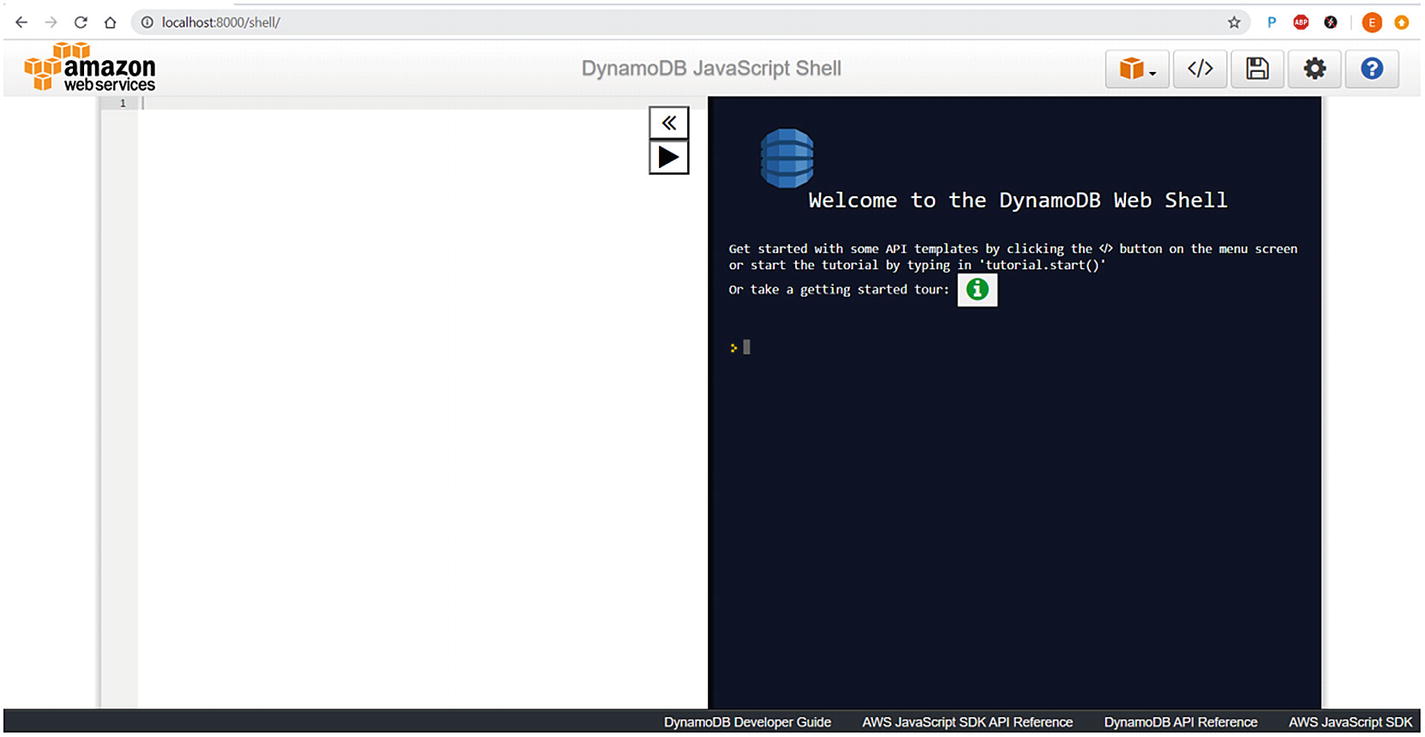
The landing screen of the DynamoDB data modeler

Add a local DynamoDB connection. Remote databases are right next to it
Manage Your DynamoDB Data Model
Table : The logical grouping of the entities. Just like in an RDBMS, you need a primary key. For my Anagram app, I will need two tables: Anagram and AnagramSource.
Item : The actual entity, analogous to a row in a RDBMS. This is the “value” in the key-value hashmap analogy. My Anagram app will consist of items of the Anagram type as well as the AnagramSource.
Attribute : The fields of the entity; what would be columns in an RDBMS. Remember, for a NoSQL database, there are no “column” restrictions. You can add as many attributes as you want to an item after the fact, with almost no consequence. Some items can have some attributes, some can be missing them, while some have other completely different attributes. It’s all fine. This can be a scalar variable – integer, string, boolean, y’know, the “flat” variables. It can also be a whole object, with its own attributes.
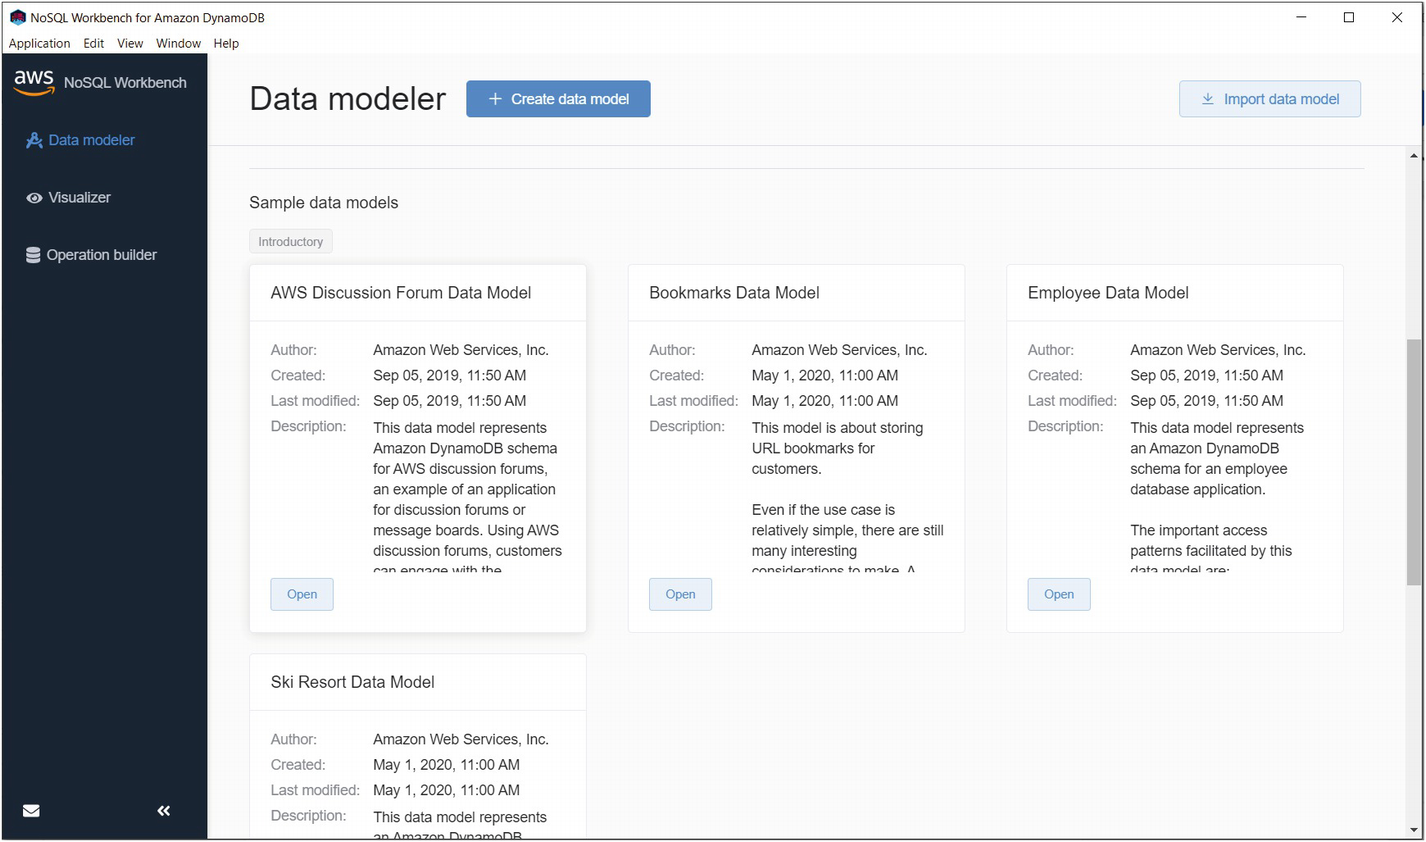
Creating a data model for my Anagram app
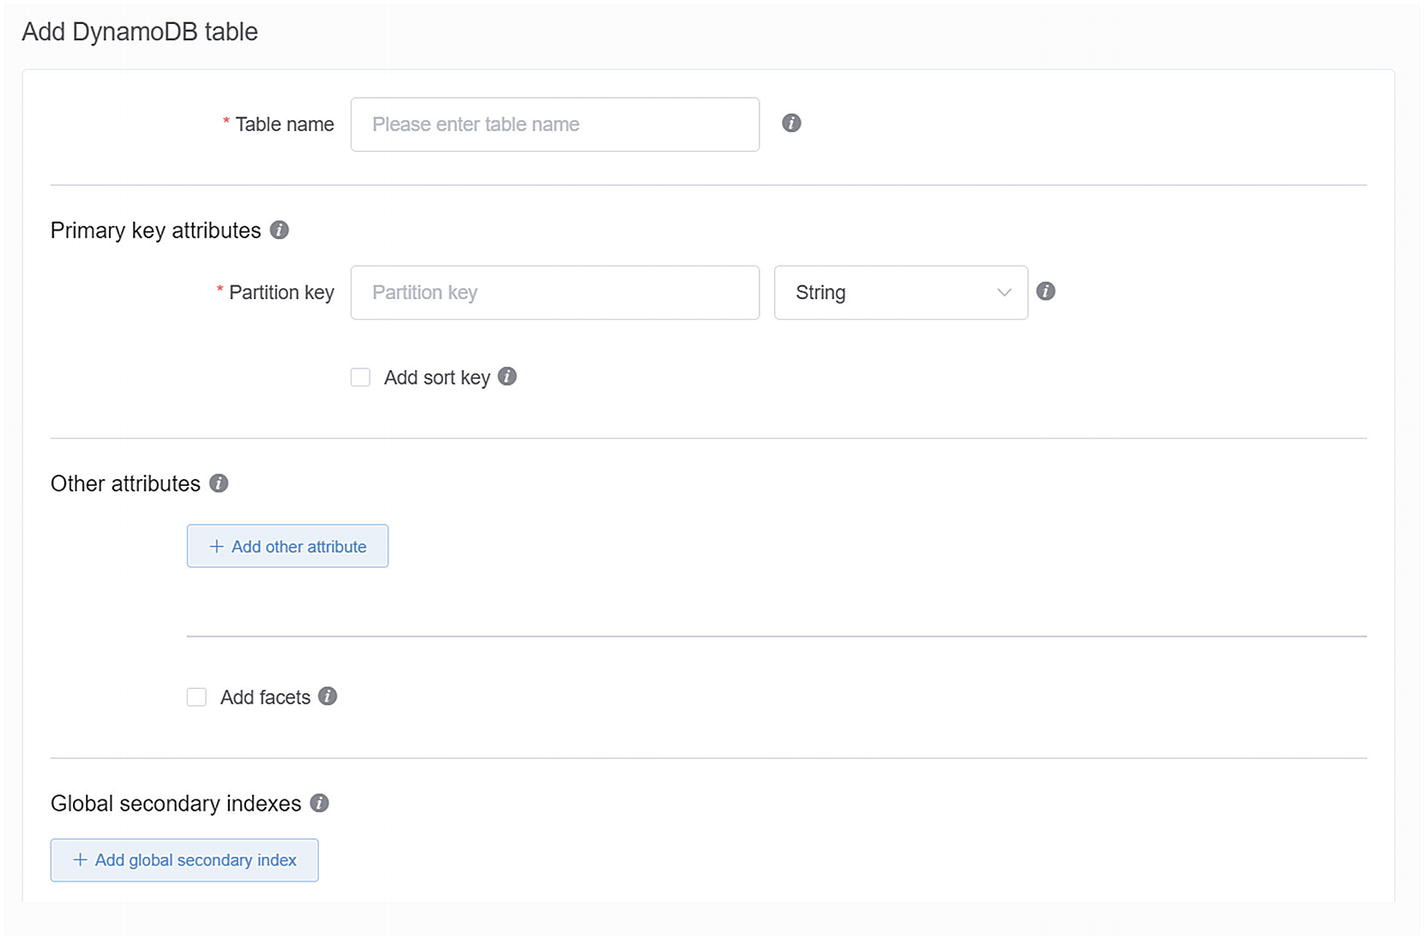
Defining a table for my anagrams
- 1.
The name of the table, “anagram”.
- 2.
The primary key or “Partition key” in DynamoDB-speak. This is what I’ll use to pull objects out of Dynamo. I’m choosing id from the Anagram class for this property. Which field you select for this purpose is one of the most important design decisions you’ll make in the design of your NoSQL access.
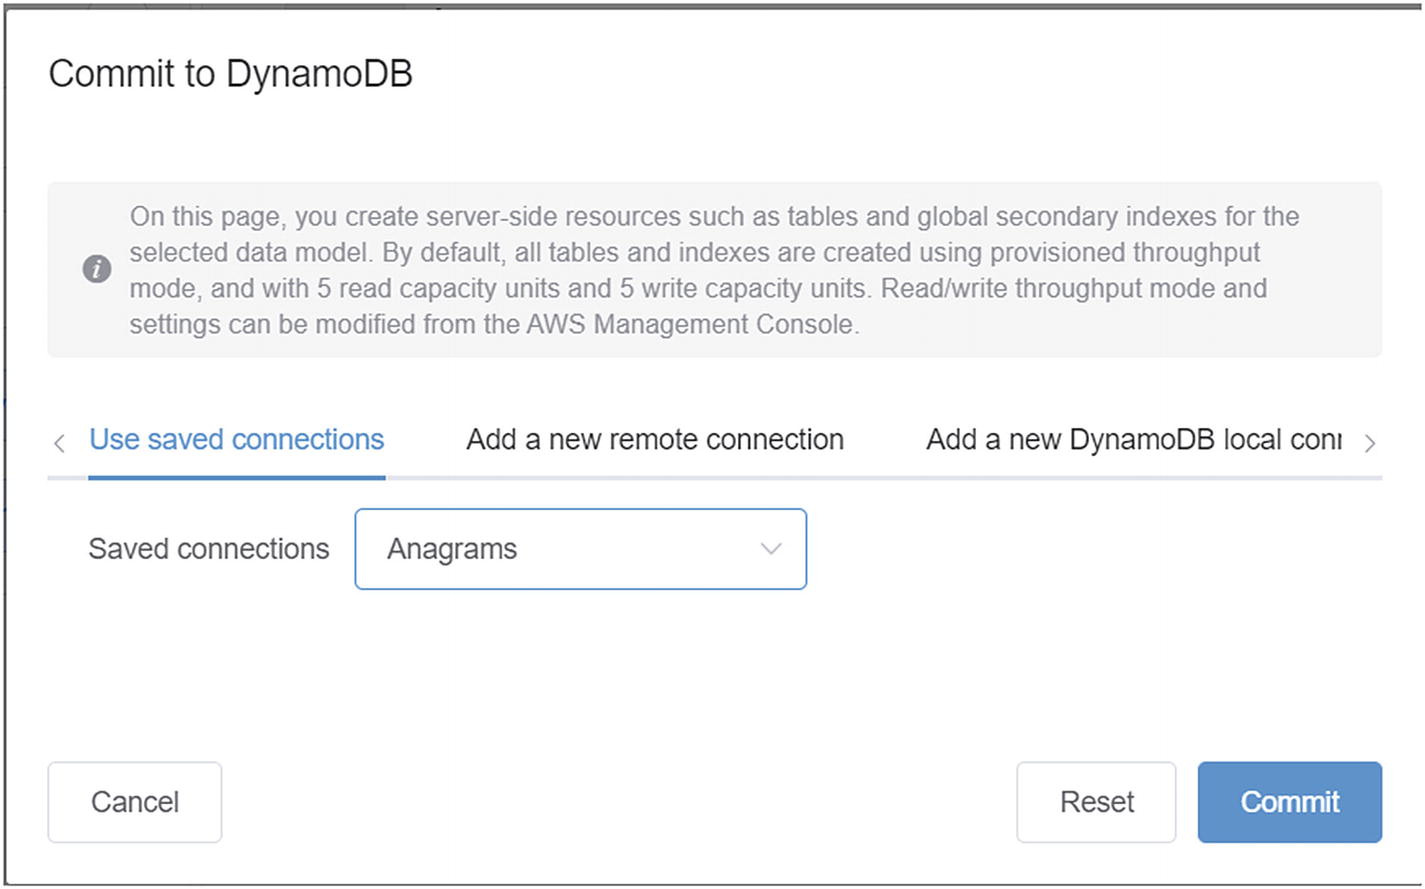
Committing the data model to DynamoDB
Now, let’s configure access to this NoSQL database.
Configure DynamoDB in Quarkus
The AWS region that your DynamoDB instance will be running in. For Quarkus, use quarkus.dynamodb.aws.region.
- The security details. There are a couple of options supported by AWS and how you configure them in Quarkus depends on what you choose.quarkus.dynamodb.aws.credentials.type controls what the credential type turns out to be.
quarkus.dynamodb.aws.credentials.type=static will require you to set quarkus.dynamodb.aws.credentials.static-provider.access-key-id and the quarkus.dynamodb.aws.credentials.static-provider.secret-access-key properties. These correspond to the access key and secret access key properties that you will get from Amazon when you sign up for an AWS account. Don’t worry about this for local development.
- quarkus.dynamodb.aws.region=default will look for the access key and secret access key in the following order in your environment:
aws.accessKeyId and aws.secretKey as Java environment launch variables.
AWS_ACCESS_KEY_ID and AWS_SECRET_ACCESS_KEY as operating system variables, corresponding to the respective key credentials.
The key credentials present in a file at ~/.aws/credentials in your machine.
The key credentials can be delivered by the AWS EC2 metadata service. The EC2 metadata service is a read-only service that provides metadata to EC2 instances.8 Included in that metadata are your credentials; all AWS SDKs are hard-coded to check the metadata service’s endpoint before any outbound service call.
quarkus.dynamodb.endpoint-override=http://localhost:8001, corresponding to the exposed port on your (hopefully) running container.
quarkus.dynamodb.aws.region=us-east-1. You can use any valid AWS region; it doesn’t matter which you pick for local development.
- quarkus.dynamodb.aws.credentials.type=static. Consequently
quarkus.dynamodb.aws.credentials.static-provider.access-key-id=anything-goes
quarkus.dynamodb.aws.credentials.static-provider.secret-access-key=dummy-val
That done, I can now get to the codin’.
CRUD in DynamoDB
Low level
Document-based
High level/ORM
The high-level API is the most convenient, with a suite of annotations that map to structures in your DynamoDB database, just like you’d expect from an ORM framework. All three APIs convert your method calls into HTTP requests sent to the database for execution. Additionally, they all transparently handle cryptography, handling retries and other convenience facilities.
At the time I’m typing these words, Quarkus is based on the v2 of the AWS SDK which is still under development. The Document and ORM flavors aren’t supported yet, so you get just the low-level API. The good news is that v2 introduces non-blocking I/O, improved streaming capabilities and your choice of HTTP client API – JDK or Apache HTTPClient.
software.amazon.awssdk.services.dynamodb.model.GetItemRequest for retrieving data from the database
software.amazon.awssdk.services.dynamodb.model.PutItemRequest for adding data to the database
software.amazon.awssdk.services.dynamodb.model.UpdateItemRequest for updating items
software.amazon.awssdk.services.dynamodb.model.PutItemRequest for deleting items
software.amazon.awssdk.services.dynamodb.model.AttributeValue for defining metadata about the attributes you need to CRUD in the database
And now, for my next trick, I’m going to CRUD with the low-level DynamoDB API.
- 1.
I inject an instance of software.amazon.awssdk.services.dynamodb.DynamoDbClient, the access point to my locally running instance of Dynamo. ArC will supply a thread-safe instance of the client object as an argument to my method.
- 2.
I prepare a HashMap of String to AttributeValue. This is the map that will hold the attributes of the items I want to commit to DynamoDB.
- 3.
I set the id attribute, with the n() method on the AttributeValue builder object. It’s…an interesting API, definitely an acquired taste. See, you need to specify the type as well as the name of the attribute that you need to set. The DynamoDB SDK team chose the first letters of types as their method names. So, n here means I’m setting a numerical field. Bold choice of API convention for sure.
- 4.
I set the anagramText attribute , using the s() method to indicate that this is a String field.
- 5.
I build a PutItemRequest with the map of attributes that constitute a complete Anagram entity. It’s at this point I indicate the database table this put request should go to.
- 6.
I then pass the PutItemRequest to the putItem method on the DynamoDbClient.
- 7.
putItem returns a PutItemResponse, from which you can pull a bunch of useful metadata about the table and the operation.
- 1.
I built the map of AttributeValue to hold my query parameters. Here, I’m interested in searching just by the anagramId.
- 2.
I built a GetItemRequest to hold the table and the attribute I’m interested in retrieving.
- 3.
The injected instance of DynamoDbClient, always at the ready, will use getItem to execute the request.
- 4.
I then get the specific attribute I want.
- 5.
Or, I get the whole item.
- 1.
In addition to the AttributeValue map that I need to supply for Dynamo to be able to find the target item, I’m now supplying a map of AttributeValueUpdate. The update operation depends on the values I set on objects of this type.
- 2.
So, first I build the AttributeValueUpdate object to handle the update of the existing field. Setting action to AttributeAction.PUT is what makes the update click.
- 3.
I still need to pass an AttributeValue object to the AttributeValueUpdate, to account for the content of the new data.
- 4.
Then I build another AttributeValueUpdate to handle the creation of a brand new attribute on the existing item. Setting action to AttributeAction.ADD is the clincher here. This is one of the things that sets NoSQL apart. In the SQL world, this is analogous to creating a new column in a table as part of an insert; only, that column will apply to just a single row – invisible to the rest. Not possible with an RDBMS eh?
- 5.
After building maps containing all the data that I need to transmit, I build an UpdateItemRequest that I will feed to the DynamoDB client.
- 6.
I can then execute with the updateItem method on DynamoDbClient. Following that, I can check the status of the update with isSuccessful on sdkHttpResponse. Remember: All these method calls are wrappers around HTTP interactions with DynamoDB. The API just translates the HTTP response into convenience methods.
DynamoDB supports batch models of all the CRUD operations as well. Bon appetit!
Transactions
Atomicity : When you mark any sequence of method calls as transactional, they all must execute successfully as one or fail as one. Any failure in the chain should trigger an “undo” of the calls before the failure point, as well as rolling back any data changes made prior to the failure. All or nothing.
Consistency : Any transactional method should be able to guarantee that the data changes being made to a given data source obey the rules that data source has in place. For example, an insert can only be successful if it doesn’t violate any referential integrity constraints set up in the data source – like primary key-foreign key relationships. Sounds like a no-brainer, yeah?
- Isolation : A transactional operation should protect the data being operated on from concurrency-related corruption.9 So problems like the following can be avoided:
Dirty reads: One thread reading uncommitted data that was created by a different thread concurrently.
Non-repeatable reads: One thread reading the same data twice and getting different values each time, because another thread is operating on the same data.
Phantom reads: One thread reading data that “disappears” or ceases to exist after it has been read, typically because another thread is operating on the same data source concurrently.
Durability : A transactional operation must ensure that data that has been committed to the data source stays committed – even in the event of a systemic failure like disk or power failures.
Implicitly, every update you make to a database occurs as a transaction, at least as far as the database server layer is concerned. It’s just that the scope of the implicit transaction is very narrow to the point where it doesn’t provide too much benefit. Talking about transactions at the application layer requires talking about boundaries. A boundary is the chunk of your code that you want to wrap in a transaction. It’s the part of your code where you use transaction APIs to buy yourself the protections of ACID. The ACID guarantee is something that a transaction manager will help you, broker, in partnership with a data source (read: your data source needs to support specific transaction semantics, for you to be able to rely on it). Things get even spicier when your application is distributed. Managing transactions across physically or logically separate data sources introduces the need for the disparate data sources10 to coordinate individual operations. Not all data sources support this.

“Welcome to Borkus!”. They’re already here. “Uhhh...Woof!”
Quarkus Transactions
Declarative using the javax.transaction.Transactional annotation
Programmatic using the javax.transaction.UserTransaction interface
These two models cannot be combined – you’ll get an IllegalStateException if you try.
There’s a third framework for transactions in Quarkus, called Software Transactional Memory (STM) ; it is based on Narayana (bet you can’t say that fast, 5 times). STM is an intriguing proposition for transaction management. Traditionally, transaction state is made durable by way of storing the transaction data in, well, durable storage. This introduces performance overhead that is avoidable in many situations. STM is a transaction management framework that isn’t too strict on the durability part of ACID. Built for high-performing environments, STM can give you a lot of bang for your buck; removing the cost of persisting transaction metadata in RAM gives all of the performance boost you would expect from constant-time, non disk I/O-bound memory access.
For now, we focus on traditional transaction management with JTA. I’ll start with adding the quarkus-narayana-jta extension.
Declarative Transactions
Applying @javax.transaction.Transactional to this method transparently initiates a transaction boundary. All the method calls along the chain of this method execution also get the ACID guarantee, being part of this transaction boundary. I also could have applied this annotation to the parent class of this method, to add transactionality to all the methods in this class.
- a)
REQUIRED here stipulates that a transaction must be started on entering this method, or an existing one can be used. It’s also the default. There are a couple of other options in JPA that dictate how the transaction manager should propagate transactions. The sexiest one in my opinion doesn’t exist in JTA. It’s the NESTED option, available only in Spring. This option makes it so that a so-decorated method can act as a savepoint. If any subsequent method calls fail as part of that transaction, the transaction is only rolled back to the last savepoint. Pretty sweet.
- b)
rollbackOn tells the transaction manager which exceptions should cause a rollback of previously executed database operations. By default, JTA will roll back when a subclass of RuntimeException is thrown. No automatic rollbacks on checked exceptions, like IOException and *gasp*, SQLException! Conversely, there’s the dontRollbackOn attribute – “don’t roll back on these exceptions”.
You can’t apply it to lifecycle methods like @PostConstruct or @PreDestroy.
You can’t apply it to static methods.
It only delivers on the A, C, and D in ACID. You cannot configure Isolation on this annotation – dirty reads, phantom reads, and so on are entirely possible with this annotation.
Putting both writeDataFromDb and longRunningCallToWebService as part of the same transaction boundary could create problems. When the transaction boundary is entered, the database connection and other resources allocated to that transaction are held for the length of that method call. Take too long and you can slowly deplete the connection pool and other scarce resources.
Consistency in Concurrency
none: You don’t want read consistency.
read-uncommitted: Allows read access to data that hasn’t been committed. It’s very permissive and has the lowest burden. It also allows dirty, phantom, and non-repeatable reads. Sooo, no.
read-committed: This allows access to only committed data, preventing dirty reads. You’re still susceptible to phantom and non-repeatable reads.
repeatable-read : Prevents dirty and non-repeatable reads. You’re still liable to experience phantom reads. This is the third highest level of isolation, with an increased degree of protection overhead.
serializable: This option is the highest level of read isolation, guaranteeing protection against dirty, phantom, and non-repeatable reads. This is at the cost of concurrent access – synchronization is how this mode protects read access. Only one thread will be able to access the data table at a time. Any others must wait their turn, so, not a great choice for scalability.
It too uses that weird-patterned Duration class. In this example, I’ve set the timeout to 75 seconds.
The isolation level you choose is one of the more crucial choices you’ll make when configuring the data source access for your application. In a serverless deployment, for example, things can quickly fall apart with the wrong sort of isolation. Each run of your serverless function is effectively a single thread – remember, serverless functions shouldn’t maintain state in themselves. An overly permissive isolation level means that multiple hits to your serverless function, accessing the same database, will lead to corrupt data. Choose an expensive but thread-safe option, and you will bottleneck your serverless function, causing it to run longer than it needs to. A long-running serverless function will cost you more money in timing costs; increased RAM and CPU costs are also going to become an issue. You’ve got to get it juuuust right, like Goldilocks.
Database Update Locking
- 1.
OPTIMISTIC: This is a type of locking that uses a dedicated version field or column to coordinate concurrent reads of the same entity. If your entity doesn’t provide a version column, expect this to not provide any protection. If you use this option in an update operation, its version number will be incremented. It prevents dirty and non-repeatable reads by using a version column on your entity class to coordinate liveness between multiple threads accessing the same data.
- 2.
OPTIMISTIC_FORCE_INCREMENT : This rather exotic option acts like OPTIMISTIC, even when the data hasn’t been updated. That means that just accessing a data in one thread makes it out of date for other concurrent access.
- 3.
PESSIMISTIC_READ: This is a lock mode that completely prevents concurrent writes, but allows concurrent reads. Using a write lock, once a thread gets a hold of a row, it’s locked for writing. Other threads that attempt to write to the same row will catch an exception; they’re free to read without consequence.
- 4.
PESSIMISTIC_WRITE: Prevents both concurrent reading and writing. Simply accessing a row prevents another thread from doing anything with it.
- 5.
PESSIMISTIC_FORCE_INCREMENT: This is PESSIMISTIC_WRITE + OPTIMISTIC_FORCE_INCREMENT. Really strict stuff.
- 6.
NONE: No row locking, all concurrency problems allowed.
These controls are particularly useful for preventing lost updates, a spectacularly insidious class of concurrency problems with database transactions. Lost updates occur when two threads are trying to modify the same column, of the same row in a table. By default, most database servers will be set to READ_COMMITTED isolation, meaning that two threads accessing the same row will not see each other’s uncommitted updates. The problem with that is that if they’re acting on the same column of the same row, only one of them can have a successful update of that column. The other thread will still “successfully” make the update, but it won’t know that another thread immediately overwrote its changes. This is where choosing a locking mechanism pays off. With an OPTIMISTIC lock mode, for example, the thread that tries to update the column last will get an OptimistLockException. This will necessitate a reattempt of the transaction, if it makes sense to do so.
Programmatic Transactions
I can then manually demarcate the transaction boundaries with begin() and commit(). Additionally, I can manually trigger the rollback when I please.
Batch Operations
persist(Iterable<Entity>)
persist(Stream<Entity>)
persist(Entity[])
You should be careful to size your batches correctly: too few items in the batch and you might as well persistAndFlush() after each run; too many items and you risk an OutOfMemoryError.
The length of time you spend waiting to collect items into a batch as well as the size of each item should be a factor in how you size your batches.
The deployment context matters a lot as well: you shouldn’t use serverless functions like AWS Lambda for long-running batch operations. That is not what Lambda is ideal for.
Managing read consistency and isolation contexts becomes more important when you’re running batch operations in a serverless context. Each serverless invocation of your application is essentially a thread – more concurrent invocations, more contention of row locks.
Scheduled Jobs
- 1.
I’ve marked the bean that’s going to host the scheduled tasks a singleton, because I need just one instance of this bean. This doesn’t really matter to Quarkus, by the way. The @Scheduled annotation is discovered by the runtime, regardless of whether the parent class is a CDI managed bean or not.
- 2.
I can inject the Scheduler, the component that manages all the tasks in the runtime, for my own nefarious purposes. You don’t need this in many cases; just in case you do though, it’s here.
- 3.
With the scheduler in hand, I can manually pause all tasks.
- 4.
@Scheduled is going to be the most common use case of this API. I can configure every to specify the interval of runs, delay to specify a wait before the first run of this method, delayUnit for the unit of measurement of delay, and a unique name for this scheduled task. I can also specify a cron-format schedule for the interval of execution. This cron schedule can be supplied as a property from application.properties as well.
- 5.
I could also resume the scheduler, after pausing it. This doesn’t mean that any suspended tasks will be run immediately, so I can manually trigger the execution of all scheduled tasks with checkTriggers.
- 6.
I can obtain metadata about a specific task run from the provided ScheduledExecution object; from there, I can log some useful info, like the next time this task is to run.
For more advanced use cases, you can turn to the quartz extension which lets you use the Quartz library in your Quarkus app. Additionally, if you’re coming from the Spring framework world, Quarkus supports Spring Scheduled Jobs.
Now this is all well and good for traditional use cases, but if we’re talking cloud and serverless, this approach might not be necessary. AWS Lambda, for example, can be easily configured as a scheduled task; Microsoft Azure also supports step functions on a schedule.
Security
How about we use database-stored credentials to authorize and authenticate access to our web services? Sure JWT is nice, especially in a distributed, cloud-computing world – you can combine JWT with OAuth,11 for example. But sometimes, you just need trusty old JDBC. More so if you’re migrating your existing “legacy” APIs to Quarkus. Here’s how SQL-backed security works in Quarkus.
Quarkus supports JDBC-backed authentication and authorization in many ways you’d expect. However, there’s currently no support for Soteria, the Jakarta EE standard on security.12 One place I am super impressed is the ORM-based support for authentication. This has the trademark sleekness and opinionated approach to features that I adore about Quarkus. Check it out.
- 1.
A role table that lists named roles that describe the authorizations of users in this service.
- 2.
A user table that holds the users that will have access to the application in general.
- 3.
A user-role mapping table that connects the user and role tables. This way, a single user can have multiple roles; a single role obviously will be mapped to multiple users. A proper many-to-many relationship.
- 4.
Roles rows for roles “VIP” and “HOYPOLOI”.
- 5.
Two users named “mynameiswhat” and “mynameiswho”, both with password “password”. A very safe and strong password that you should totally put on a sticky note next to your work station.13 Five out of five doctors recommend this.
- 1.
io.quarkus.security.jpa.UserDefinition marks this entity class as the “user” class that will identify the principal trying to connect to your service.
- 2.
io.quarkus.security.jpa.Username marks this field as the “user name” field of the entity.
- 3.
io.quarkus.security.jpa.Password designates this field as the password field. The framework expects this field to hold the hash of the password, not the plain text version. BCrypt is the default hashing function.
- 4.
io.quarkus.security.jpa.Roles will use this field to hold a list of entities that map to the roles or groups that the parent entity has.
- 5.
Because of the many-to-many relationships that I’ve set up between the user and role tables using the user_role_mapping table, I need the @ManyToMany annotation here.
- 6.
Along with the @ManyToMany annotation, I need to use the @JoinTable annotation to establish the relationship between the three tables.
io.quarkus.security.jpa.RolesValue marks this field as the name of the role. The value in this field is what an authenticated entity will present as its role. @ManyToMany annotation establishes the other side of the three-way connection between user, user_role_mapping, and role.
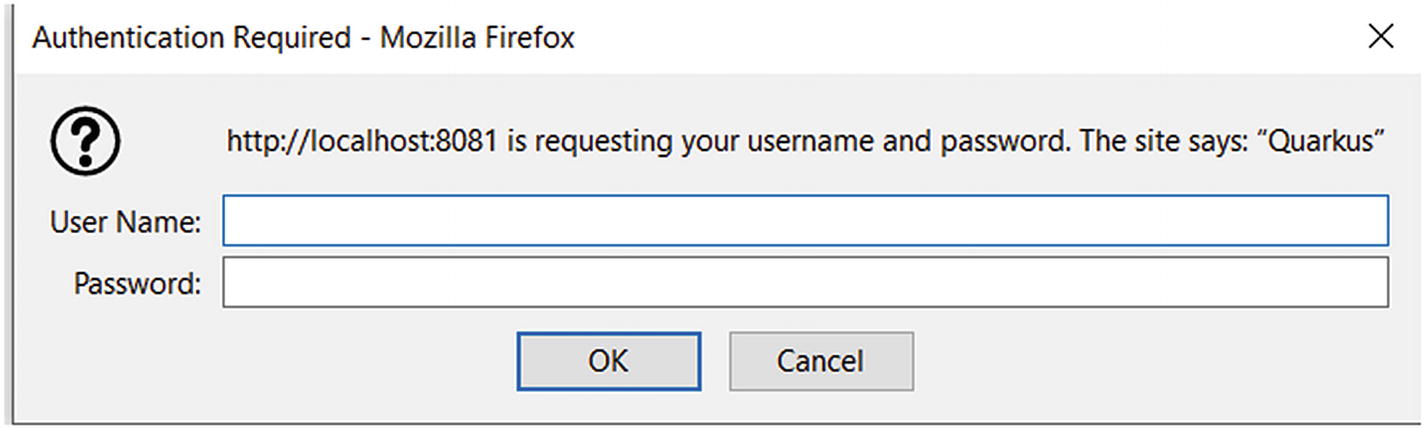
The Mozilla authentication dialog box
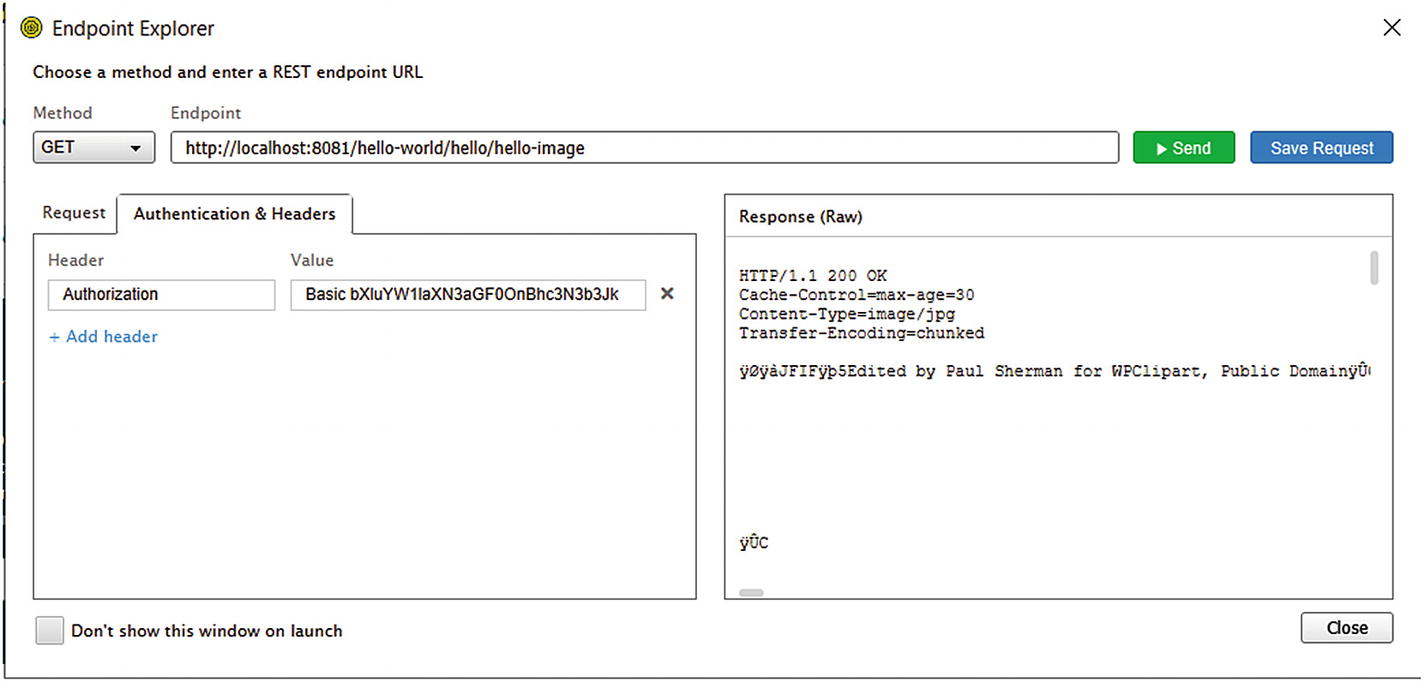
Testing my REST authentication in SoapUI
You can get the value for the Authorization header from your browser. Open the network console in your browser and attempt to hit the secured endpoint. That will yield a dialog box like the one in Figure 5-6. Fill it out and proceed to success. In the network tab of your console, you can then view the request payload and copy the authorization header off it, to use inside the API testing tool of your choice.
Regardless of your testing tool of choice, you should get a successful authentication response from your application, given the correct authentication credentials.
Pub-sub to PostgreSQL database with reactive SQL. PostgreSQL has the capability to notify you of changes to the database and data using the reactive connection.
Debezium also allows you to stream changes from your database upward into your Quarkus application.
- So. Much. Cloud. Quarkus provides support for a lot of cloud-based data services like Amazon’s SQS, SNS and S3.
For integration to cloud services though, I recommend you go through Apache Camel instead of connecting through naked Quarkus. It opens up a wider variety of options and gives more bang for buck.