
12.2. Changing the Look and Feel of the Portal Site
It is easy to create a new portal site, but most organizations want to customize its look and feel; this is sometimes referred to as branding. Some of this customization is very easy to do, whereas other modifications require extensive knowledge of HyperText Markup Language (HTML) and general web design expertise. This chapter gives you the basic information needed to change the design of the portal. Chapter 13 teaches you more about how to use MS SharePoint Designer 2007 for customizing both portal and team sites. Look at Figure 12-1 to see how the default portal intranet site looks when based on the Collaboration Portal site template.
Figure 12-1. Figure 12-1

Before you can modify any part of SharePoint, you must have the proper permissions, which means being a SharePoint Administrator or a member of the Web Designer site group. In Chapter 3, you learned how to add users to SharePoint groups in WSS. In MOSS you use the same technique, which is described in the "Managing Access to the Portal Site" section in Chapter 5.
12.2.1. Modifying the Portal Site
The easiest parts to customize in a portal are things like the logotype, the portal name, and the description. You can do this with a web browser on any computer, as long as you have the proper permission. You need to be a SharePoint administrator or a member of the Web Designer site group to perform modifications of this type. The following table explains the things you can easily customize.
It is the logo file that most organizations want to replace. As previously described, you should avoid very large pictures, because they will reduce the available area for the rest of the page. It is okay to use animated GIF pictures, but you should really make sure that they look good, not only fun the first time one sees it.
| Object | Displayed | Comment |
|---|---|---|
| Portal site name | At the top of every web page and the Site Settings administration page on the portal site. | Limited to 80 Unicode characters such as a, b, c and å, ö, ü, except for these: / : * ? " < > |. |
| Portal site description | Not displayed. | Only visible to users who are allowed to use the Site Settings page. Limited to 200 Unicode characters. |
| Logo file | At the top of every web page on the portal site. | By default: titlegraphic.gif File formats: GIF, BMP, JPEG, and PNG (TIFF is not supported). The default logo type is 225w × 26h pixels with a 96 dpi resolution. Use any reasonable size; the banner will adjust itself, but avoid pictures more than 50 pixels in height, because this will make the banner too dominant on the page. |
| Logo Description: This is the Logo alternative (alt) text. | ALT text is displayed when you hover the mouse over this logotype. | Enter the text in the Logo Description; the system will then use this as the ALT. |
NOTE
You can find lots of free animated GIF images on the Internet. Use your favorite search engine and look for "animated GIF."
To modify any of these three properties, follow the steps in the Try It Out below.
Note that the default path to the logo file is /_layouts/images. This is a virtual IIS directory that in turn points to a physical file location on the MOSS server. To see where it points to, follow the steps in the Try It Out below.
Try It Out: View the Virtual Directory Folder Location
|
If you want to replace the default logo with your own logo file, Microsoft recommends that you create a new subfolder under the images folder. For example, assume that you want to use the custom logo file My_Logo.gif. Create the new subfolder Custom and put the My_Logo.gif there. Then set the Location of the logo file to /_layouts/images/custom/My_Logo.gif.
NOTE
If you want to revert to the default logo file, simply clear the logo URL field; SharePoint will then show the default logo. (However, this will not restore the text on the icon field.)
The folder path you found in step 5 is part of a large folder structure used by MOSS for storing all files that describe how the portal site looks and behaves. It also contains the files for the WSS team sites. Note that all other content, such as documents, files, and other information that users create inside SharePoint, is not stored there. It is all stored in a content database in the SQL Server used by SharePoint. Use Windows Explorer and navigate to this path:
<disk>:Program FilesCommon FilesMicrosoft SharedWeb ServerExtensions12 emplate
NOTE
Microsoft internally calls this file structure the "12-hive," since it is full of nested folders; this is also the starting point of all SharePoint folders and files.
12.2.2. SharePoint's Folder Tree
SharePoint keeps a number of files in these folders, most commonly ASP.NET files (.aspx) and XML files (.xml). These files describe exactly how a given web page will look, including its icons, links, and lists. For example, if you wanted to move the logo on the Home page to the far right instead of its current left position, you would modify the .aspx file for that particular page. Most of these files can be modified with an editor, such as Notepad, but you should think twice before changing them. Some of them can be replaced when you apply the next service pack, and improper modifications may corrupt the portal site. In the following table is an explanation of the most interesting folders under the Template folder for the U.S. English version of SharePoint (1033) and what is inside them. Note that for all site templates listed below the Template ID is also listed; this ID is used when SharePoint code and applications need to refer to a specific site template.
NOTE
Note that customizing the Master Page used by this site is the preferred way of customizing the logo, as described later in this chapter. The description here is just to help you understand how the files work in this folder structure.
MS Office SharePoint Server 2007 is available in more than 20 different languages. After the installation you cannot change the language of the portal site, but you can install extra language template packs for the team sites (i.e., the WSS part of this SharePoint installation). There are more than 30 different language template packs for WSS, which you can download for free from www.microsoft.com, and you can install any number of of these on a WSS or MOSS server. This will make it possible to create WSS sites, such as team sites, with different languages, but again, the MOSS sites will not be affected by these language packs. If you install any of these optional language templates for WSS, you will find corresponding Locale Identifier (LCID) folders in the Template and Layouts folder. For example, if you add the Swedish template pack, it adds the new folder 1053.
The complete LCID table is not so easy to find, but in the following table you will find all the locales currently supported by Microsoft.
NOTE
Go to http://www.microsoft.com and search for "Windows SharePoint Services 3.0 Language Template Pack" to download, and then add new language templates for the WSS team sites.
12.2.3. Branding a SharePoint Site
All the files and folders mentioned in the previous section are the key to understanding how and what to modify when branding a SharePoint web site. So, now start with a common request: modifying the layout of the top navigation menu, and the Quick Launch bar. In SPS 2003 you had to edit the actual .aspx files, used by the different SPS area pages, such as Template1033SPSDefault.aspx. The problems with this method were these:
You needed to understand how these aspx files work. Changing the wrong setting could mean that the portal did not work at all.
Any changes you did on one area page in SPS, for example the Home page, had to be repeated on all other area pages.
Applying a service pack or hotfix on the SPS server could overwrite your modifications, then you needed to redo the modifications again.
These problems are now history, since SharePoint 2007 (both WSS and MOSS) use a special layout file, referred to as a Master Page, for controlling how the top navigation, links, logotype, and Quick Launch navigation will look and feel like (see Figure 12-2). These parts of a web page are also sometimes referred to as the chrome.
Figure 12-2. Figure 12-2

MOSS comes with a number of preconfigured Master Pages, ready to be used in your SharePoint environment. But there are actually two types of Master Pages:
Site Master Pages: Used by publishing pages (i.e., web sites based on a MOSS site template).
System Master Pages: Used by all forms, views, and Web Part pages (i.e., sites based on WSS site templates).
In other words, before you can change the master page for a web site, you must know if this is a WSS site or a MOSS site. If you pick the wrong master page type, nothing will change.
NOTE
Administrative pages in SharePoint, such as Site Settings, will not be affected by the Master Pages.
The table below shows you the default Master Pages you get in a MOSS 2007 environment; note that the same Master Page file can be used as both a Site Master Page, and a System Master Page. For example, if you want to apply the BlueTabs.master file on both MOSS sites and WSS site, then set both the Site Master Page and System Master Page to BlueTabs.master.
Let's try an example: Your boss comes to you and says that the structure of your MOSS environment is good, but he demands a new look and feel. After showing the boss the different master pages listed above, you decide that you will apply the BlueTabs.master to both MOSS and WSS sites. Below are the steps to do this.
Try It Out: Apply a Different Master Page
|

Figure 12-4. Figure 12-4

Using SharePoint Designer 2007, you can design new master pages. You will learn more about this in Chapter 13.
12.2.4. Changing the CSS File
The look of a web page, including its color, fonts, and font size, can be set directly in the code. But this would make a complex web application very hard to adjust. For example, if you wanted to change all text that uses Times New Roman to Arial on all web pages, this would require you to manually edit every web page. A much smarter way is to use labels for each part of the web page, like the header, text block, and tables, then define what colors, fonts, and size are to be used for each part in a separate file. This is called a style sheet. If you later want to change the header from blue to green, you identify the label for the header and change its color settings in the style sheet.
SharePoint is indeed a complex web application with lots of pages, and it uses style sheets to control the appearance of these pages. SharePoint actually uses several style sheets, which are read one after another, and the settings in the last style sheet have precedence over any other setting for the same object. This is called a Cascading Style Sheet, or CSS. Every Master Page has multiple CSS files associated with it, to control its appearance. Below is a list with some of the more common CSS files used by MOSS:
Most CSS files for simple web applications are rather short, but not SharePoint's CSS files. Some of them may contain more than 1,000 lines of definitions, and it is hard to understand exactly what each line does without some help. If you want to change just parts of the web page, you can add your own custom CSS files or you can change the original CSS files. Note that if you apply a new service pack or a hotfix for SharePoint, it may overwrite these standard CSS files, so it is safer to add your own custom CSS file.
NOTE
Shane Perran, a SharePoint MVP, has created a nice simple example of what you can do with a custom CSS file; you will use his demo in the following example. Read more on his blog: www.graphicalwonder.com/?p=642.
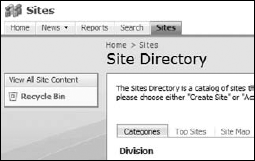
Try It Out: Add a Page CurlIn this example, you create a custom CSS file that will add a page curl to the top-left corner of every web page. You will start with an empty CSS file with the name Pagecurl.CSS and add the code to it that will display an image file named Pagecurl.gif. Both of these two files will be stored in a new document library named Custom-CSS that you will create in the subsite http://srv1/SiteDirectory. Finally, you will configure the Alternate CSS URL setting to show this custom CSS file. This file will override the default CSS settings. Follow these steps:
|

How do you know how to define the color green? And what if you want to use another color? The answer to that is to learn how to define colors using the standard Cascading Style Sheets Level 2 (CSS2) color codes. You can learn a lot more about this in any HTML development book, but you get a quick summary in the following table, which shows the ways to define a standard green color. Use whatever method you want; the point is that you have a number of options for defining a specific color, and some of them give you much more control over the exact color tone, if this is needed. For example, change the background color from "green" to "#ebf3ff" and the frame will be blue like the top row with the global breadcrumb link.
| Method | Example | Explanation |
|---|---|---|
| HTML 4.0 color names | Green | Use the HTML 4.0 standard names, like Black, Red, Green, Olive, Yellow, and so on. |
| RGB 3 digits | #080 | The first character is Red, the next is Green, and the next is Blue, with hexadecimal values between 0 and F. |
| RGB 6 digits | #008000 | The first two characters are Red, the next two are Green, and the last two are Blue, with hexadecimal values between 00 and FF. |
| RGB Triples | rgb(0,128,0) | The first number is Red, the next is Green, and the last is Blue, with decimal values between 0 and 255. |
| RGB Triples | rgb(0%,50%,0%) | Same as above, but with values between 0 and 100%. |
NOTE
You will find more information about color setting on this site: www.w3.org/TR/REC-html40/types.html#idx-color.
The need for creating CSS files in SharePoint 2007 is not as great as in SharePoint 2003. Now, you do most of the customization by modifying a Master Page file, as you will learn in Chapter 13.