In previous chapters, we learned how to create web applications using libraries such as React and Next.js. We now know how to develop an application using these libraries. What next?
Once an application is developed, it is important for us to know that it works as expected. To do so, we can write automated unit tests to verify that every component of our application is appropriately doing its job. That is exactly what we are going to learn in this chapter. We will use the Jest framework to perform unit testing on our React application.
As a developer, writing unit tests might seem to be delivering very minimal value while adding a lot of work to your already cramped schedule. However, it will help you reduce your workload in the long run when your application scales up in size, providing a very effective way to detect errors and loopholes in your code.
There are many other JavaScript testing frameworks in the market such as Mocha and Jasmine. However, we will go with the Jest framework due to its increasing popularity and utility. We will learn how to install and set up Jest in our application, then we will create a basic unit test to familiarize ourselves with the concept of Jest, and eventually, we will learn about Matchers and Enzymes that will help us test our React component. Let us start by setting up the Jest framework.
Setting Up Jest
That’s it. Jest is now successfully installed. Let us write our first test using Jest.
Writing Your First Test Using Jest
Let us first create a simple JavaScript file that contains some basic functions. I have added a file called “functions.js” to the root directory of our application with the following code:
This file contains a simple “add” function that takes in two numbers as input and returns their sum as output. Note that we have used simple JavaScript syntax to export the list of functions as a module. Avoid using ES6 syntax because Jest expects the files to be plain JavaScript while they are imported. Now that we have created a JavaScript function, let us test it using Jest. We will add our test files in the “tests” directory. It is a good practice to name the test file as the same JavaScript file you are testing, with ".test.js" suffix. Consider the following test file that contains the code to test the “add” function:
In the code for the test, we simply call the “test()” function that takes in two input parameters – the first one being a description of the test and the second one being the actual test function.
In the test function, we use the “expect()” function that takes in the function that we are testing and evaluates it, in our case, the “add()” function.
We import the list of functions from "functions.js" using JavaScript’s “require()” method because in order to call the “add()” function, we will have to import it from the file in which it is defined.
We use a Matcher, in this case, the “toBe()” function, on the “expect()” function in order to compare the evaluated value with the expected value. We pass the expected value as an input parameter to the Matcher. We will learn more about Matchers in the next topic.
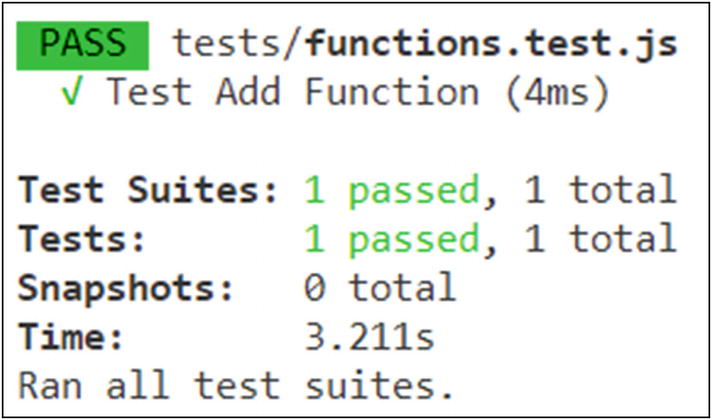
First Test Using Jest (Success)
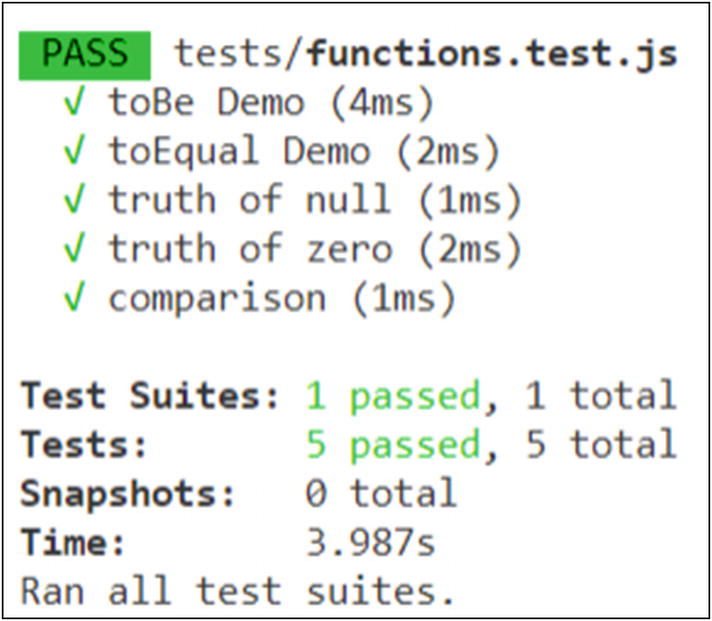
It is possible to write multiple tests in a single file.
The “Test Suites” denotes the number of test files, whereas the “Tests” denotes the combined number of tests in those files. In the preceding example, if we change the expected value to something else, let us say “4”, the test execution will fail. Let us try that. Consider the following changes to “function.test.js” file:
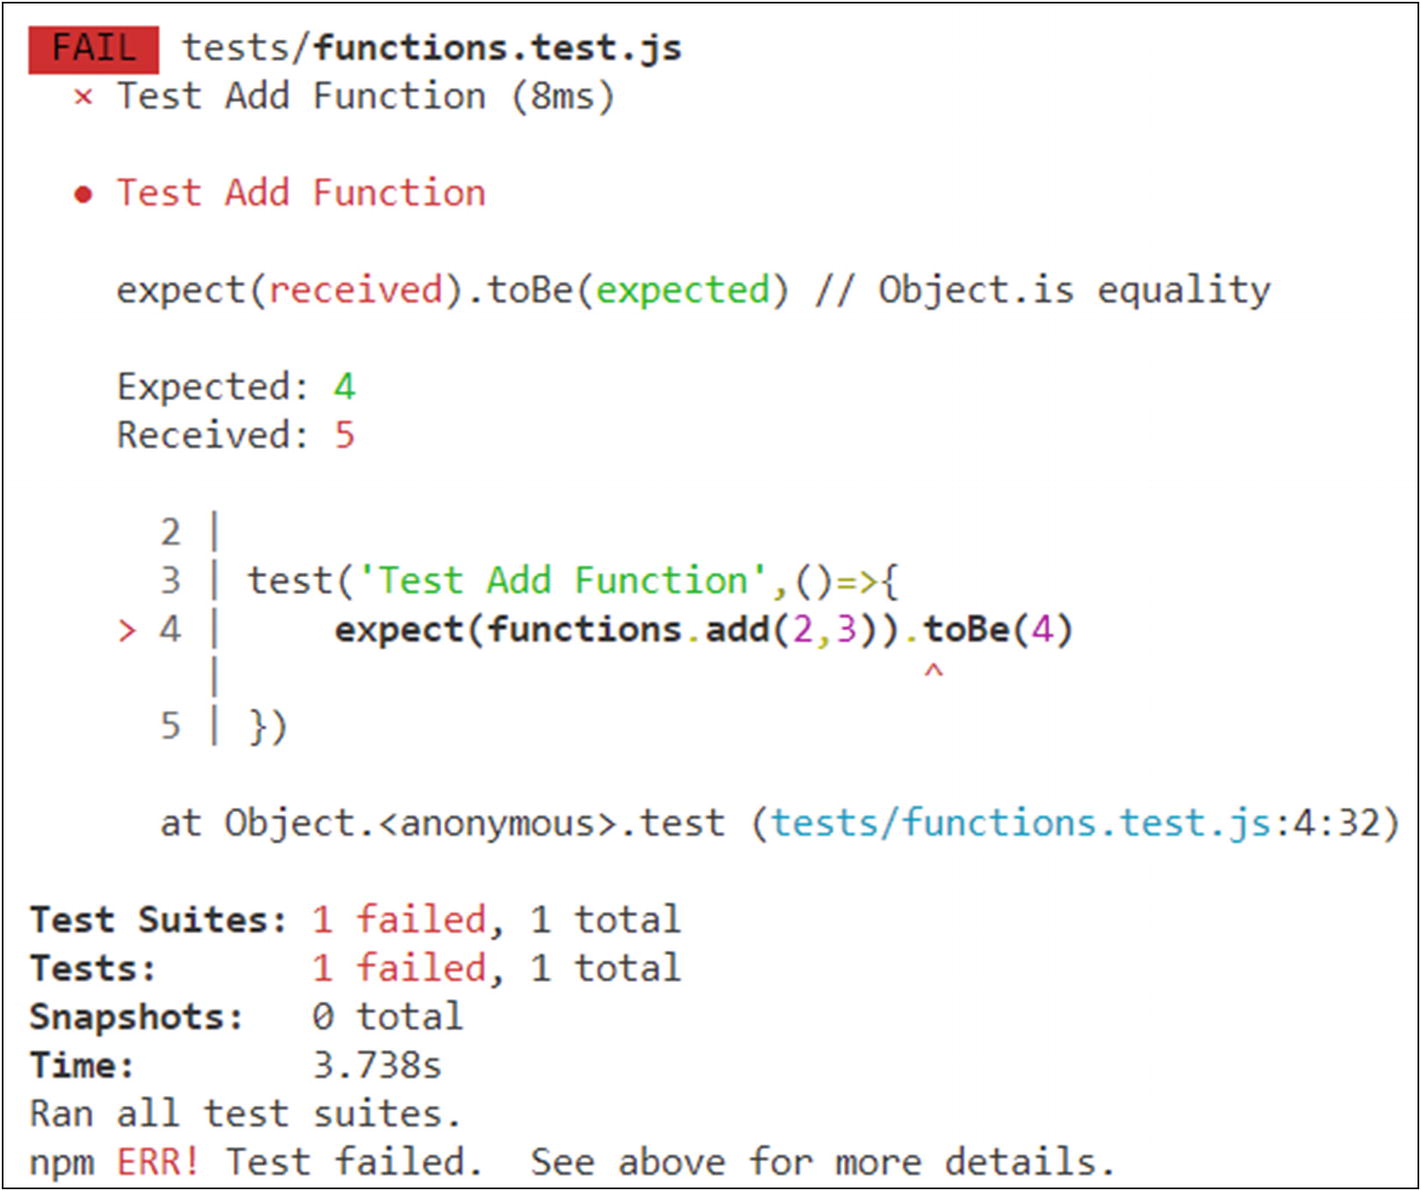
First Test Using Jest (Failure)
Now that we have learned how to write tests for JavaScript functions using Jest, let us delve a little deeper and learn about different Matchers that we can use for testing our code.
Matchers
Matchers are function used by Jest in order to compare the evaluated value with the expected value. In the previous example, we used the “toBe()” Matcher provided by Jest. Note that we use the “expect()” function in order to evaluate the actual value. This function returns an expectation object on which we call our Matcher function to compare it with the expected value. Let us have a look at all the Matchers that are provided by Jest.
Common Matchers
toBe(expectedValue) – This is the exact equality matcher. It checks if the value returned by the “expect()” function exactly matches the “expectedValue”.
toEqual(expectedValue) – This is similar to the “toBe()” matcher, except the fact that it is used to compare the value of an object. It recursively checks every property of an object.
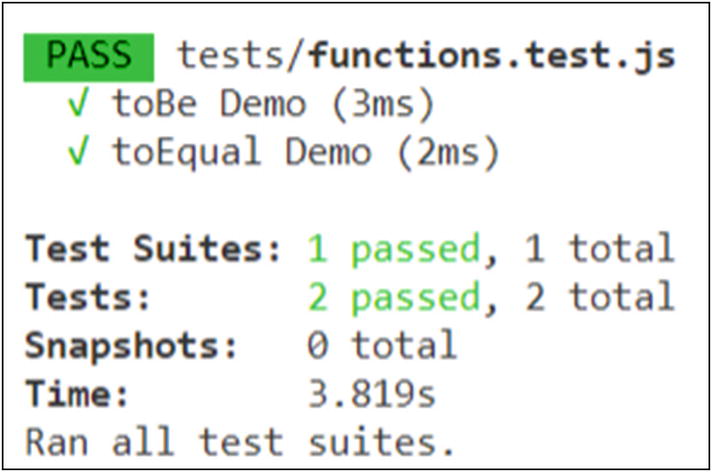
Let us look at an example in order to understand the common Matchers in working. Consider the following changes to “functions.test.js” file:
To demonstrate the utility of the “toBe()” Matcher, we use the same “add()” function that we tested during the previous example. The function returns “5” and the “toBe()” Matcher asserts it to be true since it is the value that we are expecting.
Common Matchers in Jest
If you want to try more scenarios, you can change the expected value in the preceding example and notice that the test fails.
You can use the “Jest” extension by “Orts” if you are using Visual Studio Code editor. It provides IntelliSense for Jest and is also very helpful in debugging tests that you write.
Truth Matchers
toBeNull() – Matches null values
toBeUndefined() – Matches values that are undefined
toBeDefined() – Matches values that are not undefined
toBeTruthy() – Matches the values that evaluate to true
toBeFalsy() – Matches the values that evaluate to false
Let us look at an example in order to understand truth Matchers in working. The following new tests need to be added to the “functions.test.js” file:
We have written two new tests in the preceding example, one to test the truthiness of “null” and the other to check the truthiness of the number zero. The null value should evaluate to null, defined, and not true. On the other hand, the number zero should evaluate to not null, defined, and false. If you use any number other than zero, it should evaluate to true.

Truth Matchers in Jest
Comparison Matchers
toBeGreaterThan(value) – Asserts if the actual value is greater than the provided value.
toBeGreaterThanOrEqual(value) – Asserts if the actual value is greater than or equal to the provided value.
toBeLessThan(value) – Asserts if the actual value is less than the provided value.
toBeLessThanOrEqual(value) – Asserts if the actual value is less than or equal to the provided value.
toBeCloseTo(value) – Asserts if the actual value is close to the provided value. This is specially used while dealing with floating-point values. In such cases, the precision of the expected value and the actual value might differ, so the “toBe()” Matcher (exact equality) would not work.
Let us look at an example in order to understand comparison Matchers in working. The following are the new tests added to the “functions.test.js” file:
Comparison Matchers in Jest
String Matcher
toMatch(regex) – Asserts if the computed string matches the provided regular expression
Consider the following example:

String Matcher in Jest
Matcher for Iterables
toContain(item) – Asserts if the computed iterable contains the provided item
Consider the following example:

Iterable Matchers in Jest
Exception Matcher
toThrow(expectedException) – Asserts if the evaluated piece of code throws the given exception
To test this Matcher, we will go back to our “function.js” file and define a function that throws an error. We will then add a test in the “functions.test.js” file which will invoke the function and assert the exception. Consider the following example:

Exception Matcher in Jest
That is it. We have covered most of the commonly used Jest Matchers. Let us now learn how to test our React components using what we have learned so far.
Testing a React Component Using Jest and Enzyme
Once the starter application is created, you can delete all the files that are not necessary. I have deleted all the files from the “src” folder except “index.js” and all the files from the “public” folder except “index.html” and “favicon.ico”. I have also cleaned up the “index.html” file. The following is the code for your reference:
Now that we have cleaned up our starter application, let us add our List component in the “src” folder. Consider the following code:
The preceding code is for a simple function component that fetches the items from the props and displays them as a list. Now that our component is created, we might want to instruct the “index.js” file to render it on the browser. Consider the following code for “index.js” file:
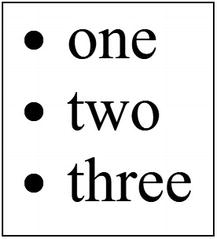
List Component Using React
We have installed a specific version of the Jest framework. This is because applications initialized using “create-react-app” command have a dependency on this version of Jest. If your version of the Jest framework does not match the required version, you will get an error during the launch of the application mentioning the version that you need. You can resolve the error by installing the version that the application requires.
After installing the Jest framework, you will also have to add the test script in “package.json” file as per the following code:
While testing simple JavaScript functions, we used to simply invoke the functions in our tests and compare the evaluated value to the expected value using Jest Matchers. But you might wonder what to do in case of a react component because we cannot just invoke a component.
Note that we have also installed an adapter along with the Enzyme framework that corresponds to the version of React that we are using. We will have to configure this adapter in Enzyme before we can use the framework. To do so, we will create an “enzyme.js” file in the root directory of our application and add the following configuration code to it:
What we are doing in the preceding code is that we import “Enzyme” and “configure” from the Enzyme framework and the “Adapter” from the Enzyme Adapter. We then use the “configure()” method provided by the Enzyme framework to set the Adapter for the instance of the Enzyme that we will be using. After configuring Enzyme, we simply export it. We also import shallow and mount from the Enzyme framework and export them as they are. These are the methods that we will be using to render our React components for testing. To conclude, all the entities of the Enzyme that we need for our testing will now be imported from the file “enzyme.js” instead of directly being imported from the framework. If you try to import the modules directly from the Enzyme framework installation folder, you might run into an error because they are not configured with the Adapter.
Now that everything is configured, let us write our test for the List component. Let us write the test in “List.test.js” file in the “src” folder. Refer to the following code:
Note that we have used two different methods to render our component – shallow and mount. Let us understand the difference between the two. As the name suggests, the “shallow()” method limits the scope of rendering to the specified component and does not render its children components. On the other hand, the “mount()” method renders the entire tree of components. In this case, we do not have any children components so the rendering would be the same in both cases.

Testing List Component Using Jest
Also, we need to create a “.babelrc” file in the root directory of our application and provide the following configurations:
If you run the test after installing and configuring the babel transform plugin, the test should successfully run and the output should be similar to Figure 5-10.
That is it. We have successfully tested our React component using Jest and Enzyme. With the end of this topic, we come to the end of this chapter.
Let us summarize what we have learned.
Summary
Jest is a test framework that can be used to test applications built using JavaScript.
It is good practice to suffix your test files with “.test.js”.
While testing, the “expect()” method is used to evaluate a JavaScript function or specify a value that needs to be tested.
Jest provides various Matchers that can be used on the “expect()” method to assert if the computed value matches the expected value.
Since React components cannot be directly invoked like functions, we will have to use the Enzyme framework that provides us the functionality to render components on a representational DOM that is created for testing.
The Enzyme framework provides two main methods for rendering a component – shallow() and mount().
We can use selectors with “find()” method to look for specific content within the rendered component.