In this chapter, I will be covering the automation of Teams lifecycle management, messages, webhooks, and resource-specific permission consent. Microsoft Graph is a unified API endpoint for dealing with data so that there is a graph endpoint for SharePoint, Teams, exchanges, and planning a whole variety of different Microsoft products, all exposed under a common API endpoint. Teams allows you to build a variety of different apps like tabs, bots, connectors, etc.
Overview of Graph API
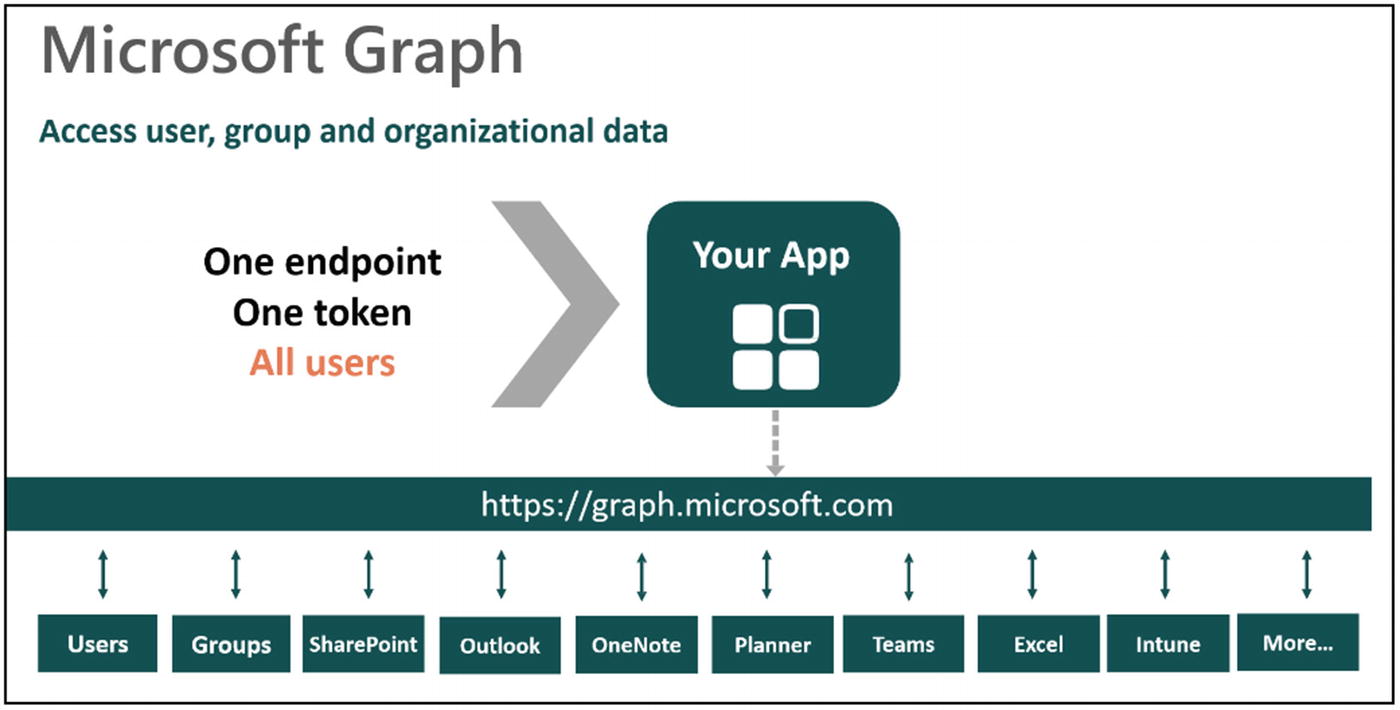
Microsoft Graph is the unified REST API for accessing all the data in Microsoft’s applications, and Microsoft Teams is the hub for teamwork in Office 365 allowing you to communicate through chat messages, online meetings, and calls. It allows you to collaborate with all of those Office 365 applications.
Office 365 services: Delve, Excel, Microsoft Bookings, Microsoft Teams, OneDrive, OneNote, Outlook/Exchange, Planner, and SharePoint;
Enterprise Mobility and Security services: Advanced Threat Analytics, Advanced Threat Protection, Azure Active Directory, Identity Manager, and Intune;
Windows 10 services: activities, devices, notifications (Figure 8-1).
Microsoft Graph – One endpoint
Teams Graph APIs
Microsoft Graph provides APIs for accessing data and you can call graph APIs from tabs, bots, and websites and services that don’t have user interfaces or even Graph APIs in your command-line tools.
A Microsoft Teams Graph API allows you to create new teams and add channels to those teams, add members to the teams, and add tabs into those channels that you have created. Once the team has run its life cycle, you then have a fully functioning team. You can then archive or delete the team using the Graph API for that functionality. Also, there are different things that people build with this first Graph API; for example, they bulk provision teams – maybe 100 teams for each department at the beginning of a year.
The second thing is that you can create temporary teams. For instance, if you are an airline and you want to fly a flight each day and have a team for each flight, you can do so at the stroke of midnight. The third thing is that people create a lot of admin tools; they just administer their teams so the PowerShell command that teams have are built on this. The modern portal for admin is also built on the Graph API so that the developer can get started with the teams Graph API to manager all teams admin activities.
APIs Available Today for Microsoft Teams
Resource | Methods |
|---|---|
team | List your teams, list all teams, create, read, update, delete, clone, archive, unarchive |
group | Add member, remove member, add owner, remove owner, get files, get notebook, get plans, get calendar |
channel | List, create, read, update, delete |
teamsTab | List, create, read, update, delete |
teamsApp | List, publish, update, remove |
teamsAppInstallation | List, install, upgrade, remove |
chatMessage | Send |
call | Answer, reject, redirect, mute, unmute, change screen sharing role, list participants, invite participants |
schedule | Create or replace, get, share |
schedulingGroup | Create, List, Get, Replace, Delete |
shift | Create, List, Get, Replace, Delete |
timeOff | Create, List, Get, Replace, Delete |
timeOffReason | Create, List, Get, Replace, Delete |
Team settings is another one of the things you can get access to - both reading and writing the settings of a team. With channels, we have the full ability to add, read, update, delete channels, as well as enumerate the channels in a team. And you can post channel messages to those channels.
Graph API for Lifecycle Management

Graph can automate team life cycle [REF – MSDN]
Teams and Groups
Microsoft 365 groups address the various needs of group collaboration and having 19 Microsoft 365 applications endpoints including Microsoft Teams. All Microsoft group features are applicable to Microsoft Teams. Every Team associated with a group communicates in the context of a specific team. Group members communicate by group conversations, which are email conversations that occur in the context of a group in Outlook. To differentiate the group associated with the team, any group that has a team has a ‘resourceProvisioningOptions’ property that contains “Team.” Do not change “Team” from the ‘resourceProvisioningOptions’ property or the result will be incorrect when you list all the teams.
Persistent chat is available only to Microsoft Teams. This feature is hierarchically represented by the channel and ‘chatMessage’ resources.
Group conversations are available only to Microsoft 365 groups. This feature is hierarchically represented by the conversation, ‘conversationThread’, and post resources.
The List joined teams method applies only to Microsoft Teams.
Calling and online meeting APIs apply only to Microsoft Teams.
From scratch, using your own team
From an existing O365 group
By cloning an existing team
From a template
Team Templates
Spin up new teams quickly with preconfigured templates that include things like channels, owner settings, and preinstalled apps.
Standard
Education (class, staff, or PLC)
Retail store (basic or manager collaboration)
Health care (ward or hospital)
Set Up Your Team Using Graph API
You can configure your team when you create it or update it later.
Display name and description
Guest and member permissions
Visibility
Messaging permissions
Create channels
Add members and roles
Add Apps and Tabs Using Graph API
Your app must be in either your organizational app Catalog or the public app store.
- To add tabs for your team:
The app must be installed first.
You can preconfigure them, or leave them to be configured when a user first interacts with the tab.
Preconfiguring tabs can be challenging, make sure you use the documentation (https://docs.microsoft.com/en-us/graph/teams-configuring-builtin-tabs).
Archive Your Team
When the time comes, use Graph to archive your team in an agile manner and if necessary, un-archive the team.
Retrieve and archive messages in important channels (beta)
Archive the team
Set the SharePoint Online team site to read only (or delete the group)
Archive or move stored files
Graph and Bots: Better Together
A Teams app with a bot can proactively send messages to a chat or channel. It can only send messages to conversations. If it has the right information for a 1:1 chat, the bot needs to be installed in a group chat or channel the user is a part of or installed as a personal app for that user. The bot must store a reference to that user when they are made aware of them.
With Graph, you can install the app for any user, enabling proactive messaging regardless of where the app is previously installed. This is particularly useful in scenarios where you need to message a large portion of your organization reliably.
Use messaging APIs to get additional information for your bot
Get the root message in a reply chain
Retrieve all replies to a message
Get previous messages from a chat thread
Microsoft Graph Toolkit
What’s in the Microsoft Graph Toolkit?
Components
Component | Description |
|---|---|
Login | A button and a flyout control to authenticate a user with the Microsoft Identity platform and display the user’s profile information on sign in. |
Person | Displays a person or contact by their photo, name, and/or email address. |
People | Displays a group of people or contacts by their photos or initials. |
Agenda | Displays events in a user or group’s calendar. |
Tasks | Displays and enables adding, removing, completing, or editing of tasks from Microsoft Planner or Microsoft To-Do. |
People picker | Provides the ability to search for people and renders the list of results. |
Person card | A flyout used on the person component to display more profile information about a user. |
Get | Make a GET query to any Microsoft Graph API directly in your HTML. |
Channel picker | Provides the ability to search for Microsoft Teams channels to select a channel from a rendered list of results. |
Providers
Providers | Description |
|---|---|
MSAL | Uses MSAL.js to sign in users and acquire tokens to use with Microsoft Graph. |
SharePoint | Authenticates and provides Microsoft Graph access to components inside of SharePoint web parts. |
Teams | Authenticates and provides Microsoft Graph access to components inside of Microsoft Teams tabs. |
Proxy | Allows the use of back-end authentication by routing all calls to Microsoft Graph through your back end. |
Custom | Creates a custom provider to enable authentication and access to Microsoft Graph with your application’s existing authentication code. |
Why Use the Microsoft Graph Toolkit?
The Microsoft Graph Toolkit makes it quick and easy to integrate common experiences powered by Microsoft Graph into your own applications.
Cut Development Time
The work to connect to Microsoft Graph APIs and render the data in a UI that looks and feels like a Microsoft 365 experience is done for you, with no customization required.
Works Everywhere
All components are based on web standards and work seamlessly with any modern browser and web framework (React, Angular, Vue, etc.).
Beautiful but Flexible
The components are designed to look and feel like Microsoft 365 experiences but are also customizable using CSS custom properties and templating.
Styling Components in the Microsoft Graph Toolkit
You can’t style internal elements of a component unless you provide a CSS custom property. The component child elements are hosted in a shadow dom https://developer.mozilla.org/en-US/docs/Web/Web_Components/Using_shadow_DOM.
Templates in the Microsoft Graph Toolkit
Data Type
Each component can have multiple parts that can be templated.
If no data type is specified, the entire component will be replaced with the template. You can also use data type="default" for the same purpose.
Binding Data
Change Binding Syntax
Data Context Helper Properties
Property | Description |
|---|---|
$index | Numerical index of item being rendered while being looped with data-for. |
$parent | If a template is rendered inside another template, this property allows you to access the parent data context. |
Conditional Rendering
Looping
Template Context
In scenarios where you need to convert data in your bindings, bind to events, or just use external data in your template’s bindings, the templates support binding to external data context. You can add additional template context in two ways.
Directly on the Component
The properties in the templateContext object will now be available to be used in the binding expressions in the template.
Globally for All Components
Converters
In many cases, you might want to transform the data before presenting it in the template. For example, you might want to properly format a date before it is rendered. In these cases, you might want to use a template converter.
Event or Property Binding
The event args, data context, and root element of the template are passed to the event handler as parameters.
Template Rendered Event
In certain cases, you might want to get a reference to the rendered element. This can be useful if you want to handle the rendering of the content yourself, or you want to modify the rendered element.
Microsoft Graph Toolkit Playground

Graph Toolkit playground
Microsoft Graph Explorer
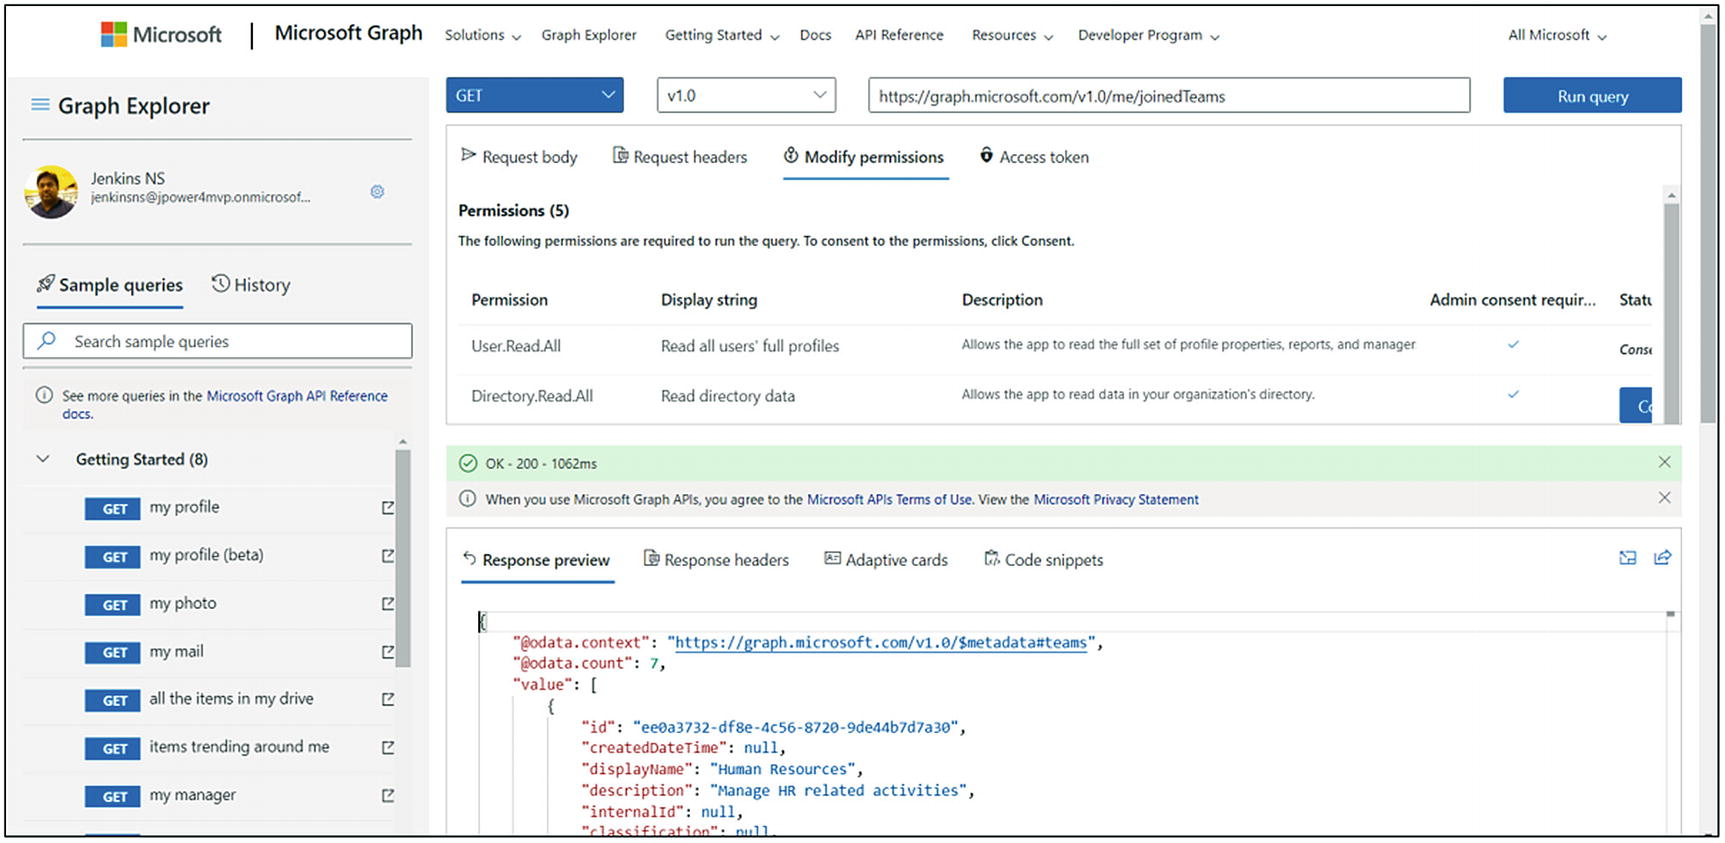
Microsoft Graph Explorer is a tool to explore graph APIs, and you can see the image in Figure 8-4 of the screenshot of the Microsoft Graph Explorer that I have captured. As you can see, this console gives you the option to type in the API or address of a specific entity type or object for which you are looking for some information, and then you also need to sign in with a specific account that has the privilege to query this particular API, Next it will also show you some of the sample queries that you can use to understand the explorer. You can access Graph Explorer at: https://developer.microsoft.com/graph/graph-explorer
Graph API Explorer
A status code and message are displayed after a request is sent and the response is shown in the Response Preview tab.
Postman
Postman is a collaboration platform for API development that you can use to build and test Microsoft Graph API requests. You can download Postman from https://www.getpostman.com . To interact with Microsoft Graph in Postman, you use the Microsoft Graph collection. To learn more about postman, refer here: https://learning.postman.com/
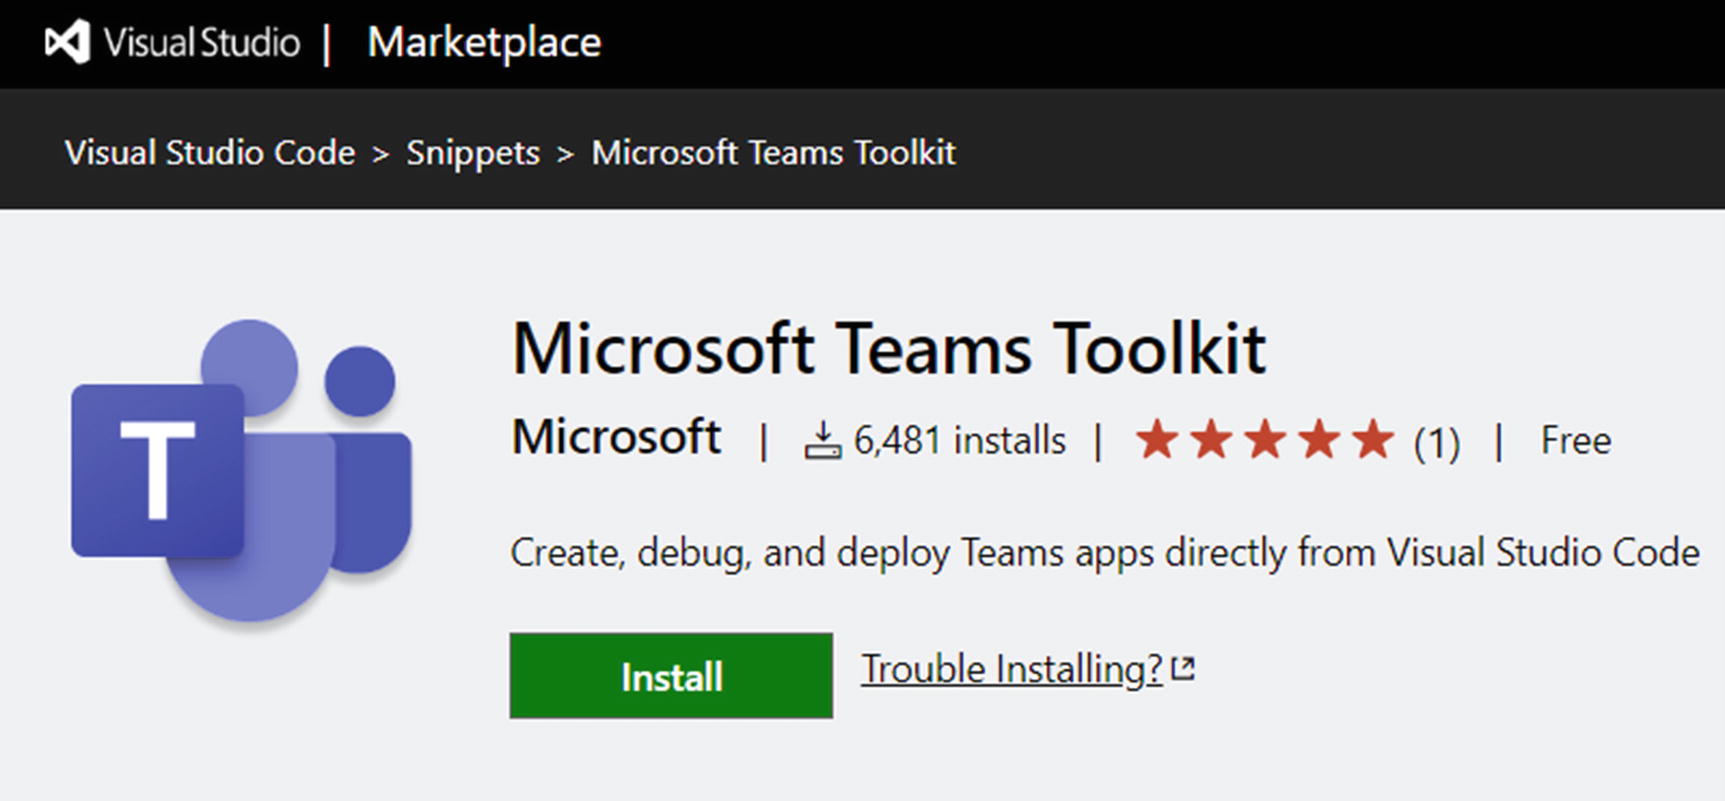
Microsoft Teams Toolkit for Visual Studio Code
The Microsoft Teams Toolkit extension enables you to create, debug, and deploy Teams apps directly from Visual Studio Code.
Visual Studio Code v1.44 or newer
NodeJS 6 or newer
Microsoft Teams Toolkit
Exercise – Microsoft Teams Tabs Using Microsoft Graph Toolkit
In this exercise, you will learn the basics of Microsoft Graph in Microsoft Teams and how to use Microsoft Graph API Toolkit, Microsoft Graph Explorer, and AAD Permission Implementation. This exercise develops using Microsoft Teams Toolkit for Visual Studio Code.
- 1.
Visual Studio Code
- 2.
Microsoft Teams Toolkit
- 3.
Ngrok account
- 1.
Install Microsoft Teams Toolkit extension for Visual Studio Code
- 2.Build Microsoft Teams tab
- Implement Microsoft Graph Toolkit
Login component: login button to authenticate a user with the Microsoft Identity platform
Teams provider: Microsoft Teams tab to facilitate authentication
Person component: displays user
- 3.
Set up ngrok for tunneling
- 4.
Register your app in Azure Active Directory
- 5.
Execute the app
- 6.
Test your App in Microsoft Teams
Enable Microsoft Teams Toolkit Extension for Visual Studio Code

Microsoft Teams Toolkit Installation
Build Microsoft Teams Tab
- 1.
Open Visual Studio Code
- 2.
Select Microsoft Teams icon on the left sidebar in Visual Studio Code and Sign in
- 3.
Log in with your tenant account
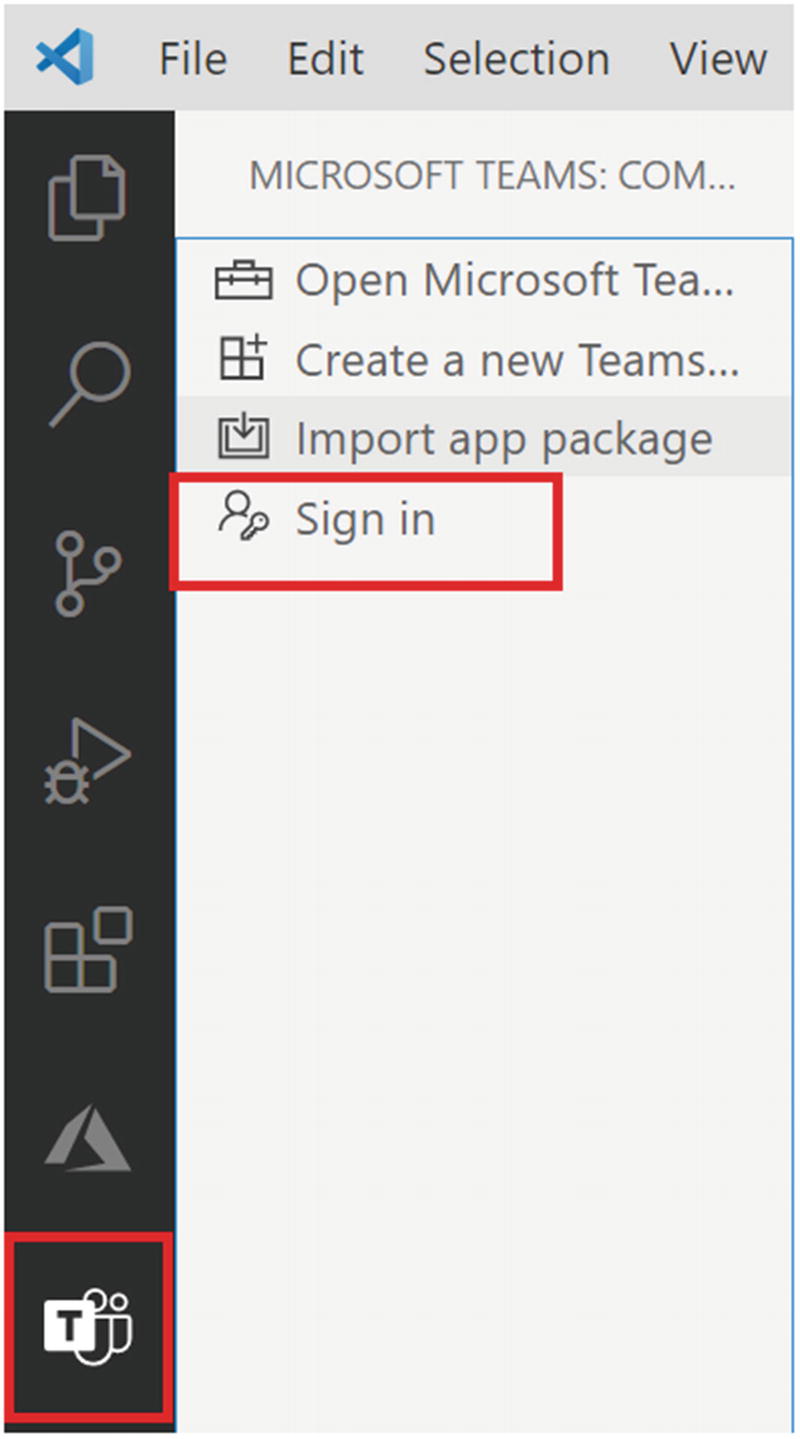
Microsoft Teams Toolkit Sign In
- 4.
Navigate to “Create a New Teams app” and Click to enter new app name (Figure 8-8)
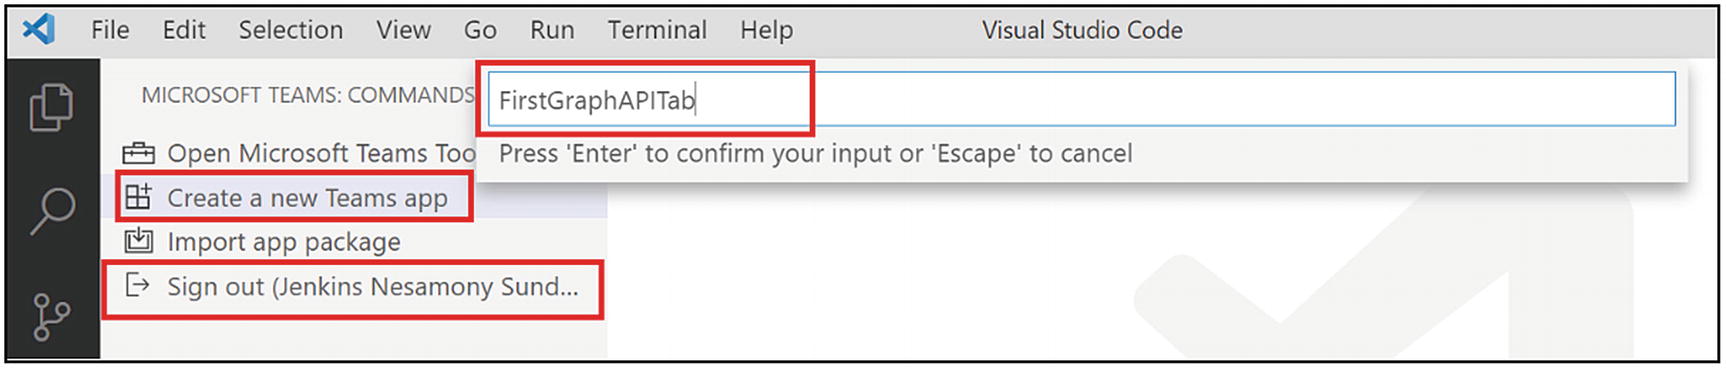
Create new App
- 5.
Press ‘Enter’ to select the app path
- 6.
Choose Tab to create Microsoft Teams Tab (Figure 8-9)

Select new tab App
- 7.
Click Next button
- 8.
Select Personal tab (Figure 8-10)

Select Personal App
- 9.
Click the Finish button to create the Teams app (Figure 8-11)

Microsoft Teams Tab App Created
Implement Microsoft Graph Toolkit
Add a new file under src folder and name it as auth.js
Then add the code below in it:
Add a new file under public folder and name as auth.html
Then add below code
Add the code below in index.html, inside <body> tag:
Set Up Ngrok for Tunneling
Go to the ngrok(https://ngrok.com/) website and log in with your tenant id
Download ngrok.exe and Complete the setup and installation guide
Copy the Authtoken from the ngrok site
Save Authtoken in the default configuration file C:Users[user name].ngrok> (Figure 8-12)

configUre ngrok auth token
Run the script below (Figure 8-13) to create an ngrok tunnel for https://localhost:3000

Ngrok created the tunnel
Go to your project .publish > Development.env, and replace baseUrl0 with ngrok URL (Figure 8-14), https://51d71653c83c.ngrok.io
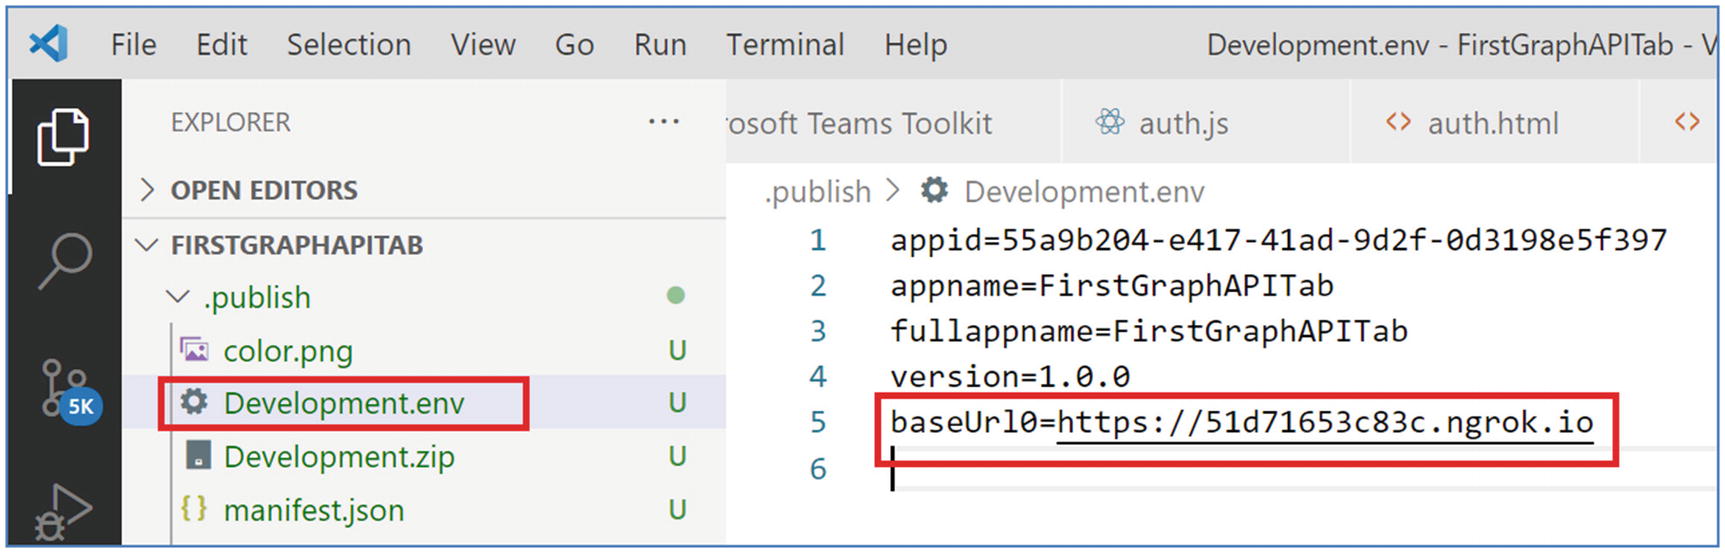
Update URL in .env file
Go to your project public > index.html, replace YOUR-NGROK-URL with ngrok URL https://51d71653c83c.ngrok.io in mgt-teams-provider > auth-popup-url (Figure 8-15).

Update URL in index file
Navigate Terminal ➤ New Terminal
Run the solution (Figure 8-16). Default Teams tab will be running https://localhost:3000

Compiled the app
Register Your App in Azure Active Directory
- 1.
Go to the Azure Portal, then Azure Active Directory ➤ App Registration and select New Registration
- 2.
Azure Active Portal URL - https://aad.portal.azure.com/
- 3.
Login
- 4.
Click Azure Active Directory
- 5.
Select App registrations
- 6.
Then Click New Registration (Figure 8-17)
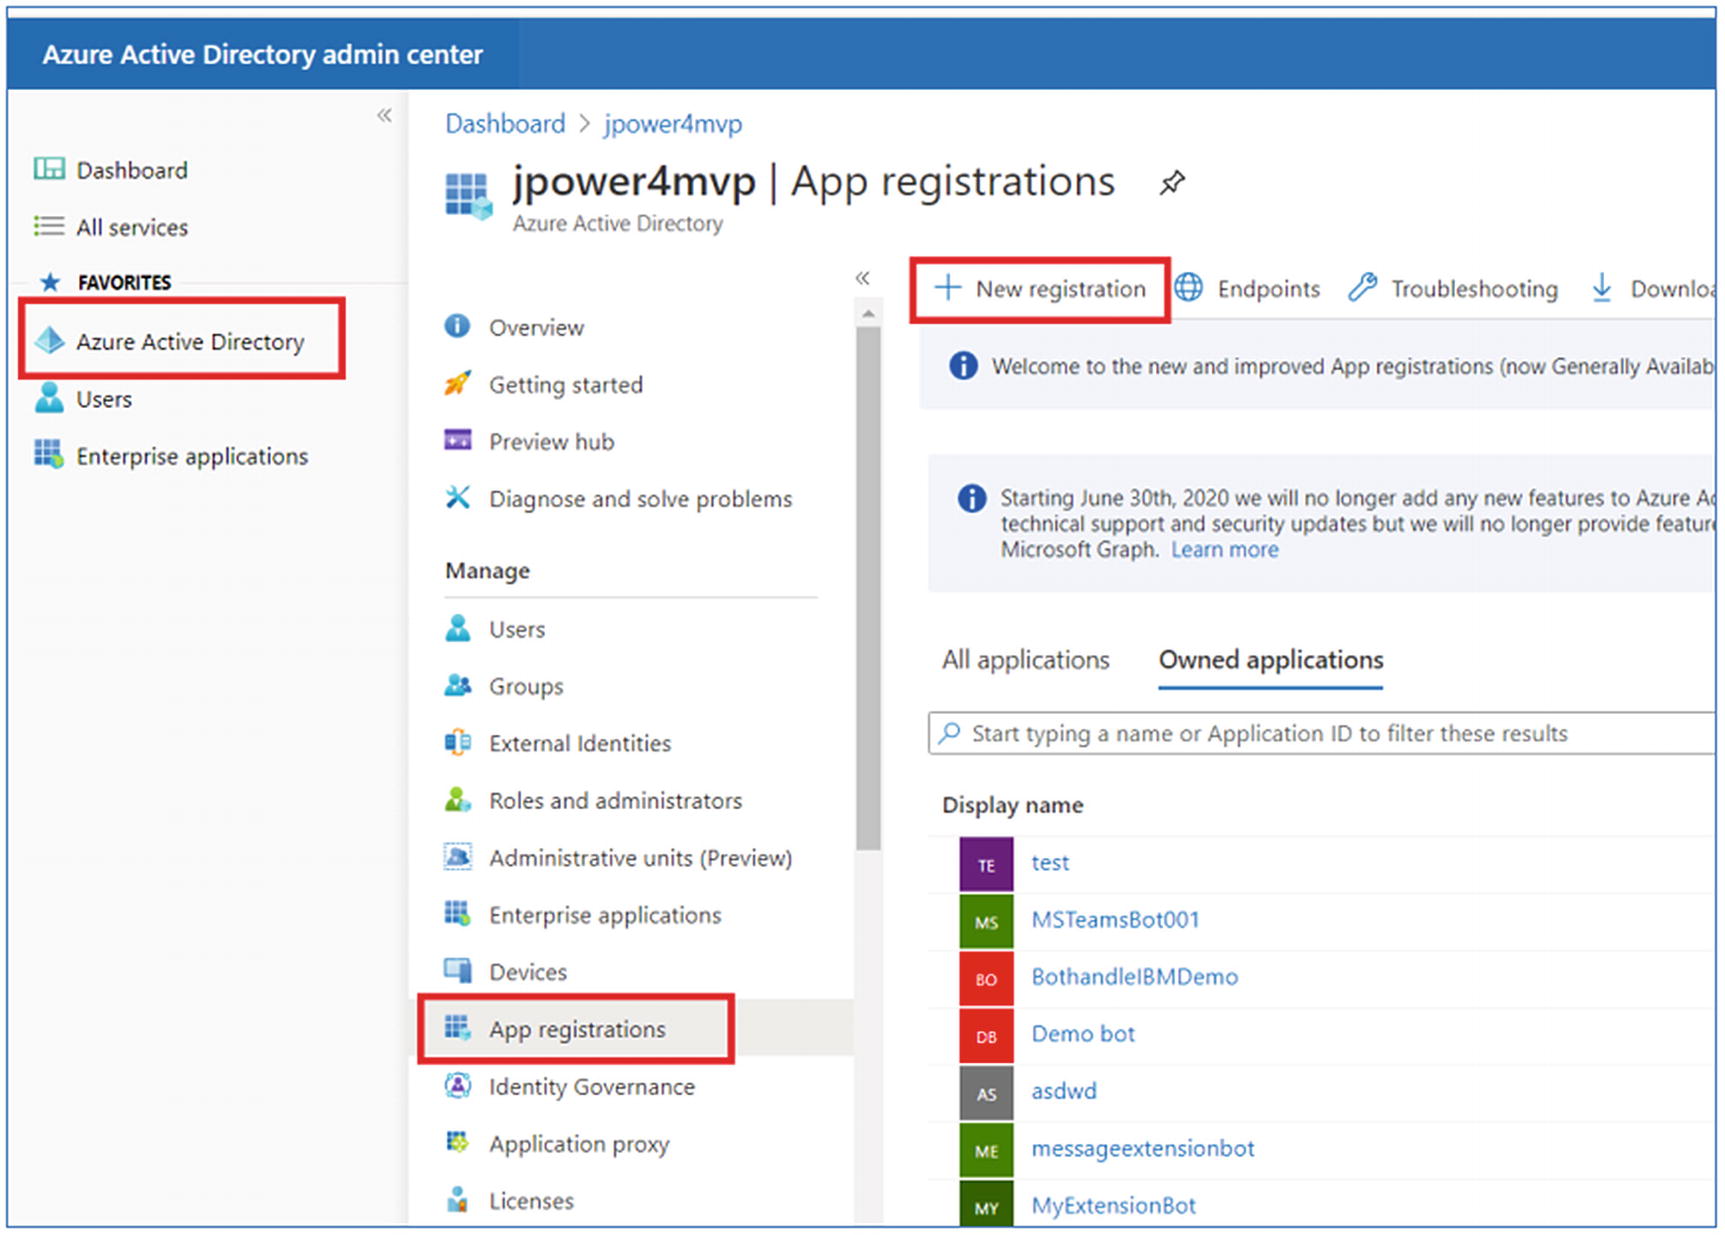
App registrations
- 7.Fill in the Details for registering an app:
Name: TeamsTabApp
Supported Account type : Accounts in any organizational directory (Any Azure AD directory - Multitenant) and personal Microsoft accounts (e.g., Skype, Xbox)
Redirect URL for web: https://REPLACE_NGROKDOMAIN.ngrok.io/auth.html
Click ‘Register’ button to register an application (Figure 8-18)
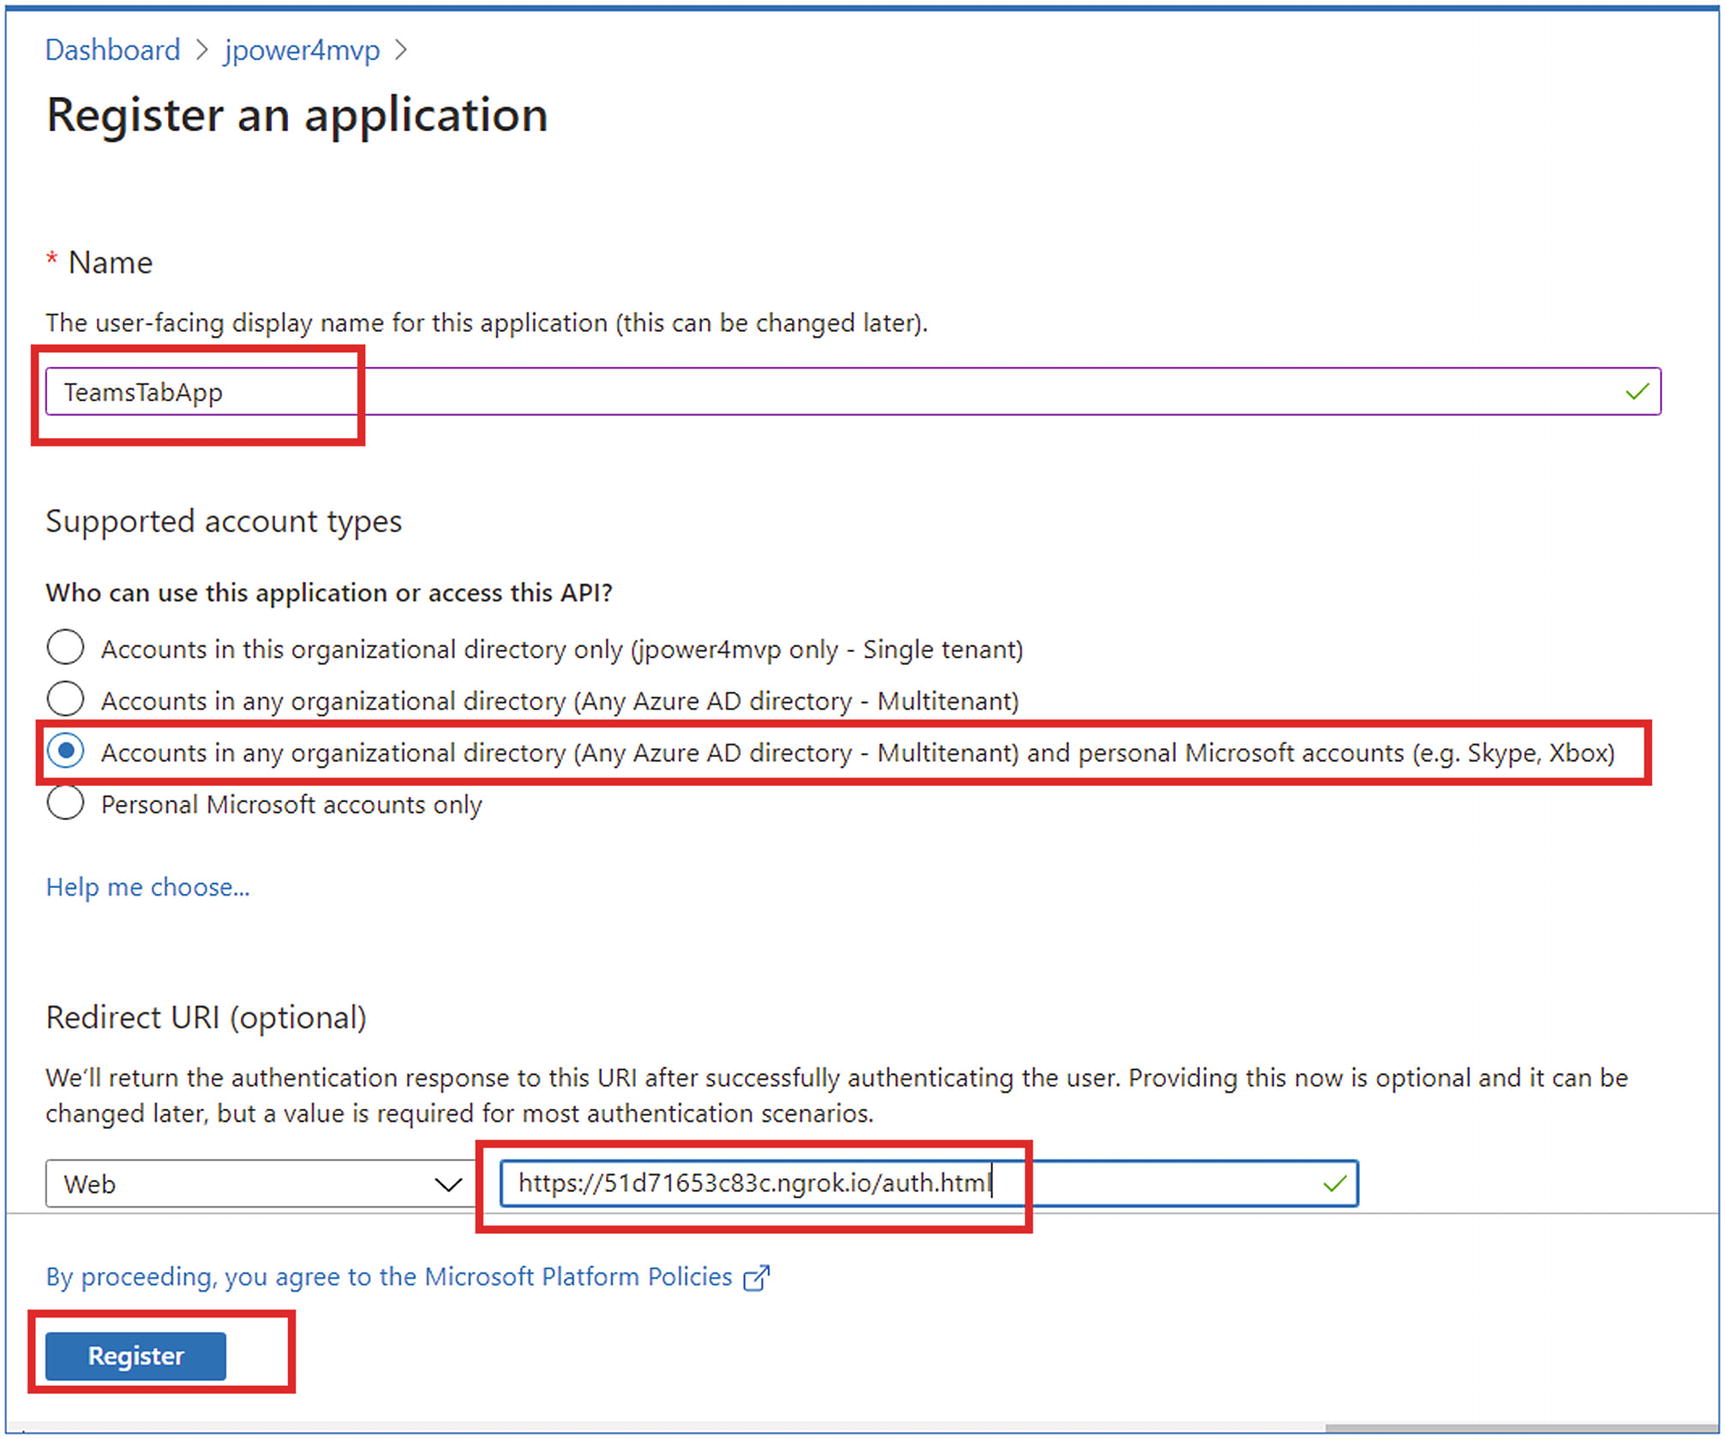
Register an application
- 8.
Go to the Authentication tab and Enable Implicit grant by selecting Access tokens and ID tokens (Figure 8-19)

Authentication
- 9.
Click Save
- 10.Go to API permissions tab (Figure 8-20), select Add a permission ➤ Microsoft Graph ➤ Delegated permissions and add permission
- a.
Calendar.Read
- b.
Calendar.ReadWrite
- c.
Directory.AccessAsUser.All
- d.
Directory.Read.All
- e.
Directory.ReadWrite.All
- f.
User.Read
- g.
User.Read.All
- h.
User.ReadWrite.All
- i.
Mail.Read
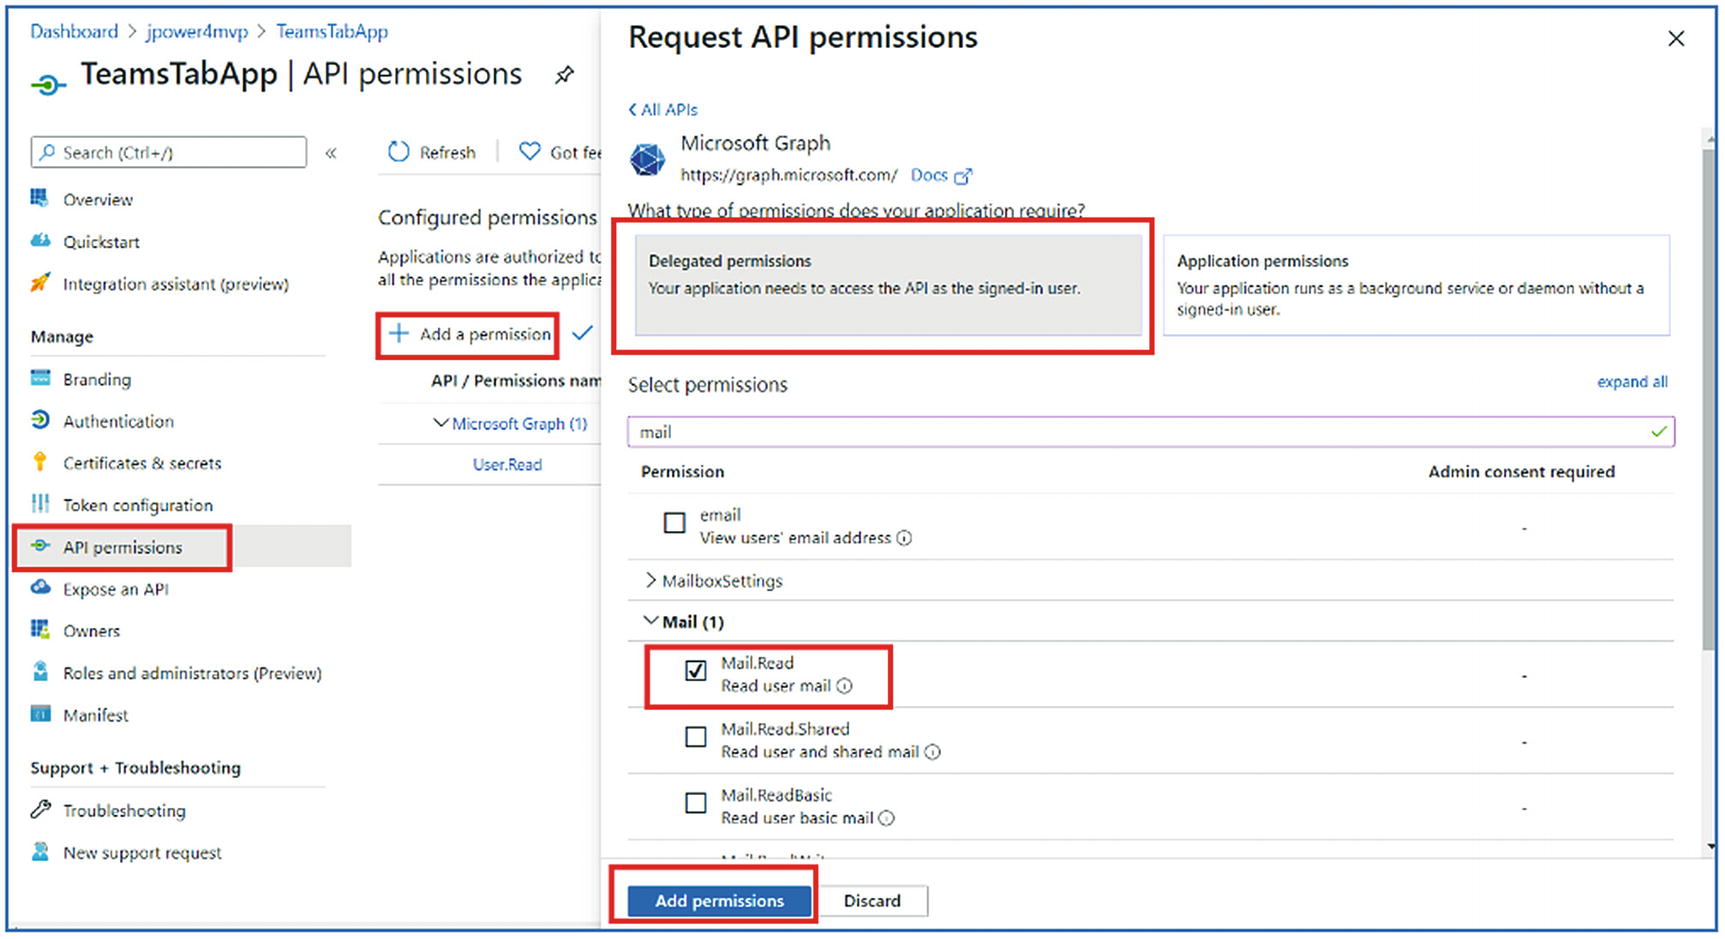
Request API permission
- 11.
Then, select Grant admin consent (Figure 8-21)

Grant Admin consent
- 12.
Go to Overview tab and copy Application (client) ID (Figure 8-22)

Application client ID
- 13.
Then go to your project public > index.html, and replace YOUR-CLIENT-ID with Application (client) ID in mgt-teams-provider > auth-popup-url (Figure 8-23).

update client ID in index file
Test Your App in Microsoft Teams
- 1.
Go to Microsoft Teams (https://teams.microsoft.com )
- 2.
Go to … ➤ open App Studio (Figure 8-24)
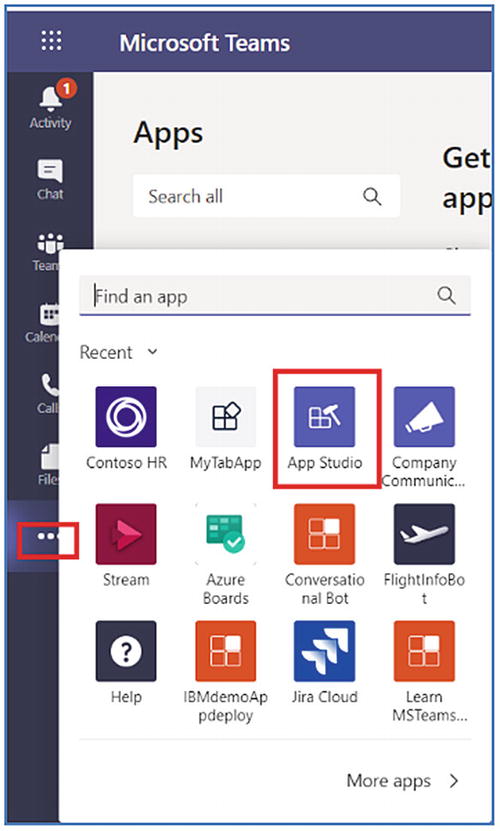
Open App Studio
- 3.
Select Manifest Editor and select Import an existing app (Figure 8-25)

Import an existing app
- 4.
Select Development.zip under your project folder ➤ .publish (Figure 8-26)
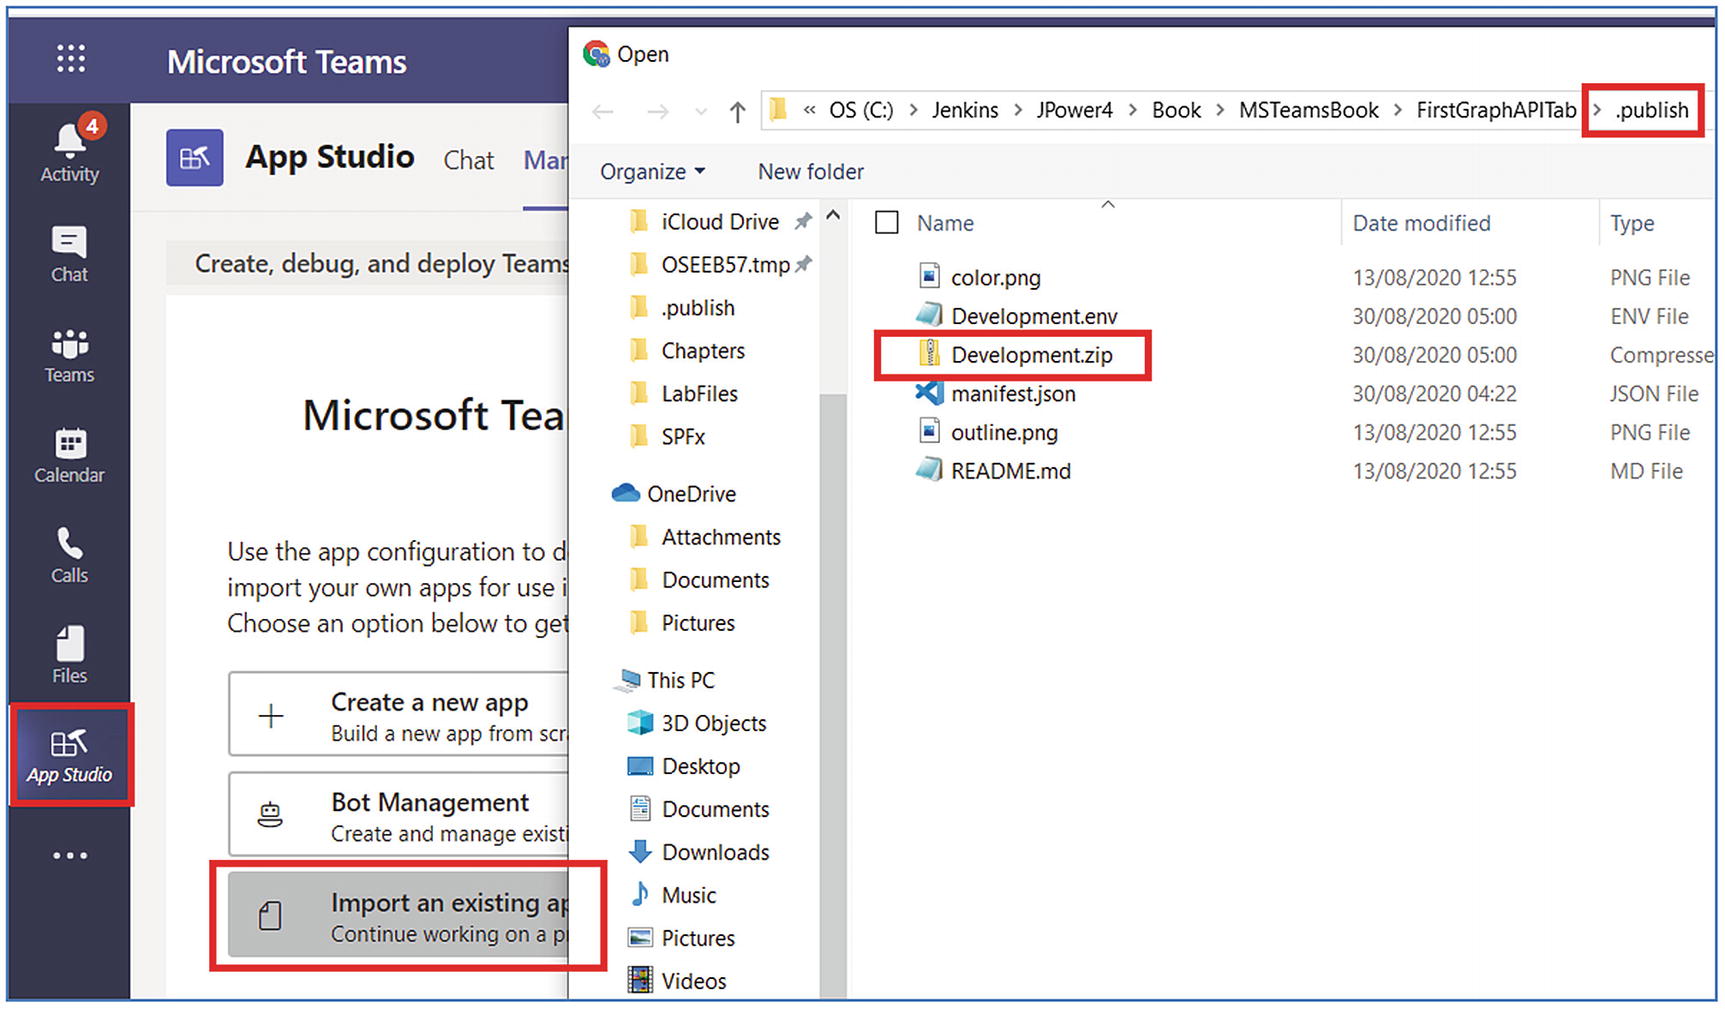
Import Development.zip file
- 5.
Scroll down and select Test and distribute, then click Install (Figure 8-27)
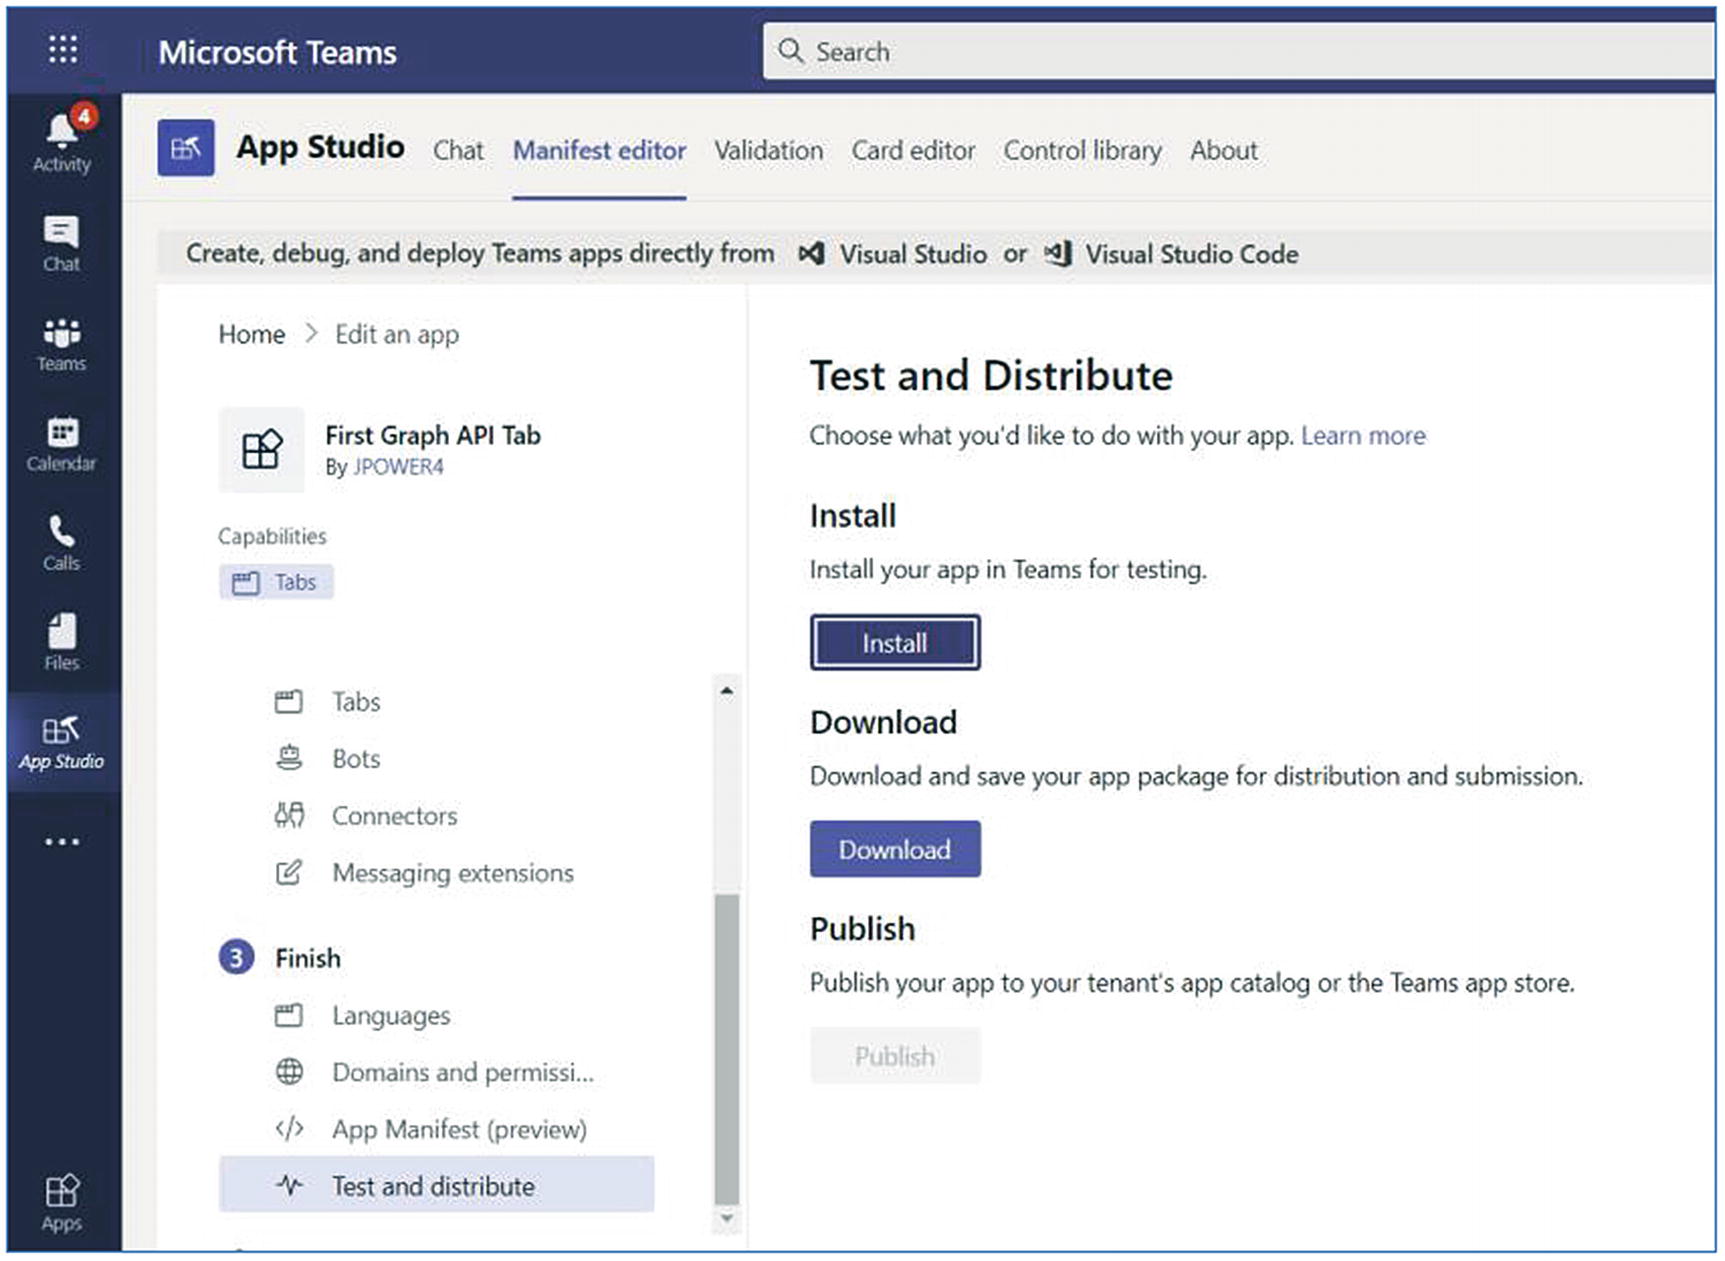
Install the app for testing
- 6.
Click the Add button to install the app (Figure 8-28)
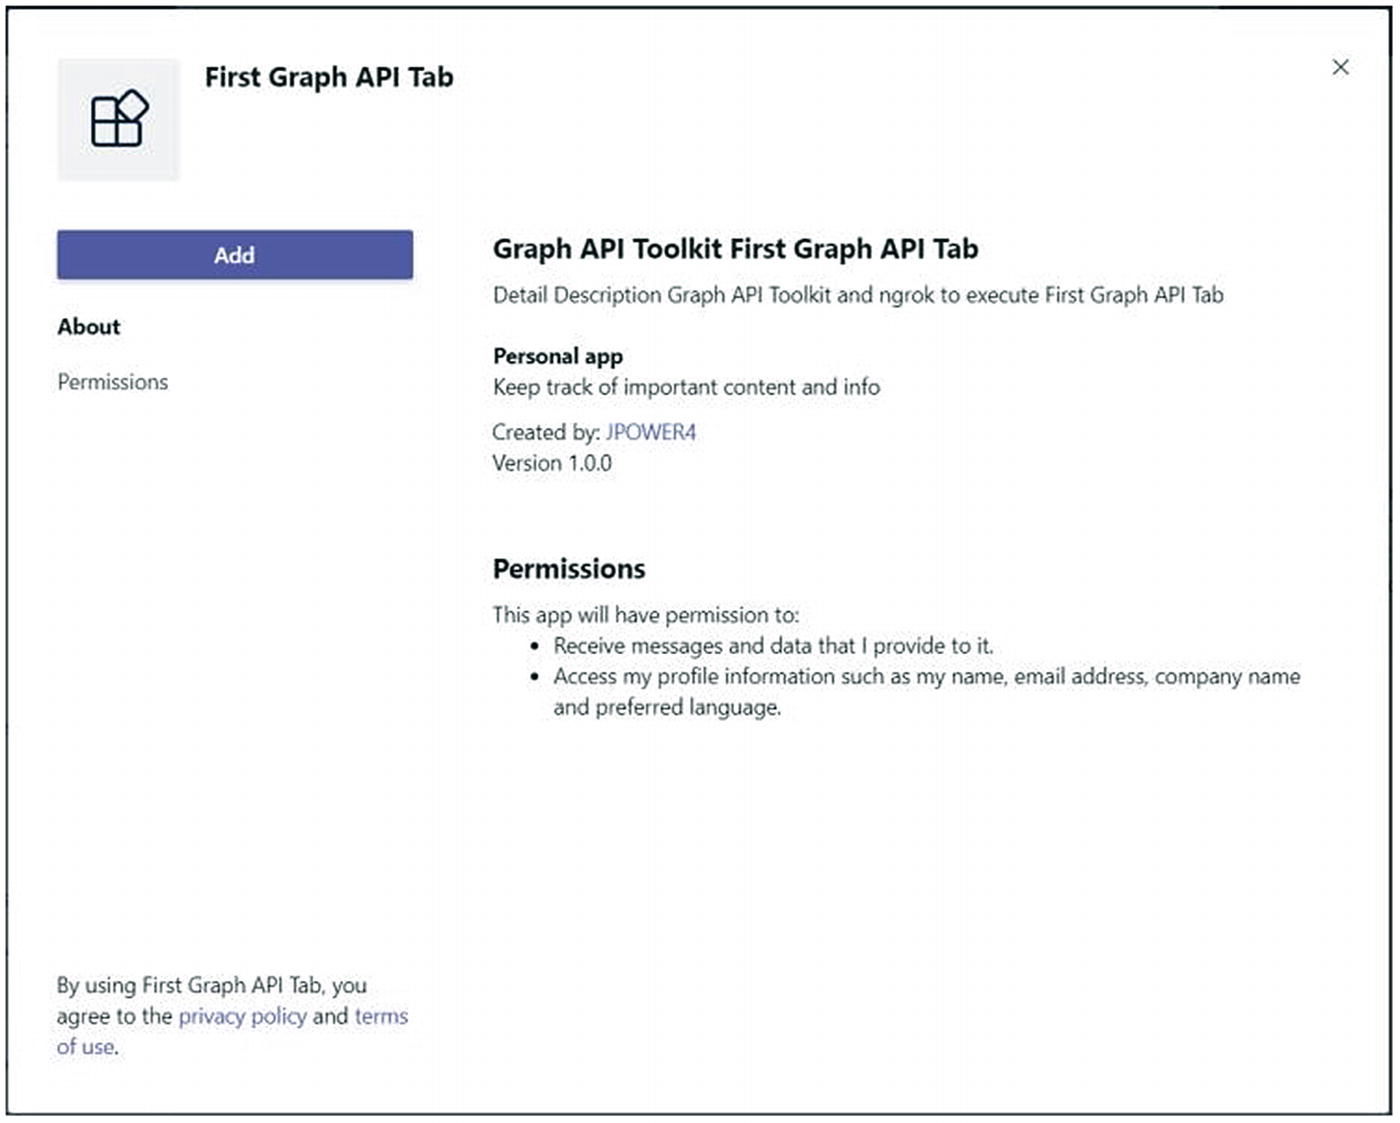
Add the app for testing
- 7.
Click Sign in for the authentication using an AAD registered app (Figure 8-29)
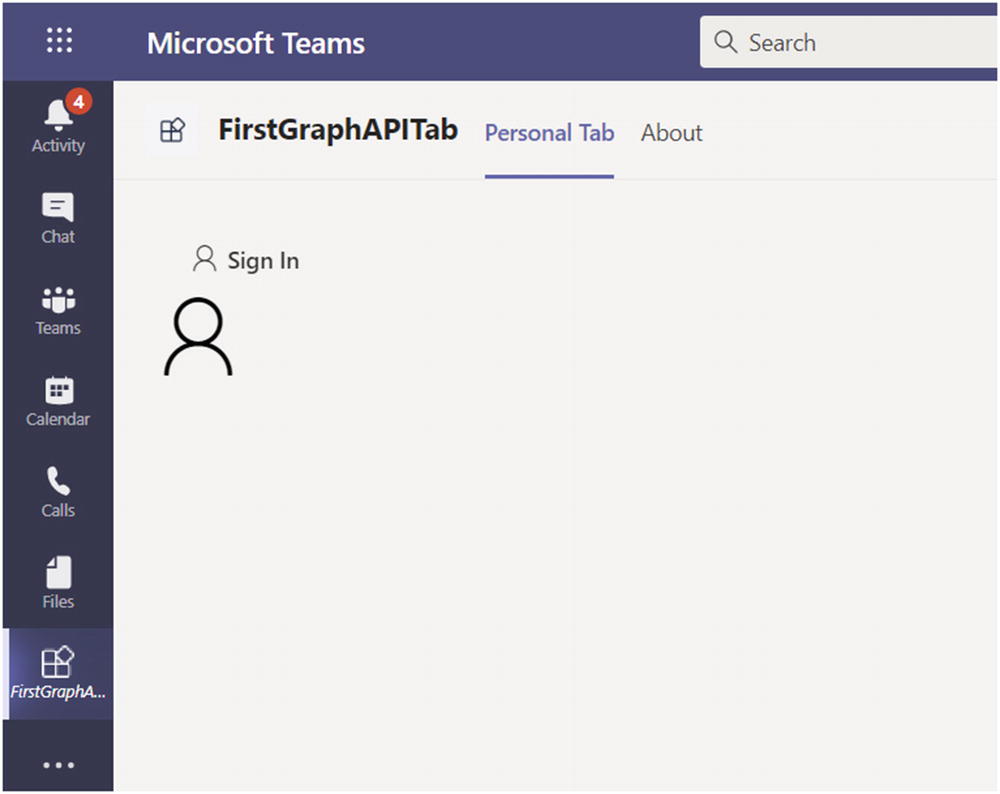
Sign in the app
- 8.
Give consent to the AAD registered app you created (Figure 8-30)

Give consent to AAD

Get User info using Graph API toolkit
- 9.
Your profile information email and name should appear in your tab after the successful authentication (Figure 8-31)
In this exercise, you have learned how to use Microsoft Teams Toolkit for Visual Studio code with Microsoft Graph API toolkit within Microsoft Teams for a tab app.
Conclusion
In this chapter, you have learned various features of Microsoft Teams Toolkit, Microsoft Graph API Toolkit, and Graph API with examples that we can be able to use from our own custom application. Along with this you will start learning different options and features of Microsoft Teams apps in our upcoming chapters.