
4. adding records
In the first chapter we created the database structure for this employee listing Web site. In the previous two chapters, we developed an Ajax as well as a non-Ajax approach for browsing the employees by department. In this chapter, let’s create a way to add employees to the database. Naturally we’ll start with the non-Ajax version, for universal accessiblity, and then add the Ajax-enabled version in the next chapter.
To begin, we’ll start by creating the HTML form that takes all the requisite data. Then we’ll write the PHP script that handles the form submission in a non-Ajax way. This will all be fairly basic PHP form handling.
what we’ll do
![]() First, on pages 45-48, we’ll create an HTML page with a form.
First, on pages 45-48, we’ll create an HTML page with a form.
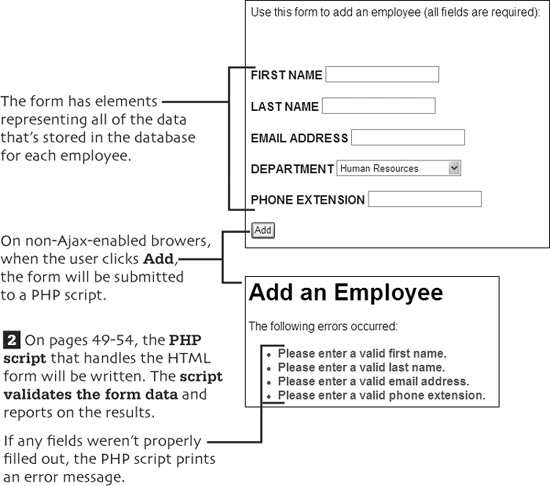
![]() Naturally, we’ll test what we’ve built to make sure it all works.
Naturally, we’ll test what we’ve built to make sure it all works.
At the end of this chapter, in the extra bits section, you’ll find more information, tips, and recommendations regarding all these steps.
In the next chapter, we’ll add the Ajax layer to these pages.
start the HTML page
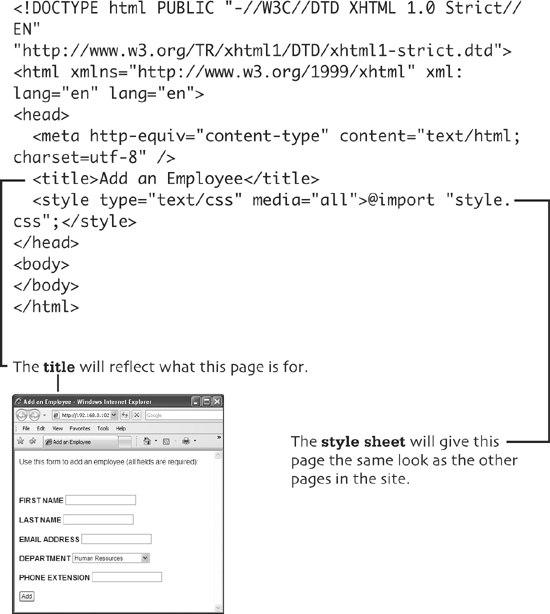
Start by creating a new HTML page in your HTML editor.
add the form

add the form elements
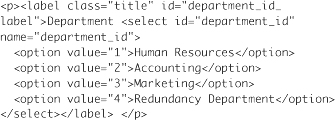
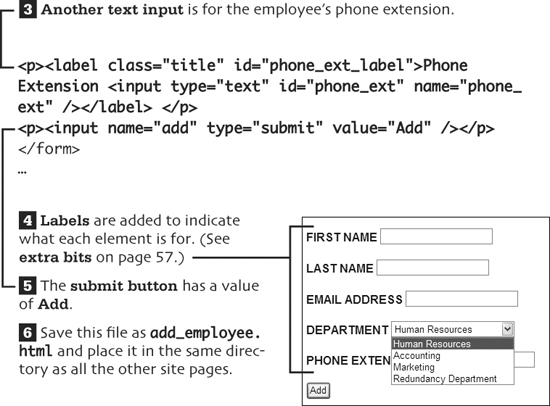
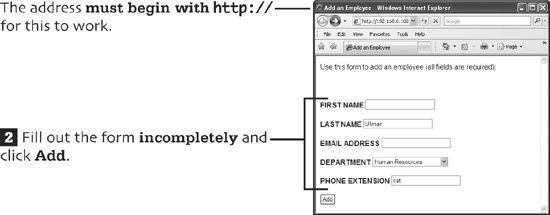
![]() A drop-down menu will allow the user to select the employee’s department.
A drop-down menu will allow the user to select the employee’s department.
start a PHP page
The first PHP page handles the non-Ajax form submission. It should also be a valid HTML document, so start with those tags.
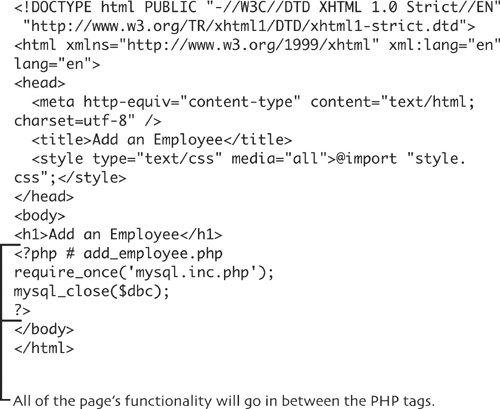
This page will need to communicate with MySQL, so the mysql.inc.php script must be included.
The MySQL connection is closed before the script terminates.
This file must be saved as add_employee.php and placed in the same directory as add_employee.html.
validate the form data
The form data must be validated prior to using it in a query. Add this code to the PHP page:
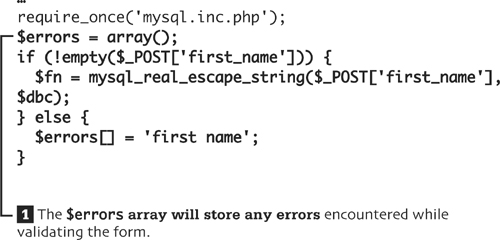
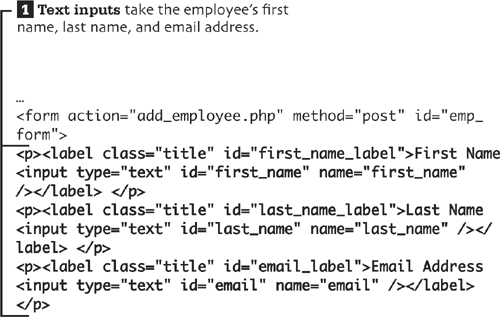
![]() Text inputs will be validated by confirming that they aren’t empty. (See extra bits on page 57.)
Text inputs will be validated by confirming that they aren’t empty. (See extra bits on page 57.)
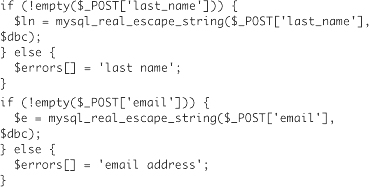
![]() To make sure the data is safe to use in a query, text inputs are run through the
To make sure the data is safe to use in a query, text inputs are run through the mysql_real_escape_string() function.
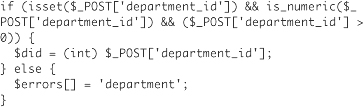
![]() Numeric values, like the department ID and the phone extension, must be positive numbers.
Numeric values, like the department ID and the phone extension, must be positive numbers.
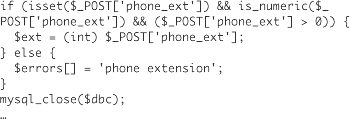
![]() To make them safe to use in a query, numeric values are type-cast as integers.
To make them safe to use in a query, numeric values are type-cast as integers.
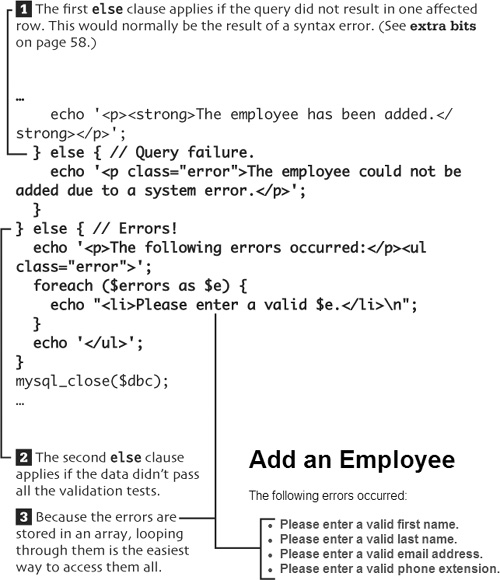
![]() Any failed validation routine results in an element being added to the
Any failed validation routine results in an element being added to the $errors array.
update the database
Assuming that the form data passed all the validation routines, an INSERT query should be run.

report any errors
Finally, indicate to the user what problems occurred, if applicable.
test the non-Ajax version
![]() Load the HTML page in your Web browser to test what we’ve created so far.
Load the HTML page in your Web browser to test what we’ve created so far.
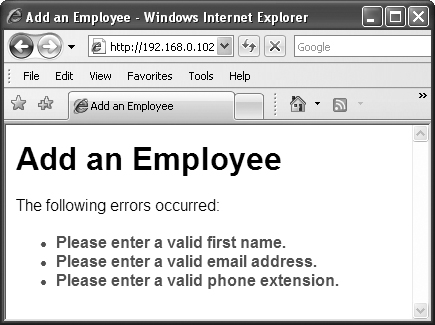
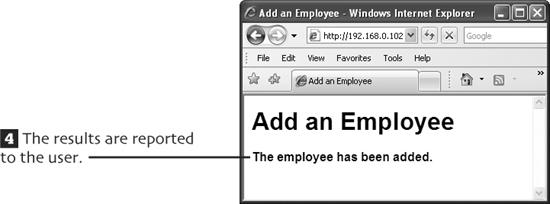
![]() The PHP page should show the results.
The PHP page should show the results.
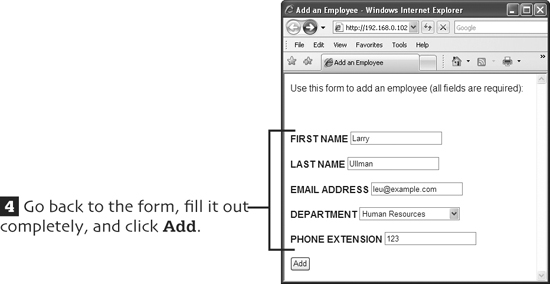
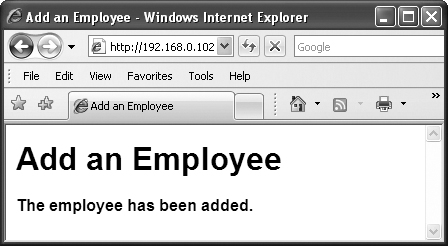
![]() Again, the PHP page shows the results.
Again, the PHP page shows the results.
extra bits
add the form p. 46
• The POST method should generally be used when the form’s submission should have an effect on the site. For example, using the Add an Employee form adds another record to the database.
• The GET method should generally be used when requesting information. For example, you should apply it when requesting the employees in a specific department.
add the form elements p. 47
• The form’s labels will serve two purposes. First, they indicate to the user what each form element is for. Second, they’ll be modified, using JavaScript, to indicate an error in the Ajax-enabled version of this form.
validate the form data p. 50
• How you validate form data depends on the data’s type (numbers, strings, etc.) and expected values (positive number, email address, and so on). For validating a person’s name, it’s often sufficient to make sure that some value is entered.
• A more thorough validation of an email address would be to confirm that it matches a regular expression pattern. You can do this with email addresses more so than names because they must abide by strict rules.
• You could improve the security of this system by applying PHP’s strip_tags() function to the text inputs. That function can help prevent cross-site scripting attacks (XSS).
• The mysql_real_escape_string() function provides language-specific protection on text used in queries.
update the database p. 53
• A more precise way to write the INSERT query would be to use the syntax where you specify the columns involved. For this query, that would be INSERT INTO employees (department_id, first_name, last_name, email, phone_ext) VALUES ($did, '$fn', '$ln', '$e', $ext).
report any errors p. 54
• To debug any PHP–MySQL problems, you’ll need to print out the query to inspect its syntax. You should also invoke the mysql_error() function to see what problems the database reports.
• Live sites should never provide detailed behind-the-scenes errors, such as the queries being run or the MySQL errors. Use this information for debugging purposes, and then hide that information in the live version (which, we hope, shouldn’t encounter such errors).