Chapter 2 Getting Started
We hope that Chapter 1 has gotten you excited to get started learning CUDA C. Since this book intends to teach you the language through a series of coding examples, you’ll need a functioning development environment. Sure, you could stand on the sideline and watch, but we think you’ll have more fun and stay interested longer if you jump in and get some practical experience hacking CUDA C code as soon as possible. In this vein, this chapter will walk you through some of the hardware and software components you’ll need in order to get started. The good news is that you can obtain all of the software you’ll need for free, leaving you more money for whatever tickles your fancy.
2.1 Chapter Objectives
Through the course of this chapter, you will accomplish the following:
• You will download all the software components required through this book.
• You will set up an environment in which you can build code written in CUDA C.
2.2 Development Environment
Before embarking on this journey, you will need to set up an environment in which you can develop using CUDA C. The prerequisites to developing code in CUDA C are as follows:
• A CUDA-enabled graphics processor
• An NVIDIA device driver
• A CUDA development toolkit
• A standard C compiler
To make this chapter as painless as possible, we’ll walk through each of these prerequisites now.
2.2.1 CUDA-Enabled Graphics Processors
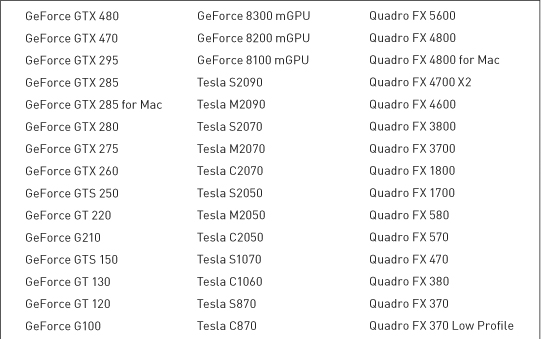
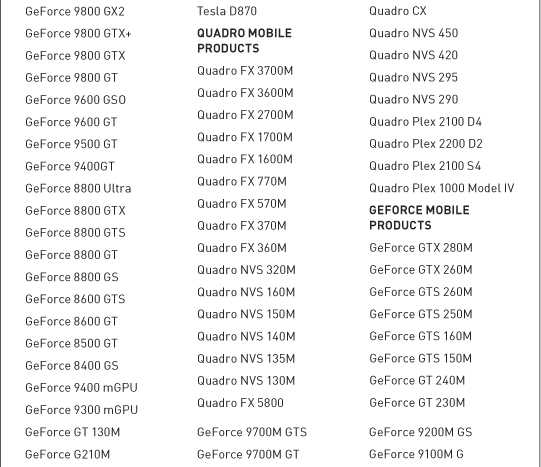
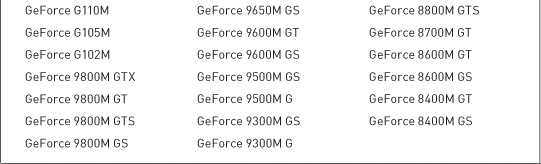
Fortunately, it should be easy to find yourself a graphics processor that has been built on the CUDA Architecture because every NVIDIA GPU since the 2006 release of the GeForce 8800 GTX has been CUDA-enabled. Since NVIDIA regularly releases new GPUs based on the CUDA Architecture, the following will undoubtedly be only a partial list of CUDA-enabled GPUs. Nevertheless, the GPUs are all CUDA-capable.
For a complete list, you should consult the NVIDIA website at www.nvidia.com/cuda, although it is safe to assume that all recent GPUs (GPUs from 2007 on) with more than 256MB of graphics memory can be used to develop and run code written with CUDA C.
2.2.2 NVIDIA Device Driver
NVIDIA provides system software that allows your programs to communicate with the CUDA-enabled hardware. If you have installed your NVIDIA GPU properly, you likely already have this software installed on your machine. It never hurts to ensure you have the most recent drivers, so we recommend that you visit www.nvidia.com/cuda and click the Download Drivers link. Select the options that match the graphics card and operating system on which you plan to do development. After following the installation instructions for the platform of your choice, your system will be up-to-date with the latest NVIDIA system software.
2.2.3 CUDA Development Toolkit
If you have a CUDA-enabled GPU and NVIDIA’s device driver, you are ready to run compiled CUDA C code. This means that you can download CUDA-powered applications, and they will be able to successfully execute their code on your graphics processor. However, we assume that you want to do more than just run code because, otherwise, this book isn’t really necessary. If you want to develop code for NVIDIA GPUs using CUDA C, you will need additional software. But as promised earlier, none of it will cost you a penny.
You will learn these details in the next chapter, but since your CUDA C applications are going to be computing on two different processors, you are consequently going to need two compilers. One compiler will compile code for your GPU, and one will compile code for your CPU. NVIDIA provides the compiler for your GPU code. As with the NVIDIA device driver, you can download the CUDA Toolkit at http://developer.nvidia.com/object/gpucomputing.html. Click the CUDA Toolkit link to reach the download page shown in Figure 2.1.
Figure 2.1 The CUDA download page
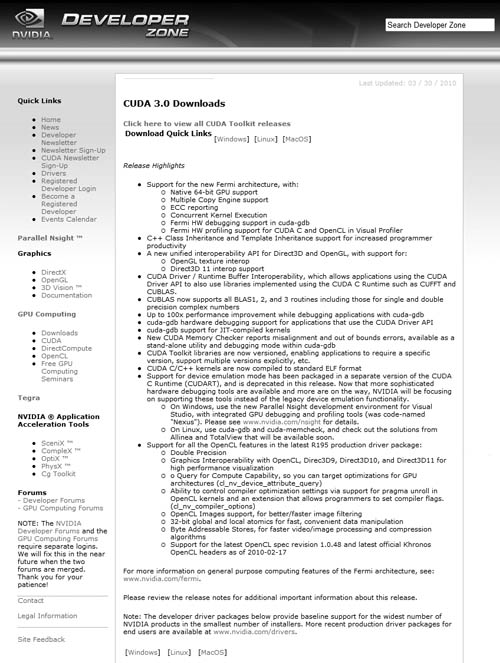
You will again be asked to select your platform from among 32- and 64-bit versions of Windows XP, Windows Vista, Windows 7, Linux, and Mac OS. From the available downloads, you need to download the CUDA Toolkit in order to build the code examples contained in this book. Additionally, you are encouraged, although not required, to download the GPU Computing SDK code samples package, which contains dozens of helpful example programs. The GPU Computing SDK code samples will not be covered in this book, but they nicely complement the material we intend to cover, and as with learning any style of programming, the more examples, the better. You should also take note that although nearly all the code in this book will work on the Linux, Windows, and Mac OS platforms, we have targeted the applications toward Linux and Windows. If you are using Mac OS X, you will be living dangerously and using unsupported code examples.
2.2.4 Standard C Compiler
As we mentioned, you will need a compiler for GPU code and a compiler for CPU code. If you downloaded and installed the CUDA Toolkit as suggested in the previous section, you have a compiler for GPU code. A compiler for CPU code is the only component that remains on our CUDA checklist, so let’s address that issue so we can get to the interesting stuff.
Windows
On Microsoft Windows platforms, including Windows XP, Windows Vista, Windows Server 2008, and Windows 7, we recommend using the Microsoft Visual Studio C compiler. NVIDIA currently supports both the Visual Studio 2005 and Visual Studio 2008 families of products. As Microsoft releases new versions, NVIDIA will likely add support for newer editions of Visual Studio while dropping support for older versions. Many C and C++ developers already have Visual Studio 2005 or Visual Studio 2008 installed on their machine, so if this applies to you, you can safely skip this subsection.
If you do not have access to a supported version of Visual Studio and aren’t ready to invest in a copy, Microsoft does provide free downloads of the Visual Studio 2008 Express edition on its website. Although typically unsuitable for commercial software development, the Visual Studio Express editions are an excellent way to get started developing CUDA C on Windows platforms without investing money in software licenses. So, head on over to www.microsoft.com/visualstudio if you’re in need of Visual Studio 2008!
Linux
Most Linux distributions typically ship with a version of the GNU C compiler (gcc) installed. As of CUDA 3.0, the following Linux distributions shipped with supported versions of gcc installed:
• Red Hat Enterprise Linux 4.8
• Red Hat Enterprise Linux 5.3
• OpenSUSE 11.1
• SUSE Linux Enterprise Desktop 11
• Ubuntu 9.04
• Fedora 10
If you’re a die-hard Linux user, you’re probably aware that many Linux software packages work on far more than just the “supported” platforms. The CUDA Toolkit is no exception, so even if your favorite distribution is not listed here, it may be worth trying it anyway. The distribution’s kernel, gcc, and glibc versions will in a large part determine whether the distribution is compatible.
Macintosh OS X
If you want to develop on Mac OS X, you will need to ensure that your machine has at least version 10.5.7 of Mac OS X. This includes version 10.6, Mac OS X “Snow Leopard.” Furthermore, you will need to install gcc by downloading and installing Apple’s Xcode. This software is provided free to Apple Developer Connection (ADC) members and can be downloaded from http://developer.apple.com/tools/Xcode. The code in this book was developed on Linux and Windows platforms but should work without modification on Mac OS X systems.
2.3 Chapter Review
If you have followed the steps in this chapter, you are ready to start developing code in CUDA C. Perhaps you have even played around with some of the NVIDIA GPU Computing SDK code samples you downloaded from NVIDIA’s website. If so, we applaud your willingness to tinker! If not, don’t worry. Everything you need is right here in this book. Either way, you’re probably ready to start writing your first program in CUDA C, so let’s get started.