7.5. FILTERS WORTH CONSIDERING
Lens filters — whether they're dropped in at the back-end of a long super-telephoto lens or screw-mounted onto the front of the most common lenses — can be very useful for a variety of photographic purposes and can even save you a lot of money in the event of a lens accident. From colored filters to creative-effects filters to clear filters designed to reduce environmental haze, there are many types available for your Canon dSLR (see 7-4). The next sections take a look at some of the more common filters and why you might want to give them a try.
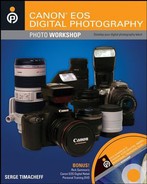
Figure 7-4. Filters can protect your lens and create a variety of effects in your photos. Here, pictured clockwise from red: Red and yellow (K2) filters used primarily to enhance contrast and tonality in black-and-white images; a UV/haze (clear) filter used to reduce haze and as basic lens protection; and a warming filter that is very helpful in portraiture to warm the skin tones of your subject. ©Serge Timacheff

7.5.1. PROTECTIVE AND UV/HAZE FILTERS
Basic protective filters, also known as neutral filters, offer no additional protection or filtration for your lens. They are made of pure optical glass and are widely available from various filter manufacturers such as Tiffen and B&W. Note that technically these are not actually filters because they aren't filtering anything, but they usually are grouped with filters.
While a basic protective filter does protect your lens, you may find that using a UV/haze filter is more useful because it also slightly improves a hazy image by removing some of the nonvisible (ultraviolet) effects of sunlight that, when exposed to a camera, records as a bluish hue in your image. Additionally, you can buy a haze filter and a UV filter separately, but really the two are essentially the same. You can use UV/haze filter on your camera virtually all the time without any detectable effect to your images. The other good thing about UV is that if your lens has any chromatic aberration, this filter will help colors be truer.
Both clear protective and UV/haze filters can act more as a protective device for your lens than anything else, keeping dust and moisture out, preventing scratches, and breaking on impact instead of your lens being damaged. For example, a few years ago I suffered a lens incident with a wide-angle lens while stopping my car on the side of the road to shoot a particularly stunning landscape in northern California. The lens I thought I had safely set onto the hood of the car suddenly slid off and onto the asphalt with a sickening crunch.
I thought the lens was totaled. However, on closer examination, it turned out that the protective UV/haze filter I had mounted to the front had taken the hit, and had shattered. I carefully removed the filter ring and broken glass, gently cleaned the glass shards off the lens so as not to mar the protective coating, and used a bulb-blower to get rid of anything I couldn't see. I then used a liquid lens cleaner to wash anything off that I still hadn't gotten before using a lens cloth. The lens suffered no damage at all. The filter served as a crash helmet for my lens, taking the hit instead of the lens itself — and saving me a lot of money.
Some studio and fine art photographers choose not to use any filters, including protective ones, so as to eliminate any variables that could potentially get in-between the subject and the image sensor. However, unless you are one of these specialists (or you have a limitless lens budget), I don't believe the difference is noticeable enough for most photographic applications to warrant going without the protection.
NOTE
If you do experience a lens accident and you have a protective filter, it's not uncommon for the filter to get slightly bent on the edges in the accident. This frequently results in the filter being almost fused to the lens, and virtually impossible to remove — at least by you. I don't suggest trying anything more than using finger or hand strength to remove the filter, and if there is broken glass involved, you may want to grip the lens with a cloth to avoid being cut. If that doesn't work, you'll need professional help, which may mean that a technician has to literally saw off the filter from the lens — a procedure that destroys anything left of the filter, but generally does not harm the lens optics.
7.5.2. SKYLIGHT AND WARMING FILTERS
A skylight filter helps you moderate what can be too much blue in your image, especially on sunny days with an excessive amount of blue sky. It's a subtle effect, providing just enough filtration to your image that the color is much better balanced; it is especially effective in a shady area under a cloudless, blue sky. While UV/haze filters are clear, skylight filters have a slight pinkish tone to them, which is what helps to offset too much blue in a photo taken on a very sunny day, for example. Like UV/haze filters, photographers often keep skylight filters on their cameras nearly all the time, especially if they shoot outdoors frequently; however, it's uncommon to have both types on a lens at the same time.
A warming filter will also cut some of the blue color in an image, especially when it's taken outdoors in sunny weather — which gives the colors in your photo a warmer, more balanced effect. It's especially effective in cloudy conditions, however, or in a shaded area on a sunny day. And, it provides additional warmth to a portrait and helps alleviate the bluish tone you sometimes get in a flash-illuminated image.
7.5.3. POLARIZING FILTERS
Polarizing filters are like sunglasses for your camera (see 7-5), and they are one of the few filters that feature the capability to rotate one of the two optical elements to achieve the best effect. A polarizer reduces the glare in an image, while improving the contrast in your photo. Colors appear more saturated and even a little more clear, depending upon the point to which you rotate the glass.
These filters are quite fun and can be very useful, especially for improving images that include water and/or sky — although they can be used to the point that the effect is almost too pronounced and the world begins to look artificially enhanced.
Figure 7-5. Polarizing filters eliminate glare and emphasize water and sky. This filter includes two layers of glass, one of which rotates so that you can adjust the various levels of polarization effect in your image. ©Serge Timacheff

Polarizing filters work differently depending on the angle of the sun and how it's hitting your lens. You see the greatest effect of a polarizing filter when your subject is at a right angle to the rays of the sun; the more direct the sunlight, the less the effect. So if you have the luxury of changing your position when shooting, be aware that the sun's position will also change in relation, meaning that you'll want to use a different rotational setting on your polarizing filter.
When looking for a polarizing filter, you will find that there are two types: linear and circular. Circular polarizing filters are what you want to use exclusively with your dSLR. Linear polarizers are used with film cameras in manual focus; used in a modern digital camera they can cause incorrect auto focusing and metering.
One thing to note: It's difficult to use a rotating polarizing filter with a lens hood because you may need to physically turn the filter. To do so, you have to remove the hood, turn the polarizer to the point where you want it, and then replace the hood.
7.5.4. COLORED FILTERS
There are a number of filters that provide varying levels of color that can affect your image. While many of the colored filters were designed originally to filter colors that would be rendered onto film, today's digital capabilities — both in the camera and the software — mitigate the need to use them. One of the most obsolete filters today is the tungsten filter, which of course was used to help the color effects of tungsten light onto conventional film. Now this is simply a white-balance setting in your camera.
Some color filters, however, can be useful and fun to use. An extreme version of the skylight filter is the yellow, or K2, filter. This slightly yellow filter dramatically increases contrast in an outdoor image, especially among clouds, landscape, and sky. You can also use it for shooting people to achieve a more natural skin tone.
The G filter is orange, and is especially useful when you're using a telephoto lens and shooting sunsets. It increases the contrast between reds and oranges in your image, making any sunset more intensely colored.
7.5.5. INFRARED FILTERS
Infrared photography has become very popular, especially since it's been discovered that digital image sensors are very sensitive to what's called the near-infrared spectrum. This is light that's just outside of visible red light, where nothing that's illuminated by thermal radiation can be seen. Infrared filters are very dark, and make the world appear as an icy, almost ghostly stark landscape, like something out of a science fiction movie.
Most modern dSLRs, including Canon, have infrared filters in front of their image sensors; some of these filters are stronger than others. There are a couple of ways to shoot an IR image. The first is to use an infrared filter; these are very dark and block most of the visible light in a scene, so you have to take very, very long exposures — and your camera's IR filter still may end up blocking lots of the IR light, so you will have to test your particular camera to see if you can achieve the results you want.
If you're really serious about producing IR images, the second way is to have your camera's image sensor professionally altered to remove the low-pass filter that normally protects it from infrared light. This is an expensive process, and most photographers use an older backup camera for this purpose because not only does it physically alter the camera permanently, it invalidates the warranty. LifePixel (www.LifePixel.com) is one such company that provides this service.
I suggest you experiment with an infrared filter first and see what your results are like before paying to have your camera altered. Using an infrared filter requires you to adjust your f-stop settings by several stops — and to have a much longer exposure. You also should use a tripod for a shot, and run the lowest ISO possible to avoid digital noise in your photo. You'll also want to pay attention to your depth of field, which will change because infrared light tends to diffract more than other types, meaning an IR shot will end up having a shallower depth of field, and you'll probably want to try a deeper depth-of-field setting first.
7.5.6. NEUTRAL DENSITY FILTERS
Neutral density filters, often just called ND filters, effectively reduce the amount of light reaching your image sensor, but do not affect the color. Why are they useful, you might wonder? In particularly bright conditions, they are very practical and allow you to shoot longer exposures. For example, if you want to shoot a waterfall with a long exposure to achieve a blurring effect, a neutral-density filter allows you to have the aperture open longer than you would if you weren't using it (see figure 7-6). This can also be really useful when you're shooting in the snow, and it also enables you to open up your aperture for a more-pronounced narrow depth of field.
A graduated neutral-density filter is one where (typically) one half of the filter is darkened and the other half is uncoated, plain optical glass. You'll find graduated filters where one half is a specific color, for creating unusual effects, but mostly (and most usefully) they are gray/neutral.
There are a number of uses for these filters, not the least notable of which is outdoor photography. Because there's often a marked contrast between sky and earth in a landscape shot, for example, using a neutral density filter where the upper half of the filter is used on the sky (which is brighter) and the lower part on the earth will help even out the shot for a more consistent exposure throughout. This allows you to have more detail in both areas. Often, using a neutral density filter and shooting in RAW produces a very wide range of tonality that provides nearly endless editing opportunities.
When using a graduated filter, the best way to determine your exposure is to meter without the filter on the lens and fill the frame with that area. Use this as a starting point for your exposure when you put the filter on the lens and shoot both the ground and the sky, and then make adjustments after you've taken some test shots and see what happens.
7.5.7. SOFTMAT (SOFT-FOCUS) FILTERS
Sometimes it is desirable to gain a soft-focus effect on the parts of your image that surround the subject, but not to be as blurry as you see in a narrow-depth-of-field image. A Softmat, or soft-focus, filter provides this effect using diffracted light, and it is especially useful in certain types of portraits as well as landscapes.
There are several types of soft-focus filters, with varying degrees of softness. These are usually graded at 1, 2, and 3 levels of softness, with 1 being the least soft. However, remember to exercise caution in what works for you so as not to soften an image more or less than you desire.
7.5.8. OTHER TYPES OF FILTERS
There are a large variety of other filters, ranging from those offering a variety of colors to ones with various special effects. Cross-screen, or starburst, filters have etched glass and create the effect of sparkling light; the number of etches on the glass affects how many reflections are visible. These are often used in wedding and other low-light images where bright points of light can be emphasized and enhanced with this effect; they should be used with caution, however, because when overused they tend to cheapen an image and make it look overedited to the point of distraction.
Figure 7-6. Oregon waterfall shot using a 0.6 ND filter offering a 2-stop reduction in light. Taken with a Canon EOS 1D Mark III using an EF 24-70mm 2.8L USM lens. ISO 100, f/13 for 8 seconds. ©Michael Guncheon

Close-up filters can increase the macro function of your lens by adding levels of magnification settings to your lens. These are a quick and easy, although a slightly lower-quality, way to take close-up images without buying another lens. They come in graduated ratings such as +1, +2, +5, and so on to indicate the relative strength of increased magnification. You can stack them for combined effect, and you should do so by using the strongest filter closest to the lens. It is important to note that they decrease your depth of field.