
It can be very helpful to use a photo reference when cartooning cars, especially when you’re drawing more realistic interpretations of them. Even if you’re conjuring up an outrageous and totally unrealistic car, it can help to use a photo reference as a guide for drawing the body and basic elements. As an artist, you have the right to change or alter the photo reference in any way (called “artistic license”), so you should never be a “slave” to your photograph. But if you’re creating a more realistic drawing and want to copy the car exactly as it appears in the photo, you may want to use one of two simple methods: the grid method (used for this illustration of a Saleen S7) or tracing and transferring a drawing (see the sidebar on page 11).
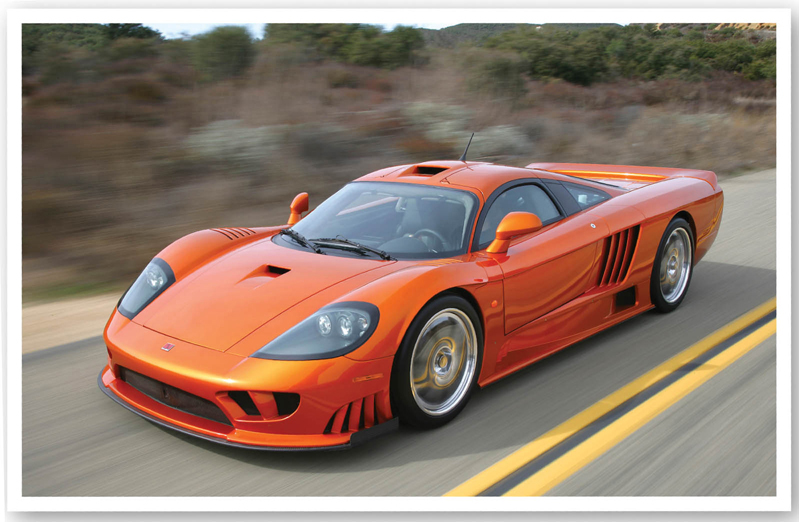
Photo © Wesley Allison
CHOOSING A DYNAMIC PHOTO
There are many different elements to consider when choosing a photograph to use as a guide when drawing a realistic car. Is the image clear? Can you make out small details? Is the composition (or the arrangement of elements in the scene) pleasing? I chose this particular photo because I liked the way the car seems to be zooming out of the scene.
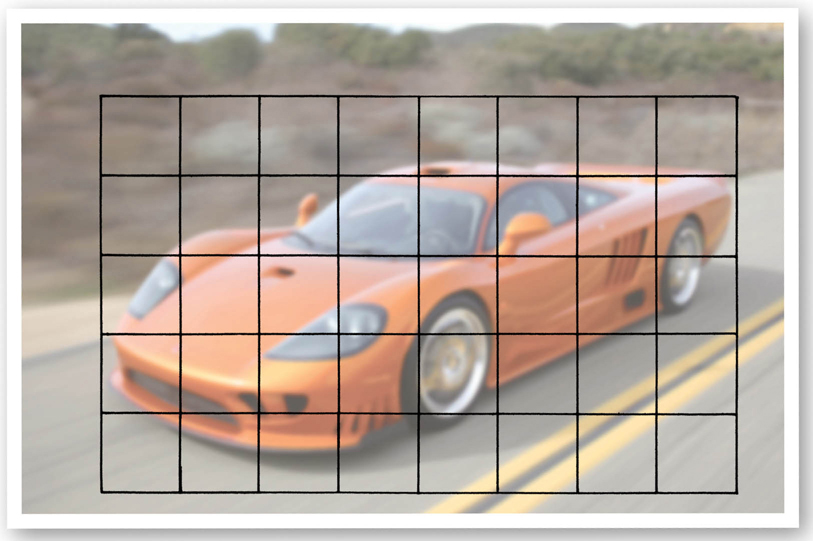
1 This project involves the grid method of transferring an image. First I trim a piece of tracing paper to fit the photo reference. Then I use a fine-tip black marker and a ruler to draw a grid of perfect 1-inch squares on the tracing paper. The squares can be any size, but the smaller the squares, the more accurate and detailed the sketch will be. (It helps to use a calculator to determine what size the squares need to be to perfectly fit the paper.)
As you create the grid on your drawing paper, remember to use light lines that will erase easily.
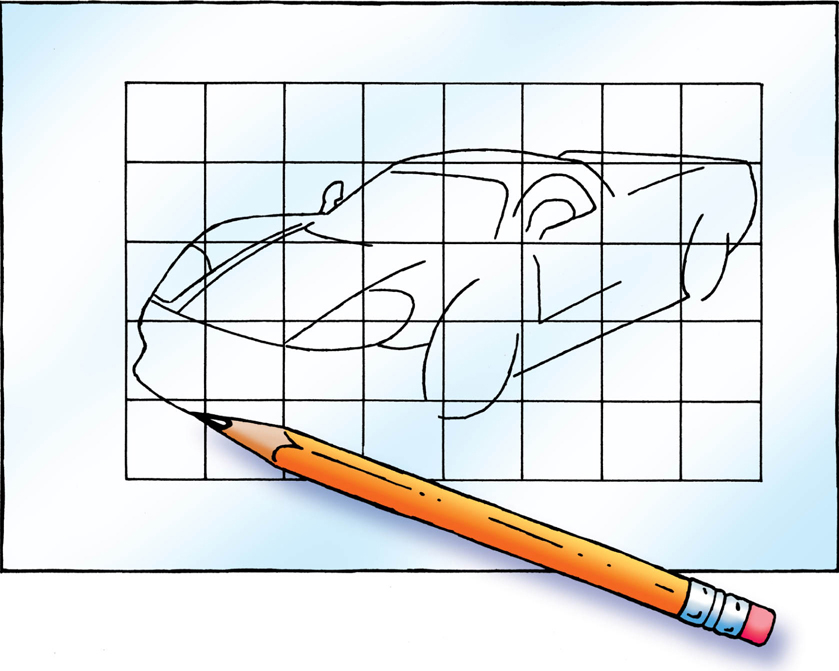
2 Using a pencil and very light pressure, I draw a grid on my drawing paper with the exact same number of rows and columns as the grid over the photo reference. If the original image is smaller than the drawing paper, the squares on the drawing paper will have to be larger than those on the tracing paper; if the original image is larger than the paper, the squares on the drawing paper will have to be smaller. Then, using a pencil and light pressure, I copy the lines I see in each square of the photo into each corresponding square on the drawing paper.
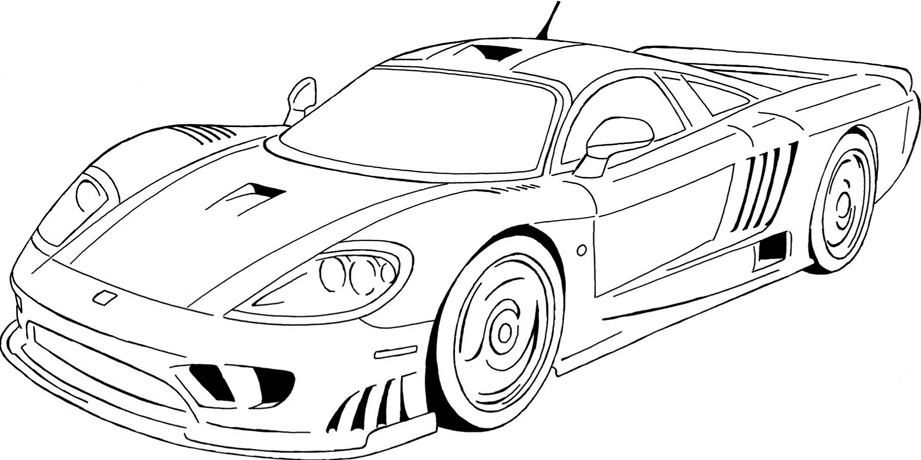
3 As I copy the lines in each square, I pay careful attention to where the lines touch the sides of the square. Once I have transferred the lines in every square, I compare my drawing with the original image and make any necessary adjustments. (Notice that here I simplified the subject by eliminating the interior details and the windshield wipers.) When I’m happy with my drawing, I carefully erase the grid lines, being cautious not to smudge the lines I want to keep. I also try not to rub too hard, as I don’t want to damage the surface of the paper. Next I use ink to go over the lines, shading the darkest areas.
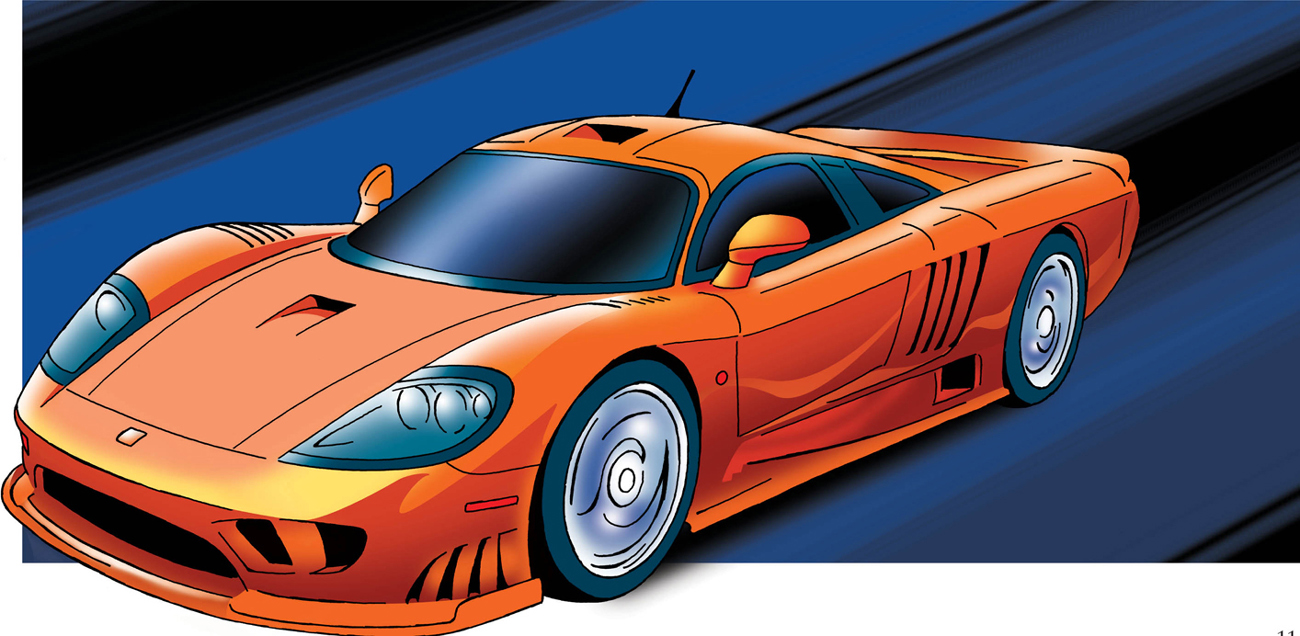
4 Now I’m ready to add color. I scan my drawing and color it digitally using photo-editing software. I opt for a complementary color scheme of blue and orange—the cool blue background makes the complementary orange really stand out; as a result, the car seems to “pop” off the page. I also remove the scenery from the photo reference in favor of a striped background that emphasizes the trajectory of the sleek, speeding car.
The easiest method of transferring your photo reference to your drawing paper is to trace the image onto a sheet of tracing paper. Then coat the back of your tracing paper with a layer of graphite, pressing down firmly to create an even layer of coverage. Now place the tracing paper over a sheet of drawing paper, graphite-side down. Tape or hold the papers together and lightly trace your outline. The lines of your sketch will transfer onto the new sheet of drawing paper.
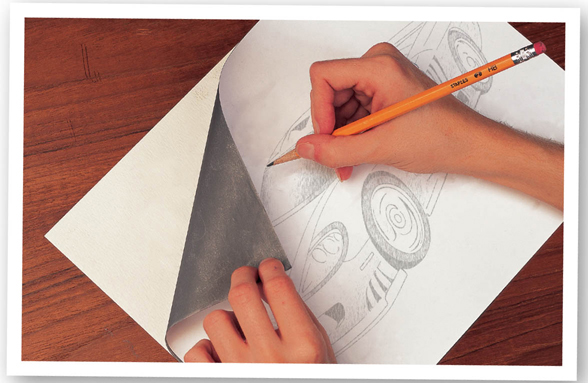
CHECKING YOUR LINES
While tracing the lines of the sketch, occasionally lift the corner of the sketch (and the coated transfer paper) to make sure that the lines that have transferred to the drawing paper aren’t too light or too dark.