
C H A P T E R 6
![]()
Windows Phone 7: Persisting Bookmarks Locally
As I've mentioned several times now, as of the time of writing, there is no relational database available for third-party apps on Windows Phone 7. There is, in fact, an implementation of the SQL CE database on the devices, but this is locked down so that it is available only to Microsoft applications, notably the Office Hub applications available on the device. One can only assume that SQL CE will become available again given time. This would be a definite good thing—Microsoft has a proven track record in building synchronization frameworks that work between its full-on SQL Server database and devices. It would be nice to have this back again on its mobile devices. Over time we'll probably see close integration with its Azure cloud services.
All this means that this chapter is a bit of an oddball because it's the only one in the book in which we're not using a database at all, let alone SQLite, which features prominently on the other platforms.
![]() Note Although I hope this chapter is of interest even when a full-on SQL database is available on Windows Phone 7, it's my intention to update this chapter online. Check the content on
Note Although I hope this chapter is of interest even when a full-on SQL database is available on Windows Phone 7, it's my intention to update this chapter online. Check the content on www.multimobiledevelopment.com/ for more information.
Approach
The approach we're going to take in this chapter is to store individual entities in individual files within a folder in isolated storage. We'll be reproducing the same entity-based scheme, including the metadata subsystem. We'll also have a SqlFilter class, although, unlike the name implies, this won't work with SQL statements. My rationale for doing this is that we want to aim for consistency across the different code bases wherever possible.
Entities
In Chapter 3, we looked at the structure of the entity model and its associated metadata subsystem, and we built an implementation on Android and iOS. In this section, we'll repeat this work in C# for Windows Phone 7. This code will more or less work unchanged on Windows Mobile, and also in the Mono implementations on Android and iOS. More importantly, it will also work if you do move over to a proper relational database.
The EntityType Class
The purpose of the EntityType class is to bundle together all of the information that you need in order to build code that can “magically” manipulate the underlying store and user interface depending on the structure of the data. In our case, instances of EntityType classes are going to group fields together, plus static memory on EntityType itself will hold a list of entity types. (But in this example we're going to have only one entity type.)
Each entity type will have two names—a programmatic name and a native name. Having separate values for the names makes it possible to smooth out other problems with the underlying store. For example, you may have a database table called TBL_CUST that you would like to refer to as Customer in code. In this case, TBL_CUST would be the native name, and Customer would be the programmatic name.
To this end, we'll create a class called EntityItem that will act as a base class for things that we want to store using the metadata system. Here's the code:
using System;


namespace AmxMobile.Phone7.SixBookmarks
{

    public abstract class EntityItem

    {

        public string Name { get; private set; }

        public string NativeName { get; private set; }


        protected EntityItem(string name, string nativeName)

        {

            this.Name = name;

            this.NativeName = nativeName;

        }

    }

}
We'll look at the fields first. Each field will store the following information:
- A native name and programmatic name
- A data type
- A size
- In this chapter, we're going to have only one, which indicates whether the field is a key field. In a full-on implementation, another example of a flag would be indicating whether the field could be nullable.
In this example, we're going to support just two data types; in a more full-on implementation, we'd obviously need to support all of the data types that the underlying database supports. (If we implement all of them now, half the book will be taken up with methods exposing out all of the data types.) Our server-side service used only strings and 32-bit integers, so we will need these, plus a Boolean type that we'll use on fields that are held locally and not on the server. Here's the SBDataType enumeration that we need to support those three types:
using System;


namespace AmxMobile.Phone7.SixBookmarks

{

    public enum DataType

    {

        String = 0,

        Int32 = 1,

        Boolean = 2

    }

}
Now that we have the enumeration, we can build EntityField. As well as supporting native name, name, data type, size, and an indication as to whether the field is a key, we'll have another property holding the ordinal of the field within the type. Here's the code:
using System;


namespace AmxMobile.Phone7.SixBookmarks

{

    public class EntityField : EntityItem

    {

        public DataType Type { get; private set; }

        public int Size { get; private set; }

        public int Ordinal { get; private set; }

        public bool IsKey { get; set; }


        internal EntityField(string name, string nativeName, DataType type, int size, int ordinal)

            : base(name, nativeName)

        {

            this.Type = type;

            this.Size = size;

            this.Ordinal = ordinal;

        }

    }

}
One other thing we need EntityField to be able to do is return a default value for the given type. We need this in order to support the insert operation. We'll talk more about this at that time—for now, here's the DefaultValue property:
// Add property to EntityField…

                public object DefaultValue

        {

            get

            {

                if (this.Type == DataType.Int32)

                    return 0;

                else if (this.Type == DataType.String)

                    return null;

                else if (this.Type == DataType.Boolean)
return false;
else
throw new NotSupportedException(string.Format("Cannot handle '{0}'.",
this.Type));
}
}
So that we can effectively work with entities, we need EntityType to be able to instantiate instances of individual entities and collections of entities. In this example, we're going to have only one entity—Bookmark. In any real-world application, you're likely to have many entitity types. This will be done by holding references to the relevant .NET types. Our motivation for doing this is so that we can say to framework code “give me a list of bookmarks” and the framework code itself will be able to create an appropriate collection type and individual entities. (Of all the platforms that we've seen in this book, the reflection subsystem in .NET is far and away the best.)
In addition, we're going to add a method to EntityType called AddField. This will be used to programmatically define the fields available on an entity type. Here's the code:
using System;

using System.Collections.Generic;


namespace AmxMobile.Phone7.SixBookmarks
{

    public class EntityType : EntityItem

    {

        public List<EntityField> Fields { get; private set; }

        public Type InstanceType { get; private set; }


        public EntityType(Type instanceType, string nativeName)

            : base(instanceType.Name, nativeName)

        {

            // set...

            this.Fields = new List<EntityField>();

            this.InstanceType = instanceType;

        }


        public EntityField AddField(string name, string nativeName, DataType type, int size)

        {

            EntityField field = new EntityField(name, nativeName, type, size, this.Fields.Count);

            this.Fields.Add(field);


            // return...

            return field;

        }

    }

}
An important part of the code there is that when we add a field using the AddField method, we need to assign each field a unique ordinal. By passing in the length of the array as the ordinal, we effectively do that.
Next we can look some of the other methods on EntityType. We're going to need to be able to find a field with a specific name, find the key field, or determine whether a field with a specified name actually exists. (This latter one is used for populating entities from data received over XML where the XML may reference fields that we don't know about.) Here are the three methods that also need to be added to EntityType:
// Add methods to EntityType…

            public EntityField GetField(String name, bool throwIfNotFound)

            {

                    foreach(EntityField field in Fields)

                    {

                            if(string.Compare(field.Name, name, StringComparison.InvariantCultureIgnoreCase) == 0)

                                    return field;

                    }


                    // throw...

                    if(throwIfNotFound)

                            throw new Exception(string.Format("Failed to find a field with

name '{0}'.", name));

                    else

                            return null;

            }


        public EntityField GetKeyField()

        {

            foreach (EntityField field in this.Fields)

            {

                if (field.IsKey)

                    return field;

            }


            // nope...

            throw new InvalidOperationException("Failed to find a key field.");

        }


        public bool IsField(string name)

        {

            EntityField field = this.GetField(name, false);

            if (field != null)

                return true;

            else

                return false;

        }
Recall that the other function EntityType needs is the ability to hold a register of the available entity types. We'll do this by creating a static hashtable on EntityType and methods called RegisterEntityType and GetEntityType.
// Add static field and methods to EntityType…

        private static Dictionary<Type, EntityType> EntityTypes { get; set; }
static EntityType()
{
EntityTypes = new Dictionary<Type, EntityType>();
}
public static void RegisterEntityType(EntityType entityType)
{
EntityTypes[entityType.InstanceType] = entityType;
}
public static EntityType GetEntityType(Type type)
{
if (EntityTypes.ContainsKey(type))
return EntityTypes[type];
else
throw new Exception(string.Format("Failed to get entity type for '{0}'.",
type));
}
We can now use this class to create and store entity types. Let's look now at building the Entity base class.
The Entity Class
The basic functionality of an entity is to store a dynamic list of data that represents the columns in the underlying database table. An entity will be created either manually by the developer or by framework code that retrieves the data from some source. (In our application, the source of data is going to be either the local files on disk or the Bookmarks data service at http://services.multimobiledevelopment.com/.) At some point during the entity's life, the data stored within will either be read for display on a screen, or be used to issue some sort of change request to the underlying store.
In our entity, we are going to hold three sets of values. Firstly we're going to store a reference to our related EntityType instance. Secondly we're going to store an array of values that map 1:1 with the data in the underlying store. Thirdly and finally, we're going to store a bunch of flags that help the entity keep track of its internal state.
Storage of data within the entity will be done in “slots.” You will notice on our EntityField instance we have a property called Ordinal. This ordinal value is the index of the slot in the entity. Thus if we have five fields, we'll have five slots numbered from zero to four inclusive.
![]() Note Recall in Chapter 3 we spoke about the BootFX application framework and its ORM functionality. Internally within BootFX, this functionality is known as “storage.”
Note Recall in Chapter 3 we spoke about the BootFX application framework and its ORM functionality. Internally within BootFX, this functionality is known as “storage.”
To manage the lifetimes of values stored within the new Entity class, we need to create an enumeration that indicates the status of the slots. We'll call this enumeration EntityFieldFlags, and it needs to be defined prior to building Entity. Here's the listing:
using System;


namespace AmxMobile.Phone7.SixBookmarks

{

    [Flags()]

    public enum FieldFlags

    {

        NotLoaded = 0,

        Loaded = 1,

        Modified = 2

    }

}
Next we'll look at the definition for the basic “storage” capability of Entity. The first thing we do is capture the entity type in the constructor. We'll need this later to allow all of the methods on the base class to reflect against the metadata. The second thing that we do is create two arrays—one to hold the values of the slots, the other to hold the flags. Here's the code:
using System;


namespace AmxMobile.Phone7.SixBookmarks

{

    public abstract class Entity

    {

        public EntityType EntityType { get; private set; }

        private object[] _values { get; set; }

        private FieldFlags[] _flags { get; set; }

        public bool IsDeleted { get; private set; }


        protected Entity()

        {

            // get the entity type...

            this.EntityType = EntityType.GetEntityType(this.GetType());

            if (this.EntityType == null)

                throw new InvalidOperationException("'this.EntityType' is null.");


            // create the slots...

            _values = new object[this.EntityType.Fields.Count];

            _flags = new FieldFlags[this.EntityType.Fields.Count];

        }

    }

}
We'll now look at making our entity do something interesting.
Setting Values in an Entity
Whenever we set a value within an entity, we'll be doing one of two things—we'll be plugging in either a value that the user has provided through some form of input, or a value that we have retrieved from a database or service. It's important that we can distinguish between these two operations—if the user has changed something, we may need to update the underlying store with that value. Conversely, if the user has not changed something, we do not want to be issuing unnecessary update requests back to the underlying store.
To keep track of which operation we intend when we set a value, we'll create an enumeration called SetReason. Here's the code:
using System;


namespace AmxMobile.Phone7.SixBookmarks
{

    public enum SetReason

    {

        UserSet = 0,

        Load = 1

    }

}
As we add methods to the entity, we'll find that oftentimes we need to add overloads for each of the methods that take either the name of a field as a string or an actual instance of an EntityField class. This is going to create additional code, but there is a substantially higher level of utility in not requiring the caller to dig out an EntityField instance every time the caller wishes to access field data. Whenever one of the string-based “name” overloads is used, we'll defer to the EntityType for the field name. Here's a collection of methods that allow values to be set:
// Add methods to Entity…

        protected void SetValue(String name, Object value, SetReason reason)

        {

            EntityField field = EntityType.GetField(name, true);

            SetValue(field, value, reason);

        }


        public void SetValue(EntityField field, Object value, SetReason reason)

        {

            int ordinal = field.Ordinal;

            SetValue(ordinal, value, reason);

        }


        private void SetValue(int ordinal, Object value, SetReason reason)

        {

                _values[ordinal] = value;


                // if...

                SetFlag(ordinal, FieldFlags.Loaded);

                if(reason == SetReason.UserSet)

            SetFlag(ordinal, FieldFlags.Modified);

        }


        private void SetFlag(int ordinal, FieldFlags flag)

        {

                _flags[ordinal] = _flags[ordinal] | flag;

        }
The function of SetValue is twofold. Firstly, it sets the value in the Values array to be the value passed in. Secondly, it sets the value in the Flags to indicate the state of the field. Regardless of the value of the reason parameter, it will indicate that the field has been loaded. If the value of reason indicates that the user changed a value, the field is marked as having been modified.
Retrieving the values is—oddly—a little trickier. In the first instance, we need to be able to behave differently depending on the state of the data. For example, if we're trying to retrieve the value for a field and we have not loaded it, we need to throw an error indicating that the value is not available. (Some implementations, including BootFX, will demand load data in this situation. However, for simplicity, we're not doing this here.)
Before we do that, we'll add a few methods that will help us understand whether fields have been loaded or modified, or whether the entity as a whole is new. We'll need these later on. Here's the implementation:
// Add methods to Entity…

            public bool IsNew

            {

            get

            {

                EntityField key = EntityType.GetKeyField();


                // state...

                if (!(IsLoaded(key)) && !(IsLoaded(key)))

                    return true;

                else

                    return false;

            }

            }


            public bool IsModified()

            {

            for (int index = 0; index < _flags.Length; index++)

            {

                if (IsModified(index))

                    return true;

            }


            // nope...

            return false;

            }


            public bool IsLoaded(EntityField field)

            {

            return IsLoaded(field.Ordinal);

            }


        private bool IsLoaded(int index)

            {

                    return IsFlagSet(index, FieldFlags.Loaded);

            }


            public bool IsModified(EntityField field)
{
return IsModified(field.Ordinal);
}
private bool IsModified(int index)
{
return IsFlagSet(index, FieldFlags.Modified);
}
private bool IsFlagSet(int index, FieldFlags flag)
{
if((_flags[index] & flag) == flag)
return true;
else
return false;
}
public void MarkForDeletion()
{
// set the flag to indicate that we want to delete on the next save…
this.IsDeleted = true;
}
Those methods lay the groundwork for the GetValue method that we implied must exist when we created our SetValue earlier. One implementation point is that we have to add a rule whereby if we're not new and we don't have it, we have to throw an error as we can't demand-load the value. This is called “demand-loading.” It's common enough in ORM tools, but to keep things simple, I have chosen not to implement it here. (Plus, seeing as we're not using a database at the moment on WP7, there's no mileage in not loading the whole entity in memory.)
We've touched a few times on this idea that we have deliberately limited data type support in this application to keep the code simple. We're about to see an example—there's quite a lot of code here to support just the few data types that we do support. Here's the code:
        public Object GetValue(String name)

        {

            EntityField field = EntityType.GetField(name, true);

            return GetValue(field.Ordinal);

        }


        public Object GetValue(EntityField field)
        {

            return GetValue(field.Ordinal);

        }


        private Object GetValue(int index)

        {

            // do we need to demand load?

            if(!(IsLoaded(index)) && !(this.IsNew))

                    throw new Exception("Demand loading is not implemented.");


            // return...
return _values[index];
}
public String GetStringValue(String name)
{
EntityField field = EntityType.GetField(name, true);
return GetStringValue(field);
}
public String GetStringValue(EntityField field)
{
Object value = GetValue(field);
if(value != null)
return value.ToString();
else
return null;
}
public int GetInt32Value(String name)
{
EntityField field = EntityType.GetField(name, true);
return GetInt32Value(field);
}
public int GetInt32Value(EntityField field)
{
Object value = GetValue(field);
if (value == null)
return 0;
else if (value is Int32)
return (int)value;
else
throw new Exception(string.Format("Cannot handle '%s'.", value.GetType()));
}
public bool GetBooleanValue(String name)
{
EntityField field = EntityType.GetField(name, true);
return GetBooleanValue(field);
}
public bool GetBooleanValue(EntityField field)
{
Object value = GetValue(field);
if(value == null)
return false;
else if (value is bool)
return (bool)value;
else if(value is int)
{
int asInt = (int)value;
if(asInt == 0) return false;
else
return true;
}
else
throw new Exception(string.Format("Cannot handle '{0}'.",
value.GetType()));
}
Now that we can get data into and out of our base entity, let's look at creating a strongly typed Bookmark class.
Building Bookmark
The point of ORM is that you're looking to get the entity layer to do most of the hard work of managing the data for you—i.e., it's easier to call a property called Name and know you're getting a string value back than it is to request an item with the name “name” out of a bucket of values returned over a SQL interface. Thus we need to add a bunch of properties to Bookmark that abstract calls to GetValue and SetValue.
Before we do that, though, there's one thing to consider. As discussed in Chapter 2, the database stores against each bookmark an internal ID, the user ID, the name, the URL, and ordinal values. In our database, in order to support the synchronization functionality that we'll build in the next chapter, we also need to store flags to indicate whether the item has been modified or deleted locally. We'll add IsLocalModified and IsLocalDeleted to achieve this.
Here's the definition of Bookmark:
using System;


namespace AmxMobile.Phone7.SixBookmarks

{

    public class Bookmark : Entity

    {

        public const String BookmarkIdKey = "BookmarkId";

        public const String OrdinalKey = "Ordinal";

        public const String NameKey = "Name";

        public const String UrlKey = "Url";

        public const string IsLocalModifiedKey = "IsLocalModified";

        public const string IsLocalDeletedKey = "IsLocalDeleted";


        public Bookmark()

        {

        }


        public int BookmarkId

        {

            get

            {

                return this.GetInt32Value(BookmarkIdKey);

            }

            set

            {
this.SetValue(BookmarkIdKey, value, SetReason.UserSet);
}
} public string Name
{
get
{
return this.GetStringValue(NameKey);
}
set
{
this.SetValue(NameKey, value, SetReason.UserSet);
}
}
public string Url
{
get
{
return this.GetStringValue(UrlKey);
}
set
{
this.SetValue(UrlKey, value, SetReason.UserSet);
}
}
public int Ordinal
{
get
{
return this.GetInt32Value(OrdinalKey);
}
set
{
this.SetValue(OrdinalKey, value, SetReason.UserSet);
}
}
public bool IsLocalModified
{
get
{
return this.GetBooleanValue(IsLocalModifiedKey);
}
set
{
this.SetValue(IsLocalModifiedKey, value, SetReason.UserSet);
}
}
public bool IsLocalDeleted
{
get
{
return this.GetBooleanValue(IsLocalDeletedKey);
}
set
{
this.SetValue(IsLocalDeletedKey, value, SetReason.UserSet);
}
}
}
}
As well as the singleton entity, we'll create a strongly typed collection. (I'm always a fan of building strongly typed collections when building entities, as it makes building a strong API on your business tier easier.) Here's the code:
using System;

using System.Collections.Generic;


namespace AmxMobile.Phone7.SixBookmarks

{

    public class List<Bookmark> : List<Bookmark>

    {

    }

}
When we built our EntityType class previously, we missed a couple of methods—specifically ones that would dynamically create singleton entity instances and collections. Here's the code to add to EntityType:
        internal Entity CreateInstance()

        {

            return (Entity)Activator.CreateInstance(this.InstanceType);

        }
Creating SBEntityType Instances
Before we can create instances of Bookmark and use them, we need to be able to create an instance of EntityType that supports it. In more sophisticated ORM layers, it's commonplace to build the metadata up from some sort of decoration in the code (this is very easy to do using attributes in .NET). In this implementation, we're going to add code to the SixBookmarksRuntime that we built in the last chapter and have it register the entity type on start. Here's the code to the constructor of SixBookmarksRuntime:
// Add code to SixBookmarksRuntime…

                private SixBookmarksRuntime()

                {

            // settings...

            this.Settings = SimpleXmlPropertyBag.Load("Settings.xml", false);
// register the entity type...
EntityType bookmark = new EntityType(typeof(Bookmark), "Bookmark");
bookmark.AddField(Bookmark.BookmarkIdKey, Bookmark.BookmarkIdKey, DataType.Int32, -1).IsKey = true;
bookmark.AddField(Bookmark.NameKey, Bookmark.NameKey, DataType.String, 128);
bookmark.AddField(Bookmark.UrlKey, Bookmark.UrlKey, DataType.String, 128);
bookmark.AddField(Bookmark.OrdinalKey, Bookmark.OrdinalKey, DataType.Int32, -
1);
bookmark.AddField(Bookmark.IsLocalModifiedKey, Bookmark.IsLocalModifiedKey,
DataType.Boolean, -1);
bookmark.AddField(Bookmark.IsLocalDeletedKey, Bookmark.IsLocalModifiedKey,
DataType.Boolean, -1);
EntityType.RegisterEntityType(bookmark);
}
We're essentially done here—we can now move on to creating some fake bookmarks and showing them on the device.
Displaying Some Fake Bookmarks
To keep us going until we have real data on the device, we'll display some fake bookmarks on the screen. To do this, we'll need a form that in previous incarnations of the application we have called the “navigator.”
![]() Note The name “navigator” is a little unfortunate in Silverlight, as Silverlight has a thing called a “navigation service” that is used to move the user around features of the application, and hence we have a little bit of a naming collision. However, as you know by now, to me the most important thing is consistency across the applications, and hence we'll keep the name “navigator.”
Note The name “navigator” is a little unfortunate in Silverlight, as Silverlight has a thing called a “navigation service” that is used to move the user around features of the application, and hence we have a little bit of a naming collision. However, as you know by now, to me the most important thing is consistency across the applications, and hence we'll keep the name “navigator.”
To the project, add a new Windows Phone Portrait Page called NavigatorPage.xaml. We'll add nine buttons to the form, one for each of the six buttons and one for each of the three options—configure, logoff, and about. These can be dragged and dropped onto the design surface in the usual way. For each of the buttons, change the Content value as per Figure 6-1, and set the Name properties to be buttonNavigate1, buttonNavigate2, etc., buttonConfigure, buttonLogoff, and buttonAbout.
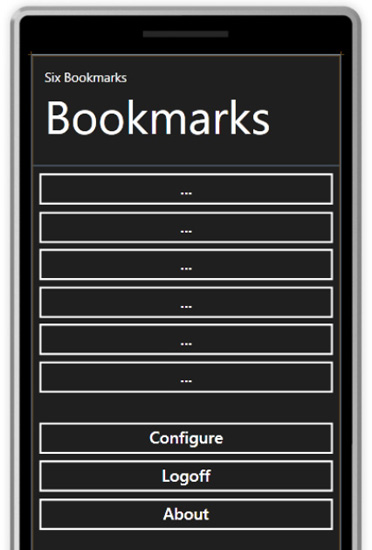
Figure 6-1. The design surface for the Navigation page
Here's the XAML that creates this view:
<navigation:PhoneApplicationPage

    x:Class="AmxMobile.Phone7.SixBookmarks.NavigatorPage"

    xmlns="http://schemas.microsoft.com/winfx/2006/xaml/presentation"

    xmlns:x="http://schemas.microsoft.com/winfx/2006/xaml"

    xmlns:navigation="clr-namespace:Microsoft.Phone.Controls;assembly=Microsoft.Phone.Controls.Navigation"

    xmlns:d="http://schemas.microsoft.com/expression/blend/2008"

    xmlns:mc="http://schemas.openxmlformats.org/markup-compatibility/2006"

    SupportedOrientations="Portrait"

    mc:Ignorable="d" Loaded="PhoneApplicationPage_Loaded" d:DesignHeight="800" d:DesignWidth="480">
<Grid x:Name="LayoutRoot" Background="{StaticResource PhoneBackgroundBrush}">
<Grid.RowDefinitions>
<RowDefinition Height="170"/>
<RowDefinition Height="*"/>
</Grid.RowDefinitions>
<!--This is the name of the application and page title-->
<Grid Grid.Row="0" x:Name="TitleGrid">
<TextBlock x:Name="ApplicationName" Text="Six Bookmarks" Style="{StaticResource
PhoneTextPageTitle1Style}"/>
<TextBlock x:Name="ListName" Text="Bookmarks" Style="{StaticResource
PhoneTextPageTitle2Style}"/>
</Grid>
<!--This section is empty. Place new content here Grid.Row="1"-->
<Grid Grid.Row="1" x:Name="ContentGrid">
<Button Content="..." Height="70" HorizontalAlignment="Left"
Name="buttonNavigate1" VerticalAlignment="Top" Width="480" />
<Button Content="..." Height="70" HorizontalAlignment="Left" Margin="0,59,0,0"
Name="buttonNavigate2" VerticalAlignment="Top" Width="480" />
<Button Content="..." Height="70" HorizontalAlignment="Left" Margin="0,116,0,0"
Name="buttonNavigate3" VerticalAlignment="Top" Width="480" />
<Button Content="..." Height="70" HorizontalAlignment="Left" Margin="0,174,0,0"
Name="buttonNavigate4" VerticalAlignment="Top" Width="480" />
<Button Content="..." Height="70" HorizontalAlignment="Left" Margin="0,231,0,0"
Name="buttonNavigate5" VerticalAlignment="Top" Width="480" />
<Button Content="..." Height="70" HorizontalAlignment="Left" Margin="0,289,0,0"
Name="buttonNavigate6" VerticalAlignment="Top" Width="480" />
<Button Content="Configure" Height="70" HorizontalAlignment="Left" Margin="0,383,0,0"
Name="buttonConfigure" VerticalAlignment="Top" Width="480" />
<Button Content="Logoff" Height="70" HorizontalAlignment="Left" Margin="0,441,0,0"
Name="buttonLogoff" VerticalAlignment="Top" Width="480" />
<Button Content="About" Height="70" HorizontalAlignment="Left" Margin="0,500,0,0"
Name="buttonAbout" VerticalAlignment="Top" Width="480" />
</Grid>
</Grid>
</navigation:PhoneApplicationPage>
This gets as far as having a view that we can actually show. What we need to do now is create our set of fake bookmarks and update the view.
Creating Fake Bookmarks
Creating the fake bookmarks is very straightforward—we just need to create instances of the Bookmark class that we built earlier and populate the properties accordingly.
To add a little finesse, we'll add a static method to Bookmark called GetBookmarksForDisplay. This will make more sense in the next chapter, but for now what we're looking to do is provide a mechanism whereby we can “soft-delete” bookmarks from the local data store by marking them as deleted. The real implementation of GetBookmarksForDisplay will return a list of bookmarks that are not soft-deleted. For now, here's the implementation that returns the fakes:
// Add method to Bookmark…

        internal static List<Bookmark> GetBookmarksForDisplay()

        {

            List<Bookmark> results = new List<Bookmark>();


            // add...

            Bookmark bookmark = new Bookmark();

            bookmark.Name = ".NET 247";

            bookmark.Url = "http://www.dotnet247.com/";

            bookmark.Ordinal = 0;

            results.Add(bookmark);


            // again...

            bookmark = new Bookmark();

            bookmark.Name = "Apress";

            bookmark.Url = "http://www.apress.com/";

            bookmark.Ordinal = 1;

            results.Add(bookmark);


            // return...

            return results;

        }
Showing and Populating the View
To use the bookmarks, we need to firstly modify the logon form so that it launches the navigator form, and we also need to implement a page load handler on the navigator form so that it displays the buttons. We do the logon form changes first.
As I alluded to earlier, Silverlight uses an approach of exposing out a class that provides navigation services to the application as a whole, which in this context means providing access to different views. These are done via URIs. In order to move from the logon form to the navigator form, we need to construct a URI for the navigator form and ask the Silverlight navigation service to show it. This is actually pretty straightforward—as the forms are in the root of the project, we create a URI relative to the root of the application that specifies the name of the .xaml file that drives the form. Here's the code that shows the change to the LogonOk method in the LogonPage class:
// Modify LogonOk method on LogonPage…

        private void LogonOk()

        {

            // flip back - we're not on the right thread...

            this.Dispatcher.BeginInvoke(delegate()

            {

                // save...

                if (this.checkRememberMe.IsChecked.Value)

                {

                    SimpleXmlPropertyBag settings = SixBookmarksRuntime.Current.Settings;

                    settings[UsernameKey] = this.textUsername.Text.Trim();

                    settings[PasswordKey] = this.textPassword.Password.Trim();

                    settings.Save();

                }

                else
this.ClearCredentials();
// do sync will come here...
// ask the navigation service to show the form...
NavigationService.Navigate(new Uri("/NavigatorPage.xaml",
UriKind.RelativeOrAbsolute));
});
}
Those are all the changes that we need to make to the logon form.
Going back to the navigator form, in the designer, double-click the white background of the design surface. This will add a Loaded event handler, like this one:
// This is added by the designer when you double-click the background of the design surface…

        private void PhoneApplicationPage_Loaded(object sender, RoutedEventArgs e)

        {

        }
The approach we'll take on this form is that we'll create a property called Bookmarks that will hold a List<Bookmark>. When this property is set, we will refresh the view. This will involve going through each of the six buttons and resetting them to a “not set” state, which in our case will mean returning them to having an ellipsis (“…”) for their text. For each bookmark that we do have, we'll find the appropriate button and set the text to be the name. Here's the code to be added to NavigatorPage.
// Modify Loaded handler, add field, properties and methods on NavigatorPage…

        private List<Bookmark> _bookmarks = null;


        private void PhoneApplicationPage_Loaded(object sender, RoutedEventArgs e)

        {

            // get a list of bookmarks and bind it...

            this.Bookmarks = Bookmark.GetBookmarksForDisplay();

        }


        private List<Bookmark> Bookmarks

        {

            get

            {

                return _bookmarks;

            }

            set

            {

                _bookmarks = value;

                this.RefreshView();

            }

        }


        private void RefreshView()

        {

            // reset...

            for (int index = 0; index < 5; index++)

                ResetButton(index);
// configure...
foreach (Bookmark bookmark in this.Bookmarks)
ConfigureBookmark(bookmark);
}
private void ConfigureBookmark(Bookmark bookmark)
{
if (bookmark == null)
throw new ArgumentNullException("bookmark");
// get...
Button button = this.GetButton(bookmark.Ordinal);
if (button == null)
throw new InvalidOperationException("'button' is null.");
// set it...
button.Content = bookmark.Name;
}
private void ResetButton(int ordinal)
{
Button button = this.GetButton(ordinal);
button.Content = "...";
}
private Button GetButton(int ordinal)
{
if (ordinal == 0)
return this.buttonNavigate1;
else if (ordinal == 1)
return this.buttonNavigate2;
else if (ordinal == 2)
return this.buttonNavigate3;
else if (ordinal == 3)
return this.buttonNavigate4;
else if (ordinal == 4)
return this.buttonNavigate5;
else if (ordinal == 5)
return this.buttonNavigate6;
else
throw new NotSupportedException(string.Format("Cannot handle '{0}'.",
ordinal));
}
Note You'll notice that the code to return the button given an ordinal (GetButton) is kinda clunky (if you've read along during the iOS and Android implementations, you'll notice something similar). There are slicker ways to handle a set of controls that operate in a similar fashion, but my view on the code for this book was that this was easier to follow than something slicker.
You can now run the code and log on. Figure 6-2 shows you what to expect.
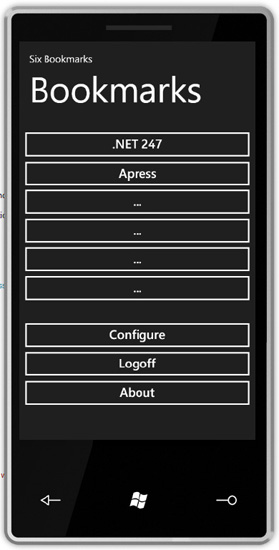
Figure 6-2. The Navigation form running and displaying fake bookmarks
Implementing Button Clicks
Those of you familiar with .NET and a particular product in its ancestry called Visual Basic will know that when you double-click a button on a design surface, it will give you a handler method for that button. This is the case with the toolset we're using now. However, we want to create just a single handler method for the navigation buttons. One way to do this is to change the XAML for all six buttons with the name of the handler that we want and double-click one of the buttons to create an appropriate handler in code.
The XAML is changed by adding a Click attribute. This snippet of the XAML from the designer shows the method reference in place:
<!—markup removed for brevity… -->

            <Button Content="..." Height="70" HorizontalAlignment="Left" Name="buttonNavigate1" VerticalAlignment="Top" Width="480" Click="buttonNavigate_Click" />

            <Button Content="..." Height="70" HorizontalAlignment="Left" Margin="0,59,0,0" Name="buttonNavigate2" VerticalAlignment="Top" Width="480" Click="buttonNavigate_Click" />

            <Button Content="..." Height="70" HorizontalAlignment="Left" Margin="0,116,0,0" Name="buttonNavigate3" VerticalAlignment="Top" Width="480" Click="buttonNavigate_Click" />

            <Button Content="..." Height="70" HorizontalAlignment="Left" Margin="0,174,0,0" Name="buttonNavigate4" VerticalAlignment="Top" Width="480" Click="buttonNavigate_Click" />

            <Button Content="..." Height="70" HorizontalAlignment="Left" Margin="0,231,0,0" Name="buttonNavigate5" VerticalAlignment="Top" Width="480" Click="buttonNavigate_Click" />

            <Button Content="..." Height="70" HorizontalAlignment="Left" Margin="0,289,0,0" Name="buttonNavigate6" VerticalAlignment="Top" Width="480" Click="buttonNavigate_Click" />

<!—markup removed for brevity… -->
If you double-click one of these buttons, you will get a method handler stub. Here's the listing for the stub. This code goes back into the Bookmarks property and extracts the bookmark with the matching ordinal. (Again the code to de-reference the button could be slicker—I'm biased toward ease of reading.)
// Add methods to NavigatorPage…

      private void buttonNavigate_Click(object sender, RoutedEventArgs e)

        {

            int ordinal = GetOrdinalForButton((Button)sender);


            // find it...

            Bookmark bookmark = GetBookmarkForOrdinal(ordinal);

            if (bookmark != null)

                SixBookmarksRuntime.Current.ShowUrl(bookmark.Url);

            else

                HandleConfigure();

        }


        private int GetOrdinalForButton(Button button)

        {

            if (button == buttonNavigate1)

                return 0;

            else if (button == buttonNavigate2)

                return 1;

            else if (button == buttonNavigate3)

                return 2;

            else if (button == buttonNavigate4)
return 3;
else if (button == buttonNavigate5)
return 4;
else if (button == buttonNavigate6)
return 5;
else
throw new NotSupportedException(string.Format("Cannot handle '{0}'.",
button.Name));
}
private Bookmark GetBookmarkForOrdinal(int ordinal)
{
foreach (Bookmark bookmark in this.Bookmarks)
{
if (bookmark.Ordinal == ordinal)
return bookmark;
}
// return...
return null;
}
private void HandleConfigure()
{
Alert.Show("TBD.");
}
You'll notice that the way we open a web resource is to defer to a to-be-built method on SixBookmarksRuntime called ShowUrl. Here's what this method this looks like:
// Add method to SixBookmarksRuntime…

        internal void ShowUrl(string url)

        {

            WebBrowserTask task = new WebBrowserTask();

            task.URL = url;

            task.Show();

        }
This method, as you can see, uses the WebBrowserTask class. The operation of this class is to open the instance of Internet Explorer installed on the phone.
If you run the application and click one of the links, IE will launch and show the page. Figure 6-3 illustrates.
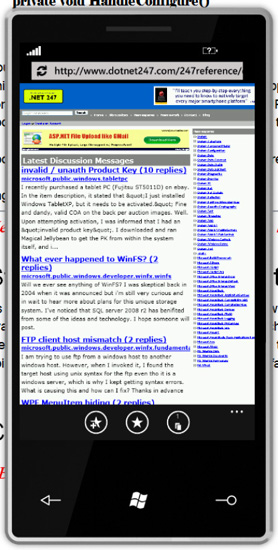
Figure 6-3. Internet Explorer showing a web page that we have navigated to
Tombstoning—A Brief Word
At this point, it's worth introducing the idea of “tombstoning.” Windows Phone 7 has a feature whereby rather than having proper multitasking, when you switch to a new application (as we have done by opening the web browser), your application is dumped out of memory. Should you click the phone's back button, your application will be brought back to life. The only wrinkle with this is that you are the one responsible for saving and restoring your application's global state when this happens. Windows Phone 7 is unique in this regard—none of the other phones works in this way.
I personally think this is a neat idea—it keeps memory usage and processor cycles on the device down to a minimum. What I don't think is neat is that you have to manage this yourself (i.e., you have to open a file of some kind and dump your static data into it)! You would think that in the OS design they would have built in a mechanism for serializing the application state down to the disk itself.
But I digress—for now, we're not going to look at tombstoning, but we will come back to it toward the end of the chapter. We're going to use the ORM subsystem to store data, and we can't do that until we've been through getting the ORM system working.
Storing Entities in the Data Box
As you know by now, as of the time of writing, a database management system is not available for Windows Phone 7, and, as such, we need to store our entities on disk. In the rest of this chapter, we'll examine how to do this by storing entities into what I'm going to call a “data box.” (This isn't a fabulous name, but it will do!)
We've already seen in the last chapter how we can use .NET's isolated storage feature to store files on disk. We'll use this feature again as part of our data box.
The design that we're going to aim for is one whereby we will create exactly one XML file per entity and we'll use the ID of the entity as the file name. When we create a data box, we'll give it an entity type, and it will use this entity type as part of the name of the folder. So, if we want to store a bookmark with ID 27, it would have a path like this:
~/Entities/Bookmark/27.xml
One complication with this arrangement is that we cannot rely on the store to manage the IDs for us. (With SQLite, or any relational DBMS we have an “autonumbering” scheme that manages the IDs of values as we put them into the store.)
Finally, as mentioned before, we'll build the SQL filter and change processor implementations as we have done on the other implementations with a proper SQL database.
Data Box Basics
The basics of a data box are a class with a property that holds a reference to an entity type and another that holds a reference to a folder. As mentioned before, we'll be using isolated storage for this. I'm also proposing creating a folder underneath a root Entities folder—this is analogous to a table. In our case, it makes it easier to get all the entities of a given type in a single hit. Here's the code:
using System;

using System.IO;

using System.IO.IsolatedStorage;

using System.Xml.Linq;
namespace AmxMobile.Phone7.SixBookmarks
{
internal class DataBox
{
public EntityType EntityType { get; private set; }
internal string FolderName { get; private set; }
internal DataBox(EntityType et)
{
this.EntityType = et;
// create a folder...
IsolatedStorageFile store = GetStore();
this.FolderName = "Entities/" + et.NativeName;
if (!(store.DirectoryExists(FolderName)))
store.CreateDirectory(FolderName);
}
internal IsolatedStorageFile GetStore()
{
return IsolatedStorageFile.GetUserStoreForApplication();
}
}
}
The first things we'll look at are methods to insert and update entities. These are actually the same operation—if we're doing an insert, we do not have a file to insert into, and if we're doing an update, we have an existing file that we wish to overwrite.
In both cases, we need to be able to transform the ID of an entity of a known type into a full file path within isolated storage. This is one example where the metadata system pays dividends. We can ask the entity type to return the key value for a given entity. We can then use this in the file name. Here's a method called GetFilePath that, when given an entity, de-references the ID and transforms it into a file name:
// Add method to DataBox…

        private string GetFilePath(Entity entity)

        {

            return string.Format("{0}/{1}.xml", this.FolderName,

entity.GetValue(EntityType.GetKeyField()));

        }
This means that we can now take a bookmark entity with an ID of, say, 27 and turn it into a file path, such as ~/Entities/Bookmark/27.xml.
If we need to insert an entity, we need to obtain the next ID in the set. As alluded to earlier, if we were using a proper relational database management system (RDBMS) to do this, we could ask it to retrieve an ID from its internal table. We don't have as much luck—what we need to do is ask isolated storage to return a list of file names to us. We can then walk these file names and look for the largest ID. The result of GetNextId would be this largest ID value plus one. Here's the code:
        private int GetNextId()

        {
IsolatedStorageFile store = this.GetStore();
int max = 0;
foreach (string path in store.GetFileNames(this.FolderName + "/*.*"))
{
string filename = System.IO.Path.GetFileNameWithoutExtension(System.IO.Path.GetFileName(path));
int id = int.Parse(filename);
if (id > max)
max = id;
}
// return...
return max + 1;
}
As a thought on this method, this is fine if you don't mind potentially repeating IDs. For example, if you had bookmark 27 and asked for the next ID, you would get 28. If you created 28.xml and deleted it, if you called GetNextId again, the largest ID would be 27, and hence you be given 28 again. This almost certainly works OK for our method here, but this behavior does not mimic that of a regular database, which, without explicit instruction, will not return the same ID twice.
As just mentioned, Insert and Update are pretty similar. Insert will retrieve an ID value and set that ID value into the entity before deferring to Update. (This process ensures not only that the ID is written to the internals of the file, but also that Entity.IsNew will return false after SaveChanges is called.) The Update method will obtain a file path and then save the entity via SaveEntity. (We'll build SaveEntity shortly.)
There is one special thing that Insert has to do that Update does not. When we write an entity to disk for the first time, we need to make sure that all of the fields are populated. If we don't do this, if we later rely on a field being there (for example, we want to select out entities by constraining on the field's values), we'll get an error. Therefore, after we have set the ID, we loop through all of the fields and find any not marked as modified. If we find any that are not modified, we set the value of the field to be the default value for that field type. (Recall that when we built EntityField field, we added the DefaultValue property.)
Here's the code:
// Add methods to DataBox…

        internal void Insert(Entity entity)

        {

            // get an ID by walking files...

            int id = GetNextId();


            // set the id into the entity...

            entity.SetValue(this.EntityType.GetKeyField(), id, SetReason.UserSet);


            // when we create an entity, all of the values have to be set as "modified"

otherwise we get

            // a problem when reading them back...

            foreach (EntityField field in entity.EntityType.Fields)

            {

                if (!(entity.IsModified(field)))

                {

                    object defaultValue = field.DefaultValue;
entity.SetValue(field, defaultValue, SetReason.UserSet);
}
}
// ...and then update it, because that operation is basically just a save...
Update(entity);
}
internal void Update(Entity entity)
{
// get the filename...
string path = GetFilePath(entity);
// save it...
SaveEntity(entity, path);
}
The operation of SaveEntity will be to call a method called EntityToXml, which will return back to us an XDocument instance. After we have the XML, we save it by asking isolated storage to give us a file stream. The operation of EntityToXml is straightforward—it uses the metadata on the entity type to enumerate the fields and simply dumps the entity's current value for that field to the XML document. Here's the code:
// Add methods to DataBox…

        private void SaveEntity(Entity entity, string path)

        {

            // create a document...

            XDocument doc = EntityToXml(entity);


            // save the file...

            IsolatedStorageFile store = this.GetStore();

            using (IsolatedStorageFileStream stream = store.CreateFile(path))

                doc.Save(stream);

        }


        private XDocument EntityToXml(Entity entity)

        {

            // save...

            XDocument doc = new XDocument();

            XElement root = new XElement(EntityType.NativeName);

            doc.Add(root);


            // walk the fields...

            foreach (EntityField field in EntityType.Fields)

            {

                XElement element = new XElement(field.NativeName);

                root.Add(element);


                // get...

                object value = entity.GetValue(field);

                if (value != null)
element.Value = value.ToString();
}
// return...
return doc;
}
For completeness, we'll also build the Delete method. Here's the code:
        internal void Delete(Entity entity)

        {

            string path = this.GetFilePath(entity);


            // delete...

            IsolatedStorageFile store = this.GetStore();

            if(store.FileExists(path))

                store.DeleteFile(path);

        }
Creating the Entity Change Processor
In this section, we're going to build the change processor. However, the approach I'm going to propose is to build it so that we can swap out the data box implementation for a proper RDBMS implementation at a future point. To do this, we'll build a strategy class that knows how to work with data boxes and a base class that is strategy-agnostic. When the time comes, we can create a new strategy class for the database.
Here's the implementation for the base class. All it needs to do is look at the state of the entity and decide whether to insert, update, delete, or take no action.
using System;


namespace AmxMobile.Phone7.SixBookmarks
{

    internal abstract class EntityChangeProcessor

    {

        public EntityType EntityType { get; private set; }


        protected EntityChangeProcessor(EntityType et)

        {

            if (et == null)

                throw new ArgumentNullException("et");

            this.EntityType = et;

        }


        internal void SaveChanges(Entity entity)

        {

            if (entity == null)

                throw new ArgumentNullException("entity");


            // new?

            if (entity.IsNew)

                Insert(entity);

            else if (entity.IsModified())
Update(entity);
else if (entity.IsDeleted)
Delete(entity);
}
internal abstract void Insert(Entity entity);
internal abstract void Update(Entity entity);
internal abstract void Delete(Entity entity);
}
}
You may notice that on the EntityChangeProcessor class we have Insert, Update, and Delete methods. What we'll do is implement a DataBoxEntityChangeProcessor class that defers to an instance of a DataBox. Here's the implementation:
using System;


namespace AmxMobile.Phone7.SixBookmarks
{

    internal class DataBoxEntityChangeProcessor : EntityChangeProcessor

    {

        private DataBox DataBox { get; set; }


        internal DataBoxEntityChangeProcessor(EntityType et)

            : base(et)

        {

            this.DataBox = new DataBox(et);

        }


        internal override void Insert(Entity entity)

        {

            // defer...

            this.DataBox.Insert(entity);

        }


        internal override void Update(Entity entity)

        {

            // defer...

            this.DataBox.Update(entity);

        }


        internal override void Delete(Entity entity)

        {

            // defer...

            this.DataBox.Delete(entity);

        }

    }

}
All that remains now is to add a SaveChanges method to Entity. We'll hard-code the DataBoxEntityChangeProcessor instantiation in here. In a more sophisticated implementation, we would look at this being a factory method of some sort, but for our purposes here, this is fine. Here's the code:
        public void SaveChanges()

        {

            DataBoxEntityChangeProcessor processor = new DataBoxEntityChangeProcessor(this.EntityType);

            processor.SaveChanges(this);

        }
Now that we can write entities onto disk, we'll look at building our Sync class. In this chapter, we'll implement this so that it will download bookmarks from the OData service. In the next chapter, we'll modify this implementation so that we can transmit changes back.
Building the Sync Class
The Sync class will be the provider of the functionality to our application that downloads bookmarks from the server and pushes changes back again. We'll call it when we log on, and we'll also call it in the next chapter in response to the user actually changing bookmarks.
If you've followed along during the Android and iOS implementations, you'll know that we had to handcrank the code to talk to the OData service. Ideally, back in the Microsoft “we'll give you a wizard to do everything” world, we should not have to do this. However, it transpires that there is no support for the kind of OData operation that we wish to build on Windows Phone 7.
Interesting story—when the first draft of this chapter was written against the CTP bits for Windows Phone 7, this support was there! However, by the time it went to release, support was dropped. There is some support available through open source efforts, but the major initiative in this space approaches the problem in a way that's not directly compatible with the other platforms. Therefore, in this chapter and the next, we're going to roll our own OData support, just as we have done for the other chapters.
Let's get started and build a class called Sync that we'll use whenever we need to upload changes to the server or download the definitive set of bookmarks from the server. (In this chapter, we're not going to upload changes—that'll happen in the next chapter.)
As you know from the last chapter, when we communicate with the server, we do so asynchronously. While this adds extra difficulty to building the application, it's worth doing so because the effect is much nicer for the user. (Plus on Windows Phone you do not have a non-asynchronous—i.e., synchronous—option.)
Each of the calls that we build will use the pattern we saw last time of providing one callback delegate for the successful path and another callback delegate for the error path. Moreover we'll reuse the Failed delegate that we introduced last time.
Let's look now at consuming the OData service. First of all, here's the code for ODataServiceProxy. We'll add more to this later.
using System;

using System.Data.Services.Client;


namespace AmxMobile.Phone7.SixBookmarks

{

    internal abstract class ODataServiceProxy : ServiceProxy

    {

        protected ODataServiceProxy(string serviceName)
: base(serviceName)
{
}
}
}
On our BookmarksService class, we need to add a method called GetAll. The method ultimately needs to call up to the server and retrieve a set of bookmarks. This is done by building and issuing a query to the server.
As you know from our work on the basic REST services, all HTTP requests happen asynchronously, and hence, when we call the GetAll method, we will pass in a success callback and a failure callback. We'll make the success delegate accept a list of bookmarks by way of a return value. In order to pass these callbacks through to the delegate that gets called when the query has executed, we'll create a private class in BookmarksService called ODataFetchState that holds the state that we need, and has some methods on it to help interpret and package the results. (This class in a real-world implementation would be internal rather than private, but this would mean making it more generic, and this seems overkill for this example.) Here's the basic implementation of BookmarksService:
using System;

using System.Data.Services.Client;

using AMX = AmxMobile.Services;


namespace AmxMobile.Phone7.SixBookmarks

{

    internal class BookmarksService : ODataServiceProxy

    {

        internal BookmarksService()

            : base("Bookmarks.svc/")

        {

        }


        private string GetServiceUrl(EntityType et)

        {

            return HttpHelper.CombineUrlParts(this.ResolvedServiceUrl, et.NativeName);

        }

  }

}
Let's look at how to build the ODataFetchState class first. This class will be a generic class and will accept a type related to an entity that we support (the Bookmark instance in this case). As part of its state, we need to track a callback to call when we have data (which will be passed into the GetAll method), and a callback if there's a failure (again, passed into the GetAll method).
The GetAll method itself will run asynchronously and will retrieve XML from the server. This will be passed into a method called ReceiveXml on the state class. Here's the implementation of GetAll first:
// Add to ODataServiceProxy…


        public void GetAll<T>(Action<List<T>> callback, Failed failed)


            where T : Entity

        {

            EntityType et = EntityType.GetEntityType(typeof(T));


            // create a state object...
ODataFetchState<T> state = new ODataFetchState<T>();
state.Callback = callback;
state.Failed = failed;
// run...
String url = GetServiceUrl(et);
HttpHelper.DownloadXml(url, GetDownloadSettings(), new
Action<XDocument>(state.ReceiveXml), failed);
}
And here's the stub implementation of the state class and its ReceiveXml method:
// Add to ODataServiceProxy…

        private class ODataFetchState<T>

            where T : Entity

        {

            internal Action<List<T>> Callback;

            internal Failed Failed;


            internal void ReceiveXml(XDocument doc)

            {

                Debug.WriteLine("Received XML from server...");


                // got...

                List<T> items = LoadEntities(doc, EntityType.GetEntityType(typeof(T)));


                // debug...

                Debug.WriteLine(string.Format("{0} item(s) loaded.", items.Count));


                // callback...

                this.Callback(items);

            }
You can see there that ReceiveXml actually defers to a method called LoadEntities, and it's this LoadEntities call that actually does the work. This will reel through the XML from the server, creating entities as it goes.
By way of a reminder, here's what the XML from the server typically looks like (I've included only one bookmark here for brevity, but a larger snippet is shown in Chapter 2).
<?xml version="1.0" encoding="iso-8859-1" standalone="yes"?>

<feed xml:base="http://services. multimobiledevelopment.com/services/Bookmarks.svc/" xmlns:d="http://schemas.microsoft.com/ado/2007/08/dataservices" xmlns:m="http://schemas.microsoft.com/ado/2007/08/dataservices/metadata" xmlns="http://www.w3.org/2005/Atom">

  <title type="text">Bookmark</title>

  <id>http://services. multimobiledevelopment.com/services/bookmarks.svc/Bookmark</id>

  <updated>2010-04-18T10:54:32Z</updated>
<link rel="self" title="Bookmark" href="Bookmark" />
<entry>
<id>http://services. multimobiledevelopment.com/services/Bookmarks.svc/Bookmark(1002)</id>
<title type="text"></title>
<updated>2010-04-18T10:54:32Z</updated>
<author>
<name />
</author>
<link rel="edit" title="Bookmark" href="Bookmark(1002)" />
<category term="AmxMobile.Services.Bookmark" scheme="http://schemas.microsoft.com/ado/2007/08/dataservices/scheme" />
<content type="application/xml">
<m:properties>
<d:BookmarkId m:type="Edm.Int32">1002</d:BookmarkId>
<d:UserId m:type="Edm.Int32">1001</d:UserId>
<d:Name>.NET 247</d:Name>
<d:Url>http://www.dotnet247.com/</d:Url>
<d:Ordinal m:type="Edm.Int32">1</d:Ordinal>
</m:properties>
</content>
</entry>
</feed>
Thus, to read in a bookmark, all we have to do is find the entry elements and then walk the properties contained within the m:properties element. Here's the code that does that:
// Add to the private ODataFetchState class within ODataServiceProxy…

  protected List<T> LoadEntities(XDocument doc, EntityType et)

        {

            // feed...

            XElement feed = doc.Element(XName.Get("feed", AtomNamespace));


            // walk...

            List<T> results = et.CreateCollectionInstance<T>();

            var entries = feed.Elements(XName.Get("entry", AtomNamespace));

            foreach (XElement entry in entries)

            {

                // get the content item...

                XElement content = entry.Element(XName.Get("content", AtomNamespace));


                // then get the properties element...

                XElement properties = content.Element(XName.Get("properties", MsMetadataNamespace));


                // create an item...

                T item = (T)et.CreateInstance();


                // then get the fields...

                Dictionary<string, object> values = new Dictionary<string, object>();

                foreach (XElement fieldElement in properties.Elements())

                {

                    if (fieldElement.Name.Namespace == MsDataNamespace)

                    {

                        // do we have that field?

                        EntityField field = et.GetField(fieldElement.Name.LocalName, false);

                        if (field != null)
{
// get the value...
object value = this.GetValue(fieldElement);
item.SetValue(field, value, SetReason.UserSet);
}
}
}
// add...
results.Add(item);
}
// return...
return results;
}
During the read process, LoadEntities calls a helper method called GetValue. This latter method's job is to interpret the data type and return strongly typed values back to the caller, ready to store within the entity. We're going to support only two data types here—a real-world implementation would contain more first-class support for different types.
            private Object GetValue(XElement field)

            {

                // fields are provided with a data element, like this....

                // <d:BookmarkId m:type="Edm.Int32">1002</d:BookmarkId>


                // look up the type name...

                string typeName = null;

                XAttribute attr = field.Attribute(XName.Get("type", MsMetadataNamespace));

                if (attr != null)

                    typeName = attr.Value;


                // nothing?

                if (string.IsNullOrEmpty(typeName))

                    return XmlHelper.GetStringValue(field);

                else if (string.Compare(typeName, "Edm.Int32", StringComparison.InvariantCultureIgnoreCase) == 0)

                    return XmlHelper.GetInt32Value(field);

                else

                    throw new Exception(string.Format("Cannot handle '%s'.", typeName));

            }
Calling GetAll
The operations of the Sync class have to run asynchronously, as we've already stated that all server communication has to be done in this way. As a result, the DoSync method on the Sync class will also need to accept a success callback and a failed callback. As we'll need to use these from various places in the code, we'll store these callbacks as properties on the Sync class.
Internal to the Sync class will be a GetLatest method. The operation of this method will be to call the GetAll method and wait until some bookmarks are returned. The bookmarks that are returned will be ready for committal to disk via a change to SaveChanges. In addition to this, we also need to delete the existing bookmarks from disk; however, we cannot do this part yet as we have not built the code that retrieves the bookmarks back. (We'll do this shortly.)
As a result, the Sync method is actually pretty simple. Here's the code:
using System;


namespace AmxMobile.Phone7.SixBookmarks

{

    public class Sync

    {

        private Action Callback { get; set; }

        private Failed Failed { get; set; }


        public Sync()

        {

        }


        public void DoSync(Action callback, Failed failed)

        {

            // set...

            this.Callback = callback;

            this.Failed = failed;


            // get latest...

            GetLatest();

        }


        private void GetLatest()

        {

            BookmarksService service = new BookmarksService();

            service.GetAll((Action<List<Bookmark>>)delegate(List<Bookmark> bookmarks) {


                // go through and save them...

                foreach (Bookmark bookmark in bookmarks)

                    bookmark.SaveChanges();


                // signal that we've finished...

                this.Callback();


            }, this.Failed);

        }

    }

}
If you recall, when we built the logon form, we added a method called LogonOk, and also added a comment indicating where the code to the synchronization code would go. We can now add this in—on success what we want to do is navigate over to the navigator form using the Silverlight NavigationService.
There's one wrinkle that we have to deal with, however. When our success callback is invoked, we'll be running on a worker thread and not on the main user interface thread. As a result, we have to use the Silverlight Dispatcher class to marshal control back to the main thread before using the NavigationService.
Here's the modified implementation of LogonOk:
// Change implementation of LogonOk on LogonForm…

        private void LogonOk()

        {

            // flip back - we're not on the right thread...

            this.Dispatcher.BeginInvoke(delegate()

            {

                // save...

                if (this.checkRememberMe.IsChecked.Value)

                {

                    SimpleXmlPropertyBag settings = SixBookmarksRuntime.Current.Settings;

                    settings[UsernameKey] = this.textUsername.Text.Trim();

                    settings[PasswordKey] = this.textPassword.Password.Trim();

                    settings.Save();

                }

                else

                    this.ClearCredentials();


                // do sync will come here...

                Sync sync = new Sync();

                sync.DoSync(delegate() {


                    // we worked...

                    Dispatcher.BeginInvoke(delegate()

                    {

                        NavigationService.Navigate(new Uri("/NavigatorPage.xaml", UriKind.RelativeOrAbsolute));

                    });


                }, Alert.GetFailedHandler(this));

            });

        }
Now you can run the application, and the sync code will complete. However, you won't be able to see anything different, as all we're doing is writing files to disk and there's no way of browsing those files on the device. In the next section, we'll look at reading the files back out.
Selecting Entities
In this section, we're going to create a class called DataBoxFilter that can be used to read entities from disk.
If you've been reading along the Android and iOS implementations, you'll know that we built a class called SqlFilter that was able to select data out of a table in a relational store. This class worked by assuming that when you created a filter you wanted all entities of a given type. You could then add constraints to limit the entities that were returned.
In DataBoxFilter, we're going to do much the same thing. This class will be bound to a data box and initially be configured to return back a list of all entities of a given type. We can add constraints to limit the results returned. (Because we are trying to move to a world where we have a relational store, I'm 120going to call the constraint class SqlConstraint, as ultimately we'd like to do away with DataBoxFilter and use SqlFilter instances instead.) In terms of how we're going to do the filtering, we'll always load all entities from disk and walk them one by one to see if they are included based on the constraints. This is the easiest way to achieve what we want, but it is the least efficient. Given that we need to keep this code easy to read in order to make the book more comprehendable, and given that our dataset is small, this approach is suitable in this case. If you were looking to work with a larger set of data, you'd need to be more sophisticated with your approach.
![]() Note I've avoided trying in this case to create a provider pattern-like approach here, whereby we abstract the user away from knowing whether he or she is using a data box or a relational store, primarily to reduce complexity. What I've tried to do is take a stab in the direction of making it easier to move over to a relational database, rather than create something that lets the developer move between the two at will.
Note I've avoided trying in this case to create a provider pattern-like approach here, whereby we abstract the user away from knowing whether he or she is using a data box or a relational store, primarily to reduce complexity. What I've tried to do is take a stab in the direction of making it easier to move over to a relational database, rather than create something that lets the developer move between the two at will.
The first method we'll need is one that returns all of the entities out of the data box. We'll implement this on DataBox itself and use it from within DataBoxFilter. This method will need to be able to create a strongly typed, generic collection of entities for a given entity type, and therefore we'll add a method called CreateCollectionInstance to EntityType. This method uses some semi-advanced .NET magic to create an appropriate collection type at runtime—suffice it to say that if we call this method on the entity type that represents Bookmark, we'll get a List<Bookmark> returned. Here's the code:
// Add method to EntityType…

        internal List<T> CreateCollectionInstance<T>()

            where T : Entity

        {

            Type listType = typeof(List<>);

            Type genericType = listType.MakeGenericType(new Type[] { typeof(T) });


            // return...

            return (List<T>)Activator.CreateInstance(genericType);

        }
We can now implement our GetAll method on DataBox. The operation of this method will be to ask isolated storage for a list of file names. These file names will then be turned into full paths (e.g., 27.xml → ~/Entities/Bookmark/27.xml) and passed to a method called EntityFromXml for rehydration back into an instance. Here's the implementation of the basic GetAll method:
// Add method to DataBox…

        internal List<T> GetAll<T>()

            where T : Entity

        {

            IsolatedStorageFile store = this.GetStore();


            // load them all...

            List<T> results = this.EntityType.CreateCollectionInstance<T>();

            foreach (string filename in store.GetFileNames(this.FolderName + "/*.xml"))

            {
// get the xml...
XDocument doc = null;
using (Stream stream = store.OpenFile(this.FolderName + "/" + filename,
FileMode.Open, FileAccess.Read))
doc = XDocument.Load(stream);
// turn it into an entity...
T entity = (T)EntityFromXml(doc);
results.Add(entity);
}
// return...
return results;
}
The EntityFromXml method is intended to be able to be able to hydrate any form of entity (i.e., it's not Bookmark-specific). Its operation is to use the field definition within the entity type to identify elements contained within the document. If there is a match between a field and an element, the field's value is set and marked as loaded. If there is no match, no error occurs. Here's the code:
// Add method to DataBox…

        private Entity EntityFromXml(XDocument doc)

        {

            Entity entity = this.EntityType.CreateInstance();


            // walk...

            List<XElement> elements = new

List<XElement>(doc.Descendants(this.EntityType.NativeName));

            if (elements.Count == 0)

                throw new InvalidOperationException(string.Format("An element with name '{0}'

was not found.", this.EntityType.NativeName));


            // walk the fields...

            XElement root = elements[0];

            foreach (EntityField field in this.EntityType.Fields)

            {

                // find an element...

                XElement element = root.Element(field.NativeName);

                if (element != null)

                {

                    if (field.Type == DataType.String)

                        entity.SetValue(field, XmlHelper.GetStringValue(element), SetReason.Load);

                    else if (field.Type == DataType.Int32)

                        entity.SetValue(field, XmlHelper.GetInt32Value(element), SetReason.Load);

                    else if (field.Type == DataType.Boolean)

                        entity.SetValue(field, XmlHelper.GetBooleanValue(element), SetReason.Load);

                    else

                        throw new NotSupportedException(string.Format("Cannot handle '{0}'.",

field.Type));
}
}
// return...
return entity;
}
Now that we can load the entities, we can turn our attention to creating a filter. The first class we need to support our filter is SqlConstraint. This class exists simply as a pair of properties—specifically an EntityField instance and the value be constrained. (In more sophisticated implementations, this may include an operator, such as “not equal to” or “greater than.” Our implementation will support only “equal to.”)
Here's the code:
using System;


namespace AmxMobile.Phone7.SixBookmarks

{

    public class SqlConstraint

    {

        internal EntityField Field { get; private set; }

        internal object Value { get; private set; }


        internal SqlConstraint(EntityField field, object value)

        {

            this.Field = field;

            this.Value = value;

        }

    }

}
For our actual DataBoxFilter, we'll hold a DataBox instance and set of constraints in instance fields. For our ExecuteEntityCollection method, we'll call GetAll to get them all back and then go through and “black ball” any in the collection that do not meet the constraints. For extra flexibility, when we know we're matching string fields, we'll do the matching in a case-insensitive fashion. Here's the code:
using System;

using System.Collections.Generic;


namespace AmxMobile.Phone7.SixBookmarks

{

    internal class DataBoxFilter

    {

        private DataBox Box { get; set; }

        private List<SqlConstraint> Constraints { get; set; }


        internal DataBoxFilter(DataBox box)

        {

            this.Box = box;

            this.Constraints = new List<SqlConstraint>();

        }
internal List<T> ExecuteEntityCollection<T>()
where T : Entity
{
// get them all from the box...
List<T> all = this.Box.GetAll<T>();
// create a new collection to put the filtered results in...
List<T> results = this.Box.EntityType.CreateCollectionInstance<T>();
// walk the master list...
foreach (T item in all)
{
bool ok = true;
// look for non-matches...
foreach (SqlConstraint constraint in this.Constraints)
{
if (constraint.Field.Type == DataType.String)
{
string value = item.GetStringValue(constraint.Field);
if (string.Compare(value, (string)constraint.Value, StringComparison.InvariantCultureIgnoreCase) != 0)
ok = false;
}
else if (constraint.Field.Type == DataType.Int32)
{
int value = item.GetInt32Value(constraint.Field);
if (value != (int)constraint.Value)
ok = false;
}
else
throw new InvalidOperationException(string.Format("Cannot handle
{0}.", constraint.Field.Type));
// stop early?
if(!(ok))
break;
}
// add if we're OK...
if (ok)
results.Add(item);
}
// return...
return results;
}
internal T ExecuteEntity<T>()
where T : Entity
{
List<T> items = ExecuteEntityCollection<T>(); if (items.Count > 0)
return items[0];
else
return null;
}
internal void AddConstraint(string name, object value)
{
EntityField field = this.Box.EntityType.GetField(name, true);
if (field == null)
throw new InvalidOperationException("'field' is null.");
// defer...
AddConstraint(field, value);
}
internal void AddConstraint(EntityField field, object value)
{
if (field == null)
throw new ArgumentNullException("field");
// add...
this.Constraints.Add(new SqlConstraint(field, value));
}
}
}
Now all that remains is to create a filter, configure it, and call the ExecuteEntityCollection method.
At this point, we already have a method on Bookmark called GetBookmarksForDisplay. At the moment, this returns a list of fake bookmarks; what we can do now is change it so that it returns the bookmarks from the data box. At this stage, we're going to return all of them—in the next chapter, we're going to add an additional flag to the bookmark and make a further change to GetBookmarksForDisplay to constrain against that field. For now, here's the revised implementation of GetBookmarksForDisplay:
// Modify implementation of GetBookmarksForDisplay…

        internal static List<Bookmark> GetBookmarksForDisplay()

        {

            // create a filter...

            DataBoxFilter filter = new DataBoxFilter(GetDataBox());

            return filter.ExecuteEntityCollection<Bookmark>();

        }
With that method in place, all we have to do is run the project, and it will load the real bookmarks and display them. Figure 6-4 shows the result.
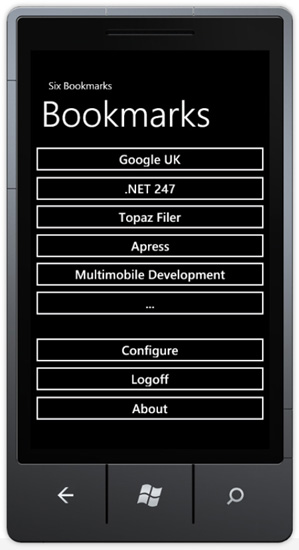
Figure 6-4. The Navigation form showing real bookmarks from the server
That's it! The whole thing works from end to end. We can connect up to the server, download the bookmarks, and show them on the screen. There's just one housekeeping task missing, which we'll do next.
Implementing Delete All on the Sync
The synchronization routine needs to delete all of the bookmarks off of the local device before the new bookmarks are downloaded. Although it's not obvious, at this stage we're actually creating an ever-increasing list of bookmarks on the device. It's not obvious because when the UI is built, the ordinal of the bookmark is used to choose the button to associate the bookmark with. Hence we can have multiple bookmarks with the same ordinal, and the result is to just keep reconfiguring the same bookmark again and again.
Here's the code:
// Add method to Bookmark…

        internal static void DeleteAll()

        {

            DataBoxFilter filter = new DataBoxFilter(GetDataBox());

            foreach(Bookmark bookmark in filter.ExecuteEntityCollection<Bookmark>())

            {

                bookmark.MarkForDeletion();

                bookmark.SaveChanges();

            }

        }
All we have to do once we have that method is call DeleteAll from within the GetLatest method on Sync. Here's the code:
// Modify GetLatest method on Sync…

        private void GetLatest()

        {

            BookmarksService service = new BookmarksService();

            service.GetAll((Action<List<Bookmark>>)delegate(List<Bookmark> bookmarks)

            {

                // delete first...

                Bookmark.DeleteAll();


                // go through and save them...

                foreach (Bookmark bookmark in bookmarks)

                    bookmark.SaveChanges();


                // signal that we've finished...

                this.Callback();


            }, this.Failed);

        }
Using the ORM Subsystem to Support Tombstoning
Before we finish the chapter, we should clear up the issue related to tombstoning the applications.
As discussed previously, when we switch to another application (of which Internet Explorer is one), we will get dismissed from memory automatically. The state of our application is not preserved when this happens—we are responsible for serializing and deserializing whatever state we want to keep in order to maintain our application. The only state that we absolutely need to keep in this fashion is our logon token to the services.
Various bits of documentation related to tombstoning suggest using isolated storage to keep the data safe. We already use isolated storage with our ORM subsystem, so it seems logical to reuse this for this purpose. Specifically we'll build a new entity called TombstoneItem and create a related entity type. The format of TombstoneItem will be as a basic name/value pair.
Without further ado, we'll define our TombstoneItem class like this:
using System;

using System.Collections.Generic;


namespace AmxMobile.Phone7.SixBookmarks
{

    public class TombstoneData : Entity

    {

        public const string TombstoneDataIdKey = "TombstoneDataId";

        public const string NameKey = "Name";

        public const string ValueKey = "Value";


        public TombstoneData()

        {

        }


        public int TombstoneDataId

        {

            get

            {

                return this.GetInt32Value(TombstoneDataIdKey);

            }

            set

            {

                this.SetValue(TombstoneDataIdKey, value, SetReason.UserSet);

            }

        }


        public string Name

        {
get
{
return this.GetStringValue(NameKey);
}
set
{
this.SetValue(NameKey, value, SetReason.UserSet);
}
}
public string Value
{
get
{
return this.GetStringValue(ValueKey);
}
set
{
this.SetValue(ValueKey, value, SetReason.UserSet);
}
}
private static DataBox GetDataBox()
{
EntityType et = EntityType.GetEntityType(typeof(TombstoneData));
return new DataBox(et);
}
}
}
To use this name/value collection, we'll need to be able to get a TombstoneItem instance for a given name. We'll do this via a method called GetTombstoneItem, which will use the DataBoxFilter that we built earlier, plus it will have the capability to create a new item, should one not be found. Here's the code:
// Add to TombstoneItem…

        internal static TombstoneData GetTombstoneItem(string name, bool createIfNotFound)

        {

            DataBoxFilter filter = new DataBoxFilter(GetDataBox());

            filter.AddConstraint(NameKey, name);


            // return...

            TombstoneData data = filter.ExecuteEntity<TombstoneData>();

            if (data == null && createIfNotFound)

            {

                data = new TombstoneData();

                data.Name = name;

            }


            // return...

            return data;

        }
As you know, in order to use entities, we need to define an entity type. As before, we'll do this within the SixBookmarksRuntime class. Here's the modified code:
//Modified SixBookmarksRuntime constructor…

            private SixBookmarksRuntime()

            {

        // settings...

        this.Settings = SimpleXmlPropertyBag.Load("Settings.xml", false);


        // register the entity type...

        EntityType bookmark = new EntityType(typeof(Bookmark), "Bookmark");
bookmark.AddField(Bookmark.BookmarkIdKey, Bookmark.BookmarkIdKey, DataType.Int32,
-1).IsKey = true;
bookmark.AddField(Bookmark.NameKey, Bookmark.NameKey, DataType.String, 128);
bookmark.AddField(Bookmark.UrlKey, Bookmark.UrlKey, DataType.String, 128);
bookmark.AddField(Bookmark.OrdinalKey, Bookmark.OrdinalKey, DataType.Int32, -1);
bookmark.AddField(Bookmark.IsLocalModifiedKey, Bookmark.IsLocalModifiedKey,
DataType.Boolean, -1).IsOnServer = false;
bookmark.AddField(Bookmark.IsLocalDeletedKey, Bookmark.IsLocalDeletedKey,
DataType.Boolean, -1).IsOnServer = false;
EntityType.RegisterEntityType(bookmark);
// create a tombstone data entity type...
EntityType tombstone = new EntityType(typeof(TombstoneData), "TombstoneData");
tombstone.AddField(TombstoneData.TombstoneDataIdKey, TombstoneData.TombstoneDataIdKey, DataType.Int32, -1).IsKey = true;
tombstone.AddField(TombstoneData.NameKey, TombstoneData.NameKey, DataType.String, 64);
tombstone.AddField(TombstoneData.ValueKey, TombstoneData.ValueKey, DataType.String, 256);
EntityType.RegisterEntityType(tombstone);
}
To support tombstoning, the Windows Phone 7 runtime will call events on our application class—specifically Activated and Deactivated. When we're deactivated, we need to store the user token held in static memory within the RestServiceProxy base class. (For a more elegant solution, each class that you know should be storing state could be enlisted in some sort of chain, and each class given responsibility for storing its own state. However, this is probably good enough for this example.) Here's the “deactivated” event handler:
// Add to App…

    private void Application_Deactivated(object sender, DeactivatedEventArgs e)

    {

        // get a tombstonedata item...

        TombstoneData data = TombstoneData.GetTombstoneItem("UserToken", true);

        if (data == null)

            throw new InvalidOperationException("'data' is null.");

        data.Value = RestServiceProxy.Token;

        data.SaveChanges();

    }
The “activated” handler is a similar shape, although, on top of restoring the data, we also have to “reboot” the application runtime. This is done by using a method called EnsureInitialized, which we'll build in a moment. Here's the “activated” handler:
// Add to App…

private void Application_Activated(object sender, ActivatedEventArgs e)

    {

        SixBookmarksRuntime.EnsureInitialized();


        // load up the token...

        TombstoneData data = TombstoneData.GetTombstoneItem("UserToken", false);
if (data != null)
RestServiceProxy.Token = data.Value;
}
The operation of EnsureInitialized is very straightforward. By calling any static method on the class, we'll end up calling the constructor as we did before. Here's the code:
// Add to SixBookmarksRuntime…

    internal static void EnsureInitialized()

    {

        // called after we have been "tombstoned"... all we have to do here is check that

we

    // have Current defined.  this will re-establish our state...

        if (Current == null)

            throw new InvalidOperationException("'Current' is null.");

    }
There's one final thing to consider. Our state is persistently stored on disk; therefore we have to reset it when the application starts. We can listen out for the “launching” event and delete the tombstone item out at this stage. Here's the code:
// Add to App…

    private void Application_Launching(object sender, LaunchingEventArgs e)

    {

       // check...

       SixBookmarksRuntime.EnsureInitialized();


       // delete any old token that we may have...

       TombstoneData data = TombstoneData.GetTombstoneItem("UserToken", false);

       if (data != null)

      {

           data.MarkForDeletion();

           data.SaveChanges();

      }

  }
That's all we need to do! Now we can flip back and forth between our application and Internet Explorer with impunity.
Conclusion
In this chapter, we have seen how, despite the lack of a relational database management system on Windows Phone, we can still use the object-relational mapping approach we outlined in the system architecture chapter and implemented on iOS and Android. We saw how we could create a “data box” and entities in it as individual files. We also saw how to communicate with the standard OData service in order to download entities from the cloud service. In the next chapter, we'll look at how to push up changes to the server.