
4
Artful Cursive
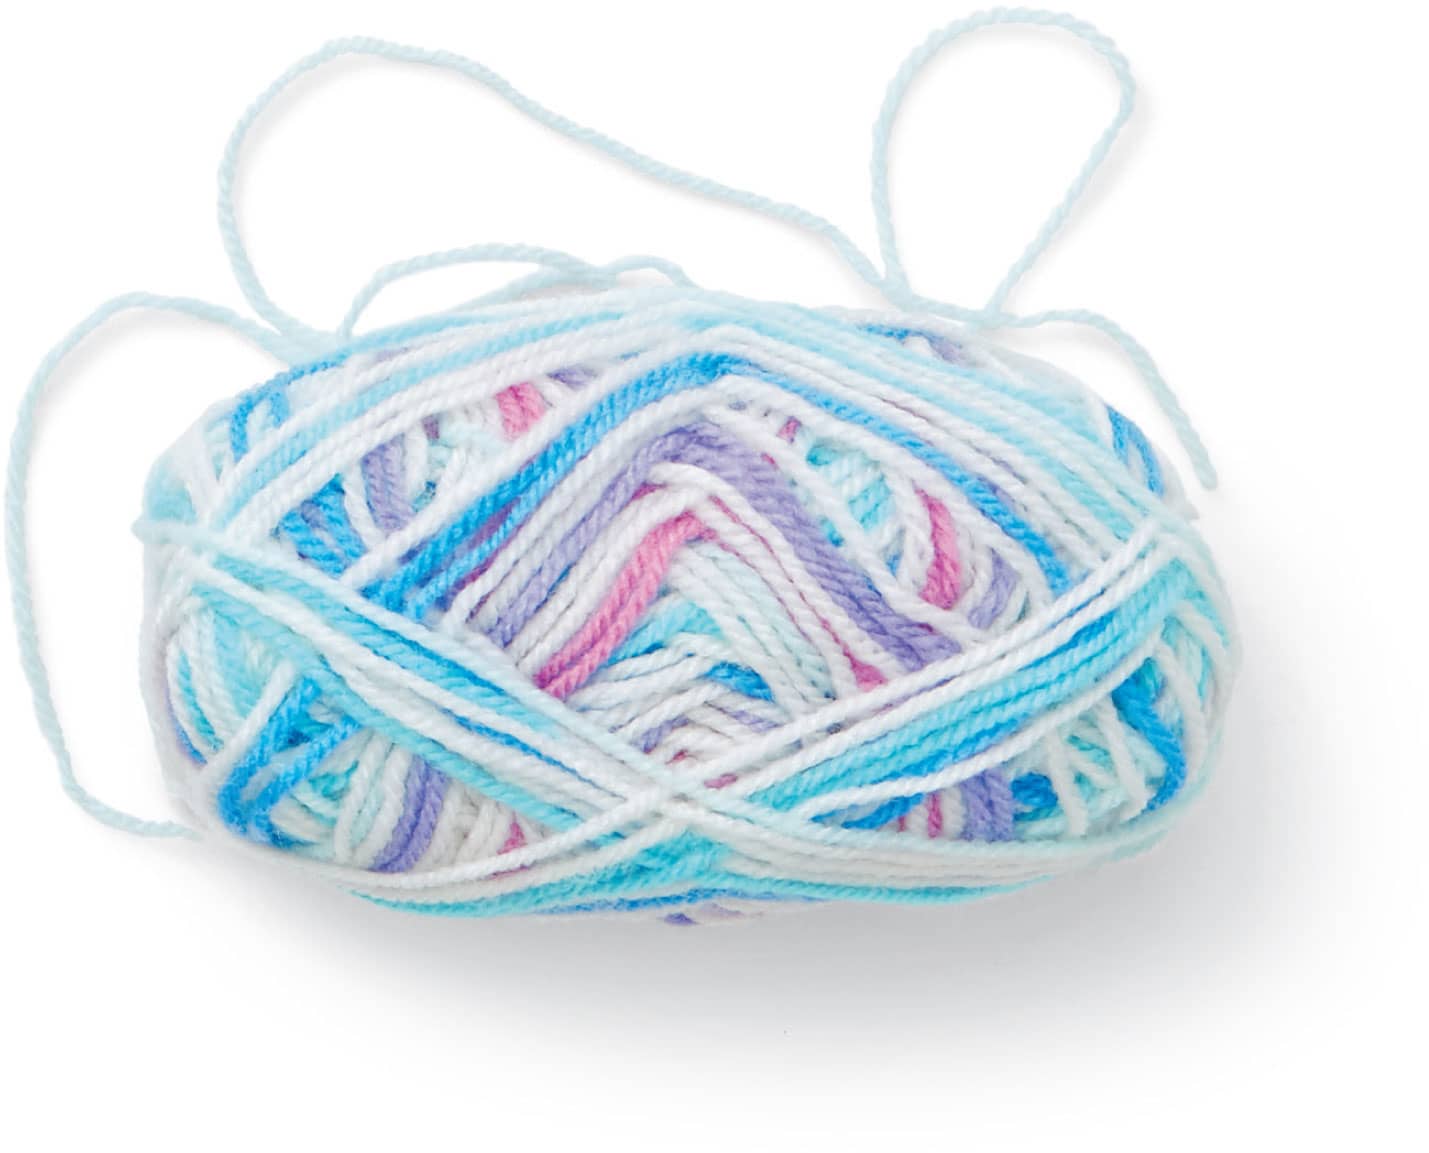

Yarn Art
How about writing your name in 3-D cursive? Bring your name or favorite word (like peace, love, or friendship) to life with this colorful work of art made by bending and twisting pipe cleaners—like writing in air—and decorating the word with yarn. The finished words can be propped up against books on your bookcase, attached to a bulletin board, hung on a wall, or gifted to a friend.

Bend the Pipe Cleaners

1 Practice writing your word on a piece of paper. Make it large enough to trace with pipe cleaners.
2 Twist the pipe cleaners together to make a long string of them—long enough for writing your name or word. You can add more pipe cleaners as you go.

3 Bend the pipe cleaners to form the desired word.
Wrap with Yarn

1 Secure the end of the yarn to the beginning of the pipe cleaner by tying it into a knot.

2 Wrap the word with yarn. You can use multiple colors or one color. It’s up to you! When you reach an intersection where the pipe cleaners cross, wrap the yarn around both wires to secure it in place.
3 When you reach the end of the word, secure the yarn with another knot and trim it.
4 Display your yarn art!


Repoussé Foil Art
Repoussé is a French word (pronounced reh-poo-say) that means “pushed up.” The technique is often used in jewelry making, to give sheets of silver or gold a “pushed up” or raised design.
For this project, we’ll make raised designs with aluminum foil and a glue gun. (I’ll bet you never thought you’d be writing with a glue gun!) Use this technique to make a doorplate for your room, names tags to put on top of gifts, or any other ideas you dream up.

Steps
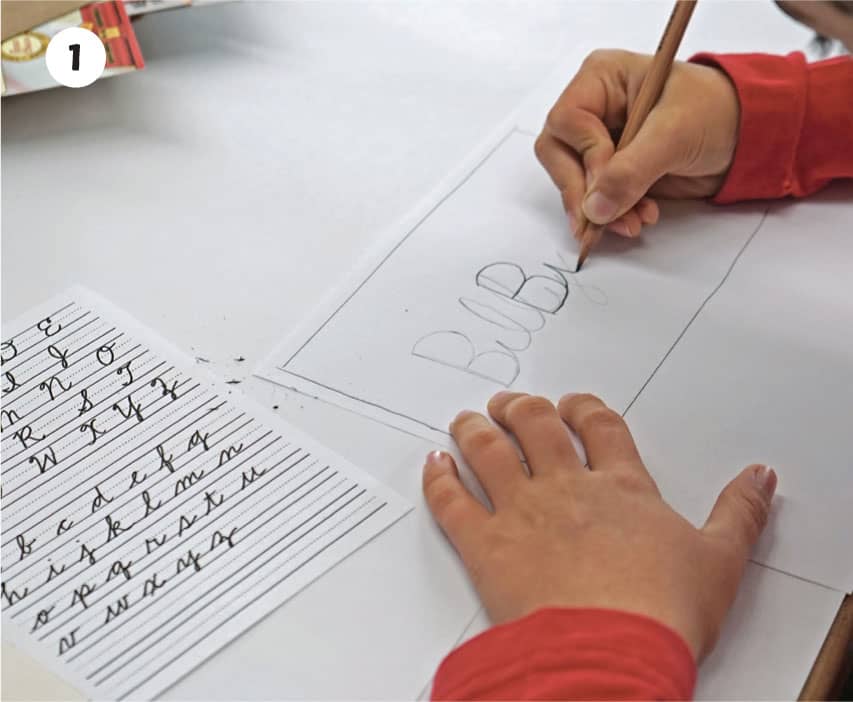
1 Write your name or any words you like in cursive on a page of scratch paper with pencil until you have a design you’re happy with.

2 Copy your cursive design onto the cardboard with pencil. Be sure that you make it big enough that you can easily go over the lines with the glue gun and still see the word. Add a decorative border in pencil, if you like.
3 Plug in the glue gun until the glue is hot.

4 Test your glue-gun writing skills: Trace over the words you wrote on the scratch paper to practice, before using it on the cardboard.

5 Are you ready? Trace over your word on the cardboard. Stop at the end of a letter if you need to take a break while writing.

6 To make your word pop, trace the border around it with more glue.
7 Allow the glue to harden. This should take less than a minute.
8 Cut a piece of foil larger than the cardboard by at least 1 inch (2.5 cm) all the way around.

9 Liberally cover the foil with the glue stick.

10 Place the foil on top of the design. Wrap the foil around the back of the cardboard and glue down the edges with the glue stick.

11 Starting in the middle of the design, gently rub the foil with the cotton swab, careful to not tear the foil.
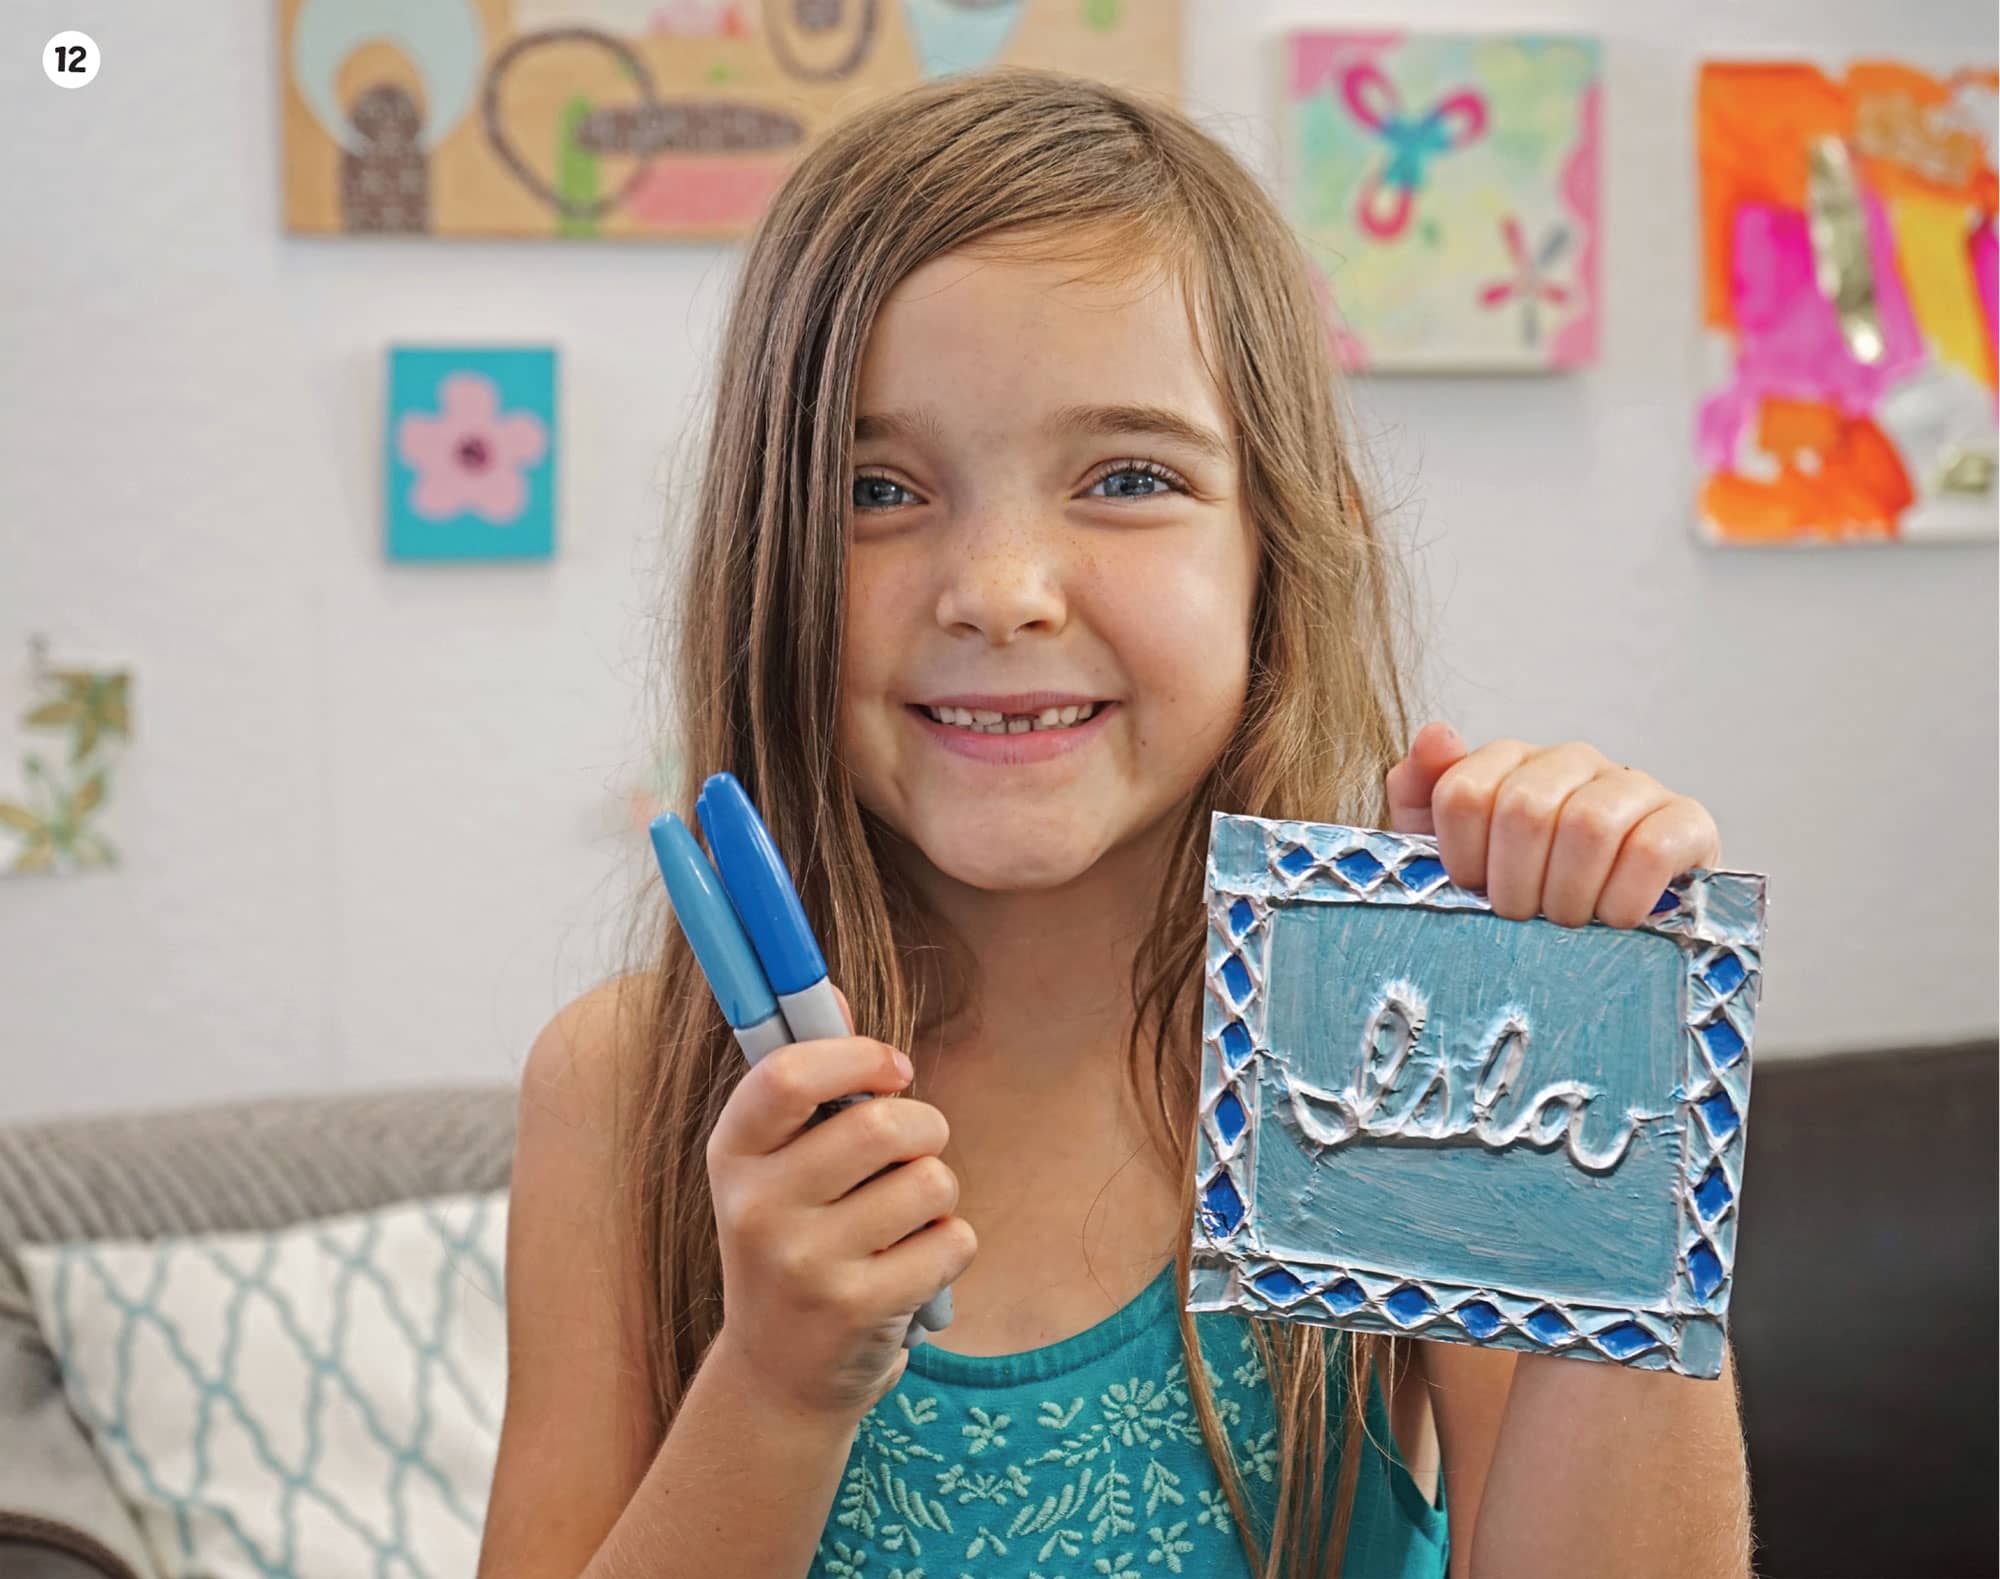
12 Color in the design with permanent marker, leaving the raised areas shiny silver.
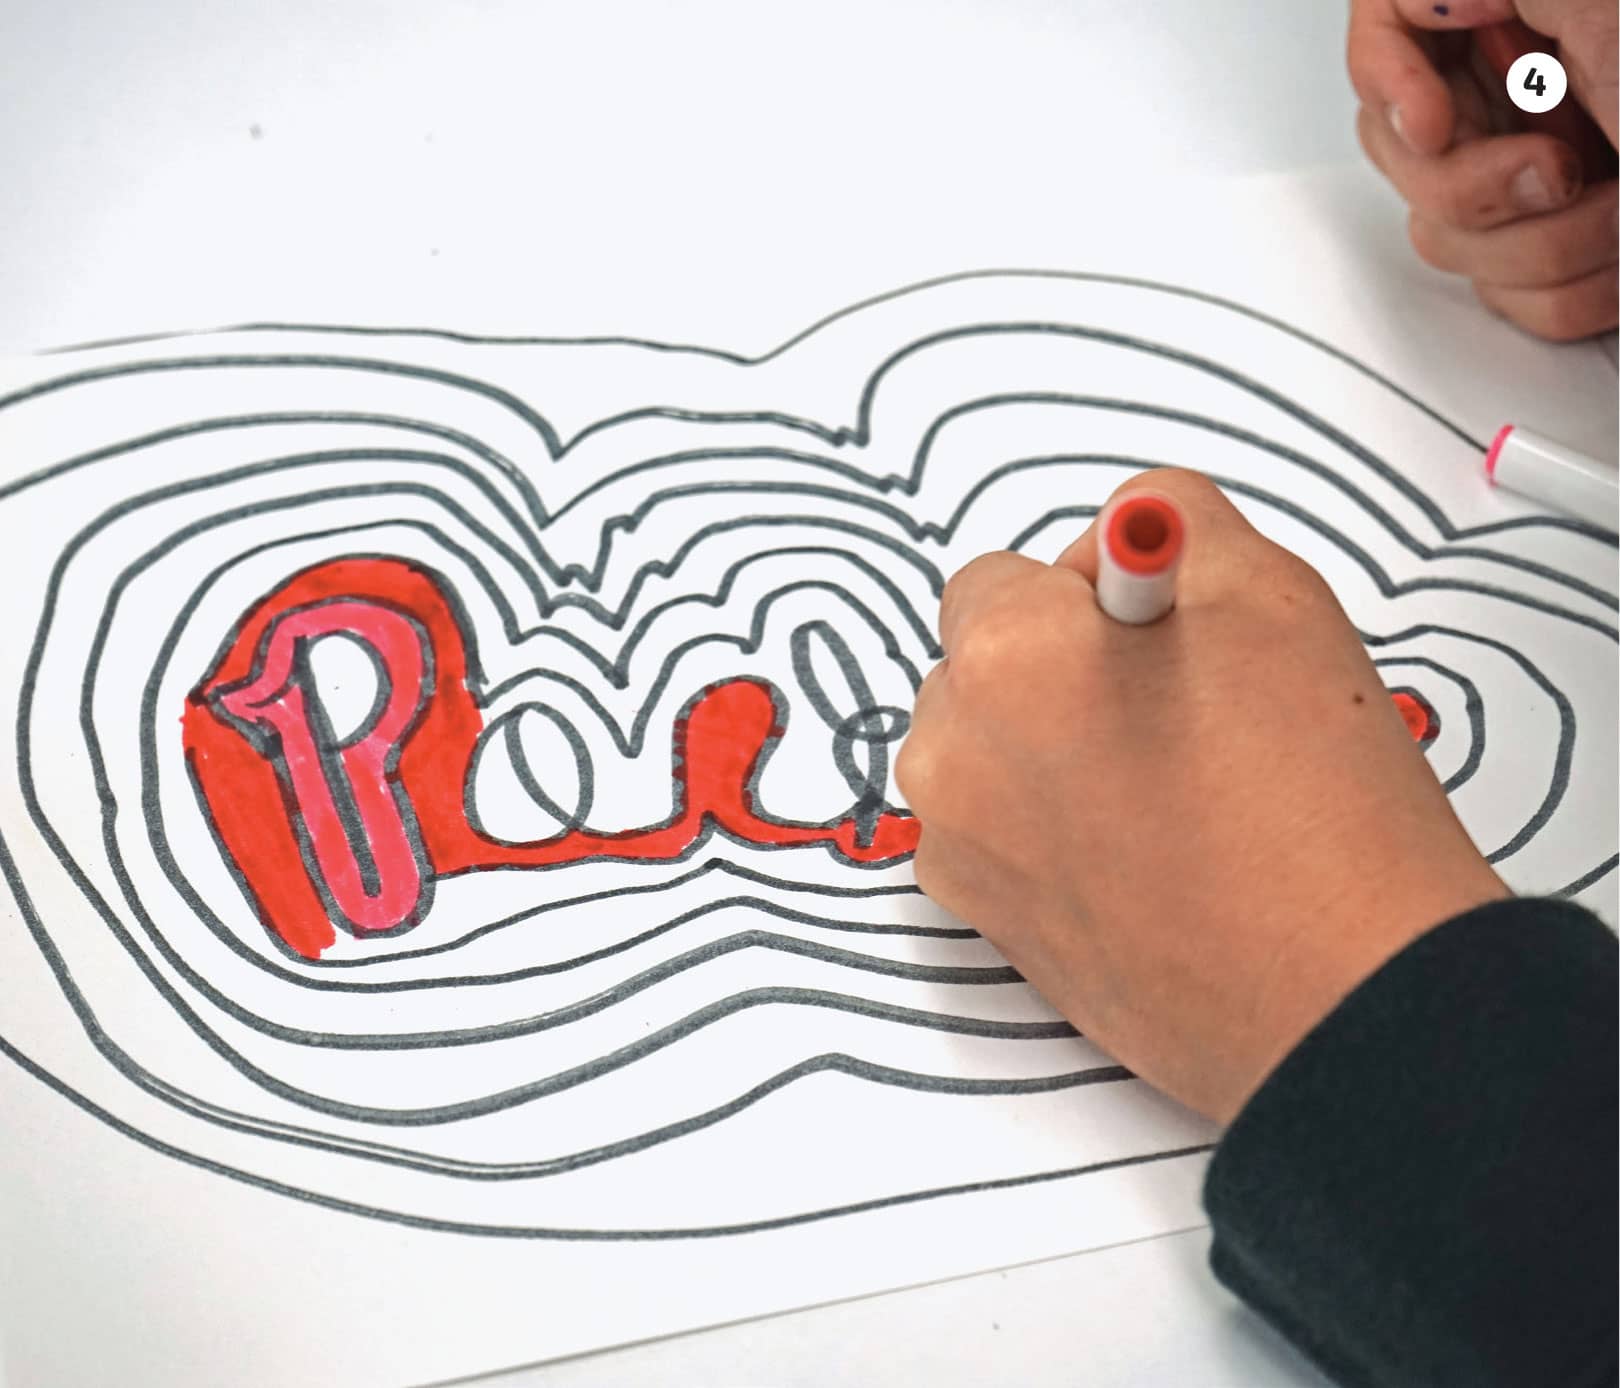
Word Pictures
Do you have museum-quality cursive? Now you can find out! This project is a fun way to turn your name, a friend’s name, or any word you like into an abstract work of art. Use this technique to design the front of a birthday card or make a frame-worthy piece of art.

Steps
1 Write your name or another word on the paper in cursive.

2 Turn the paper and write your word again, crossing over the first name.

3 Continue turning your paper and writing your word, changing the size of your writing and even the style.
4 Keep going until your page is filled with words. Many of them will be unrecognizable. That’s okay!

5 Fill in the closed spaces with marker. You could choose a special color palette such as all warm colors or all shades of blue or go rainbow and use a whole spectrum of colors.
VARIATION
Radiating Words
For another style of modern art, try this—it will show you the shape of your name in script!
1 Write your name in the center of a piece of paper.

2 Draw an outline around your name. Then, draw an outline around the outline.

3 Keep going, adding as many color outlines as you like. When choosing colors, you could decide on a color scheme such as shades of green or rainbow colors.
4 For a completely different look, color in only parts of your art!
These word pictures pop!
Ombré Lettering
Ombré is the French word for “shaded.” It describes the blending of one color into another. In its wet state, watercolor is easy to blend and is pure magic to look at when it’s dry. You can use this fun process just about anywhere that watercolor will stick!
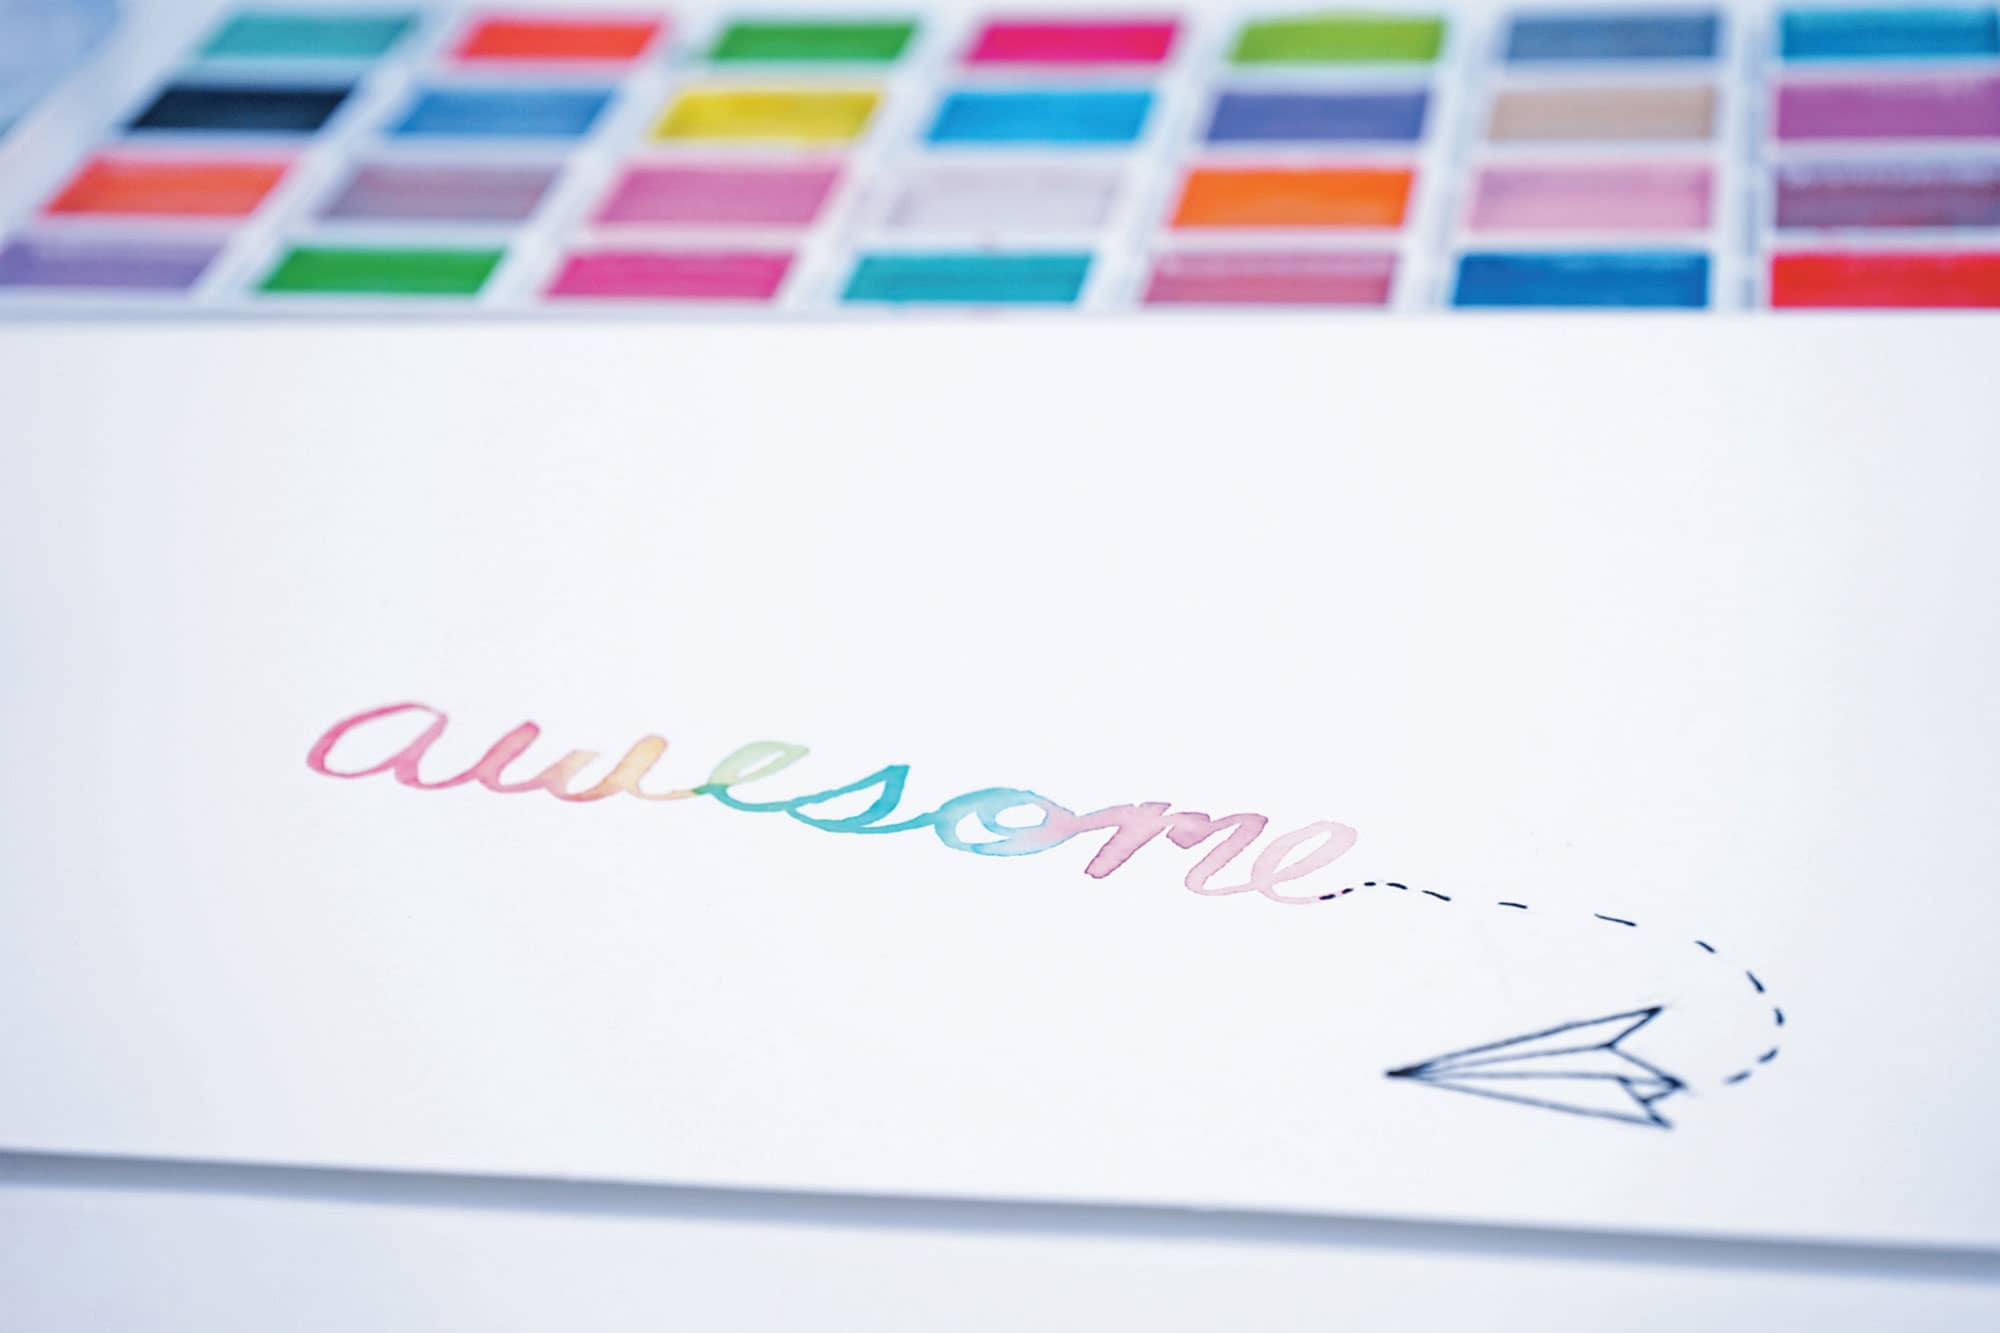
Steps
1 Cut the watercolor paper to the size you want. Tape it to your table to prevent it from slipping while you work.
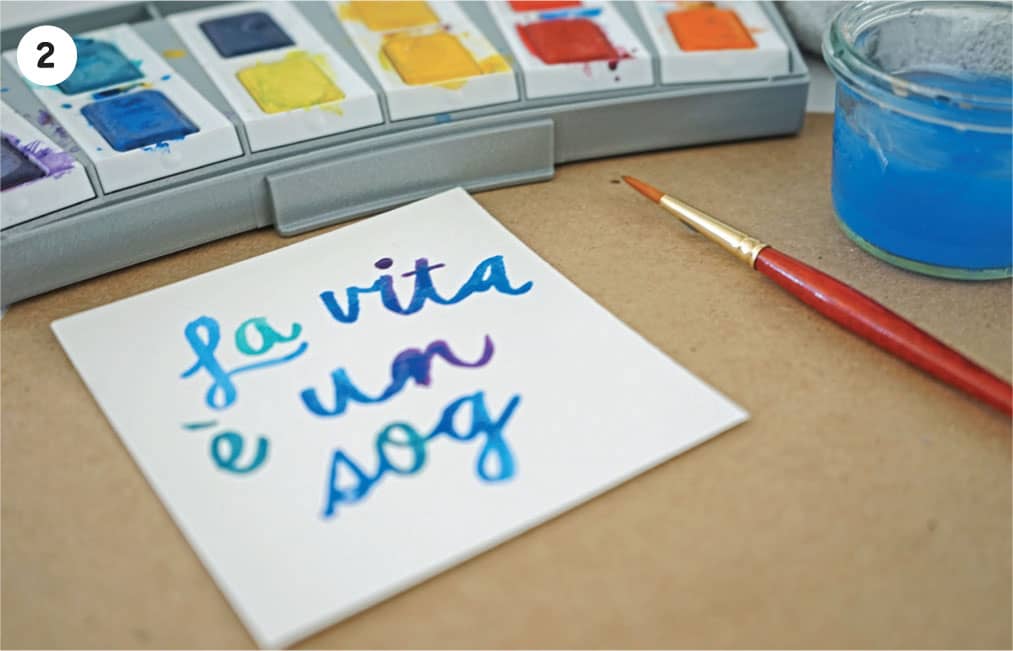
2 Wet the paintbrush and swirl it into your first color. Write the first letter and the beginning of the second on the watercolor paper.
3 Before the paint has a chance to dry, rinse the paintbrush and load it with the next color.

4 Now, continue writing. Overlap the tail of the previous letter so that the colors blend. Make the rest of second letter and part of the third.
5 Continue in this fashion until all the letters are done.
6 Experiment with different kinds of paints to find one that you enjoy most. Some possibilities include liquid watercolors, tempera cakes, and watercolor cakes.