
Chapter 4: Configuring and Customizing HTTPS with Kestrel
HTTPS is on by default and is a first-class feature. On Windows, the certificate that is needed to enable HTTPS is loaded from the Windows certificate store. If you create a project on Linux or Mac, the certificate is loaded from a certificate file.
Even if you want to create a project to run it behind an IIS or an NGINX web server, HTTPS is enabled. Usually, you would manage the certificate on the IIS or NGINX web server in that case. This shouldn't be a problem, however, so don't disable HTTPS in the ASP.NET Core settings.
Managing the certificate within the ASP.NET Core application directly makes sense if you run services behind the firewall, services that are not accessible from the internet; services such as background services for a microservice-based application, or services in a self-hosted ASP.NET Core application.
There are some scenarios where it makes sense to also load the certificate from a file on Windows as well. This could be in an application that you will run on Docker for Windows or Linux. Personally, I like the flexible way of loading the certificate from a file.
Only two topics will be covered in this short chapter:
- Introducing Kestrel
- Setting up Kestrel
The topics in this chapter refer to the Host layer of the ASP.NET Core architecture:

Figure 4.1 – ASP.NET Core architecture
Technical requirements
To follow the descriptions in this chapter, you will need to create an ASP.NET Core MVC application. Open your console, shell, or bash terminal, and change to your working directory. Use the following command to create a new MVC application:
dotnet new mvc -n HttpSample -o HttpSample
Now, open the project in Visual Studio by double-clicking the project file or, in VS Code, by typing the following command in the already open console:
cd HttpSample
code .
All of the code samples in this chapter can be found in the GitHub repository for this book at https://github.com/PacktPublishing/Customizing-ASP.NET-Core-5.0/tree/main/Chapter04.
Introducing Kestrel
Kestrel is a newly implemented HTTP server that is the hosting engine of ASP.NET Core. Every ASP.NET Core application will run on the Kestrel server. Classic ASP.NET applications (running on the .NET Framework) usually run directly on the IIS web server. With ASP.NET Core, Microsoft was inspired by Node.js, which also ships an HTTP server, called Libuv. In the first version of ASP.NET Core, Microsoft also used Libuv, and then added a layer on top called Kestrel. Node.js and ASP.NET Core shared the same HTTP server at that time.
Since the .NET Core framework has grown, and .NET Sockets was implemented on it, Microsoft has built its own HTTP server based on .NET Sockets, and removed Libuv, which was a dependency they don't own or control. Now, Kestrel is a full-featured HTTP server that runs ASP.NET Core applications.
The IIS web server acts as a reverse proxy that forwards the traffic to Kestrel and manages the Kestrel process. On Linux, usually NGINX is used as a reverse proxy for Kestrel.
Setting up Kestrel
As we did in the first two chapters of this book, we need to override the default WebHostBuilder type a little bit to set up Kestrel. With ASP.NET Core 3.0 and higher, it is possible to replace the default Kestrel base configuration with a custom configuration. This means that the Kestrel web server is configured to the host builder:
- You will be able to add and configure Kestrel manually simply by using it. The following code shows what happens when you call the UseKestrel() method on IwebHostBuilder. Let's now see how this fits into the CreateWebHostBuilder method:
public class Program
{
public static void Main(string[] args)
{
CreateWebHostBuilder(args).Build().Run();
}
public static IHostBuilder
CreateHostBuilder(string[] args) =>
Host.CreateDefaultBuilder(args)
.ConfigureWebHostDefaults(webBuilder =>
{
webBuilder
.UseKestrel(options =>
{
})
.UseStartup<Startup>();
}
}
The UseKestrel() method accepts an action to configure the Kestrel web server.
- What we actually need to do is to configure the addresses and ports that the web server is listening on. For the HTTPS port, we also need to configure how the certificate should be loaded:
.UseKestrel(options =>
{
options.Listen(IPAddress.Loopback, 5000);
options.Listen(IPAddress.Loopback, 5001,
listenOptions =>
{
listenOptions.UseHttps("certificate.pfx",
"topsecret");
});
})
In this snippet, we add the addresses and ports to listen on. The second is defined as a secure endpoint configured to use HTTPS. The UseHttps() method is overloaded multiple times, to load certificates from the Windows Certificate Store as well as from files. In this case, we will use a file called certificate.pfx located in the project folder.
- To create a certificate file to just play around with this configuration, open the certificate store and export the development certificate created by Visual Studio. It is located in the current user certificates under the personal certificates:
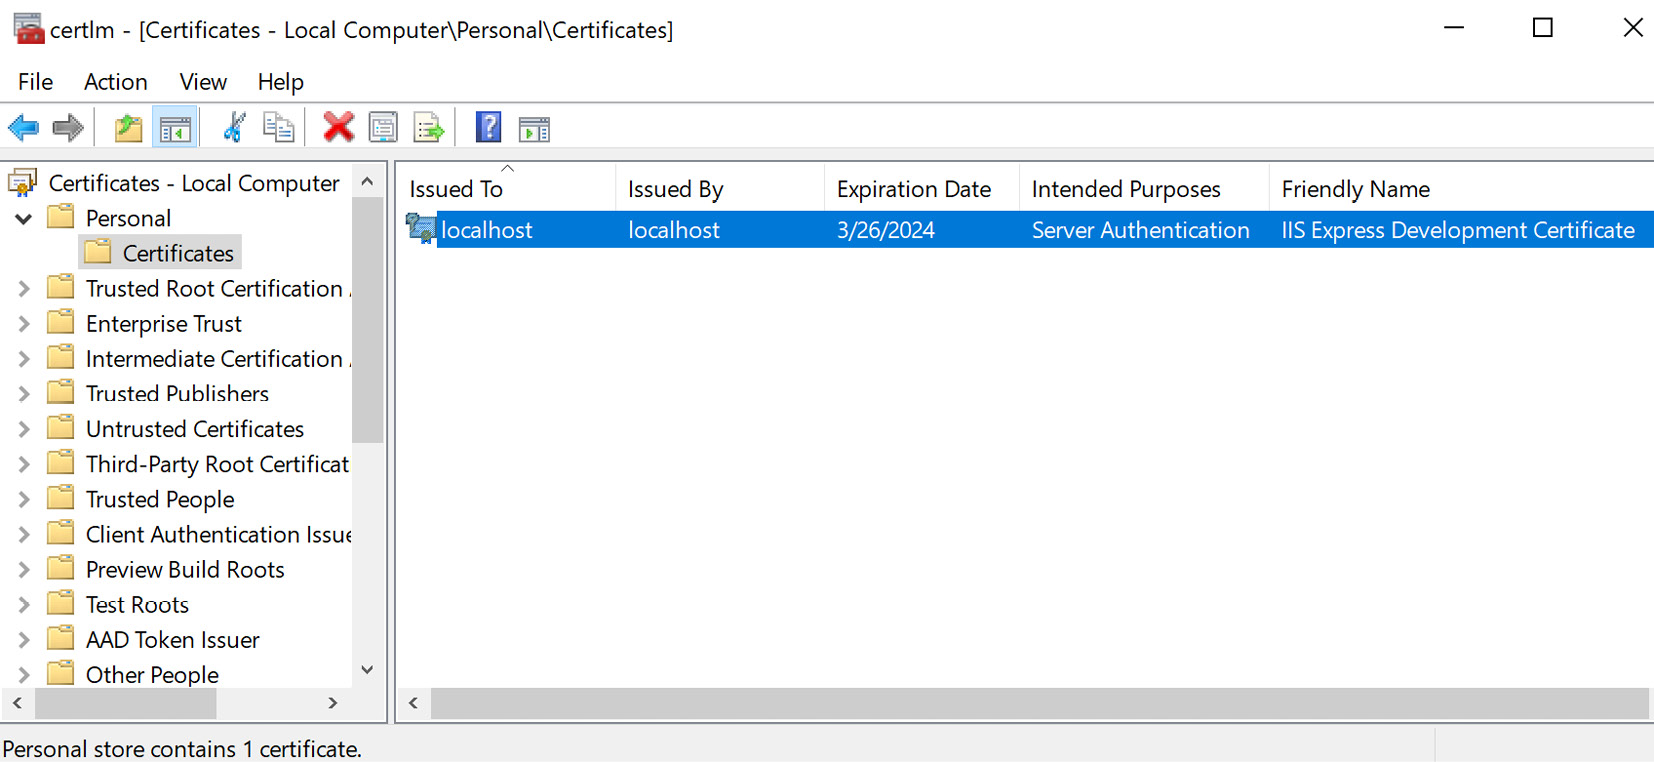
Figure 4.2 – Certificates
Right-click this entry. In the context menu, go to All Tasks and click Export. In the Certificate Export Wizard, choose Yes, export the private key and choose the .PFX format in the next screen. Click Next. Here, you need to set a password. This is the exact same password you will need to use in the code, as seen in the samples. Choose a filename and a location to store the file and press Next. The last screen will show a summary. Press Finish to save the certificate to a file.
For your safety
Use the following line ONLY to play around with this configuration:
listenOptions.UseHttps("certificate.pfx", "topsecret");
The problem is the hardcoded password. Never, ever store a password in a code file that gets pushed to any source code repository. Ensure that you load the password from the configuration API of ASP.NET Core. Use the user secrets on your local development machine and use environment variables on a server. On Azure, use the application settings to store the passwords. Passwords will be hidden on the Azure portal UI if they are marked as passwords.
Summary
This is just a small customization, but it should help if you want to share the code between different platforms, or if you want to run your application on Docker and don't want to worry about certificate stores, and so on.
Usually, if you run your application behind a web server such as IIS or NGINX, you don't need to care about certificates in your ASP.NET Core 5.0 application. However, if you host your application inside another application, on Docker or without an IIS or NGINX, you will need to.
ASP.NET Core 5.0 has a new feature to run tasks in the background inside the application. This topic will be covered in the next chapter.