
Additional options are available from the Sony a68’s Custom Settings, Playback, and Setup menus, which allow you to tailor how your camera operates; view, print, and protect images; and adjust important camera settings, such as monitor brightness or audio volume.
Custom Settings Menu
Custom Settings are adjustments that you generally don’t make during a particular shooting session, but need to tweak more often than those in the Setup menu. The Custom Settings 1 menu is shown in Figure 4.1.

Figure 4.1 Zebra is the first entry in the Custom Settings 1 menu.
The Custom Settings are as follows:
- Zebra
- Focus Magnifier Time
- Grid Line
- Audio Level Display
- Auto Review
- DISP Button
- Peaking Level
- Peaking Color
- Exposure Settings Guide
- Live View Display
- AF Range Control Assist
- AF Area Auto Clear
- AF Area Points
- Flexible Spot Points
- Wide AF Area Display
- Zoom Setting
- Eye-Start AF
- FINDER/MONITOR
- Release w/o Lens
- Priority Setup
- AF w/ shutter
- AEL w/ shutter
- SteadyShot w/ shutter
- e-Front Curtain Shutter
- Superior Auto
- Exposure Compensation Set
- Bracket Order
- Face Registration
- AF Micro Adjust
- Lens Compensation
- Function Menu Settings
- Custom Key Settings
- Dial/Wheel Setup
- Dial/Wheel Ev Compensation
- MOVIE Button
- Dial Wheel Lock
Zebra
Options: OFF, IRE 70, 75, 80, 85, 90, 95, 100, 100+
Default: OFF
My preference: 100
This feature, the first entry in the Custom Settings 1 menu (shown in Figure 4.1), warns you when highlight levels in your image are brighter than a setting you specify in this menu option. It’s somewhat comparable to the flashing “blinkies” that digital cameras have long used during image review to tell us, after the fact, which highlight areas of the image we just took are blown out.
As you learn more about correct exposure (see Chapter 5), you’ll discover that overexposure is your worst enemy. It is often possible to extract information from areas that are underexposed, as those inky shadows are rarely pure black and may still contain some detail that can be coaxed out with image-editing tools. But once your sensor’s photosites have been flooded with photons and register pure white, the detail is lost forever. So, your a68 gives you multiple tools capable of alerting you to overexposure.
Your camera’s live histogram, if you bother to activate and use it, is your first line of defense. When the histogram chart shows that a significant number of pixels are hugging the right side (as I’ll explain in Chapter 5), that’s your warning to reduce exposure. But, unfortunately, a histogram only tells us that some areas are overexposed; it doesn’t let us know where. Perhaps the washed-out area of an image is the white seamless background in a studio shot, which we want portrayed as a featureless area. But if the overexposure involves, say, a human face, it’s a different story.
The a68’s highlight “blinkie” feature, which can display both over and underexposure, is more area-oriented, but provides its information only on picture review. You must retake your picture using a corrected exposure setting. Zebra patterns, on the other hand, are a much more useful tool, because you are given an overexposure alert before you take the picture, and can actually specify exactly how bright too bright is.
The Zebra feature has been a staple of professional video shooting for a long time, as you might guess from the moniker assigned to the unit used to specify brightness: IRE, a measure of video signal level, which stands for Institute of Radio Engineers. The Zebra pattern warnings manifest themselves as a real-time display of diagonal stripes in overexposed areas, as seen in Figure 4.2. You can immediately adjust exposure to correct the problem—if it applies to your shot.

Figure 4.2 The Zebra stripes in this example show that the white seamless background behind the model is “overexposed,” and, in this case, is not a problem.
When you want to use Zebra pattern warnings, access this menu entry and specify an IRE value from 70 to 100, plus 100+. Once you’ve been notified, you can adjust your exposure settings (using, say, exposure compensation) to reduce the brightness of the highlights, as I’ll describe in Chapter 5.
So, exactly how bright is too bright? A value of 100 IRE indicates pure white, so any Zebra pattern visible when using this setting (or 100+) indicates that your image is extremely overexposed. Any details in the highlights are gone, and cannot be retrieved. Settings from 70 to 90 can be used to make sure facial tones are not overexposed. As a general rule of thumb, Caucasian skin generally falls in the 80 IRE range, with darker skin tones registering as low as 70, and very fair skin or lighter areas of your subject edging closer to 90 IRE. Once you’ve decided the approximate range of tones that you want to make sure do not blow out, you can set the a68’s Zebra pattern sensitivity appropriately and receive the flashing striped warning on the LCD of your camera. The pattern does not appear in your final image (nor in previews using an HDMI-connected external monitor), of course—it’s just an aid to keep you from blowing it, so to speak.
Focus Magnifier Time
Options: 2 sec., 5 sec., No Limit
Default: 2 sec.
My preference: 2 sec.
This entry can be used to specify the length of time that the feature will magnify the image during focusing using the lens focusing ring. If you find that it takes you longer than two seconds to focus, you can change the time to five seconds, or to No Limit. If you choose No Limit, focus magnification is canceled until you press the shutter release halfway or all the way.
Grid Line
Options: Rule of 3rds Grid, Square Grid, Diag.+Square Grid, Off
Default: Off
My preference: Off
This feature allows you to activate one of three optional grids, so it’s superimposed on the LCD monitor or EVF display. The grid pattern can help you with composition while you are shooting. I sometimes use the Rule of Thirds grid to help with composition, but you might want to activate another option when composing images of scenes that include diagonal, horizontal, and perpendicular lines. (See Figure 4.3 for the LCD version.)

Figure 4.3 Grid lines can help you align your images on the display.
Audio Level Display
Options: On, Off
Default: Off
My preference: On
When this item is set to On, the Sony a68 displays a moderately helpful pair of scales that show the relative volume level of the sound being recorded. Unless you have an add-on device (such as a video recorder connected to the camera’s HDMI port) with a headphone jack (as the a68 has no headphone connector of its own), you really can’t monitor the quality of your sound, but this feature, at least, gives you a feeling for whether the sound level is too low, too high, or just about right.
Auto Review
Options: Off, 2 sec., 5 sec., 10 sec.
Default: 2 sec.
My preference: 5 sec.
When this item is set to an option other than Off, the Sony a68 can display an image on the LCD or viewfinder for your review immediately after the photo is taken. (When you shoot a continuous or bracketed series of images, only the last picture that’s been recorded will be shown.) During this display, you can delete a disappointing shot by pressing the Delete button, or cancel picture review by tapping the shutter release or performing another function. (You’ll never be prevented from taking another picture because you were reviewing images.) This option can be used to specify whether the review image appears on the LCD for 2, 5, or 10 seconds, or not at all.
Depending on how you’re working, you might want a brief display or you might prefer to have time for a more leisurely examination (when you’re carefully checking compositions). Other times, you might not want to have the review image displayed at all, such as when you’re taking photos in a darkened theater or concert venue, and the constant flashing of images might be distracting to others. Turning off picture review or keeping the duration short also saves battery power. You can always review the last picture you took at any time by pressing the Playback button.
For most of what I shoot, 2 seconds is too short, and 5 seconds is about right. If you select 10 seconds as your default value, remember that you can stop the review display and return to shooting mode at any time by tapping the shutter release button.
DISP Button
Options (Monitor): Graphic Display, Display All Info., No Disp. Info., Histogram, For Viewfinder
Options (Viewfinder): Graphic Display, Display All Info., No Disp. Info., Histogram
Default: Graphic Display, Display All Info., No Disp. Info.
My preference: Deactivate Graphic Display Only
Use this item, the first on the Custom Settings 2 page (see Figure 4.4), to specify which of the available display options will—and will not—be available in shooting mode when you use the LCD or viewfinder and press the DISP button to cycle through the various displays. All of the options except for Histogram are on by default. If you want to add the Histogram as one of the display options, you can do so in this menu item. Scroll to Histogram and press the center button to add a checkmark beside this option.
Choose from Monitor or Viewfinder and mark or unmark the screens you want to be able to view (see Figure 4.5). The Monitor selection includes a For Viewfinder option that displays a text/graphic display of your current settings.
You can use this menu item to deselect one or more of the display options so it/they will never appear on the LCD when your press the DISP button. To change which screens are shown, scroll to an option and press the center button to remove the checkmark beside it. Naturally, at least one display option must remain selected. If you de-select all of them, the camera will warn you about this and it will not return to shooting mode until you add a checkmark to one of the options. If you turn the a68 off while none are selected, the camera will interpret this as a Cancel command and return to your most recent display settings. Here’s a recap of the available display options for the monitor.

Figure 4.4 The Custom Settings 2 menu.

Figure 4.5 Select which display screens are shown on the LCD monitor (left) or viewfinder (right).
All five of the display screen options were illustrated in Chapter 2.
- Graphic Display. When selected, this display shows basic shooting information, plus a graphic display of shutter speed and aperture (except when Sweep Panorama is the mode in use). If you learn how to interpret it, you’ll note that it indicates that a fast shutter speed will freeze motion, and that a small aperture (large f/number) will provide a great range of acceptably sharp focus and other information of this type. It’s a useful screen for beginners, but once you become adept with your a68, you’ll probably want to deactivate it.
- Display All Info. The default screen when you first turn the camera on, this option displays many items of data about current settings for a complete overview of recording information.
- No Disp. Info. In spite of its name, this display option provides the basic shooting information as to settings, in a conventional size.
- Histogram. Activate this option if you want to be able to view a live luminance histogram to assist you in evaluating the exposure before taking a still photo, a feature to be discussed in Chapter 5. The basic shooting data will appear in addition to the histogram. The histogram cannot be displayed when using Movie mode.
- For Viewfinder. This display can be shown only on the LCD monitor. When visible, you can press the Fn button to produce the Quick Navi screen, which I explained in Chapter 2.
Peaking Level
Options: High, Mid, Low, Off
Default: Off
My preference: High
This is a useful manual focusing aid (available only when focusing in Manual and Direct Manual modes) that’s difficult to describe and to illustrate. You’re going to have to try this feature for yourself to see exactly what it does. Focus peaking is a technique that outlines the area in sharpest focus with a color; as discussed below, that can be red, white, or yellow. The colored area shows you at a glance the edges of what will be very sharp if you take the photo at that moment. If you’re not satisfied, simply change the focused distance (with manual focus). As the focus gets closer to ideal for a specific part of the image, the color outline develops around hard edges that are in focus. You can choose how much peaking is applied (High, Medium, and Low), or turn the feature off. I use this feature a lot, and like to set the intensity on High.
Peaking Color
Options: White, Red, Yellow
Default: White
My preference: Yellow
Peaking Color allows you to specify which color is used to indicate peaking when you use manual focus. White is the default value, but if that color doesn’t provide enough contrast with a similarly hued subject (which I find to be the case frequently), you can switch to a more contrasting color, such as red or yellow. (See Figure 4.6.)

Figure 4.6 You can choose any of three colors for peaking color (for manual focus), but only if you have activated the Peaking Level item.
Exposure Settings Guide
Options: On, Off
Default: On
My preference: Off
This mystery feature (Sony’s manual provides nary a clue as to what sort of “guide” appears when it’s enabled) is of most use to those with poor eyesight, but it is a convenience for all. All it does is show a scrolling scale on the LCD or viewfinder with the current shutter speed or aperture highlighted in orange. It more or less duplicates the display of both that already appears on the bottom line of the screen, but in a larger font and with the next/previous setting flanking the current value. In Aperture Priority, the scale shows f/stops. In Shutter Priority, you see shutter speeds. The display can be somewhat distracting, and interferes with your view of your subject. However, when using Manual exposure, the down key alternates between f/stop and shutter speed display. In that case, I like to leave this feature switched on, as the display is a reminder of which parameter I’m fooling with at the moment.
Live View Display
Options: Setting Effect ON, Setting Effect OFF
Default: Setting Effect ON
My preference: Setting Effect ON
Here’s another poorly named feature. The a68 is always in “live view” mode, showing you what the sensor sees. Sony uses the term in a more precise sense, here: when activated (the default setting), the live preview display in the EVF or the LCD reflects the exact effects of any camera features that you’re using to modify the view, such as exposure compensation and white balance. This allows for an accurate evaluation of what the photo will look like and enables you to determine whether the current settings will provide the effects you want.
It’s virtually mandatory to turn this feature OFF when using studio flash, because the camera has no idea that you’re using flash illumination and assumes the picture will be taken using ambient light. So, at the typical flash sync speed of 1/160th second, a small f/stop appropriate for high-intensity flash illumination, and a low ISO sensitivity setting, the camera thinks you are seriously underexposing the image, and the screen may look very dark, or even completely black. With Setting Effect OFF, the screen remains bright. Unfortunately, this setting has caused more than a few minutes of head-scratching among new users who switch to Manual exposure mode and find themselves with a completely black (or utterly white) screen. The black screen, especially, may fool you into thinking your camera has malfunctioned.
On the other hand, the On option can be especially helpful when you’re using any of the Picture Effects, because you can preview the exact rendition that the selected effect and its overrides will provide. It’s also very useful when you’re setting some exposure compensation, as you can visually determine how much lighter or darker each adjustment makes the image. And when you’re trying to achieve correct color balance, it’s useful to be able to preview the effect of your white balance setting.
AF Range Control Assist
Options: Off, On
Default: Off
My preference: On
This setting does nothing more than turn the focus points yellow when your subject is within the range during the AF Range Control Function. At this point, you’re probably wondering what the AF Range Control Function is. It’s one of several Sony “secret” functions (another being Eye Autofocus), and lets you tell the a68 the specified minimum and maximum distance that should be used when calculating autofocus; subjects closer than or farther than the range you define will be ignored.
As a secret function, AF Range Control isn’t activated as the default function of any button, and, in fact, can’t be used at all unless you take the time to assign a button yourself in order to enable that function. This particular menu entry is the only vestigial reflection of the function’s existence.
Using AF Range Control
Before the AF Range Control Assist can be used, you must turn on AF Range Control. In my case, I assigned the function to the C2 button, located just southwest of the Fn button on the back of the camera. Here’s how to define a button (you’ll find a more complete discussion of defining custom keys later in this chapter):
- Access Custom Key Settings. Visit the Custom Key Settings entry in the Custom Settings 6 menu.
- Select button to define. Scroll down the list of definable buttons and select the one you want to use. Press the center button.
- Select function. A list of available functions appears. Scroll down to AF Range Control and press the center button.
- Exit. Press the MENU button to exit Custom Key setup.
Once you’ve specified a button to summon the AF Range Control function, to use it all you need to do is follow these steps:
- Autofocus on your subject. The AF Range Control feature does not work in Manual focus mode or Movie mode.
- Press the defined button. A screen like the one shown in Figure 4.7 appears, with a scale at the bottom.
- Evaluate current AF plane. The scale has a flower icon at its left end, indicating the closest possible focusing distance; a mountain at the other end of the scale represents the most distant focus position. A white triangle shows the current autofocus plane, and will be used to set the nearest/farthest points of your range.
- Set near point. Use the control wheel to set the near point of the focus range, to the left of the white triangle.
- Set far point. Use the control dial to set the farthest point of the focus range, located to the right of the white triangle. The orange area in the scale shows the current autofocusing area.
- Monitor changes. As you set the focusing range, the focusing points that represent the area that will be used to autofocus appear. Use the yellow highlighted focus points as a guideline for setting your range.
- Exit range setting. Press the defined button a second time, or tap the shutter release button. AF Range Control is now activated. The orange range bar turns white, and the yellow focus points continue to illuminate in yellow.
- Reset when finished. The easiest way to turn off your current AF range is to simply power down the camera and then turn it on again. Note: If, for some reason, you don’t want those yellow-illuminated focus points, you can turn off their display using this menu entry.

Figure 4.7 Setting autofocus range.
AF Area Auto Clear
Options: Off, On
Default: Off
My preference: Off
When activated, this setting declutters your viewing screen by turning off the green AF points a second or two after the a68 achieves autofocus. If you find the illuminated points distracting, set this option to On; if you’d rather the points were illuminated as long as focus is achieved, set to Off. I like the reassurance that my subject is still sharply focused, so I disable this setting most of the time. This is the first entry in the Custom Settings 3 menu. (See Figure 4.8.)
AF Area Points
Options: Auto, 61 Points
Default: Auto
My preference: Auto
This setting allows you to deactivate the outermost focus points within the a68’s 79-point focus grid when using the AF Area: Wide focus option, leaving “only” 61 points to collect focus information. Of course, most of the time you selected Wide because you knew your main subject was going to reside in an unpredictable position in the frame, so Wide gave you a better chance to lock in focus on that subject than Zone or Spot modes. Even so, there are cases when you want to narrow the search for perfect focus down just a tad.
Figure 4.9 shows an example of such a situation at a basketball game. You’re stationed along the baseline, and the players are usually clustered around the area under the hoop, with a few located farther out. The top image shows the positions of the focus points using the full 71 points. The player on the left is too far away to attract the attention of the focus system, but the other player on the right is close enough to, possibly, cause problems.

Figure 4.8 The Custom Settings 3 menu.
With the AF area points set to 61, both players are more or less out of the picture (figuratively), and the autofocus system can concentrate on the most important action.
Most of the time you’ll want to use Auto when working with Wide Area AF, and let the a68 decide which set of area points to use. But, as you gain experience you may find a few instances where you’ll find the 61-point option handy.

Figure 4.9 All 79 focus points can be active in Auto mode (top); select 61 Points instead, and the 18 points along the periphery are disabled (bottom).
Flexible Spot Points
Options: All, 15 Points
Default: All
My preference: All
Spot focus allows you to choose which focus point to use exclusively. When you select All in this menu entry, it’s possible to use the control wheel to locate the spot focus point at any of the 79 available points. That can make for a lot of finger action, which might not be practical if you want to use spot focus with subjects that may roam around the frame.
This entry lets you switch from 79 AF points to just 15 spaced within roughly the same area of the frame. You can combine either 79 point or 15 point modes with Expanded Flexible Spot option for additional flexibility. There are enough permutations involved in choosing the correct focus point that I’m going to save the in-depth discussion (and illustrations of the locations of the focus points) for Chapter 6.
Wide AF Area Display
Options: On, Off
Default: On
My preference: On
The focus points are illuminated in green singly or in combination when you are selecting an AF point, or the a68 is choosing one for you. The rest of the time they are displayed as small black rectangles. They aren’t really distracting once you’ve become accustomed to them. But, you can set this entry to Off, rendering the focus points invisible when not being actively used for focus, which can be helpful when you want to frame your image with a decluttered screen.
Zoom Setting
Options: Optical Zoom Only, Clear Image Zoom, Digital Zoom
Default: Optical Zoom Only
My preference: Optical Zoom Only
As I mentioned in Chapter 3 under the Camera Settings 1 menu’s Zoom entry, the a68 has three different types of zoom settings: Optical Zoom, Clear Image Zoom, and Digital Zoom, and you can choose any one of them. The last two are not available when using Sweep Panorama, Smile Shutter, or when Image Quality is set to RAW or RAW & JPEG; Metering Mode is locked at Multi, and Focus Area setting is disabled (the focus area frame in the zoomed image is shown by a dotted line). Descriptions of each type of zoom follow.
Optical Zoom Only
This is what you get when you select Optical Zoom Only. Simply turn the zoom ring on the lens. Your zooming is limited to the focal length range(s) provided by the lens mounted on your camera. With the 18-55mm kit lens, you’ll get only the field of view offered by the lens, and nothing more. If you have a fixed focal length lens mounted, you get no zooming at all.
This mode provides the best image quality, because the full 24 megapixels of the a68’s sensor are used (when Large Image Size is selected in the Camera 1 menu) to record the photo. The magnification range is determined by the lens itself. For example, the 18-55mm kit lens allows a roughly 1X to 3X zoom range.
You should always use the optical zoom to magnify your image first, before resorting to one of the “fake” zoom options, because optical zoom produces the least amount of image degradation. Indeed, with a good-quality zoom lens, you may notice little, if any, loss in sharpness as you zoom in and out. Note that if you have selected Optical Zoom Only and set Image Size to Medium or Small, the Smart Zoom version (described next) is available.
Clear Image Zoom
This digital zoom mode varies its magnification effect depending on the Image Size you select in the Camera Settings 1 menu:
Large Image Size. When Clear Image Zoom is activated, rotate the zoom ring on any A-mount zoom lens you have mounted. The a68 will use image processing to magnify the image, if required. A scale on the LCD is divided into two parts. The left-hand portion shows the amount of optical zoom applied using the actual zooming characteristics of a zoom lens; the focal length (say, 18-55mm) appears under the scale. When the indicator crosses the center portion of the scale, the focal length readout freezes at the maximum focal length of the lens (say, 50mm), and Clear Image Zoom kicks in, and the magnifying glass icon has a “C” next to it to show that additional magnification is being applied using image processing.
Medium/Small Image Size. However, if you choose Medium or Small Image Size, the zooming begins as before with the left-hand portion of the scale showing the optical zoom range. Once the indicator crosses the center point, the camera will first simply crop the image (without any processing) from 1X to 1.5X (Medium) or 1.1X to 2.1X (Small). Sony calls this Smart Zoom, and the magnifying glass shows an “S” label. If you continue zooming, then image processing will be used to provide additional zooming from 1.4X to 2.8X (Medium) or 2X to 4X (Small). The magnifying glass icon will then display a “C” to show the processing mode being used.
Clear Image Zoom provides a simulated zoom effect that operates even if you don’t have a zoom lens! However, you could simply shoot Large JPEGs and later crop them with image-editing software in your computer to make the subject larger in the frame. This automated feature is useful if you do not own a sufficiently long telephoto lens, since it’s possible to make a subject larger in the frame.
Digital Zoom
With this variation, the camera gives you even higher magnifications, up to 4X in Large JPEG photos creating more impressive simulated zooming effects to fill the frame with a distant subject. However, the higher the level of digital zoom that you use, the greater the loss of image quality. That’s because the camera crops the photo to simulate the use of a longer lens, discarding millions of pixels; the processor then uses interpolation (adding pixels) to restore the image to its original full size. That works well with Clear Image Zoom but above 2X magnification, the camera’s processor no longer uses the most sophisticated technology (which Sony calls Bi-pixel Super Resolution), so the image quality suffers; it gets worse at each higher magnification level.
That’s why I recommend leaving the Digital Zoom item at Off and using only Clear Image Zoom unless you absolutely must have greater magnification of a distant subject. If you often need telephoto focal lengths, you might want to save up and add such a long lens to your arsenal.
Large Image Size. When Large is selected, Clear Image Zoom magnification, a high-quality image processing algorithm, will be used from 1.1X to 2X, while from 2.1X to 4X, the reduced image-quality process, Digital Zoom, will be activated.
Medium Image Size. Select Medium resolution, and the highest quality Smart Zoom trimming will be applied from 1.1X to 1.4X, and Clear Image Zoom from 1.5X to 2.9X, and Digital Zoom from 3X to 5.7X.
Small Image Size. Select Small, and Smart Zoom will be applied from 1.1X to 2.0X, and Clear Image Zoom will be applied from 2.1X to 3.8 X, and Digital Zoom from 4.1X to 8.0X.
Eye-Start AF
Options: On, Off
Default: Off
My preference: Off
This setting is the first in the Custom Settings 4 menu. (See Figure 4.10.) It is Off by default, but when turned On, the a68 will start autofocusing the instant you move the viewfinder to your eye. The display on the LCD vanishes, the camera adjusts autofocus, and, if you’re using any operating mode other than Manual, it sets the shutter speed and/or aperture so you’re ready to take the shot. You don’t even need to touch the shutter release button. Of course, it’s not magic. There is a sensor just above the viewfinder window that detects when your face (or anything else) approaches the finder.
This is useful because it increases the odds of capturing a fleeting moment. On the other hand, some people find this feature annoying. When it’s On, the camera will begin to autofocus every time a stray hand or other object passes near the viewfinder. Also, if you’re wearing the camera around your neck, you may hear a continuous clicking as the camera rubs against your body, triggering the focusing mechanism. When this happens frequently, it will consume a significant amount of battery power.

Figure 4.10 The Custom Settings 4 menu.
After experimenting with this feature, you may decide to turn Eye-Start AF off. After you do so, the a68 reverts to its boring old behavior of not initiating focus until you partially depress the shutter button. Naturally, the electronic viewfinder will still activate when your eye (or anything else) is near the sensors, but you won’t get autofocus until you’re certain you want AF to start. Note that this feature is disabled when you use Center Lock-On AF mode.
FINDER/MONITOR
Options: Auto, Viewfinder, Monitor
Default: Auto
My preference: Auto
This item is somewhat similar to the Eye-Start AF item, but it controls only whether the camera turns off the LCD and switches the view to the viewfinder when your eye comes near the EVF. With the default setting of Auto, the screen goes blank and the viewfinder activates when your eye (or any other object) approaches the Eye-Start sensors.
Switch to the Viewfinder or Monitor and the Eye-Start sensors are disabled. The display is always sent to the viewing device you selected, and the other one is turned off. You might want to use the Monitor option if you are doing work involving critical focusing using the LCD, and as you examine the screen closely, your face will frequently be close to the back of the camera where the Eye-Start sensor might detect it. Or, perhaps, you are shooting at a concert or other venue where the bright LCD can be distracting to others. Choose Viewfinder, and the shooting preview, menus, photos displayed for review during playback, and so forth will be shown only in the EVF.
Release w/o Lens
Options: Disable, Enable
Default: Disable
My preference: Enable
By default, the a68 will refuse to try to take a photo when a lens is not mounted on the camera; this is a logical setting. If you chose Enable, however, the a68 will activate its shutter when you depress the shutter release button even when no lens is mounted. This option will be useful if you attach the camera to some accessory such as a telescope or third-party optic that’s not recognized as a lens (perhaps a Lensbaby distortion lens). I happen to use a few Nikon lenses with my a68 with an adapter, so I leave this option set to Enable.
Priority Setup
Options: AF, Release, Balanced Emphasis
Default: Balanced Emphasis
My preference: Release
Lets you specify whether the camera waits to actually take the picture until it has achieved sharp focus (when using an autofocus mode, not Manual focus mode); whether it takes the picture immediately, even if sharp focus is not guaranteed; or using a balanced approach somewhere between the two. For most kinds of candid photography, sports, or photojournalism, most of us would rather get the shot rather than lose a fleeting moment, and so Release is often your best choice. If you have a little more time, and the shot won’t be affected by a short delay (perhaps half a second, on average), Balanced Emphasis, the default, will do the job. If you’re looking for the best sharpness your 24-megapixel shooter can provide, AF might be your best option. The three choices are as follows:
- AF. The shutter is not activated until sharp focus is achieved. This is best for subjects that are not moving rapidly. In Continuous Focus mode, the a68 will continue to track your subjects’ movement, but the camera won’t take a picture until focus is locked in. An indicator in the viewing screen will flash green until focus can be achieved. You might miss a few shots, but you will have fewer out-of-focus images.
- Release. When this option is selected, the shutter is activated when the release button is pushed down all the way, even if sharp focus has not yet been achieved. Because Continuous Focus focuses and refocuses constantly when autofocus is active, you may find that an image is not quite in sharpest focus. Use this option when taking a picture is more important than absolute best focus, such as fast action or photojournalism applications. (You don’t want to miss that record-setting home run, or the protestor’s pie smashing into the governor’s face.) Using this setting doesn’t mean that your image won’t be sharply focused; it just means that you’ll get a picture even if autofocusing isn’t quite complete. If you’ve been poised with the shutter release pressed halfway, the camera probably has been tracking the focus of your image.
- Balanced Emphasis. As I said, the shutter is released when the button is pressed, with a slight pause if autofocus has not yet been achieved. You would not want to use this setting if the highest possible continuous shooting rates are important to you.
AF w/ Shutter
Options: On, Off
Default: On
My preference: On
As you know, a gentle touch on the shutter release button causes the camera to begin focusing when using an autofocus mode. There may be some situations in which you prefer that the camera not re-focus every time you touch the shutter release button. Let’s say you are taking multiple pictures in a laboratory or studio with the subject at the same distance; you have no need to refocus constantly, and there is no need to put an extra burden on the autofocus mechanism and on the battery. But, you don’t want to switch to manual focus. Instead, you can set AF w/Shutter to Off. From then on, the camera will never begin to autofocus, or to change the focus. You can still initiate autofocus by pressing a key that you’ve assigned the AF-On function (as I’ll describe later under Custom Keys). The user-defined AF-On button will start autofocus at any point, independent of the shutter release, giving you the “back button focus” capability. This setting works only in still photography mode.
AEL w/ Shutter
Options: Auto, On, Off
Default: Auto
My preference: Auto
This item is Auto by default so the a68 can lock the exposure (as well as the focus in AF-S or DMF mode) when you apply light pressure to the shutter release button. Point the camera at your primary subject, and maintain contact with the button while re-framing for a better composition. This technique will ensure that both focus and exposure are optimized for the primary subject. You can also select On, in which case exposure is always locked with a half-press of the shutter release button, regardless of focus mode.
However, if you set this item to Off, light pressure on the shutter release button will lock only focus, and not the exposure. After choosing Off, you’ll need to depress the AEL button when you want to lock the exposure. (Light pressure on the shutter release button will still lock focus, unless you’ve disabled that using the AF w/Shutter feature described above.) Then, the only method for locking the exposure will be to press the AEL button you have set up.
You might want to choose the Off option because this will allow you to lock focus on one subject in the scene while locking the exposure for an entirely different part of the scene. To use this technique, focus on the most important subject and keep the focus locked by keeping your finger on the shutter release button while you recompose. You can then point the lens at an entirely different area of the scene to read the exposure, and lock in the exposure with pressure on the AEL button you’ve defined using the Custom Key Settings option in the Custom Settings 6 menu. Finally, reframe for the most pleasing composition and take the photo.
In your image, the primary subject will be in sharpest focus while the exposure will be optimized for the area that you metered. This technique makes most sense when your primary subject is very light in tone like a snowman or very dark in tone like a black Lab dog. Subjects of that type can lead to exposure errors, so you might want to expose for an area that’s a middle tone, such as grass. I’ll discuss exposure in detail in Chapter 5; then, the value of this menu option will be more apparent. This is another stills-only setting that does not operate in Movie mode.
SteadyShot w/Shutter
Options: On/Off
Default: On
My preference: Off
This setting, the first in the Custom Settings 5 menu (see Figure 4.11) enables or disables activation of the a68’s in-body image stabilization when you press the shutter button halfway while shooting still images. I usually disable it to save battery power, in which case SteadyShot, if active (see below), will wait to activate until you press the shutter release down all the way to actually take a picture. The important factors to keep in mind:
- You must have SteadyShot for still photos enabled using the entry in the Camera Settings 8 menu described in Chapter 3.
- Choose On if you want image stabilization to begin as soon as you half-press the shutter release. In this case, you’ll be able to see the shake correction on your LCD monitor/viewfinder screen as you compose the image.
- Choose Off, and image stabilization won’t be activated until you take the photo.
- Remember that, as I explained earlier in Chapter 3, still photography SteadyShot corrects for motion by shifting the sensor, while its movie-shooting counterpart uses electronic correction. So this entry has no effect on SteadyShot when shooting movies.

Figure 4.11 The Custom Settings 5 menu.
e-Front Curtain Shutter
Options: On, Off
Default: On
My preference: On
This feature reduces the lag time between when you press the shutter, and when the picture is actually taken. It can also reduce a certain type of blurring due to slight camera motion when the physical shutter “clunks” open. When set to On, the electronic front shutter curtain is used by the camera at the start of the exposure, rather than the mechanical shutter. (The physical rear shutter curtain is still used to conclude the exposure.) I’ll explain the use of front curtain versus rear curtain shutters as they relate to flash exposures in detail in Chapter 10.
For now, you just need to keep in mind that the a68 has three shutters. There is a physical front curtain shutter, which first closes to allow the live view image to be “dumped” and the sensor readied to take a picture, and then opens again to start the exposure. It also has an electronic front-curtain shutter (enabled with this menu entry), which doesn’t require the physical shutter to close; the live view image is discarded electronically and the camera immediately starts recording the new image. In either case, a physical rear curtain shutter closes and blocks the sensor to conclude the capture, and then opens again to restore your live view image.
The electronic front curtain shutter is both faster and quieter. However, while the e-front curtain shutter usually works very well when you are using an unusually wide aperture, such as f/1.8, and a very fast shutter speed, areas of the photo may exhibit a secondary (ghost) image. The aperture of an affected lens requires the diaphragm components to travel a greater distance, and there may simply not be enough time. An overexposure may result.
When that happens, set this menu item to Off and the camera will use only its mechanical shutter mechanism, and the problem will not occur. Sony also recommends turning the e-curtain Off when you are using a lens made by another manufacturer, as exposure may be uneven or incorrect.
The problems pop up because the e-curtain is, in effect, too fast. It reduces the shutter lag to the point that the iris may not have sufficient time to close completely before the exposure begins. So, the f/stop used at the beginning of the exposure can be different from the one used for the rest of the exposure (after the iris closes down to the correct aperture completely). The overall exposure will thus be incorrect, regardless of shutter speed. In addition, at higher shutter speeds, exposure grading, can occur. At those higher speeds, the “slit” (the gap between the front and rear curtains) is increasingly small as the shutter speed becomes faster, and parts of the image exposed initially will receive more exposure than those exposed later.
Exposure grading is worse with lenses that need a longer time to close their irises, and so is more likely with non-Sony lenses, older Sony lenses, and Sony/Minolta/third-party A-mount lenses. The irises of those lenses aren’t designed to respond at the speeds demanded by an electronic front curtain shutter. In addition, even theoretically compatible lenses may have slower iris response due to dust/grit infiltration. You’ll want to use newer, good-condition A-mount lenses, or adapted lenses that are manually stopped down to the “taking” aperture prior to exposure.
Superior Auto
Options: Continuous Shooting Auto, Off; Image Extraction Auto, Off
Default: Continuous Shooting Auto; Image Extraction Auto
My preference: Auto for both
Thank Sony for splitting up two paired menu entries. As I mentioned in Chapter 3, you can specify whether the green Auto position on the mode dial yields Intelligent Auto or Superior Auto exposure behavior. This entry is available only when you have selected Superior Auto using the Auto Mode entry in the Camera Settings 8 menu. This entry, on the other hand, controls two options that you have for how Superior Auto operates.
- Continuous Shooting. As you know, Superior Auto is much smarter than plain old Intelligent Auto! As you shoot, the a68 evaluates a scene and selects a relevant SCN mode. If appropriate (as deemed by the camera; it’s not up to you), when this setting is set to Auto, the camera can snap off multiple shots for as long as you hold down the shutter release, upping your odds of getting at least one good one. You can partially disable this behavior by selecting Off instead. Disabling the feature can reduce the inevitable lag time that results while the camera is busy shooting multiple images unbidden.
However, you can’t totally disable Superior Auto’s proclivity for snapping off multiple shots. If the SCN mode it selects is HDR or Hand-Held Twilight, the a68 will go ahead and take three consecutive shots when the shutter button is pressed, and then choose one or create a composite that has a higher dynamic range or improved digital noise than you’d get with Intelligent Auto alone.
- Image Extraction. With the default Auto setting for this feature, only the final image is saved to the memory card, which makes a lot of sense. But if you want the camera to record all three of the photos it fired, as well as the final photo, choose the Off option. Note: No composite image can be saved if Image Quality is set to RAW or RAW & JPEG. When HDR or Hand-Held Twilight modes are selected, only one image is saved, even if this entry is set to Off. With Auto Object Framing active, two images are always saved, even if you select Auto here.
Exp. Comp. Set
Options: Ambient & Flash, Ambient Only
Default: Ambient & Flash
My preference: Ambient Only
Your a68 has separate exposure compensation, Flash Comp. and Exposure Comp., available from the Fn menu, and also from the Camera Settings 2 and 4 menus (respectively). When this item is at the default setting, any exposure compensation value that you set will apply to both the ambient light exposure and to the flash exposure when using flash. You’d want to stick to this option in flash photography when you find that both the available-light exposure and the flash exposure produce an image that’s too dark or too light. Setting plus or minus exposure compensation will affect both. However, most of the time you’ll want to set each independently, so I recommend choosing Ambient Only, so you can control only the brightness of the ambient light exposure and not mess with the flash exposure.
For example, the Ambient Only option allows you to control only the brightness of the background such as a city skyline behind a friend when you’re taking flash photos at night in a scene of this type. Setting exposure compensation will now allow you to get a brighter or a darker background (at a + and – setting, respectively) without affecting the brightness of your primary subject who will be exposed by the light from the flash. (Any exposure compensation you set will have no effect on the flash intensity.) You can then tone down the flash output, if you choose to, by adjusting the separate Flash Compensation setting.
Bracket Order
Options: 0 → − → +, − → 0 → +
Default: 0 → − → +
My preference: 0 → − → +
This option sets the order of your shots when using exposure bracketing. With the default setting, the first photo is made at the metered setting, the second with minus exposure compensation (darker), and the third with plus exposure compensation (lighter). With the other option, the first exposure is darker, the second as metered, and the third lighter. I like the default value because I trust my camera, and would prefer to take the metered (and probably correct) exposure first to make sure I get the shot. Those who shoot and manually merge HDR images may prefer to have the exposures taken in order of increasing exposure instead.
Face Registration
Options: New Registration, Order Exchanging, Delete, Delete All
Default: None
My preference: None
This menu entry, the first in the Custom Settings 6 menu (see Figure 4.12), is used to log into your camera’s Face Detection memory the visages of those you photograph often. New Registration allows you to log up to eight different faces. Line up your victim (subject) against a brightly lit background, to allow easier detection of the face. A white box appears that you can use to frame the face. Press the shutter button. A confirmation message appears (or a Shoot Again warning suggests you try another time). When Register Face? appears, choose Enter or Cancel, and press the MENU button to confirm.

Figure 4.12 The Custom Settings 6 menu.
The Order Exchanging option allows you to review and change the priority in which the faces appear, from 1 to 8. The a68 will use your priority setting to determine which face to focus on if several registered faces are detected in a scene. You can also select a specific face and delete it from the registry (say, you broke up with your significant other!) or delete all faces from the registry (your SO got custody of the camera). Face data remains in the camera when you delete individual faces, but is totally erased when you select Delete All.
AF Micro Adjustment
Options: AF Adjustment Setting, Amount, Clear
Default: None
My preference: None
From time to time, you may find that some slight autofocus adjustment is necessary to fine-tune your lens. This menu item allows choosing a value from –20 (to focus closer to the camera) to +20 (to change the focus point to farther away). You can enable/disable the feature, and clear the value set for each lens. The camera stores the value you dial in for the lens currently mounted on the camera, and can log up to 30 different lenses (but each lens must be different; you can’t register two copies of the same lens). Once you’ve “used up” the available slots, you’ll need to mount a lesser-used lens and clear the value for that lens to free up a memory slot. This adjustment works reliably only with Sony, Minolta, and Konica-Minolta A-mount lenses. I’ll show you how to use this feature in Chapter 9.
Lens Compensation
Options: Shading, Chromatic Aberration, Lens Distortion: Auto, Off
Default: Lens Distortion: Off; Shading: Auto; Chromatic Aberration: Auto
My preference: Auto
This trio of menu entries optimizes lens performance by compensating for optical defects; they’re useful because very few lenses in the world are even close to perfect in all aspects. While each of these requires the a68 to perform additional processing on your images before saving them to your memory card, unless you’re shooting at high continuous rates, the actual time penalty is negligible.
- Shading compensation. This is an anti-vignetting correction feature, which can fully or partially compensate for darkened corners produced by some types of lenses, as illustrated in Figure 4.13. Because the default setting is Auto, you may never know that this feature is at work until you turn it off. This setting works with both JPEG and RAW files, while the next two apply only to JPEGs.
- Chromatic aberration compensation. This is a type of distortion caused by a lens’s failure to focus all colors of light on the same plane. That can cause reduced sharpness or colored fringes along distinct edges in an image. By default, the camera corrects for this aberration, a useful feature in my opinion. (See Figure 4.14.)
- Lens distortion compensation feature. This feature corrects the inward (pincushion) or outward (barrel) bowing of lines at the edges of images, caused by telephoto and wide-angle lenses (respectively). Both forms of distortion can also be fixed (somewhat) in an image editor like Photoshop, but allowing the camera to do so can save a lot of extra work. If the Distortion feature is grayed out with the lens you’re using, you’ll need to update the camera’s firmware. (Newer lenses may not be compatible with Distortion Compensation without a firmware update.)

Figure 4.13 No shading (vignetting) correction (top); shading corrected (bottom).

Figure 4.14 Chromatic aberration displayed as green fringe (top); chromatic aberration corrected (bottom).
Function Menu Settings
Options: Function menu settings
Default: Drive Mode, Flash Mode, Flash Comp., Focus Area, Exposure Comp., ISO, Metering Mode, White Balance, DRO/Auto HDR, Creative Style, Picture Effect, Shooting Mode
My preference: None
When you press the Fn button, a screen like the one shown in Figure 4.15 pops up, with a total of 12 settings in two rows arrayed along the bottom. The default options are illustrated. This entry allows you to change the function of any of the 12 positions in the Function menu, so you can display only those you use most, and arrange them in the order that best suits you.

Figure 4.15 Function menu default settings.
For example, the last three default settings in the second row may be of little interest to some a68 owners. Perhaps you shoot only RAW and don’t need to change Creative Styles frequently; or you find the canned Picture Effects too gimmicky. Shooting modes can be selected using the mode dial, so it’s unlikely you’ll be using the Function menu to change modes. Instead, you might want to put White Balance and Metering Mode on the top line next to Drive Mode, and would like the Quality settings to be available from the Function menu. The seemingly infinitely adjustable a68 lets you arrange things your preferred way.
Just highlight Function Menu Set., and press the center button to produce the first of two screens, shown in Figure 4.16. The screen has an entry for each of the positions in the top row, along with the current function (the second screen shows the positions in the bottom row). Highlight the position you want to modify, and press OK. You can then select from among these options:
- Drive Mode
- Flash Mode
- Flash Comp.
- Focus Mode
- Focus Area
- Exposure Comp.
- ISO
- Metering Mode
- White Balance
- DRO/Auto HDR
- Creative Style
- Shoot Mode
- Picture Effect
- Center Lock-On AF
- Smile/Face Detect
- Soft Skin Effect
- Auto Obj. Framing
- Image Size
- Aspect Ratio
- Quality
- SteadyShot (Stills)
- SteadyShot (Movies)
- Auto Recording Level
- Zebra
- Grid Line
- Auto Level Display
- Peaking Level
- Peaking Color
- Not Set
Note that you can select Not Set to leave a position blank if you want to unclutter your screen, and you can even duplicate an entry in multiple positions, accidentally or on purpose.

Figure 4.16 Function menu settings.
Custom Key Settings
Options: Definitions for Custom 1, Custom 2, Center, AEL, ISO, Exposure Comp., White Balance, Drive Mode, Preview, and Focus Hold Buttons
Default: Various
My preference: None
This entry is an essential one, as it allows you to define 10 different buttons to summon any of 51 functions that you prefer to have available with a dedicated key, plus Not Set (to disable a button entirely). Your custom key definitions override any default definitions for those buttons when in shooting mode; they retain their original functions in playback mode. The definable buttons and their default values are shown in Figure 4.17.

Figure 4.17 Custom Key Settings.
That’s quite a large number of definable controls. Indeed, the following is a list of the key buttons on the camera that you cannot redefine to perform some other function:
- Shutter release. It is always used to take a picture and will initiate autofocus (although you can assign AF-ON and other AF functions to a different key).
- Mode dial lock release. This is a mechanical button in the center of the mode dial that unlocks the mode dial, and has no electronic functions at all.
- Up directional button. It is used to change your information display in shooting and playback modes, and as a directional button in menus.
- Playback button. Activates picture review.
- Fn (Function) button. Always summons the Function menu, and in playback mode rotates the current image.
- Movie button. Starts/stops movies. However, you can specify whether you want the button to commence video capture always, or only when the mode dial is set to the Movie position. I’ll explain that in the description of the entries in the Custom Settings 7 menu later in this chapter.
Most of the functions available for assignment, which are listed below, simply provide faster access to a function that is available from the Fn or regular menus. When assigning definitions to keys, keep in mind that certain behaviors, such as Eye AF, can be used only after you have made them available using a custom key definition. They are more or less self explanatory. Some exceptions include:
- Standard. Available only for the center button, this option leaves the control wheel at its standard behavior as an OK/Enter button.
- In-Camera Guide. The defined button provides a tip that reminds you what a menu item or function does.
- AEL Hold/AEL Toggle/Center AEL Hold/Center AEL Toggle. Hold options lock exposure while the button is held down; Toggle options turn lock on when pressed, off when pressed again.
- Flash Exposure Lock Hold/Flash Exposure Lock Toggle. Same as above, but for flash exposure.
- Flash Exposure Lock/AEL Hold. Both flash and ambient light exposure locked when button held down.
- Flash Exposure Lock/AEL Toggle. Both flash and ambient light exposure locked when button is pressed, unlocked when pressed again.
- Eye AF. This function is available only when you assign it to a button. It tells the a68 to focus on the subject’s eyes when a face is detected.
- AF Range Control. Another function available only when assigned to a button, as described in Chapter 3.
- Focus Hold. Deactivates further autofocus while the button is held down.
- Aperture Preview. Creates a depth-of-field preview button.
- Shot Result Preview. Includes depth-of-field preview, and adds in preview of any lens corrections and Dynamic Range Optimizer adjustments.
- Focus Magnifier. Zooms in on the live view image to enhance manual focusing.
- Deactivate Monitor. Turns off display of preview image on the LCD monitor. Useful, say, at a concert or other dark venue where you want to reduce the distraction of the monitor while you shoot.
The full list of the functions you can assign include:
- Standard (assignable only to center button)
- Drive Mode
- Flash Mode
- Flash Compensation
- Focus Area
- Exposure Compensation
- ISO
- Metering Mode
- White Balance
- DRO/Auto HDR
- Creative Style
- Picture Effect
- Smile/Face Detect.
- Soft Skin Effect
- Auto Object Framing
- SteadyShot (Stills)
- SteadyShot (Movies)
- Auto Recording Level
- Image Size
- Aspect Ratio
- Quality
- In-Camera Guide
- AEL Hold
- AEL Toggle
- Center Point AEL Hold
- Center Point AEL Toggle
- Flash Exposure Lock Hold
- Flash Exposure Lock Toggle
- Flash Exposure Lock/AEL Hold
- Flash Exposure Lock/AEL Toggle
- AF/MF Control Hold
- AF/MF Ctrl Toggle
- Center Lock-on AF
- Eye AF
- AF Lock
- AF-On
- AF Range Control
- Focus Hold
- Aperture Preview
- Shot. Result Preview
- Smart Teleconverter
- Zoom
- Focus Magnifier
- Deactivate Monitor
- Zebra
- Grid Line
- Audio Level Display
- Peaking Level
- Peaking Color
- Monitor Brightness
- Not Set
You have several options for assigning the very useful autoexposure lock (AEL) functions to one of the definable keys.
- AEL hold. Exposure is locked while the button is held down.
- AEL toggle. The AEL button can be pressed and released, and the exposure remains locked until the button is pressed again.
- Center Point AEL hold. Exposure is locked on the center point of the frame while the button is held down.
- Center Point AEL toggle. Toggles exposure lock on/off using the center point of the frame.
Dial/Wheel Setup
Options: Reverse functions
Default: Control Dial: f/stop, Control Wheel: Shutter speed
My preference: Control Dial: f/stop, Control Wheel: Shutter speed
By default, the control dial adjusts the aperture, and the control wheel controls the shutter speed in Manual exposure mode. This feature allows you to reverse those functions for Manual exposure only if you prefer. Either the control dial or control wheel can be used to adjust shutter speed (in Shutter Priority mode) and aperture (in Aperture Priority mode), unless you activate Dial/Wheel Ev Comp, described next.
Dial/Wheel Ev Comp
Options: Off, Control Dial, Control Wheel
Default: Off
My preference: Control Wheel
This is the first entry in the Custom Settings 7 menu (see Figure 4.18). If you like, you can use the front control dial or rear control dial to set exposure compensation. When you do that, the other control retains its original function. That is, if you choose the control dial to set EV, then the control wheel can still be used to adjust shutter speed in Shutter Priority mode, and the control wheel to select aperture in Aperture Priority mode. Select the control wheel for EV instead, and the control dial retains its shutter speed or aperture function, respectively.
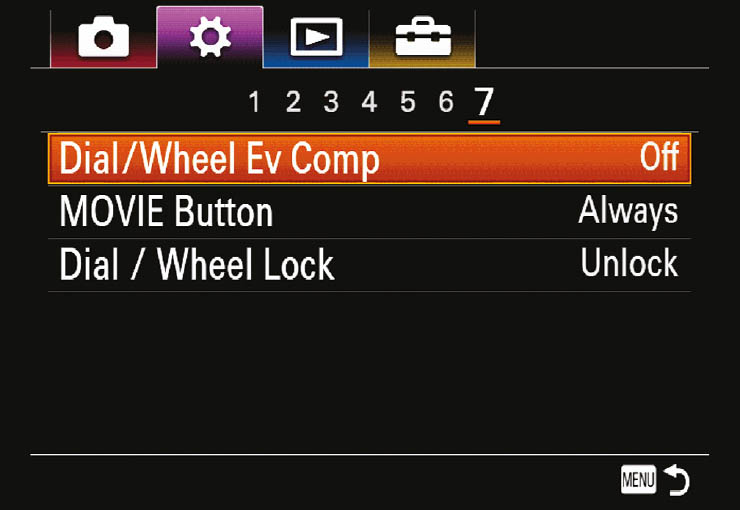
Figure 4.18 Custom Settings 7 menu.
MOVIE Button
Options: Always, Movie Mode Only
Default: Always
My preference: Always
Movie recording can be started in any operating mode by pressing the Movie record button. This feature is set for Always by default, but if you find that you occasionally press the button inadvertently, you might want to choose the Movie Mode Only option. After you do so, pressing the button will have no effect; when you want to record a movie you’ll need to rotate the mode dial to the Movie position.
Dial/Wheel Lock
Options: Lock, Unlock
Default: Unlock
My preference: Unlock
If you want to avoid accidentally changing settings by inadvertently rotating the control wheel or control dial, you can implement this locking option. Choose Lock and both dials are frozen whenever the Fn button is pressed and held down for approximately 2 seconds. A “Locked” indicator appears on the screen. You can unlock the dials by pressing the Fn button again for 2 seconds. If the default Unlock option is selected, pressing the Fn button has no effect on the dials.
Playback Menu
This menu controls functions for deleting, protecting, displaying, and printing images. You can bring it up on your screen more quickly by pressing the Playback button first, then the MENU button, which causes the Playback icon to be highlighted on the main menu screen. The first set of items that are visible on the screen when you activate the Playback menu are shown in Figure 4.19.
- Delete
- View Mode
- Image Index
- Display Rotation
- Slide Show
- Rotate
- Enlarge Image
- 4K Still Image Playback
- Protect
- Specify Printing
Delete
Options: Multiple Img., All in Movie or Still Folder, by AVCHD, or by Date
Default: Multiple Img.
My preference: Multiple Img.
Sometimes we take pictures or video clips that we know should never see the light of day. Maybe you were looking into the lens and accidentally tripped the shutter. Perhaps you really goofed up your settings. You want to erase that photo now, before it does permanent damage to your reputation as a good photographer. Unless you have turned Auto Review off through the Setup menu, you can delete a photo immediately after you take it by pressing the Trash key (Delete button), which is marked with a trash can icon next to it. Also, you can use that method to delete any individual image that’s being displayed on the screen in playback mode.
However, sometimes you need to wait for an idle moment to erase all pictures that are obviously not “keepers.” This menu item makes it easy to remove selected photos or video clips (Multiple Images), or to erase all the photos or video clips taken, sorted by your currently active view mode (such as folder, or date). (Change the type of view using the View Mode option, described next.) Note that there is no delete method that will remove images tagged as Protected (as described below in the section on “Protect”).

Figure 4.19 Playback 1 menu.
To remove one or more images (or movie files), select the Delete menu item, and use the up/down direction controls or the control dial to choose the Multiple Images option. Press the center button, and the most recent image using your currently active view will be displayed on the LCD.
Scroll left/right through your images and press the center button when you reach the image you want to tag for deletion; a checkmark then appears beside it and an orange check mark appears to the left of the image. You can press the DISP button to see more information about a particular image.
The number of images marked for deletion is incremented in the indicator at the lower-right corner of the LCD, next to a trash can icon. When you’re satisfied (or have expressed your dissatisfaction with the really bad images), press the MENU button, and you will be asked if you’re sure you want to proceed. To confirm your decision, press the center button. The images (or video clips) you had tagged will now be deleted. If you want to delete everything on the memory card, it’s quicker to do so by using the Format item in the Setup menu, as discussed later in this chapter.
View Mode
Options: Date View, Folder View (Still), Folder View (MP4), AVCHD, XAVC S View
Default: Date View (Still)
My preference: Date View
Adjusts the way the a68 displays image/movie files, which is useful for reviewing only certain types of file, or for deleting only particular types, as described above. You can elect to display files by Date View, Folder View (still photos only), Folder View (MP4 clips only), or AVCHD and XAVC S View (just AVCHD or XAVC S movies).
Image Index
Options: 9, 25
Default: 9
My preference: 9
You can view an index screen of your images on the camera’s LCD by pressing the AEL/Index button while in playback mode. By default, that screen shows up to 9 thumbnails of photos or movies; you can change that value to 25 using this menu item. Remember to use the View Mode menu item first, to identify the folder (stills, MP4, or AVCHD) that the index display should access; by default, it will show thumbnails of still photos but you might want to view thumbnails of your movie clips instead.
Display Rotation
Options: Auto, Manual, Off
Default: Auto
My preference: Off
You can use this function to determine whether a vertical image is rotated automatically during picture review. The options are somewhat confusingly named, as the Off setting actually means that vertical images are automatically rotated:
- Auto. The a68 rotates images shot in vertical orientation, as shown at top in Figure 4.20. The image will be smaller in size, but the camera does not have to be tilted to view it. Landscape images are always displayed in landscape mode. When you rotate the camera, the image is rotated at the same time.
- Manual. With this setting, the image is always displayed on the LCD in the same orientation it was taken. You can manually rotate either type of image using the Rotate option discussed later in this section.
- Off. With this setting, both vertical and horizontal images are displayed in landscape mode, filling the screen as much as possible with the image. Vertical shots are larger, as shown at bottom in Figure 4.20, but the camera must be rotated to view them as shot.

Figure 4.20 Vertical images can be displayed in their normal orientation (top), or rotated to fill more of the screen (bottom).
Slide Show
Options: Repeat: On, Off; Interval: 1 second, 3 seconds, 5 seconds, 10 seconds, 30 seconds
Default: 3 seconds
My preference: None
Use this menu option when you want to display all the still images on your memory card in a continuous show. You have your choice of viewing on the a68’s screens or on an HDTV screen through an HDMI cable connection. If you have a Sony Bravia-compatible set, you have additional options (see HDMI Settings in the “Setup Menu” section later in this chapter).
Using this command, you can display still images in a continuous series. You’ll need to have View Mode (described earlier in this section) set to Date View (to display images in reverse chronological order), or Folder View (Still) (to view all images in a folder on your memory card). Each “slide” is displayed for the amount of time that you set. Choose the Repeat option to make the show repeat in a continuous loop. After making your settings, press the center button and the slide show will begin. You can scroll left or right to go back to a previous image or go forward to the next image immediately, but that will stop the slide show. The show cannot be paused, but you can exit by pressing the MENU button. If your show is a long one, it’s a good idea to set Power Save Start Time in the Setup menu 2 (described later in this chapter) to the maximum delay, 30 minutes.
Rotate
Options: None
When you select this menu item, you are immediately presented with a new screen showing the current or most recently reviewed image along with an indication that the center button can be used to rotate the image. (This feature does not work with movies.) Scroll left/right to reach the image you want to rotate. Successive presses of the center button will now rotate the image 90 degrees at a time. The camera will remember whatever rotation setting you apply here. You can use this function to rotate an image that was taken with the camera held vertically, when you have set Display Rotation to Manual. Press the MENU button to exit. If you have set Display Rotation to Auto, you cannot access this feature.
Enlarge Image
Options: None
Default: N/A
This is the first entry on the second page of the Playback menu (see Figure 4.21). Whenever you are playing back still images (not movies), you can use this menu entry to magnify the image. Use the rear control dial to zoom in and out, and you can scroll around inside the enlarged image using the control wheel. In playback mode, the Zoom In button does the same thing. The Zoom Out (AEL) button reduces the image size.

Figure 4.21 The second page of the Playback menu.
4K Still Image Playback
Options: None
Default: N/A
This menu choice sends JPEG images in 4K format to a compatible 4K television connected using an HDMI cable. It does not work with non-4K HDTV equipment. If you send a RAW image, it will be displayed in HD quality, rather than 4K resolution.
Protect
Options: Multiple Images, All with Current View Mode, Cancel All Images
Default: None
You might want to protect certain images or movie clips on your memory card from accidental erasure, either by you or by others who may use your camera from time to time. This menu item enables you to tag one or more images or movies for protection so a delete command will not delete it. (Formatting a memory card deletes everything, including protected content.) This menu item also enables you to cancel the protection from all tagged photos or movies.
To use this feature, make sure to specify whether you want to do so for stills or movies; use the View Mode item in the Playback menu to designate the desired view mode, as described earlier. Then, access the Protect menu item, choose Multiple Images, and press the center button. An image (or thumbnail of a movie) will appear. Scroll among the photos or videos to reach the photo you want to tag for protection; press the center button to tag it. (If it’s already tagged, pressing the button will remove the tag, eliminating the protection you had previously provided.) An orange checkmark at the left of the image indicates it is tagged.
After you have marked all the items you want to protect, press the MENU button to confirm your choice. A screen will appear asking you to confirm that you want to protect the marked images; press the center button to do so. Later, if you want, you can go back and select the Cancel All Images option to unprotect all of the tagged photos or movies.
Specify Printing
Options: Multiple Images, Cancel All, Print Setting
Default: N/A
Most digital cameras are compatible with the DPOF (Digital Print Order Format) protocol, which enables you to tag JPEG images on the memory card (but not RAW files or movies) with an orange red checkmark, designating them for printing with a DPOF-compliant printer; you can also specify whether you want the date imprinted, as well. Afterward, you can transport your memory card to a retailer’s digital photo lab or do-it-yourself kiosk, or use your own DPOF-compatible printer to print out the tagged images in the quantities you’ve specified.
Choose multiple images using the View Mode filters described earlier to select to view either by Date or by Folder. Press the center button to mark an image for printing, and the MENU button to confirm when you’re finished. The Print Setting entry lets you choose to superimpose the date onto the print. The date will be added during printing by the output device, which controls its location on the final print. The camera displays a message asking if you want to create the DPOF set and number of images. Select OK to confirm, or choose Cancel to quit.
Setup Menu
Use the lengthy Setup menu to adjust infrequently changed settings, such as language, date/time, and power-saving options. The first five items in the Setup menu are shown in Figure 4.22.
- Monitor Brightness
- Viewfinder Brightness
- Finder Color Temperature
- Volume Settings
- Audio Signals
- Tile Menu
- Mode Dial Guide
- Delete Confirm.
- Power Save Start Time
- Cleaning Mode
- Demo Mode
- HDMI Settings
- USB Connection
- USB LUN Setting
- Language
- Date/Time Setup
- Area Setting
- Format
- File Number
- Select REC Folder
- New Folder
- Folder Name
- Recover Image Database
- Display Media Information
- Version
- Setting Reset

Figure 4.22 The Setup menu.
Monitor Brightness
Options: Auto, Sunny Weather, Manual
Default: Manual
My preference: Manual
When you access this menu item, one of three screens appears, depending on how you have this option currently set:
- Auto. At this setting, the a68 will adjust the brightness of the LCD screen according to the ambient light levels. You cannot make any changes, except pressing the center button to display a screen that allows you to switch between Auto, Manual, and Sunny Weather modes. (Figure 4.23, top.)
- Sunny Weather. If you set Sunny Weather, the LCD brightness will automatically increase, making the display easier to view in very bright light. This makes the display unusually bright so use it only when it’s really necessary. Remember too that it will consume a lot more battery power, so have a spare battery available. Use this setting while on the ski slopes, or when shooting at a beach. You might resort to this setting if you’re shooting outdoors in bright sun and find it hard to view the LCD even when shading it with your hand.
Again, you cannot adjust the screen brightness, but you can press the center button to display a screen that allows you to switch to one of the other modes. (Figure 4.23, middle.)
- Manual. In this mode, two controls appear on the screen (see Figure 4.23, bottom). The first is a Brightness bar (shown just above the grayscale/color patches). The grayscale steps and color patches can be used as a reference while you manually adjust the screen brightness using the control wheel left/right controls or rear control dial. Scroll to the right to make the LCD display brighter or scroll to the left to make the LCD display darker, in a range of plus and minus 2 (arbitrary) increments.
As you change the brightness, keep an eye on the grayscale and color chart in order to visualize the effect your setting will have on various tones and hues. The zero setting is the default and it provides the most accurate display in terms of exposure, but you might want to dim it when the bright display is distracting while shooting in a dark theater, perhaps. A minus setting also reduces battery consumption but makes your photos appear to be underexposed (too dark) during picture review.
I prefer to choose Manual but then to leave the display at the zero setting. This ensures the most accurate view of scene brightness on the LCD for the best evaluation of exposure while previewing the scene before taking a photo.

Figure 4.23 Adjust monitor brightness (top to bottom): Auto, Sunny Weather, Manual.
Viewfinder Brightness
Options: Manual, Auto
Default: Manual
My preference: Manual
This entry operates exactly the same as the Monitor Brightness option just described, but without the Sunny Weather option. A notice will appear on the LCD monitor advising you to look through the viewfinder and make your adjustments.
Finder Color Temperature
Options: +2 to –2
Default: 0
My preference: None
While looking through the viewfinder, press the left/right directional buttons or control wheel to adjust the color balance of the finder to make it appear warmer (using the left button) or colder/bluer (using the right button), according to your preference. Use this if you find that the image you see in the viewfinder is slightly different from what you see on the LCD monitor.
Volume Settings
Options: 0–15
Default: 7
My preference: None
This menu item affects only the audio volume of movies that are being played back in the camera, rather than the camera’s other sounds, such as the beeping you hear when the self-timer counts down. When you select Volume Settings, the camera displays a scale of loudness from 0 to 15; change the setting using the left/right controls or rear control dial. Your setting will remain in effect until changed. You might want to use this menu item to pre-set a volume level that you generally prefer.
Audio Signals
Options: On, Off
Default: On
My preference: Off
This is the menu entry to use when you want to turn off (or enable) the self-timer beep and other feedback provided by the a68 as you shoot. I usually switch those sounds off, as I find them distracting, and, sometimes, so do my human or non-human subjects. Playback sounds, such as movie audio, are not affected.
Upload Settings
Options: On, Off
Default: On
My preference: Off
The Upload Settings for Eye-Fi cards (not shown in Figure 4.24) appears as the very last entry of the Setup 1 menu, but only when you have inserted an Eye-Fi card into the camera’s memory card slot. An Eye-Fi card is a special type of SD card that connects to an available wireless network and uploads the images from your memory card to a computer on that network. The Upload Settings option on the Setup menu lets you either enable or disable the use of the Eye-Fi card’s transmitting capability. So, if you want to use an Eye-Fi card just as an ordinary SD card, simply set this item to Off, which saves a bit of power drawn by the card’s Wi-Fi circuitry. I usually leave it Off until I am ready to work with the Eye-Fi card’s Wi-Fi features.
Tile Menu
Options: On, Off
Default: On
My preference: Off
This is the first entry on the second page of the Setup menu. The Tile menu is a holdover from the NEX era, and features icons representing the six main menu tabs. While it might be marginally useful when you first begin working with your a68, it’s really an unnecessary intermediate step. Turn it Off, and when you press the MENU button, you’ll be whisked to the conventional menu system, where you can quickly navigate to the tab you want. (See Figure 4.24.)

Figure 4.24 The Setup 2 menu.
Mode Dial Guide
Options: On, Off
Default: On
My preference: Off
The On setting activates an on-screen description of the current shooting mode as you rotate the mode dial. You might want to enable this extra help when you first begin using your a68, and turn it off after you’re comfortable with the various mode dial settings.
Delete Confirm
Options: Delete First, Cancel First
Default: Cancel First
My preference: Delete First
Determines which choice is highlighted when you press the trash button to delete an image. The default Cancel First is the safer option, as Cancel is highlighted when the trash button is pressed, and you must deliberately select Delete and then press the center button to actually remove an image. Delete First is faster, and, for most people, makes more sense. Just press the trash button, and a screen appears with Delete highlighted. Press the center button, and the unwanted image is gone. You’d have to scroll to Cancel if you happened to have changed your mind or pressed the trash button by mistake.
Power Save Start Time
Options: 30 minutes, 5 minutes, 2 minutes, 1 minute, 10 seconds
Default: 1 minute
My preference: 1 minute; 5 minutes for photojournalism or sports
This item lets you specify the exact amount of time that should pass before the camera goes to “sleep” when not being used. The default of 1 minute is a short time, useful to minimize battery consumption. You can select a much longer time before the camera will power down, or a much shorter time. Don’t worry about interrupting long downloads from your camera to your computer over a cable or Eye-Fi Wi-Fi link; the a68 will always wait until the download is finished before powering down.
I always set this parameter to five minutes when I’m doing street photography or sports. There may be periods when nothing is happening, but I’m closely following the activities or action and want to be able to snap off a picture at a moment’s notice. I find the five-minute setting to be perfect; if I forget to turn off the camera at half-time, the a68 powers down automatically and battery power isn’t wasted for the 15-minute interval.
If you’re using the Slide Show capability described earlier in this chapter and have connected to an external TV or monitor, there’s no need to change this setting. The a68 is smart enough to temporarily switch to a 30-minute power-down cycle while you’re linked, and then return to the setting you’ve made here when you resume operations.
Cleaning Mode
Options: None
Default: None
My preference: None
This is the first item on the third page of the Setup menu. (See Figure 4.25.) Use this entry when you want to use the a68’s auto image sensor cleaning feature. Highlight Enter and press the center button. The sensor vibrates rapidly to shake off any accumulated artifacts.
Demo Mode
Options: On, Off
Default: Off
My preference: None
This is a semi-cool feature that allows your camera to be used as a demonstration tool, say, when giving lectures or showing off at a trade show. When activated, if the camera is idle for about one minute it will begin showing a protected AVCHD movie, which is not impressive on the camera’s built-in LCD, but can have a lot more impact if the a68 is connected to a large-screen HDTV through the HDMI port.

Figure 4.25 The Setup 3 menu.
- Use the File Format entry in the Camera Settings 2 menu and select AVCHD as the movie format, as explained in Chapter 3. Demo Mode works only with AVCHD files.
- Shoot the clip that you want to use as your demonstration, in AVCHD format.
- In the Playback 1 menu, access the View Mode and select AVCHD View so that only AVCHD videos will appear.
- In the Playback 2 menu, choose Protect and select the demo clip, which should be the movie file with the oldest recorded date and time.
- Connect the a68 to the optional AC-PW10 AC adapter. Because Demo Mode uses a lot of juice, it operates only when the external power source is connected.
- Demo Mode will no longer be grayed out in the Setup 2 menu. Select it and choose On.
- After about one minute of idling, the demo clip will begin playing. Note that, because the AC adapter is connected, your automatic power saving setting is ignored, and that Demo Mode will not operate if no movie file is stored on your memory card.
HDMI Settings
Options: HDMI Resolution: Auto, 1080p, 1080i; HDMI Info. Display: On, Off; Control for HDMI: On, Off
Default: Auto, On, On (respectively)
My preference: Auto, Off, Off (respectively)
This entry allows adjusting three HDMI parameters:
- HDMI Resolution. The camera can adjust its output for display on a high-definition television when at the Auto setting. This usually works well with any HDTV. If you have trouble getting the image to display correctly, you can set the resolution manually here to 1080p or to 1080i; the latter should work fine with any HDTV.
- HDMI Info. The parameter controls whether on-screen information overlays are shown while you’re shooting movies when the a68 is connected to an HDTV television/monitor using an HDMI cable. Select Off if you don’t want to show the shooting information on the display as you capture your video, or (especially) if you are routing the video from your camera to an external video recorder and want only the raw uncompressed video to be captured.
- Ctrl for HDMI. You can view the display output of your camera on a high-definition television (HDTV) when you connect it to the a68 if you make the investment in an HDMI cable (which Sony does not supply); get the Type C with a mini-HDMI connector on the camera end. When connecting HDMI-to-HDMI, the camera automatically makes the correct settings. If you’re lucky enough to own a TV that supports the Sony Bravia synchronization protocol (Sony brand or otherwise), you can operate the camera using that TV’s remote control when this item is On. Just press the Link Menu button on the remote, and then use the device’s controls to delete images, display an image index of photos in the camera, display a slide show, protect/unprotect images in the camera, specify printing options, and play back single images on the TV screen.
The CTRL for HDMI option on the Setup menu can also be useful when you have connected the camera to a non-Sony HDTV that is supposedly Bravia-sync compatible and find that the TV’s remote control produces unintended results with the camera. If that happens, try turning this option Off, and see if the problem is resolved. If you later connect the camera to a Sony Bravia sync-compliant HDTV, set this menu item back to On.
The RMT-DSLR-2 remote discussed earlier can also be used to control display on an HDTV screen.
USB Connection
Options: Auto, Mass Storage, MTP, PC Remote
Default: Auto
My preference: Mass Storage
This entry allows you to select the type of USB connection protocol between your camera and computer.
- Auto. Connects your a68 to your computer or other device automatically, choosing either Mass Storage or MTP connection as appropriate.
- Mass Storage. In this mode, your camera appears to the computer as just another storage device, like a disk drive. You can drag and drop files between them.
- MTP. This mode, short for Media Transfer Protocol is a newer version of the PTP (Picture Transfer Protocol) that was standard in earlier cameras. It allows better two-way communication between the camera and the computer and is useful for both image transfer and printing with PictBridge-compatible printers.
- PC Remote. This setting is used with Sony’s Remote Camera Control software to adjust shooting functions and take pictures from a linked computer.
USB LUN Setting
Options: Multi, Single
Default: Multi
My preference: Multi
This setting specifies how the a68 selects a Logical Unit Number when connecting to a computer through the USB port. Normally, you’d use Multi, which allows the camera to adjust the LUN as necessary, and is compatible with the PlayMemories Home software. Use Single to lock in a LUN if you have trouble making a connection between your camera and a particular computer. PlayMemories Home software will usually not work when this setting is active. But don’t worry; Single is rarely necessary.
Language
Options: English, French, Spanish, Italian, Japanese, Chinese languages
Default: Language of country where camera is sold
My preference: English
If you accidentally set a language you cannot read and find yourself with incomprehensible menus, don’t panic. Just find the Setup menu, the one with the red tool box for its icon, and scroll down to the line that has a symbol that looks like an alphabet block “A” to the left of the item’s heading. No matter which language has been selected, you can recognize this menu item by the “A.” Scroll to it, press the center button to select this item, and scroll up/down among the options until you see a language you can read.
Date/Time Setup
Options: Year, Month, Day, Hour, Minute, Date Format, Daylight Savings Time
Default: None
My preference: None
This is the first entry on the Setup 4 menu. (See Figure 4.26.) Use this option to specify the date and time that will be embedded in the image file along with exposure information and other data. Having the date set accurately also is important for selecting movies for viewing by date. Use the left/right directional buttons to navigate through the choices of Daylight Savings Time: On/Off; year; month; day; hour; minute; and date format. You can’t directly change the AM/PM setting; you need to scroll the hours past midnight or noon to change that setting. Use the up/down directional buttons or rotate the control dial to change each value as needed.
Figure 4.26 The Setup 4 menu.
Area Setting
Options: World time zones
Default: None
My preference: None
When you select this option, you are presented with a world map on the LCD. Use the left/right directional buttons to scroll until you have highlighted the time zone that you are in. Once the camera is set up with the correct date and time in your home time zone, you can use this setting to change your time zone during a trip, so you will record the local time with your images without disrupting your original date and time settings. Just scroll back to your normal time zone once you return home. Because Daylight Savings Time is activated on different dates in different countries, this setting also helps your a68 make the switchover on the correct weekend.
Format
Options: Enter, Cancel
Default: None
My preference: Format after images are copied
As you’d guess, you’ll use Format to re-format your memory card while it’s in your a68. To proceed with this process, choose the Format menu item and select “OK” and press the center button to confirm, or Cancel to chicken out.
Use the Format command to erase everything on your memory card and to set up a fresh file system ready for use. This procedure removes all data that was on the memory card, and reinitializes the card’s file system by defining anew the areas of the card available for image storage, locking out defective areas, and creating a new folder in which to deposit your images. The camera will recognize SDXC cards and install the proper exFAT file system on them. It’s usually a good idea to reformat your memory card in the camera (not in your camera’s card reader using your computer’s operating system) before each use. Formatting is generally much quicker than deleting images one by one. Before formatting the card, however, make sure that you have saved all your images and videos to another device; formatting will delete everything, including images that were protected.
File Number
Options: Series, Reset
Default: Series
My preference: Series
The default for the File Number item is Series, indicating that the a68 will automatically apply a file number to each picture and video clip that you make, using consecutive numbering; this will continue over a long period of time, spanning many different memory cards, and even if you reformat a card. Numbers are applied from 0001 to 9999; when you reach the limit, the camera starts back at 0001. The camera keeps track of the last number used in its internal memory. So, you could take pictures numbered as high as 100–0240 on one card, remove the card and insert another, and the next picture will be numbered 100–0241 on the new card. Reformat either card, take a picture, and the next image will be numbered 100–0242. Use the Series option when you want all the photos you take to have consecutive numbers (at least, until your camera exceeds 9999 shots taken).
If you want to restart numbering back at 0001 frequently, use the Reset option. In that case, the file number will be reset to 0001 each time you format a memory card or delete all the images in a folder, insert a different memory card, or change the folder name format (as described in the next menu entry). I do not recommend this since you will soon have several images with exactly the same file number.
Select REC Folder
Options: Folder
Default: None
My preference: None
This entry allows you to create a new storage folder. Although your a68 will create new folders automatically as needed, you can create a new folder at any time, and switch among available folders already created on your memory card. (Of course, a memory card must be installed in the camera.) This is an easy way to segregate photos by folder. For example, if you’re on vacation, you can change the Folder Name convention to Date Form (described next). Then, each day, create a new folder (with that date as its name), and then deposit that day’s photos and video clips into it. A highlighted bar appears; press the up/down buttons to select the folder you want to use, and press the center button.
New Folder
Options: N/A
Default: None
My preference: None
This item will enable you to create a brand-new folder. Press the center button, and a message like “10100905 folder created” or “102MSDCF folder created” appears on the LCD. The alphanumeric format will be determined by the Folder Name option you’ve selected (and described next), either Standard Form or Date Form.
Folder Name
Options: Standard Form, Date Form
Default: Standard Form
My preference: Standard Form
This is the first entry in the Setup 5 menu (see Figure 4.27). If you have viewed one of your memory card’s contents on a computer, you noticed that the top-level folder on the card is always named DCIM. Inside it, there’s another folder created by your camera. Different cameras use different folder names, and they can co-exist on the same card. For example, if your memory card is removed from your Sony camera and used in, say, a camera from another vendor that also accepts Secure Digital or Memory Stick cards, the other camera will create a new folder using a different folder name within the DCIM directory.

Figure 4.27 The Setup 5 menu.
By default, the a68 creates its folders using a three-number prefix (starting with 100), followed by MSDCF. As each folder fills up with 999 images, a new folder with a prefix that’s one higher (say, 101) is used. So, with the “Standard Form,” the folders on your memory card will be named 100MSDCF, 101MSDCF, and so forth.
You can select Date Form instead, and the Alpha will use a xxxymmdd format, such as 10070904, where the 100 is the folder number, 7 is the last digit of the year (2017), 09 is the month, and 04 is the day of that month. If you want the folder names to be date-oriented, rather than generic, use the Date Form option instead of Standard Form. This entry allows you to switch back and forth between them, both for folder creation (using the New Folder entry described above) and REC folder preference (also described above).

Tip
Whoa! Sony has thrown you a curveball in this folder switching business. Note that if you are using Date Form naming, you can create folders using the date convention, but you can’t switch among them when Date Form is active. If you do want to switch among folders named using the date convention, you can do it. But you have to switch from Date Form back to Standard Form. Then you can change to any of the available folders (of either naming format). So, if you’re on that vacation, you can select Date Form, and then choose New Folder each day of your trip, if you like. But if, for some reason, you want to put some additional pictures in a different folder (say, you’re revisiting a city and want the new shots to go in the same folder as those taken a few days earlier), you’ll need to change to Standard Form, switch folders, and then resume shooting. Sony probably did this to preserve the “integrity” of the date/folder system, but it can be annoying.
Recover Image Database
Options: OK, Cancel
Default: None
My preference: None
The Recover Image DB function is provided in case errors crop up in the camera’s database that records information about your movies. According to Sony, this situation may develop if you have processed or edited movies on a computer and then re-saved them to the memory card that’s in your camera. I have never had this problem, so I’m not sure exactly what it would look like. But, if you find that your movies are not playing correctly in the camera, try this operation. Highlight this menu option and press the center button, and the camera will prompt you, “Check Image Database File?”. Press the center button to confirm, or the MENU button to cancel.
Display Media Information
Options: None
Default: None
My preference: None
This entry gives you a report of how many still images and how many movies can be recorded on the memory card that’s in the camera, given the current shooting settings. This can be useful, but that information is already displayed on the screen when the camera is being used to shoot still photos (unless you have cycled to a display with less information), and the information about minutes remaining for movie recording is displayed on the screen as soon as you press the Record button. But, if you want confirmation of this information, this menu option is available.
Version
Options: None
Default: None
My preference: None
Select this menu option to display the version number of the firmware (internal operating software) installed in your camera. From time to time, Sony updates the original firmware with a newer version that adds or enhances features or corrects operational bugs. When a new version is released, it will be accompanied by instructions, which generally involve downloading the update to your computer and then connecting your camera to the computer with the USB cable to apply the update. It’s a good idea to check occasionally at the Sony website, esupport.sony.com (don’t preface the URL with www), to see if a new version of the camera’s firmware is available for download. (You can also go to that site to download updates to the software that came with the camera, and to get general support information.)
Setting Reset
Options: Camera Settings Reset, Initialize
Default: Camera Settings Reset
If you’ve made a lot of changes to your a68’s settings, you may want to return their features to their defaults so you can start over without manually going back through the menus and restoring everything. This menu item lets you do that. Your choices are as follows:
- Camera Settings Reset. Resets the main shooting settings to their default values.
- Initialize. Resets all camera settings to their default settings, including the time/date and downloaded applications, but not including any AF Micro Adjustments you may have dialed in.