
This chapter will show you how to troubleshoot the problems you are most likely to experience with Chromebooks in the classroom.
As you will know from your experience with computers and students, many different things can go wrong with hardware, software, wetware, and where the three ’wares meet. Some problems have quick and easy fixes, while other problems—even if they initially appear trivial—can require involved steps and plenty of time to troubleshoot.
This chapter assumes that you will be troubleshooting Chromebooks deployed in your school’s classrooms and that your priority is to keep the Chromebooks running and your classrooms functioning smoothly. This means that you likely won’t have time to dig into the specifics of each problem the moment it occurs; instead, you will want to work around problems as far as possible and spend time troubleshooting only when you are free to do so. To this end, the chapter will begin by suggesting a troubleshooting approach that assumes you have extra Chromebooks that you can swap in and out of the classrooms as necessary.
After setting out this approach, the chapter will walk you through three key troubleshooting moves: resetting a Chromebook to clear up minor problems, running a Powerwash to get rid of major problems, and recovering the Chromebook to resolve intractable problems. Following that, the chapter will present separate sections on troubleshooting issues with networking, performance, and storage; keyboards, touchpads, and touchscreens; batteries; and Bluetooth, cameras, and audio.
Two Moves to Streamline Troubleshooting Your School’s Chromebooks
When something goes wrong with a desktop computer in the classroom, you will normally need to troubleshoot it soon—if not immediately—in order to keep the classroom functioning usefully. But you will normally have much greater flexibility in troubleshooting your school’s Chromebooks. This means that you may be better off using a restart-and-replace approach to troubleshooting any problem you can’t instantly resolve. You can then use other troubleshooting moves—such as resetting the Chromebook, running a Powerwash on it, or using the Chromebook Recovery Utility—to resolve the problem when you have time.
Restarting as a Troubleshooting Move
As you no doubt know from experience, you can clear up many problems with end-user electronics—from smartphones and tablets to laptops and desktops—simply by restarting them. The same goes for Chromebooks. The speed and simplicity of restarting a Chromebook means that a restart is often a sensible place to start troubleshooting any problem that does not have an immediate fix. A restart usually takes less than a minute, and any student can perform it.
You will find that many of the sections in this chapter suggest restarting the Chromebook either as a first move in troubleshooting a problem or as a subsequent move if other options fail.
Tip
The quick way to restart a Chromebook is to hold down the Reload key and press the Power key or the Power button. It is best to sign out before using this keyboard shortcut because Chrome OS does not give you the chance to save any unsaved data. Otherwise, the normal way to restart a Chromebook is to give the Shut down command, either from the status menu when you are signed in or from the sign-in screen; after the Chromebook shuts down, press the Power key or Power button to restart it.
Replacing a Chromebook as a Troubleshooting Move
If a restart does not clear up a problem that will prevent the Chromebook from functioning as needed in the classroom , your best move is to replace the Chromebook with a spare—as long as you have a spare.
If possible, plan and maintain your Chromebook fleet so that you have one or more spare Chromebooks that you can swap in when one of your regular Chromebooks suffers problems or gets broken.
Resolving Problems by Resetting and Powerwashing Chromebooks
Reset: You can reset all the settings to factory defaults. Resetting leaves all the user accounts on the Chromebook and does not delete any user files.
Powerwash: You can remove all user accounts and user files and reset the Chromebook to its original condition.
Caution
Because a Powerwash removes all user accounts and user files from the Chromebook, make sure you have backed up any content stored only on the Chromebook before starting a Powerwash. Given that Chromebooks are designed to store almost all content online, such a backup is usually not a problem.
The following subsections will explain how to perform a reset and a Powerwash.
Note
If even a Powerwash cannot restore the Chromebook to health, you may be able to recover it by using the Chromebook Recovery Utility and a recovery device. See the section “Recovering a Chromebook Using a Chrome OS Recovery Device” later in this chapter for details.
Displaying the Reset Screen in the Settings Window
- 1.
Click the status area at the right end of the shelf to open the status menu.
- 2.
Click the Settings icon to display the Settings window.
- 3.
Click the Navigation button on the left to display the Navigation panel and then click the Advanced section to expand its contents.
- 4.
Click the Reset button to display the Reset screen (see Figure 9-1).

From the Reset screen in the Settings window, you can reset a Chromebook’s settings to their factory defaults or Powerwash the Chromebook to remove all user accounts and reset the settings
Resetting a Chromebook to Factory Default Settings
- 1.
Click the Reset button. The Reset dialog box opens (see Figure 9-2).

In the Reset dialog box, read the details of what the reset operation will change. Click the Reset button to proceed.
- 2.
Check the “Help make Chrome better by reporting the current settings” check box if you are happy for Chrome OS to share the details of the Chromebook’s settings with Google. If not, uncheck this check box. You can click the “current settings” link to open a browser window showing the settings you will be sharing.
- 3.
Click the Reset button. Chrome OS will reset the Chromebook’s settings.
When resetting the Chromebook, Chrome OS closes your current tabs, but Chrome OS does not sign you out of the device, and the Chromebook does not restart, so you may find the experience underwhelming. Nevertheless, see if the problem you were experiencing has been resolved. If not, you may want to run a Powerwash, as explained in the next section.
Powerwashing a Chromebook
- 1.
Click the Powerwash button. The Restart your device dialog box opens (see Figure 9-3).
Note
If the Powerwash setting does not appear on the Reset screen, your Chromebook is a managed device. You will need to have an administrator reconfigure it for you.
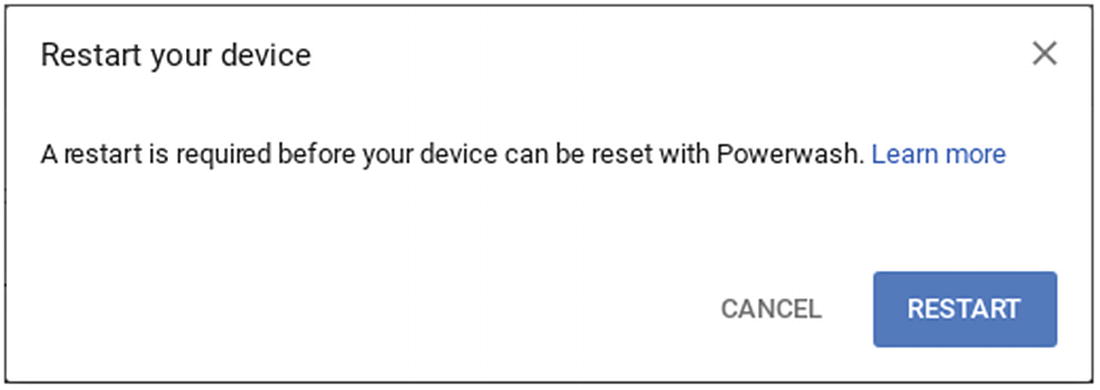
Click the Restart button in the Restart your device dialog box to start the Powerwash reset process.
- 2.
Click the Restart button . The Chromebook restarts. The Reset this Chrome device dialog opens.
- 3.
Click the Powerwash button. The Confirm Powerwash dialog box then opens, warning you that all user accounts and local data will be removed.
- 4.
Click the Continue button. The Powerwash in progress screen appears, showing the progress of the Powerwash process.
When the Powerwash is complete, the Welcome! dialog will open, and you can set up the Chromebook again from scratch.
Recovering a Chromebook Using a Chrome OS Recovery Device
The ultimate troubleshooting step for a Chromebook is to recover it by using a recovery device, which is a USB flash drive or an SD card with a copy of Chrome OS on it. This section will explain when to use a recovery device, how to create the recovery device, and how to use it.
Understanding When to Use a Recovery Device
Normally, you would use a recovery device if the Chromebook displays the message Chrome OS is missing or damaged when you power the device on.
You can also use a recovery device when all other troubleshooting moves have failed. Usually, you would try a reset first; a Powerwash next, if the reset did not help; and then recovery with a recovery device, if the Powerwash did not fix the problem either.
Creating a Recovery Device
To create a recovery device, you can use either a Chromebook or a Windows PC or a Mac that has the Chrome browser installed on it. On this Chromebook, PC, or Mac, you install the Chromebook Recovery Utility as an app in the Chrome browser. You then run the Chromebook Recovery Utility, which downloads a suitable copy of Chrome OS for the Chromebook and creates the recovery device on a USB flash drive or an SD card.
The following subsections will take you through the details of what you need to do.
Installing Chrome on the PC or Mac
If you are using a PC or Mac to create the recovery device, it must have the Chrome browser installed on it because the Chromebook Recovery Utility runs as a Chrome app.
If the PC or Mac already has Chrome, skip this section. If not, steer your current browser to the Chrome website ( https://www.google.com/chrome ) and then download and install Chrome.
Installing the Chromebook Recovery Utility
Next, install the Chromebook Recovery Utility as an app in Chrome on the Chromebook, the PC, or the Mac. Launch Chrome and go to the following page in the Chrome Web Store: https://chrome.google.com/webstore/detail/chromebook-recovery-utili/jndclpdbaamdhonoechobihbbiimdgai .
Tip
The URL for the Chromebook Recovery Utility is a challenge to type—for me, anyway. You can also locate the Chromebook Recovery Utility by going to http://google.com/chromeos/recovery and then clicking one of the Recovery app links in the Step 2 section. In theory, another way to locate the Chromebook Recovery Utility is to go to the Chrome Web Store and search for “Chromebook recovery utility,” but this search currently returns only results for other Chrome extensions, not for the Chromebook Recovery Utility.

When you find the Chromebook Recovery Utility, click the Add to Chrome button at the top to add it to the Chrome browser
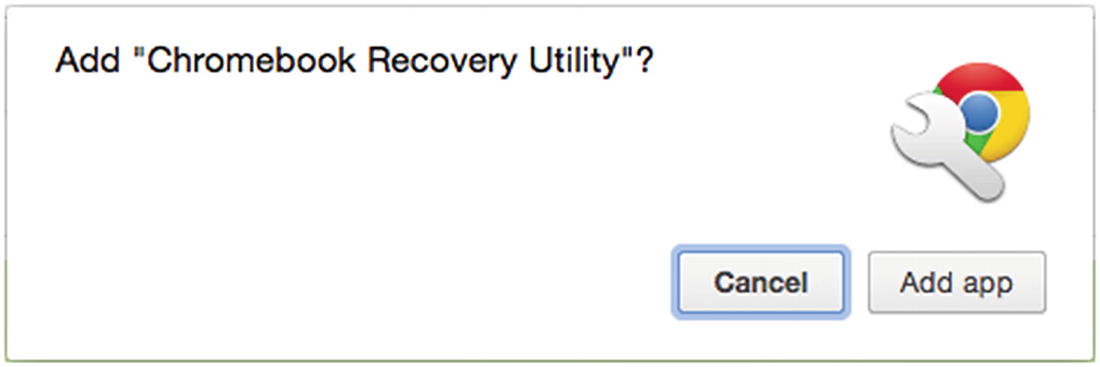
Click the Add app button in the Add “Chromebook Recovery Utility”? dialog box

Click the Recovery icon on the Apps screen to launch the Recovery app
Running the Chromebook Recovery Utility and Creating the Recovery Device
- 1.
Click the Recovery icon to launch the Recovery app. The Chromebook Recovery Utility window then appears, showing the Create a recovery media for your Chromebook screen (see Figure 9-7).

On the Create a recovery media for your Chromebook screen of the Chromebook Recovery Utility, click the Get started button.
- 2.
Click the Get started button. The Identify your Chromebook screen appears (see Figure 9-8).

On the Identify your Chromebook screen, either type the Chromebook’s model number in the text box or click the Select a model from a list link and then use the Select a manufacturer pop-up menu and the Select a product pop-up menu to enter the details
- 3.
Type the model name and number in the text box, and make sure the Found a match with the exact model name readout appears; an image of the Chromebook and its description should appear too. Alternatively, click the Select a model from a list link to display the Select a manufacturer pop-up menu and the Select a product pop-up menu, and then use these pop-up menus to identify the model.
- 4.
Click the Continue button. The Insert your USB flash drive or SD card screen appears (see Figure 9-9).

On the Insert your USB flash drive or SD card screen, open the Select the media you’d like to use pop-up menu and click the USB flash drive or SD card item. You can also take other actions, such as erasing the recovery medium or using a local image of Chrome OS.
- 5.
Connect the USB flash drive or SD card to the computer if it is not already connected.
- 6.
Open the Select the media you’d like to use pop-up menu and then click the menu item for the USB flash drive or SD card.
Note
You can click the Settings icon (the gear icon) toward the right end of the title bar of the Chromebook Recovery Utility window to take three actions: Click the Erase recovery media menu item to erase the contents of the recovery media. Click the Use local image menu item to open a dialog box for selecting a Chrome OS image from your computer so that the Chromebook Recovery Utility does not have to download the image. Click the Send feedback menu item to open the Tell Us What’s Happening dialog box, which enables you to send details of problems you experience using the Chromebook Recovery Utility to Google.
- 7.
Click the Continue button . The Create a recovery image screen appears (see Figure 9-10).

On the Create a recovery image screen, verify that you have chosen the correct USB drive or SD card and then click the Create now button
- 8.
Double-check the device name to verify that you have chosen the correct USB drive or SD card.
- 9.
Click the Create now button. The Chromebook Recovery Utility downloads the Chrome OS image, verifies the download, and then unpacks it. The Chromebook Recovery Utility then erases the USB flash drive or SD card, repartitions it, and installs the Chrome OS image on it. When this process is complete, the Chromebook Recovery Utility will eject the USB flash drive or SD card from the computer’s file system.
Note
On the Mac, the authopen process may request permission to “make changes” after unpacking the downloaded image. The changes are erasing the USB flash drive or SD card. Type your password and then click the OK button to proceed.
- 10.
When the Success! Your recovery media is ready screen appears (see Figure 9-11), you can remove the USB flash drive or SD card and click the Done button to close the Chromebook Recovery Utility.

When the Success! Your recovery media is ready screen appears, remove the USB flash drive or SD card and click the Done button
Recovering the Chromebook with the Recovery Drive
You can now recover the Chromebook using the recovery drive, like this:
- 1.Put the Chromebook into Recovery mode:
If the Chromebook puts itself into Recovery mode when you press the Power key or Power button, you are all set.
If the Chromebook boots to the sign-in screen, click the Shut down button to shut it down. Then, hold down the Esc key and the Reload key while you press the Power key or Power button. The Chromebook boots to Recovery mode.
- 2.
Plug the USB flash drive or SD card into the Chromebook. The Chromebook automatically reads the drive or card and begins the process of reinstalling Chrome OS from it.
- 3.
Wait while the recovery takes place. First, the Chromebook verifies the integrity of the recovery media. Next, you see the message “System recovery is in progress…” as the Chromebook reinstalls Chrome OS from the recovery media.
- 4.
When the message “System recovery is complete” appears, remove the USB flash drive or SD card from the Chromebook. The Chromebook then restarts automatically.
- 5.
When the Welcome! screen appears, set the Chromebook up from scratch, as discussed in Chapter 3.
Troubleshooting Network Issues
Chromebooks are designed to spend most of their lives connected to the Internet and to perform almost all tasks online, so you will need to make sure your network connections are working. In this section, we will look at how to troubleshoot network issues, starting with checking the essentials, moving along to resolving two specific network-connection errors, and then covering how to update the password for a Wi-Fi network.
Checking the Essentials
Verify that Wi-Fi is enabled: Look at the Wi-Fi icon in the status area at the right end of the shelf. If the Wi-Fi icon has a line through it, Wi-Fi is disabled. To enable Wi-Fi, click the Wi-Fi icon, click the Wi-Fi button (which will say No network) on the status menu, and then set the “Wi-Fi” switch at the top of the Network status menu to On.
Check whether the Chromebook is connected to a network: See whether the Wi-Fi icon in the status area is showing connection bars (the arcs that indicate the signal strength).
See if the Chromebook is connected to the right network: Click the Wi-Fi icon in the status area to display the status menu and then look at the Wi-Fi button. If the Chromebook is connected to a network, the Wi-Fi button shows Connected to and the network’s name.
Note
If the Chromebook has connected to the wrong network, make sure that the right network is available. If the Chromebook has multiple known networks, it works its way through them until it finds one that is available.
Make sure the Wi-Fi network is available: If you find that the Chromebook is not able to connect to the Wi-Fi network it is supposed to connect to, make sure the network is available. For example, see if one of the other Chromebooks has connected successfully to the network, or check whether your phone or tablet can see the network. If you find the network has disappeared, you probably need to restart the Wi-Fi access point (or have a colleague restart it) rather than chastise the Chromebook .
Resolving Network-Connection Errors
Failed to Connect to Network: DHCP Lookup Failed
Out of Range
Resolving the “Failed to Connect to Network: DHCP Lookup Failed” Error
The message Failed to Connect to Network: DHCP Lookup Failed indicates that the Chromebook is able to connect to the Wi-Fi network, but the Dynamic Host Configuration Protocol (DHCP) service is not available. Unless you specify an IP address and other network details manually for the Chromebook, it will be unable to use the Wi-Fi network.
This error message typically indicates a problem with the Wi-Fi network with which the Chromebook is trying to connect. When you encounter this error, you would usually need to restart the Wi-Fi access point or have a colleague restart it.
Resolving the “Out of Range” Error
As you would expect, the message Network Connection Error: Out of Range typically occurs when the Chromebook is too far from the Wi-Fi network; in this case, the remedy is to either bring the Chromebook within range of the network or switch to another network that’s available. But this error can also occur when the Chromebook is well within range of the network . If this happens, try the following steps to troubleshoot it:
Connect to another network and then reconnect to this network: If another Wi-Fi network is available, try connecting the Chromebook to that network. If the Chromebook connects successfully, try switching back to the problem network. If the Chromebook cannot connect to the other network either, try restarting the Chromebook.
Restart the Chromebook: Restarting clears out any glitches that have occurred in the network settings, so it can often resolve the problem.
- Forget the Wi-Fi network and connect again: Forgetting the Wi-Fi network removes the network settings; connecting to the network again replaces them. Follow these steps:
- 1.
Click the Wi-Fi icon in the status area to display the status menu.
- 2.
Click the Wi-Fi button to display the Network status menu.
- 3.
Click the Network settings icon (the gear icon) in the upper-right corner to open the Settings window.
- 4.
Click the button for the current network to display the Wi-Fi screen.
- 5.
Click the right-arrow button on the right of the button for the current network to display the Settings screen for the network.
- 6.
Click the Forget button. Chrome OS forgets the network, and the Wi-Fi screen appears again.
- 7.
Click the network you just made the Chromebook forget. The Join Wi-Fi network dialog box opens.
- 8.
Type the password for the network.
- 9.
Check the “Share this network with other users” check box if necessary.
- 10.
Click the Connect button.
- 1.
- Change the name servers: Follow these steps:
- 1.
Click the Wi-Fi icon in the status area to display the status menu.
- 2.
Click the Wi-Fi button to display the Network status menu.
- 3.
Click the Network settings icon (the gear icon) in the upper-right corner to open the Settings window.
- 4.
Click the button for the current network to display the Wi-Fi screen.
- 5.
Click the right-arrow button on the right of the button for the current network to display the Settings screen for the network.
- 6.
Click the Network heading to display the fields in the Network section.
- 7.
Click the Name servers pop-up menu and choose a different setting. For example, if the current setting is Automatic name servers, you might try Google name servers or Custom name servers .
- 1.
Updating the Password for a Wi-Fi Network
When you try to connect to a Wi-Fi network whose password has changed, Chrome OS will display the Join Wi-Fi network dialog box, prompting you to enter the password. However, if Chrome OS attempts to connect to the Wi-Fi network automatically, when the connection fails because of the password problem, Chrome OS will then connect to the next known network—assuming one is available—without telling you that it was unable to connect to the first network. This behavior makes good sense for ensuring the Chromebook has an Internet connection, but it can mean that some of the networks on the known list are not usable.
- 1.
Click the status area to open the status menu.
- 2.
Click the Settings icon to open the Settings window.
- 3.
In the Network section, click the right-arrow button on the right of the Wi-Fi button to display the Wi-Fi screen.
- 4.
Click the right-arrow button on the right of the network whose password you want to update. The configuration screen for the network appears.
- 5.
Click the Configure button. The Join Wi-Fi network dialog box opens.
- 6.
Type the new password in the Password box.
- 7.
Click the Connect button .
Troubleshooting Performance Issues
The Chromebook runs too slowly.
The Chromebook freezes, crashes, or spontaneously restarts itself.
Troubleshooting a Chromebook Running Too Slowly
If a Chromebook is running too slowly, try closing any tabs or windows that you no longer need. If performance improves, it is likely that the Chromebook was running out of memory. Unless the Chromebook is a model with expandable RAM, and you can add more RAM to it (preferably as much as it will hold), your best bet is to limit the number of tabs and windows you have open at any given time. Restarting the Chromebook may provide temporary relief, but the problem is likely to recur once you start overtaxing its resources.
If the Chromebook is temporarily slow, but performance then improves, apparently of its own accord, check to see whether there is a problem with the Internet connection.
Note
Look at the status area to see if the System Update icon (an arrow) appears. If so, apply the update to see if it delivers any performance improvement.
Troubleshooting a Chromebook Freezing, Crashing, or Restarting
If a Chromebook freezes when a Chrome window is active, try pressing Ctrl+Shift+R to force a refresh of the page. A refresh may be enough to unfreeze the Chromebook.
If the Chromebook is still frozen, try restarting it by holding down the Reload key and pressing the Power key or the Power button. If the Restart shortcut does not work, power down the Chromebook by pressing the Power key or Power button and then start it again.
If the Chromebook continues to freeze after the restart, or if it crashes, try uninstalling the most recently installed apps or extensions:
- Uninstall an app:
- a.
Click the Launcher button to open the Launcher.
- b.
Click the up-arrow button to display the Launcher screen.
- c.
Right-click the app to display the shortcut menu.
- d.
Click the Uninstall item on the menu. The Remove dialog box for the app opens.
- e.
Click the Remove button .
- a.
- Uninstall an extension:
- a.
Open or activate a Chrome window.
- b.
Click the More Actions button (the three vertical dots) to display the menu.
- c.
Click or highlight the More tools item to display the More tools submenu, and then click the Extensions item to open a Chrome tab displaying the Extensions screen.
- d.
Click the Delete icon (the trash icon) to the right of the extension you want to remove. The Remove dialog box for the extension opens.
- e.
Click the Remove button.
- a.
If a Chromebook restarts spontaneously, you will normally need to run a Powerwash to recover it.
Troubleshooting Storage Issues
The Chromebook has a small amount of storage, such as 16 GB.
Multiple user accounts have been set up on the Chromebook.
The Chromebook’s users have downloaded many files or large files (such as videos) for local use.
Note
As with most computers, Chromebooks have less storage than their nominal capacity. Part of the difference is Chrome OS and its apps, which occupy several gigabytes between them. The other reason is that Chromebook manufacturers use decimal (base 10) numbers rather than binary (base 2) numbers for measuring storage capacity. In decimal, a gigabyte has 1,000,000,000 bytes of storage—1000 x 1000 x 1000. But in binary, a gigabyte has 1,073,741,824 bytes—1024 x 1024 x 1024—or 7.4% more; technically, this is a gibibyte, or 1 GiB, but few people use the term. So, when a manufacturer claims a Chromebook has 16 GB of storage, that means it has 16,000,000,000 bytes, which translates to 14.9 GB in binary.
See How Much Storage Is Available on a Chromebook
- 1.
Click the status area to display the status menu.
- 2.
Click the Settings icon to open the Settings window.
- 3.
In the Device section, click the Storage management button to display the Storage management screen (see Figure 9-12).
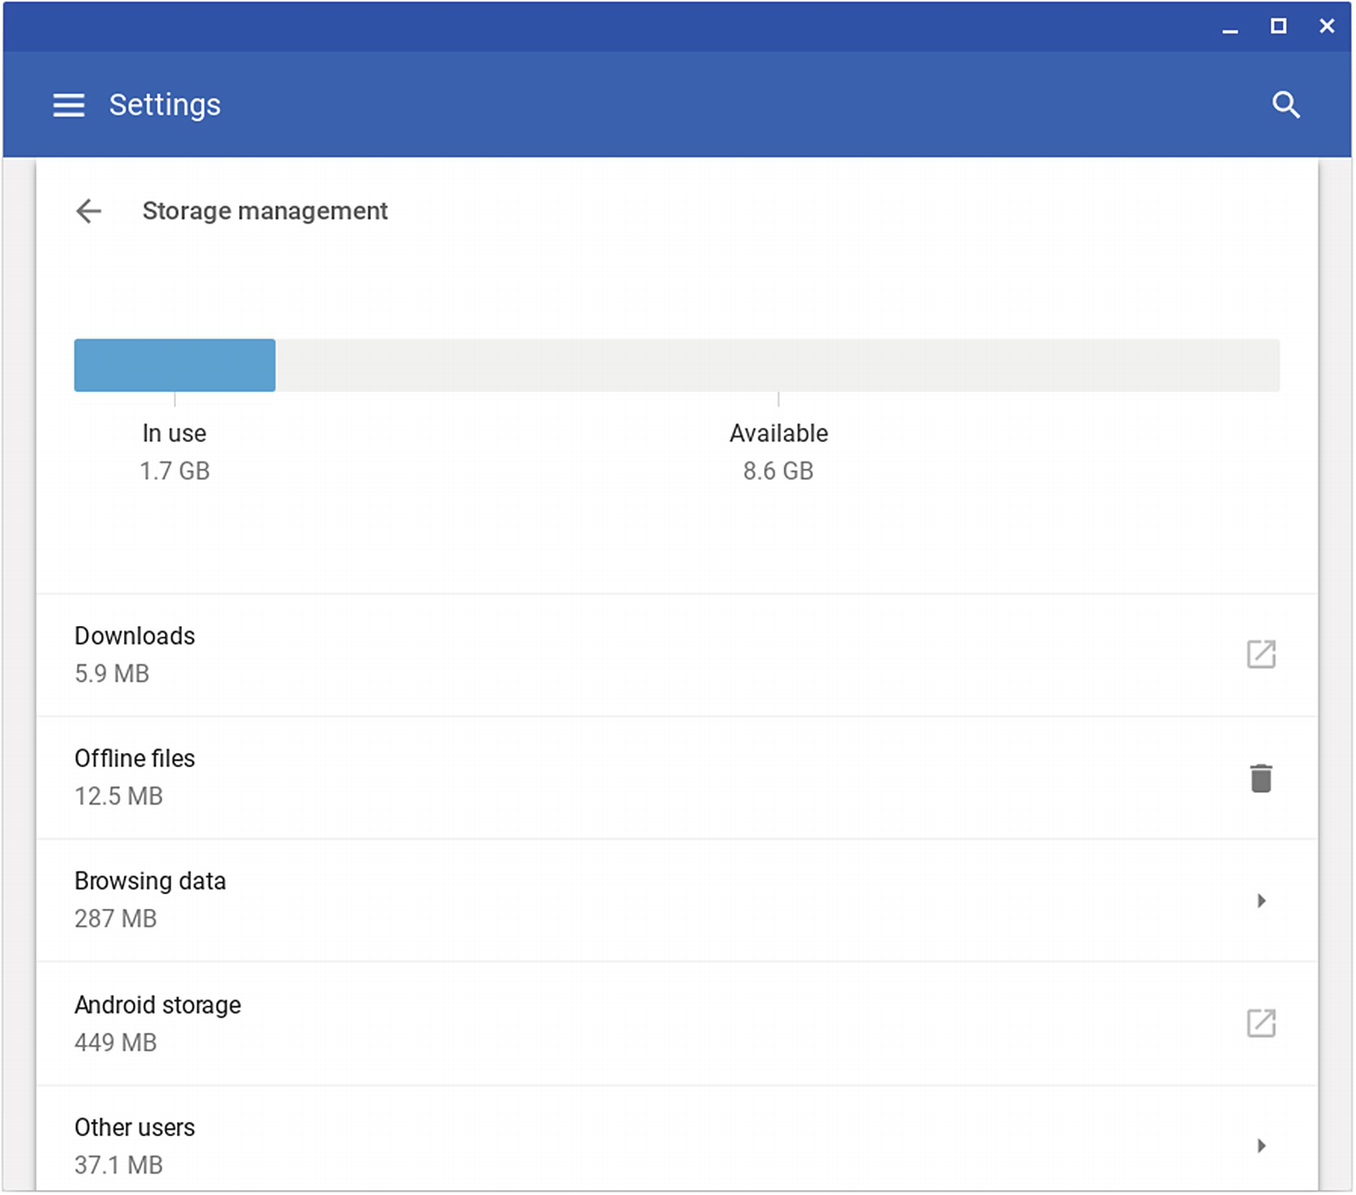
Look at the histogram at the top of the Storage management screen in the Settings window to see how much space is free on the Chromebook and what categories of items are consuming space
- 4.
Look at the histogram at the top, which shows a blue In use bar and a gray Available bar.
Tip
You can also see how much storage is available in the Files app. Click the Downloads folder (because it is stored on the Chromebook), and then click the More Actions button and look at the readout at the bottom.
Free Up Storage on a Chromebook
Remove any extra user accounts.
Delete downloaded files and offline files you no longer need.
Clear your browser cache.
Uninstall any apps you do not need.
See the following subsections for details of these moves.
Remove Any Extra User Accounts
Usually, the best place to start recovering space on a Chromebook that has multiple users is by removing any user accounts that are no longer needed. Each user account can contain downloaded files, offline files, and files cached by the browser, so for a Chromebook shared by many users, space may disappear quickly.
Note
You cannot remove the owner account from the Chromebook this way. To remove the owner account, first run a Powerwash, restoring the Chromebook to factory settings. You can then set up the Chromebook again using the account you want to have as the new owner account.
- 1.
If you are signed in to the Chromebook, click the status area and then click the Sign out button on the status menu . The sign-in screen appears.
- 2.
On the sign-in screen, click the user account. The Password field appears.
- 3.
Click the pop-up menu button on the selected user account. The pop-up menu opens.
- 4.
Click the Remove this user item. A warning appears, telling you that the user’s files and local data will be removed from the Chromebook.
- 5.
Click the Remove this user button. Chrome OS removes the user account.
Delete Offline Files and Downloaded Files
- 1.
Click the status area to display the status menu.
- 2.
Click the Settings icon to open the Settings window.
- 3.
In the Device section, click the Storage management button to display the Storage management screen (shown in Figure 9-12, earlier in this chapter).
- 4.
To delete the offline files, click the Offline files button, and then click the Delete Files button in the Delete offline files ? dialog box that opens (see Figure 9-13).

Click the Delete Files button in the Delete offline files? dialog box to remove all your offline files from the Chromebook
- 5.
If you want to delete downloaded files, click the Downloads button to open a Files window showing the contents of the Downloads folder.
- 6.
Delete any downloaded files you no longer need. To delete a file, select it and then click the Delete button (the Trash icon) on the toolbar. You can also delete a file by right-clicking it and then clicking Delete on the contextual menu, or by selecting the file and then pressing Alt+Backspace.
Note
If you need to check the contents of a file before deleting it, get a preview by selecting the file and pressing the spacebar. Press the spacebar again to close the preview.
- 7.
When you finish working with the downloaded files, go back to the Storage management screen if you want to clear your browser cache.
Clear Your Browser Cache
Your next step in reclaiming precious space on a Chromebook is to clear the browser cache—the images and data that Chrome has stored to enable you to browse more quickly and return to sites you have previously visited.
- 1.
Click the Browsing data button to open the Clear Browsing Data dialog box.
- 2.
Click the Basic tab or the Advanced tab as needed.
Note
See the section “Clearing Browsing Data” in Chapter 4 for full details on the categories of data you can clear in the Clear browsing data dialog box.
- 3.
Uncheck the check box for each category of data you do not want to clear. (All the check boxes are checked by default.)
- 4.
Click the Clear Data button.
Troubleshooting Keyboard Issues
The keyboard does not respond.
The keys produce the wrong characters.
Troubleshooting the Keyboard Not Responding
If the keyboard on a Chromebook stops working, your best bet is normally to restart the Chromebook . If the pointer is still working, shut down the Chromebook by clicking the Shut down button on either the status menu (if you or another user are logged in) or on the sign-in screen. Otherwise, press and hold the Power key or Power button to power off the Chromebook. After the Chromebook shuts down, press the Power key or Power button again to restart the Chromebook.
If the keyboard now works, try signing in using the same account that had the keyboard problem. If the keyboard now works fine in that account, the Chromebook is back in business. But if the keyboard problem recurs, sign out of the account and restart the Chromebook again. If the account exhibiting the problems is not the owner account for the Chromebook, delete that account from the Chromebook and then add it back again. But if the problem account is the owner account, reset the Chromebook as explained in the section “Resolving Problems by Resetting and Powerwashing Chromebooks” earlier in this chapter.
If the keyboard still does not work after restarting the Chromebook, you will need to contact the Chromebook’s manufacturer. For a short-term fix, you can try connecting a USB keyboard and see if that works.
Troubleshooting the Keys Producing the Wrong Characters
If pressing the keys on the Chromebook’s keyboard produces the wrong characters on the screen, most likely the keyboard layout has been changed. To find out, click the status area and then look at the Input method item near the top. If this item shows the wrong keyboard layout, click the item to display the Input methods status menu and then click the right keyboard layout, such as US keyboard.
If the keyboard layout you need does not appear on the Input methods status menu, click the Settings icon to display the Languages and input section of the Settings window. You can then click the Input method button to expand the Input method controls and use them to configure the input method.
Troubleshooting Touchpad Issues
If the touchpad on a Chromebook stops registering touches, check to see whether the touchpad has accumulated dirt or dust. If so, use a soft, lint-free cloth to remove the dirt or dust.
If—or when—the touchpad is clean enough but is still not responding, try pressing the Esc key several times. Next, try drumming your fingers on the touchpad for several seconds to see if it starts registering.
If the touchpad is still not responding , you will need to resort to two of the three standard moves. First, try restarting the Chromebook by powering it off and then on again. If restarting does not solve the problem, run a Powerwash.
If the touchpad problem persists after the Powerwash, sign in to the Chromebook (or have someone else sign in) using a different user account than the one that was having the trouble. If the touchpad works correctly for this user account, delete the other user account from the Chromebook and then add it again.
If none of these moves cures the problem, contact the Chromebook’s manufacturer for advice. In the meantime, consider plugging in a USB mouse if you need to keep the Chromebook operational.
TROUBLESHOOTING UNWANTED TOUCHPAD CLICKS
If you find a user complains that the touchpad clicks things by itself, first turn off the tap-to-click feature. Open the Settings app , click the Touchpad button in the Device section to display the Touchpad screen, and then set the Enable tap-to-click switch to Off.
If the Enable tap-to-click switch is already set to Off, or if the problem persists after you set it to Off, the culprit is most likely the Automatic clicks accessibility feature, which automatically clicks following a short delay after the pointer is moved. To turn this feature off, click the status area, click the Accessibility button on the status menu, and then click the Automatic clicks item on the Accessibility status menu.
Troubleshooting Touchscreen Issues
If the touchscreen on a Chromebook stops responding to touch, your first move should be to clean the screen to remove any dirt or dust that may be preventing it from reading touches correctly. Normally, the best thing to use is a soft, lint-free cloth moistened slightly with water. If you need heavier-duty cleaning, consult the Chromebook manufacturer’s website for recommendations on cleaners that are safe for the screen; do not reach for the contents of the janitorial closet.
Beyond cleaning the touchscreen and checking for any obvious damage, try restarting the Chromebook, resetting it, and Powerwashing it. If these standard moves do not resuscitate the touchscreen, contact the manufacturer for advice.
Troubleshooting Battery Issues
The battery in a Chromebook should last several years, but you may need to troubleshoot issues along the way.
Verify that the charger cable is connected securely to the charger: The cables may have become loose.
Verify that the charger cable is connected correctly to the Chromebook: Chromebooks use various types of power ports, and you may find a student has plugged the power connector into the wrong port. If this has happened, check that the assaulted port has survived the experience.
Verify that the charger cable is intact and fully connected to the socket: Replace the cable if it has been damaged.
Verify that the power socket is providing power: If the charger, the cable, and the connections are fine, try a different socket.
Try replacing the charger: If you have other Chromebooks of the same type, borrow a working charger from one of them and see if it works for the problem Chromebook.
- 1.
Disconnect the charger from the socket.
- 2.
Disconnect the charger from the Chromebook.
- 3.
Reconnect the charger to the Chromebook.
- 4.
Reconnect the charger to the socket.
- 5.
Leave the Chromebook to charge for 30 minutes.
If the Chromebook still will not charge after 30 minutes, try resetting the Chromebook , as explained in the section “Resolving Problems by Resetting and Powerwashing Chromebooks” earlier in this chapter. If the reset does not get the Chromebook to start charging, you will need to contact the manufacturer for further steps to fix the problem.
Troubleshooting Bluetooth Issues
Bluetooth on Chromebooks can be highly useful for connecting devices such as headphones, speakers, and mice, but it seems to produce more problems than on Windows PCs and Macs. While Chrome OS does support many widely used Bluetooth devices, there are many other devices that it does not support.
This section will show you how to troubleshoot typical problems using Bluetooth devices.
Make Sure the Bluetooth Device Is Close Enough to the Chromebook
Start by making sure that the Bluetooth device is close enough to the Chromebook for Bluetooth to work. If the device works intermittently with the Chromebook and is located more than a few yards away, try moving the device closer to see if a stronger connection solves the problem.
Note
The range at which a Bluetooth device can sustain a connection depends on the device’s class and its hardware. There are three classes: Class 1 devices transmit at 100 mW and have an intended range of 100 meters (328 feet); Class 2 devices transmit at 2.5 mW and have an intended range of 10 meters (33 feet); and Class 3 devices transmit at 1 mW and also have an intended range of 10 meters (still 33 feet). These intended ranges are not absolute. If there are walls or other obstructions between the Bluetooth devices, the effective range will be less. But Bluetooth should normally work well within a typical classroom.
Verifying That Bluetooth Is Enabled
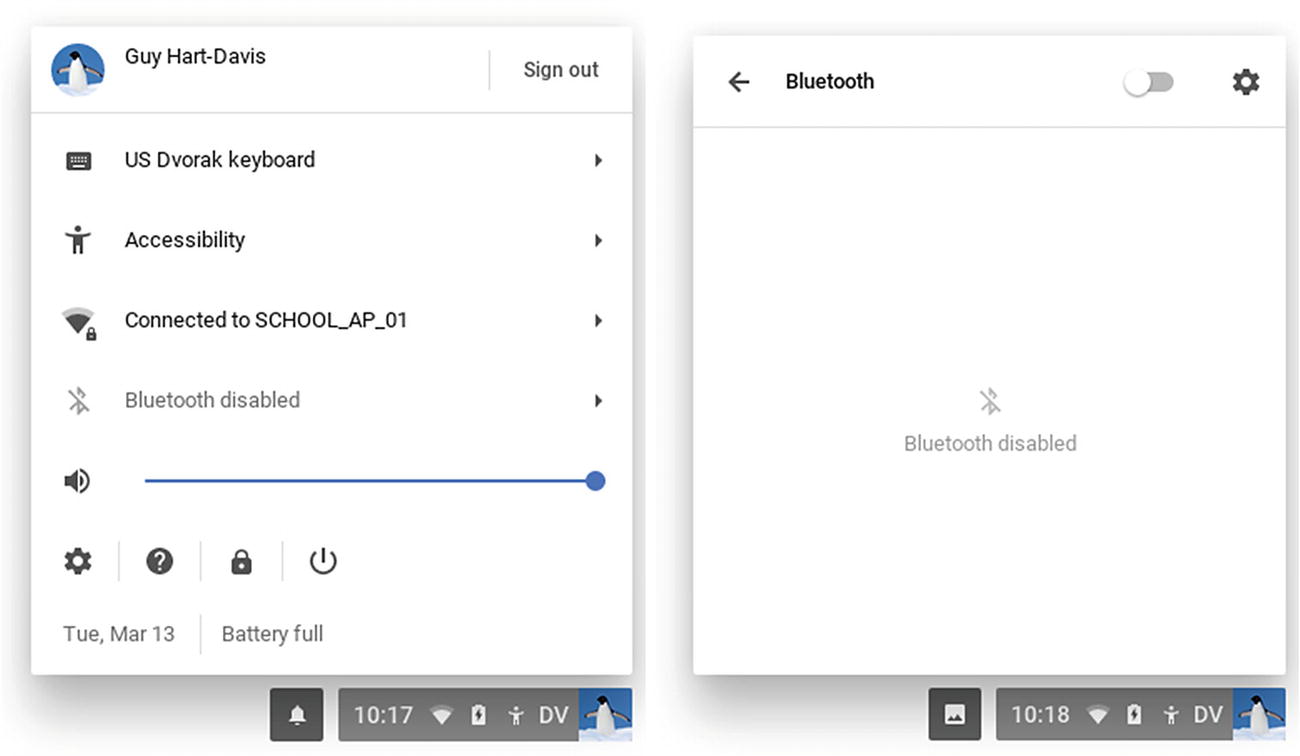
If the Bluetooth item on the status menu (left) shows Bluetooth disabled, click the menu item to display the Bluetooth status menu (right) and then set the switch at the top to On
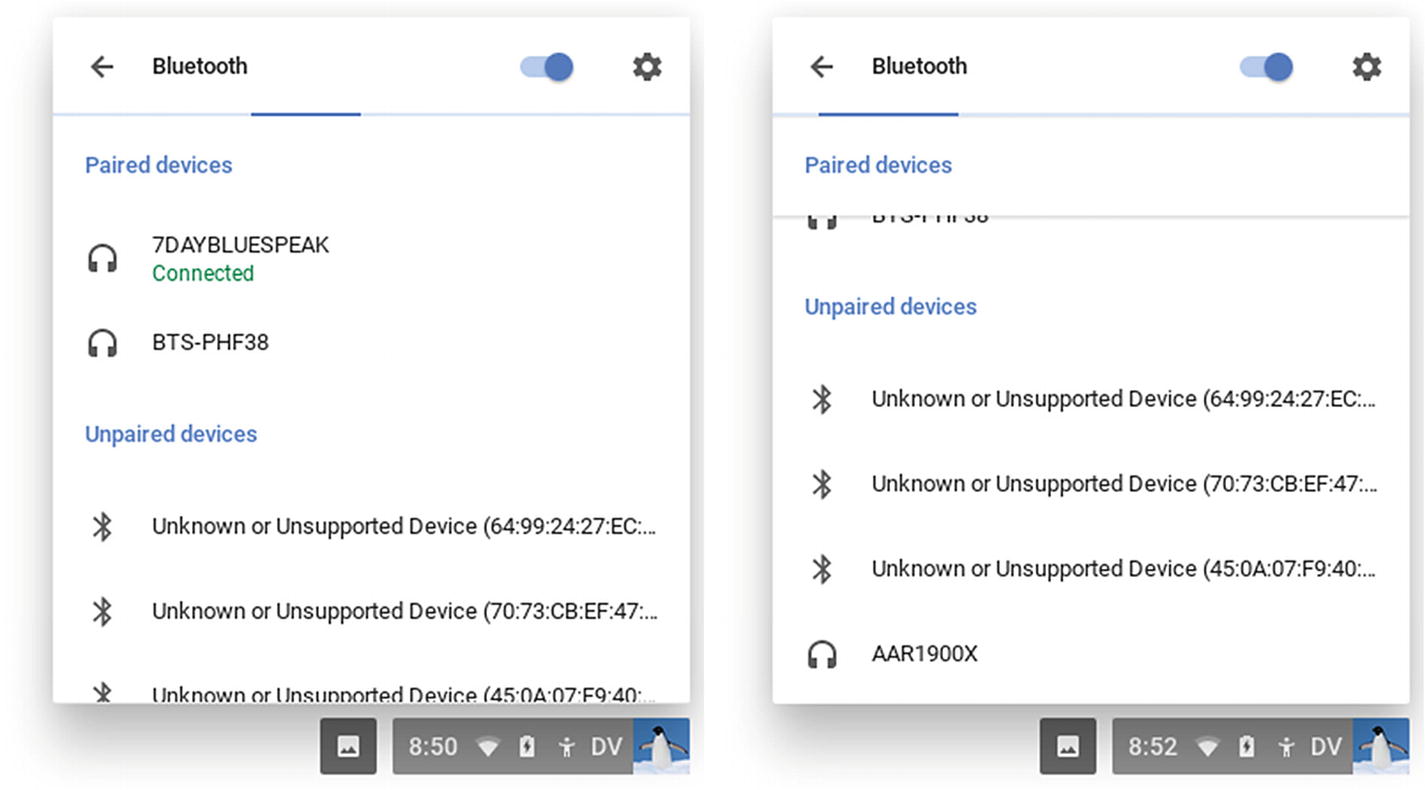
The Bluetooth status menu shows the Paired devices list at the top and the Unpaired devices list below it. Scroll down if necessary to locate the device you are trying to connect.
ADDING BLUETOOTH TO A CHROMEBOOK THAT LACKS IT
If the Bluetooth item (which displays Bluetooth enabled or Bluetooth disabled) does not appear on the status menu, the Chromebook does not support Bluetooth. If you need the Chromebook to have Bluetooth capabilities, you may be able to add them by plugging in a USB Bluetooth adapter. To reduce the risk of the Bluetooth adapter getting broken, look for a small adapter that will protrude only a short distance from the socket.
Seeing If the Bluetooth Device Is Compatible with Chrome OS

The Unpaired devices list on the Bluetooth screen in the Settings window shows “Unknown or Unsupported Device” for any Bluetooth device Chrome OS cannot recognize or does not support
Look at the Unpaired devices list to see whether Chrome OS can handle the Bluetooth device. If the device appears by name with a category icon, like the AAR1900X audio receiver (an honorary headphone) shown in the figure, Chrome OS recognizes the device and supports it. If the device appears as Unknown or Unsupported Device and its MAC address, with the generic Bluetooth icon, Chrome OS does not recognize the device and most likely does not support it.
FINDING OUT WHICH MAC ADDRESS BELONGS TO WHICH DEVICE
Looking at Figure 9-16, you have likely spotted a problem: To know which Bluetooth device Chrome OS does not recognize or support, you need to be able to identify the device by its MAC address. Most Bluetooth devices do not have the MAC address printed on them, so identifying a device from its MAC address can be a challenge—especially because the Chromebook may list Bluetooth devices in neighboring rooms, or even neighboring properties, as well as the ones you can physically control. The resulting plethora of Bluetooth devices renders useless the old standby of turning on a Bluetooth device and identifying it by the new entry on the list of devices.
One option is to open a browser window, search for a MAC address lookup tool (the search mac address lookup usually produces plenty of results), and then enter the MAC address of the unknown or unsupported device that Chrome OS is reporting. The lookup tool may return the manufacturer’s name, which may give you enough information to identify the device. However, the manufacturers of many devices are not listed, so this approach works only sometimes.
A more promising way to learn a Bluetooth device’s MAC address is to use a Windows PC or a Mac, as both Windows and MacOS have much wider Bluetooth support than Chrome OS. You can either use a Bluetooth scanner app to find information about nearby Bluetooth devices or pair the Bluetooth device with the PC or Mac and then look at the device’s information. For example, on MacOS, choose Apple ➤ About This Mac to open the About This Mac window, click the System Report button to launch the System Information app, and then click the Bluetooth item in the Hardware section of the sidebar to display details on paired and connected Bluetooth devices.
Verifying That the Bluetooth Device Is Working
If the Bluetooth device worked before with Chrome OS, but you cannot get it working with Chrome OS now, double-check that the device is working. First, try a different Chromebook to see if the device will work with it. If not, use a computer or device running a different operating system, such as an Android phone, to verify that the device is working. You will usually need to pair the Bluetooth device with the computer or device in order to get it working, and you will normally need to unpair the Bluetooth device again in order to pair it with the Chromebook afterward.
Disabling and Reenabling Bluetooth on the Chromebook
- 1.
Click the status area to display the status menu.
- 2.
Click the Bluetooth button to display the Bluetooth status menu.
- 3.
Set the switch at the top to Off.
- 4.
Set the switch back to On.
After re-enabling Bluetooth, try connecting to the device again. If you still cannot get the Bluetooth device to work, and you are sure it is compatible, try restarting the Chromebook to reload the operating system.
Troubleshooting Camera Issues
If the camera on a Chromebook stops working, the problem will usually be pretty obvious: Either an app (such as the Camera app built into Chrome OS or Google’s Hangout app) displays a black rectangle where a smiling face should be, or Chrome OS displays the message “No camera found”—or both.
Once you have checked that the camera has not been physically removed or otherwise suffered terminal trauma, power the Chromebook down and then power it back on. If, once you have signed in using the same account, the camera works in the app with which the problem occurred, you are back in business. If not, try running another app that uses the camera. If that app works, but the problem app does not, try uninstalling and then reinstalling the problem app.
If the camera is still not working, try resetting the Chromebook. If a reset does not solve the problem, try a Powerwash. Beyond that, you will need to contact the Chromebook’s manufacturer for advice on fixing the camera or getting it fixed.
Troubleshooting Audio Issues
The Chromebook produces no sound.
The Chromebook produces distorted or stuttering sound.
The Chromebook plays audio in mono rather than stereo.
Troubleshooting No Sound
If a Chromebook is producing no sound , first look for obvious problems with any speakers, headphones, or other audio hardware connected to the headphone port. For example, speakers may be muted, disconnected from a power source, or set to zero volume; and headphones may simply be broken. If necessary, disconnect any audio hardware so you can troubleshoot the problem using the Chromebook’s internal speaker.
Next, make sure that the audio is not muted and that the volume level is not set to zero. Either simply press the Volume Up key on the keyboard until the pop-up volume control shows a moderate volume, or click the status bar to display the status menu and then drag the Volume slider to set a moderate volume.
Tip
Keep the volume down when troubleshooting a lack of audio output. You may find that the Chromebook is sending the audio to a remote device, such as a Bluetooth speaker in another classroom.
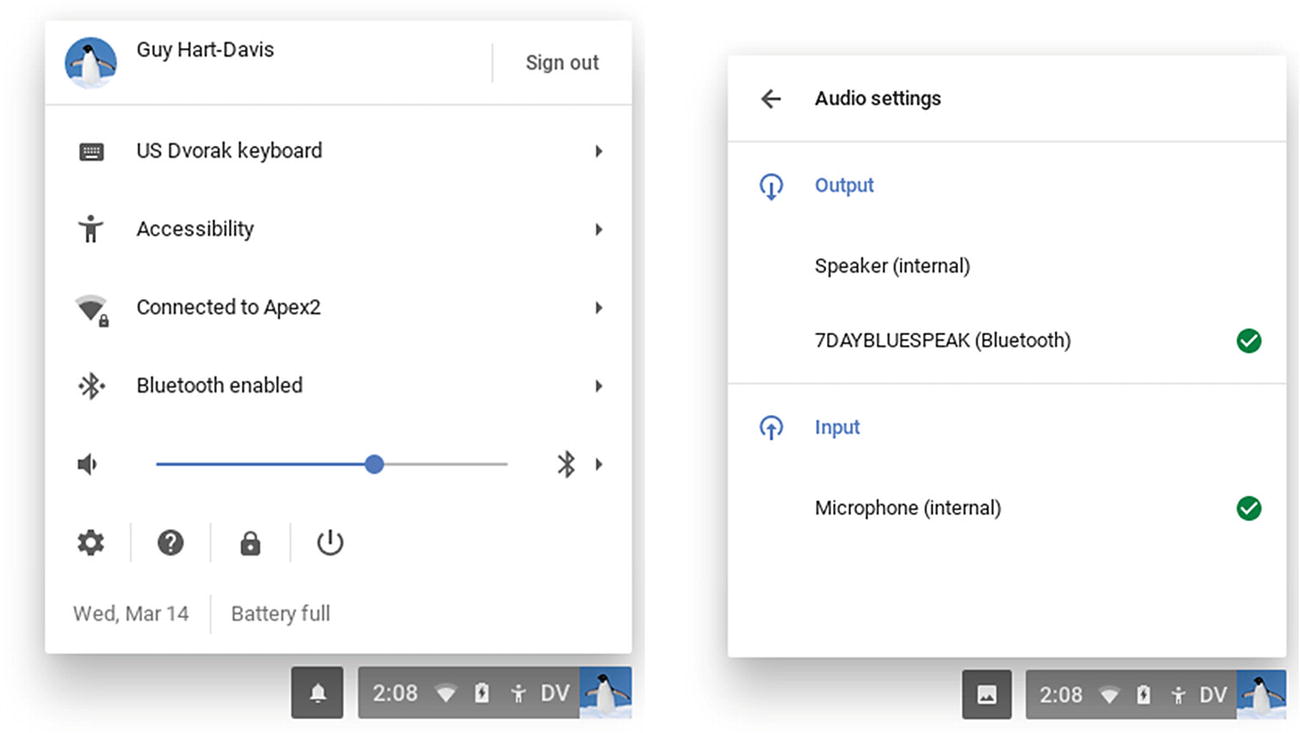
Click the right-arrow button on the right of the Volume slider in the status menu (left) to display the Audio settings status menu (right), whose Output section shows you the current audio output device
Restart the Chromebook .
Reset the Chromebook.
Powerwash the Chromebook.
Troubleshooting Distorted Sound or Stuttering Playback
The volume is too high for the internal speakers: Chromebooks tend to have small speakers that are not capable of producing the volume of sound that some students prefer. External speakers may be a solution.
There is a poor connection to external speakers or headphones: Make sure the speaker or headphone cable is plugged securely into the Chromebook’s headphone port. Check the cable for damage. Check the headphone port for damage or for what medical professionals call “foreign bodies,” such as lint, gum, or insects.
A teenager is listening to emo: The immediate solution is headphones . The longer-term solution is the passage of several years.
Another possibility is that two Chrome apps are trying to output audio at the same time. When this happens, you will normally hear one app’s output with interruptions rather than some output from each app. Look through the open apps and close any audio-capable apps other than the one whose output you want to hear. If this does not solve the problem, try restarting the Chromebook. If a restart does not help either, reset the Chromebook.
If a Chromebook’s audio stutters when playing to a Bluetooth device, see if a restart helps. However, anecdotal evidence suggests that Chrome OS is prone to stuttering when playing audio to some Bluetooth devices. If the problem persists, try using another Bluetooth device or (preferably) a wired device instead.
Troubleshooting Audio Playing in Mono
- 1.
Click the status area to display the status menu.
- 2.
Click the Accessibility button to display the Accessibility status menu.
- 3.
In the Additional settings section, see if the Mono audio item bears a green circle with a white check mark. If so, click the Mono audio item to remove the check mark.
Note
If the Mono audio setting is not enabled, make sure that the cable for external speakers or headphones is fully inserted in the Chromebook’s headphone port. A partial connection may cause only one channel to play, giving a mono-like effect.
Summary
In this chapter, you have learned to deal with a wide variety of the problems you are most likely to encounter when running a fleet of Chromebooks in a school’s classrooms. Armed with extra Chromebooks and the restart-and-replace approach, you can keep your classrooms fully computerized and resolve problems when you have time. You know how to perform the three major problem-solving moves: resetting a Chromebook, running a Powerwash, and recovering a Chromebook using a recovery device. You have also learned how to troubleshoot a wide range of issues, ranging from networking and performance to hardware issues involving the keyboard, touchpad, touchscreen, and other Chromebook components.