
Hour 5
Visible and Visual Teamwork
What You’ll Learn in This Hour:
 Summary and Case Study
In this hour, we explore not only how to use Design Thinking principles for teamwork and collaboration, but how to execute a Design Thinking exercise in the form of a workshop or session. After covering the importance of Visual Thinking and listing more than two dozen exercises for visual collaboration, we highlight several online Design Thinking collaboration tools. Then we walk through a simple three-stage process for successfully executing any Design Thinking exercise: preparing for the exercise, running the exercise, and concluding the exercise. By keeping the process streamlined and open for exercise-specific additions, and including key steps within each stage, we set the stage for remote as well as face-to-face collaboration. A “What Not to Do” highlighting the importance of gaining a shared understanding between team members concludes Hour 5.
Making Teamwork Visible and Visual
If we are thinking solo, we might not absolutely need to get our initial thoughts down on paper, a whiteboard, or into some kind of a digital format. Though our chances are slim, we might get lucky and remember enough of the factors and implications surrounding our thoughts to actually arrive at a solution. It’s not the smartest approach, but sometimes it works.
However, if we are working in a team, we absolutely need to get what’s in our heads out of our heads. Mere words are rarely adequate if only because it’s too easy to misuse and misinterpret words. The best way to get what’s in our heads out of our heads is to do so visually. We call this general technique Making Ideas Visible and Visual. And it’s nothing more than creating and together refining pictures, figures, charts, models, and so on to help us create a shared understanding between our team members and others we might invite to help us think through and solve problems. Two methods for making our work visible and visual include Visual Thinking and visually based Design Thinking exercises for visual collaboration.
Design Thinking in Action: Visual Thinking for Understanding
For our purposes, Visual Thinking is about intentionally augmenting or even replacing words with pictures and figures. As we’ve heard countless times, a picture is worth a thousand words. While we might argue the word count, as we see in Figure 5.1, a picture can indeed create a shared understanding more effectively than pages of words.
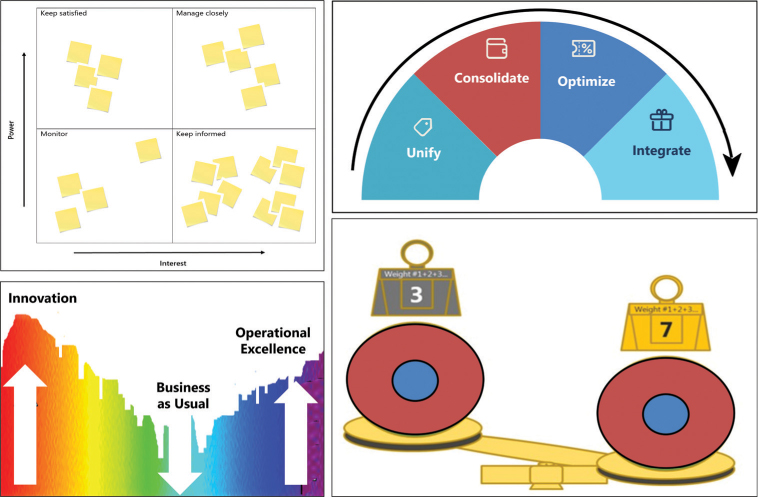
FIGURE 5.1
Note how the visuals here help anyone, regardless of their previous involvement, begin to understand the problem or challenge that a team may be facing.
Design Thinking in Action: Exercises for Visual Collaboration
As we have already seen, fundamental to Design Thinking is the notion of making ideas visible and visual. It’s in these ways that we can pull our thinking out of our heads and share it with others to empathize, ideate, communicate, empathize, prototype, test, operationalize, execute, and more. Throughout the book, we cover more than three dozen exercises for collaborating visually and visibly. Some of these include
- Stakeholder Mapping for learning about people more quickly
- The Power/Interest Grid for prioritizing stakeholders
- Journey Mapping to learn more about people and their work
- Empathy Mapping for learning more about users and personas
- Problem Tree Analysis for separating causes from effects
- Boats and Anchors for thinking through schedules
- Metaphor and Analogy Thinking for simplifying the complex
- Mission Impossible thinking for ideation
- Möbius Ideation for “efficiency thinking”
- Pattern Matching and Fractal Thinking for identifying themes
- Affinity Clustering for finding patterns and themes
- Running the Swamp for ideation and empathy
- The Culture Cube for understanding broadly
- Golden Ratio Analysis for validating the fit of natural patterns
- Bullseye Prioritization to understand what’s first, second, third
- Force Field Analysis for visualizing forces for and against change
- Mind Mapping for visual problem solving
- Concentric Communications for right person, right time
- Structured Text for rapid comprehension
- 2×2 Matrix Thinking for focus and prioritization
- Adjacent Space Exploration for low-risk next steps
- Cover Story Mockup to align and excite
- RTB for smarter next steps
- Process Flows for shared understanding
- Mockups for learning and feedback
- The Inverse Power Law for responsibly accommodating change
Let us now turn our attention to a set of tools that facilitate visual and visible collaboration and give us ways for geographically disbursed teams to run through Design Thinking exercises together.
Tools for Visual Collaboration
All of us are accustomed to collaborating with others face to face. We use whiteboards, take a look at figures and plans across a desk or table from one another, and communicate in meeting rooms and conference spaces.
But as we know, collaboration cannot always be done face to face. As our teams span further distances and geographies, and a myriad of local and worldwide conditions make travel difficult or expensive, the need to collaborate virtually has become more important than ever.
For Design Thinking exercises and other such real-time interactions, consider using popular tools such as the following:
- Klaxoon boards and its workshop platform for running interactive meetings and Design Thinking workshops, reviewing and marking up pre-prepared content created in Microsoft PowerPoint or Visio or Adobe’s collaboration tools, running live exercises using Klaxoon’s multicolored smart and resizable sticky notes, and more. In cases where a team cannot physically meet to run a Design Thinking exercise, Klaxoon and Microsoft Whiteboard (covered next) are easy to use. See https://klaxoon.com/ to create an account and start using Klaxoon’s workshop platform.
- Microsoft Whiteboard and its prepopulated problem-solving, design, strategy, retrospective, and empathy map templates and more for live sketching, working out concepts, marking up content to drop into a Klaxoon board, and so on. Whiteboard is included in Windows 11, is available in a limited Web version, and can be downloaded for other Windows platforms, Apple iPhone, and iPads. See the online Microsoft store for the app.
- Figma for wireframing, marking up sticky notes, and sharing ideas quickly with others including using custom libraries to host and iterate on prototypes for our projects and initiatives. And use Figma’s FigJam for online whiteboarding, ideating, and exploring ideas together. See https://www.figma.com to set up an account and use this tool.
- Microsoft Teams and Zoom Video Communications for communicating and collaborating through video, sharing figures and other data, and communicating both real time and asynchronously. Download Zoom at www.zoom.us/download and download Microsoft Teams at www.microsoft.com/en-us/microsoft-teams/download-app.
Of course, many other tools are available, too. Use Miro for collaboration, Canva for prototyping, Mural for Design Thinking templates and canvases, the Billboard Design Thinking group on LinkedIn for templates, and others similar to the ones listed here for running real-time collaboration and video sessions on platforms such as Linux and various mobile platforms.
Executing a Design Thinking Exercise
There are entire books and courses dedicated to delivering Design Thinking workshops and facilitating exercises. For our purposes, we have simplified “running a Design Thinking exercise” into three stages, as noted here and illustrated in Figure 5.2.
- Stage One: Prepare for the Exercise
- Stage Two: Run the Exercise
- Stage Three: Conclude the Exercise

FIGURE 5.2
Use this simple three-stage process for thinking through and executing a Design Thinking exercise.
Use these three stages and the steps contained within each stage to execute any of the Design Thinking exercises outlined in this book. Each stage is detailed next.
Note
Just a Bit of Clarity…
Though another term might have been ideal, we settled on the term stage to avoid confusion with the phases associated with the Design Thinking Model for Tech and the steps associated with running Design Thinking exercises.
Stage One: Prepare for the Exercise
There are entire courses dedicated to preparing for and delivering Design Thinking workshops, sessions, or exercises (terms that are generally interchangeable). For our purposes, we want to keep any overhead as light as we responsibly can to create as simple a process as possible.
We need to consider the “people aspect” of an exercise too; not only the community of users who must be central to our work, but our team members and other stakeholders we will ask to join us in a Design Thinking exercise.
Finally, if we keep in mind that our exercises are generally intended to broadly learn, deeply empathize, define problems to ideate and problem solve, or prototype and test, and we understand where our Design Thinking exercise sits on this continuum, then we should know more about what to gather, how to plan, and who to invite and prepare.
Prepare and plan for running a Design Thinking exercise by performing the following:
Select an owner to determine the need for a particular Design Thinking exercise and prepare for it. Oftentimes the owner will also serve as the exercise facilitator (or coach), but we should not make that assumption just yet.
Pull together all of the logistics including how the exercise will be facilitated (in a physical location or through a tool such as Klaxoon).
Arrange for the tools and materials necessary to facilitate the exercise (ranging from physical whiteboards, tables, markers, and sticky notes to virtual equivalents of the same).
Establish the key challenge to be tackled, a brief set of exercise objectives, and a simple agenda.
Based on the objectives, ensure that the planned Design Thinking exercise is still appropriate. Adjust or add additional exercises and update the agenda as needed.
Consider how much time is needed to run the exercise (refer to the Exercise Notes for that exercise). Identify the number and makeup of the necessary attendees and the actual calendar date and timing for the exercise based on attendee and presumed facilitator or coach availability.
Send out the meeting invitations early enough to lock in the attendees. Include the agenda and objectives in this meeting invitation, and make it clear that the exercise will not only be fun and a great use of time, but also an important step toward together achieving our goals.
Based on what we’ve learned through this process, identify and prepare our Design Thinking exercise facilitator or coach. Ensure that the facilitator runs through a mock set of the exercises to familiarize themselves. The facilitator needs to be ready and excited to engage the attendees and drive our exercise’s outcomes.
This simple and repeatable process may be modified, of course, but it should serve as a good starting point or template for any exercise.
Stage Two: Run the Exercise
If we have prepared well, then we should have a physical or virtual room full of attendees ready and excited to work together. Commence and execute the Design Thinking exercise by performing the following:
Be the first to (physically or virtually) arrive and welcome everyone. Round-robin through brief 30-second introductions. Include a simple icebreaker as each attendee introduces themselves (see the note here for a list of popular and favorite icebreakers).
Share any logistics or housekeeping rules related to facilities, scheduled breaks, practices for reducing distractions, expectations for participation, protocols for participating, and so on. Keep these lighthearted and optimistic, creating a safe space for collaboration and open communication.
Introduce the topic and objectives of the meeting, the agenda, what we should all know about the problem or situation or lay of the land, and our ultimate goal today: the outcome we wish to achieve (which might include understanding more about a situation, modeling or defining a problem, ideating to learn or potentially solve a problem, building a prototype, and so on).
Prior to commencing the actual Design Thinking exercise, it may be useful to start with a warm-up intended to help people think creatively. See Hour 10 for warm-ups, including activities such as drawing what’s in our heads, building a skyscraper with toy blocks or LEGO blocks, building a pasta noodle or paper bridge with a neighbor, creating the most accurate or best-distance paper airplane, designing a four-cup holder with only paper and tape, drawing a house without lifting the pen or retracing a line, and so on.
Introduce the Design Thinking exercise, the challenge we face, the materials we will use, and the outcomes we are seeking. Remind the attendees of the key user communities we need to stay focused on, including those users and edge cases at risk of being ignored or marginalized.
Run the actual Design Thinking exercise following the steps outlined here or in other sources.
If the attendees stall or get stuck or distracted, consider introducing a set of guardrails for thinking differently (as outlined in Hour 11) or running a quick check-in to see how everyone is doing. Provide clarity or help as needed.
Note
Important Icebreaker Guidance
Some of our favorite icebreakers include having an attendee share their dream job, favorite sports team, first car, proudest accomplishment, the item at the top of their bucket list, the music or podcast they’re currently listening to, the last book they read, how they spent last weekend, or to share something that few people probably know about them. Be careful to create an inclusive and encouraging environment, however, while walking through each attendee’s answers!
This process looks easy on paper, but challenges will arise. Be prepared to optimistically navigate those challenges, keeping in mind the outcomes we need to achieve and the fact that we all need to cross the finish line together.
Stage Three: Conclude the Exercise
While the conclusion of a particular exercise may yield very different outputs and outcomes, there are still several common steps to execute to conclude our time together.
Perform a simple retrospective on the exercise and how it was delivered and received, including where it sits in the Design Thinking continuum and what was accomplished.
Collect or record or otherwise save all of the completed templates, worked examples, problem statements and framing outputs, models, lists of ideas, prioritized choices or decisions, prototypes and drawings, test plans and outputs, and all of the visuals that were likely created along the way.
Agree with the attendees about what next steps and follow-up look like, including the next set of decisions, techniques, and exercises.
Prior to dismissing anyone, ask for attendee feedback regarding the usefulness of the exercise, tools, and materials, the effectiveness of the facilitator or coach, and what should be done differently next time.
Wrap up the exercise and thank everyone for coming and participating.
Run a leadership-internal debrief to share outcomes and outputs and to discuss with this smaller audience what should be done differently next time.
Afterward, share in digital format the outputs, conclusions, next steps, and so forth with the attendees and relevant stakeholders so they’re not lost in the aftermath of the exercise.
What Not to Do: Keeping It All Inside
A regional retailer was in the middle of a business transformation and found its people working incredible hours but making little progress, as evidenced in the slow development cycles and poor test results. Someone eventually suggested that the team was too entrenched in the details and weeds; team members needed a North Star and a way of aligning their work to that North Star.
Cursory ideas were tossed about, but no one thought to drive the team’s thinking in a way that pulled ideas out of their heads and into the open so that others could “see” and consider them. The team was keeping everything inside, trapped in their heads…one person’s perspective slightly different than another’s. The team needed to make their ideas and their work visible and visual. They needed to arrive at some kind of shared understanding and use a shared vocabulary regarding their interim and final outputs.
Instead, they were told to get back to work. After another year of slogging through their business transformation, the company decided the broader change just wasn’t worth the effort and halted the project.
Summary
In Hour 5, we explored Design Thinking principles for visible and visual teamwork and collaboration. We outlined Visual Thinking for creating a shared understanding between people, followed by an extensive list of visual exercises for visual collaboration. After walking through a set of simple tools to facilitate this collaboration among remote and geographically dispersed teammates, we then turned to the three stages for running any of the more than three dozen Design Thinking exercises spanning this book: Phase 1 for preparing for an exercise, Phase 2 for running an exercise, and Phase 3 for concluding the exercise. By keeping the process for running exercises simple, and including key steps within each stage, we created a simple and repeatable process. A “What Not to Do” reiterating the importance of gaining a shared understanding among team members concludes Hour 5.
Workbook
Case Study
Consider the following case study and questions. You can find the answers to the questions related to this case study in Appendix A, “Case Study Quiz Answers.”
Situation
Satish has noted numerous communications issues recently and has concluded that several of the OneBank initiative teams are using common words and phrases in ways that mean one thing to them but something completely different to others. As he’s tackling that shared vocabulary issue, he has asked you to also share with those teams your perspectives on making teamwork visible and visual. The teams have passed on a few questions for you to answer first.
Quiz
1. What is Visual Thinking in the simplest terms?
2. What are some examples of Design Thinking exercises for Visual Collaboration?
3. In cases where a team cannot physically meet to run a Design Thinking exercise or session, what alternatives might be most useful?
4. What kind of stepwise process might be used to organize and execute a Design Thinking exercise or session?