
5
Applying Domain-Driven Design to a Monolithic Application
In the first part of this book, we learned about the theory behind domain-driven design (DDD) and looked at isolated examples of how we might implement each idea or pattern. In Part 2 of this book, we are going to build real-world applications together that will help cement the ideas and give you example projects to reference in the future.
We will start by building a domain-driven monolithic application (after defining what a monolithic application is) from scratch. We will then discuss how you might apply DDD principles to an existing application that was not created using DDD from the beginning.
By the end of the chapter, you will be able to understand the following topics:
- What a monolithic application is, as well as in what situation you may want to build one
- How to build an entire domain-driven monolith from scratch
- How to identify that your existing application might benefit from applying domain-driven design
We’ll get started by looking at what we mean by a monolithic application. But before that, let’s go through the technical requirements of the chapter.
Technical requirements
In this chapter, we will write a large amount of Golang code. To be able to follow along, you will need the following:
- Golang: You can find instructions to install it at https://go.dev/doc/install. The code in this chapter was written with Go 1.19.3 installed, so anything later than this should be fine.
- A text editor or IDE: Some popular options are VS Code (https://code.visualstudio.com/download) or GoLand (https://www.jetbrains.com/help/go/installation-guide.html). All screenshots in this section are taken from GoLand.
- GitHub repository: All code for this section can be found here: https://github.com/PacktPublishing/Domain-Driven-Design-with-GoLang/tree/main/chapter5.
- Docker: We will use this to run a database on our machine. You can find instructions on how to install Docker here: https://docs.docker.com/compose/install.
A friendly warning
The application we are going to create in this chapter is intended for demonstration only and to really highlight how to work in the domain-driven design style. It is not production ready, and we will be skipping lots of best practices, such as testing and documentation. These are critically important but beyond the scope of this book.However, please see Chapter 8 (P-Italics) for some insight on how testing and DDD can be complimentary
What do we mean when we say monolithic application?
A monolithic application, or monolith, is likely a term you have heard before, as it is probably the most popular pattern for developing an enterprise application. We call it a monolithic application if all the different components of the system are encapsulated into a single unit – for example, if the user interface, several domains, and infrastructure services are combined into a single deployable unit. The following figure illustrates this:

Figure 5.1 – Multiple services packed into a single application
Monolithic applications remain popular because of the following reasons:
- They are simple to develop. All code and concerns exist in a single place, and you do not need to worry as much about the failures that can come with remote procedure calls in distributed systems (more on this in the next chapter).
- They are simple to deploy. There is only one deployable, and its requirements should be well understood.
- They are simple to scale (to a point). Need more power? Simply deploy more versions of the application behind a load balancer.
However, there are also some major downsides. These downsides tend to appear as the application grows in complexity and/or scale:
- The startup time for the application can become multiple minutes. This quickly adds up to many hours wasted by engineers during development.
- Scaling the application starts to become difficult. In addition to the slow startup time, which can impact customers, monoliths can only typically scale in one dimension. And since the application covers so many different use cases, a lot of time can be spent optimizing configuration to cover all these use cases. This can lead to monoliths becoming very expensive on a resource front (for example, CPUs).
- Continuous deployment becomes slow. Even if you make a small code change to a specific part, you must deploy the entire application. This gets slower and slower as the application grows in complexity. Deployments taking longer than an hour are not unheard of.
- A long-term commitment to a specific technology stack is necessary. If your monolithic application is written in PHP, you must continue to use PHP, even if new application requirements would be better suited for new technology, or if you hire an expert in a different language – you have to stick with PHP. Moving to a new language would require a rewrite of the entire system (or parts of it if you decide to move to microservices. We will discuss microservices more in the next chapter).
- Changes become difficult to make. With the pressure of delivery and the barrier to beginning development getting higher, oftentimes, the modularity of the system can become blurred. This is where DDD can help!
In the next section, we will build a simple monolithic application using domain-driven design principles. Let’s start by outlining the business for which we will build a system.
Setting the scene
In this section, we will outline a scenario using a fictitious company. Domain-driven design is all about solving business invariants in a specific context, and I hope this example will help reinforce that.
CoffeeCo is a national coffee shop chain. They experienced rapid growth in the last year and have opened 50 new stores. Each store sells coffee and coffee-related accessories, as well as store-specific drinks. Stores often have individual offers, but national marketing campaigns are often run, which influence the price of an item too.
CoffeeCo recently launched a loyalty program called CoffeeBux, which allows customers to get 1 free drink for every 10 they purchase. It doesn’t matter which store they purchase a drink at or which they redeem it at.
CoffeeCo has been thinking of launching an online store. They are also considering a monthly subscription that allows purchasers to get unlimited coffee every month, as well as a discount on other drinks. Now that we understand the business domain, we can start to explore how we can build systems to help CoffeeCo achieve its goals!
We had a domain modeling session with the domain experts, which included employees at the coffee shop, people from the head office, and suppliers. In this session, we have identified the following ubiquitous language and definitions that we should keep in mind as we develop our system:
- Coffee lovers: What CoffeeCo calls its customers.
- CoffeeBux: This is the name of their loyalty program. Coffee lovers earn one CoffeeBux for each drink or accessory they purchase.
- Tiny, medium, and massive: The sizes of the drinks are in ascending order. Some drinks are only available in one size, others in all three. Everything on the menu fits into these categories.
During the domain modeling session, we identified the following domains:
- Store
- Products
- Loyalty
- Subscription
We will revisit each of these as we build our system.
We spoke about what would be a good minimum viable product (MVP) for the new system that we will create. The domain experts felt that the following features need to be in scope:
- Purchasing a drink or accessory using CoffeeBux
- Purchasing a drink or accessory with a debit/credit card
- Purchasing a drink or accessory with cash
- Earning CoffeeBux on purchases
- Store-specific (but not national) discounts
- We can assume all purchases are in USD for now; in the future, we need to support many currencies though
- Drinks only need to come in one size for now
Getting started with our CoffeeCo system
Now that we understand what our business does, let’s begin to build a domain-driven system to satisfy all the requirements.
Let’s start by initializing a new Golang project:
- We will create a new project called coffeeco in our Dev folder using GoLand; you can use whichever IDE you like:
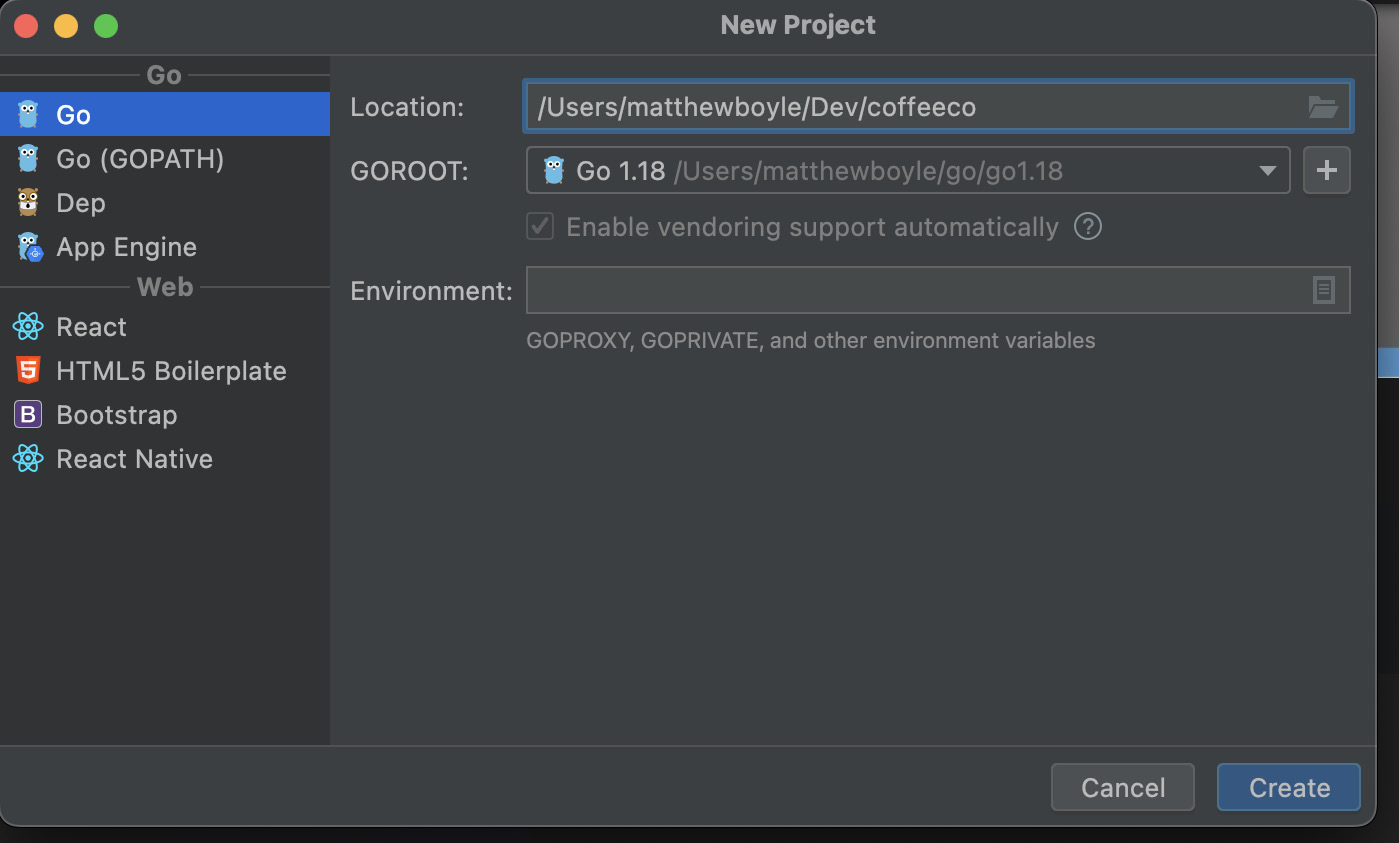
Figure 5.2 – Project creation screen in GoLand

Figure 5.3 – Our project structure so far
The internal folder is a special folder in Golang. Anything within the internal directory cannot be imported by other projects. This is a great fit for DDD as we do not want our domain code to be part of our public API. To automatically enforce this, we will be putting all our domain code inside this internal folder.
- Before we can write any code about the loyalty scheme, we need to define a few other structs. We know from the brief that the loyalty scheme is called CoffeeBux and that they can be collected at any store where a coffee lover purchases a drink. Therefore, let’s start by defining a coffee lover.
A coffee lover is most certainly an entity. This is because we want a coffee lover to be defined by their identity; whenever we are talking about a coffee lover and adding CoffeeBux to their loyalty account, there should be no doubt as to which coffee lover we are applying these.
Let’s create the coffeelover.go file inside the internal folder as follows:

Figure 5.4 – The coffeelover.go file
This will make it accessible to our entire domain code.
- Inside coffeelover.go, we can add the following:
package coffeeco
import "github.com/google/uuid"
type CoffeeLover struct {ID uuid.UUID
FirstName string
LastName string
EmailAddress string
}
You’ll notice that we have added some entity attributes (FirstName, LastName, and EmailAddress). This was after consulting the domain experts and understanding what information we need to store about coffee lovers. Domain-driven design is about constant communication with your stakeholders and it’s essential you do this.
- Next, let’s add our store domain, as shown in the following figure:

Figure 5.5 – Adding a store domain
- We create store/store.go in our internal folder and add the following code:
package store
import "github.com/google/uuid"
type Store struct {ID uuid.UUID
Location string
}
Notice we have decided to make the store an entity again. Again, this is due to the fact that when we reference a store, it’s really important that we can easily identify which one we are talking about.
This is a good start but a lot is missing that we have not defined yet. Each store sells coffee and coffee-related accessories, as well as store-specific drinks. We therefore need to define a product.
Defining products is our first real challenge. Should it be an entity or a value object? I think it could be either. Let’s go back to our questions from Chapter 3:
- Is it possible for me to treat this object as immutable?
- Does it measure, quantify, or describe a domain concept?
- Can it be compared to other objects of the same type just by its values?
We can answer yes to all of these questions. Furthermore, as we mentioned in Chapter 3, it is better to treat something as a value object and then upgrade it to an entity later, as it’s a safer construct to deal with. Therefore, for now, we will treat the product as a value object. Let’s go ahead and implement it:
- We create the product.go file:
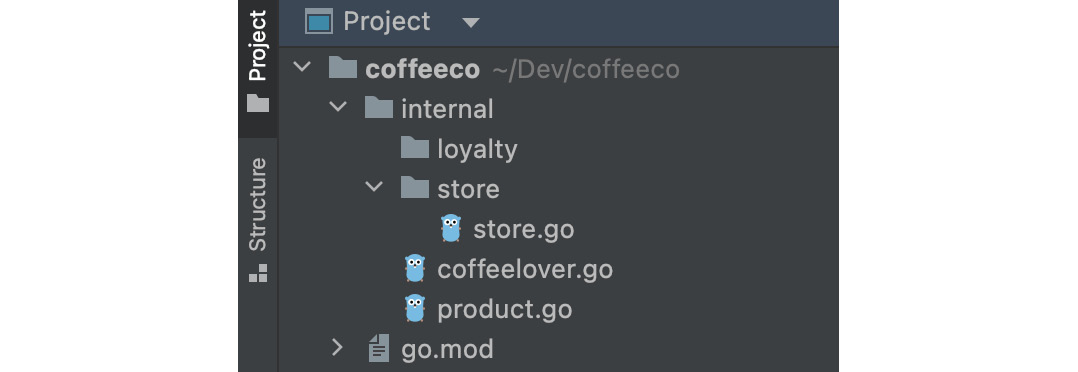
Figure 5.6 – The product.go file
- Add the following code:
package coffeeco
import "github.com/Rhymond/go-money"
type Product struct {ItemName string
BasePrice money.Money
}
We added the base price after consulting our domain experts. This is the language they use to refer to the non-offer price of a product. We should add this to our ubiquitous language definitions.
- We can now go back to store.go and add our products:
package store
import (
"github.com/google/uuid"
coffeeco "coffeeco/internal"
)
type Store struct {ID uuid.UUID
Location string
ProductsForSale []coffeeco.Product
}
store.go looks pretty good. We now need to think of how we would like to model a purchase. This would be another situation we would speak to our domain experts about to understand the language they use to describe a customer buying coffee and whether there is anything surprising that we need to account for.
- After a discussion, we create purchase.go:

Figure 5.7 – Creating purchase.go
- Then, write the following code:
package purchase
import (
"github.com/Rhymond/go-money"
"github.com/google/uuid"
coffeeco "coffeeco/internal"
"coffeeco/internal/store"
)
type Purchase struct {id uuid.UUID
Store store.Store
ProductsToPurchase []coffeeco.Product
total money.Money
PaymentMeans payment.Means
timeOfPurchase time.Time
}
Our Purchase type has its own ID and should be an entity; this makes sense. If a customer ever wants a refund on an item, we will need to be able to reference a specific transaction.
- There is a little bit more we need to think about for a purchase. Did the customer use card or cash? If they used a card, which was it? We need to represent this behavior.
We, therefore, need to make a payment domain. Let’s create payment/means.go:

Figure 5.8 – Our project structure so far
- And add the following code:
package payment
type Means string
const (
MEANS_CARD = "card"
MEANS_CASH = "cash"
MEANS_COFFEEBUX = "coffeebux"
)
type CardDetails struct {cardToken string
}
We have used a type alias here to represent payment means. We have also created a struct to represent CardDetails. This is not how card payments work, but in our simple example, we will assume we receive a token representing a card at the time of purchase, and that is what we will charge.
We have made some constants here to define cash and CoffeeBux payments too. This is a little pre-emptive, but we know we will need them shortly, so I see no harm.
- Finally, we can go back and add the new PaymentMeans to Purchase:
type Purchase struct {id uuid.UUID
Store store.Store
ProductsToPurchase []coffeeco.Product
total money.Money
PaymentMeans payment.Means
timeOfPurchase time.Time
CardToken *string
}
- We are nearly ready to add some service logic. However, first, let’s define our loyalty scheme.
Let’s make loyalty/coffeebux.go:

Figure 5.9 – Our project structure so far
- coffeebux.go is going to contain the logic for the loyalty scheme. Let’s add the following code:
package loyalty
import (
"github.com/google/uuid"
coffeeco "coffeeco/internal"
"coffeeco/internal/store"
)
type CoffeeBux struct {ID uuid.UUID
store store.Store
coffeeLover coffeeco.CoffeeLover
FreeDrinksAvailable int
RemainingDrinkPurchasesUntilFreeDrink int
}
We reference a lot of other entities here. It really highlights why companies like having loyalty schemes; look at how much data we can gather!
We finally have all our domain models defined and we are ready to take our first pass at creating a service. A purchase is a good fit for service because of the following:
- We are about to perform a significant piece of business logic within our domain
- We need to calculate some values
- We need to interact with the repository layer
To program as defensively as possible, we are going to define a validateAndEnrich function in product.go. This will help us keep our service as thin as possible. Remember, we should always be trying to push down as much logic as possible into our domain objects:
- Let’s add the following code to product.go:
func (p *Purchase) validateAndEnrich() error {if len(p.ProductsToPurchase) == 0 {return errors.New("purchase must consist of at least one product")}
p.total = *money.New(0, "USD")
for _, v := range p.ProductsToPurchase {newTotal, _ := p.total.Add(&v.BasePrice)
p.total = *newTotal
}
if p.total.IsZero() {return errors.New("likely mistake; purchase should never be 0. Please validate")}
p.id = uuid.New()
p.timeOfPurchase = time.Now()
return nil
}
In this code block, notice the following:
- Purchase is a pointer. That is because our function updates values that are missing.
- We initialize a total of 0 USD. We’d need to update this in the future to support more currencies.
- Also, in purchase.go, let’s add the following:
type CardChargeService interface {ChargeCard(ctx context.Context, amount money.Money, cardToken string) error
}
type Service struct {cardService CardChargeService
purchaseRepo Repository
}
func (s Service) CompletePurchase(ctx context.Context, purchase *Purchase) error {if err := purchase.validateAndEnrich(); err != nil {return err
}
switch purchase.PaymentMeans {case payment.MEANS_CARD:
if err := s.cardService.ChargeCard(ctx, purchase.total, *purchase.cardToken); err != nil {return errors.New("card charge failed, cancelling purchase")}
case payment.MEANS_CASH:
// TODO: For the reader to add :)
default:
return errors.New("unknown payment type")}
if err := s.purchaseRepo.Store(ctx, *purchase); err != nil {return errors.New("failed to store purchase")}
return nil
}
The service is small. We call our validateAndEnrich function to mutate the purchase object for us to add some necessary values. We could also have made Purchase both a value object and an entity, which would have meant we did not need to mutate.
- After calling purchase.validateAndEnrich(), we have some logic depending on the payment means. If it’s a card, we call CardService to create the purchase. We don’t have CardService defined yet, so for now, we are creating an interface.
Let’s imagine that your team has split into two halves. One half is working on payments, and the other on implementing purchases. We could meet with the payment team and agree on a contract for what CardService will look like (in Go, we call these contracts interfaces), and then we can continue with our implementations at separate paces. This is a really powerful pattern so use it often when working with other teams!
Finally, if all goes well, we call PurchaseRepo to store our new purchase.
We define repository.go inside the purchase package:

Figure 5.10 – repository.go added to the purchase folder
And for now, it’s just an interface:
package purchase
import "context"
type Repository interface {
   Store(ctx context.Context, purchase Purchase) error
}
Again, defining this as an interface is a good idea. As a team, we can now have a discussion about which database might be the best for this project and it has not slowed down development. We could satisfy this interface with any number of different databases.
We now have a basic outline of what our service will look like. We need to add an infrastructure service for payment and implementation of our repository layer. Let’s do both now.
Implementing our product repository
After a discussion with the team, we have opted to use Mongo, a document database. The reason the team selected Mongo is that they have good experience with running it, and given that products and payments have flexible metadata, we think it will be a good fit.
From a development perspective, it also means we don’t need to write any database migration scripts.
So, let’s first connect to Mongo and then implement a product repository:
- In repository.go, let’s define a Mongo implementation. If you are going to have a lot of code or different implementations, you may want to store it in a different file. For now, I think it’s fine in one:
type MongoRepository struct {purchases *mongo.Collection
}
func NewMongoRepo(ctx context.Context, connectionString string) (*MongoRepository, error) {client, err := mongo.Connect(ctx, options.Client().ApplyURI(connectionString))
if err != nil {return nil, fmt.Errorf("failed to create a mongo client: %w", err)}
purchases := client.Database("coffeeco").Collection("purchases")return &MongoRepository{purchases: purchases,
}, nil
}
- Firstly, we define MongoRepository and write some basic code to connect. We return any errors. For this to work, you’ll need to add two imports for the official Mongo Golang package. Therefore, your imports should now look like the following:
import (
"context"
"fmt"
"time"
"github.com/Rhymond/go-money"
"github.com/google/uuid"
"go.mongodb.org/mongo-driver/mongo"
"go.mongodb.org/mongo-driver/mongo/options"
coffeeco "coffeeco/internal"
"coffeeco/internal/payment"
"coffeeco/internal/store"
)
- Now that we have the basic code to connect to Mongo, we need to satisfy the Repository interface we defined before. Let’s do that:
func (mr *MongoRepository) Store(ctx context.Context, purchase Purchase) error {mongoP := New(purchase)
_, err := mr.purchases.InsertOne(ctx, mongoP)
if err != nil {return fmt.Errorf("failed to persist purchase: %w", err)}
return nil
}
- Here, we also call a toMongoPurchase function:
type mongoPurchase struct {id uuid.UUID
store store.Store
productsToPurchase []coffeeco.Product
total money.Money
paymentMeans payment.Means
timeOfPurchase time.Time
cardToken *string
}
func toMongoPurchase(p Purchase) mongoPurchase {return mongoPurchase{id: p.id,
store: p.Store,
productsToPurchase: p.ProductsToPurchase,
total: p.total,
paymentMeans: p.PaymentMeans,
timeOfPurchase: p.timeOfPurchase,
cardToken: p.cardToken,
}
}
The reason we do this is to decouple our purchase aggregate from the Mongo implementation. We should also decouple all the other domain models from the database models, but I will leave that as an exercise for you.
For now, that’s all we need. Our repository layer is very simple and lightweight, which is a sign that DDD is really helping us here.
Adding an infrastructure service for payment handling
For our payment service, we are going to use Stripe. Like our Mongo repository, we are going to decouple ourselves from Stripe as much as possible, as it is not part of our domain, and it is a tool that the company may change its mind on in the future. This can be particularly true for payment services if a cheaper option comes along.
So, here’s how we connect Stripe from our service:
- First, let’s make stripe.go in our payment package:

Figure 5.11 – stripe.go added to the payment folder
- Next, let’s add some basic code to initialize Stripe:
package payment
import (
"context"
"errors"
"fmt"
"github.com/Rhymond/go-money"
"github.com/stripe/stripe-go/v73"
"github.com/stripe/stripe-go/v73/charge"
"github.com/stripe/stripe-go/v73/client"
)
type StripeService struct {stripeClient *client.API
}
func NewStripeService(apiKey string) (*StripeService, error) {if apiKey == "" {return nil, errors.New("API key cannot be nil ")}
sc := &client.API{}sc.Init(apiKey, nil)
return &StripeService{stripeClient: sc}, nil}
Notice how we have imported the official Stripe package. You will need to add this to your go.mod.
- Now that we have an initialized Stripe client, we need to satisfy the interface for CardChargeService. As a reminder, this is the interface:
type CardChargeService interface {ChargeCard(ctx context.Context, amount money.Money, cardToken string) error
}
We, therefore, implement that function on our StripeService struct:
func (s StripeService) ChargeCard(ctx context.Context, amount money.Money, cardToken string) error {
   params := &stripe.ChargeParams{
      Amount:   stripe.Int64(amount.Amount()),
      Currency: stripe.String(string(stripe.CurrencyUSD)),
      Source:   &stripe.PaymentSourceSourceParams{Token: stripe.String(cardToken)},
   }
   _, err := charge.New(params)
   if err != nil {
      return fmt.Errorf("failed to create a charge:%w", err)
   }
   return nil
}
This is near enough a copy and paste from the Stripe documentation (which is excellent). You can read more about creating charges in Stripe here: https://stripe.com/docs/api/charges/create?lang=go.
Challenge
See whether you can implement a different CardChargeService, perhaps using Square: https://developer.squareup.com/gb/en/online-payment-apis.
Now that we have done that, let’s go back to our business requirements!
Paying with CoffeeBux
Our system is looking good! It is modular and easy to extend…so let’s extend it.
As of now, we haven’t satisfied all our business requirements. The requirements state that coffee lovers should get a coffee free after they have purchased 10 already. This means we need to track the number of purchases and also allow customers to pay with CoffeeBux. Let’s design an entity to help us do this:
- First, let’s change our code so we are tracking free drinks. Let’s add the following to coffeebux.go:
func (c *CoffeeBux) AddStamp() {if c.RemainingDrinkPurchasesUntilFreeDrink == 1 {c.RemainingDrinkPurchasesUntilFreeDrink = 10
c.FreeDrinksAvailable += 1
} else {c.RemainingDrinkPurchasesUntilFreeDrink--
}
}
This code checks whether we need to increment our free drink count and reset our purchased drinks counter. Otherwise, we just add a virtual stamp.
- Now, let’s go to purchase.go and update our purchase function to the following:
func (s Service) CompletePurchase(ctx context.Context, purchase *Purchase, coffeeBuxCard *loyalty.CoffeeBux) error {if err := purchase.validateAndEnrich(); err != nil {return err
}
switch purchase.PaymentMeans {case payment.MEANS_CARD:
if err := s.cardService.ChargeCard(ctx, purchase.total, *purchase.cardToken); err != nil {return errors.New("card charge failed, cancelling purchase")}
case payment.MEANS_CASH:
// For the reader to add :)
default:
return errors.New("unknown payment type")}
if err := s.purchaseRepo.Store(ctx, *purchase); err != nil {return errors.New("failed to store purchase")}
if coffeeBuxCard != nil {coffeeBuxCard.AddStamp()
}
return nil
}
Here, we have changed the signature of CompletePurchase to include CoffeeBuxCard. Notice how it’s a pointer. This is because a customer is under no obligation to present a loyalty card and therefore, it can be nil.
At the bottom of our function, after a user has paid and they have persisted the purchase successfully, we add a stamp to their loyalty card. Notice how easy it was to add and how easy it is to follow our code?
- We now need to add our loyalty card as a payment source. This is an interesting problem from a domain perspective because a loyalty card now belongs in both the payment and the loyalty domain. There are lots of different ways we could solve this problem and there is no wrong answer. The way we will solve it is to add CoffeeBux as a payment means. We actually already did this, and you can see it in means.go:
const (
MEANS_CARD = "card"
MEANS_CASH = "cash"
MEANS_COFFEEBUX = "coffeebux"
)
- And in loyalty.go, we will add the following code:
func (c *CoffeeBux) Pay(ctx context.Context, purchases []purchase.Purchase) error {lp := len(purchases)
if lp == 0 {return errors.New("nothing to buy")}
if c.FreeDrinksAvailable < lp {return fmt.Errorf("not enough coffeeBux to cover entire purchase. Have %d, need %d", len(purchases), c.FreeDrinksAvailable)}
c.FreeDrinksAvailable = c.FreeDrinksAvailable - lp
return nil
}
In this code block, we program defensively and ensure that purchases is not empty. We then check there are enough free drinks to accommodate the entire purchase.
Note
We have made an assumption here that we should validate with the domain experts – it might be that they want to allow partial redemption of a purchase against a loyalty card. If that is so, our implementation is wrong, and we’d need to change it.
After this, we simply remove the necessary amount of free drinks from the CoffeeBux card.
We now have everything we need to accept payment in CoffeeBux, so let’s go ahead and add it to purchase.go:
func (s Service) CompletePurchase(ctx context.Context, purchase *Purchase, coffeeBuxCard *loyalty.CoffeeBux) error {
   if err := purchase.validateAndEnrich(); err != nil {
      return err
   }
   switch purchase.PaymentMeans {
   case payment.MEANS_CARD:
      if err := s.cardService.ChargeCard(ctx, purchase.total, *purchase.cardToken); err != nil {
         return errors.New("card charge failed, cancelling purchase")
      }
   case payment.MEANS_CASH:
   // For the reader to add :)
   case payment.MEANS_COFFEEBUX:
      if err := coffeeBuxCard.Pay(ctx, purchase.ProductsToPurchase); err != nil {
         return fmt.Errorf("failed to charge loyalty card: %w", err)
      }
   default:
      return errors.New("unknown payment type")
   }
   if err := s.purchaseRepo.Store(ctx, *purchase); err != nil {
      return errors.New("failed to store purchase")
   }
   if coffeeBuxCard != nil {
      coffeeBuxCard.AddStamp()
   }
   return nil
}
We have added the ability to pay with your CoffeeBux card. However, there is a potential bug here. Can you spot it?
Right now, if you pay with your CoffeeBux card, you still earn a loyalty stamp. This is something we need to consult our domain experts about to see whether this is the correct business invariant.
We have one final feature to add to fulfill the project brief, which is to add store-specific discounts. Before we propose a solution in the next section, try and think about how you might approach it. Even better, try and implement it!
Adding store-specific discounts
First, we need to save store-specific discounts somewhere. We therefore need a repository layer:
- Let’s add repository.go to our store package:

Figure 5.12 – repository.go added to the store folder
- And add the following code:
package store
import (
"context"
"errors"
"fmt"
"github.com/google/uuid"
"go.mongodb.org/mongo-driver/bson"
"go.mongodb.org/mongo-driver/mongo"
"go.mongodb.org/mongo-driver/mongo/options"
)
var ErrNoDiscount = errors.New("no discount for store")type Repository interface {GetStoreDiscount(ctx context.Context, storeID uuid.UUID) (int, error)
}
type MongoRepository struct {storeDiscounts *mongo.Collection
}
func NewMongoRepo(ctx context.Context, connectionString string) (*MongoRepository, error) {client, err := mongo.Connect(ctx, options.Client().ApplyURI(connectionString))
if err != nil {return nil, fmt.Errorf("failed to create a mongo client: %w", err)}
discounts := client.Database("coffeeco").Collection("store_discounts")return &MongoRepository{storeDiscounts: discounts,
}, nil
}
func (m MongoRepository) GetStoreDiscount(ctx context.Context, storeID uuid.UUID) (float32, error) {var discount float32
if err := m.storeDiscounts.FindOne(ctx, bson.D{{"store_id", storeID.String()}}).Decode(&discount); err != nil {if err == mongo.ErrNoDocuments {// This error means your query did not match any documents.
return 0, ErrNoDiscount
}
return 0, fmt.Errorf("failed to find discount for store: %w", err)}
return discount, nil
}
A lot of this code should look familiar from our previous repository layer. We may want to move some of the connection logic for a Mongo connection or pool of connections to a different package that we could share in the future.
When we use GetStoreDiscount, we check the error type; if it is ErrNoDocuments, we want to return a specific ErrNoDiscount error so that in the preceding layer, we know it’s not a real error.
If all goes well, we simply return our store discount.
- Let’s make an interface for StoreService in purchase.go:
type StoreService interface {GetStoreSpecificDiscount(ctx context.Context, storeID uuid.UUID) (float32, error)
}
- We will now add this interface to PurchaseService:
type Service struct {cardService CardChargeService
purchaseRepo Repository
storeService StoreService
}
- We then update our CompletePurchase function as follows:
func (s Service) CompletePurchase(ctx context.Context, storeID uuid.UUID, purchase *Purchase, coffeeBuxCard *loyalty.CoffeeBux) error {if err := purchase.validateAndEnrich(); err != nil {return err
}
discount, err := s.storeService.GetStoreSpecificDiscount(ctx, storeID)
if err != nil && err != store.ErrNoDiscount {return fmt.Errorf("failed to get discount: %w", err)}
purchasePrice := purchase.total
if discount > 0 {purchasePrice = *purchasePrice.Multiply(int64(100 - discount))
}
switch purchase.PaymentMeans {case payment.MEANS_CARD:
if err := s.cardService.ChargeCard(ctx, purchase.total, *purchase.cardToken); err != nil {return errors.New("card charge failed, cancelling purchase")}
case payment.MEANS_CASH:
// For the reader to add :)
case payment.MEANS_COFFEEBUX:
if err := coffeeBuxCard.Pay(ctx, purchase.ProductsToPurchase); err != nil {return fmt.Errorf("failed to charge loyalty card: %w", err)}
default:
return errors.New("unknown payment type")}
if err := s.purchaseRepo.Store(ctx, *purchase); err != nil {return errors.New("failed to store purchase")}
if coffeeBuxCard != nil {coffeeBuxCard.AddStamp()
}
return nil
}
This is looking a little complex to read and isn’t using a lot of domain-specific language in our service layer, so let’s refactor a little:
func (s Service) CompletePurchase(ctx context.Context, storeID uuid.UUID, purchase *Purchase, coffeeBuxCard *loyalty.CoffeeBux) error {
   if err := purchase.validateAndEnrich(); err != nil {
      return err
   }
   if err := s.calculateStoreSpecificDiscount(ctx, storeID, purchase); err != nil {
      return err
   }
   switch purchase.PaymentMeans {
   case payment.MEANS_CARD:
      if err := s.cardService.ChargeCard(ctx, purchase.total, *purchase.cardToken); err != nil {
         return errors.New("card charge failed, cancelling purchase")
      }
   case payment.MEANS_CASH:
   // For the reader to add :)
   case payment.MEANS_COFFEEBUX:
      if err := coffeeBuxCard.Pay(ctx, purchase.ProductsToPurchase); err != nil {
         return fmt.Errorf("failed to charge loyatly card: %w", err)
      }
   default:
      return errors.New("unknown payment type")
   }
   if err := s.purchaseRepo.Store(ctx, *purchase); err != nil {
      return errors.New("failed to store purchase")
   }
   if coffeeBuxCard != nil {
      coffeeBuxCard.AddStamp()
   }
   return nil
}
func (s *Service) calculateStoreSpecificDiscount(ctx context.Context, storeID uuid.UUID, purchase *Purchase) error {
   discount, err := s.storeService.GetStoreSpecificDiscount(ctx, storeID)
   if err != nil && err != store.ErrNoDiscount {
      return fmt.Errorf("failed to get discount: %w", err)
   }
   purchasePrice := purchase.total
   if discount > 0 {
      purchase.total = *purchasePrice.Multiply(int64(100 - discount))
   }
   return nil
}
Here, we have added a calculateStoreSpecificDiscount function and updated our service layer. It is much cleaner now, and it will be easier to speak to our domain experts about it.
- Finally, we need to implement storeService to satisfy the interface:
type Service struct {repo Repository
}
func (s Service) GetStoreSpecificDiscount(ctx context.Context, storeID uuid.UUID) (float32, error) {dis, err := s.repo.GetStoreDiscount(ctx, storeID)
if err != nil {return 0, err
}
return float32(dis), nil
}
We have now written an entire service using the domain-driven concept. The finished package structure is as follows:
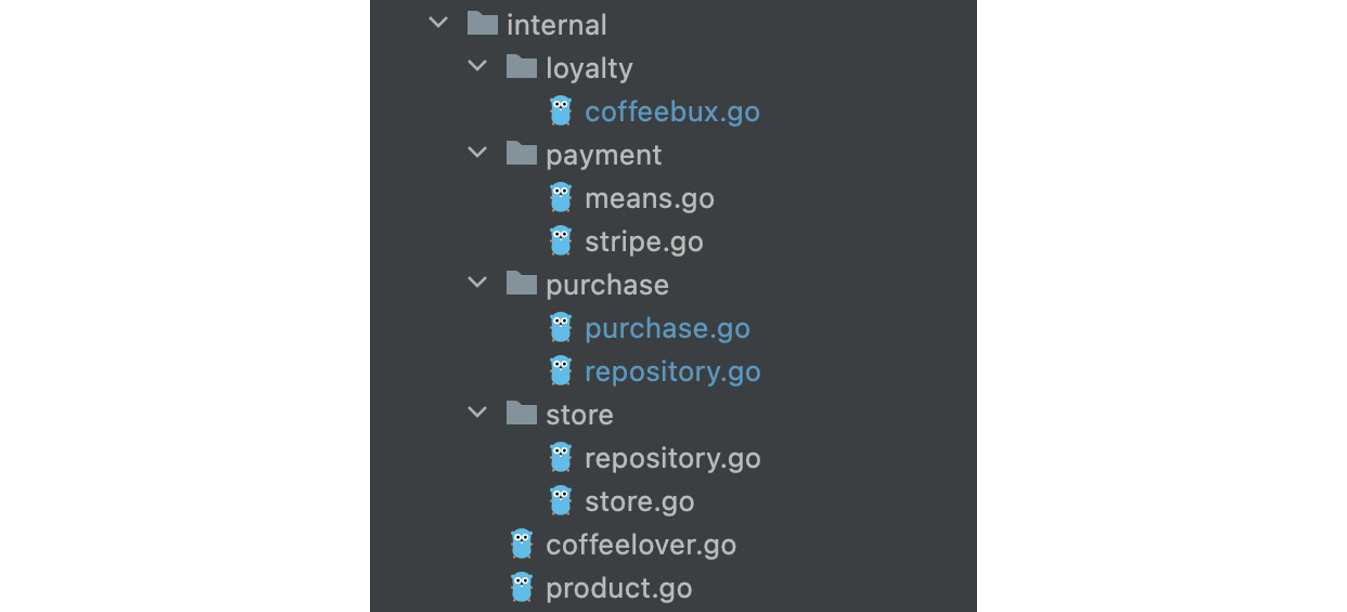
Figure 5.13 – The final package structure for our application
I have provided main.go to make it runnable and a docker-compose file in the GitHub repo here: https://github.com/PacktPublishing/Domain-Driven-Design-with-GoLang/tree/main/chapter5. This will enable you to run it and test it easily. In the README file, there are instructions on how to get it all started.
Extending our service
As an exercise, here are some features you might want to try and add to extend the service:
- Add an online store that allows customers to order a subscription
- Add drinks in different sizes
- Add unit tests
- Add an integration test
If you get them working, please feel free to create a PR into the example repo; I’d love to see them.
Applying DDD to an existing monolithic application
If you already work on a monolithic application, it is still worth trying to apply some of the patterns we have discussed throughout this book. My advice would be to start with building a strong relationship with the domain experts in your company. Together, you can start to build a ubiquitous language. If you start to reflect this in your code, you will notice that you will be able to start having much more meaningful and aligned conversations with them.
It might be that moving to repositories and domain objects is too much of a refactor. That’s okay. I would recommend that the infrastructure be the place where spending the time to decouple yourself from specific APIs (like we did with Stripe) is a valuable use of time. It will keep your business logic clearer and give the business more options when considering new providers in the future.
Summary
In this chapter, we got hands-on with Golang and built an entire application from scratch. We started by understanding the problem domain and building out a robust, ubiquitous language. We then built an application by splitting our application into domains, aggregates, repositories, services, and infrastructure services. Hopefully, you now see the true value of domain-driven design (if it was ever in doubt) and you are able to apply DDD principles to your own projects. In my experience, this is a highly desirable trait that is worth discussing when you are interviewing for new jobs.
In the next chapter, we will be looking at microservices, how they differ from monolithic applications, and what new things we need to consider when building them with domain-driven design in mind.
Further reading
- Stripe developer documentation: https://stripe.com/docs
- Using Go to connect to Mongo: https://www.mongodb.com/docs/drivers/go/current/
- What is a minimal viable product (MVP)?: https://www.agilealliance.org/glossary/mvp/