Related to the lindworm, the wyvern is a carnivorous, energetic beast that usually possesses two legs, batlike wings, and a barbed tail. It does not have arms. This creature was popular as a heraldic icon in the medieval period.

Step One With a 3H pencil, I sketch the basic shapes that make up the wyvern. Using a horizontal facial guideline, I place the eye. Then I draw a pointed beak and a whiplike tail.

Step Two Continuing with the basic shapes, I add two large, angular wings, a pair of curled legs, and spikes along the head and at the end of the tail. I add a finlike ear that is reminiscent of the wings. Then I draw the lower jaw, adding a long, curled tongue. I refine the eye a bit and add a large nostril.
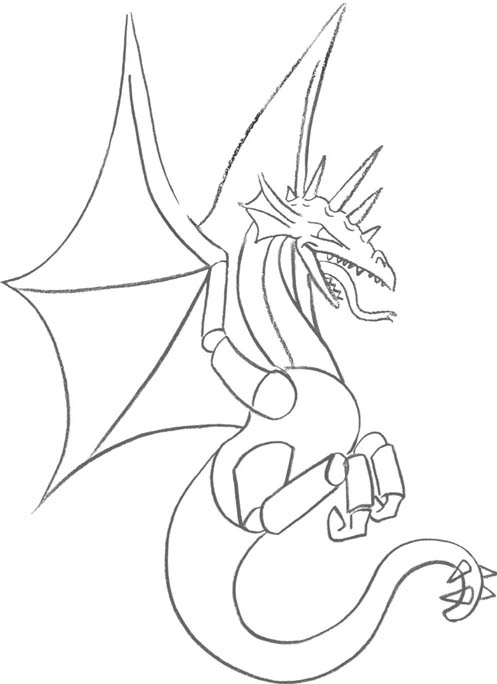
Step Three Focusing on the head, I extend the eye and add small, sharp teeth. I change the shape of the tongue a bit and give it a forked tip. I refine the spikes on top of the head, adding ridges where they protrude from the head. Then I refine the ear a bit.
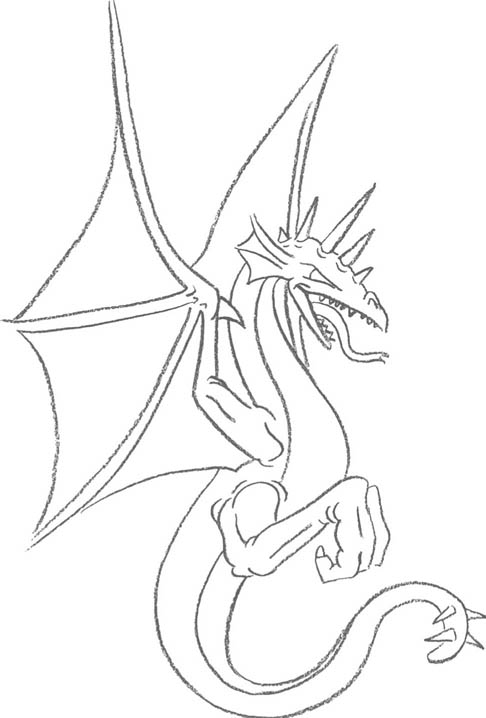
Step Four Building on my initial wing structures, I add definition and connect the base of the wing to the body. Then I refine the legs, using the basic shapes to create their forms. I add a claw to the foot, then draw a line to delineate the front of the tail. Next I erase any unwanted lines.
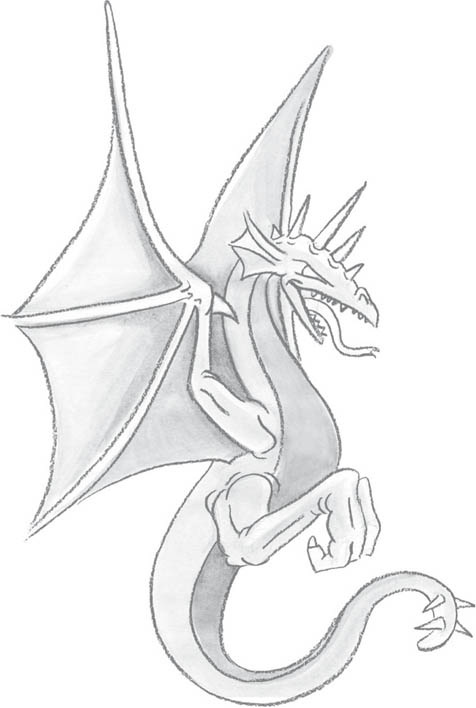
Step Five I want to create a sleek, subtle tone for this dragon, so I dilute some India ink to make a wash (see page 3), applying it all over the body with a small flat brush. I allow this layer to dry, and then I apply another wash over the belly and the front of the tail, as well as around the wing bones.

Step Six After the wash dries, I erase any visible pencil lines. With a small, round detail brush, I introduce details with a much darker wash (this time using more ink and less water). I use the dark wash sparingly, because the black is so powerful; it is much safer to start light and build to dark than the other way around.
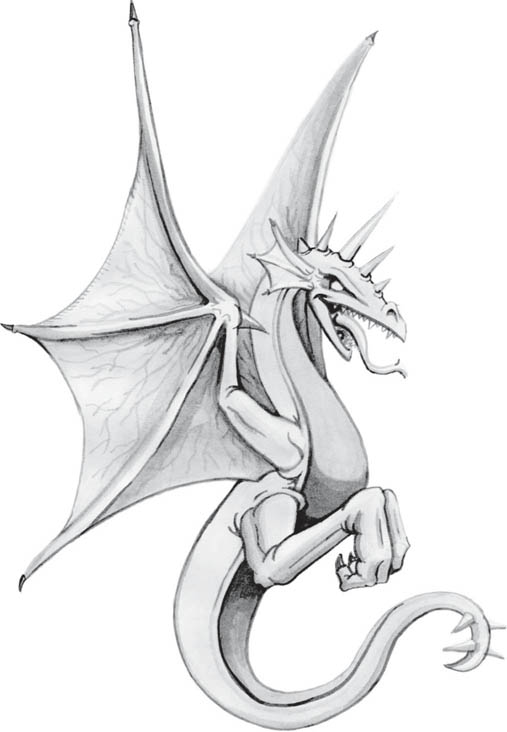
Step Seven Still using the detail brush, I go back to a medium-thin wash to “draw” small veins on the wings. Then I add spikes at the tips of the wing bones with less-diluted ink, using this same dark mix to outline the bases of the spikes on the head. I deepen the shading on the underside of the tail and the belly area, and I use the same dark ink to outline the ridge of the curved body and tail.
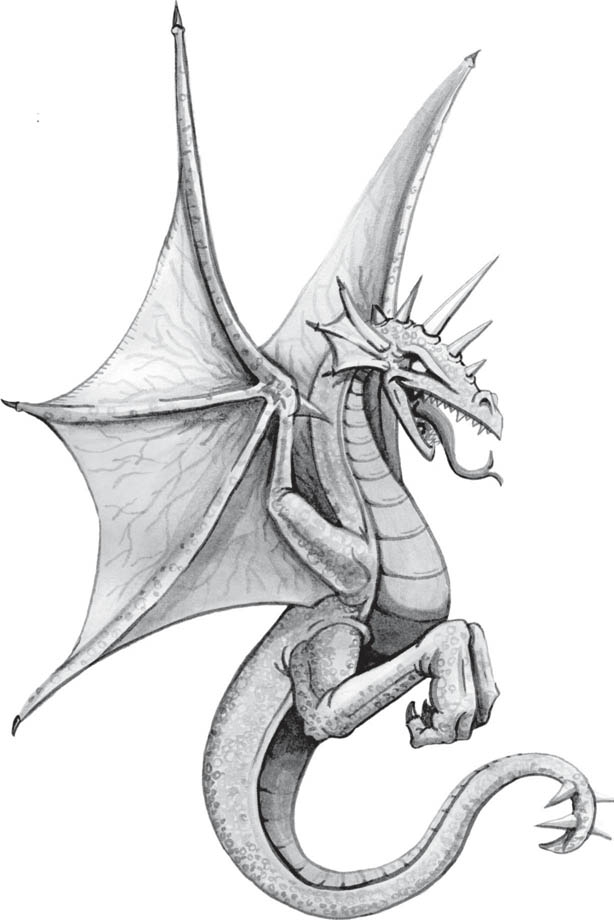
Step Eight With a light wash, I add small spots all over the dragon’s body to indicate its scaly texture. This makes the smoother areas (the wings, horns, and belly) stand out more. Once the ink dries, I use my 3B pencil to draw curved lines across the dragon’s belly and add some detail shading. I use the same pencil to indicate a soft shadow cast from the wing on the upper thigh, and I make crisp cast shadows from the tail spikes. After some additional finalizing and touching up, I’m done!