Chapter 3. Controlling Output
Chapter 3
shows you how to control the XML, HTML, and
text output of an XSLT processor using the XSLT top-level element
output. You have seen the
output
element in previous examples, but I have only discussed 2 of
output’s 10 attributes so far.
I’ll talk about each of
output’s attributes in this
chapter.
In this chapter, I’ll talk about the results you can expect from different output methods in XML, HTML, text, or custom output. I’ll also cover indentation, how to manage XML declarations, document type declarations, CDATA sections, and media types. For more detail, cross-reference this chapter with Section 16 of the XSLT specification.
Tip
Be aware that not all
XSLT processors adhere strictly to the
output element. There are models in which the XSLT
processor has no control over the final serialization of the output
because the output values are overridden. You will
see an example of this type of model when you use the Moxie
processor, discussed in Chapter 17.
The Output Method
As you have already seen, the output
element has a method attribute. This attribute
indicates explicitly the kind of output you want the XSLT processor
to produce, namely, XML, HTML, or plain text. These three
amigos—the attribute values xml,
html, and text—should
always be lowercase when used as values for
method. (Again, XSLT 2.0 will also support the
xhtml output method.)
The Default Output Methods
If you don’t assign a value to
method, you get a default output method depending
on what a stylesheet produces. The default output method for XSLT is
XML unless the document element in the result is
html. In such a case, the default output method is
HTML. The tag name html can be in uppercase,
lowercase, or mixed case, but it must not have a namespace URI
associated with it (no xmlns attribute).
Default HTML output
To understand how default HTML works, consider the document name.xml found in examples/ch03 (this is where all the examples files mentioned in this chapter are found):
<name>
 <last>Churchill</last>
 <first>Winston</first>
</name>
Then look at default-html.xsl that produces HTML using literal result elements:
<xsl:stylesheet version="1.0" xmlns:xsl="http://www.w3.org/1999/XSL/Transform">


<xsl:template match="name">
 <html>
  <body>
  <p><xsl:apply-templates select="last"/></p>
  <p><xsl:apply-templates select="first"/></p>
  </body>
 </html>
</xsl:template>

</xsl:stylesheet>
Notice that there is no output element in
default-html.xsl to tell the processor
explicitly what the output method is. Apply this stylesheet to
name.xml with Xalan:
xalan -m name.xml default-html.xsl
and it will produce a default HTML result:
<html>
<head>
</head>
<body>
<p>Churchill</p>
<p>Winston</p>
</body>
</html>
The -m command-line option suppresses the
META tag that
Xalan would normally produce. The
result does not have an XML declaration because Xalan evaluated the
result as HTML, as it should. The result is also indented (line
breaks at start tags, but zero space) because if the output method is
HTML, a default value of yes for
indent is assumed as if an
output element with
indent="yes" attribute were present.
With Xalan, you can also control the amount of indentation from the
command line by using the -i option with an
integer. For example, if you want to indent the output by three
spaces, type this command:
xalan -i 3 -m name.xml default-html.xsl
The indented output will look like this:
<html>
   <body>
      <p>Churchill</p>
      <p>Winston</p>
   </body>
</html>
The child elements body and p
are nicely indented by three spaces. This indentation feature of
Xalan is not specified by XSLT itself, but it is nice to have
nevertheless. You can read more about the default HTML output method
in Section 16.2 of the XSLT specification.
Default XML output
Now, check out default-xml.xsl , which produces a default XML result using literal result elements:
<xsl:stylesheet version="1.0" xmlns:xsl="http://www.w3.org/1999/XSL/Transform">


<xsl:template match="name">
 <name>
  <family><xsl:apply-templates select="last"/></family>
  <given><xsl:apply-templates select="first"/></given>
 </name>
</xsl:template>

</xsl:stylesheet>
Applying default-xml.xsl to name.xml with Xalan:
xalan name.xml default-xml.xsl
will produce the following result:
<?xml version="1.0" encoding="UTF-8"?>
<name><family>Churchill</family><given>Winston</given></name>
The default XML output method for Xalan kicks out an XML declaration
with an encoding declaration for UTF-8 (more about this in
Section 3.2.1.2). The elements
are output with no indentation added because the default for
indent is no for XML output (as
if an output element were present with
indent="no“).
You can use the default methods
for HTML and XML, but it is always cleaner, and more apparent to
other humans reading your stylesheet, if you specify the
method attribute explicitly with a value of
xml or html. (You can read even
more about the default XML output method in Section 16.1 of the XSLT
specification.)
Outputting XML
With the XML output method, whether declared explicitly or by default, a compliant XSLT processor produces well-formed XML as output. As you already know, well-formed XML follows the syntax rules outlined in the XML specification—rules such as matching start and end tags, matching quotes around attribute values, proper nesting of elements, and so forth. For example, if you create XML as you did in Chapter 2, the processor will make sure that the XML is well-formed. If it is not, the XSLT processor will report any errors.
The output element helps you to control a number
of features relating XML output, including the XML declaration,
document type declarations, and CDATA sections, all of which are
discussed in the sections that follow.
The XML Declaration
As
explained in Chapter 1, the XML declaration is
optional. You don’t have to use it, except under
certain circumstances, such as when an encoding declaration is
imperative. XSLT allows you to have control over the XML declaration
with the output element. With
output, you can keep XML declarations from being
written to output, change version information, control the encoding
declaration, and monitor the stand- alone declaration.
I’ll cover all of these features step-by-step in the
sections that follow.
Omitting the XML declaration
Most XSLT processors automatically write an XML declaration at the
top of the result. If the XML declaration is not essential to your
output, you can turn this behavior off by giving
output’s
omit-xml-declaration attribute a value of
yes; by default, the value is
no when the attribute is not present. The
omit-xml-declaration attribute is used in
omit.xsl
:
<xsl:stylesheet version="1.0" xmlns:xsl="http://www.w3.org/1999/XSL/Transform">
<xsl:output method="xml" indent="yes"/>
<xsl:output omit-xml-declaration="yes"/>
<xsl:template match="name">
 <name>
  <family><xsl:apply-templates select="last"/></family>
  <given><xsl:apply-templates select="first"/></given>
 </name>
</xsl:template>

</xsl:stylesheet>
This stylesheet uses two output elements. You
could merge them into one output element if you
wish. The only reason I use two output elements in
this example is because it makes a cleaner line break this way!
When applied to name.xml using:
xalan name.xml omit.xsl
the XML declaration is dropped, as you can see in the output:
<name>
<family>Churchill</family>
<given>Winston</given>
</name>
The encoding declaration
XML 1.0 supports characters or atomic units of text as described in ISO/IEC 10646-1:1993 Information technology— Universal Multiple-Octet Coded Character Set (UCS)—Part 1: Architecture and Basic Multilingual Plane, plus its seven amendments (see http://www.iso.ch). The mission of the UCS standard is to identify all characters in all writing systems in the world. Since XML 1.0 became a W3C recommendation, ISO/IEC 10646-1:1993 has advanced to ISO/IEC 10646-1:2000.
Unicode is a parallel standard developed by the Unicode Consortium (see http://www.unicode.org). XML 1.0 likewise supports Unicode Version 2.0, but Unicode has recently advanced to Version 4.0, so there are some differences in what XML 1.0 supports and in what the latest version of Unicode supports.
Both ISO/IEC 10646-1 and Unicode assign the same values and descriptions for each character, but Unicode defines some semantics for the characters that ISO/IEC 10646-1 does not. In this book, I’ll generally refer to Unicode, although Unicode and ISO/IEC 10646-1 are an inexact synonym.
Tip
Good background reading on Unicode and character sets is Mike Brown’s XML tutorial at http://www.skew.org/xml/tutorial. To look up character charts, see Kosta Kostis’ charts at http://www.kostis.net/charsets/.
Each character in Unicode is represented by a unique, hexadecimal (base 16) number. The first 128 characters in Unicode are the same characters in US-ASCII or Latin-1 (ISO-8859-1), which surely makes the transition to Unicode easier to follow. The numbers that represent these characters are called code points .
ISO/IEC 8859
ISO-8859-1, commonly called Latin-1, represents 256 Western European characters, numbered 0-255, using 8-bit bytes or octets. It was originally specified by the European Computer Manufacturers Association (ECMA) in the 1980s and is currently defined there as ECMA-94 (see http://www.ecma-international.org). This standard is also endorsed by ISO and is specified in ISO/IEC 8859-1:1998 Information technology—8-bit single-byte graphic character sets—Part 1: Latin alphabet No. 1 (see http://www.iso.ch). ISO-8859-1 is only the beginning: there are actually 15 character sets in this family. These character sets helped to unify earlier 7-bit efforts. All 15 of these 8-bit character sets are specified by ISO and are listed in Table 3-1.
|
ISO standard |
Description |
Character set name |
|
ISO/IEC 8859-1:1998 |
Part 1, Latin 1 |
ISO-8859-1 |
|
ISO/IEC 8859-2:1999 |
Part 2, Latin 2 |
ISO-8859-2 |
|
ISO/IEC 8859-3:1999 |
Part 3, Latin 3 |
ISO-8859-3 |
|
ISO/IEC 8859-4:1998 |
Part 4, Latin 4 |
ISO-8859-4 |
|
ISO/IEC 8859-5:1998 |
Part 5, Cyrillic |
ISO-8859-5 |
|
ISO/IEC 8859-6:1996 |
Part 6, Arabic |
ISO-8859-6 |
|
ISO 8859-7:1987 |
Part 7, Greek |
ISO-8859-7 |
|
ISO/IEC 8859-8:1999 |
Part 8, Hebrew |
ISO-8859-8 |
|
ISO/IEC 8859-9:1999 |
Part 9, Latin 5 |
ISO-8859-9 |
|
ISO/IEC 8859-10:1998 |
Part 10, Latin 6 |
ISO-8859-10 |
|
ISO/IEC 8859-11:2001 |
Part 11, Thai |
ISO-8859-11 |
|
ISO/IEC 8859-13:1998 |
Part 13, Latin 7 |
ISO-8859-13 |
|
ISO/IEC 8859-14:1998 |
Part 14, Latin 8 (Celtic) |
ISO-8859-14 |
|
ISO/IEC 8859-15:1999 |
Part 15, Latin 9 |
ISO-8859-15 |
|
ISO/IEC 8859-16:2001 |
Part 16, Latin 10 |
ISO-8859-16 |
Using octets to represent single characters expands the limit to 256 characters. The ISO 8859 character sets reuse the code points 0-255 for each part. Part 1 assigns the small Latin letter ÿ (y with dieresis) to code point 255 but the same code point 255 is assigned to the
(Cyrillic small letter dzhe) in Part 5. Unicode avoids code point conflicts by assigning a unique number to each character. Unicode accomplishes this by not limiting character definitions to a single octet.
UTF-8 and UTF-16
XML processors are required to support both UTF-8 and UTF-16 character encodings. These encodings provide different ways of representing Unicode characters in binary form. (UTF stands for UCS Transformation Format .) UTF-8 is not limited to a fixed-length character encoding but can use between one and six bytes to represent Unicode characters. Unicode code points in the range of 0-255 are represented with one octet, those in the range of 256-2047 are represented with two octets, those in the range of 2048-65535 are represented with three octets, and so forth. It uses a special encoding scheme to get the most out of the least bits, using the first octet of a sequence of more than one octet to indicate how many octets are in the sequence. (See http://www.ietf.org/rfc/rfc2279.txt.)
UTF-16 uses a minimum of two octets to represent characters and, if the character cannot be represented with two octets, it uses four octets. It also uses a special encoding scheme (see http://www.ietf.org/rfc/rfc2279.txt), but if you are using only Latin characters, UTF-16 characters can take up more space when they don’t need to. For example, the letter A would only take one octet in UTF-8 but would take two in UTF-16. On the other hand, a character in the higher ranges that might take six octets in UTF-8 would take at most four octets in UTF-16. UTF-8 is a good choice for Latin alphabets, and UTF-16 is good for other than the simplest Chinese, Japanese, and Korean characters.
The Byte Order Mark
A Byte Order Mark, or BOM, is a special space character (Unicode character FEFF) that is used only as an encoding signature. If an XML document is UTF-16, it must begin with a BOM; if it is UTF-8, it may begin with a BOM. If the document is not UTF-8 or UTF-16, the character encoding must be declared. You can also declare UTF-8 or UTF-16 encoding explicitly in an XML declaration. (See Section 4.3.3 of the XML specification.)
XML processors may support other encodings such as US-ASCII,
ISO-8859-1, or Shift_JIS (Japanese). The Internet Assigned Numbers
Authority keeps track of encoding names and publishes them at
http://www.iana.org/assignments/character-sets.
You can use your own private encoding name if you start it with
x-, but you would have to write your own code to
process it.
Unicode and the Command Shell Window
In a shell or command prompt window, it’s difficult, if not impossible, to see the difference between one kind of character encoding and another. To show you the effect of this, apply the stylesheet encoding.xsl to name.xml with Xalan:
xalan name.xsl encoding.xsl
Here’s encoding.xsl:
<xsl:stylesheet version="1.0" xmlns:xsl="http://www.w3.org/1999/XSL/Transform">

<xsl:output method="xml" indent="yes"/>
<xsl:output encoding="UTF-16"/>

<xsl:template match="name">
 <name>
  <family><xsl:apply-templates select="last"/></family>
  <given><xsl:apply-templates select="first"/></given>
 </name>
</xsl:template>

</xsl:stylesheet>
The result in a Windows command prompt window, which doesn’t handle UTF-16 properly, will look something like this:
               < ? x m l   v e r s i o n = " 1 . 0  "  e n c o d i n g = " U T F - 1 6 " ? >
 < n a m e >
 < f a m i l y > A s a m i < / f a m i l y >
 < g i v e n > T o m o h a r u < / g i v e n >
 < / n a m e >
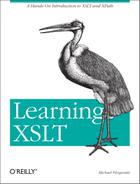
The dark block at the beginning of the document shows you where the BOM is. Even though the BOM is a zero-width space, the code page used by the Windows command prompt represents it differently. A code page is a Microsoft character set, and if your computer is configured for U.S. English, the code page is likely to be 437. Code page 437, using the Lucida Console font, interprets 8 bits of the character (FE in hexadecimal, 11111110 in binary, and 254 in decimal) as a black square. That is what is mapped to the character in the code page (see http://www.kostis.net/charsets/cp437.htm). In Unicode, the black square is 25A0 in hexadecimal (see Figure 3-1), and it is 9632 in decimal.
Where did that extra space come from in the output of encoding.xsl? Because you are using UTF-16 encoding, each character in the output is represented by two octets. Code page 437 interprets the other 8 bits (FF in hexadecimal, 11111111 in binary, and 255 in decimal) as nonbreaking space. Unicode numbers the nonbreaking space as A0 in hexadecimal and as 160 in decimal. That’s where the extra space is coming from. This incompatibility between encoding schemes and the display of characters in a shell window or text editor is the cause of a lot of confusion. It is good to be aware of it. Character Map and UniPad are tools that can help analyze Unicode characters.
Using Character Map and UniPad
The Windows Character Map utility allows you to select and copy characters in available fonts for use in other applications, but it also helps you quickly identify the Unicode code point and names for characters. Notice the lower-left corner in Figure 3-1, which identifies the Unicode code point in hexadecimal (U+25A0), plus the character name (Black Square). Figure 3-1 shows what the Character Map looks like in Windows XP Professional.
Another useful program is Sharmahd Computing’s SC
UniPad,
a Unicode text editor available for free download from http://www.unipad.org. Among other things,
UniPad shows you the Unicode value of a character based on the
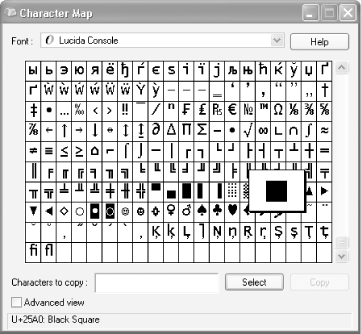
position of the cursor in the edit window. Figure 3-2 shows you dump.xml in a
UniPad window. Note the Unicode character information in the status
bar. A few things the status bar tells you is the Unicode code point
for the character where the cursor is located
(U+003C) and the character’s
descriptive name (LESS-THAN SIGN). It indicates
the encoding (UTF-16
(L) for
little endian), and tells you that the byte-order mark is present
(BOM).
Entities and text declarations
A text declaration is similar to an XML declaration, but it does not have to provide version information. Text declarations are used for separate, external documents called entities . If an external entity is not in UTF-8 or UTF-16, the external entity must have a text declaration (see Section 4.3.3 of the XML specification). To understand what an external entity is, look at the document entity.xml:
<?xml version="1.0" encoding="ISO-8859-1"?>
<?xml-stylesheet href="entity.css" type="text/css"?>
<!DOCTYPE name [
<!ENTITY first SYSTEM "name.ent">
]>

<name>
 <last>Churchill</last>
 <first>&first;</first>
</name>
This document contains an internal
document type
definition, or DTD, called an internal
subset
. It’s internal to the
XML document that it qualifies. The entity is declared in the
internal subset (note the keyword ENTITY).
You’ll learn about DTDs in Section 3.2.4, later in this chapter. For
right now, I’ll focus only on the entity.
The entity is an external, parsed entity.
External means
that the content of the entity is stored in an external file.
Parsed means that the entity is made of text
that may be parsed. The name of this entity is
first. The
SYSTEM
keyword indicates that the entity is in
a named file, and the name of that file is
name.ent. The first element contains a
(&first;) that, when processed, will be
expanded or replaced with the contents of the file
name.ent:
<?xml encoding="ISO-8859-1"?>Randolph
The external entity name.ent contains a text
declaration that has an encoding declaration with the encoding name
ISO-8859-1. It looks like an XML declaration, but
the version information is not required (nor is it forbidden). If you
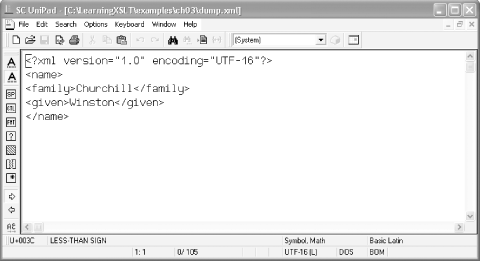
display entity.xml in IE, at least in Version
6.0 or greater, the entity will be expanded so that the content of
the first element will be
Randolph.
Figure 3-3 shows what entity.xml looks like in IE when using the stylesheet entity.css:
name {font-size: 18pt}
last {display:inline}
You’ll read more about entities in Section 3.2.3.2 to follow. For more information on text declarations, see Section 4.3.1 of the XML specification.
The standalone declaration
The
standalone
declaration in an XML declaration indicates explicitly
whether an XML document depends on external markup declarations. An
element type declaration, such as <!ELEMENT family
(#PCDATA)>, is an example of a markup declaration.
Markup declarations are stored in DTDs. The following document,
standalone.xml
,
states bluntly that it does not depend on external documents:
                  <?xml version="1.0" encoding="UTF-8" standalone="yes"?>

<name>
 <last>Churchill</last>
 <first>Winston</first>
</name>
If, however, you apply the stylesheet notalone.xsl :
<xsl:stylesheet version="1.0" xmlns:xsl="http://www.w3.org/1999/XSL/Transform">

<xsl:output method="xml" indent="yes"/>
<xsl:output doctype-system="notalone.dtd"/>
<xsl:output standalone="no"/>

<xsl:template match="name">
 <name>
  <family><xsl:apply-templates select="last"/></family>
  <given><xsl:apply-templates select="first"/></given>
 </name>
</xsl:template>

</xsl:stylesheet>
to standalone.xml, using:
xalan -o notalone.xml standalone.xml notalone.xsl
the value of the standalone declaration is changed from
yes to no in the output
document notalone.xml, and a document type
declaration is also added:
                  <?xml version="1.0" encoding="UTF-8" standalone="no"?>
                  <!DOCTYPE name SYSTEM "notalone.dtd">
<name>
<family>Churchill</family>
<given>Winston</given>
</name>
The DTD notalone.dtd contains three markup declarations, all for elements:
<!ELEMENT name (family, given)>
<!ELEMENT family (#PCDATA)>
<!ELEMENT given (#PCDATA)>
You’ll learn more about the document type declaration later in this chapter in Section 3.2.4.
It is important for you to know—though you have probably already realized it—that standalone declarations are not required. They may be useful in some applications because the XML declaration must be on the first line in a document, and so information about whether the document has dependencies is available to applications early on.
If a document declares standalone="no“, but
actually has dependencies nonetheless, an XML processor will ignore
the declaration. If a document does have dependencies, declaring
standalone="yes" will generate an error. If a
document doesn’t have a standalone declaration in an
XML declaration, it usually doesn’t matter much
anyway: an XML processor will find the external markup declarations
nevertheless. Again, for more insight, see Section 3.2.4.
XML version information
Version 1.0 of XML was approved as a W3C
recommendation in February 1998. While the 1.0 specification has held
its ground for over five years, it is likely that the W3C will
deliver XML 1.1 as a recommendation in 2003. If so, XSLT is ready in
at least one respect: you can control XML version information in an
XML declaration with output’s
version attribute.
Here is an example of how it works. The stylesheet
version.xsl
uses the version attribute on the
output element:
<xsl:stylesheet version="1.0" xmlns:xsl="http://www.w3.org/1999/XSL/Transform">
<xsl:output method="xml" indent="yes" encoding="UTF-8"/>
<xsl:output version="1.1"/>

<xsl:template match="name">
 <name>
  <family><xsl:apply-templates select="last"/></family>
  <given><xsl:apply-templates select="first"/></given>
 </name>
</xsl:template>

</xsl:stylesheet>
When applied to name.xml like:
xalan name.xml version.xsl
this stylesheet will produce the following result with an altered XML declaration:
                  <?xml version="1.1" encoding="UTF-8"?>
<name>
<family>Churchill</family>
<given>Winston</given>
</name>
The XML version is changed from 1.0 to 1.1.
Controlling Document Type Declarations
A document type declaration associates document type definitions (DTDs) with an XML document. In essence, it helps an XML validator find where DTDs exist. The DTD can be either internal to an XML document, external to it, or both. To illustrate, the document name-int.xml has an internal subset:
<?xml version="1.0" encoding="UTF-8"?>
<!DOCTYPE name [
               <!ELEMENT name (last, first)>
               <!ELEMENT last (#PCDATA)>
               <!ELEMENT first (#PCDATA)>
               ]>

<name>
 <last>Churchill</last>
 <first>Winston</first>
</name>
DTDs, as you already can see, have a different syntax than ordinary
XML. DOCTYPE
is the keyword for the document type
declaration. Following that keyword is the name of the document
element for the XML document called name. Inside
the square brackets ([ ]) are three element
declarations that begin with the keyword
ELEMENT
.
According to this internal subset, a name element
must be followed by exactly one last element,
which is followed by exactly one first element.
Both last and first must
contain parsed character data (#PCDATA). The
document contained in internal.xml is valid with
regard to its internal subset.
The document external.xml references an external DTD called the external subset. It is in a file called external.dtd; external.xml is valid with regard to it:
<?xml version="1.0" encoding="UTF-8"?>
<!DOCTYPE name SYSTEM "external.dtd">

<name>
 <last>Churchill</last>
 <first>Winston</first>
</name>
The SYSTEM keyword indicates that the following
value will be a system identifier or URI. Here is
external.dtd that has the same declarations as
internal.dtd, but in a document separate from
the instance:
<!ELEMENT name (last, first)>
<!ELEMENT last (#PCDATA)>
<!ELEMENT first (#PCDATA)>
The document both.xml contains an internal subset and also refers to an external subset:
<?xml version="1.0" encoding="UTF-8"?>
<!DOCTYPE name SYSTEM "both.dtd" [
<!ELEMENT last (#PCDATA)>
]>
<name>
 <last>Churchill</last>
 <first>Winston</first>
</name>
The document type declaration encloses an internal subset and also points to the external subset both.dtd with a system identifier:
<!ELEMENT name (last, first)>
<!ELEMENT first (#PCDATA)>
The external subset contains declarations for the
name and first elements, and
the internal subset holds a declaration for last
only. Both the internal and external subsets are needed to validate
the document.
Validation with transformation
You can validate a source document
at the same time that you transform it by using the
-v (validate) command-line option. For example,
the following command line performs validation on
both.xml before the document is transformed with
both.xsl:
xalan -v both.xml both.xsl
The validate option works with Saxon and MSXSL as well. MSXSL is a fast, Windows-native command-line processor available free from Microsoft (see the appendix for more information on MSXSL).
Adding a document type declaration with a system identifier
XSLT won’t let you add markup declarations such as
<!ELEMENT name (last, first)> to an internal
subset through a transformation, but it will let you add document
type declarations to a result. The document
name.xml, for example, doesn’t
have a document type declaration. You can add one with XSLT by using
the
doctype-system
attribute on output. The following stylesheet,
doctype-system.xsl, shows you how:
<xsl:stylesheet version="1.0" xmlns:xsl="http://www.w3.org/1999/XSL/Transform">
<xsl:output method="xml" indent="yes" encoding="UTF-8"/>
<xsl:output doctype-system="name.dtd"/>

<xsl:template match="name">
 <name>
  <family><xsl:apply-templates select="last"/></family>
  <given><xsl:apply-templates select="first"/></given>
 </name>
</xsl:template>

</xsl:stylesheet>
When name.xml is transformed with this stylesheet:
xalan name.xml doctype-system.xsl
the doctype-system attribute triggers the creation of a document type declaration in the result that references the system identifier name.dtd:
<?xml version="1.0" encoding="UTF-8"?>
<!DOCTYPE name SYSTEM "name.dtd">
<name>
<family>Churchill</family>
<given>Winston</given>
</name>
Adding a document type declaration with a public identifier
Public identifiers are often associated with widely accepted DTDs—the strict DTD associated with XHTML, for example. In some situations, software can resolve the names of public identifiers with local copies of a DTD, rather than by using a remote DTD over a network. Finding and using local DTDs can save processing time, especially when you have many files to validate.
Following is a public identifier for strict XHTML 1.0:
-//W3C//DTD XHTML 1.0 Strict//EN
The leading - indicates that the public identifier
is not registered with ISO. The name of the
identifier’s owner is preceded by a pair of slashes
(//W3C), followed by a pair of slashes and the
description of the DTD (//DTD XHTML 1.0 Strict),
followed by a pair of slashes and a language code
(//EN).
The stylesheet doctype-public.xsl adds a public identifier for strict XHTML 1.0 to a result:
<xsl:stylesheet version="1.0" xmlns:xsl="http://www.w3.org/1999/XSL/Transform">
<xsl:output method="xml" indent="yes" encoding="UTF-8"/>
<xsl:output doctype-public="-//W3C//DTD XHTML 1.0 Strict//EN"/>
<xsl:output doctype-system="http://www.w3.org/TR/xhtml1/DTD/xhtml1-strict.dtd"/>

<xsl:template match="name">
<html xmlns="http://www.w3.org/1999/xhtml">
<head>
 <title><xsl:value-of select="name(  )"/></title>
</head>
<body>
  <p><xsl:apply-templates select="last"/></p>
  <p><xsl:apply-templates select="first"/></p>
</body>
</html>
</xsl:template>

</xsl:stylesheet>
In addition to a public identifier, this stylesheet also specifies a
system identifier URI for an XHTML DTD. The
value-of element’s
select attribute contains an expression that calls
the XPath name( ) function that returns the name
of a node, rather than its content. You’ll learn
more about XPath functions such as name( ) in
Chapter 5.
When applied to name.xml with:
xalan name.xml doctype-public.xsl
doctype-public.xsl produces the following output:
<?xml version="1.0" encoding="UTF-8"?>
<!DOCTYPE html PUBLIC "-//W3C//DTD XHTML 1.0 Strict//EN" "http://www.w3.org/TR/xhtml1/
DTD/xhtml1-strict.dtd">
<html xmlns="http://www.w3.org/1999/xhtml">
<head>
<title>name</title>
</head>
<body>
<p>Churchill</p>
<p>Winston</p>
</body>
</html>
Validating XHTML
This output is valid, strict XHTML 1.0. Save the output to a file, for example, with the command:
xalan -o name.html name.xml doctype-public.xsl
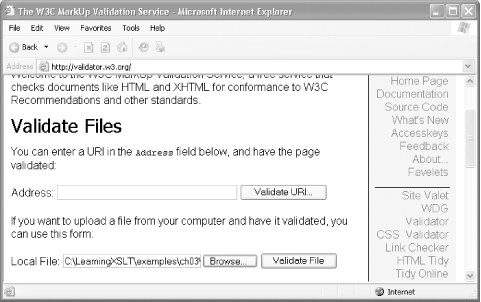
As XHTML, you can validate name.html just as you would any XML document. One easy way to do this is with W3C’s online validation tool. If you go to the W3C Markup Validation Service page at http://validator.w3.org, you can upload a local file, such as name.html, using the Browse button (see Figure 3-4). Then you can click the Validate File button, and the service will attempt to validate the file. One of the nice things about the W3C service is that it provides diagnostics if there are errors present on the page, making it easier to correct the errors. This online tool also works as an XML and HTML validator.
Outputting CDATA Sections
CDATA
sections in XML allow you to hide
characters like < and &
from the XSLT processor. The difference between a CDATA section and
an individual entity reference is that you hide a section of
characters rather than just one at a time.
A CDATA section begins with the characters
<![CDATA[ and ends with
]]>. For example, the
company element in this fragment contains a CDATA
section:
<company><![CDATA[<pub>O'Reilly & Associates</pub>]]></company>
The & and < characters
in the CDATA section are hidden so that they aren’t
interpreted as markup (such as the start of an entity or character
reference). The cdata-section-elements attribute
on output lets you tell the XSLT processor which
elements you want to contain CDATA sections in the result.
To see how it’s done, consider the stylesheet cdata.xsl :
<xsl:stylesheet version="1.0" xmlns:xsl="http://www.w3.org/1999/XSL/Transform"> <xsl:output method="xml" indent="yes"/> <xsl:output cdata-section-elements="notes"/> <xsl:template match="name"> <name> <family><xsl:apply-templates select="last"/></family> <given><xsl:apply-templates select="first"/></given> <notes>Author & British prime minister</notes> </name> </xsl:template> </xsl:stylesheet>
In this example, the cdata-section-elements
attribute of output contains the name of an
element (notes) whose content you want to enclose
in a CDATA section. If you process name.xml with
cdata.xsl:
xalan name.xml cdata.xsl
you will see the following result:
<?xml version="1.0" encoding="UTF-8"?>
<name>
<family>Churchill</family>
<given>Winston</given>
<notes><![CDATA[Author & British prime minister]]></notes>
</name>
The character data content of notes (from the
template in the stylesheet) is surrounded by a CDATA section in the
result, and the entity reference & is
changed into &. The
cdata-section-elements attribute can contain a
list of whitespace-separated element names. Each element in such a
list must contain character data in the source document, as
notes does.
You can also serialize CDATA sections by using literal text. To do this, use literal text such as shown in literal-cdata.xsl :
<xsl:stylesheet version="1.0" xmlns:xsl="http://www.w3.org/1999/XSL/Transform">
<xsl:output method="xml" indent="yes"/>
<xsl:output cdata-section-elements="notes"/>

<xsl:template match="name">
 <name>
  <family><xsl:apply-templates select="last"/></family>
  <given><xsl:apply-templates select="first"/></given>
  <notes><![CDATA[Author & British prime minister]]></notes>
 </name>
</xsl:template>

</xsl:stylesheet>
When you transform name.xml with this stylesheet using:
xalan name.xml literal-cdata.xsl
you will see the CDATA section passed on literally to the result:
<?xml version="1.0" encoding="UTF-8"?>
<name>
<family>Churchill</family>
<given>Winston</given>
<notes><![CDATA[Author & British prime minister]]></notes>
</name>
You can find more about CDATA sections in Section 2.7 of the XML specification.
Outputting HTML
You have seen a few examples that produce HTML output. The following HTML example is more complicated than ones you have seen before. This section covers explicit, presentation-oriented HTML output, discussed in Section 16.2 of the XSLT specification. The XML document, wg.xml (Example 3-1), contains the names of the former and current W3C XML Working Group (WG) members at the time of the publication of the first edition of XML 1.0.
<?xml version="1.0"?>

<!--
 names of persons acknowledged as current and past members
 of the W3C XML Working Group at the time of the publication
 of the first edition of the XML specification on 1998-02-10
-->

<names>
 <name>
  <last>Angerstein</last>
  <first>Paula</first>
 </name>
 <name>
  <last>Bosak</last>
  <first>Jon</first>
 </name>
 <name>
  <last>Bray</last>
  <first>Tim</first>
 </name>
 <name>
  <last>Clark</last>
  <first>James</first>
 </name>
 <name>
  <last>Connolly</last>
  <first>Dan</first>
 </name>
 <name>
  <last>DeRose</last>
  <first>Steve</first>
 </name>
 <name>
  <last>Hollander</last>
  <first>Dave</first>
 </name>
 <name>
  <last>Kimber</last>
  <first>Eliot</first>
 </name>
 <name>
  <last>Magliery</last>
  <first>Tom</first>
 </name>
<name>
  <last>Maler</last>
  <first>Eve</first>
 </name>
 <name>
  <last>Maloney</last>
  <first>Murray</first>
 </name>
<name>
  <last>Murata</last>
  <first>Makoto</first>
 </name>
 <name>
  <last>Nava</last>
  <first>Joel</first>
 </name>
 <name>
  <last>O'Connell</last>
  <first>Conleth</first>
 </name>
 <name>
  <last>Paoli</last>
  <first>Jean</first>
 </name>
 <name>
  <last>Sharpe</last>
  <first>Peter</first>
 </name>
 <name>
  <last>Sperberg-McQueen</last>
  <first>C. M.</first>
 </name>
 <name>
  <last>Tigue</last>
  <first>John</first>
 </name>
</names>
Tip
The element names last and
first fit Western-oriented names, which admittedly
is a problem when you are dealing with international names. In other
examples in this chapter, last is transformed to
family and first is transformed
to given, which is more generalized for
international names. But because this example is only concerned with
presentation-oriented HTML, changing the element names to more
descriptive names is extraneous.
Along with the names of the individual in alphabetical order, the document contains an informative comment in the prolog (near the top). You can use the stylesheet wg.xsl , shown in Example 3-2, to transform this document into the HTML shown in Example 3-3.
<xsl:stylesheet version="1.0" xmlns:xsl="http://www.w3.org/1999/XSL/Transform">

<xsl:output method="html" version="4.01"/>
<xsl:output doctype-system="http://www.w3.org/TR/html4/strict.dtd"/>

<xsl:output doctype-public="-//W3C//DTD HTML 4.01//EN"/>

<xsl:template match="/">
 <html>
  <head>
  <title>Original W3C XML Working Group Members</title>
  <style type="text/css">
  body {font-family: sans-serif}
  h1 {font-size: 20pt}
  lu {font-size: 16pt}
  </style>
  </head>
  <body>
  <h1>Original W3C XML Working Group Members</h1>
  <p>Following are the
   <xsl:value-of select="substring(comment(  ),2,string-length(comment(  ))-12)"/>
    10 February 1998:</p>
   <ul><xsl:apply-templates/></ul>
  </body>
 </html>
</xsl:template>

<xsl:template match="name">
  <li><xsl:apply-templates/></li>
</xsl:template>

<xsl:template match="last">
  <xsl:comment> family name </xsl:comment>
  <xsl:apply-templates/><xsl:text>, </xsl:text>
</xsl:template>

<xsl:template match="first">
  <xsl:comment> given name </xsl:comment>
  <xsl:apply-templates/>
</xsl:template>

</xsl:stylesheet>
The stylesheet sets the output method to html
unambiguously, that is, it does not depend on the default HTML output
method. The version attribute indicates the HTML
version number. This won’t show up in the output,
but it is available should any application want the information
(rare). The stylesheet will also produce a public and system
identifier for HTML 4.01.
The first template matches on the root of the document and starts building the outer layers of an HTML document, including some CSS style rules. Following that, there is an interesting line of gobbledy-gook that I want to draw your attention to:
<xsl:value-of select="substring(comment( ),2,string-length(comment( ))-12)"/>
This instance of value-of returns a substring or
shortened version of the comment in the prolog by using the
substring(
)
function. The first argument of the
substring( ) function is comment(
), which looks like a function, but it
isn’t—it’s something called a
node-test
(you’ll learn about node-tests in Chapter 4). The expression in the
select attribute uses substring(
) to subtract 14 characters from the comment—2
characters at the beginning of the comment (skips characters 0 and 1,
and starts at character 2) and 12 at the end of the comment.
Tip
Processing comments blindly without knowing their exact content will probably result in a good deal of frustration on your part.
The string-length(
)
function, which appears as the third
argument of the function substring( ), returns the
length of the comment (181 characters) and subtracts 12 from 181.
This removes the ISO 8601 date from the returned comment and allows
the stylesheet to add a differently formatted date (10
February 1998), which is specified as literal text. The
returned comment is preceded by the text Following are
the. You will learn more about expressions and functions
in Chapter 5.
The first template, the one that matches the document root
(/), calls apply-templates,
which in turn finds the template that reaches each occurrence of the
child element name. This name
template instantiates the HTML element li (list
item) and then calls apply-templates, which finds
template rules for its children last and
first. The templates for last
and first add comments to the result, and the
template for last adds a comma. After each
template is invoked, it returns control to the template that invoked
it. The XSLT processor munches through the whole document until it
can’t find any more nodes in the source.
Go ahead and process wg.xml with wg.xsl, saving the result to wg.html:
xalan -o wg.html wg.xml wg.xsl
The resulting file wg.html follows in Example 3-3.
<!DOCTYPE HTML PUBLIC "-//W3C//DTD HTML 4.01//EN" "http://www.w3.org/TR/html4/strict.dtd">
<html>
<head>
<META http-equiv="Content-Type" content="text/html; charset=UTF-8">
<title>Original W3C XML Working Group Members</title>
<style type="text/css">
body {font-family: sans-serif}
h1 {font-size: 20pt}
lu {font-size: 16pt}
</style>
</head>
<body>
<h1>Original W3C XML Working Group Members</h1>
<p>Following are the
names of persons acknowledged as current and past members
of the W3C XML Working Group at the time of the publication
of the first edition of the XML specification on
10 February 1998:</p>
<ul>
<li>
<!-- family name -->Angerstein,
<!-- given name -->Paula
</li>
<li>
<!-- family name -->Bosak,
<!-- given name -->Jon
</li>
<li>
<!-- family name -->Bray,
<!-- given name -->Tim
</li>
<li>
<!-- family name -->Clark,
<!-- given name -->James
</li>
<li>
<!-- family name -->Connolly,
<!-- given name -->Dan
</li>
<li>
<!-- family name -->DeRose,
<!-- given name -->Steve
</li>
<li>
<!-- family name -->Hollander,
<!-- given name -->Dave
</li>
<li>
<!-- family name -->Kimber,
<!-- given name -->Eliot
</li>
<li>
<!-- family name -->Magliery,
<!-- given name -->Tom
</li>
<li>
<!-- family name -->Maler,
<!-- given name -->Eve
</li>
<li>
<!-- family name -->Maloney,
<!-- given name -->Murray
</li>
<li>
<!-- family name -->Murata,
<!-- given name -->Makoto
</li>
<li>
<!-- family name -->Nava,
<!-- given name -->Joel
</li>
<li>
<!-- family name -->O'Connell,
<!-- given name -->Conleth
</li>
<li>
<!-- family name -->Paoli,
<!-- given name -->Jean
</li>
<li>
<!-- family name -->Sharpe,
<!-- given name -->Peter
</li>
<li>
<!-- family name -->Sperberg-McQueen,
<!-- given name -->C. M.
</li>
<li>
<!-- family name -->Tigue,
<!-- given name -->John
</li>
</ul>
</body>
</html>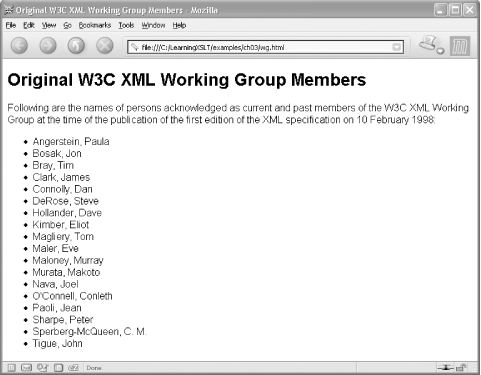
Figure 3-5 shows what wg.html looks like in Mozilla.
You can easily validate wg.html using Mozilla’s built-in link to the W3C Markup Validation Service. To do so, follow these steps:
Choose File → Edit Page (or CTRL+E) in Mozilla.
When the Composer window appears, choose Tools → Validate HTML.
When the W3C Markup Validation Service window appears, click the Browse button and select wg.html.
Click the button Validate this file.
The successful result should appear as Figure 3-6.

Outputting Text
The
text
output method lets an XSLT processor
know that you intend to output plain text to the result. You have
already seen simple examples that do this previously in the book.
This example shows you how to output programming language text using
the text method. If you are not a programmer, this
section may be a little tough to follow. You can skip it if
programming makes you queasy or if you aren’t
interested in .NET, although the same approach can be used to
generate Java, VisualBasic, COBOL, or the language of your choice.
Now, I’ll show you how you can use XSLT to write a program in the C# programming language. The stylesheet csharp.xsl uses the text output method:
<xsl:stylesheet version="1.0" xmlns:xsl="http://www.w3.org/1999/XSL/Transform">
<xsl:output method="text"/>

<xsl:template match="name">
using System;
using System.Xml;

class Name {

    static void Main(  ) {
        XmlTextWriter w = new XmlTextWriter(Console.Out);
         w.Formatting = Formatting.Indented;
         w.Indentation = 1;
         w.WriteStartDocument(  );
         w.WriteStartElement("<xsl:value-of select="name(  )"/>");
         w.WriteAttributeString("title", "Mr.");
          w.WriteElementString("family", "<xsl:value-of select="last"/>");
            w.WriteElementString("given", "<xsl:value-of select="first"/>");
         w.WriteEndElement(  );
        w.Close(  );

    }

}
</xsl:template>

</xsl:stylesheet>
This stylesheet uses value-of instruction elements
to grab string values from the source tree. The first occurrence of
value-of uses the XPath function name(
) to grab the name of the element that the template
matches. The template actually matches not just the name of an
element node, but a node-set, that is, the set
of nodes including the element name and its
children. The value-of element, however, returns
only the string value of the first node of this node-set. The next
two occurrences of value-of capture the text node
children of the last and first elements in the source tree,
respectively. (You’ll learn more about nodes and
node-sets in Chapter 4.)
When name.xml is processed with this stylesheet, it outputs a C# program. C# is part of the .NET Framework and offers many conveniences for a programmer that must handle XML. You can download .NET for Windows from Microsoft at http://www.microsoft.com/net/. You can also download Ximian’s open source implementation of .NET at http://www.go-mono.com/, which runs on Linux and Windows, as well as FreeBSD and Mac OS X.
To transform name.xml with csharp.xsl, use this command to save the program to a file:
xalan -o name.cs name.xml csharp.xsl
After the transformation, the program is saved to the file name.cs:
using System;
using System.Xml;

class Name {

    static void Main(  ) {
        XmlTextWriter w = new XmlTextWriter(Console.Out);
         w.Formatting = Formatting.Indented;
         w.Indentation = 1;
         w.WriteStartDocument(  );
         w.WriteStartElement("name");
         w.WriteAttributeString("title", "Mr.");
          w.WriteElementString("family", "Churchill");
          w.WriteElementString("given", "Winston");
         w.WriteEndElement(  );
        w.Close(  );

    }

}
The XmlTextWriter
object allows C# programs to write
well-formed XML to the console, file, or stream. The output of this
particular program is written to the console (standard output), and
the output will be indented. This is set by the Formatting and
Indentation properties. The document element name
is created by the WriteStartElement( ) method of
XmlTextWriter, and it has a single attribute,
title, created with WriteAttributeString(
). This element also has two children,
family and given, produced by a
pair of WriteElementString( ) methods.
You can compile and run this program if you have the .NET Framework downloaded and installed. Compile the program with the Microsoft C# compiler by typing the following at a command prompt:
csc name.cs
Or with the Mono compiler using:
mcs name.cs
It should report no errors—all you should see are some copyright messages. The output of the compilation is an executable file called name.exe. If you have the Windows implementation, type:
name
If you have the Mono implementation, type:
mono name.exe
Again, this example works only if you have .NET installed. When you successfully run this program on Windows, for example, it produces the following well-formed XML output:
<?xml version="1.0" encoding="IBM437"?>
<name title="Mr.">
 <family>Churchill</family>
 <given>Winston</given>
</name>
IBM437 is an IANA-registered character set name for the Windows
code page 437. XML processors are not
required to support this character set, but they are permitted to
support any character sets registered at IANA (which IBM437 is), plus
any private character sets (they must be prefixed with
x-).
Using a QName Output Method
I have explained the
xml, html, and
text output methods. You can also use a QName for
a value of the method attribute. But
there’s a catch: if you use a QName, it must be
supported as an extension by the XSLT processor that you use with it.
(This mechanism allows you to invoke a user-written serializer, such
as with a SAX ContentHandler.) This can be useful if you want to
produce non-XML formats as your output.
Johannes Döbler’s XSLT processor jd.xslt
offers several QName values for the method
attribute by way of extension. One of them is
jd:empty.
Tip
The value of method must be a QName, not an
NCName. Any value other than xml,
html, or text is considered an
extension and must be qualified with a namespace.
The jd:empty output method, when used together
with the jd.xslt processor, produces a result tree but
doesn’t serialize it. This is useful when you are
interested only in measuring the performance of the processor with a
given stylesheet. The stylesheet empty.xsl uses
output with a method of
jd:empty:
<xsl:stylesheet version="1.0" xmlns:xsl="http://www.w3.org/1999/XSL/Transform">
<xsl:output method="jd:empty" xmlns:jd="http://www.aztecrider.com/xslt"/>

<xsl:template match="name">
 <name>
  <family><xsl:apply-templates select="last"/></family>
  <given><xsl:apply-templates select="first"/></given>
 </name>
</xsl:template>

</xsl:stylesheet>
The QName jd:empty is associated with the
namespace name http://www.aztecrider.com/xslt. You can
process empty.xsl against the document
name.xml with jd.xslt to see what happens. (For
details of how to download, install, and run jd.xslt, see the
appendix.) To run it, enter the following at a command or shell
prompt using the -verbose switch:
java -jar jdxslt.jar -verbose name.xml empty.xsl
You won’t see a result, but the processor will deliver the following information:
jd.xslt processor version 1.4.0

java vm              = Sun Microsystems Inc., 1.4.1_01
parser               = org.apache.crimson.parser.XMLReaderImpl
modelbuilder factory = jd.xml.xpath.model.build.ModelBuilderFactory
read stylesheet      = file:C:/LearningXSLT/examples/ch03/empty.xsl
prepare stylesheet   = 180 ms
read xml input       = 10 ms (using normal tree model)
transform input      = 10 ms
max memory usage     = 1.937 MB
With -verbose, the processor reports the
transformation performance results.
Media Types
The last attribute
I’ll mention is
media-type
. This attribute
allows you to set the media type for the result. Media types are also
sometimes called MIME types (MIME is short for
Multipurpose Internet Mail Extensions), but since the types apply to
more than just email, the term media
type is more encompassing.
Here is one example fragment. A media type of
application/xml may be specified in an
output element like this:
<xsl:output output="xml" media-type="application/xml"/>
The value of this attribute, if you use it, will not be reflected
explicitly in the result. In fact, the specification makes no
stipulations about whether a processor needs to provide this
information to an application. Nevertheless, an application might
possibly make the media type information available to a server
running HTTP, which could then use it in the
Content-Type field of an HTTP header. This was
probably the intent of this obscure attribute.
Table 3-2 lists the default media types for the three built-in output methods of XSLT.
Summary
This chapter covered the results you get from different output methods, including default and unambiguous XML, HTML, text, or custom output. It also talked about indentation, working with XML declarations, document type declarations, CDATA sections, and media types. In the next chapter, you will learn more details about using XPath to look at XML documents as trees of nodes.