
You can dramatically improve the performance of your ASP.NET application through caching. If you cache the content of a page in your Web server’s memory, you can avoid regenerating the page content each and every time the page is requested.
In this chapter, you’ll learn how to use the three caching mechanisms provided by the ASP.NET Framework. You’ll learn
How to use Page Output Caching to store the entire contents of a Web Form Page in memory
How to use Partial Page Caching to store different regions of a Web Form Page in memory
How to use Data Caching to cache an arbitrary object in memory
Page Output Caching enables you to store the entire contents of a page in your Web server’s memory. Whatever content is rendered by the page is stored in the cache.
Visual Studio .NET has no direct support for Page Output Caching. You won’t find a property for it in the Properties window. To enable Page Output Caching, you must add a directive to the HTML source of a page yourself.
We’ll test Page Output Caching by creating a
page that displays the current time in a Label control. If the page shows the same time when it is refreshed, we’ll know that the content of the page is being cached in the Web server’s memory.
Perform the following steps to create the TestCache.aspx page:
Add a Web Form Page to your project named
TestCache.aspxto your project.Add a Web Forms
Labelcontrol to the page.Double-click the Designer surface to switch to the Code Editor.
Enter the following code for the
Page_Loadhandler:C#.
private void Page_Load(object sender, System.EventArgs e) { Label1.Text = DateTime.Now.ToString( "T" ); }VB.NET.
Private Sub Page_Load(ByVal sender As System.Object, ByVal e As System.EventArgs) Handles
 MyBase.Load
  Label1.Text = DateTime.Now.ToString("T")
End Sub
MyBase.Load
Label1.Text = DateTime.Now.ToString("T")
End Sub
Right-click the TestCache.aspx in the Solution Explorer window and select Build and Browse.
When the page opens, the current time is displayed. If you click the Refresh button, the time is updated. In other words, every time you click Refresh, the content of the page is regenerated.
To enable Page Output Caching, do the following:
Switch back to the Designer by selecting Designer from the View menu.
Switch to the HTML View of the page by clicking the HTML tab at the bottom-left of the Designer.
Enter the following directive at the very top of the page (see Figure 14.1):
<%@ OutputCache Duration="15" VaryByParam="none" %>
Right-click the TestCache.aspx page in the Solution Explorer window and select Build and Browse.
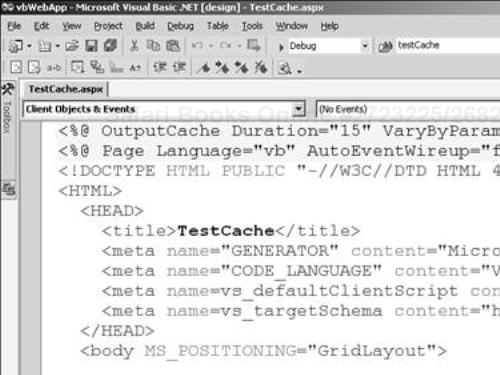
This time, if you click Refresh after the page opens, the same time is displayed for 15 seconds. The OutputCache directive that we added causes the content of the TestCache.aspx page to be cached
for 15 seconds.
There’s a problem that you run into when taking advantage of Page Output Caching. What if you want a page to display different content depending on the value of a query string or form parameter passed to the page?
This is a common scenario. For example, if you are creating an online store, it is common to have a single page that acts as the product page. Depending on the value of a query string passed to the page, the page displays information on different products.
If you use the OutputCache directive discussed in the previous section, however, your page will not work as expected. The first product requested will be cached and future query string parameters will be ignored. So, the same product will be shown every time the page is requested.
Fortunately, there is an easy way around this problem. You can take advantage of the VaryByParam attribute to create different cached versions of a page. You can create a different cached version of a page whenever different query string or form parameters are passed to the page.
The VaryByParam attribute can take three types of values:
*. Indicates that a different cached version of the page is generated whenever different query string or form parameters are passed to the pagenone. Indicates that a single cached version of the page is created, regardless of the query string or form parameters passed to the pageParam1;Param2; . . .A semicolon-delimited list of parameters used to create different cached versions of the page
Note
The VaryByParam attribute must be included when using the OutputCache directive, even when you don’t care about caching different versions of the page.
To test the VaryByParam attribute,
we’ll create a page that displays the value of a query string parameter named ID.
Add a Web Form Page to your project named
TestVaryByParam.aspx.Click the HTML tab at the bottom of the Designer to switch to HTML View.
Enter the following directive at the very top of the page:
<%@ OutputCache Duration="60" VaryByParam="none" %>
Click the Design tab at the bottom of the Designer to switch to Design View.
Add a Web Forms
Labelcontrol to the page.Double-click the Designer surface to switch to the Code Editor.
Enter the following code for the
Page_Loadhandler:C#.
private void Page_Load(object sender, System.EventArgs e) { Label1.Text = Request.QueryString[ "id" ]; }VB.NET.
Private Sub Page_Load(ByVal sender As System.Object, ByVal e As System.EventArgs) Handles
 MyBase.Load
  Label1.Text = Request.QueryString("id")
End Sub
Build the current project by selecting Build Project Name from the Build menu.
After you build the project, launch Internet Explorer and enter the following path in your browser’s address bar:
http://localhost/project name/TestVaryByParam.aspx?id=1
Next, request the same page but change the value of the ID query string parameter:
http://localhost/project name/TestVaryByParam.aspx?id=2
You should notice that the value 1 is still displayed by the Label control on the page. The first page that you requested is cached in memory for 60 seconds, so the page is not updated when
you pass a different query string.
To create different cached versions of the TestVaryByParam.aspx page, do the following:
Open the TestVaryByParam.aspx page in the Designer by selecting Designer from the View menu.
Click the HTML tab at the bottom left of the Designer surface.
Modify the
OutputCachedirective so it looks like the following:<%@ OutputCache Duration="60" VaryByParam="*" %>
Build your current project by selecting Build Project Name from the Build menu.
After you complete these steps, refresh the browser. Now the page will correctly output the value of the ID query string. The content of the page is regenerated every time you pass a different query string or form parameter to the page.
It is important to understand that the content of the page is still being cached when you use the VaryByParam attribute. However, a different cached version of the page is generated whenever different query string or form parameters
are passed to the page.
If you place a Web Forms control in a cached page, the control will display the exact same content every time the page is requested. This creates problems when you want to provide a user with the ability to interact with the page.
For example, suppose that you want to display a list of product categories in a DropDownList control. If you cache the page, the same item will be selected in the DropDownList control every time a user requests the page. If a user selects a new item from the DropDownList control, the selection will be ignored.
You can get around this problem, once again, by taking advantage of the VaryByParam attribute. You can use the VaryByParam attribute not only with the names of form and query string parameters but also with the names of controls.
If you add a DropDownList control named DropDownList1 to a cached page, you can use the following OutputCache directive to correctly vary the cached content of the page:
<%@ OutputCache Duration="50" VaryByParam="DropDownList1" %>
This OutputCache directive automatically generates different cached versions of the page depending on the selected item in the DropDownList1 control.
If you
think
about it, there’s still a problem with the OutputCache directive. One of the most valuable features of Web Forms controls is that they will render different content depending on the browser being used to request the page. For example, a Web Form control will render Cascading Style Sheet attributes only when the control detects that a browser is capable of supporting these attributes.
However, if you cache the output of a page, the same content will be delivered to any browser that requests a page. For example, if the page is first requested by someone using an Internet Explorer 6.0 browser, everyone else will get the cached content generated for an Internet Explorer 6.0 browser.
One way around this problem is to use the VaryByHeader attribute. The VaryByHeader attribute enables you to generate different cached versions of a page depending on the value of a browser header. You can use this attribute with browser headers, such as the Accept-Language or the User-Agent header.
For example, suppose that you need to display both an English and German language version of a page. You can use the Accept-Language header to detect the preferred language of the user requesting the page:
C#.
switch (Request.Headers[ "Accept-Language" ])
{
  case "en-us":
    // Display English Content
    break;
  case "de":
    // Display German Content
    break;
}
VB.NET.
Select Case Request.Headers("Accept-Language")
  Case "en-us"
    ' Display English Content
  Case "de"
    ' Display German Content
End Select
Note
You can change your preferred language when using Internet Explorer 6.0 by selecting Tools, Options. Under the General tab, click the Languages button.
If you want to cache both the English and German language version of the page, you can use the following OutputCache directive:
<%@ OutputCache Duration="60" VaryByParam="None" VaryByHeader="Accept-Language" %>
Another browser header that you can use with the VaryByHeader attribute is the User-Agent header. The User-Agent header indicates the type of browser being used to request the page. For example, my browser sends the following User-Agent header with each page request:
Mozilla/4.0 (compatible; MSIE 6.0; Windows NT 5.0; Q312461; .NET CLR 1.0.3705)
You might be tempted to use the User-Agent header with the OutputCache directive to cache different versions of a page, depending on the type of browser requesting the page. In general, this is not a good idea. The problem is that the User-Agent header is far too specific.
Notice that the User-Agent header not only contains the type of browser and the major version of the browser, it contains a number of other pieces of information. For example, my User-Agent header contains the platform, a quick fix number, and the version of the .NET Framework on my machine.
Note
Notice that the User-Agent header reports the version of the .NET Framework that you have installed on your machine (.NET CLR 1.0.3705). You can detect whether visitors to your Web site are running .NET from the header.
Because the information sent in the User-Agent header is likely to be different for the majority of users, you would not want to use this header with the VaryByHeader attribute. Instead, you should use the VaryByCustom
attribute.
The VaryByCustom attribute
accepts the special value browser. When you assign this value to the VaryByCustom attribute, a different cached version of a page is generated depending on the type of browser and the major version of the browser.
For example, if a user requests a page from Internet Explorer 5.0, the page will be generated and cached. If another user requests a page from Internet Explorer 6.0, a new page will be generated and cached. But if a third user requests from Internet Explorer 5.5, a new page will not be generated—the first cached page will be served.
You can use the VaryByCustom attribute by adding the following directive to the HTML source of a page:
<%@ OutputCache Duration="60" VaryByParam="None" VaryByCustom="browser" %>
You might be wondering why this attribute is called the VaryByCustom attribute. The VaryByCustom attribute, in reality, enables you to generate different cached versions of a page depending on any custom criteria that you specify. When using the VaryByCustom attribute, you can add a method to the Global.asax file that contains your custom criteria.
Note
To learn more about the Global.asax file see Chapter 18, “Handling Application-Wide Events.”
For example, suppose that you want to create different cached versions of a page depending on a user’s SessionID (the unique string that identifies each user session).
Add a Web Form Page to your project named
VaryBySessionID.aspxand click Open.Add a
Labelcontrol to the page by dragging theLabelcontrol from under the Web Forms tab in the Toolbox onto the Designer surface.Click the HTML tab at the bottom of the Designer to switch to HTML View.
Add the following directive to the top of the page:
<%@ OutputCache Duration="100" VaryByParam="none" VaryByCustom="SessionID" %>
Select View, Code to switch to the Code Editor.
Enter the following code for the
Page_Loadhandler:C#.
private void Page_Load(object sender, System.EventArgs e) { Label1.Text = Session.SessionID; }VB.NET.
Private Sub Page_Load(ByVal sender As System.Object, ByVal e As System.EventArgs) Handles
 MyBase.Load
  Label1.Text = Session.SessionID
End Sub
Right-click the Global.asax file in the Solution Explorer window and select View Code.
Enter the following
GetVaryByCustomString()method under the Web Form Designer generated code region:C#.
public override string GetVaryByCustomString(HttpContext context, string arg) { if (arg == "SessionID" && Request.Cookies["ASP.NET_SessionId"] != null) return "SessionID=" + Request.Cookies["ASP.NET_SessionId"].Value; else return String.Empty; }VB.NET.
Public Overrides Function GetVaryByCustomString(ByVal context As HttpContext, ByVal arg As
 String) As String
  If arg = "SessionID" Then
    Return "SessionID=" & Request.Cookies("ASP.NET_SessionId").Value
  End If
End Function
In the Solution Explorer window, right-click the VaryBySessionID.aspx page and select Build and Browse.
Whenever a new user visits your Web site, the user will get different versions of all the pages. If the pages contain any custom user information, the information will appear correctly.
Of course, you can provide any criteria that you want within the GetVaryByCustomString() method. You can create different cached versions of pages depending on the time of day, a randomly generated number, or the weather in Columbus,
Ohio.
Tip
You can detect different features of a user’s browser with the HttpBrowserCapabilities class exposed by the Request.Browser property. For example, you can test whether a browser supports JavaScript by using Request.Browser.JavaScript. Any of these properties can be used in the GetVaryByCustomString() method.
By default, when
you use the OutputCache direction, the page is not only cached on the server. The page is actually cached in three possible locations—the server, any proxy servers, and the browser.
You can control exactly where a page is cached by taking advantage of the location attribute of the OutputCache directive. This attribute accepts any of the following values:
Any. The default value—Cache the page on the browser, any proxy servers, and the serverClient. Cache the page only on the Web browserDownstream. Cache the page on the Web browser or any proxy serversNone. Don’t cache the pageServer. Cache the page only on the server
For example, the following OutputCache directive causes the page to be cached only on the Web server:
<%@ OutputCache Duration="100" VaryByParam="none" Location="Server" %>
Suppose that your home page displays a random banner advertisement at the top of the page. Also suppose that you are displaying database records in the body of the page. It would be nice if you could cache this page so you can avoid hitting the database to retrieve the database records. However, if you cache this page, the same banner advertisement will be displayed to every user.
In situations when you want to cache only particular regions of a page, you need to take advantage of Partial Page Caching. Partial Page Caching enables you to cache the database records displayed in the body of the page without caching the banner advertisement.
Partial Page Caching is implemented with Web User Controls. You can use the same
OutputCache directive (with some limitations discussed shortly) in a Web User Control as you can use within a Web Form Page.
Note
To learn more about Web User Controls see Chapter 5, “Creating Web User Controls.”
To test out Partial Page Caching, let’s create a page that contains a Web User Control with cached content. The Web User Control will display the current time.
Add a Web User Control to your project by selecting Add Web User Control from the Project menu. Name the new Web User Control
CachedControl.ascxand click Open.Click the HTML tab at the bottom left of the Designer surface to switch to HTML View.
Enter the following
OutputCachedirective at the top of the HTML page:<%@ OutputCache Duration="20" VaryByParam="none"%>
Click the Design tab at the bottom left of the Designer surface to switch back to Design View.
Drag a
Labelcontrol from under the Web Forms tab in the Toolbox onto the Designer surface.Double-click the Designer surface to switch to the Code Editor.
Enter the following code for the
Page_Loadhandler:C#.
private void Page_Load(object sender, System.EventArgs e) { Label1.Text = DateTime.Now.ToString( "T" ); }VB.NET.
Private Sub Page_Load(ByVal sender As System.Object, ByVal e As System.EventArgs) Handles
 MyBase.Load
  Label1.Text = DateTime.Now.ToString("T")
End Sub
Next, we need to create a Web Form Page that contains the cached control. The Web Form Page itself will not be cached.
Add a Web Form Page to your project named
TestCachedControl.aspx.Add a Web Forms
Labelcontrol to the page.Add a Flow Layout Panel to the page by dragging the Flow Layout Panel from under the HTML tab in the Toolbox onto the Designer surface.
Add the
CachedControl.ascxto the Flow Layout Panel by draggingCachedControl.ascxfrom the Solution Explorer window onto the Flow Layout Panel.Double-click the Designer surface to switch to the Code Editor.
Enter the following code for the
Page_Loadhandler:C#.
private void Page_Load(object sender, System.EventArgs e) { Label1.Text = DateTime.Now.ToString( "T" ); }VB.NET.
Private Sub Page_Load(ByVal sender As System.Object, ByVal e As System.EventArgs) Handles
 MyBase.Load
  Label1.Text = DateTime.Now.ToString("T")
End Sub
Right-click the TestCachedControl.aspx page in the Solution Explorer window and select Build and Browse.
When the TestCachedControl.aspx page opens, the current time is displayed in two places on the page. If you click the browser Refresh button, the page time updates, but the Web User Control time does not (for 20 seconds). The content of the Web User Control is cached.
Warning
There are some important differences between the way the OutputCache directive works in a Web User Control and the way it works in a normal Web Forms Page. You cannot use either the Location or VaryByHeader attributes in a Web User Control. You can use the Duration, VaryByCustom, and VaryByParam attributes. However, the VaryByParam attribute works in a different way with controls in a Web User Control (see the next section).
Suppose that
you want to place a control within a Web User Control. For example, you might want to add a DropDownList control to a Web User Control that enables a user to pick a product category or a DataList control that functions as a menu. However, if you cache the content of the Web User Control, the Web User Control will display the same content every time the page that contains the control is rendered. In other words, the state of the control contained within the Web User Control will be ignored.
When you use controls, such as DropDownList controls, in a cached Web User Control, you need to take advantage of an attribute of the OutputCache directive called the VaryByControl attribute. The VaryByControl attribute causes different versions of a Web User Control to be generated depending on the state of a control.
For example, if you add a DropDownList control named DropDownList1 to a Web User Control, you can cache different versions of the Web User Control depending on the state of the DropDownList1 control by using the following OutputCache directive:
<%@ OutputCache Duration="1000" VaryByControl="DropDownList1" %>
If you add this directive to a Web User Control, a new cached version of the Web User Control is generated whenever a user selects a new item from the dropdown list. If you have multiple controls inside the Web User Control, you can use a semicolon-delimited list to list more than one control with the VaryByControl
attribute.
Note
The VaryByControl attribute does not work with Web Form Pages. It only works with Web User Controls. You can generate different cached version of a Web Form Page depending on the state of a control contained in the Web Form Page with the VaryByParam attribute (see the “Using Controls in a Cached Page” section earlier in this chapter).
You cannot programmatically modify a property exposed by a cached Web User Control. You should never attempt to refer to a cached Web User Control within the Web Form Page that contains it.
For example, suppose that you have created a Web User Control named Menu.ascx that has a property named Color. Additionally, suppose that you decide to include the Web User Control in a Web Form Page named TestMenu.aspx. Adding the following Page_Load handler to the TestMenu.aspx page will generate an error:
C#.
protected Menu Menu1;

private void Page_Load(object sender, System.EventArgs e)
{
  Menu1.Color = "blue";
}
VB.NET.
Protected Menu1 As Menu Private Sub Page_Load(ByVal sender As System.Object, ByVal e As System.EventArgs) Handles
The page will work correctly the first time you request it. However, if you refresh the page, you’ll receive a Null Reference exception. The error is generated because you are referring to the Menu1 Web User Control within the Page_Load handler.
On the other hand, there is nothing wrong with declaratively setting the value of a property. Within the HTML source of the TestMenu.aspx page, you can assign a value to the Color property as
follows:
<uc1:Menu id="Menu1" runat="server" color="blue"></uc1:Menu>
You can
add just about any object in the .NET Framework to the Cache, including DataSets, Hashtables, or custom classes. When an item is added to the cache, the item is stored in the Web server’s memory. It remains in memory until it is automatically scavenged when memory becomes low.
Note
You can monitor the cache by using performance counters. When you install the .NET Framework, 10 performance counters are added for monitoring such things as the total number of entries in the cache.
The cache has application scope. That means that you can retrieve any item that you have added to the cache from any page that is located under the same virtual directory.
Behind the scenes, when you use either Page Output Caching or Partial Page Caching, the Cache object is used to store the generated content. In other words, the Cache object is the fundamental caching mechanism used by all other forms of caching in the ASP.NET Framework.
We’ve already discussed how you can use the Cache object to store a DataSet in memory in Chapter 8, “Overview of ADO.NET.” In this section, you’ll learn how to take advantage of some of the advanced features of the Cache object, such as file dependencies, expiration policies, and item
priorities.
You can
insert a new item into the Cache by using the Insert method as follows:
C#.
Cache.Insert( "someItem", someItem );
VB.NET.
Cache.Insert( "someItem", someItem )
Or, and this does the very same thing, you can insert an item like the following:
C#.
Cache[ "someItem" ] = someItem;
VB.NET.
Cache( "someItem" ) = someItem
After you add an item to the Cache, the item can be retrieved from the Cache within any Web Form Page located within the same application. You retrieve an item from the Cache as follows:
C#.
someItem = Cache[ "someItem" ];
VB.NET.
someItem = Cache( "someItem" )
When items are retrieved from the Cache, the
items are returned as instances of the Object class. When programming with C#, or using Option Strict with VB.NET, you’ll need to cast the item returned from the Cache to the appropriate type as follows:
C#.
someItem = (DataSet)Cache[ "someItem" ];
VB.NET.
someItem = CType( Cache( "someItem" ), DataSet )
There are two warnings that you should always keep in mind when using the Cache object. First, and this is true even when you are programming with VB.NET, the Cache object is case sensitive. So, retrieving an item named SomeItem is very different from retrieving an item named someItem.
Second, you should always remember that an item that you have added to the Cache object is not guaranteed to be there when you later attempt to retrieve it. Items are automatically scavenged from the Cache. For this reason, you should always check whether an item exists before using it by comparing the item
to either null or Nothing as in the following:
C#.
if (Cache[ "someItem" ]!= null )
{
  // Use someItem
}
VB.NET.
If Not Cache("someItem") Is Nothing Then
  ' Use someItem
End If
If you do want to explicitly remove an item from the Cache, you can use the Remove() method:
C#.
Cache.Remove( "someItem" );
VB.NET.
Cache.Remove( "someItem" )
For example, you might want to explicitly Remove() a DataSet from the Cache if you have just updated a record in the underlying database
table.
The Cache object
supports something called a file dependency. After you add an item to the Cache with a file dependency, if the file is modified, the item is automatically dropped from the Cache. You can create a file dependency for a single file, a group of files, or even a directory.
For example, suppose that you want to create a drop-down list that displays a list of companies. Additionally, suppose that you want to store the list of companies in an XML file. You can cache the contents of the XML file in memory and create a file dependency. That way, if the contents of the XML file are modified, you can automatically reload the XML file into the Cache.
Let’s try this example. First, we need to create the XML file.
Add a new XML file to your project by selecting Add New Item from the Project menu. Select XML File under Templates, name the new XML file
Companies.xml, and click Open.Enter the following list of companies in the XML Editor window (see Figure 14.2):
<?xml version="1.0" encoding="utf-8" ?>
<companies>
  <company>Amazon</company>
  <company>Microsoft</company>
  <company>Disney</company>
</companies>
Click Save to save the XML file.
Next, we need to create a Web Form Page that displays the list
of companies from the XML file in a DropDownList control. We’ll cache the XML file with a file dependency on the XML file.
Add a Web Form Page to your project named
PickCompany.aspx.Add a
DropDownListcontrol to the page.Add a
Labelcontrol to the page.Double-click the Designer surface to switch to the Code Editor.
Enter the following code for the
Page_Loadhandler:C#.
private void Page_Load(object sender, System.EventArgs e) { DataSet dstCompanies; dstCompanies = (DataSet)Cache["Companies"]; if (dstCompanies == null) { Label1.Text = "Retrieving from file!"; dstCompanies = new DataSet(); dstCompanies.ReadXml(MapPath("Companies.xml")); Cache.Insert( "Companies", dstCompanies, new System.Web.Caching.CacheDependency(MapPath("Companies.xml"))); } DropDownList1.DataSource = dstCompanies; DropDownList1.DataTextField = "company_text"; DropDownList1.DataBind(); }VB.NET.
Private Sub Page_Load(ByVal sender As System.Object, ByVal e As System.EventArgs) Handles
 MyBase.Load
  Dim dstCompanies As DataSet

  dstCompanies = Cache("Companies")
  If dstCompanies Is Nothing Then
     Label1.Text = "Retrieving from file!"
     dstCompanies = New DataSet()
     dstCompanies.ReadXml(MapPath("Companies.xml"))
     Cache.Insert( _
       "Companies", _
       dstCompanies, _
       New System.Web.Caching.CacheDependency(MapPath("Companies.xml")))
  End If
  DropDownList1.DataSource = dstCompanies
  DropDownList1.DataTextField = "company_text"
  DropDownList1.DataBind()
End Sub
Right-click the PickCompany.aspx page in the Solution Explorer window and select Build and Browse.
When the page first opens, the list of companies appears in the DropDownList control. The Label control displays the message Retrieving from File!. If you click Refresh, the message disappears because the XML file is now stored in the Cache.
The XML file will remain in the Cache unless the Companies.xml file is modified. You can test this by doing the following:
Double-click the Companies.xml file in the Solution Explorer window to open the file in the XML Editor.
Remove Disney from the list of companies in the XML file.
Save the XML file by clicking the Save button.
Refresh the PickCompany.aspx page.
When you refresh the PickCompany.aspx page, the changes you made to the XML file appear immediately. When you modified the XML file, the file was automatically dropped from the Cache and reloaded when you refreshed the page.
You can automatically dump items from the Cache at timed intervals by supplying either an absolute or sliding expiration policy for an item that you add to the Cache.
An absolute expiration policy is a date and time when you want an item to be automatically dropped. You can supply any date and time that you want. For example, if you are caching a list of banner advertisements, you might want to drop the banner advertisements from the Cache every hour to check for expired advertisements. You can do this by supplying an expiration time with the Insert() method as follows:
C#.
Cache.Insert(
  "Ads",
  Ads,
  null,
  DateTime.Now.AddHours( 1 ),
  System.Web.Caching.Cache.NoSlidingExpiration );
VB.NET.
Cache.Insert( _
  "Ads", _
  Ads, _
  Nothing, _
  DateTime.Now.AddHours(1), _
  System.Web.Caching.Cache.NoSlidingExpiration )
A sliding expiration policy works differently than an absolute expiration policy. A sliding expiration policy specifies an interval of time. As long as the item is requested within that interval, the item will remain in the Cache.
Sliding expiration policies are useful when you need to store a large number of items in the Cache. Using a sliding expiration policy, you can cache a large number of items and only the items that are most frequently accessed will remain in the Cache.
The following adds an item to the Cache with a sliding expiration policy of 10 minutes:
C#.
Cache.Insert(
  "someItem",
  someItem,
  null,
  System.Web.Caching.Cache.NoAbsoluteExpiration,
  TimeSpan.FromMinutes( 10 ));
VB.NET.
Cache.Insert( _
  "someItem", _
  someItem, _
  Nothing, _
  System.Web.Caching.Cache.NoAbsoluteExpiration, _
  TimeSpan.FromMinutes(10) )
Be aware that you cannot add an item to the Cache with both an absolute expiration policy and sliding expiration policy. You must pick one or the other.
You can set different item priorities for items added to the Cache. When memory resources become low, items with lower priorities will be dropped before items with higher priorities.
The item priority is represented by values from the CacheItemPriority enumeration. The following lists the values from this enumeration in order of priority:
NotRemovable. Should never be removed from the CacheHigh. Least likely to be removed from the CacheAboveNormal. Less likely to be removed from the CacheDefault. Same as NormalNormal. Normal priorityBelowNormal. More likely to be removed from the CacheLow. Most likely to be removed from the Cache
For example, you would use the following code to add an
item to the Cache with High priority:
C#.
Cache.Insert(
  "someItem",
  someItem,
  null,
  System.Web.Caching.Cache.NoAbsoluteExpiration,
  System.Web.Caching.Cache.NoSlidingExpiration,
  System.Web.Caching.CacheItemPriority.High,
  null);
VB.NET.
Cache.Insert( _
  "Ads", _
  Ads, _
  Nothing, _
  System.Web.Caching.Cache.NoAbsoluteExpiration, _
  System.Web.Caching.Cache.NoSlidingExpiration, _
  System.Web.Caching.CacheItemPriority.High, _
  Nothing)
In this chapter, you learned how to take advantage of the three caching mechanisms built into the ASP.NET Framework. In the first section, you learned how to use Page Output Caching to store the entire contents of a Web Form Page in memory. You also learned how to create different cached versions of the page, depending on the values of parameters passed to the page.
Next, you learned how to use Partial Page Caching to cache regions of a page. You learned how to implement Partial Page Caching with Web User Controls.
Finally, you learned how to use Data Caching to cache an arbitrary object in memory. You learned how to create file dependencies, expiration policies, and assign different item priorities for items added to the Cache.