
Chapter 11. Exceptions, Logging, Assertions, and Debugging
• LOGGING
In a perfect world, users would never enter data in the wrong form, files they choose to open would always exist, and code would never have bugs. So far, we have mostly presented code as though we lived in this kind of perfect world. It is now time to turn to the mechanisms the Java programming language has for dealing with the real world of bad data and buggy code.
Encountering errors is unpleasant. If a user loses all the work he or she did during a program session because of a programming mistake or some external circumstance, that user may forever turn away from your program. At the very least, you must
• Notify the user of an error;
• Save all work; and
• Allow users to gracefully exit the program.
For exceptional situations, such as bad input data with the potential to bomb the program, Java uses a form of error trapping called, naturally enough, exception handling. Exception handling in Java is similar to that in C++ or Delphi. The first part of this chapter covers Java’s exceptions.
During testing, you want to run lots of checks to make sure your program does the right thing. But those checks can be time-consuming and unnecessary after testing has completed. You could just remove the checks and stick them back in when additional testing is required, but that is tedious. The second part of this chapter shows you how to use the assertion facility for selectively activating checks.
When your program does the wrong thing, you can’t always communicate with the user or terminate. Instead, you may want to record the problem for later analysis. The third part of this chapter discusses the logging facility of Java SE.
Finally, we give you some tips on how to get useful information out of a running Java application, and how to use the debugger in an IDE.
Dealing with Errors
Suppose an error occurs while a Java program is running. The error might be caused by a file containing wrong information, a flaky network connection, or (we hate to mention it) use of an invalid array index or an attempt to use an object reference that hasn’t yet been assigned to an object. Users expect that programs will act sensibly when errors happen. If an operation cannot be completed because of an error, the program ought to either
• Return to a safe state and enable the user to execute other commands; or
• Allow the user to save all work and terminate the program gracefully.
This may not be easy to do, because the code that detects (or even causes) the error condition is usually far removed from the code that can roll back the data to a safe state or the code that can save the user’s work and exit cheerfully. The mission of exception handling is to transfer control from where the error occurred to an error handler that can deal with the situation. To handle exceptional situations in your program, you must take into account the errors and problems that may occur. What sorts of problems do you need to consider?
• User input errors.In addition to the inevitable typos, some users like to blaze their own trail instead of following directions. Suppose, for example, that a user asks to connect to a URL that is syntactically wrong. Your code should check the syntax, but suppose it does not. Then the network layer will complain.
• Device errors.Hardware does not always do what you want it to. The printer may be turned off. A web page may be temporarily unavailable. Devices will often fail in the middle of a task. For example, a printer may run out of paper during printing.
• Physical limitations.Disks can fill up; you can run out of available memory.
• Code errors.A method may not perform correctly. For example, it could deliver wrong answers or use other methods incorrectly. Computing an invalid array index, trying to find a nonexistent entry in a hash table, and trying to pop an empty stack are all examples of a code error.
The traditional reaction to an error in a method is to return a special error code that the calling method analyzes. For example, methods that read information back from files often return a –1 end-of-file value marker rather than a standard character. This can be an efficient method for dealing with many exceptional conditions. Another common return value to denote an error condition is the null reference. In Chapter 10, you saw an example of this with the getParameter method of the Applet class that returns null if the queried parameter is not present.
Unfortunately, it is not always possible to return an error code. There may be no obvious way of distinguishing valid and invalid data. A method returning an integer cannot simply return –1 to denote the error—the value –1 might be a perfectly valid result.
Instead, as we mentioned back in Chapter 5, Java allows every method an alternative exit path if it is unable to complete its task in the normal way. In this situation, the method does not return a value. Instead, it throws an object that encapsulates the error information. Note that the method exits immediately; it does not return its normal (or any) value. Moreover, execution does not resume at the code that called the method; instead, the exception-handling mechanism begins its search for an exception handler that can deal with this particular error condition.
Exceptions have their own syntax and are part of a special inheritance hierarchy. We take up the syntax first and then give a few hints on how to use this language feature effectively.
The Classification of Exceptions
In the Java programming language, an exception object is always an instance of a class derived from Throwable. As you will soon see, you can create your own exception classes if the ones built into Java do not suit your needs.
Figure 11–1 is a simplified diagram of the exception hierarchy in Java.
Figure 11–1. Exception hierarchy in Java
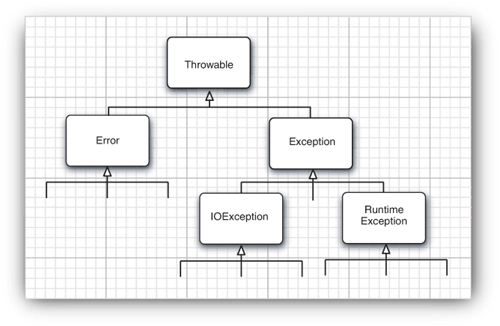
Notice that all exceptions descend from Throwable, but the hierarchy immediately splits into two branches: Error and Exception.
The Error hierarchy describes internal errors and resource exhaustion inside the Java runtime system. You should not throw an object of this type. There is little you can do if such an internal error occurs, beyond notifying the user and trying to terminate the program gracefully. These situations are quite rare.
When doing Java programming, you focus on the Exception hierarchy. The Exception hierarchy also splits into two branches: exceptions that derive from RuntimeException and those that do not. The general rule is this: A RuntimeException happens because you made a programming error. Any other exception occurs because a bad thing, such as an I/O error, happened to your otherwise good program.
Exceptions that inherit from RuntimeException include such problems as
• A bad cast
• An out-of-bounds array access
• A null pointer access
Exceptions that do not inherit from RuntimeException include
• Trying to read past the end of a file
• Trying to open a malformed URL
• Trying to find a Class object for a string that does not denote an existing class
The rule “If it is a RuntimeException, it was your fault” works pretty well. You could have avoided that ArrayIndexOutOfBoundsException by testing the array index against the array bounds. The NullPointerException would not have happened had you checked whether the variable was null before using it.
How about a malformed URL? Isn’t it also possible to find out whether it is “malformed” before using it? Well, different browsers can handle different kinds of URLs. For example, Netscape can deal with a mailto: URL, whereas the applet viewer cannot. Thus, the notion of “malformed” depends on the environment, not just on your code.
The Java Language Specification calls any exception that derives from the class Error or the class RuntimeException an unchecked exception. All other exceptions are called checked exceptions. This is useful terminology that we also adopt. The compiler checks that you provide exception handlers for all checked exceptions.
The name RuntimeException is somewhat confusing. Of course, all of the errors we are discussing occur at runtime.
If you are familiar with the (much more limited) exception hierarchy of the standard C++ library, you will be really confused at this point. C++ has two fundamental exception classes, runtime_error and logic_error. The logic_error class is the equivalent of Java’s RuntimeException and also denotes logical errors in the program. The runtime_error class is the base class for exceptions caused by unpredictable problems. It is equivalent to exceptions in Java that are not of type RuntimeException.
Declaring Checked Exceptions
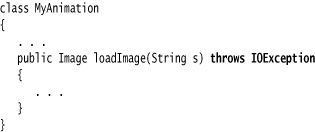
A Java method can throw an exception if it encounters a situation it cannot handle. The idea is simple: a method will not only tell the Java compiler what values it can return, it is also going to tell the compiler what can go wrong. For example, code that attempts to read from a file knows that the file might not exist or that it might be empty. The code that tries to process the information in a file therefore will need to notify the compiler that it can throw some sort of IOException.
The place in which you advertise that your method can throw an exception is the header of the method; the header changes to reflect the checked exceptions the method can throw. For example, here is the declaration of one of the constructors of the FileInputStream class from the standard library. (See Chapter 12 for more on streams.)
public FileInputStream(String name) throws FileNotFoundException
The declaration says that this constructor produces a FileInputStream object from a String parameter but that it also can go wrong in a special way—by throwing a FileNotFoundException. If this sad state should come to pass, the constructor call will not initialize a new FileInputStream object but instead will throw an object of the FileNotFoundException class. If it does, then the runtime system will begin to search for an exception handler that knows how to deal with FileNotFoundException objects.
When you write your own methods, you don’t have to advertise every possible throwable object that your method might actually throw. To understand when (and what) you have to advertise in the throws clause of the methods you write, keep in mind that an exception is thrown in any of the following four situations:
• You call a method that throws a checked exception, for example, the FileInputStream constructor.
• You detect an error and throw a checked exception with the throw statement (we cover the throw statement in the next section).
• You make a programming error, such as a[-1] = 0 that gives rise to an unchecked exception such as an ArrayIndexOutOfBoundsException.
• An internal error occurs in the virtual machine or runtime library.
If either of the first two scenarios occurs, you must tell the programmers who will use your method about the possibility of an exception. Why? Any method that throws an exception is a potential death trap. If no handler catches the exception, the current thread of execution terminates.
As with Java methods that are part of the supplied classes, you declare that your method may throw an exception with an exception specification in the method header.
If a method might throw more than one checked exception type, you must list all exception classes in the header. Separate them by a comma as in the following example:

However, you do not need to advertise internal Java errors, that is, exceptions inheriting from Error. Any code could potentially throw those exceptions, and they are entirely beyond your control.
Similarly, you should not advertise unchecked exceptions inheriting from RuntimeException.
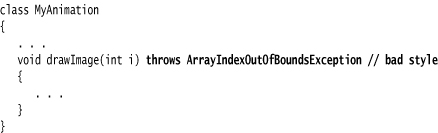
These runtime errors are completely under your control. If you are so concerned about array index errors, you should spend the time needed to fix them instead of advertising the possibility that they can happen.
In summary, a method must declare all the checked exceptions that it might throw. Unchecked exceptions are either beyond your control (Error) or result from conditions that you should not have allowed in the first place (RuntimeException). If your method fails to faithfully declare all checked exceptions, the compiler will issue an error message.
Of course, as you have already seen in quite a few examples, instead of declaring the exception, you can also catch it. Then the exception won’t be thrown out of the method, and no throws specification is necessary. You see later in this chapter how to decide whether to catch an exception or to enable someone else to catch it.
If you override a method from a superclass, the checked exceptions that the subclass method declares cannot be more general than those of the superclass method. (It is ok to throw more specific exceptions, or not to throw any exceptions in the subclass method.) In particular, if the superclass method throws no checked exception at all, neither can the subclass. For example, if you override JComponent.paintComponent, your paintComponent method must not throw any checked exceptions, because the superclass method doesn’t throw any.
When a method in a class declares that it throws an exception that is an instance of a particular class, then it may throw an exception of that class or of any of its subclasses. For example, the FileInputStream constructor could have declared that it throws an IOException. In that case, you would not have known what kind of IOException. It could be a plain IOException or an object of one of the various subclasses, such as FileNotFoundException.
The throws specifier is the same as the throw specifier in C++, with one important difference. In C++, throw specifiers are enforced at runtime, not at compile time. That is, the C++ compiler pays no attention to exception specifications. But if an exception is thrown in a function that is not part of the throw list, then the unexpected function is called, and, by default, the program terminates.
Also, in C++, a function may throw any exception if no throw specification is given. In Java, a method without a throws specifier may not throw any checked exception at all.
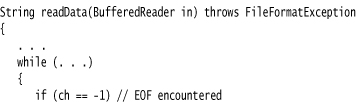
How to Throw an Exception
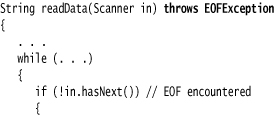
Let us suppose something terrible has happened in your code. You have a method, readData, that is reading in a file whose header promised
Content-length: 1024
but you get an end of file after 733 characters. You decide this situation is so abnormal that you want to throw an exception.
You need to decide what exception type to throw. Some kind of IOException would be a good choice. Perusing the Java API documentation, you find an EOFException with the description “Signals that an EOF has been reached unexpectedly during input.” Perfect. Here is how you throw it:
throw new EOFException();
or, if you prefer,
EOFException e = new EOFException();
throw e;
Here is how it all fits together:
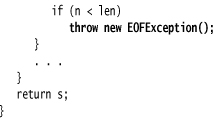
The EOFException has a second constructor that takes a string argument. You can put this to good use by describing the exceptional condition more carefully.
String gripe = "Content-length: " + len + ", Received: " + n;
throw new EOFException(gripe);
As you can see, throwing an exception is easy if one of the existing exception classes works for you. In this case:
1. Find an appropriate exception class.
2. Make an object of that class.
3. Throw it.
Once a method throws an exception, the method does not return to its caller. This means that you do not have to worry about cooking up a default return value or an error code.
Throwing an exception is the same in C++ and in Java, with one small exception. In Java, you can throw only objects of subclasses of Throwable. In C++, you can throw values of any type.
Creating Exception Classes
Your code may run into a problem that is not adequately described by any of the standard exception classes. In this case, it is easy enough to create your own exception class. Just derive it from Exception or from a child class of Exception such as IOException. It is customary to give both a default constructor and a constructor that contains a detailed message. (The toString method of the Throwable superclass prints that detailed message, which is handy for debugging.)
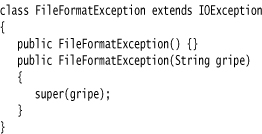
Now you are ready to throw your very own exception type.

![]()
• Throwable()
• Throwable(String message)
• String getMessage()
Catching Exceptions
You now know how to throw an exception. It is pretty easy. You throw it and you forget it. Of course, some code has to catch the exception. Catching exceptions requires more planning.
If an exception occurs that is not caught anywhere, the program will terminate and print a message to the console, giving the type of the exception and a stack trace. Graphics programs (both applets and applications) catch exceptions, print stack trace messages, and then go back to the user interface processing loop. (When you are debugging a graphically based program, it is a good idea to keep the console available on the screen and not minimized.)
To catch an exception, you set up a try/catch block. The simplest form of the try block is as follows:
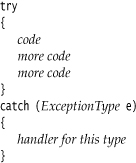
If any of the code inside the try block throws an exception of the class specified in the catch clause, then
1. The program skips the remainder of the code in the try block.
2. The program executes the handler code inside the catch clause.
If none of the code inside the try block throws an exception, then the program skips the catch clause.
If any of the code in a method throws an exception of a type other than the one named in the catch clause, this method exits immediately. (Hopefully, one of its callers has already coded a catch clause for that type.)
To show this at work, we show some fairly typical code for reading in data:
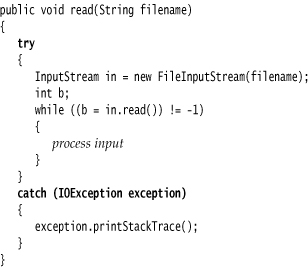
Notice that most of the code in the try clause is straightforward: it reads and processes bytes until we encounter the end of the file. As you can see by looking at the Java API, there is the possibility that the read method will throw an IOException. In that case, we skip out of the entire while loop, enter the catch clause and generate a stack trace. For a toy program, that seems like a reasonable way to deal with this exception. What other choice do you have?
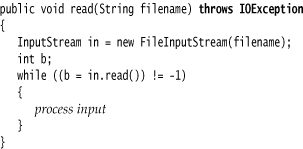
Often, the best choice is to do nothing at all and simply pass the exception on to the caller. If an error occurs in the read method, let the caller of the read method worry about it! If we take that approach, then we have to advertise the fact that the method may throw an IOException.
Remember, the compiler strictly enforces the throws specifiers. If you call a method that throws a checked exception, you must either handle it or pass it on.
Which of the two is better? As a general rule, you should catch those exceptions that you know how to handle and propagate those that you do not know how to handle.
When you propagate an exception, you must add a throws specifier to alert the caller that an exception may be thrown.
Look at the Java API documentation to see what methods throw which exceptions. Then decide whether you should handle them or add them to the throws list. There is nothing embarrassing about the latter choice. It is better to direct an exception to a competent handler than to squelch it.
Please keep in mind that there is one exception to this rule, as we mentioned earlier. If you are writing a method that overrides a superclass method that throws no exceptions (such as paintComponent in JComponent), then you must catch each checked exception in the method’s code. You are not allowed to add more throws specifiers to a subclass method than are present in the superclass method.
Catching exceptions is almost the same in Java and in C++. Strictly speaking, the analog of
catch (Exception e) // Java
is
catch (Exception& e) // C++
There is no analog to the C++ catch (...). This is not needed in Java because all exceptions derive from a common superclass.
Catching Multiple Exceptions
You can catch multiple exception types in a try block and handle each type differently. You use a separate catch clause for each type as in the following example:
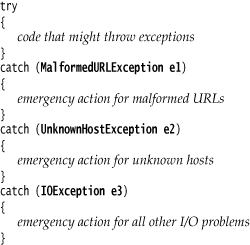
The exception object (e1, e2, e3) may contain information about the nature of the exception. To find out more about the object, try
e3.getMessage()
to get the detailed error message (if there is one), or
e3.getClass().getName()
to get the actual type of the exception object.
Rethrowing and Chaining Exceptions
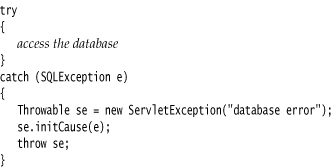
You can throw an exception in a catch clause. Typically, you do this because you want to change the exception type. If you build a subsystem that other programmers use, it makes a lot of sense to use an exception type that indicates a failure of the subsystem. An example of such an exception type is the ServletException. The code that executes a servlet may not want to know in minute detail what went wrong, but it definitely wants to know that the servlet was at fault.
Here is how you can catch an exception and rethrow it:
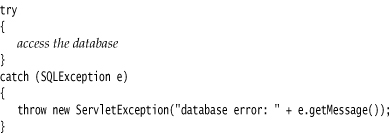
Here, the ServletException is constructed with the message text of the exception. As of Java SE 1.4, you can do better than that and set the original exception as the “cause” of the new exception:
When the exception is caught, the original exception can be retrieved:
Throwable e = se.getCause();
This wrapping technique is highly recommended. It allows you to throw high-level exceptions in subsystems without losing the details of the original failure.
The wrapping technique is also useful if a checked exception occurs in a method that is not allowed to throw a checked exception. You can catch the checked exception and wrap it into a runtime exception.
A number of exception classes, such as ClassNotFoundException, InvocationTargetException, and RuntimeException, have had their own chaining schemes. As of Java SE 1.4, these have been brought into conformance with the “cause” mechanism. You can still retrieve the chained exception in the historical way or just call getCause.
The finally Clause
When your code throws an exception, it stops processing the remaining code in your method and exits the method. This is a problem if the method has acquired some local resource that only it knows about and if that resource must be cleaned up. One solution is to catch and rethrow all exceptions. But this solution is tedious because you need to clean up the resource allocation in two places, in the normal code and in the exception code.
Java has a better solution, the finally clause. Here we show you how to properly dispose of a Graphics object. If you do any database programming in Java, you will need to use the same techniques to close connections to the database. As you will see in Chapter 4 of Volume II, it is very important to close all database connections properly, even when exceptions occur.
The code in the finally clause executes whether or not an exception was caught. In the following example, the program will dispose of the graphics context under all circumstances:
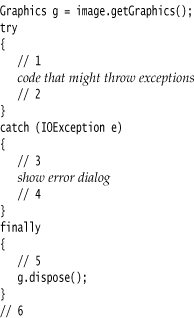
Let us look at the three possible situations in which the program will execute the finally clause.
1. The code throws no exceptions. In this event, the program first executes all the code in the try block. Then, it executes the code in the finally clause. Afterwards, execution continues with the first statement after the finally clause. In other words, execution passes through points 1, 2, 5, and 6.
2. The code throws an exception that is caught in a catch clause, in our case, an IOException. For this, the program executes all code in the try block, up to the point at which the exception was thrown. The remaining code in the try block is skipped. The program then executes the code in the matching catch clause, then the code in the finally clause.
If the catch clause does not throw an exception, the program executes the first line after the finally clause. In this scenario, execution passes through points 1, 3, 4, 5, and 6.
If the catch clause throws an exception, then the exception is thrown back to the caller of this method, and execution passes through points 1, 3, and 5 only.
3. The code throws an exception that is not caught in any catch clause. For this, the program executes all code in the try block until the exception is thrown. The remaining code in the try block is skipped. Then, the code in the finally clause is executed, and the exception is thrown back to the caller of this method. Execution passes through points 1 and 5 only.
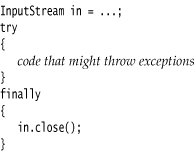
You can use the finally clause without a catch clause. For example, consider the following try statement:

The in.close() statement in the finally clause is executed whether or not an exception is encountered in the try block. Of course, if an exception is encountered, it is rethrown and must be caught in another catch clause.
In fact, as explained in the following tip, we think it is a very good idea to use the finally clause in this way whenever you need to close a resource.
We strongly suggest that you decouple try/catch and try/finally blocks. This makes your code far less confusing. For example:

The inner try block has a single responsibility: to make sure that the input stream is closed. The outer try block has a single responsibility: to ensure that errors are reported. Not only is this solution clearer, it is also more functional: errors in the finally clause are reported.
A finally clause can yield unexpected results when it contains return statements. Suppose you exit the middle of a try block with a return statement. Before the method returns, the contents of the finally block are executed. If the finally block also contains a return statement, then it masks the original return value. Consider this contrived example:
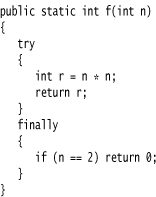
If you call f(2), then the try block computes r = 4 and executes the return statement. However, the finally clause is executed before the method actually returns. The finally clause causes the method to return 0, ignoring the original return value of 4.
Sometimes the finally clause gives you grief, namely if the cleanup method can also throw an exception. A typical case is closing a stream. (See Chapter 1 of Volume II for more information on streams.) Suppose you want to make sure that you close a stream when an exception hits in the stream processing code.
Now suppose that the code in the try block throws some exception other than an IOException that is of interest to the caller of the code. The finally block executes, and the close method is called. That method can itself throw an IOException! When it does, then the original exception is lost and the IOException is thrown instead. That is very much against the spirit of exception handling.
It is always a good idea—unfortunately not one that the designers of the InputStream class chose to follow—to throw no exceptions in cleanup operations such as dispose, close, and so on, that you expect users to call in finally blocks.
There is one fundamental difference between C++ and Java with regard to exception handling. Java has no destructors; thus, there is no stack unwinding as in C++. This means that the Java programmer must manually place code to reclaim resources in finally blocks. Of course, because Java does garbage collection, there are far fewer resources that require manual deallocation.
Analyzing Stack Trace Elements
A stack trace is a listing of all pending method calls at a particular point in the execution of a program. You have almost certainly seen stack trace listings—they are displayed whenever a Java program terminates with an uncaught exception.
Before Java SE 1.4, you could access the text description of a stack trace by calling the printStackTrace method of the Throwable class. Now you can call the getStackTrace method to get an array of StackTraceElement objects that you can analyze in your program. For example:
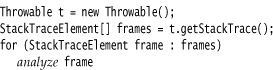
The StackTraceElement class has methods to obtain the file name and line number, as well as the class and method name, of the executing line of code. The toString method yields a formatted string containing all of this information.
Java SE 5.0 added the static Thread.getAllStackTraces method that yields the stack traces of all threads. Here is how you use that method:
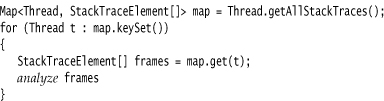
See Chapters 13 and 14 for more information on the Map interface and threads.
Listing 11–1 prints the stack trace of a recursive factorial function. For example, if you compute factorial(3), the printout is
factorial(3):
StackTraceTest.factorial(StackTraceTest.java:18)
StackTraceTest.main(StackTraceTest.java:34)
factorial(2):
StackTraceTest.factorial(StackTraceTest.java:18)
StackTraceTest.factorial(StackTraceTest.java:24)
StackTraceTest.main(StackTraceTest.java:34)
factorial(1):
StackTraceTest.factorial(StackTraceTest.java:18)
StackTraceTest.factorial(StackTraceTest.java:24)
StackTraceTest.factorial(StackTraceTest.java:24)
StackTraceTest.main(StackTraceTest.java:34)
return 1
return 2
return 6
Listing 11–1. StackTraceTest.java

![]()
• Throwable(Throwable cause) 1.4
• Throwable(String message, Throwable cause) 1.4
• Throwable initCause(Throwable cause) 1.4
• StackTraceElement[] getStackTrace() 1.4
![]()
• Exception(Throwable cause) 1.4
• Exception(String message, Throwable cause)
java.lang.RuntimeException 1.0
![]()
• RuntimeException(Throwable cause) 1.4
• RuntimeException(String message, Throwable cause) 1.4
java.lang.StackTraceElement 1.4
![]()
• String getFileName()
• int getLineNumber()
• String getClassName()
• String getMethodName()
• boolean isNativeMethod()
• String toString()
Tips for Using Exceptions
There is a certain amount of controversy about the proper use of exceptions. Some programmers believe that all checked exceptions are a nuisance, others can’t seem to throw enough of them. We think that exceptions (even checked exceptions) have their place, and offer you these tips for their proper use.
1. Exception handling is not supposed to replace a simple test.
As an example of this, we wrote some code that tries 10,000,000 times to pop an empty stack. It first does this by finding out whether the stack is empty.
if (!s.empty()) s.pop();
Next, we tell it to pop the stack no matter what. Then, we catch the EmptyStackException that tells us that we should not have done that.
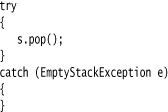
On our test machine, we got the timing data in Table 11–1.

As you can see, it took far longer to catch an exception than it did to perform a simple test. The moral is: Use exceptions for exceptional circumstances only.
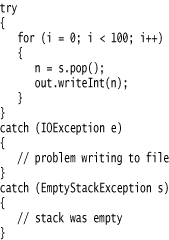
2. Do not micromanage exceptions.
Many programmers wrap every statement in a separate try block.
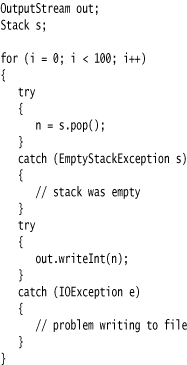
This approach blows up your code dramatically. Think about the task that you want the code to accomplish. Here we want to pop 100 numbers off a stack and save them to a file. (Never mind why—it is just a toy example.) There is nothing we can do if a problem rears its ugly head. If the stack is empty, it will not become occupied. If the file contains an error, the error will not magically go away. It therefore makes sense to wrap the entire task in a try block. If any one operation fails, you can then abandon the task.
This code looks much cleaner. It fulfills one of the promises of exception handling, to separate normal processing from error handling.
3. Make good use of the exception hierarchy.
Don’t just throw a RuntimeException. Find an appropriate subclass or create your own.
Don’t just catch Throwable. It makes your code hard to read and maintain.
Respect the difference between checked and unchecked exceptions. Checked exceptions are inherently burdensome—don’t throw them for logic errors. (For example, the reflection library gets this wrong. Callers often need to catch exceptions that they know can never happen.)
Do not hesitate to turn an exception into another exception that is more appropriate. For example, when you parse an integer in a file, catch the NumberFormatException and turn it into a subclass of IOException or MySubsystemException.
4. Do not squelch exceptions.
In Java, there is the tremendous temptation to shut up exceptions. You write a method that calls a method that might throw an exception once a century. The compiler whines because you have not declared the exception in the throws list of your method. You do not want to put it in the throws list because then the compiler will whine about all the methods that call your method. So you just shut it up:
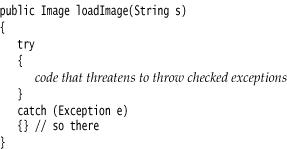
Now your code will compile without a hitch. It will run fine, except when an exception occurs. Then, the exception will be silently ignored. If you believe that exceptions are at all important, you should make some effort to handle them right.
5. When you detect an error, “tough love” works better than indulgence.
Some programmers worry about throwing exceptions when they detect errors. Maybe it would be better to return a dummy value rather than throw an exception when a method is called with invalid parameters. For example, should Stack.pop return null rather than throw an exception when a stack is empty? We think it is better to throw a EmptyStackException at the point of failure than to have a NullPointerException occur at later time.
6. Propagating exceptions is not a sign of shame.
Many programmers feel compelled to catch all exceptions that are thrown. If they call a method that throws an exception, such as the FileInputStream constructor or the readLine method, they instinctively catch the exception that may be generated. Often, it is actually better to propagate the exception instead of catching it:

Higher-level methods are often better equipped to inform the user of errors or to abandon unsuccessful commands.
Rules 5 and 6 can be summarized as “throw early, catch late.”
Using Assertions
Assertions are a commonly used idiom for defensive programming. Suppose you are convinced that a particular property is fulfilled, and you rely on that property in your code. For example, you may be computing
double y = Math.sqrt(x);
You are certain that x is not negative. Perhaps it is the result of another computation that can’t have a negative result, or it is a parameter of a method that requires its callers to supply only positive inputs. Still, you want to double-check rather than having confusing “not a number” floating-point values creep into your computation. You could, of course, throw an exception:
if (x < 0) throw new IllegalArgumentException("x < 0");
But this code stays in the program, even after testing is complete. If you have lots of checks of this kind, the program runs quite a bit slower than it should.
The assertion mechanism allows you to put in checks during testing and to have them automatically removed in the production code.
As of Java SE 1.4, the Java language has a keyword assert. There are two forms:
assert condition;
and
assert condition : expression;
Both statements evaluate the condition and throw an AssertionError if it is false. In the second statement, the expression is passed to the constructor of the AssertionError object and turned into a message string.
The sole purpose of the expression part is to produce a message string. The AssertionError object does not store the actual expression value, so you can’t query it later. As the JDK documentation states with paternalistic charm, doing so “would encourage programmers to attempt to recover from assertion failure, which defeats the purpose of the facility.”
To assert that x is nonnegative, you can simply use the statement
assert x >= 0;
Or you can pass the actual value of x into the AssertionError object, so that it gets displayed later.
assert x >= 0 : x;
The assert macro of the C language turns the assertion condition into a string that is printed if the assertion fails. For example, if assert(x >= 0) fails, it prints that "x >= 0" is the failing condition. In Java, the condition is not automatically part of the error report. If you want to see it, you have to pass it as a string into the AssertionError object: assert x >= 0 : "x >= 0".
Assertion Enabling and Disabling
By default, assertions are disabled. You enable them by running the program with the -enableassertions or -ea option:
java -enableassertions MyApp
Note that you do not have to recompile your program to enable or disable assertions. Enabling or disabling assertions is a function of the class loader. When assertions are disabled, the class loader strips out the assertion code so that it won’t slow execution.
You can even turn on assertions in specific classes or in entire packages. For example:
java -ea:MyClass -ea:com.mycompany.mylib... MyApp
This command turns on assertions for the class MyClass and all classes in the com.mycompany.mylib package and its subpackages. The option -ea... turns on assertions in all classes of the default package.
You can also disable assertions in certain classes and packages with the -disableassertions or -da option:
java -ea:... -da:MyClass MyApp
Some classes are not loaded by a class loader but directly by the virtual machine. You can use these switches to selectively enable or disable assertions in those classes.
However, the -ea and -da switches that enable or disable all assertions do not apply to the “system classes” without class loaders. Use the -enablesystemassertions/-esa switch to enable assertions in system classes.
It is also possible to programmatically control the assertion status of class loaders. See the API notes at the end of this section.
Using Assertions for Parameter Checking
The Java language gives you three mechanisms to deal with system failures:
• Throwing an exception
• Logging
• Using assertions
When should you choose assertions? Keep these points in mind:
• Assertion failures are intended to be fatal, unrecoverable errors.
• Assertion checks are turned on only during development and testing. (This is sometimes jokingly described as “wearing a life jacket when you are close to shore, and throwing it overboard once you are in the middle of the ocean.”)
Therefore, you would not use assertions for signaling recoverable conditions to another part of the program or for communicating problems to the program user. Assertions should only be used to locate internal program errors during testing.
Let’s look at a common scenario—the checking of method parameters. Should you use assertions to check for illegal index values or null references? To answer that question, you have to look at the documentation of the method. Suppose you implement a sorting method.
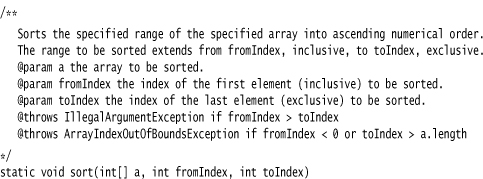
The documentation states that the method throws an exception if the index values are incorrect. That behavior is part of the contract that the method makes with its callers. If you implement the method, you have to respect that contract and throw the indicated exceptions. It would not be appropriate to use assertions instead.
Should you assert that a is not null? That is not appropriate either. The method documentation is silent on the behavior of the method when a is null. The callers have the right to assume that the method will return successfully in that case and not throw an assertion error.
However, suppose the method contract had been slightly different:
@param a the array to be sorted. (Must not be null)
Now the callers of the method have been put on notice that it is illegal to call the method with a null array. Then the method may start with the assertion
assert a != null;
Computer scientists call this kind of contract a precondition. The original method had no preconditions on its parameters—it promised a well-defined behavior in all cases. The revised method has a single precondition: that a is not null. If the caller fails to fulfill the precondition, then all bets are off and the method can do anything it wants. In fact, with the assertion in place, the method has a rather unpredictable behavior when it is called illegally. It sometimes throws an assertion error, and sometimes a null pointer exception, depending on how its class loader is configured.
Using Assertions for Documenting Assumptions
Many programmers use comments to document their underlying assumptions. Consider this example from http://java.sun.com/javase/6/docs/technotes/guides/language/assert.html:
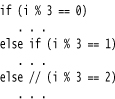
In this case, it makes a lot of sense to use an assertion instead.

Of course, it would make even more sense to think through the issue a bit more thoroughly. What are the possible values of i % 3? If i is positive, the remainders must be 0, 1, or 2. If i is negative, then the remainders can be –1 or –2. Thus, the real assumption is that i is not negative. A better assertion would be
assert i >= 0;
before the if statement.
At any rate, this example shows a good use of assertions as a self-check for the programmer. As you can see, assertions are a tactical tool for testing and debugging. In contrast, logging is a strategic tool for the entire life cycle of a program. We will examine logging in the next section.
![]()
• void setDefaultAssertionStatus(boolean b) 1.4
• void setClassAssertionStatus(String className, boolean b) 1.4
• void setPackageAssertionStatus(String packageName, boolean b) 1.4
• void clearAssertionStatus() 1.4
Logging
Every Java programmer is familiar with the process of inserting calls to System.out.println into troublesome code to gain insight into program behavior. Of course, once you have figured out the cause of trouble, you remove the print statements, only to put them back in when the next problem surfaces. The logging API is designed to overcome this problem. Here are the principal advantages of the API:
• It is easy to suppress all log records or just those below a certain level, and just as easy to turn them back on.
• Suppressed logs are very cheap, so that there is only a minimal penalty for leaving the logging code in your application.
• Log records can be directed to different handlers, for display in the console, for storage in a file, and so on.
• Both loggers and handlers can filter records. Filters discard boring log entries, using any criteria supplied by the filter implementor.
• Log records can be formatted in different ways, for example, in plain text or XML.
• Applications can use multiple loggers, with hierarchical names such as com.mycompany.myapp, similar to package names.
• By default, the logging configuration is controlled by a configuration file. Applications can replace this mechanism if desired.
Basic Logging
Let’s get started with the simplest possible case. The logging system manages a default logger Logger.global that you can use instead of System.out. Use the info method to log an information message:
Logger.global.info("File->Open menu item selected");
By default, the record is printed like this:
May 10, 2004 10:12:15 PM LoggingImageViewer fileOpen
INFO: File->Open menu item selected
(Note that the time and the names of the calling class and method are automatically included.) But if you call
Logger.global.setLevel(Level.OFF);
at an appropriate place (such as the beginning of main), then all logging is suppressed.
Advanced Logging
Now that you have seen “logging for dummies,” let’s go on to industrial-strength logging. In a professional application, you wouldn’t want to log all records to a single global logger. Instead, you can define your own loggers.
When you request a logger with a given name for the first time, it is created.
Logger myLogger = Logger.getLogger("com.mycompany.myapp");
Subsequent calls to the same name yield the same logger object.
Similar to package names, logger names are hierarchical. In fact, they are more hierarchical than packages. There is no semantic relationship between a package and its parent, but logger parents and children share certain properties. For example, if you set the log level on the logger "com.mycompany", then the child loggers inherit that level.
There are seven logging levels:
• SEVERE
• WARNING
• INFO
• CONFIG
• FINE
• FINER
• FINEST
By default, the top three levels are actually logged. You can set a different level, for example,
logger.setLevel(Level.FINE);
Now all levels of FINE and higher are logged.
You can also use Level.ALL to turn on logging for all levels or Level.OFF to turn all logging off.
There are logging methods for all levels, such as
logger.warning(message);
logger.fine(message);
and so on. Alternatively, you can use the log method and supply the level, such as
logger.log(Level.FINE, message);
The default logging configuration logs all records with level of INFO or higher. Therefore, you should use the levels CONFIG, FINE, FINER, and FINEST for debugging messages that are useful for diagnostics but meaningless to the program user.
If you set the logging level to a value finer than INFO, then you also need to change the log handler configuration. The default log handler suppresses messages below INFO. See the next section for details.
The default log record shows the name of the class and method that contain the logging call, as inferred from the call stack. However, if the virtual machine optimizes execution, accurate call information may not be available. You can use the logp method to give the precise location of the calling class and method. The method signature is
void logp(Level l, String className, String methodName, String message)
There are convenience methods for tracing execution flow:
void entering(String className, String methodName)
void entering(String className, String methodName, Object param)
void entering(String className, String methodName, Object[] params)
void exiting(String className, String methodName)
void exiting(String className, String methodName, Object result)
For example:

These calls generate log records of level FINER that start with the strings ENTRY and RETURN.
At some point in the future, the logging methods with an Object[] parameter will be rewritten to support variable parameter lists (“varargs”). Then, you will be able to make calls such as logger.entering("com.mycompany.mylib.Reader", "read", file, pattern).
A common use for logging is to log unexpected exceptions. Two convenience methods include a description of the exception in the log record.
void throwing(String className, String methodName, Throwable t)
void log(Level l, String message, Throwable t)
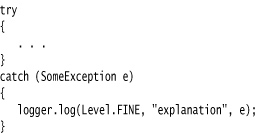
Typical uses are
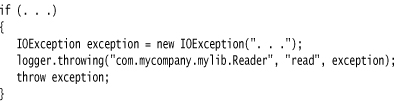
and
The throwing call logs a record with level FINER and a message that starts with THROW.
Changing the Log Manager Configuration
You can change various properties of the logging system by editing a configuration file. The default configuration file is located at
jre/lib/logging.properties
To use another file, set the java.util.logging.config.file property to the file location by starting your application with
java -Djava.util.logging.config.file=configFile MainClass
Calling System.setProperty("java.util.logging.config.file", file) in main has no effect because the log manager is initialized during VM startup, before main executes.
To change the default logging level, edit the configuration file and modify the line
.level=INFO
You can specify the logging levels for your own loggers by adding lines such as
com.mycompany.myapp.level=FINE
That is, append the .level suffix to the logger name.
As you see later in this section, the loggers don’t actually send the messages to the console—that is the job of the handlers. Handlers also have levels. To see FINE messages on the console, you also need to set
java.util.logging.ConsoleHandler.level=FINE
The settings in the log manager configuration are not system properties. Starting a program with -Dcom.mycompany.myapp.level=FINE does not have any influence on the logger.
At least up to Java SE 6, the API documentation of the LogManager class claims that you can set the java.util.logging.config.class and java.util.logging.config.file properties via the Preferences API. This is false—see http://bugs.sun.com/bugdatabase/view_bug.do?bug_id=4691587.
The logging properties file is processed by the java.util.logging.LogManager class. It is possible to specify a different log manager by setting the java.util.logging.manager system property to the name of a subclass. Alternatively, you can keep the standard log manager and still bypass the initialization from the logging properties file. Set the java.util.logging.config.class system property to the name of a class that sets log manager properties in some other way. See the API documentation for the LogManager class for more information.
It is also possible to change logging levels in a running program by using the jconsole program. See http://java.sun.com/developer/technicalArticles/J2SE/jconsole.html#LoggingControl for information.
Localization
You may want to localize logging messages so that they are readable for international users. Internationalization of applications is the topic of Chapter 5 of Volume II. Briefly, here are the points to keep in mind when localizing logging messages.
Localized applications contain locale-specific information in resource bundles. A resource bundle consists of a set of mappings for various locales (such as United States or Germany). For example, a resource bundle may map the string "readingFile" into strings "Reading file" in English or "Achtung! Datei wird eingelesen" in German.
A program may contain multiple resource bundles, perhaps one for menus and another for log messages. Each resource bundle has a name (such as "com.mycompany.logmessages"). To add mappings to a resource bundle, you supply a file for each locale. English message mappings are in a file com/mycompany/logmessages_en.properties, and German message mappings are in a file com/mycompany/logmessages_de.properties. (The en, de codes are the language codes.) You place the files together with the class files of your application, so that the ResourceBundle class will automatically locate them. These files are plain text files, consisting of entries such as
readingFile=Achtung! Datei wird eingelesen
renamingFile=Datei wird umbenannt
...
When requesting a logger, you can specify a resource bundle:
Logger logger = Logger.getLogger(loggerName, "com.mycompany.logmessages");
Then you specify the resource bundle key, not the actual message string, for the log message.
logger.info("readingFile");
You often need to include arguments into localized messages. Then the message should contain placeholders {0}, {1}, and so on. For example, to include the file name with a log message, include the placeholder like this:
Reading file {0}.
Achtung! Datei {0} wird eingelesen.
You then pass values into the placeholders by calling one of the following methods:
logger.log(Level.INFO, "readingFile", fileName);
logger.log(Level.INFO, "renamingFile", new Object[] { oldName, newName });
Handlers
By default, loggers send records to a ConsoleHandler that prints them to the System.err stream. Specifically, the logger sends the record to the parent handler, and the ultimate ancestor (with name "") has a ConsoleHandler.
Like loggers, handlers have a logging level. For a record to be logged, its logging level must be above the threshold of both the logger and the handler. The log manager configuration file sets the logging level of the default console handler as
java.util.logging.ConsoleHandler.level=INFO
To log records with level FINE, change both the default logger level and the handler level in the configuration. Alternatively, you can bypass the configuration file altogether and install your own handler.
Logger logger = Logger.getLogger("com.mycompany.myapp");
logger.setLevel(Level.FINE);
logger.setUseParentHandlers(false);
Handler handler = new ConsoleHandler();
handler.setLevel(Level.FINE);
logger.addHandler(handler);
By default, a logger sends records both to its own handlers and the handlers of the parent. Our logger is a child of the primordial logger (with name "") that sends all records with level INFO or higher to the console. But we don’t want to see those records twice. For that reason, we set the useParentHandlers property to false.
To send log records elsewhere, add another handler. The logging API provides two useful handlers for this purpose, a FileHandler and a SocketHandler. The SocketHandler sends records to a specified host and port. Of greater interest is the FileHandler that collects records in a file.
You can simply send records to a default file handler, like this:
FileHandler handler = new FileHandler();
logger.addHandler(handler);
The records are sent to a file javan.log in the user’s home directory, where n is a number to make the file unique. If a user’s system has no concept of the user’s home directory (for example, in Windows 95/98/Me), then the file is stored in a default location such as C:Windows. By default, the records are formatted in XML. A typical log record has the form
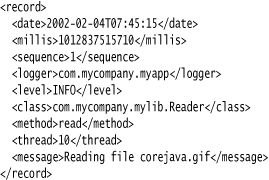
You can modify the default behavior of the file handler by setting various parameters in the log manager configuration (see Table 11–2), or by using another constructor (see the API notes at the end of this section).
Table 11–2. File Handler Configuration Parameters
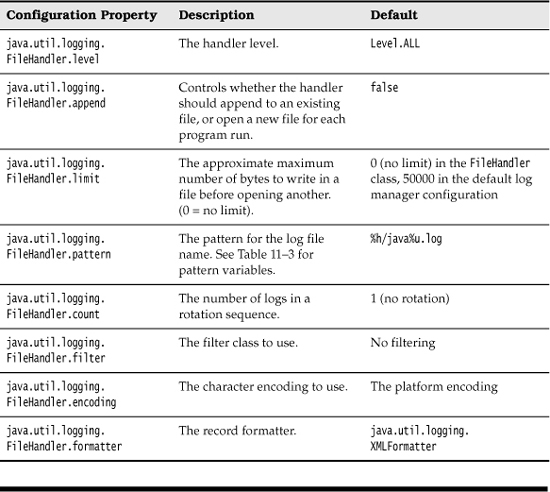
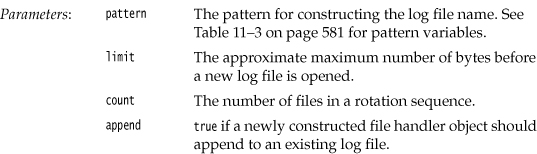
You probably don’t want to use the default log file name. Therefore, you should use another pattern, such as %h/myapp.log. (See Table 11–3 for an explanation of the pattern variables.)
Table 11–3. Log File Pattern Variables
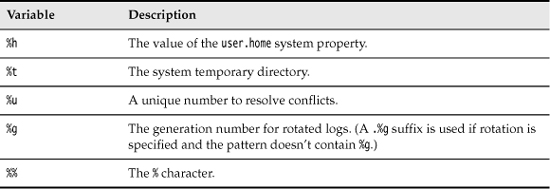
If multiple applications (or multiple copies of the same application) use the same log file, then you should turn the “append” flag on. Alternatively, use %u in the file name pattern so that each application creates a unique copy of the log.
It is also a good idea to turn file rotation on. Log files are kept in a rotation sequence, such as myapp.log.0, myapp.log.1, myapp.log.2, and so on. Whenever a file exceeds the size limit, the oldest log is deleted, the other files are renamed, and a new file with generation number 0 is created.
Many programmers use logging as an aid for the technical support staff. If a program misbehaves in the field, then the user can send back the log files for inspection. In that case, you should turn the “append” flag on, use rotating logs, or both.
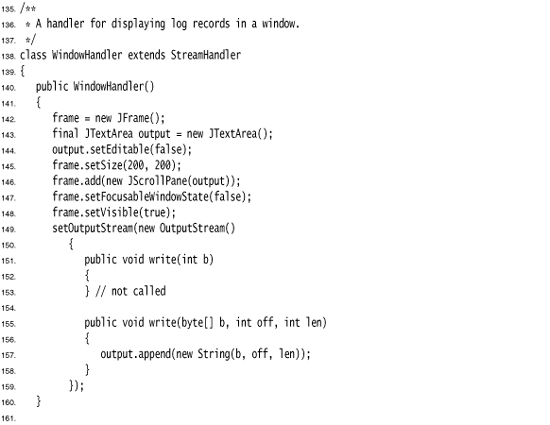
You can also define your own handlers by extending the Handler or the StreamHandler class. We define such a handler in the example program at the end of this section. That handler displays the records in a window (see Figure 11–2).
Figure 11–2. A log handler that displays records in a window
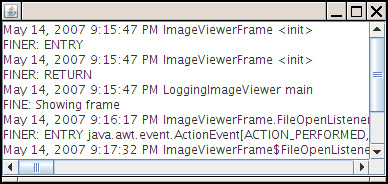
The handler extends the StreamHandler class and installs a stream whose write methods display the stream output in a text area.
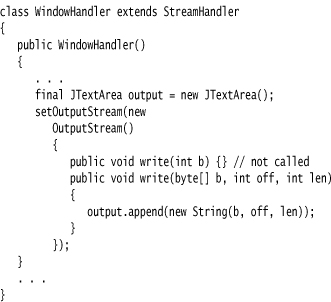
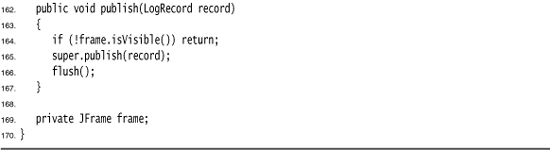
There is just one problem with this approach—the handler buffers the records and only writes them to the stream when the buffer is full. Therefore, we override the publish method to flush the buffer after each record:

If you want to write more exotic stream handlers, extend the Handler class and define the publish, flush, and close methods.
Filters
By default, records are filtered according to their logging levels. Each logger and handler can have an optional filter to perform added filtering. You define a filter by implementing the Filter interface and defining the method
boolean isLoggable(LogRecord record)
Analyze the log record, using any criteria that you desire, and return true for those records that should be included in the log. For example, a particular filter may only be interested in the messages generated by the entering and exiting methods. The filter should then call record.getMessage() and check whether it starts with ENTRY or RETURN.
To install a filter into a logger or handler, simply call the setFilter method. Note that you can have at most one filter at a time.
Formatters
The ConsoleHandler and FileHandler classes emit the log records in text and XML formats. However, you can define your own formats as well. You need to extend the Formatter class and override the method
String format(LogRecord record)
Format the information in the record in any way you like and return the resulting string. In your format method, you may want to call the method
String formatMessage(LogRecord record)
That method formats the message part of the record, substituting parameters and applying localization.
Many file formats (such as XML) require a head and tail part that surrounds the formatted records. In that case, override the methods
String getHead(Handler h)
String getTail(Handler h)
Finally, call the setFormatter method to install the formatter into the handler.
A Logging Recipe
With so many options for logging, it is easy to lose track of the fundamentals. The following recipe summarizes the most common operations.
1. For a simple application, choose a single logger. It is a good idea to give the logger the same name as your main application package, such as com.mycompany.myprog. You can always get the logger by calling
Logger logger = Logger.getLogger("com.mycompany.myprog");
For convenience, you may want to add static fields
private static final Logger logger = Logger.getLogger("com.mycompany.myprog");
to classes with a lot of logging activity.
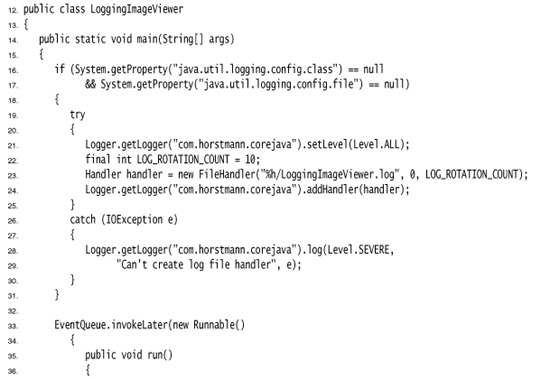
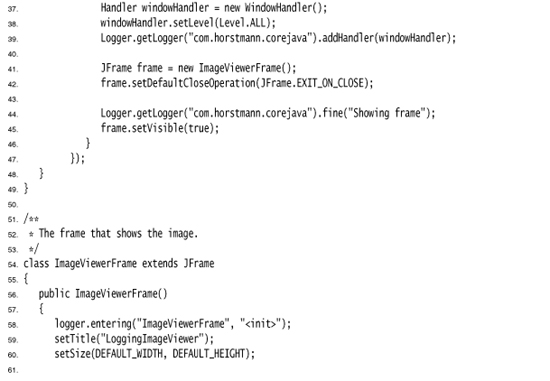
2. The default logging configuration logs all messages of level INFO or higher to the console. Users can override the default configuration, but as you have seen, the process is a bit involved. Therefore, it is a good idea to install a more reasonable default in your application.
The following code ensures that all messages are logged to an application-specific file. Place the code into the main method of your application.
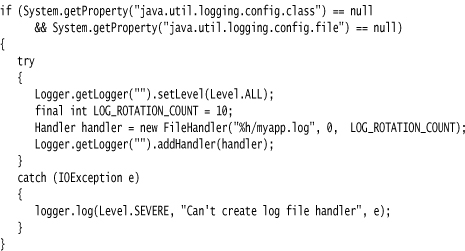
3. Now you are ready to log to your heart’s content. Keep in mind that all messages with level INFO, WARNING, and SEVERE show up on the console. Therefore, reserve these levels for messages that are meaningful to the users of your program. The level FINE is a good choice for logging messages that are intended for programmers.
Whenever you are tempted to call System.out.println, emit a log message instead:
logger.fine("File open dialog canceled");
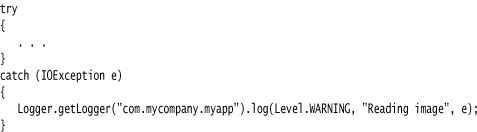
It is also a good idea to log unexpected exceptions. For example:
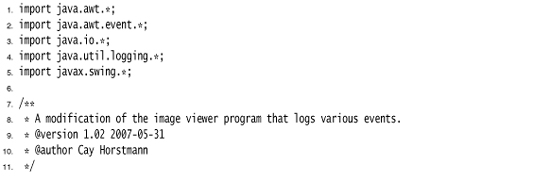
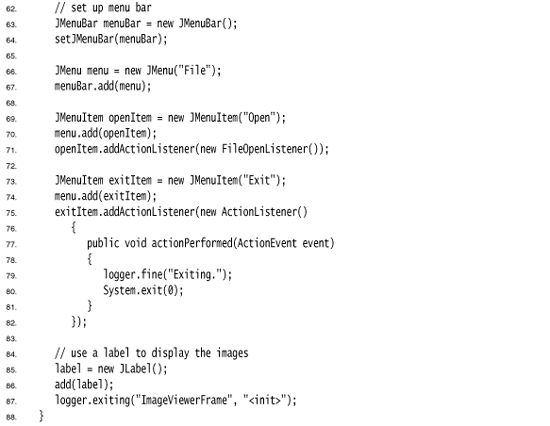
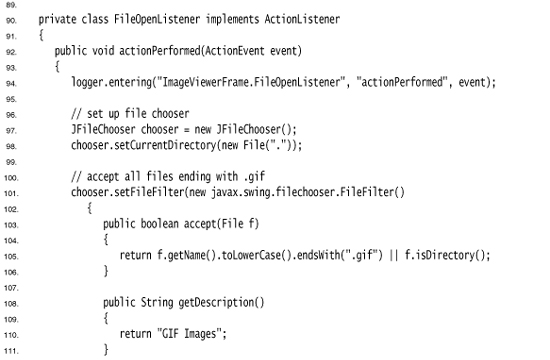
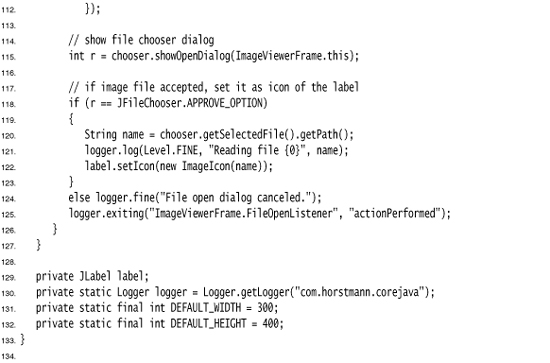
Listing 11–2 puts this recipe to use with an added twist: Logging messages are also displayed in a log window.
Listing 11–2. LoggingImageViewer.java
![]()
• Logger getLogger(String loggerName)
• Logger getLogger(String loggerName, String bundleName)

• void severe(String message)
• void warning(String message)
• void info(String message)
• void config(String message)
• void fine(String message)
• void finer(String message)
• void finest(String message)
• void entering(String className, String methodName)
• void entering(String className, String methodName, Object param)
• void entering(String className, String methodName, Object[] param)
• void exiting(String className, String methodName)
• void exiting(String className, String methodName, Object result)
• void throwing(String className, String methodName, Throwable t)
• void log(Level level, String message)
• void log(Level level, String message, Object obj)
• void log(Level level, String message, Object[] objs)
• void log(Level level, String message, Throwable t)
• void logp(Level level, String className, String methodName, String message)
• void logp(Level level, String className, String methodName, String message, Object obj)
• void logp(Level level, String className, String methodName, String message, Object[] objs)
• void logp(Level level, String className, String methodName, String message, Throwable t)
• void logrb(Level level, String className, String methodName, String bundleName, String message)
• void logrb(Level level, String className, String methodName, String bundleName, String message, Object obj)
• void logrb(Level level, String className, String methodName, String bundleName, String message, Object[] objs)
• void logrb(Level level, String className, String methodName, String bundleName, String message, Throwable t)
• Level getLevel()
• void setLevel(Level l)
• Logger getParent()
• void setParent(Logger l)
• Handler[] getHandlers()
• void addHandler(Handler h)
• void removeHandler(Handler h)
• boolean getUseParentHandlers()
• void setUseParentHandlers(boolean b)
• Filter getFilter()
• void setFilter(Filter f)
![]()
• abstract void publish(LogRecord record)
• abstract void flush()
• abstract void close()
• Filter getFilter()
• void setFilter(Filter f)
• void setFormatter(Formatter f)
• Level getLevel()
• void setLevel(Level l)
java.util.logging.ConsoleHandler 1.4
![]()
• ConsoleHandler()
java.util.logging.FileHandler 1.4
![]()
• FileHandler(String pattern)
• FileHandler(String pattern, boolean append)
• FileHandler(String pattern, int limit, int count)
• FileHandler(String pattern, int limit, int count, boolean append)
java.util.logging.LogRecord 1.4
![]()
• Level getLevel()
• String getLoggerName()
• ResourceBundle getResourceBundle()
• String getResourceBundleName()
• String getMessage()
• Object[] getParameters()
• Throwable getThrown()
• String getSourceMethodName()
• long getMillis()
• long getSequenceNumber()
• int getThreadID()
![]()
• boolean isLoggable(LogRecord record)
java.util.logging.Formatter 1.4
![]()
• abstract String format(LogRecord record)
• String getHead(Handler h)
• String getTail(Handler h)
• String formatMessage(LogRecord record)
Debugging Tips
Suppose you wrote your program and made it bulletproof by catching and properly handling all exceptions. Then you run it, and it does not work right. Now what? (If you never have this problem, you can skip the remainder of this chapter.)
Of course, it is best if you have a convenient and powerful debugger. Debuggers are available as a part of professional development environments such as Eclipse and NetBeans. We discuss the debugger later in this chapter. In this section, we offer you a number of tips that may be worth trying before you launch the debugger.
1. You can print or log the value of any variable with code like this:
System.out.println("x=" + x);
or
Logger.global.info("x=" + x);
If x is a number, it is converted to its string equivalent. If x is an object, then Java calls its toString method. To get the state of the implicit parameter object, print the state of the this object.
Logger.global.info("this=" + this);
Most of the classes in the Java library are very conscientious about overriding the toString method to give you useful information about the class. This is a real boon for debugging. You should make the same effort in your classes.
2. One seemingly little-known but very useful trick is that you can put a separate main method in each class. Inside it, you can put a unit test stub that lets you test the class in isolation.
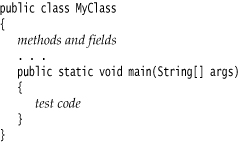
Make a few objects, call all methods, and check that each of them does the right thing. You can leave all these main methods in place and launch the Java virtual machine separately on each of the files to run the tests. When you run an applet, none of these main methods are ever called. When you run an application, the Java virtual machine calls only the main method of the startup class.
3. If you liked the preceding tip, you should check out JUnit from http://junit.org. JUnit is a very popular unit testing framework that makes it easy to organize suites of test cases. Run the tests whenever you make changes to a class, and add another test case whenever you find a bug.
4. A logging proxy is an object of a subclass that intercepts method calls, logs them, and then calls the superclass. For example, if you have trouble with the setBackground method of a panel, you can create a proxy object as an instance of an anonymous subclass:
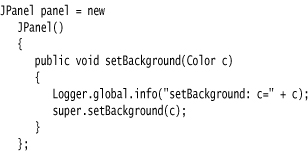
Whenever the setBackground method is called, a log message is generated. To find out who called the method, generate a stack trace.
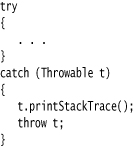
5. You can get a stack trace from any exception object with the printStackTrace method in the Throwable class. The following code catches any exception, prints the exception object and the stack trace, and rethrows the exception so it can find its intended handler.
You don’t even need to catch an exception to generate a stack trace. Simply insert the statement
Thread.dumpStack();
anywhere into your code to get a stack trace.
6. Normally, the stack trace is displayed on System.err. You can send it to a file with the void printStackTrace(PrintWriter s) method. Or, if you want to log or display the stack trace, here is how you can capture it into a string:
StringWriter out = new StringWriter();
new Throwable().printStackTrace(new PrintWriter(out));
String trace = out.toString();
(See Chapter 1 of Volume II for the PrintWriter and StringWriter classes.)
7. It is often handy to trap program errors in a file. However, errors are sent to System.err, not System.out. Therefore, you cannot simply trap them by running
java MyProgram > errors.txt
Instead, capture the error stream as
java MyProgram 2> errors.txt
To capture both System.err and System.out in the same file, use
java MyProgram >& errors.txt
This works in bash and the Windows shell.
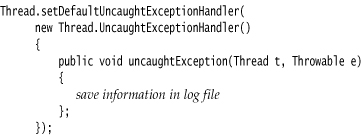
8. Having stack traces of uncaught exceptions show up in System.err is not ideal. These messages are confusing to end users if they happen to see them, and they are not available for diagnostic purposes when you need them. A better approach is to log them to a file. As of Java SE 5.0, you can change the handler for uncaught exceptions with the static Thread.setDefaultUncaughtExceptionHandler method:
9. To watch class loading, launch the Java virtual machine with the -verbose flag. You get a printout such as the following:
[Opened /usr/local/jdk5.0/jre/lib/rt.jar]
[Opened /usr/local/jdk5.0/jre/lib/jsse.jar]
[Opened /usr/local/jdk5.0/jre/lib/jce.jar]
[Opened /usr/local/jdk5.0/jre/lib/charsets.jar]
[Loaded java.lang.Object from shared objects file]
[Loaded java.io.Serializable from shared objects file]
[Loaded java.lang.Comparable from shared objects file]
[Loaded java.lang.CharSequence from shared objects file]
[Loaded java.lang.String from shared objects file]
[Loaded java.lang.reflect.GenericDeclaration from shared objects file]
[Loaded java.lang.reflect.Type from shared objects file]
[Loaded java.lang.reflect.AnnotatedElement from shared objects file]
[Loaded java.lang.Class from shared objects file]
[Loaded java.lang.Cloneable from shared objects file]
...
This can occasionally be helpful to diagnose class path problems.
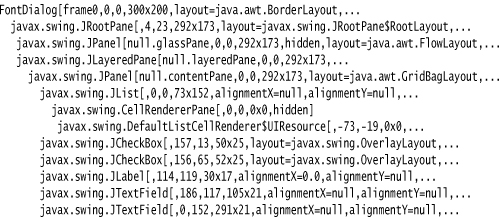
10. If you ever looked at a Swing window and wondered how its designer managed to get all the components to line up so nicely, you can spy on the contents. Press CTRL+SHIFT+F1, and you get a printout of all components in the hierarchy:
11. If you design your own custom Swing component and it doesn’t seem to be displayed correctly, you’ll really love the Swing graphics debugger. And even if you don’t write your own component classes, it is instructive and fun to see exactly how the contents of a component are drawn. To turn on debugging for a Swing component, use the setDebugGraphicsOptions method of the JComponent class. The following options are available:
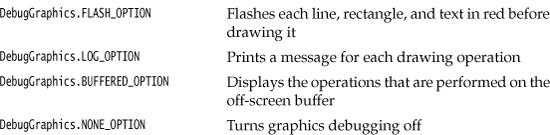
We have found that for the flash option to work, you must disable “double buffering,” the strategy used by Swing to reduce flicker when updating a window. The magic incantation for turning on the flash option is
RepaintManager.currentManager(getRootPane()).setDoubleBufferingEnabled(false);
((JComponent) getContentPane()).setDebugGraphicsOptions(DebugGraphics.FLASH_OPTION);
Simply place these lines at the end of your frame constructor. When the program runs, you will see the content pane filled in slow motion. Or, for more localized debugging, just call setDebugGraphicsOptions for a single component. Control freaks can set the duration, count, and color of the flashes—see the on-line documentation of the DebugGraphics class for details.
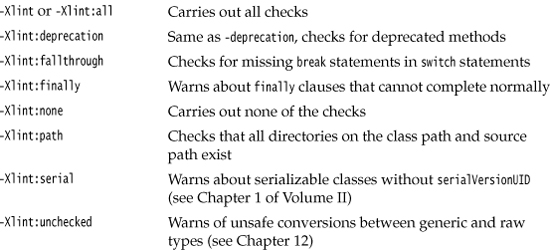
12. Java SE 5.0 added the -Xlint option to the compiler for spotting common code problems. For example, if you compile with the command
javac -Xlint:fallthrough
then the compiler reports missing break statements in switch statements. (The term “lint” originally described a tool for locating potential problems in C programs, and is now generically applied to tools that flag constructs that are questionable but not illegal.)
The following options are available:
13. Java SE 5.0 added support for monitoring and management of Java applications, allowing the installation of agents in the virtual machine that track memory consumption, thread usage, class loading, and so on. This feature is particularly important for large and long-running Java programs such as application servers. As a demonstration of these capabilities, the JDK ships with a graphical tool called jconsole that displays statistics about the performance of a virtual machine (see Figure 11–3). Find out the ID of the operating system process that runs the virtual machine. In UNIX/Linux, run the ps utility; in Windows, use the task manager. Then launch the jconsole program:
jconsole processID
Figure 11–3. The jconsole program
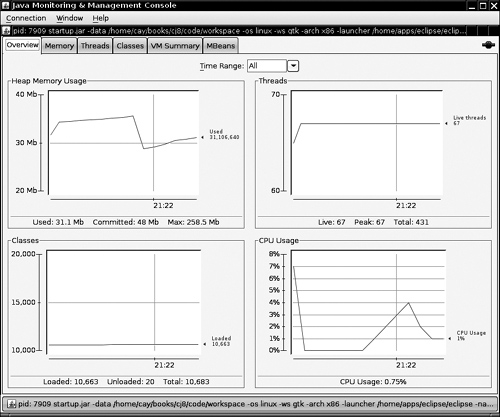
The console gives you a wealth of information about your running program. See http://java.sun.com/developer/technicalArticles/J2SE/jconsole.html for more information.
Prior to Java SE 6, you need to launch your program with the -Dcom.sun.management.jmxremote option:
java -Dcom.sun.management.jmxremote MyProgramjconsole processID
14. You can use the jmap utility to get a heap dump that shows you every object on the heap. Use these commands:
jmap -dump:format=b,file=dumpFileName processID
jhat dumpFileName
Then, point your browser to localhost:7000. You will get a web application that lets you drill down into the contents of the heap at the time of the dump.
15. If you launch the Java virtual machine with the -Xprof flag, it runs a rudimentary profiler that keeps track of the methods in your code that were executed most often. The profiling information is sent to System.out. The output also tells you which methods were compiled by the just-in-time compiler.
The -X options of the compiler are not officially supported and may not be present in all versions of the JDK. Run java -X to get a listing of all nonstandard options.
Using a Console Window
When you debug an applet, you can see error messages in a window: In the configuration panel of the Java Plug-in, check the Show Java Console box (see Chapter 10). The Java Console window has a set of scrollbars, so you can retrieve messages that have scrolled off the window. Windows users will find this a definite advantage over the DOS shell window in which the System.out and System.err output normally appears.
We give you a similar window class so you can enjoy the same benefit of seeing your debugging messages in a window when debugging a program. Figure 11–4 shows our ConsoleWindow class in action.
Figure 11–4. The console window
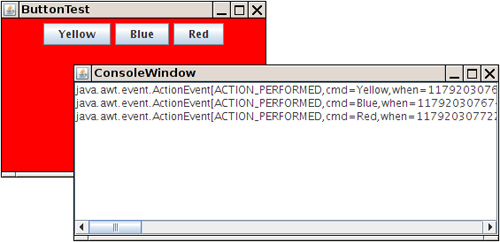
The class is easy to use. Simply call
ConsoleWindow.init()
Then print to System.out or System.err in the normal way.
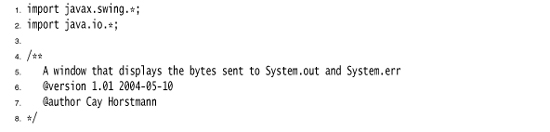
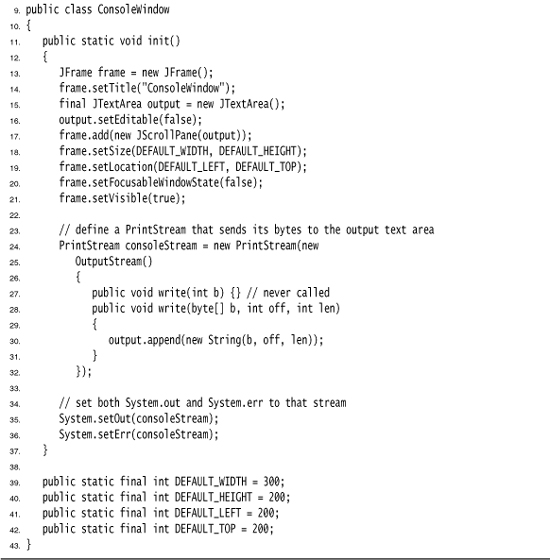
Listing 11–3 lists the code for the ConsoleWindow class. As you can see, the class is quite simple. Messages are displayed in a JTextArea inside a JScrollPane. We call the System.setOut and System.setErr methods to set the output and error streams to a special stream that adds all messages to the text area.
Listing 11–3. ConsoleWindow.java
Tracing AWT Events
When you write a fancy user interface in Java, you need to know what events AWT sends to what components. Unfortunately, the AWT documentation is somewhat sketchy in this regard. For example, suppose you want to show hints in the status line when the user moves the mouse over different parts of the screen. The AWT generates mouse and focus events that you may be able to trap.
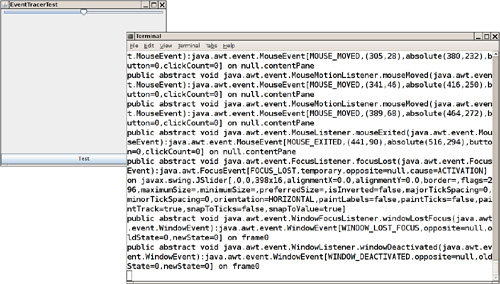
We give you a useful EventTrace class to spy on these events. It prints out all event handling methods and their parameters. See Figure 11–5 for a display of the traced events.
Figure 11–5. The EventTracer class at work
To spy on messages, add the component whose events you want to trace to an event tracer:
EventTracer tracer = new EventTracer();
tracer.add(frame);
That prints a textual description of all events, like this:
public abstract void java.awt.event.MouseListener.mouseExited(java.awt.event.MouseEvent):
java.awt.event.MouseEvent[MOUSE_EXITED,(408,14),button=0,clickCount=0] on javax.swing.JBut-
ton[,0,345,400x25,...]
public abstract void java.awt.event.FocusListener.focusLost(java.awt.event.FocusEvent):
java.awt.event.FocusEvent[FOCUS_LOST,temporary,opposite=null] on javax.swing.JButton[,0,345,400x25,...]
You may want to capture this output in a file or a console window, as explained in the preceding sections.
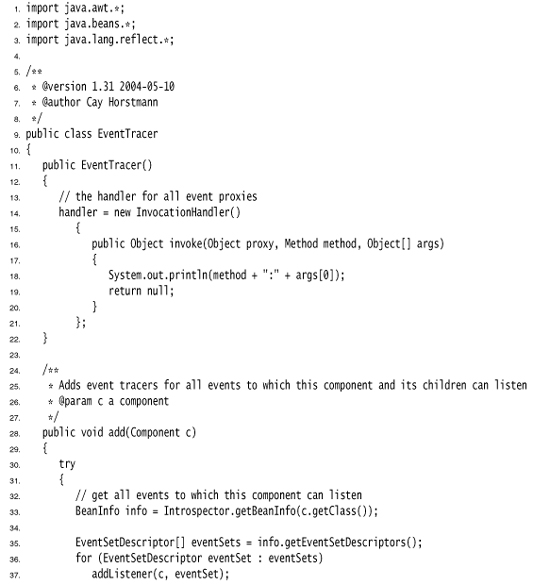
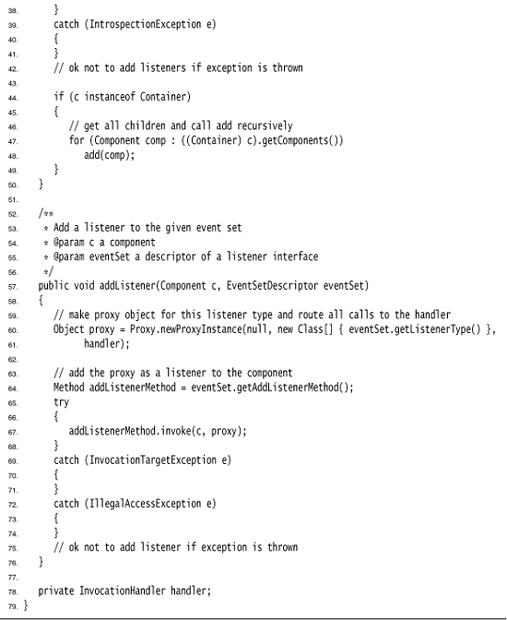
Listing 11–4 is the EventTracer class. The idea behind the class is easy even if the implementation is a bit mysterious. Here are the steps that are carried out behind the scenes:
1. When you add a component to the event tracer in the add method, the JavaBeans introspection class analyzes the component for methods of the form void addXxxListener(XxxListener). (See Chapter 8 of Volume II for more information on JavaBeans.) For each matching method, an EventSetDescriptor is generated. We pass each descriptor to the addListener method.
2. If the component is a container, we enumerate its components and recursively call add for each of them.
3. The addListener method is called with two parameters: the component on whose events we want to spy and the event set descriptor. The getListenerType method of the EventSetDescriptor class returns a Class object that describes the event listener interface such as ActionListener or ChangeListener. We create a proxy object for that interface. The proxy handler simply prints the name and event parameter of the invoked event method. The getAddListenerMethod method of the EventSetDescriptor class returns a Method object that we use to add the proxy object as the event listener to the component.
This program is a good example of the power of the reflection mechanism. We don’t have to hardwire the fact that the JButton class has a method addActionListener whereas a JSlider has a method addChangeListener. The reflection mechanism discovers these facts for us.
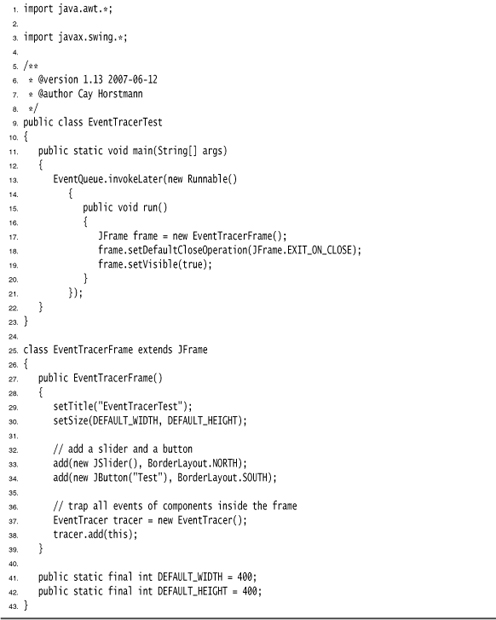
Listing 11–5 tests the event tracer. The program displays a frame with a button and a slider and traces the events that these components generate.
Listing 11–4. EventTracer.java
Listing 11–5. EventTracerTest.java
Letting the AWT Robot Do the Work
Java SE 1.3 added a Robot class that you can use to send keystrokes and mouse clicks to any AWT program. This class is intended for automatic testing of user interfaces.
To get a robot, you need to first get a GraphicsDevice object. You get the default screen device through the sequence of calls:
GraphicsEnvironment environment = GraphicsEnvironment.getLocalGraphicsEnvironment();
GraphicsDevice screen = environment.getDefaultScreenDevice();
Then you construct a robot:
Robot robot = new Robot(screen);
To send a keystroke, tell the robot to simulate a key press and a key release:
robot.keyPress(KeyEvent.VK_TAB);
robot.keyRelease(KeyEvent.VK_TAB);
For a mouse click, you first need to move the mouse and then press and release a button:
robot.mouseMove(x, y); // x and y are absolute screen pixel coordinates.
robot.mousePress(InputEvent.BUTTON1_MASK);
robot.mouseRelease(InputEvent.BUTTON1_MASK);
The idea is that you simulate key and mouse input and afterwards take a screen snapshot to see whether the application did what it was supposed to. You capture the screen with the createScreenCapture method:
Rectangle rect = new Rectangle(x, y, width, height);
BufferedImage image = robot.createScreenCapture(rect);
The rectangle coordinates also refer to absolute screen pixels.
Finally, you usually want to add a small delay between robot instructions so that the application can catch up. Use the delay method and give it the number of milliseconds to delay. For example:
robot.delay(1000); // delay by 1000 milliseconds
The program in Listing 11–6 shows how you can use the robot. A robot tests the button test program that you saw in Chapter 8. First, pressing the space bar activates the leftmost button. Then the robot waits for two seconds so that you can see what it has done. After the delay, the robot simulates the tab key and another space bar press to click on the next button. Finally, we simulate a mouse click on the third button. (You may need to adjust the x and y coordinates of the program to actually press the button.) The program ends by taking a screen capture and displaying it in another frame (see Figure 11–6).
Figure 11–6. Capturing the screen with the AWT robot
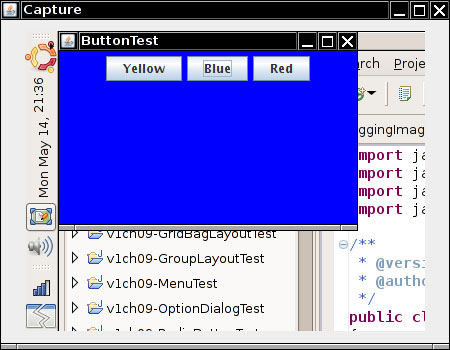
As you can see from this example, the Robot class is not by itself suitable for convenient user interface testing. Instead, it is a basic building block that can be a foundational part of a testing tool. A professional testing tool can capture, store, and replay user interaction scenarios and find out the screen locations of the components so that mouse clicks aren’t guesswork. Hopefully, as Java applications are becoming more popular, we will see more sophisticated testing tools.

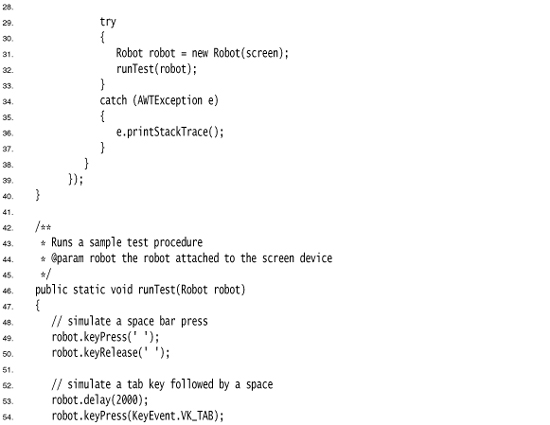
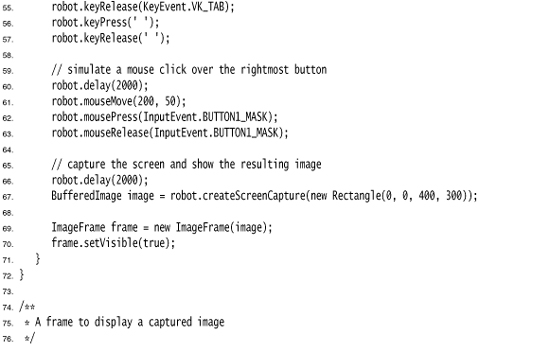
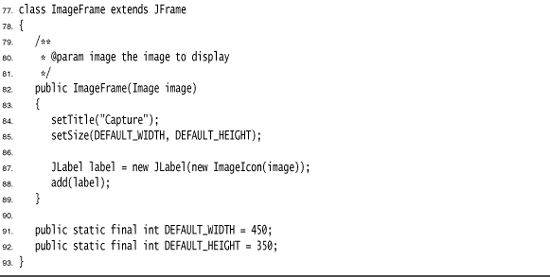
java.awt.GraphicsEnvironment 1.2
![]()
• static GraphicsEnvironment getLocalGraphicsEnvironment()
• GraphicsDevice getDefaultScreenDevice()
![]()
• Robot(GraphicsDevice device)
• void keyPress(int key)
• void keyRelease(int key)
![]()
• void mouseMove(int x, int y)
![]()
• void mousePress(int eventMask)
• void mouseRelease(int eventMask)
![]()
• void delay(int milliseconds)
• BufferedImage createScreenCapture(Rectangle rect)
![]()
Using a Debugger
Debugging with print statements is not one of life’s more joyful experiences. You constantly find yourself adding and removing the statements, then recompiling the program. Using a debugger is better. A debugger runs your program in full motion until it reaches a breakpoint, and then you can look at everything that interests you.
Listing 11–7 show a deliberately corrupted version of the ButtonTest program from Chapter 8. When you click on any of the buttons, nothing happens. Look at the source code—button clicks are supposed to set the background color to the color specified by the button name.
Listing 11–7. BuggyButtonTest.java
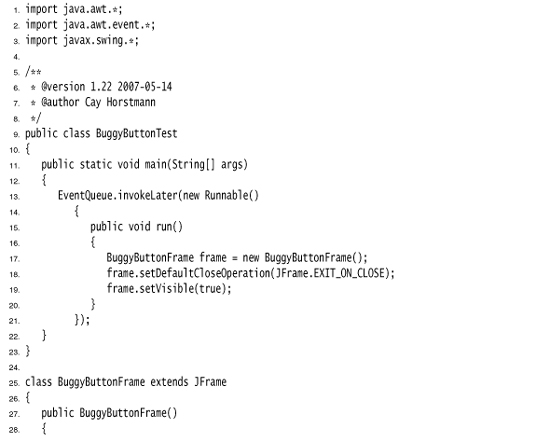
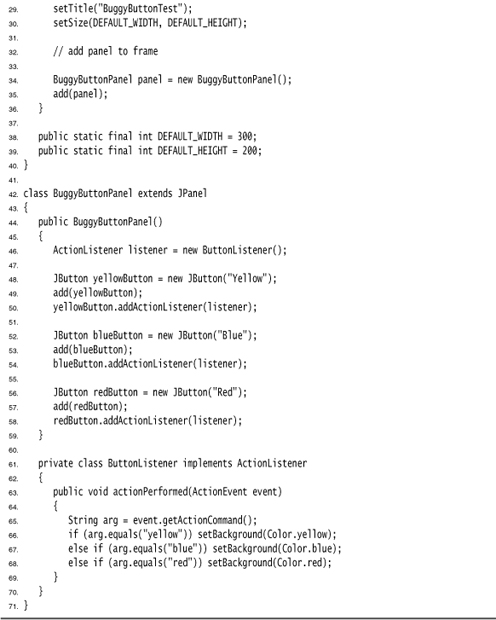
In a program this short, you may be able to find the bug just by reading the source code. Let us pretend that scanning the source code for errors is not practical. We show you how to use the Eclipse debugger to locate the error.
If you use a stand-alone debugger such as JSwat (http://www.bluemarsh.com/java/jswat/) or the venerable and extremely clunky jdb, you must first compile your program with the -g option. For example:
javac -g BuggyButtonTest.java
In an integrated environment, this is done automatically.
In Eclipse, start the debugger with the menu option Run -> Debug As -> Java Application. The program will start running.
Set a breakpoint at the first line of the actionPerformed method: Right-click in the left margin, next to the line of code, and chose Toggle Breakpoint.
The breakpoint will be hit as soon as Java starts processing code in the actionPerformed method. For this, click on the Yellow button. The debugger breaks at the start of the actionPerformed method—see Figure 11–7.
Figure 11–7. Stopping at a breakpoint
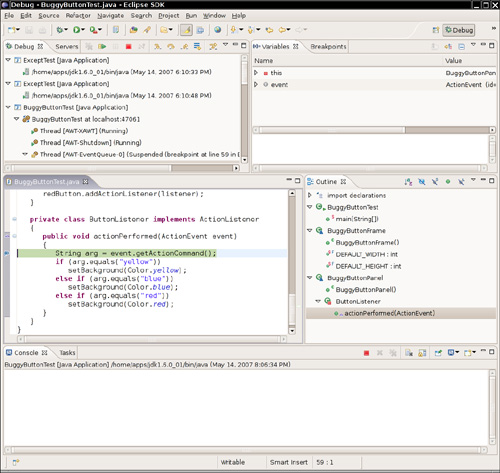
There are two basic commands to single-step through a program. The “Step Into” command steps into every method call. The “Step Over”command goes to the next line without stepping inside any further method calls. Eclipse uses menu options Run -> Step Into and Run -> Step Over, with keyboard shortcuts F5 and F6. Issue the “Step Over” command twice and see where you are.
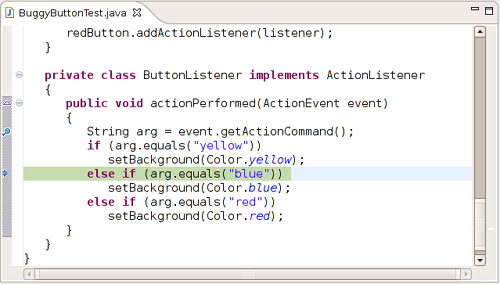
That is not what should have happened. The program was supposed to call setBackground(Color.yellow) and then exit the method.
Inspect the local variables and check the value of the arg variable:
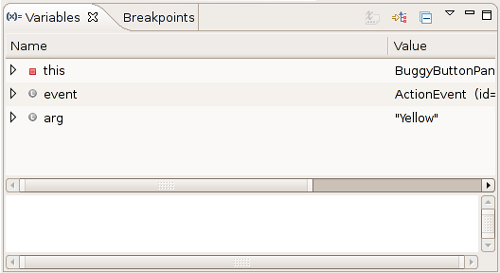
Now you can see what happened. The value of arg was "Yellow", with an uppercase Y, but the comparison tested
if (arg.equals("yellow"))
with a lowercase y. Mystery solved.
To quit the debugger, select Run -> Terminate from the menu.
There are more advanced debugging commands in Eclipse, but you can get a long way with the simple techniques that you just saw. Other debuggers, such as the NetBeans debugger, have very similar commands.
This chapter introduced you to exception handling and gave you some useful hints for testing and debugging. The next two chapters cover generic programming and its most important application: the Java collections framework.