Lesson 5. Managing Google+ Settings and Privacy
In this lesson, you learn how to manage your Google+ account and privacy settings.
Understanding Google+ Privacy
With Google+, you have complete control over who sees your content through a combination of Google+ circles and Google privacy settings. The Google Accounts page offers seven tabs that enable you to manage your account and privacy settings for Google+ and other connected Google products. Before you start sharing content on Google+, you should review the information and settings on this page to ensure that you understand all the available options and make the right choices for your needs.
Tip: What Is Google’s Privacy Policy for the Content I Share on Google+?
For a summary of how Google uses and protects your data, read the Google+ Privacy Policy at www.google.com/policies. This page explains in plain English how Google+ uses your data.
Managing Your Google Account Settings
To manage your Google account settings, click the Home icon on the Google+ ribbon, select Settings from the drop-down menu in the upper-right corner of the page (see Figure 5.1), and click the Account tab on the Google Accounts page.
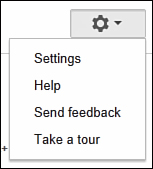
Figure 5.1. Easily access your Google+ account settings.
On the Account tab, shown in Figure 5.2, you can do the following:
• Edit your profile. Click the Edit Profile link to open your Google+ profile. See Lesson 2, “Working with Google+ Profiles,” for more information about editing your profile.
• Add an alternate email to your account. Click the Edit link in the Email Addresses and Usernames section, enter an additional email address in the Add an Alternate Email to Your Account section, and click the Save button. An alternate email address enables you to sign in to your Google account if you can no longer access your primary email account.
• Enable +1 on Non-Google Sites. See “Enabling +1 Personalization” later in this lesson to learn how to enable or disable this feature.
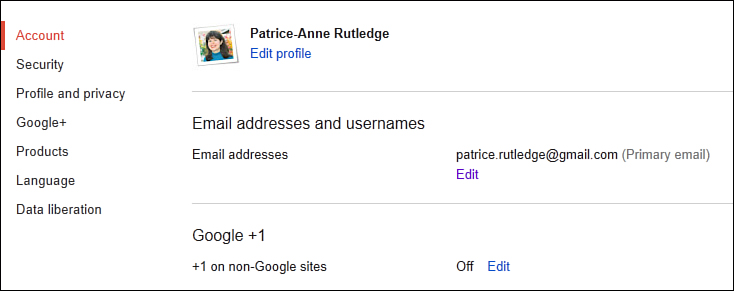
Figure 5.2. The Account tab provides links to Google pages that help you manage your account.
• Connect your accounts from other services. Click the Connecting Your Accounts link to open the Connected Accounts page where you can connect Google to your accounts on other sites such as Facebook, LinkedIn, Quora, Twitter, Yahoo!, and more. By connecting accounts, you can view contents your friends share when you search on Google. You can also choose whether to display links to these accounts on your Google+ profile and whether to allow Google+ to use your email address to search for your accounts on other social sites.
• Delete your Google+ profile. See “Deleting Your Google+ Profile” later in this section for more information.
• Delete your Google account. See “Deleting Your Google Account” later in this section for more information.
• View, enable, or disable web history. Click the Go to Web History link to specify whether you want to enable this feature.
Deleting Your Google+ Profile
If you decide you no longer want to maintain your Google+ profile, you can delete it.
Tip: Consider Other Options Before Deleting Your Google+ Profile
If you’re thinking about deleting your Google+ profile for privacy concerns, another option is to disable search engine visibility and change the visibility settings for your profile. That way, you can retain a profile but have total control over who can—and can’t—view your profile data. See Lesson 2 for more information about editing your profile.
To delete your Google+ profile, follow these steps:
1. Click the Home icon on the Google+ ribbon and select Settings from the drop-down menu in the upper-right corner of the page (refer to Figure 5.1).
2. On the Google Accounts page, select the Account tab.
3. At the bottom of the Account tab, click the Delete Profile and Remove Associated Google+ Features link.
4. On the Delete Google+ Content or Your Entire Google Profile page, select the Delete Google+ Content option button to delete your profile content, including circles, posts, and comments, but retain a basic profile for use with Google products that use profile data. Optionally, select the Delete Your Entire Google Profile option button to delete circles, posts, comments, and your profile.
5. Check the box stating that you understand that deleting this service can’t be undone and the data deleted can’t be restored.
6. Click the Remove Selected Services button and confirm your deletion.
Deleting Your Google Account
Another option is to delete your entire Google account, which removes access to all Google products, including Google+.
Caution: Think Twice Before Deleting Your Google Account
Deleting your Google account doesn’t just delete your Google+ profile. It also deletes your account on any other Google products you have, such as Gmail, Google Reader, Google Buzz, Google Checkout, and more. Be very sure that you really want to delete everything before proceeding with this option. If privacy is your concern, this lesson offers many suggestions for protecting your privacy while still maintaining your accounts.
To delete your Google account, follow these steps:
1. Click the Home icon on the Google+ ribbon and select Settings from the drop-down menu in the upper-right corner of the page (refer to Figure 5.1).
2. On the Google Accounts page, select the Account tab.
3. At the bottom of the Account tab, click the Close Account and Delete All Services and Info Associated with It link to open the Delete Google Account page. This is a powerful page; it enables you to delete your accounts for all Google products.
4. Select the check box next to each Google product that displays on this page. This confirms that you understand Google will delete your account on these products and you can no longer use them. You can’t select only certain check boxes; you must select them all to confirm you really want to delete all Google products.
5. Confirm your password.
6. Confirm that you want to delete your account and that you understand that you’re still responsible for any pending financial transactions (for example, using Google Wallet) by selecting the corresponding check boxes.
7. Click the Delete Google Account button and confirm the permanent deletion of your account.
Managing Your Security
To manage your Google security settings, click the Home icon on the Google+ ribbon, select Settings from the drop-down menu in the upper-right corner of the page (see Figure 5.1), and click the Security tab on the Google Accounts page.
On the Security tab, you can do the following:
• Change your password. Click the Change Password button to open the Change Password page. To create a secure password, use a combination of uppercase letters, lowercase letters, and numbers. For more password tips, click the Password Strength link on this page.
• Change your recovery options. Click the Account Recovery Options button to open the Account Recovery Options page. Recovery options enable you to access your account even if you forget your password. Options include password recovery by email, text message, or security question.
• Enable 2-step verification. Click the Edit link to the right of the 2-step Verification field to set up 2-step verification. This feature adds an extra layer of protection to your account but requires that you enter both a password and a verification code each time you sign in.
• Authorize and revoke access to your account. Click the Edit link to the right of the Authorizing Applications and Sites field to open the Authorized Access to Your Google Account page, shown in Figure 5.3. This page lists all the third-party applications you’ve authorized to access your Google account, such as Google+ games or other social sites. You can revoke access to any third-party application, but doing so means that your account will no longer be connected. For example, you can no longer play games to which you revoke access.
Figure 5.3. You can revoke access to any third-party applications.
Managing Your Privacy Settings
To manage your privacy settings, click the Home icon on the Google+ ribbon, select Settings from the drop-down menu in the upper-right corner of the page (refer to Figure 5.1), and click the Profile and Privacy tab on the Google Accounts page.
Managing Privacy Settings for Your Google+ Profile
The Google Profiles section on the Profile and Privacy tab previews what your Google+ profile looks like in search results, as shown in Figure 5.4.
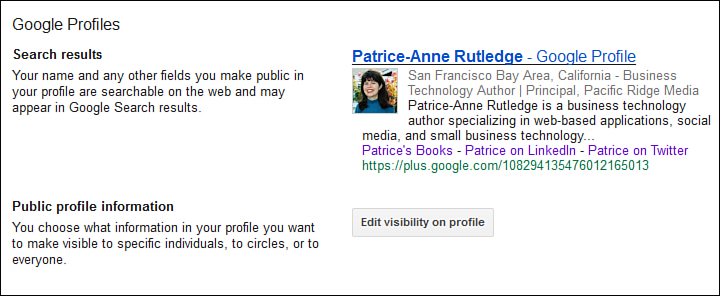
Figure 5.4. Manage your profile visibility.
To edit your profile visibility, click the Edit Visibility on Profile button to open your profile in Edit mode. For example, you can specify privacy settings for each section of your profile and choose whether to make your profile visible in search engine results. See Lesson 2 for more information about editing your profile.
Managing Google+ Sharing
The Sharing section of the Profile and Privacy page, shown in Figure 5.5, helps you manage the privacy of the content you share on Google+.
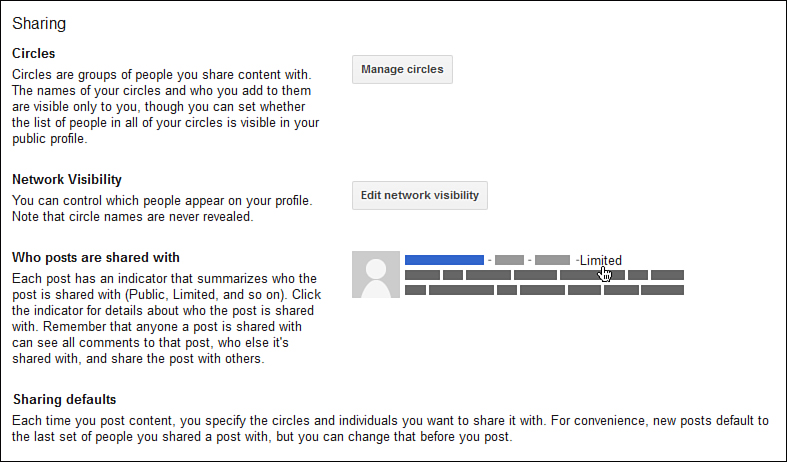
Figure 5.5. Learn more about how sharing works in Google+.
This section provides information about Google+ sharing all in one place with tips, information, and links to other areas of Google+ where you can specify your sharing preferences. In this section, you can:
• Click the Manage Circles button to open the Circles page where you can place people in circles that determine what content they can view. See Lesson 4, “Managing Your Network with Circles,” for more information about how circles help you manage the way you share with others.
• Click the Edit Network Visibility button to open the About tab on your profile where you can disable search engine visibility if you don’t want anyone to find your profile on a search engine such as Google, Yahoo!, or Bing (using the Profile Discovery field). See Lesson 2 for more information about profile privacy.
Managing Other Google+ Privacy Options
The remaining buttons on the Profile and Privacy tab enable you to establish additional privacy settings. Here, you can do the following:
• Click the Edit Photos Settings button to open the Photos section of the Google+ tab where you can manage your photo settings. See Lesson 10, “Working with Photos,” for more information.
• Click the Sign into Dashboard button to sign in to your Google Dashboard. On the Dashboard, you can manage all your Google products, including Google+, Gmail, Docs, Talk, Buzz, and more.
• Click the Go to Privacy Center button to open the Google Privacy Center page, which includes information and videos about protecting your privacy.
Managing Google+ Settings
To manage your Google+ settings, click the Home icon on the Google+ ribbon, select Settings from the drop-down menu in the upper-right corner of the page (refer to Figure 5.1), and click the Google+ tab on the Google Accounts page. Figure 5.6 shows the Google+ tab.
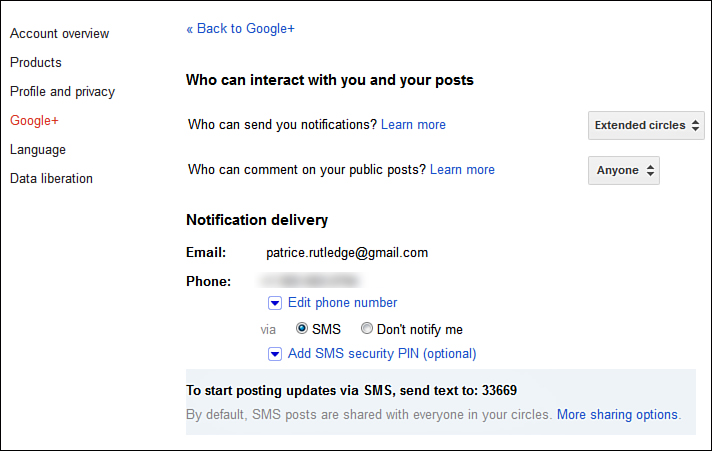
Figure 5.6. Specify how you want Google+ to notify you on the Google+ tab.
On this tab, you can set your email and phone delivery preferences, set your notification preferences, and specify +1 personalization.
This tab also offers several fields for specifying photo preferences. See Lesson 10 for more information about these preferences.
Specifying Who Can Interact with You and Your Posts
The Who Can Interact with You and Your Posts section enables you to control exactly who can send you notifications and comment on your public posts. Your choices include Anyone, Extended Circles, Your Circles, Only You, or Custom (this gives you the option of selecting specific circles or people). By default, Google+ allows people in your extended circles to send you notifications and allows anyone to comment on your public posts.
Setting Notification Delivery Preferences
The Notification Delivery section of the Google+ tab displays the email address and mobile phone number where you want to receive notifications. You can change your email address on the Account Overview tab. If you haven’t connected a mobile phone to this account, you can do so on this tab. To learn more about how Google+ notifications work, see Lesson 9, “Viewing and Managing Notifications.”
To add a phone number, follow these steps:
1. Click the Add Phone Number link in the Notification Delivery section of the Google+ tab.
2. Enter your country and phone number.
3. Click the Send Verification Code button. Google+ sends a verification code by text message to your phone.
4. Enter your six-digit code in the Verification Code field and click the Confirm button.
5. Select the SMS option button if you want to receive selected Google+ notifications by text message. Select the Don’t Notify Me option button if you don’t want to receive text message notifications.
Be sure to specify your notification preferences after enabling SMS so that you can control the volume of messages you receive.
Managing Email Subscriptions
By default, Google+ sends you occasional updates about top content from your circles, Google+ activity, and friend suggestions. If you don’t want to receive these updates, remove the check marks in the Manage Email Subscriptions section.
Specifying Notification Preferences
The Receive Notifications section of the Google+ tab enables you to specify which actions trigger a Google+ notification and how to send this notification: by email, via SMS text message, or both.
Figure 5.7 shows the Receive Notifications section, which displays the events that trigger notifications, such as when someone mentions you in a post, adds you to a circle, tags you, comments on one of your posts, starts a Messenger conversation with you, and so forth.
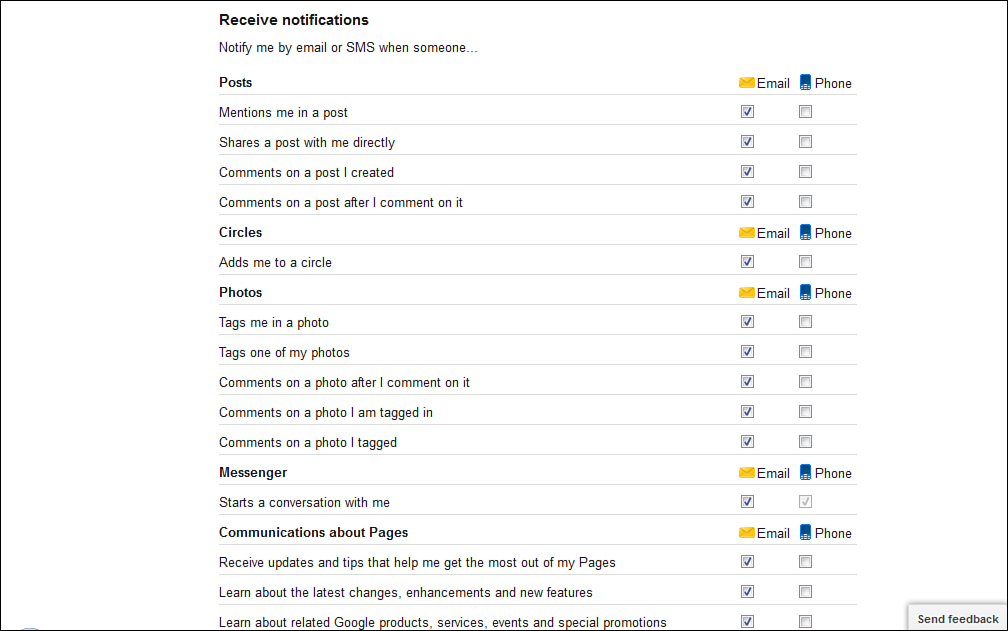
Figure 5.7. You have control over which notifications you receive and how you receive them.
For each event, you can select your preferred notification method. If you don’t want to receive any notifications, remove the check marks from all check boxes.
Note: Why Can’t I Select the Phone Check Box?
You must select the SMS option button in the Notification Delivery section at the top of this tab to activate the Phone column.
Enabling +1 Personalization
By default, Google+ disables +1 personalization on third-party sites, but you can enable this feature if you want to. When you enable +1 personalization, Google uses your account data, such as the names of people in your circles, to personalize content and ads on third-party sites. For example, you could see the name of someone in one of your circles who has clicked the +1 button to show support for a post on a popular website.
To enable this feature, follow these steps:
1. Click the Edit link in the Google +1 section on the Google+ tab.
2. On the +1 Personalization on Non-Google Sites page, shown in Figure 5.8, select the Enable option button. If you want to read more information about the ramifications of this choice, click the Learn More link to open a page with a detailed explanation of +1 personalization with several examples.
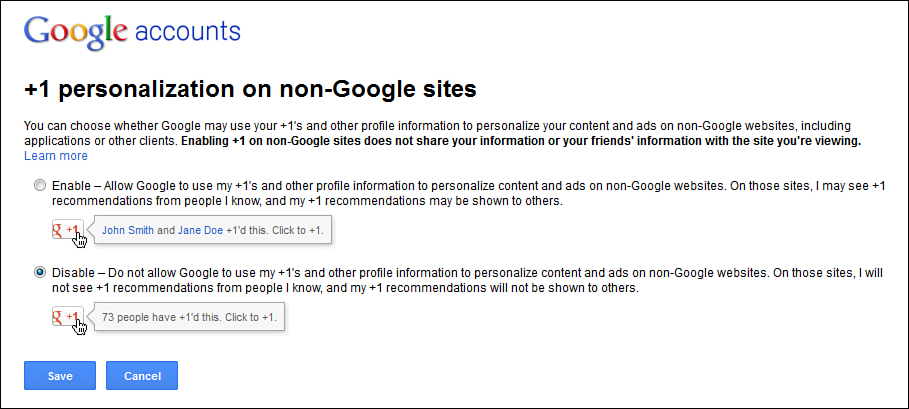
Figure 5.8. Decide whether you want to enable +1 personalization.
3. Click the Save button.
Adding Google+ Pages to Your Circles
If you search for a Google+ page on Google by inserting the plus sign (+) before the page name (such as “+Toyota), Google can add this page automatically to your circles. To activate this feature, select the check box in the Google+ Pages section.
Displaying Content About Google+ Games
By default, Google+ displays links to recently played games on the side of your stream and shows Google+ game notifications on the Notifications menu. To disable either of these features, remove the check marks from the associated check boxes.
Customizing Your Circles
By default, when you choose to share content with Your Circles, Google+ shares with all your circles except the Following circle. To customize this, click the Customize button in the Your Circles section. In the pop-up box that opens, you can select the specific circles you want to include in Your Circles.
Managing Google+ Photo Settings
Optionally, Google+ enables you to:
• Show your photos’ geographic location in newly uploaded albums and photos.
• Allow viewers to download your photos.
• Find your face in photos, prompt people in your circles to tag you, and specify whose tags to approve automatically.
To enable any of these options, place a check mark in the associated check box.
Managing Your Products
To manage Google products other than Google+, click the Home icon on the Google+ ribbon, select Settings from the drop-down menu in the upper-right corner of the page (refer to Figure 5.1), and click the Products tab on the Google Accounts page.
On the Your Products page, you can manage your settings for other Google products you use, including Alerts, Docs, Gmail, Google Music, Knol, Picasa Web Albums, Talk, Voice, YouTube, AdSense, AdWords, and more.
Specifying Your Preferred Languages
Google enables you to view its products in multiple languages. For example, you can view Google+ in more than 40 languages, ranging from Arabic to Vietnamese. Because Google hasn’t localized all its products in every language it supports, you can specify secondary languages if your primary language isn’t available for a specific product.
To specify your preferred languages, follow these steps:
1. Click the Settings link in the upper-right corner of any Google+ page. Click the Home icon on the Google+ ribbon and select Settings from the drop-down menu in the upper-right corner of the page (refer to Figure 5.1).
2. Click the Language tab on the Google Accounts page.
3. Select your default language from the Primary Language drop-down list (see Figure 5.9). This field displays the current language you’re using to view the Google+ interface, but you can choose from dozens of other languages. For example, if you’re currently viewing Google+ in English but would rather view it in Italian, select Italian as your primary language.
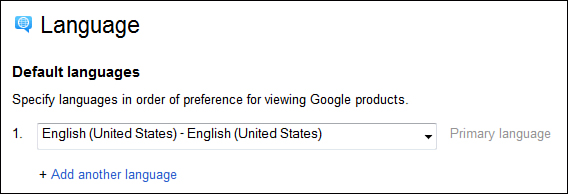
Figure 5.9. View Google+ in your preferred language.
4. If you changed your default language in step 3, click the Reload link to switch languages. Figure 5.10 shows Google+ in Italian. Be aware that although Google localizes the Google+ product interface, user content such as posts and comments remain in their original language.
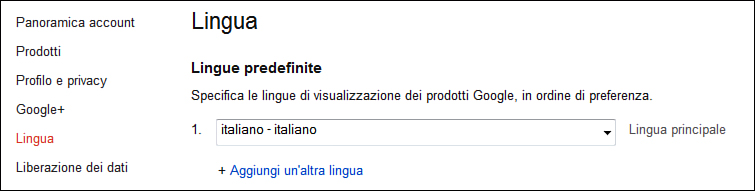
Figure 5.10. Google+ is available in more than 40 languages, including Italian.
5. Optionally, click the Add Another Language link to add a second language to this list. This option is useful if you would like to view Google products in another language you know when your native language isn’t available. For example, if you’re a native speaker of Estonian but also speak English, you should list Estonian first and then English.
You can change a secondary language to your primary language by clicking the Make Primary link to its right. You can also delete a language by clicking the Remove link to its right. You can change your primary language, but you can’t delete it.
Backing Up Your Data
Google enables you to back up your critical data using Google Takeout, which creates a downloadable archive of your +1s, Buzz content, contacts, Picasa Web Albums, and Google+ profile, circles, and stream. You can download all your Google data or only specific data.
To download your Google data, follow these steps:
1. Click the Home icon on the Google+ ribbon and select Settings from the drop-down menu in the upper-right corner of the page (refer to Figure 5.1).
2. On the Google Accounts page, select the Data Liberation tab, as shown in Figure 5.11.
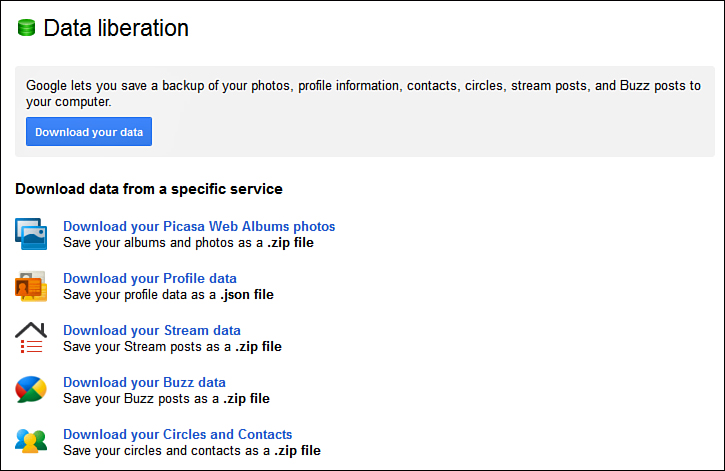
Figure 5.11. Back up your Google+ data for safekeeping.
3. Click the Download Your Data button. Optionally, you can click one of the five links that display at the bottom of the page to download only specific data.
4. Confirm your password to verify your identity.
5. On the Takeout page, click the All of Your Data tab. Optionally, click the Choose Services tab and select from the available download options: +1s, Buzz, Circles, Contacts, Knol, Picasa Web Albums, Profile, Stream, or Voice.
6. Click the Create Archive button. Google+ analyzes your data and displays a summary on the Downloads tab, as shown in Figure 5.12. Your download is available for one week.

Figure 5.12. The Downloads tab summarizes your data archive.
7. Click the Download button in the lower-right corner. Google prompts you to save your download file to your computer. The exact process for this varies by operating system and browser.
Google places a .zip file in your default Downloads folder, or in a folder you specify, using the following naming convention: [email address]-backup.zip. You can store this file for safekeeping or unzip it for another use, such as managing downloaded photos in an external photo album.
Summary
In this lesson, you learned how to manage your Google+ account and privacy settings. Next, you can get started sharing some content on Google+.