Lesson 4. Managing Your Network with Circles
In this lesson, you learn how to add and manage Google+ circles.
Understanding Google+ Circles
One of the first things to do when you sign up for Google+ is to add people you know—and those whose posts you find interesting—to circles.
Plain English: Google+ Circles
Circles enable you to organize your Google+ network by placing people into distinct groups. When you post content on Google+, you can specify exactly which circles can view those posts. You can also specify privacy settings by circle. This gives you complete control over who sees what content.
By default, Google+ offers four ready-made circles for your profile (the default circles for pages are different), but you can also create new circles and delete any circles you don’t want to use. The default circles are shown in Figure 4.1:
• Friends. People you consider close friends. This circle should be the one you want to give the most access to your Google+ content.
• Family. Family members, including siblings, parents, cousins, and so forth. If what you share with family members varies, consider placing them in separate circles. For example, the content you share with your sister could differ from what you share with your grandmother.
• Acquaintances. People you know who aren’t close friends or family members. This circle could include coworkers, classmates, or people you know from professional associations, clubs, or community organizations. Creating separate circles for acquaintances based on shared interests is another option. For example, you might create one circle for professional colleagues and another for acquaintances you met through your love for skiing.
• Following. People whose posts you want to read on Google+, but don’t actually know. Celebrities, industry experts, and popular bloggers all fall into this category.
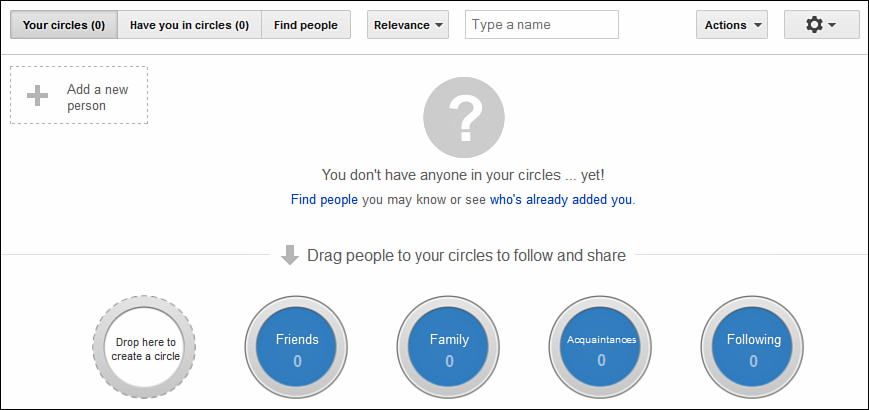
Figure 4.1. Google+ gets you started with four ready-made circles.
To get started with Google+ circles, you should follow these steps:
1. Think about how you want to use Google+ and what circles you’ll need.
2. Create any new circles.
3. Add people to your circles.
Creating New Circles
When you first start using Google+, you can add people to any of the default circles: Friends, Family, Acquaintances, or Following. Although these four circles might be sufficient for your needs, you can create other circles if you want to categorize people further, such as create a circle for the members of your book club or one for the members of a committee you are on.
To create a new circle, follow these steps:
1. Click the Circles icon on the Google+ ribbon.
2. Click the circle named Drop Here to Create a Circle (refer to Figure 4.1).
3. In the pop-up box that opens (see Figure 4.2), enter a name and optional description for your circle.
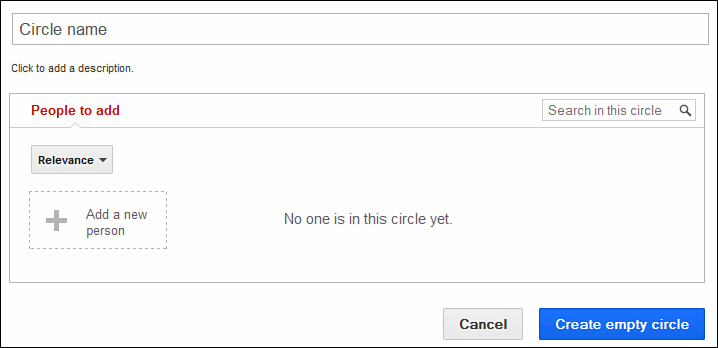
Figure 4.2. Give your circle an appropriate name.
4. Optionally, you can click the Add a New Person link to search for people by name or email address. If you want to use another method to add people to circles, click the Create Empty Circle button. Your new circle now displays on the Circles page.
Tip: Create a New Circle and Add Someone to It at the Same Time
If you already know someone you want to add to a circle (such as a person who displays on the Find People tab), you can save time by doing two things at once. Drag the person you want to add to the circle named Drop Here to Create a Circle (refer to Figure 4.1). Google+ enables you to create a circle and adds this person to it.
Adding People to Circles
When you first sign up for Google+, your circles are empty (refer to Figure 4.1). It’s easy to add people to circles, but first you have to find them. Google+ offers several ways to find people to add to circles:
• Add people who display on the Find People tab on the Circles page.
• Add your email contacts.
• Add people and pages suggested on the right side of your Google+ home page.
• Add people who appear on your Notifications menu, which you can open by clicking the Notifications button located in the upper-right corner of Google+.
• Add people from the Explore page and What’s Hot stream. See Lesson 7, “Viewing Your Google+ Stream,” for more information about this stream.
• Add people from their Google+ profile. Many people now display a Google+ button on their website or blog, which makes it easy for you to find their profile.
• Send invitations to people who don’t use Google+ yet and add them to your circles.
When you add people to circles, Google+ notifies them (on their Notification menu and via email) but doesn’t tell them the name of the circle you added them to. For example, if you create an Annoying People circle, no one knows you placed them there.
In addition, adding people to a circle doesn’t mean that you are automatically added to their circles. They must take the action to add you to their circles. In this way, adding people to Google+ circles is similar to following people on Twitter. Just because you follow them doesn’t mean that they follow you.
Adding People to Circles from the Find People Tab
Discovering people to add to your circles on the Find People tab is one of the easiest ways to get started growing your Google+ circles.
To add people from the Find People tab, follow these steps:
1. Click the Circles icon on the Google+ ribbon.
2. Review the people on the Find People tab to locate individuals you want to add to circles. Figure 4.3 shows an example with several people waiting for you to add them to your circles. If the Email icon displays in the lower-right corner, this means that the person isn’t on Google+. You can share with these people via email or invite them to join Google+.

Figure 4.3. The Find People tab suggests people you might want to add to your circles.
Note: Why Doesn’t Google+ Suggest Any People for Me to Add to Circles?
If the Find People tab doesn’t display any people, this means that you haven’t added anyone to a circle yet and Google+ couldn’t find any email contacts associated with the email address you used to sign up. In this case, follow the other suggestions in this section to search for and add people to your circles. After you have some people in circles, the Find People tab will start displaying additional people for you to consider.
3. If the Find People tab page contains a large number of people, you can narrow your results by email account or search for coworkers or classmates from the All Suggestions drop-down menu.
4. If you want to see more people on the Find People tab, you can type the name of a person in the text box or drag one of the people on this tab to the “Drag People Here for Related Suggestions” text. This displays suggestions related to that person (usually people in their circles).
5. Select and drag people to the appropriate circles using your mouse. If you want to add more than one person to a particular circle, select multiple people and drag the group to the desired circle. You can also add an individual to more than one circle.
Figure 4.4 shows a person added to a circle. On the Find People tab, a small circle displays in the lower-right corner of the box surrounding anyone you’ve added to a circle.
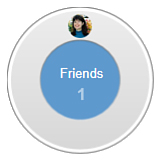
Figure 4.4. The people you add to a circle display in that circle’s ring.
Understanding Google+ Suggestions
The people Google+ displays on the Find People tab come from many sources. These include the following:
• People who are in your email address book. Initially, Google+ searches for your contacts using the email address associated with your Google+ account. For example, if you signed up for Google+ with your Gmail address, your Gmail contacts display on the Find People tab. You can also search for your Hotmail or Yahoo! Mail contacts or upload an email address book. See “Adding Your Email Contacts” later in this lesson.
• People you’ve interacted with on Google+ or other Google products, including any connected accounts.
• People in your extended circles.
Plain English: Extended Circles
Extended Circles include the people who are in your circles’ circles. For example, after you add people to circles, the people in their circles are in your extended circle. Think of them as friends of friends, or friends of the people you follow on Google+.
Deleting People on the Find People Tab
Adding the people Google+ suggests on the Find People tab is optional. You can ignore any suggestion or delete the box for that person by pausing over it with your mouse and clicking the Delete button (x) in the upper-right corner, as shown in Figure 4.5.
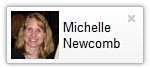
Figure 4.5. You can delete suggested people you don’t know or don’t want to add to a circle.
Adding Your Email Contacts
If the Find People tab doesn’t display enough people, you can search additional email accounts for more people to add to circles. Google+ enables you to search Yahoo! Mail or Hotmail for contacts or upload your email address book from Outlook, Thunderbird, Apple Address Book, and other email systems.
Note: Connecting with Your Email Contacts on Google+
After importing your email contacts, you can add them to your Google+ circles. If they have a Google+ account, they can view your posts on their stream. Otherwise, you can optionally share with them via email or send them an invitation to Google+. To invite an email contact to Google+, double-click this person’s name and click the Invite button in the Invite People to Join You on Google+ dialog box, which opens.
Adding Your Hotmail Contacts
If you use Hotmail, you can search for and display your email contacts on the Find People tab.
To add your Hotmail contacts to circles, follow these steps:
1. Click the Circles icon on the Google+ ribbon.
2. On the Find People tab, select Hotmail from the All Suggestions drop-down menu.
3. In the pop-up box that opens, enter your Windows Live ID and password and click the Sign In button. Google+ connects with Hotmail and displays your email contacts on the Find People tab.
4. Google+ identifies a Hotmail contact by placing the orange Hotmail icon in the upper-right corner of the box that surrounds that person. Select and drag people to the appropriate circles using your mouse.
Adding Your Yahoo! Mail Contacts
If you use Yahoo! Mail, you can search for and display your email contacts on the Find People tab.
To add your Yahoo! Mail contacts to circles, follow these steps:
1. Click the Circles icon on the Google+ ribbon.
2. On the Find people tab, select Yahoo! from the All Suggestions drop-down menu.
3. In the pop-up box that opens, enter your Yahoo! ID and password and click the Sign In button.
4. Click the Agree button to give Yahoo! permission to share your data. Google+ connects with Yahoo! and displays your email contacts on the Find People tab.
5. Google+ identifies a Yahoo! contact by placing the purple Yahoo! icon in the upper-right corner of the box that surrounds that person. Select and drag people to the appropriate circles using your mouse.
Adding Email Contacts from an Exported File
If you use another email application—such as Outlook, Thunderbird, or Apple Mail, you can upload and display your email contacts on the Find People tab. This process works with any email system that allows you to export your data in either comma-separated values (.csv) or vCard (.vcf) format.
To add your email contacts to circles, follow these steps:
1. Export your email contacts in either .csv or .vcf format, following the instructions your email system provides.
2. Click the Circles icon on the Google+ ribbon.
3. On the Find People tab, select Upload Address Book from the All Suggestions drop-down menu and click the Upload Address Book link.
4. In the File Upload dialog box, select your email contact file and click the Open button. Depending on your operating system and browser, the name of this dialog box and button could vary. Google+ uploads your email file and displays your email contacts on the Find People tab (see Figure 4.6).

Figure 4.6. Add your email contacts to circles.
5. Google+ identifies any uploaded email contact by placing the green file icon in the upper-right corner of the box that surrounds that person. Select and drag people to the appropriate circles using your mouse.
Adding People and Pages that Google+ Suggests
On the right side of your home page, Google+ suggests people you may know as well as other people and pages you might enjoy based on the content you post (see Figure 4.7). To add a person, click the Add button and select the circle to which you want to add this individual. To check out fun and interesting people and pages, click the associated View button.
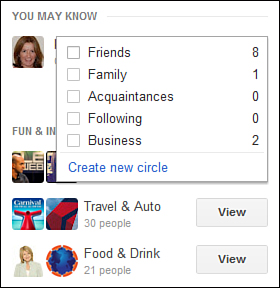
Figure 4.7. Select the circle to which you want to add this person or page.
Adding People from the Notifications Menu
You can also add people to circles from the Notifications menu. This enables you to see who has added you to their circles and decide whether you want to do the same.
To add people from the Notifications menu, follow these steps:
1. Click the Notifications button that displays in the upper-right corner of the screen, as shown in Figure 4.8. See Lesson 9, “Viewing and Managing Notifications,” for more information about Google+ notifications.
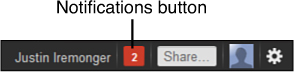
Figure 4.8. Click the Notifications button to display a list of your notifications.
2. Pause your mouse over the gravatar (small photo) of the person you want to add to one of your circles. A small pop-up box opens (see Figure 4.9), displaying this person’s name, a larger photo, the number of other Google+ users you share in common, and the Add button.
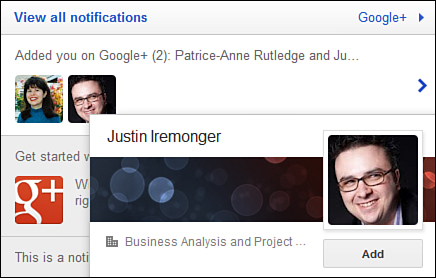
Figure 4.9. View people associated with recent notifications.
3. Pause your mouse over the Add button next to the name of a person you want to add to a circle. Google+ opens a pop-up box that lists your available circles.
4. Select the check box to the left of the circle to which you want to add this person and then move your mouse away. Google+ adds this person to the selected circle.
Optionally, you can add someone to a new circle by clicking the Create New Circle link in the pop-up box, typing the name of the new circle, and clicking the Create button.
Adding People from Their Google+ Profile
When you discover Google+ profiles of interesting people, you might want to add them to one of your circles to keep track of what they post.
To add people from their Google+ profiles, follow these steps:
1. Navigate to the Google+ profile of the person you want to add to a circle. You can find profiles by
• Searching for someone in the Search Google+ box at the top of Google+. See Lesson 8, “Searching on Google+,” for more information.
• Exploring Google+ for interesting people.
• Searching for someone on Google (www.google.com).
• Clicking a Google+ button or googleCard on someone’s website or blog.
2. Pause your mouse over the Add to Circles button in the upper-right corner of the profile whose owner you want to add to a circle, as shown in Figure 4.10. Google+ opens a pop-up box that lists your available circles.
Figure 4.10. When you view an interesting Google+ profile, you can add this person to one of your circles.
3. Select the check box to the left of the circle to which you want to add this person and then move the mouse away. Google+ adds this person to the selected circle.
Managing Circles
Google+ makes it easy to view and manage the people in your circles. You can move people to other circles, remove individuals from circles, and delete circles.
Viewing People in Your Circles
To view the people in your circles, click the Circles icon on the Google+ ribbon. The Your Circles tab displays by default (see Figure 4.11).
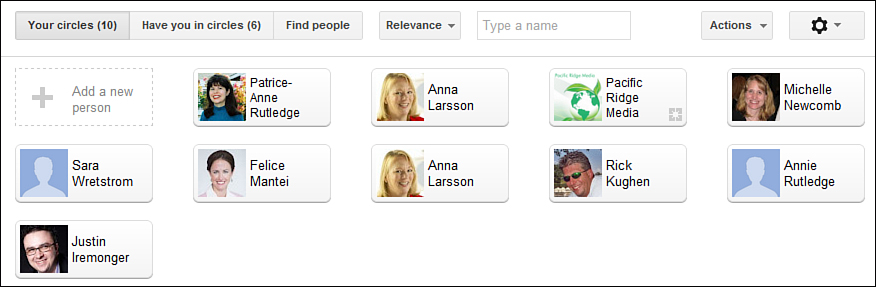
Figure 4.11. View the people you added to circles.
To arrange the order in which people appear on this tab, select one of the following options from the Relevance drop-down list: First Name, Last Name, Relevance (the default), Recently Updated, Circles, and Not Yet Using Google+.
Viewing People Who Added You to Their Circles
To view the people who have added you to their circles, click the Circles icon on the Google+ ribbon and then click the Have You in Circles tab (see Figure 4.12).
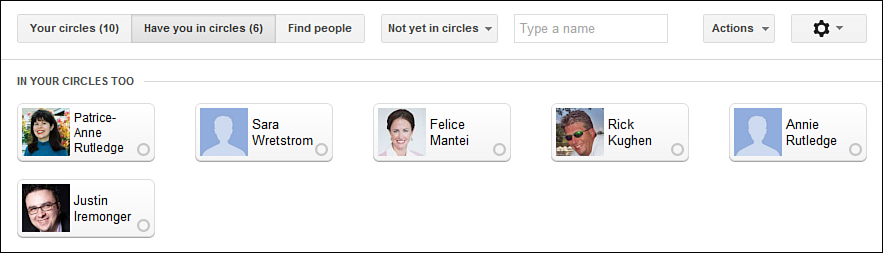
Figure 4.12. See who has added you to their circles.
To arrange the order in which people appear on this tab, select one of the following options from the Relevance drop-down list: First Name, Last Name, Relevance, Recently Updated, and Not Yet in Circles.
Moving People from One Circle to Another
If you add someone to the wrong circle or decide you want to rearrange your circles, you can move people easily.
To move someone from one circle to another, follow these steps:
1. Click the Circles icon on the Google+ ribbon.
2. Click the Your Circles tab.
3. Drag the photo of the person you want to move from its existing circle to another circle using your mouse (see Figure 4.13).
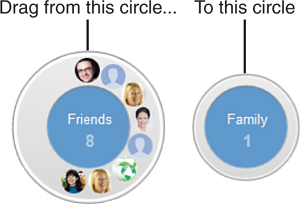
Figure 4.13. Drag a photo from one circle to another to move that person to another circle.
Removing People from Circles
You can remove people from a circle if you decide you no longer want to view their posts.
To remove someone from a circle, follow these steps:
1. Click the Circles icon on the Google+ ribbon.
2. Click the Your Circles tab.
3. Drag the photo of the person you want to remove away from the circle. Google+ removes the person from the circle.
Caution: Where Did That Person Go?
People you remove from a specific circle who are part of other circles remain in those other circles. If you remove people from the only circle they are part of, you remove them entirely from the Circles page. If you change your mind or remove someone by mistake, you need to search for this person again using the Search Google+ box at the top of Google+.
Editing a Circle’s Name and Description
You can edit the name and description of your circles.
To edit a circle, follow these steps:
1. Click the Circles icon on the Google+ ribbon.
2. Right-click the circle you want to edit and select Edit Circle from the menu that displays, as shown in Figure 4.14.
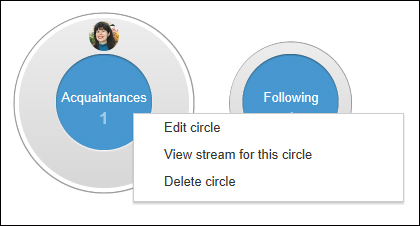
Figure 4.14. You can edit any circle’s name or description.
3. In the pop-up box that opens, replace the existing name and description with new content.
4. Click the Save button to save your changes and close the dialog box.
In each circle’s dialog box, at the bottom, you can click additional links to view the stream for this circle, view circle members on a tab, or delete the circle.
Deleting a Circle
If you no longer plan to use a circle, or created it by mistake, you can delete it.
To delete a circle, follow these steps:
1. Click the Circles icon on the Google+ ribbon.
2. Right-click the circle you want to delete and select Delete Circle from the menu that displays (refer to Figure 4.14).
3. In the pop-up box that opens, click the Delete Circle button to permanently delete the circle.
Caution: Think Twice Before Deleting a Circle
Deleting a circle with no people or that you created by mistake usually has no negative consequences. But if you delete a circle with people in it and you have shared content with this circle, you lose your connection to these people and they can no longer view anything you shared with them. Google+ circle deletions are permanent.
Sharing a Circle
If you’ve created a circle that you think might interest other Google+ users, you can share it. Sharing a circle is most appropriate for circles you’ve created on a specialized topic, such as technology journalists, small business experts, or foodies, for example. You wouldn’t want to publicly share a circle that contains your family, friends, or other personal contacts.
To share a circle, follow these steps:
1. Click the Circles icon on the Google+ ribbon.
2. Click the circle you want to share and then click the Share Circle button in that circle, as shown in Figure 4.15.
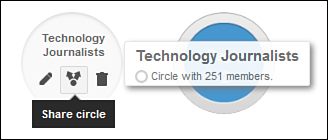
Figure 4.15. Share interesting circles with other Google+ users.
3. In the Share Circle dialog box (see Figure 4.16), add an optional comment to let people know why you’re sharing this circle.
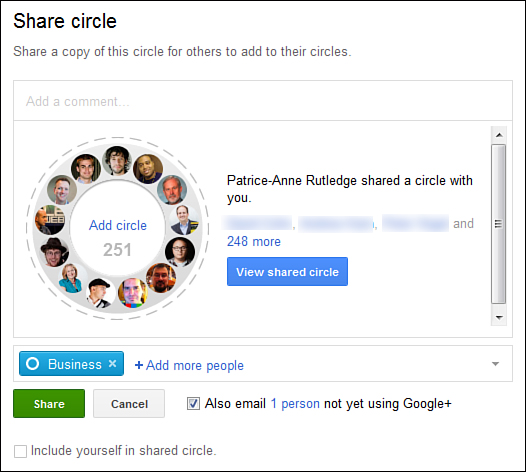
Figure 4.16. Select the people with whom you want to share a circle.
4. Specify who you want to share this circle with. Your options include the following:
• People in specific circles. To share this circle with specific circles, click the Add More People link. In the menu that opens, select the circles you want to share with. When you’re finished selecting circles, click outside the menu to close it.
• A specific person. This is the equivalent of sending a private message on Google+. If the person you want to share with uses Google+, type the person’s name in the text box and select from the pop-up menu of potential matches.
5. If you want to be included in this circle, select the Include Yourself in Shared Circle check box.
6. Click the Share button. Your circle suggestion displays on the stream of the people you shared with.
Summary
In this lesson, you learned how to manage your Google+ circles. Next, you’ll focus on managing your Google+ privacy settings.