
3. Importing Media
Lesson overview
In this lesson, you’ll learn about the following:
• Using the Media Browser to load video files
• Using the Import command to load graphic files
• Choosing where to place cache files
• Capturing from tape
This lesson will take approximately 75 minutes to complete.
To edit your video assets, you need to first get the sources into your project. Because Adobe Premiere Pro can work with so many types of assets, there are multiple methods for browsing and importing media.
Getting started
In this lesson, you’ll learn to import media assets into Adobe Premiere Pro CC. For most files, you will use the Adobe Media Browser, a robust asset browser that works with all the media types you may need to import into Adobe Premiere Pro. You’ll also learn about special cases such as importing graphics or capturing from videotape.
For this lesson, you’ll use the project file you set up in Lesson 2.
1. Continue to work with the project file from the previous lesson, or open it from your hard drive.
2. Choose File > Save As.
3. Rename the file Lesson 03.prproj.
4. Choose a preferred location on your hard drive, and click Save to save the project.
If you do not have the previous lesson file, you can open the file Lesson 03.prproj from the Lesson 03 folder.
Importing assets
When you import items into an Adobe Premiere Pro project, you are creating a link from the original media to a pointer that lives inside your project. This means you are not actually modifying the original files; you’re just manipulating them in a nondestructive manner. For example, if you choose to edit only part of a clip into your sequence, you’re not throwing away the unused media.
You’ll import media into Adobe Premiere Pro in two principal ways:
• Standard importing by choosing File > Import
• By using the Media Browser panel
Let’s explore the benefits of each.
When to use the Import command
Using the Import command is straightforward (and may match what you’re used to from other applications). To import any file, just choose File > Import. You can also use the keyboard shortcut Control+I (Windows) or Command+I (Mac OS) to open the standard Import dialog.
This method works best for self-contained assets such as graphics and audio, especially if you know exactly where those assets are on your drive and you want to quickly navigate to them. This importing method is not ideal for camera format files, which often use complex folder structures with separate files for audio and video. For camera-originated media, you’ll instead rely on the Media Browser.
![]() Tip
Tip
Another way to open the Import dialog is to simply double-click an empty area of the Project panel.
When to use the Media Browser
The Media Browser is a robust tool for reviewing your media assets and then importing them into Adobe Premiere Pro. The Media Browser is designed to properly show you media formats acquired by modern digital video cameras and can convert the complex camera folder structures into easy-to-browse icons and metadata. Being able to see this metadata (which contains important information, such as duration, date, and file type) makes it far easier to select the correct clip from long lists of files or shots.
1. Launch Adobe Prelude.
2. Open the project you want to transfer.

3. Choose File > Export Project.
4. Select the Project check box.
5. Enter a name in the Name field.
6. Change the Type setting to Premiere Pro to create an Adobe Premiere Pro project.
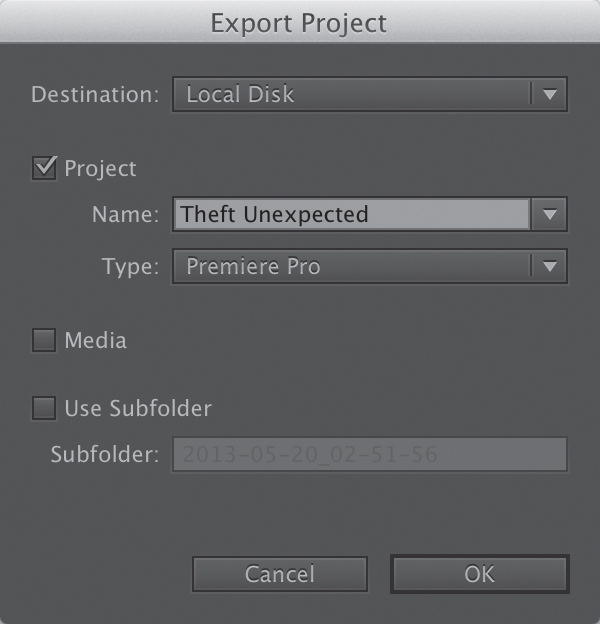
7. Click OK. A new dialog opens.
8. Navigate to a desired destination for the project, and click Choose. A new Adobe Premiere Pro project is created.
9. Switch to Adobe Premiere Pro, and make sure that the project that will be receiving the media is open.
10. Choose File > Import and import the entire project into an existing project. The files should appear in the Project panel.
![]() Note
Note
You can also use the Media Browser to selectively browse the project file.
By default, you’ll find the Media Browser in the lower-left corner of your Adobe Premiere Pro workspace (if your workspace is set to Editing). It’s docked in the same frame as the Project panel. You can also quickly access the Media Browser by pressing Shift+8.
You can position the Media Browser elsewhere onscreen by dragging it, or you can undock it and make it a floating panel by clicking the submenu in the corner of the panel and choosing Undock Panel.
You’ll find that working in the Media Browser is not significantly different from browsing using your computer’s operating system. There are a series of navigation folders on the left side and standard up, down, left, and right arrows in the upper-right corner to change levels of browsing. You can use the up and down arrows to select items within a list and the left and right arrows to move further along a file directory path (such as stepping into a folder to examine its contents).
The major benefits of the Media Browser include the following:
• Narrowing the display to a specific file type, such as JPEG, Photoshop, XML, AAF, and more.
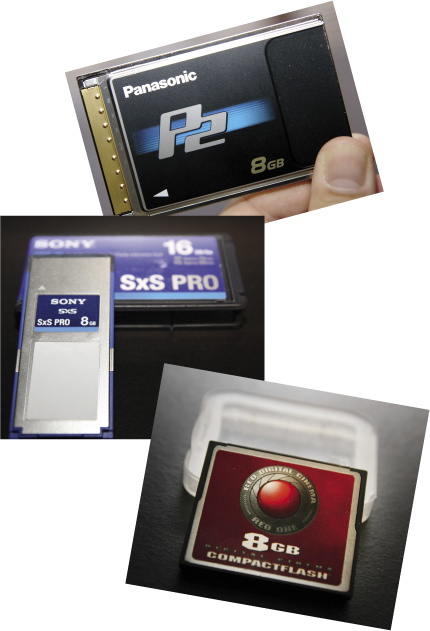
• Autosensing camera data—AVCHD, Canon XF, P2, RED, ARRIRAW, Sony HDV, and XDCAM (EX and HD).
• Viewing and customizing the display of metadata associated with your clips.
• Correctly displaying media that has spanned clips across multiple camera media cards. This is common in professional cameras, and Adobe Premiere Pro will import the files as a single clip even if two cards were used to record the longer file.
![]() Tip
Tip
If you need to use assets from another Adobe Premiere Pro project, you can import that project into your current one. Just use the Media Browser to locate it; once you click a project, all of its assets and bin structure will be revealed. You can then navigate through it and drag it into your current project.
Working with the Media Browser
The Media Browser in Adobe Premiere Pro allows you to easily browse for files on your computer. It can also stay open all the time, giving you immediate access to the media files on your hard drive. It’s fast and convenient and highly optimized for locating and importing footage.
![]() Note
Note
To complete this lesson, you will be importing files from your computer. Be sure you have copied the entire DVD included with this book to your computer. For more details, see the “Getting Started” section in the front of the book.
Using a tapeless workflow
A tapeless workflow (also known as a file-based workflow) is simply the process of importing video from a tapeless camera, editing it, and exporting it. Adobe Premiere Pro CC makes this especially easy because, unlike many competing nonlinear editing systems, it does not require the media from these tapeless formats to be converted before editing. Adobe Premiere Pro can edit tapeless formats (such as P2, XDCAM, AVCHD, and even DSLRs that shoot video) natively with no conversions.
For best results when working with your own camera media, follow these guidelines:
1. Create a new folder for each project.
2. Copy the camera media to your editing hard drive (being sure to keep the existing folder structure intact). Be sure to transfer the complete data folder directly from the root directory of the card. For best results, you can also use the transfer application that is often included by the camera manufacturer to move your video clips. Visually inspect it to ensure that all media files have been copied and that the card and new folder sizes match.
3. Clearly label the folder of the media with the camera information, including card number and date of shoot.
4. Create a second copy of the cards on a second drive.
5. Ideally, create a long-term archive using another backup method, such as Blu-ray Disc, LTO tape, and so on.
![]() Note
Note
You may want to use Adobe Prelude to manage the process of copying and importing tapeless media sources.
Supported video file types
It’s not unusual to work on a project and end up with video clips from different cameras using different file formats. This is no problem for Adobe Premiere Pro, because you can mix clips of different frame sizes on the same Timeline. The Media Browser can see just about any file format. It is particularly well suited for native support of tapeless formats.
The major tapeless formats supported by Adobe Premiere Pro include the following:
• Any DSLR camera that shoots H.264 directly as an .mov or .mp4 file
• Panasonic P2 (DV, DVCPRO, DVCPRO 50, DVCPRO HD, AVC-Intra)
• RED ONE, RED EPIC, and the RED Mysterium X
• ARRIRAW
• XDCAM SD, XDCAM EX, XDCAM HD, and HD422
• Sony HDV (when shot on removable tapeless media)
• AVCHD cameras
• Canon XF
• Apple ProRes
• Avid DNxHD MXF files
Finding assets with the Media Browser
The good news is that the Media Browser is self-explanatory. In many ways, it’s like a web browser (it has forward and back buttons to go through your recent navigation). It also has a list of shortcuts on the side. Finding materials is easy.
1. Work with the Lesson 03.prproj file from earlier. This project should have no assets imported yet.
![]() Tip
Tip
Filter the assets you’re looking for by using the Files of Type menu in the Media Browser.
2. Let’s reset the workspace to the default; choose Window > Workspace > Editing. Then choose Window > Workspace > Reset Current Workspace, and click Yes.
3. Click the Media Browser (it should be docked with the Project panel by default). Make it larger by dragging its right edge to the right.
4. Let’s make the Media Browser easier to see. Place your mouse pointer over the panel; then press the ` (grave) key. It is often in the upper-left corner of your keyboard.
The Media Browser panel should now fill the screen. You may need to adjust the width of columns to make it easier to see items.
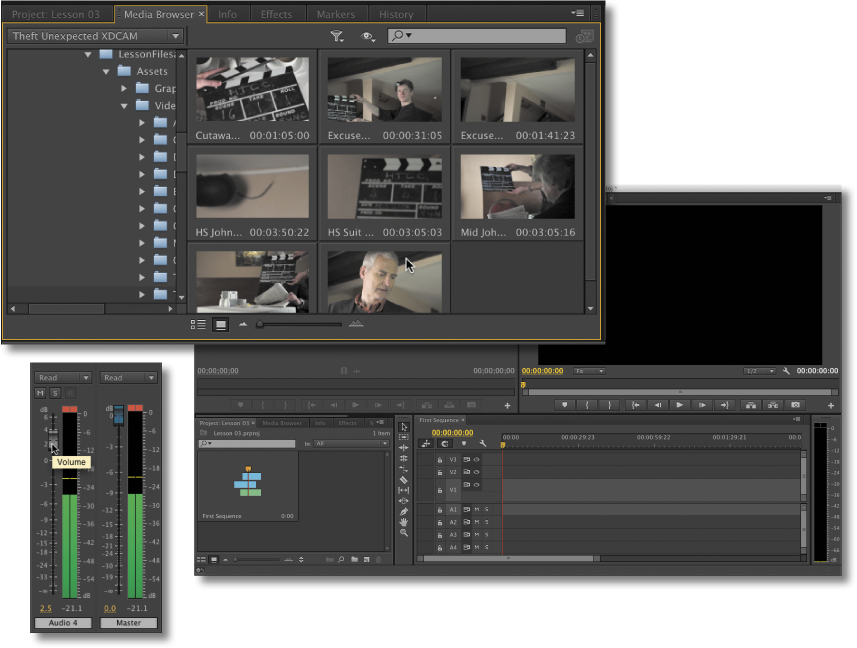
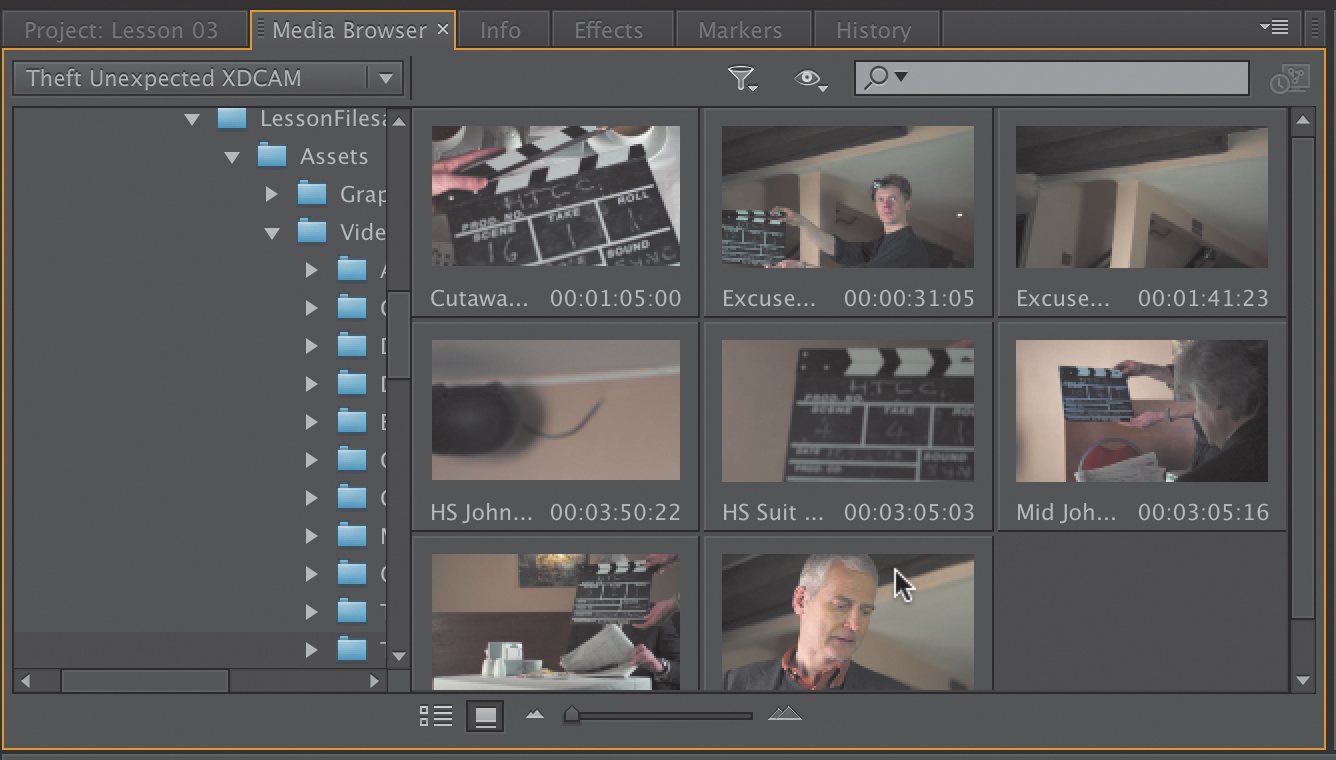
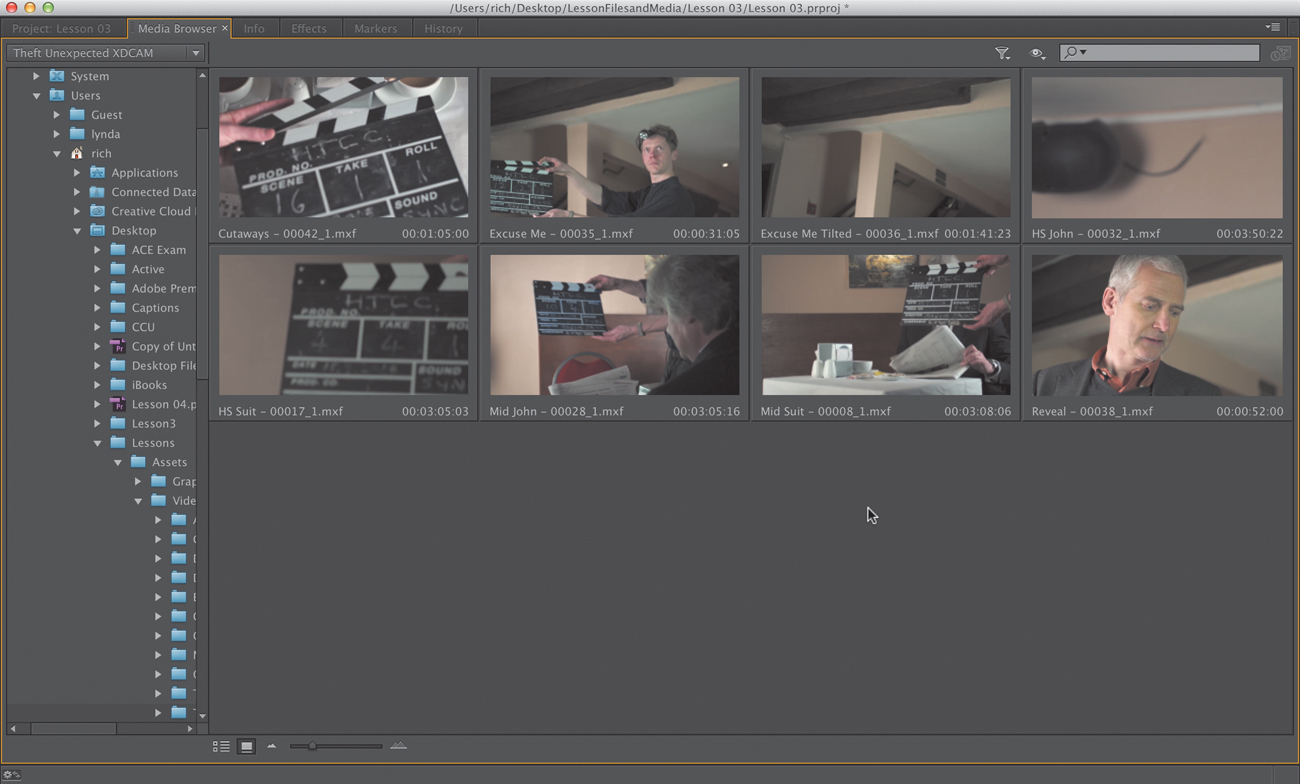
5. Using the Media Browser, navigate to the Lessons/Assets/Video and Audio Files/Theft Unexpected XDCAM folder. You can open each folder by double-clicking.
![]() Note
Note
The Media Browser filters out non-media files, making it easier to browse for video or audio assets.
6. Drag the resize slider in the lower-left corner of the Media Browser to enlarge the thumbnails of the clips. You can use any size you like.
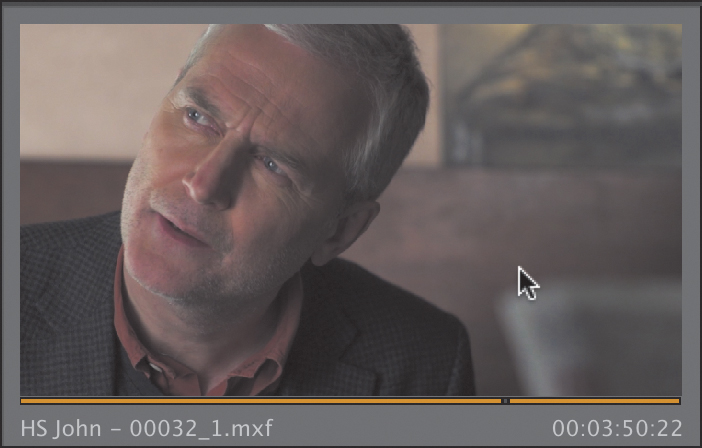
7. Click a clip in the bin to select it.
You can now preview the clip using keyboard shortcuts.
8. Press the L key to preview a clip.
9. To stop playback, press the K key.
10. Rewind the clip by pressing the J key.
11. Experiment with playing back other clips. If the volume of your computer is turned up, you should be able to hear the audio playback clearly.
You can also press the J or L key multiple times to increase the playback rate for fast previews. Use the K key or the spacebar to pause.
12. Let’s import all of these clips into our project. Press Control+A (Windows) or Command+A (Mac OS) to select all of the clips.
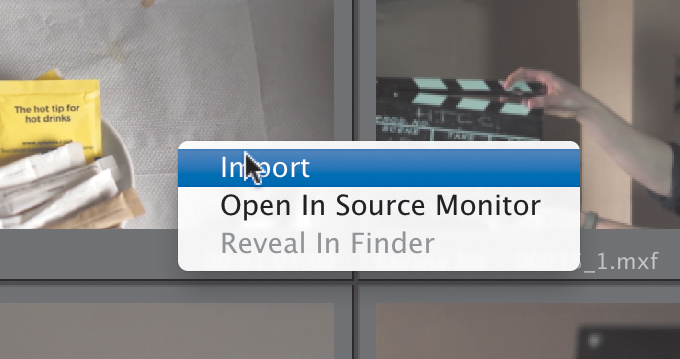
13. Right-click one of the selected clips and choose Import.
Alternatively, you can drag all of the selected clips onto the Project panel’s tab and then down into the empty area to import the clips.
14. Switch back to the Project panel.
Importing images
Graphics have become an integral part of the modern video edit. People expect graphics to both convey information and add to the visual style of a final edit. Fortunately, Adobe Premiere Pro can import just about any image and graphic file type. Support is especially excellent when you use the native file formats created by Adobe’s leading graphic tools, Adobe Photoshop and Adobe Illustrator.
Importing flattened Adobe Photoshop files
Anyone who works with print graphics or does photo retouching has probably used Adobe Photoshop. It is the workhorse of the graphic design industry. Adobe Photoshop is a powerful tool with great depth and versatility, and it is becoming an increasingly important part of the video production world. Let’s explore how to properly import two files from Adobe Photoshop.
To start, let’s import a basic Adobe Photoshop graphic:
1. Click the Project panel to select it.
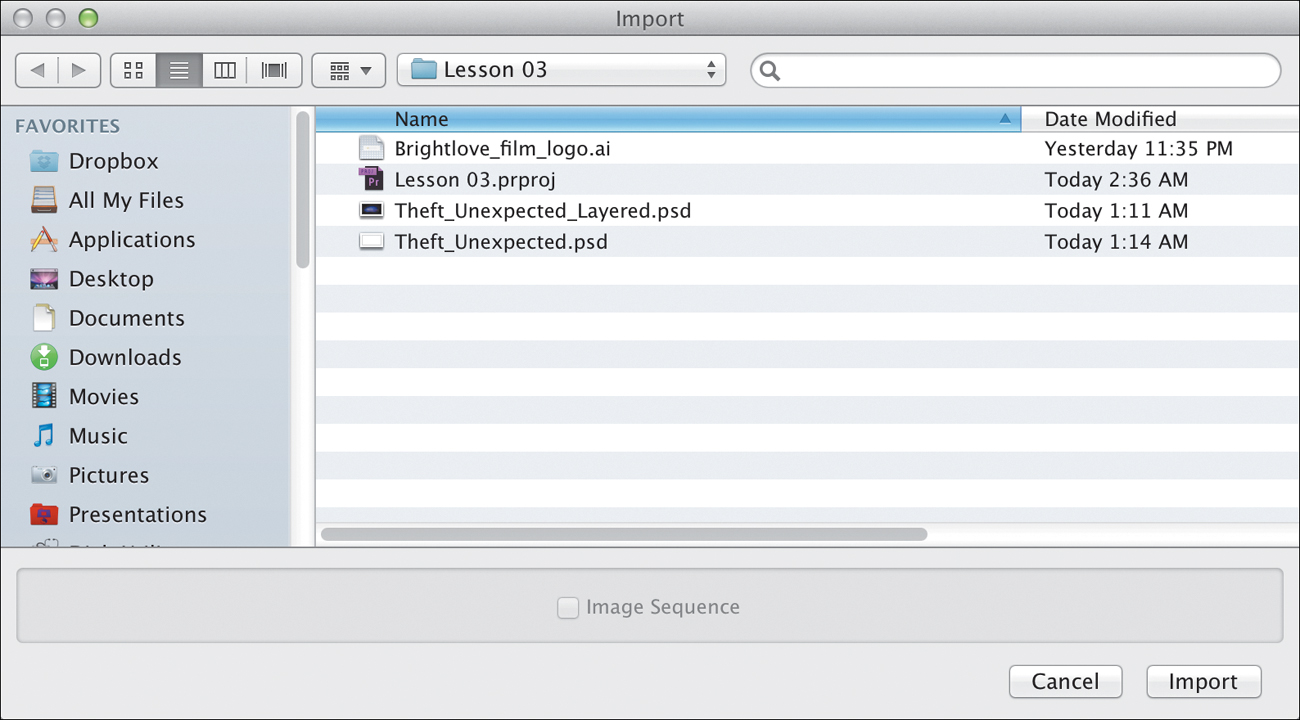
2. Choose File > Import, or press Control+I (Windows) or Command+I (Mac OS).
3. Navigate to Lessons/Lesson 03.
4. Select the file Theft_Unexpected.psd, and click Import.
The graphic is a simple logo file and imports into the Adobe Premiere Pro project.
Importing layered Adobe Photoshop files
Adobe Photoshop can also create graphics using multiple layers. Layers are similar to tracks in your Timeline and allow for separation between elements. These layers can be imported into Adobe Premiere Pro to allow for isolation or animation.
1. Double-click an empty area of the Project panel to open the Import dialog.
2. Navigate to Lessons/Lesson 03.
3. Select the file Theft_Unexpected_Layered.psd, and click Import.
4. A new dialog opens, giving you a choice of how to interpret the layered file. There are four ways to import the file, controlled by a pop-up menu in the Import Layered File dialog:
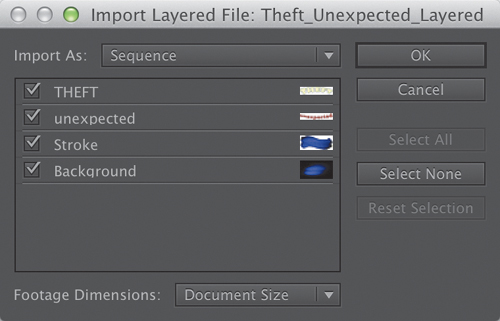
• Merge All Layers: Merges all layers, importing the file into Adobe Premiere Pro as a single, flattened clip.
• Merged Layers: Merges only the layers you select into Adobe Premiere Pro as a single, flattened clip.
• Individual Layers: Imports only the layers you select from the list into a bin, making one clip for each source layer.
• Sequence: Imports only the layers you select, each as a single clip. Adobe Premiere Pro also then creates a new sequence (with its frame size based on the imported document) containing each layer on a separate track (that matches the original stacking order).
Choosing Sequence or Individual Layers allows you to select one of the following options from the Footage Dimensions menu:
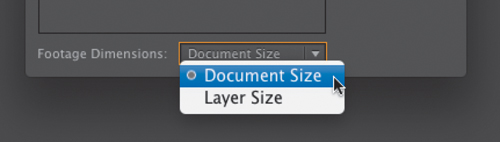
• Document Size: Brings the selected layer in at the size of the original Photoshop document.
• Layer Size: Matches the frame size of the clips to the frame size of their content in the original Photoshop file. Layers that do not fill the entire canvas may be cropped smaller as transparent areas are removed.
5. For this exercise, choose Sequence and use the Document Size option. Click OK.
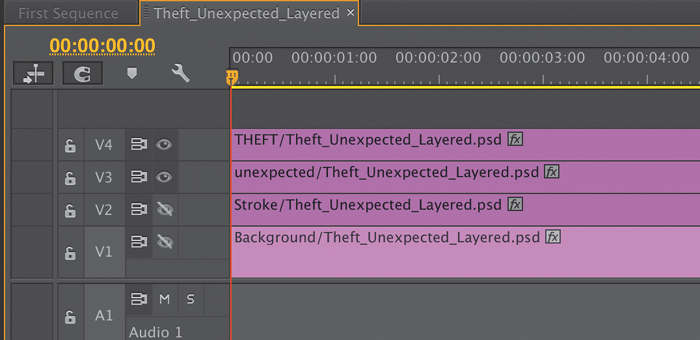
6. Looking in the Project panel, locate the new bin Theft_Unexpected_Layered. Double-click it to open it and reveal its contents.
7. Double-click the sequence Theft_Unexpected_Layered to load it.
8. Examine the sequence in the Timeline panel. Try turning the visibility icons off and on for each track to see how the layers are isolated.
Importing Adobe Illustrator files
Another graphics component in Adobe Creative Suite is Adobe Illustrator. Unlike Adobe Photoshop, which is primarily designed to work with pixel-based (or raster) graphics, Adobe Illustrator is a vector application. This means it is typically used for things such as technical illustrations, line art, and complex graphics, which can be scaled infinitely inside Adobe Illustrator.
Let’s import a vector graphic.
1. Double-click an empty area of the Project panel to open the Import dialog.
2. Navigate to Lessons/Lesson 03.
3. Select the file Brightlove_film_logo.ai, and click Import.
This file type is Adobe Illustrator Artwork. Here’s how Adobe Premiere Pro deals with Adobe Illustrator files:
• Like the Photoshop CC file you imported in the previous exercise, this is a layered graphic file. However, Adobe Premiere Pro doesn’t give you the option to import Adobe Illustrator files in separate layers. It merges them.
• It also uses a process called rasterization to convert the vector (path-based) Adobe Illustrator art into the pixel-based (raster) image format used by Adobe Premiere Pro. This conversion happens during the import stage, so be sure your graphics are large enough in Illustrator before importing into Adobe Premiere Pro.
• Adobe Premiere Pro automatically anti-aliases, or smooths the edges of, the Adobe Illustrator art.
• Adobe Premiere Pro converts all empty areas into a transparent alpha channel so that clips below those areas on the Timeline can show through.
![]() Note
Note
If you right-click Brightlove_film_logo.ai in the Project panel, you’ll note that one option is Edit Original. If you have Illustrator installed on your computer, selecting Edit Original will open this graphic in Illustrator, ready to be edited. So even though the layers are merged in Adobe Premiere Pro, you can return to Adobe Illustrator, edit the original layered file, and save it, and the changes will immediately show up in Adobe Premiere Pro.
Recording a scratch narration track
1. If you’re not using a built-in microphone, make sure your external microphone is properly connected to your computer. You may need to see the documentation for your computer or sound card.
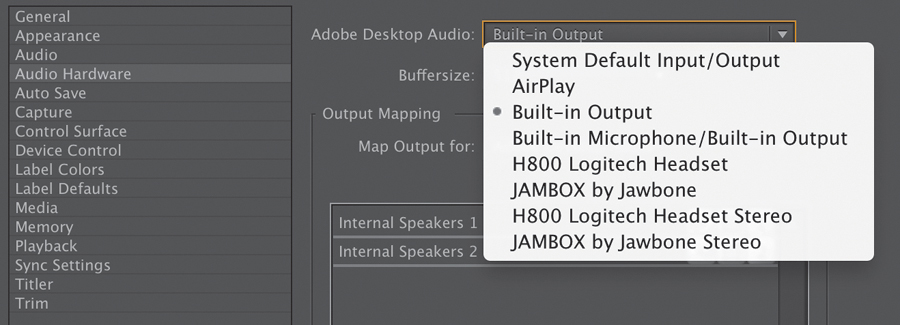
2. Choose Edit > Preferences > Audio Hardware (Windows) or Premiere Pro > Preferences > Audio Hardware (Mac OS) to properly configure your microphone so Adobe Premiere Pro can use it. Use one of the choices from the Default Device pop-up menu, such as System Default Input/Output or Built-in Microphone/Built-in Output, and click OK.
3. Turn down the speakers on your computer to prevent feedback or echo.
4. Open a sequence, and select an empty track in the Timeline.
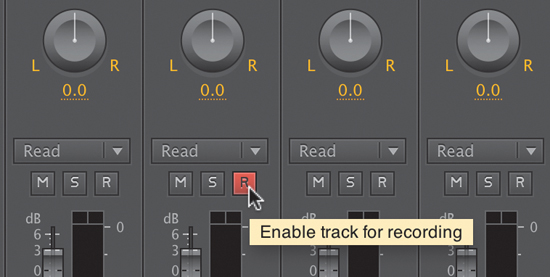
5. Choose Window > Audio Track Mixer (which is likely to be docked in the same frame as your Source Monitor).
6. In the Audio Track Mixer, click the Enable Track For Recording icon (R) for the track you want to use for your audio device.
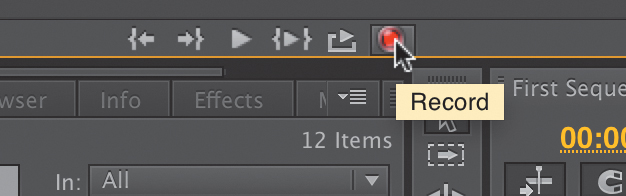
7. Choose the recording input channel from the Track Input Channel menu.
8. Click the Record button at the bottom of the Audio Track Mixer to enter Record mode.
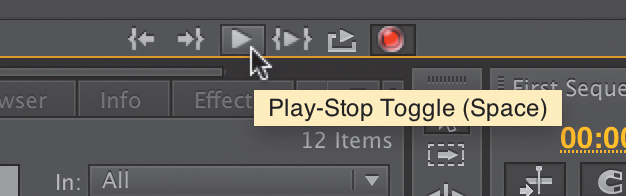
9. Click the Play button to start recording.
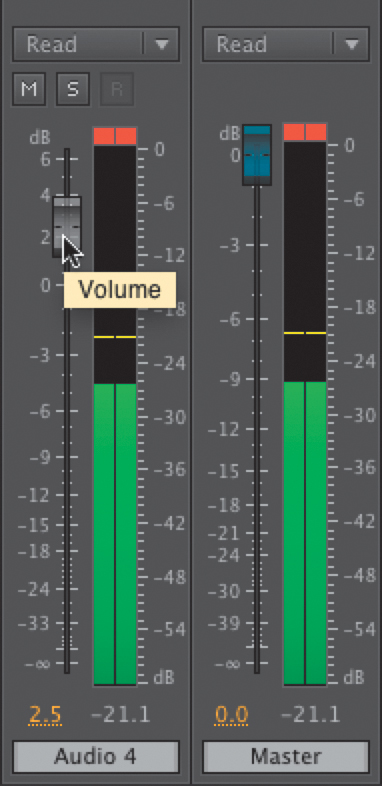
10. If the levels are too loud or too quiet, you can adjust the track volume slider up (louder) or down (quieter) as you record. If you see the red indicators at the top of the VU meters light up, you likely have distortion. A good target to aim for is loud audio registering near 0 dB and quiet audio registering around –18 dB.
11. Click the Stop icon to stop recording.
12. Locate both instances of the recorded audio. The newly recorded audio appears both on the audio track in the Timeline and as a clip in the Project panel. You can select the clip in the Project panel and rename it or delete it from your project.
The media cache
When you import certain video and audio formats, Adobe Premiere Pro may need to process and cache a version. This is particularly true for highly compressed formats. Imported audio files are conformed to a new .cfa file. Most MPEG files are indexed to a new .mpgindex file. You’ll know that the cache is being built if you see a small progress indicator in the lower-right corner of the screen when importing media.
The benefit of the media cache is that it greatly improves performance for previews. It does this by lessening the load on a computer’s CPU. You can fully customize the cache to further improve responsiveness. This media cache database is shared with Adobe Media Encoder, Adobe After Effects, Adobe Premiere Pro, and Adobe Audition, so each of these applications can read from and write to the same set of cached media files.
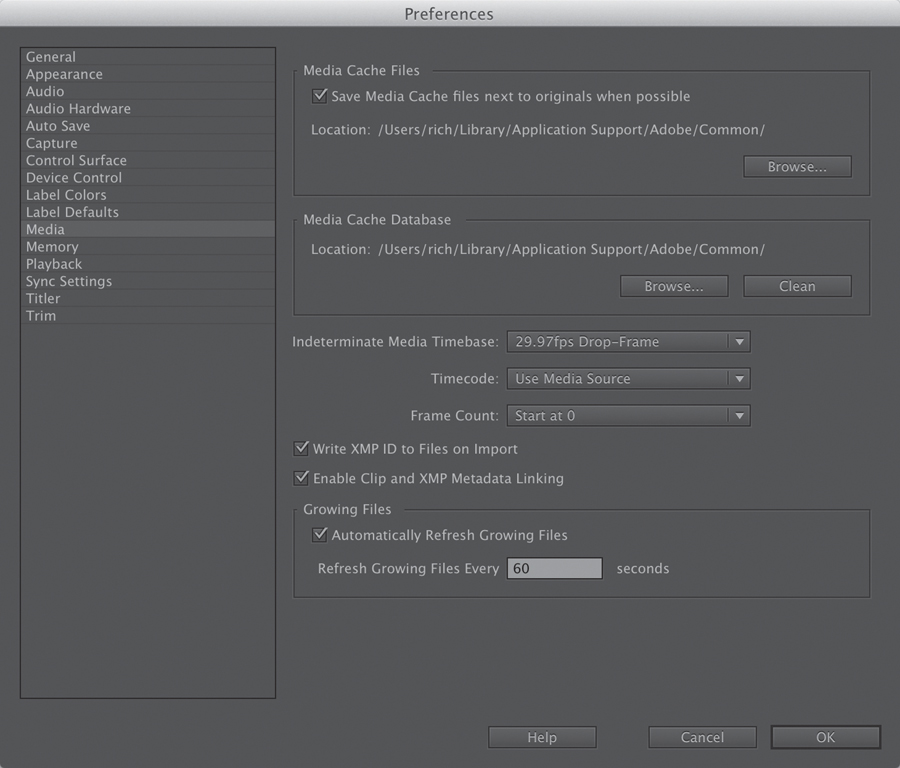
To access controls for the cache, choose Edit > Preferences > Media (Windows) or Premiere Pro > Preferences > Media (Mac OS). Here are the relevant options to consider:
• To move the media cache or the media cache database to a new disk, click the respective Browse button, select the desired location, and click OK. In most cases, you should not move the media cache database after you start to edit. However, it should be cleaned on a regular basis.
• To clean the cache to remove conformed and indexed files, click the Clean button. Any connected drives will have their cache files removed. It’s a good idea to do this after you wrap up projects, because it removes unneeded previews.
• Select “Save Media Cache files next to originals when possible” in order to keep cache files stored on the same drive as the media. This will distribute the media cache files to the same drive as the media, which is generally desirable. If you want to keep everything in one central folder, leave this check box unselected.
Review questions
1. Does Adobe Premiere Pro CC need to convert P2, XDCAM, or AVCHD footage when it is imported?
2. What is one advantage of using the Media Browser to import tapeless media over the File > Import method?
3. When you’re importing a layered Photoshop file, what are the four different ways to import the file?
4. Where can media cache files be stored?
Review answers
1. No. Adobe Premiere Pro CC can edit P2, XDCAM, and AVCHD natively.
2. The Media Browser understands the P2 and XDCAM folder structures and shows you the clips in a visually friendly way.
3. You can choose Merge All Layers for a single file, or select the layers you want by choosing Merged Layers. If you want layers as individual graphics, choose Individual Layers to choose which ones to import as separate graphics, or choose Sequence to import the selected layers and create a new sequence.
4. You can store media cache files in a specified location or automatically next to the original files (when possible).