Hour 6. Lights and Cameras
What You’ll Learn in This Hour:
• How to work with lights in Unity
• The core elements of cameras
• How to work with multiple cameras in a scene
• How to work with layers
In this hour you will learn to use lights and cameras in Unity. You will start by looking at the main features of lights. You will then explore the different types of lights and their unique uses. Once you are finished with lights, you will begin working with cameras. You will learn how to add new cameras, place them, and generate interesting effects with them. You will finish by learning about layers in Unity.
Lights
In any form of visual media, lights go a long way in defining how it is to be perceived. Bright, slightly yellow light can make a scene look sunny and warm. Take the same scene and give in a low intensity, blue light and it will look eerie and disconcerting. Most scenes that strive for realism or dramatic effect will implore at least one, and often many, lights. In you past you have briefly worked with lights to highlight other elements. In this section, you will work with lights more directly.
Note: Repeat Properties
The different lights share many of the same properties. If a light has a property that has already been covered under a different light type, it won’t be covered again. Just remember that if two different light types have properties with the same names, they do the same thing.
Note: What Is A Light?
In Unity lights are not objects themselves. Instead, lights are a component. This means that when you add a light to a scene, you are really just adding a game object with the “Light” component. This light component is capable of being any of the types of light you can use.
Point Lights
The first light type you will be working with is the point light. The point light can be thought of as a light bulb. All light is emitted from one central location out in every direction. The point light is also the most common type of light for illuminating interior areas.
To add a point light to a scene click “GameObect->Create Other->Point Light”. Once in the scene the point light game object can be manipulated just like any other. Table 6.1 lists the point light properties with their description:
Table 6.1. Point Light Properties

Note: Baking
The term “baking” refers to the process of adding light and shadow to textures and objects during creation. This can be done with Unity or with a graphical editor. For instance, if you were to make a wall texture with a dark spot on it that resembled a human shadow, and then put a human model next to the wall it was on, it would seem like the model was casting a shadow on the wall. The truth is though that the shadow was “baked” into the texture. Baking can make your games run much more quickly because the engine won’t have to calculate light and shadow every single frame. That’s a big deal!
Let’s take a moment to build a scene with some dynamic point lighting. The completed version of this project is available in the book assets under Hour 6 titled “Hour6_PointLight”.
1. Create a new scene or project.
2. Add a plane to the scene (“GameObject->Create Other->Plane”). Ensure the plane is positioned at (0, .5, 0) and it rotated (270, 0, 0). The plane should be visible to the camera.
3. Add two cubes to the scene. Position them at (-1.5, 1, -5) and (1.5, 1, -5).
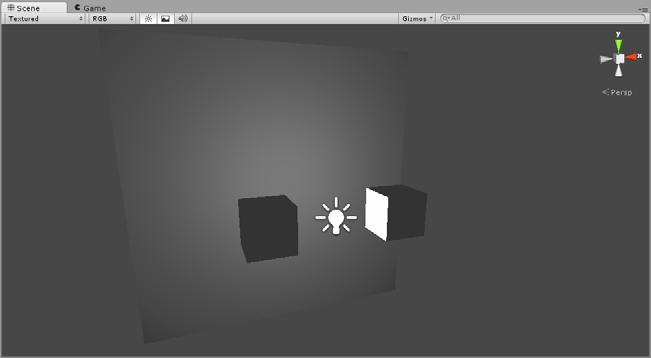
4. Add a point light to the scene (“GameObject->Create Other->Point Light”). Position the point light at (0, 1, -5). Notice how the light illuminates the inner sides of the cubes and the background plane (see Figure 6.1).
Figure 6.1. The results of the exercise.
5. Continue exploring the light properties. Be sure to experiment with the light color, range, and intensity.
Spot Lights
Spot lights work a lot like the headlights in a car or flashlights. The light of a spot light begins in at a central spot and them radiates out in a cone. In other words, spot lights illuminate whatever is in front of them while leaving everything else in the dark. Unlike a point light, which sends light in every direction, spot lights can be aimed.
To add a spot light to your scene click “GameObject->Create Other->Spotlight”. Alternatively, if you already have a light in your scene you can change its type to “Spot”. It will then become a spot light.
Spot lights only have one property not already covered and that is “Spot Angle”. The spot angle determines the radius of the cone of light emitted by the spot light.
Directional Lights
The last light type you will work with in this section is the directional light. The directional light is similar to the spot light in that it can be aimed. Unlike the spot light, though, the directional light illuminates the entire scene. You can think of a directional light as a sun. In fact, you used a directional light already as a sun in the previous hours working with terrain. The light from a directional light radiates evenly in parallel lines across a scene.
To add a directional light to your scene click “GameObject->Create Other->Directional Light”. Alternatively, if you already have a light in your scene you can change its type to “Directional”. It will then become a directional light.
Directional lights have one additional property that hasn’t been covered yet: “Cookie Size”. Cookies will be covered later, but basically this property controls how big a cookie is and thus how many times it is repeated across a scene.
Note: Honorable Mention: Area Light
There is one more light type that is not being covered in this text and that is the area light. An area light is a Unity Pro only feature that exists for a process called lightmap baking. These topics are more advanced than the aim of this text and aren’t need for basic game projects. If you would like to learn more about this, Unity has a wealth of online documentation.
Creating Lights out of Objects
Since lights in Unity are components, any object in a scene can be a light. To add a light to an object first select the object. Then in the inspector view click the “Add Component” button. A new list should popup. Select “Rendering” and then “Light”. Now your object has a light component. An alternative way to add a light to an object is to select the object and click “Component->Rendering->Light” in the menu.
There are a couple things to note about adding lights to objects. The first is that the object will not block the light. This means that putting a light inside a cube will not stop the light from radiating. The second this is that adding a light to an object does not make it glow. The object itself will not look like it is giving off light, but it is.
Halos
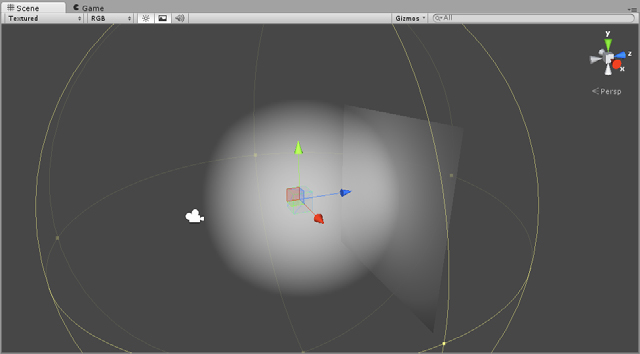
Halos are glowing circles that appear around lights in foggy or cloudy conditions (see Figure 6.2). They occur because light is bouncing off of small particles all around the light source. In Unity, you can add halos to your lights very easily. Each light has a checkbox called “Draw Halo”. If it is checked, then a halo will be drawn for the light.
Figure 6.2. A halo around a light.
Caution: Unity Bug
As of Unity 4.1 there is a bug when working with halos. As of the time of writing, you need to perform a work around to get the halo to appear around a light. When you check the “Draw Halo” checkbox on a light, if nothing appears, you will need to add a halo component (if a halo appears, you do not need to follow these steps). To do this, select your light and click “Component->Effects->Halo”. The halo for your light should now appear. At this point you can remove the halo component you just added. You should also only have to do this once per scene. If the halo still isn’t appearing, make sure to zoom out as the halo will not appear when the camera is too close.
The size of a halo is determined by the light’s range. The bigger the range, the bigger the halo. Unity also provides a few properties that apply to all halos in a scene. These properties can be accessed by clicking “Edit->Render Settings”. The render settings will then appear in the inspector view (see Figure 6.3).
Figure 6.3. The render settings
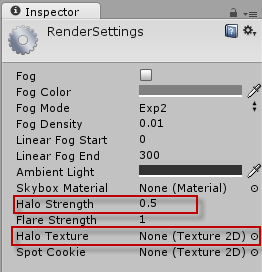
The halo strength property determines how big the halo will be based off of the light’s range. For instance, if a light has a range of 10 and the strength is set to 1, then then halo will extend out all 10 units. If the strength were set to .5, then the halo would extend out only 5 units (10 * .5 = 5). The halo texture property allows you to specify a different shape for your halo by providing a new texture. If you do not want to use a custom texture for your halo, you can leave it blank and the default circular one will be used.
Cookies
If you have ever shone a light on a wall and then put your hand in between the light and the wall, you probably noticed that some of the light was blocked by your hand leaving a hand shaped shadow on the wall. You can simulate this effect in Unity with cookies. Cookies are special textures that can be added to lights to dictate how the light radiates. Cookies are a little different for point, spot, and directional lights. Spot lights and directional lights both use black and white flat textures for cookies. Spot lights don’t repeat the cookies and directional lights do. Point lights also use black and white textures, but they must be placed in a cubemap. A cubemap is 6 textures placed together to form a box (like a skybox).
Adding a cookie to a light is a fairly straight forward process. You simply apply a texture to the “Cookie” property of the light. The trick to getting a cookie to work is setting the texture up correctly ahead of time. To set up the texture correctly, select it in Unity and then change its properties in the inspector window. Figure 6.4 shows the correct properties for a point cookie, a spot cookie, and a directional cookie.
Figure 6.4. The texture properties of cookies for point, spot, and directional lights

Let’s take a moment to add a cookie to a spot light so that you can see the process start to finish. This exercise requires the “biohazard.png” image in the book assets for Hour 6.
1. Create a new project or scene. Add a plane to the scene and position it at (0, 1, 0) with a rotation of (270, 0, 0).
2. Add a spot light to the main camera by selecting the main camera and then clicking “Component->Rendering->Light” and changing the type to “Spot”. Set the range to 18, the spot angle to 40, and the intensity to 3.
3. Drag the biohazard.png texture from the book assets into your project. Select the texture and in the inspector view change the “Texture Type” to “Advanced”. Check the “Alpha from Grayscale” checkbox. Check the “Border Mips Maps” checkbox. Finally, change the “Wrap Mode” to “Clamp”. Click “Apply”. If you are unsure if you have the correct settings, check the spot settings in Figure 6.4 above.
4. With the main camera selected, click and drag the biohazard texture into the “Cookie” property of the light component. You should see the biohazard symbol projected onto the plane (see Figure 6.5).
Figure 6.5. Spot light with a cookie.

5. Experiment with different ranges and intensities of the light. Rotate the plane and see how the symbol warps and distorts.
Cameras
The camera is the player’s view into the world. It provides their perspective and controls how things appear to them. All games in Unity have at least one camera. In fact, a camera is always added for you whenever you create a new scene. The camera always appears in the hierarchy as “Main Camera”. In this section, you will learn all about cameras and how to use them for interesting effects.
Anatomy of a Camera
All cameras share the same set of properties which dictate how they behave. Table 6.2 contains all of the camera properties as well as their description.
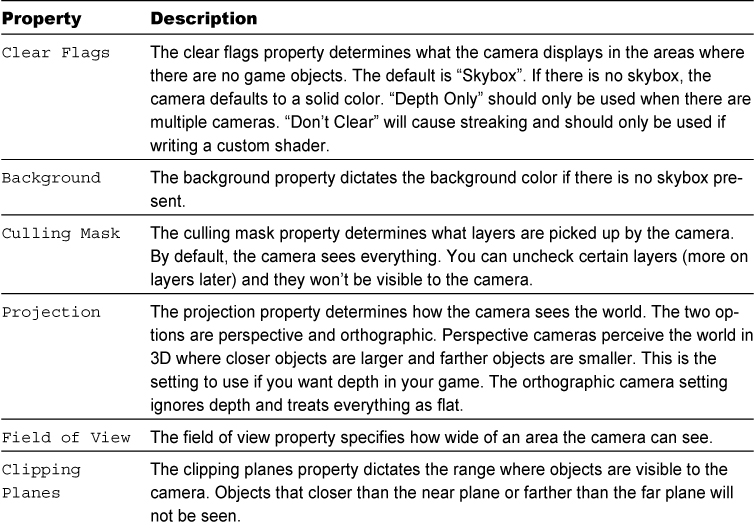
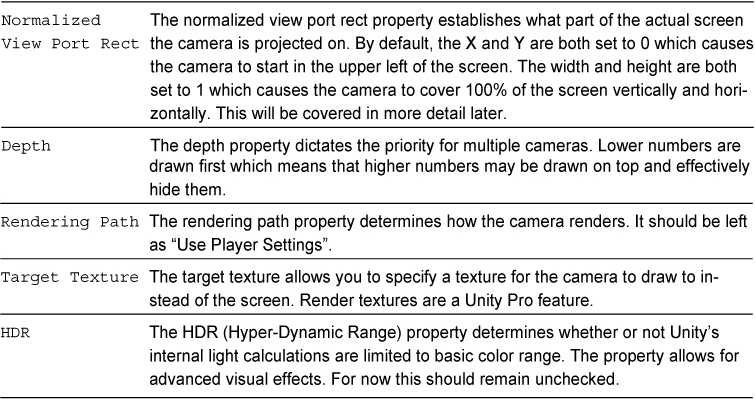
Cameras have many properties, but most can be set once and forgotten about. Cameras also have a few extra components. The “GUI Layer” allows the camera to see GUI elements (will be covered later in this book). The “Flare Layer” allows the camera to see the lens flares of lights. Finally, the “Audio Listener” allows the camera to pick up sound. If you add more cameras to a scene, you will need to remove their audio listeners. There can be only one audio listener per scene.
Multiple Cameras
There are many effects in modern games that would not be possible without multiple cameras. Thankfully, you can have as many cameras as you want in a Unity scene. To add a new camera to a scene click “GameObject->CreateOther->Camera”. Alternatively, you can add the camera component to a game object already in your scene. To do that, select the object and click “Add Component” in the inspector. Select “Rendering->Camera” to add the camera component. Remember that adding a camera component to an existing object will not automatically give you the Gui Layer, Flare Layer, or Audio Listener.
Caution: Multiple Audio Listeners
As mentioned above, a scene can only have a single audio listener. In older versions of Unity, having two or more listeners would cause an error and prevent a scene from running. In Unity 4, having multiple listeners will just display a warning message, though audio may not be heard correctly. This topic will be covered in greater detail in a later hour.
Split Screen and Picture-in-Picture
As you saw above, having multiple cameras is a scene doesn’t do much good if one simply draws over the other. In this section, you will learn to use the “Normalized View Port Rect” to achieve split screen and picture-in-picture effects.
The normalized view port basically treats the screen as a simple rectangle. The upper left hand corner of the rectangle is (0, 0) while the lower right hand corner is (1, 1). This does not mean that the screen has to be a perfect square. Instead, think of the coordinates as percentages of the size. So a coordinate of 1 means 100% while a coordinate of .5 means 50%. With this in mind, placing cameras on the screen becomes very easy. By default, cameras project from (0, 0) with a width and height of 1 (or 100%). This causes them to take up the entire screen. If you were to change those numbers, however, you would get a different effect.
Let’s walk through creating a split screen camera system. This type of system is very common in two player games where the players have to share the same screen. This exercise will build off of the previous “Try-It-Yourself” for multiple cameras above.
1. Open up the previously created project.
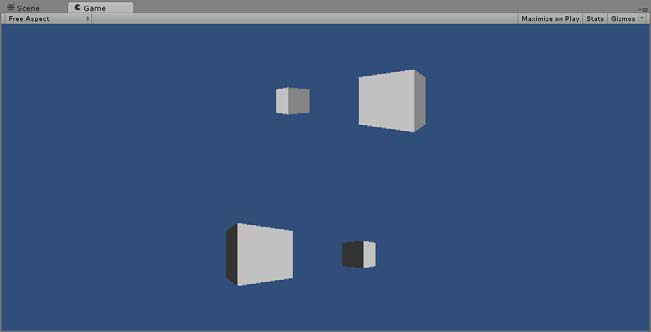
2. Ensure that the main camera has a depth of -1. Ensure the X and Y properties of the camera’s “Normalized View Port Rect” are both zero. Set the W and H properties to 1 and .5 respectively (100% of the width and 50% of the height).
3. Ensure that the second camera also has a depth of -1. Set the X and Y properties of the view port to (0, .5). This will cause the camera to begin drawing halfway down the screen. Set the W and H properties to 1 and .5 respectively.
4. Run the scene and notice how both cameras are now projecting on the screen at the same time (see Figure 6.6). The screen can be split like this as many times as you want.
Figure 6.6. The split screen effect.
Picture-in-Picture is a common way to create effects like minimaps. With this effect, one camera is going to draw over another one in a specific area. This exercise will build off of the previous “Try-It-Yourself” for multiple cameras above.
1. Open up the previously created project.
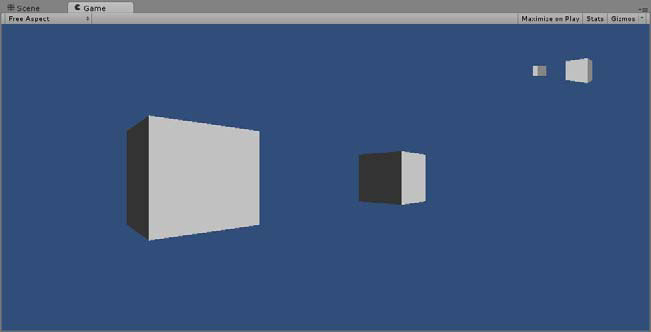
2. Ensure that the main camera has a depth of -1. Ensure the X and Y properties of the camera’s “Normalized View Port Rect” are both zero and the W and H properties both 1.
3. Ensure the depth of the second camera is 0. Set the X and Y property of the view port to (.75, .75) and set the W and H values to .2 each.
4. Run the scene. Notice how the second camera appears in the upper right hand corner of the screen (see Figure 6.7). Experiment with the different view port settings to get the camera to appear in the different corners.
Figure 6.7. The picture-in-picture effect.
Layers
With so many objects in a project and in a scene, it can often be difficult to organize them. Sometimes you want items to only be viewable by certain cameras or illuminated by certain lights. Sometimes you want collision to occur only between certain types of objects. Unity’s answer to this organization is layers. Layers are groupings of similar objects so that they can be treated a certain way. By default, there are 8 built in layers and 24 layers for the user to define.
Caution: Layer Overload!
Adding layers can be a great way to achieve complex behaviors without doing a lot of work. A word of warning though: do not create layers for items unless you need to. Too often, people arbitrarily create layers when adding objects to a scene with the thinking that they might need them later. This approach can lead to an organizational nightmare as you try to remember what each layer is for and what it does. In short, add layers when you need them. Don’t try to use layers just because you can.
Working with Layers
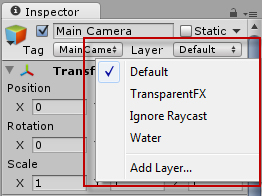
Every game objects starts in the “Default” layer. That is, the object has no specific layer to belong to so it is lumped in with everything else. You can easily add an object to a layer in the inspector view. With the object selected, click the “Layer” drop down in the inspector and choose a new layer for the object to be a part of (see Figure 6.8). By default, there are 4 layers to choose from: Default, TransparentFX, Ignore Raycast, and Water. You can safely ignore most of these for now as they are not very useful to you at this point.
Figure 6.8. The layer drop down menu.
While the current built in layers aren’t exactly useful to you, you can easily add new layers. You add layers in the “Tag Manager” and there are three ways to open the tag manager:
• With an object selected, click the layers drop down and select “Add Layer” (see Figure 6.8 above).
• In the menu at the top of the editor click “Edit->Project Settings->Tags”.
• Click the “Layers” selector in the scene toolbar and choose “Edit Layers” (see Figure 6.9).
Figure 6.9. The layer selector in the scene toolbar.
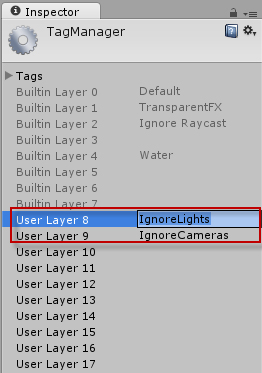
Once in the tag manager, simply click to the right of one of the user layers to give it a name. Figure 6.10 illustrates this process and shows two new layers being added (they are added for this picture and you won’t have them unless you add them yourself).
Figure 6.10. Adding new layers to the tag manager.
Using Layers
There are many uses for layers. The usefulness of layers is limited only by what you can think to do with them. In this section, thought, three common uses will be covered.
The first is the ability to hide layers from the scene view. By clicking on the “Layers” selector in the scene view toolbar (see Figure 6.9 above) you can choose which layers appear in the scene view and which don’t. By default, the scene is set up to show everything.
Tip: Invisible Scene Items
One common mistake for people working new to Unity is accidently changing the layers visible in the scene view. If you are not familiar with the ability to make layers invisible, this can be quite confusing. Just note that if at any time items are not appearing in the scene view when they should, check the layer selector to ensure that it is set to show everything.
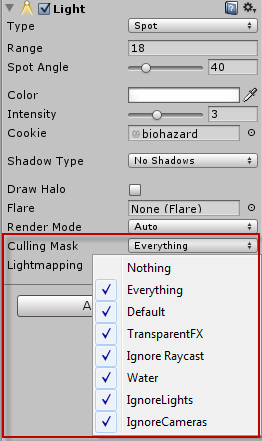
The second useful ability of layers is to use them to exclude objects from being illuminated by light. This can be useful if you are making a custom user interface, shadowing system, or are using a complex lighting system. To prevent a layer from being illuminated by a light, select the light. Then, in the inspector view click the “Culling Mask” property and deselect any layers that you want ignored (see Figure 6.11).
Figure 6.11. The Culling Mask property.
The last thing to know about layers is that you can use them to determine what a camera can and cannot see. This is useful if you want to build a custom visual effect using multiple cameras for a single viewer. Just like above, to ignore layers simply click the “Culling Mask” drop down on the camera component and deselect anything you don’t want to appear.
Summary
This hour you learned about lights and cameras. You worked with the different types of lights. You also learned to add cookies and halos to the lights you had in the scene. From there, you got hands on with cameras. You learned all about the basics of cameras as well as adding multiple cameras to create a split screen and picture-in-picture effect. You wrapped up the hour by learning about layers in Unity.
Q&A
Q. I noticed we skipped lightmapping. Is it important to learn?
A. Lightmapping is a very useful technique for optimizing the performance of a scene. That being said, it is a more advanced topic and is not necessary for the projects you will be making at this stage. It will be more important for you when you get into more advanced game projects.
Q. How do I know if I want a perspective or orthographic camera?
A. As mentioned in the text, a general rule of thumb is that you want perspective for 3D games and effects and orthographic for 2D games and effects.
Workshop
Take some time to work through the questions here to ensure you have a firm grasp on the material.
Quiz
1. If you want to illuminate an entire scene with one light, which type should you use?
2. How many cameras can be added to a scene?
3. How many user defined layers can you have?
4. What property determines which layers are ignored by lights and cameras?
Answers
1. A directional light is the only light that is applied evenly to an entire scene.
2. You can have as many as you want.
3. 24.
4. The culling mask property.
Exercise
In this exercise you will have a chance to work with multiple cameras and lights. You will have a bit of leeway in the construction of this exercise so feel free to be creative.
1. Create a new scene or project. Add a sphere to the scene and place it at (0, 0, 0).
2. Add four point lights to your scene. Place them at (-4, 0, 0), (4, 0, 0), (0, 0, -4), and (0, 0, 4). Give each of them their own color. Set the ranges and intensities how you would like to create a visual effect on the sphere that you find enjoyable.
3. Delete the main camera from your scene (right click the main camera and select “Delete”). Add four cameras to the scene. Disable the audio listener on three of them. Position them at (2, 0, 0), (-2, 0, 0), (0, 0, 2), and (0, 0, -2). Rotate each of them about the y axis until they are facing the sphere.
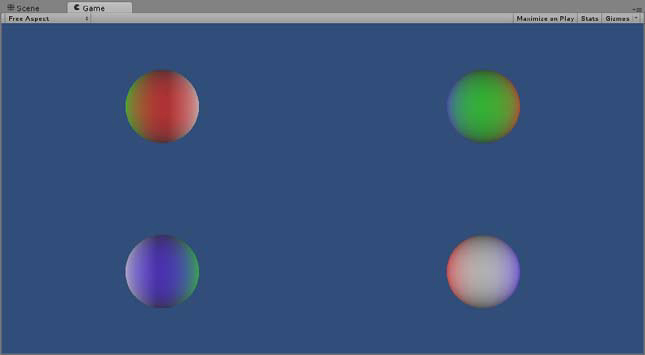
4. Change the view port settings on the four cameras so that you achieve a split screen effect with all four cameras. You should have a camera displaying in each corner of the screen taking up a quarter of the screen’s size (see Figure 6.12). This step is left for you to complete. If you get stuck, however, a completed version of this exercise is available in the Hour 6 assets titled “Hour6_Exercise”.
Figure 6.12. The completed exercise.