
1. Introducing the Workspace
Lesson Overview
In this lesson, you’ll learn how to do the following:
• Open documents.
• Select and use tools.
• Use the Application bar and Control panel.
• Manage document windows.
• Work with panels.
• Customize the workspace.
• Change the magnification of a document.
• Navigate through a document.
• Use context menus and panel menus.
• Change Interface preferences.

This lesson will take about 45 minutes to complete.
To download the project files for this lesson, log in or set up an account at peachpit.com. Enter the book’s ISBN (9780134664095) or go directly to the book’s product page to register. Once on the book’s page, click the Register Your Product link. The book will show up in your list of registered products along with a link to the book’s bonus content. Click the link to access the lesson files for the book. Store the files on your computer in a convenient location, as described in the “Getting Started” section of this book. Your Account page is also where you’ll find any updates to the chapters or to the lesson files.

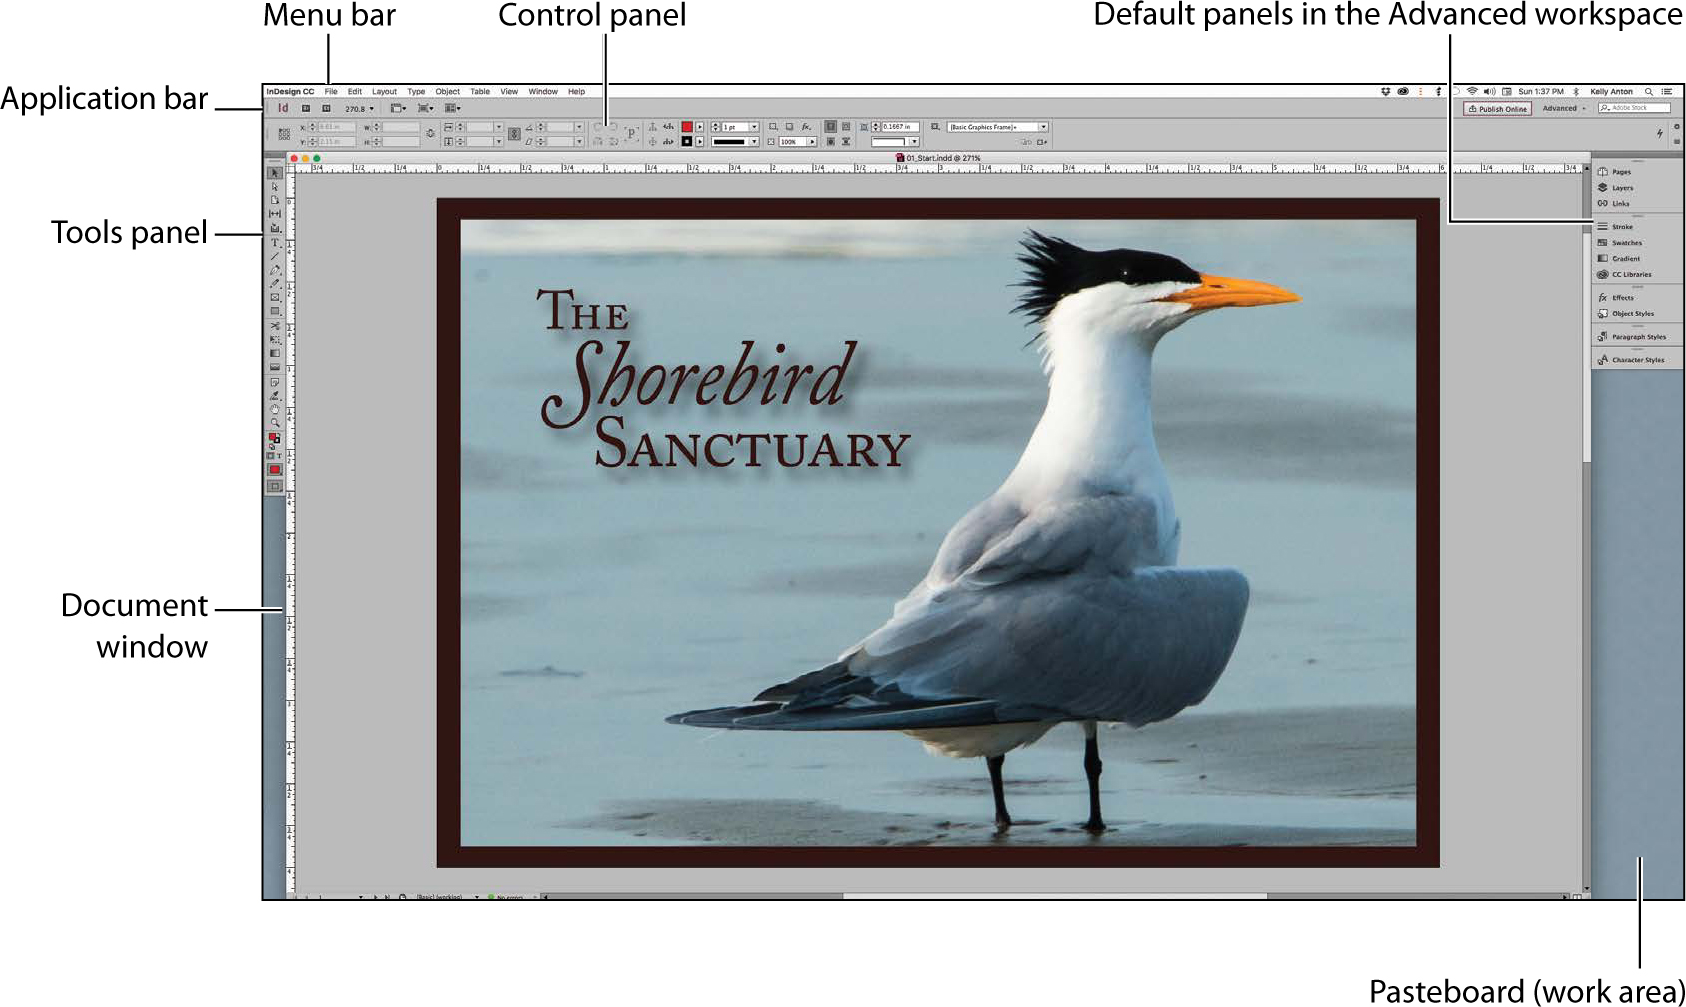
The intuitive InDesign interface makes it easy to create compelling layouts. It is important to understand the InDesign work area to make the most of its powerful layout and design capabilities. The work area consists of the Application bar, Control panel, document window, menus, pasteboard, Tools panel, and other panels.
Getting started
In this lesson, you’ll practice using tools, using panels, and navigating through a simple layout. This is the final version of the document—you will not make permanent changes to objects, add graphics, or modify text. You will use this document only to explore the InDesign work area.
1 To ensure that the preferences and default settings of your Adobe InDesign program match those used in this lesson, move the InDesign Defaults file to a different folder following the procedure in “Saving and restoring the InDesign Defaults file” on pages 4–5.
2 Start Adobe InDesign.
3 To ensure that the panels and menu commands match those used in this lesson, choose Window > Workspace > [Advanced], and then choose Window > Workspace > Reset Advanced.
4 Choose File > Open, and open the 01_Start.indd file in the Lesson01 folder, located inside the Lessons folder within the InDesignCIB folder on your hard disk.
![]() Note
Note
The screen captures in this book show the Medium Light interface. Interface elements such as panels and dialog boxes will be darker on your screen. You will learn to change this Interface preference later in the lesson.
5 If an alert informs you that the document contains links to sources that have been modified, click Update Links.
6 If the Missing Fonts dialog box displays, click Sync Fonts to access any missing fonts through Adobe Typekit. Click Close when font syncing is complete. For more information on using Adobe Typekit, see “Getting Started” at the beginning of this book.
7 Choose File > Save As, rename the file 01_Introduction.indd, and save it in the Lesson01 folder.
8 To display the document at a higher resolution, choose View > Display Performance > High Quality Display.
9 Using the scroll bars on the document window, scroll down to see the second page of the postcard, and then scroll back up to the first page of the postcard.
Looking at the workspace
The InDesign work area encompasses everything you see when you first open or create a document.
• Menu bar, Application bar, and Control panel, at the top of the screen
• Tools panel, docked at the left side of the screen
• Commonly used panels, docked at the right side of the screen
You can customize the InDesign work area to suit your work style. For example, you can choose to display only the panels you frequently use, minimize and rearrange panel groups, resize windows, and so on. The configuration of the work area is referred to as the “workspace.” You can save your custom workspace setup or choose among special-purpose configurations such as Digital Publishing, Printing And Proofing, and Typography.
Selecting and using tools
The Tools panel contains tools for creating and modifying page objects, adding and formatting text and images, and working with color. By default, the Tools panel is docked to the upper-left corner of the work area. In this exercise, you will select and experiment with several tools.
Using the Selection tool
The Selection tool lets you move and resize objects, and it lets you select objects for formatting, such as applying color. You will click to select the Selection tool. Later, you will experiment with other methods of selecting tools.
![]() Tip
Tip
The building blocks of InDesign pages are objects, which include frames (for containing text and graphics) and lines.
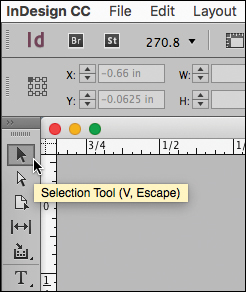
1 Locate the Tools panel at the far-left side of the screen.
2 Point at each tool in the Tools panel to see its name.
3 Click the Selection tool (![]() ), the top tool on the Tools panel.
), the top tool on the Tools panel.
4 Click near the bird’s beak to select the graphics frame containing the bird photograph.
![]() Note
Note
If you click and hold the mouse button before you start to drag, you can see the object as you drag it.
5 Drag the frame up and to the right to see how frames move.

![]() Note
Note
The page contains three text frames and a black background frame you can experiment with moving.
6 After you release the mouse button, press Ctrl+Z (Windows) or Command+Z (Mac OS) to undo the move.
7 With the Selection tool still selected, click other objects on the page, and drag them to new locations. Undo each move immediately after you do it.
Using the Type tool
Now you will switch to the Type tool, which lets you enter, edit, and format text. Rather than clicking to select it, you will use its keyboard shortcut.
1 Point at the Type tool (![]() ) to display its tool tip. The letter shown in parentheses indicates a single-letter keyboard shortcut for selecting this tool. In this case, the letter is T.
) to display its tool tip. The letter shown in parentheses indicates a single-letter keyboard shortcut for selecting this tool. In this case, the letter is T.
2 Point at various other tools to see their single-letter keyboard shortcuts.
![]() Note
Note
The single-letter shortcuts do not work when the text insertion bar is in text (which results in typing).
3 Press T on the keyboard to select the Type tool.
4 Click in the word “Shorebird” in the middle of the postcard.

5 Type a few characters inside the word “Shorebird” to get a feel for the Type tool.
6 Press Ctrl+Z (Windows) or Command+Z (Mac OS) to undo any changes to the word “Shorebird.”
![]() Tip
Tip
As you learn InDesign and experiment with designs, remember that you can undo as many changes as you want.
7 With the Type tool still selected, click in other words and revise the text. Undo each change immediately after you do so.
Using the Line tool and Hand tool
Now you will switch to the Line tool, which lets you create horizontal, vertical, and diagonal lines. Once you have experimented with the Line tool, you will select the Hand tool temporarily by holding its keyboard shortcut: H. When you release the keyboard shortcut, InDesign reverts to the previously selected tool. This technique is useful for quickly using a tool—for example, you might use the Hand tool to move to another area of a page and then create a line there.
1 Click the Line tool (![]() ) to select it.
) to select it.

2 Click and drag to create a line anywhere on the page. Press Ctrl+Z (Windows) or Command+Z (Mac OS) to undo the line creation.
![]() Tip
Tip
To constrain the Line tool to creating horizontal, vertical, or 45° lines, press the Shift key as you draw.
3 With the Line tool still selected, press the H key on the keyboard. While you hold the H key, the Hand tool (![]() ) is selected.
) is selected.
4 Drag the Hand tool around to view another area of the page. When you release the H key, the Line tool is selected again.

Using the Rectangle Frame tool and the Ellipse Frame tool
So far, you have selected tools that display on the Tools panel in three ways: (1) clicking them, (2) pressing a keyboard shortcut, and (3) holding a keyboard shortcut to select the tool temporarily. Now, you will select a tool that is not visible on the Tools panel. A small triangle in the lower-right corner of a tool indicates a menu of additional hidden tools.
In this exercise, you will select and use the Rectangle Frame tool, and then you will select and use the Ellipse Frame tool. You would create these frames to contain imported graphics and text.
1 Choose View > Screen Mode > Normal so you can see the frames that contain graphics and text.
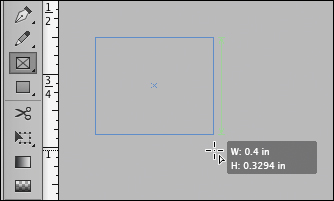
2 Press F on the keyboard to select the Rectangle Frame tool (![]() ).
).
3 Scroll to the left to view the pasteboard surrounding the document. Click and drag to create a rectangular graphics frame.
![]() Tip
Tip
To easily create a square or circle, press the Shift key while you draw with the Rectangle Frame tool or with the Ellipse Frame tool.
4 Press Ctrl+Z (Windows) or Command+Z (Mac OS) to undo the frame creation.
5 To see the Ellipse Frame tool, click and hold on the Rectangle Frame tool to display additional hidden tools.
6 Select the Ellipse Frame tool (![]() ), and notice how it replaces the Rectangle Frame tool.
), and notice how it replaces the Rectangle Frame tool.

7 Click and drag to create an oval graphics frame anywhere on the page. Press Ctrl+Z (Windows) or Command+Z (Mac OS) to undo the frame creation.
![]() Tip
Tip
You can Alt-click (Windows) or Option-click (Mac OS) a tool in the Tools panel to alternate between the tools in a menu.
8 Click and hold the Ellipse Frame tool to display the menu, and choose the Rectangle Frame tool to display it again. This is the default tool that displays.
9 Review the remaining hidden tools: Click each tool with a triangle and hold down the mouse button to see its menu of additional tools. The tools with menus for hidden tools include the following:
• Type tool
• Pen tool
• Pencil tool
• Rectangle Frame tool
• Rectangle tool
• Free Transform tool
• Color Theme tool
Reviewing the Control panel
The Control panel displays immediately below the Application bar and offers quick access to options for editing selected objects.
1 Choose View > Screen Mode > Normal so you can see the frames that contain graphics and text.
2 In the Tools panel, select the Selection tool (![]() ).
).
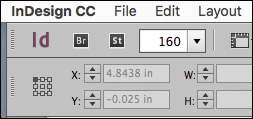
3 Click the word “Shorebird.” The Control panel provides options for controlling the position, size, and other attributes of the selected object (a text frame).

![]() Tip
Tip
You can also move and resize objects by entering values in these fields and by dragging objects with the mouse.
4 In the Control panel, click the X, Y, W, and H up and down arrows to see how you can reposition the selected text frame and change its dimensions. Press Ctrl+Z (Windows) or Command+Z (Mac OS) to undo any changes
5 In the Tools panel, select the Type tool (![]() ).
).
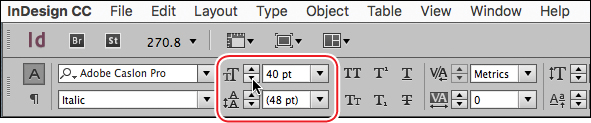
6 Click in the word “Shorebird.” The Control panel now provides options for controlling paragraph and character formatting.
7 Select the word “Shorebird” and click once on the down arrow on the Font Size field as shown to decrease the size of the type.
8 Press Ctrl+Z (Windows) or Command+Z (Mac OS) to undo the change.
9 Click the pasteboard (the blank area outside the pages) to deselect the text.
Reviewing the Application bar
At the top of the default workspace is the Application bar, which provides quick access to the most-used layout aids. These include options for changing a document’s zoom level, showing and hiding guides, and managing multiple document windows. The Application bar also provides access to Adobe resources such as Adobe Stock art.
• To get familiar with the controls in the Application bar, point at each to display its tool tip.
• To show and hide the Application bar in Mac OS, choose Window > Application Bar. You cannot hide the Application bar in Windows.
![]() Note
Note
When you hide the Application bar in Mac OS, the zoom level controls display in the lower-left corner of the document window. You cannot hide the Application bar when Window > Application Frame is selected.
• In Mac OS, the Application bar, document windows, and panels can be grouped into a single unit called the Application frame. To activate the Application frame, choose Window > Application Frame. (This grouping of workspace components in a single application window is the default on Windows.)
Reviewing the document window and pasteboard
The document window and pasteboard make up your work area and have the following characteristics:
![]() Tip
Tip
You can change the size of the pasteboard in Preferences > Guides & Pasteboard.
• Controls for displaying different pages in the document are in the lower-left corner of the document window.
• Each page or spread is surrounded by its own pasteboard.
• You can use the pasteboard as a work area or a storage area—for example, to place design elements not yet included in the page layout.
Now, you will look at the pasteboard and review features on the document window.
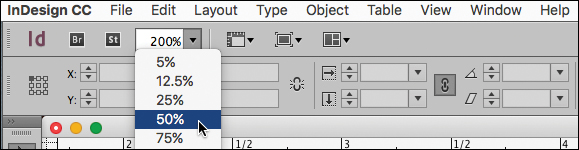
1 To see all the pages in the document and the document’s pasteboard, choose 50% from the Zoom Level menu on the Application bar.
![]() Tip
Tip
Objects on the pasteboard do not print. However, the pasteboard does provide additional space around the perimeter of each page or spread for extending objects past the page edge (called a “bleed”). Bleeds are used when an object must print to the edge of a page.
2 In the Tools panel, select the Selection tool (![]() ).
).
![]() Note
Note
On a smaller monitor, you may not be able to drag the text frame all the way to the pasteboard. You can still see how the pasteboard can serve as a storage area.
3 Click the text frame containing the word “Shorebird.” Drag the frame to the pasteboard to see how easy it is to use the area for storage.

4 Press Ctrl+Z (Windows) or Command+Z (Mac OS) to undo the change.
5 Choose View > Fit Page In Window.
6 In the lower-left corner of the document window, click the arrow next to the Page Number box to display a menu of document pages and master pages.
7 Choose 2 from the menu to display page 2 in the document window.

8 Click the arrow to the left of the Page Number box to turn back to page 1.
9 Choose View > Screen Mode > Preview to hide the frame guides.
Working with multiple document windows
When you open multiple documents, each document displays in its own tab of the main document window. You can also open multiple windows for a single document so you can see different parts of the layout at one time. Here, you’ll create a second window so you can see how changes to the headline affect the entire page. The techniques you use here for arranging document windows can be used with different views of the same document and for any other open documents.
1 Choose Window > Arrange > New Window For 01_Introduction.indd.
A new window, titled 01_Introduction.indd:2, opens. The original window is now titled 01_Introduction.indd:1.
2 If necessary, in Mac OS, choose Window > Arrange > Tile to display both windows onscreen.
![]() Tip
Tip
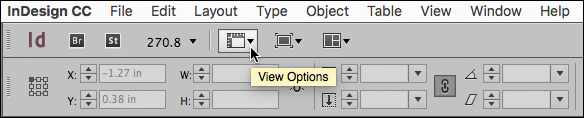
The Application bar provides quick access to options for managing windows. Click the Arrange Documents button to see all the options.
3 Select the Zoom tool (![]() ) in the Tools panel.
) in the Tools panel.
4 In the second window, 01_Introduction.indd:2, click and drag to draw a marquee around the box containing the word “Shorebird” to zoom in on the text.
Notice that the other window stays at its original magnification.
5 Press T on the keyboard to select the Type tool (![]() ).
).
6 In the second window, click at the end of the word “Shorebird” and change it to “Shorebirds.”
Notice the change in the first window.

7 Press Ctrl+Z (Windows) or Command+Z (Mac OS) to restore the word “Shorebird.”
8 Choose Window > Arrange > Consolidate All Windows. This creates a tab for each window.
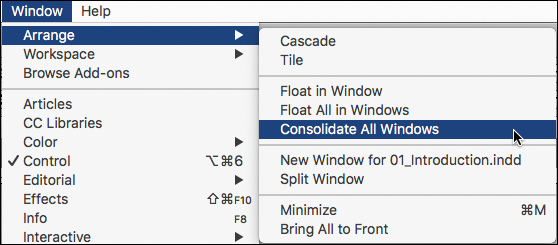
9 Click the tabs in the upper-left corner (below the Control panel) to control which document window to display.

10 Close the 01_Introduction.indd:2 window by clicking the Close Window button on the tab. The original document window remains open.
11 If necessary, choose View > Fit Page In Window. If necessary, in Mac OS, resize and reposition the remaining window by clicking the Maximize button in the top-left corner of the document window.
Working with panels
Panels provide quick access to commonly used tools and features. By default, various useful panels are docked at the right side of the screen. (Think of a dock as a collection of panels that are “glued” together.) The panels that display are different depending on the selected workspace, and each workspace remembers its panel configuration.
![]() Tip
Tip
As you become comfortable with InDesign, experiment with configuring the panels and workspace to best meet your needs. You will soon find out which panels you use the most, where you like to keep them, and what size is best for your needs.
You can reorganize panels in various ways. Here, you’ll experiment with opening, collapsing, and closing the default panels in the Advanced workspace.
Opening and closing panels
To display a hidden panel, choose the panel name from the Window menu (or a submenu of the Window menu). If the panel name has a check mark, it is already open and in front of any other panels in its panel group. In this exercise, you will open, use, and close the Info panel, which provides feedback about anything you point at onscreen.
1 Choose Window > Info to open the Info panel.
2 In the Tools panel, select the Selection tool (![]() ).
).
3 Point at and click various objects on the page to view its details.

4 Choose Window > Info again to close the Info panel.
![]() Tip
Tip
When a panel is floating, you can click its close box to close it.
Expanding and collapsing panels
In this exercise, you will expand and collapse a panel, hide the panel names, and expand all the panels in the dock.
1 In the default dock to the right of the document window, click the Pages panel icon to expand the Pages panel.
This technique is handy if you want to open a panel, use it briefly, and then close it.
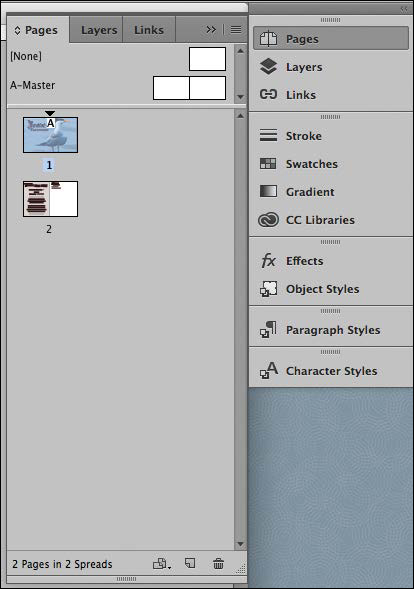
2 When you’ve finished using the Pages panel, click the double arrow (![]() ) to the right of the panel names or click the Pages panel icon again to collapse the panel.
) to the right of the panel names or click the Pages panel icon again to collapse the panel.
3 To reduce the width of the panel dock, drag the left edge of the panel dock to the right until the names are hidden.
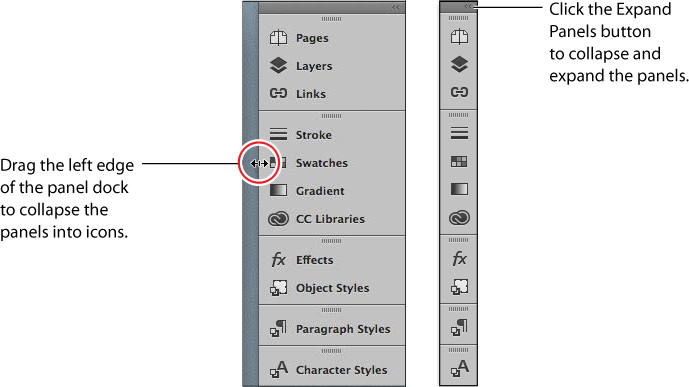
4 To expand all the panels in the dock so you can see all their controls, click the double arrow (![]() ) in the upper-right corner of the dock.
) in the upper-right corner of the dock.
For the next exercise, you will leave the panels expanded.
![]() Tip
Tip
The double arrow button expands and collapses panels.
Rearranging and customizing panels
In this exercise, you will drag a single panel out of the dock to create a free-floating panel. Then, you will drag another panel into that panel to create a custom panel group. You will also ungroup the panels, stack them, and minimize them.
1 Locate the Paragraph Styles panel toward the bottom of the default panels docked at the right. You will detach this from the dock to create a floating panel.
![]() Tip
Tip
A detached panel is called a floating panel. Click the double arrow on a floating panel’s title bar to expand or minimize it.
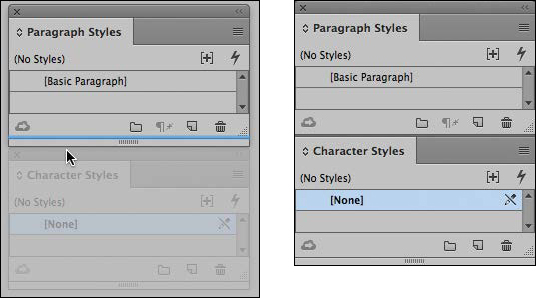
2 Drag the tab of the Paragraph Styles panel away from the dock to remove the panel from the dock.

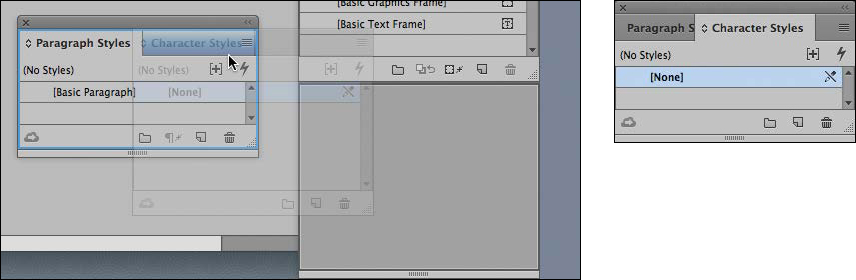
Now you will add the Character Styles panel to the floating Paragraph Styles panel to create a panel group.
3 Locate the Character Styles panel toward the bottom of the panel dock. Drag its tab into the gray area to the right of the Paragraph Styles panel tab.
![]() Tip
Tip
Grouping the Character Styles and Paragraph Styles panels can be helpful for formatting text. You can put this panel group in a handy location while leaving the remaining panels collapsed and out of the way.
4 Release the mouse button when the blue line appears along the perimeter of the Paragraph Styles panel.
5 To ungroup the panels, drag one of the panel tabs out of the panel group.
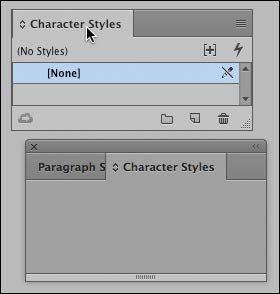
You can also stack floating panels in a vertical arrangement. You’ll try that now.
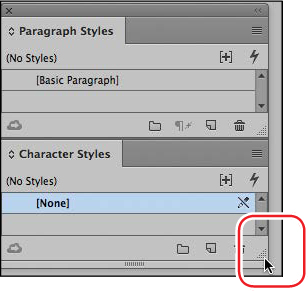
6 Drag the tab of the Character Styles panel to the bottom of the Paragraph Styles panel. Release the mouse button when a blue line appears.
The panels are now stacked rather than grouped. Stacked panels attach vertically to each other. You can move the panels as a unit by dragging the topmost title bar. Next, you’ll experiment with resizing the stacked panels.
7 Drag the lower-right corner of a panel to resize it.
8 Regroup the panels by dragging the tab of the Character Styles panel up next to the Paragraph Styles panel tab.
![]() Tip
Tip
For floating panels, you can change the width and height by dragging the lower-right or lower-left corner, change the height by dragging the bottom, and change the width by dragging the left or right edge of the panel. For docked panels, you can change the width and height by dragging the lower-left corner, change the width by dragging the left edge, or change the height by dragging the bottom of the panel.
9 Minimize the panel group by double-clicking the gray area to the right of a panel’s tab. Double-click the area again to expand the panels.
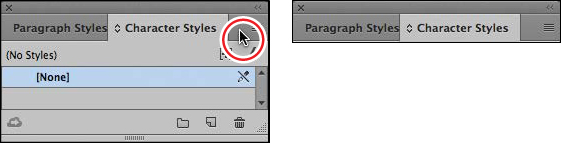
Leave the panels this way to be saved with a workspace in a later exercise.
Moving the Tools panel and Control panel
In general, you will keep the Tools panel and the Control panel open all the time. However, like all other panels, you can move them to best suit your own work style. Here, you will experiment with moving these two panels.
![]() Tip
Tip
To undock the Tools panel, you can drag either the title bar or the gray dotted bar just below the title bar.
1 To undock the Tools panel and make it float in the workspace, drag the panel by its dotted bar to pull it into the pasteboard.
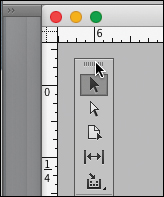
When the Tools panel is floating, it can be a two-column vertical panel, a single-column vertical panel, or a single-column horizontal row. The Tools panel must be floating (not docked) to display horizontally.
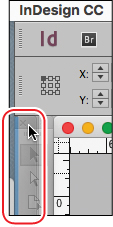
2 With the Tools panel floating, click the double arrow (![]() ) at the top of the Tools panel.
) at the top of the Tools panel.
The Tools panel becomes one horizontal row.
3 Click the double arrow (![]() ) in the Tools panel to turn it into a two-column vertical panel. Click the double arrow again to return to the default Tools panel.
) in the Tools panel to turn it into a two-column vertical panel. Click the double arrow again to return to the default Tools panel.

4 To dock the Tools panel again, drag the dotted bar (![]() ) at the top of the Tools panel to the far-left edge of the screen.
) at the top of the Tools panel to the far-left edge of the screen.
5 Release the Tools panel when a blue line appears along the edge of the workspace.
The Control panel can be moved if you don’t like it docked at the top of the document window.
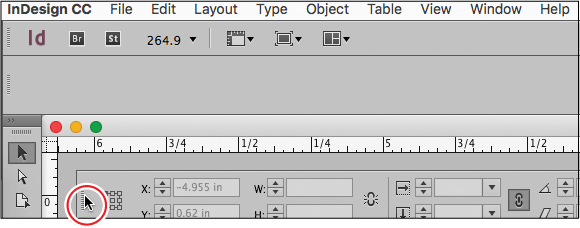
6 In the Control panel, drag the vertical dotted bar (![]() ) at the left into the document window. Release the mouse button to make the panel float.
) at the left into the document window. Release the mouse button to make the panel float.
![]() Tip
Tip
To customize the options showing in the Control panel, click the gear icon (![]() ) at the far right side of the panel.
) at the far right side of the panel.
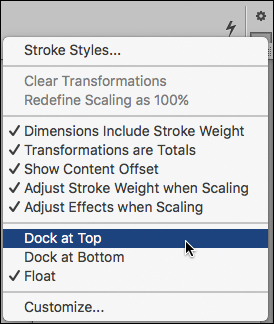
7 To dock the panel again, click the Control panel menu button (![]() ) at the far right and choose Dock At Top.
) at the far right and choose Dock At Top.
![]() Tip
Tip
You can also dock the Control panel by dragging the dotted bar until a horizontal blue line appears at the docking position.
Customizing the workspace
A workspace is a configuration of panels and menus. (The configuration of document windows is not saved in workspaces.) InDesign provides a variety of workspaces for special purposes, such as Digital Publishing, Printing And Proofing, and Typography. You cannot modify the provided workspaces, but you can save your own. In this exercise, you will save the panel customizations from the previous exercises. In addition, you will customize the appearance of the interface.
![]() Tip
Tip
To further customize the workspace, you can control which commands appear in the InDesign menus by choosing Edit > Menus. For example, you might prefer shorter menus for use on a smaller laptop screen, or you might want to streamline the commands available to a new user. You can save the menu customization with your saved workspaces.
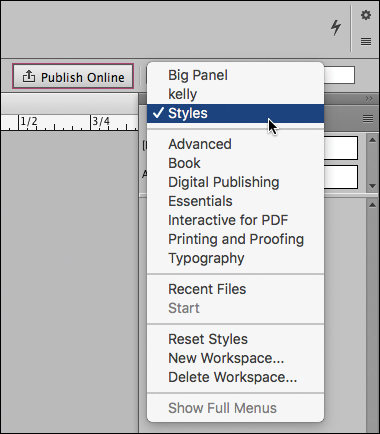
1 Choose Window > Workspace > New Workspace.
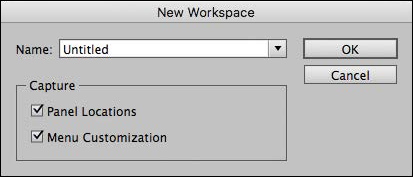
2 In the New Workspace dialog box, type Styles in the Name box. If necessary, select Panel Locations and Menu Customization. Click OK.
3 Choose Window > Workspace to see that your custom workspace is selected.
4 The name of the selected workspace also displays in a menu at the far right of the Control panel. Click this menu and select a different workspace.
5 Choose each workspace from the Window > Workspace submenu or the Control panel Workspace menu to see the different panel and menu configurations.
6 Choose Window > Workspace > Advanced, and then choose Window > Workspace > Reset Advanced.
Changing the magnification of a document
Controls in InDesign let you view documents at any zoom level from 5% to 4000%. When a document is open, the current magnification percentage is displayed in the Zoom Level box in the Application bar and next to the filename in the document’s tab or title bar.
![]() Tip
Tip
Keyboard shortcuts let you quickly change the view to 200%, 400%, and 50%. In Windows, press Ctrl+2 for 200%, Ctrl+4 for 400%, and Ctrl+5 for 50%. In Mac OS, press Command+2 for 200%, Command+4 for 400%, and Command+5 for 50%.
Using the view commands
You can easily enlarge or reduce the view of a document by doing any of the following:
• Choose View > Zoom In to enlarge the display by one preset increment.
• Choose View > Zoom Out to reduce the display by one preset increment.
• Choose View > Fit Page In Window to center and display the page in the window.
• Choose View > Fit Spread In Window to center and display the targeted spread in the window.
• Choose View > Actual Size to display the document at 100%.
• Choose a percentage from the Zoom Level menu in the Application bar to enlarge or reduce the display by any preset increment.
• Type a percentage in the Zoom Level box by clicking in the box, typing the desired viewing percentage, and then pressing the Enter or Return key.
![]() Note
Note
If you close the Application bar in Mac OS, the zoom controls appear in the lower-left corner of the document window.
• Press Ctrl+= (Windows) or Command+= (Mac OS) to increase the magnification by one preset increment.
• Press Ctrl+- (Windows) or Command+- (Mac OS) to decrease the magnification by one preset increment.
Using the Zoom tool
In addition to the view commands, you can use the Zoom tool to magnify and reduce the view of a document. In this exercise, you will experiment with the Zoom tool.
![]() Tip
Tip
When clicking with the Zoom tool to increase the zoom level, target the item you want to zoom into to avoid zooming into random areas of a page.
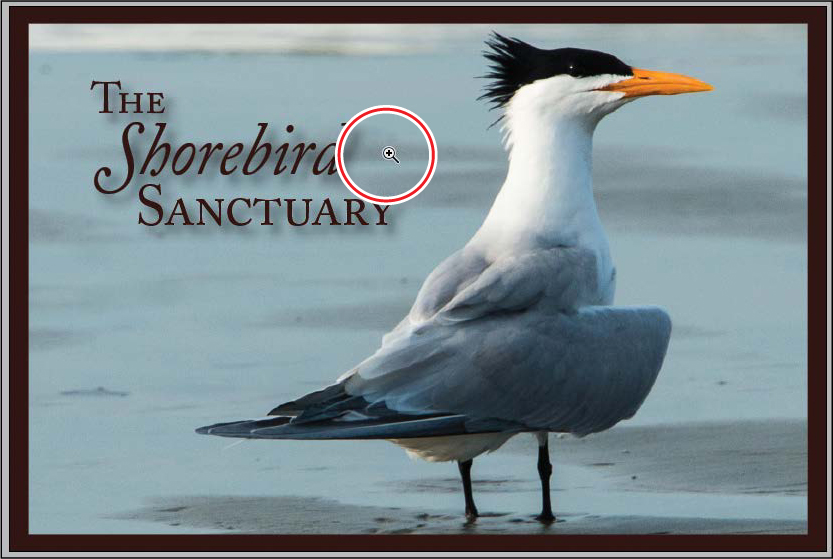
1 Choose View > Actual Size to view the document at 100%.
2 Select the Zoom tool (![]() ) in the Tools panel and position it near the text, “The Shorebird Sanctuary,” on the first page. Notice that a plus sign appears in the center of the Zoom tool.
) in the Tools panel and position it near the text, “The Shorebird Sanctuary,” on the first page. Notice that a plus sign appears in the center of the Zoom tool.
3 Click three times. The view changes to the next preset magnification, centered on the point where you clicked.
Now you’ll reduce the view.
4 Position the Zoom tool over the text and hold down the Alt (Windows) or Option (Mac OS) key. A minus sign appears in the center of the Zoom tool.
5 While holding the Alt or Option key, click three times to reduce the view scale.
You can also use the Zoom tool to drag a marquee around a portion of a document to magnify a specific area.
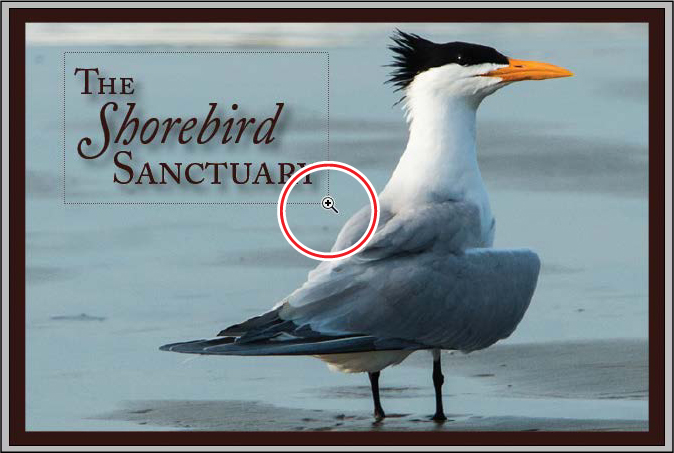
6 With the Zoom tool still selected, hold down the mouse button to drag a marquee around the text, and then release the mouse button.
The percentage by which the area is magnified depends on the size of the marquee: the smaller the marquee, the larger the degree of magnification.
7 Choose View > Fit Page In Window.
Because the Zoom tool is used frequently during the design and editing processes, you can temporarily select it from the keyboard at any time without deselecting the tool you are using. You’ll do that now.
8 Click the Selection tool (![]() ) in the Tools panel and position it anywhere in the document window.
) in the Tools panel and position it anywhere in the document window.
9 Hold down Ctrl+spacebar (Windows) or Command+spacebar (Mac OS) so that the Selection tool icon becomes the Zoom tool icon, and then click the bird to magnify the view. When you release the keys, the pointer returns to the Selection tool.
10 Choose View > Fit Page In Window to center the page again.
![]() Note
Note
Mac OS may override the zooming keyboard shortcut. You can disable system shortcuts in Apple menu > System Preferences > Keyboard.
Navigating through a document
InDesign offers several different ways to navigate through a document, including using the Pages panel, the Hand tool, the Go To Page dialog box, and controls in the document window. As you work with InDesign, you will find that you prefer certain methods over others. Once you find a method you like, remember any shortcuts to make that method easier. For example, if you prefer to enter a page number in the Go To Page dialog box, memorize its keyboard shortcut.
![]() Tip
Tip
To navigate pages, you can also use commands in the Layout menu: First Page, Previous Page, Next Page, Last Page, Next Spread, and Previous Spread.
Navigating pages
You can navigate document pages using the Pages panel, the page buttons at the bottom of the document window, the scroll bars, or a variety of other methods. The Pages panel displays an icon for each page in the document. Double-clicking any page icon or page number in the panel brings that page or spread into view. In this exercise, you will experiment with turning pages.
1 Click the Pages panel icon to expand the Pages panel, if necessary.
2 Double-click the page 2 icon to display it in the document window.
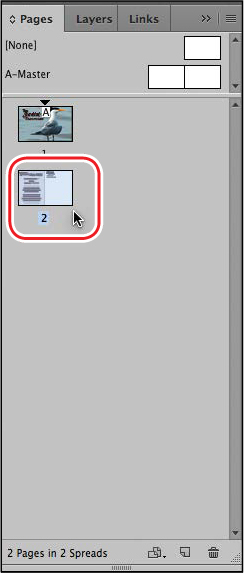
3 Double-click the page 1 icon to center the first page in the document window.
4 To return to the second page of the document, use the menu in the lower-left corner of the document window. Click the down arrow, and choose 2.
You will now use the buttons at the bottom of the document window to display a different page.
![]() Note
Note
When View > Fit Spread In Window is selected, the navigation controls are for spreads rather than pages.
5 Click the Previous Page button (left-facing arrow) next to the Page Number box to switch pages until the first page is displayed.
6 Click the Next Page button (the right-facing arrow) next to the Page Number box until the second page is displayed.

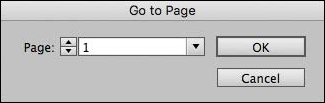
7 Choose Layout > Go To Page.
![]() Tip
Tip
The keyboard shortcut for Layout > Go To Page is Ctrl+J (Windows) or Command+J (Mac OS).
8 In the Page box, type 1 or select 1 from the menu. Click OK.
Using the Hand tool
The Hand tool in the Tools panel lets you “push” the pages of a document around until the area you want to view is visible. In this exercise, you will experiment with the Hand tool.
1 Choose 400% from the Zoom Level menu on the Application bar.
2 Select the Hand tool (![]() ).
).
3 Click and drag in any direction to move the page around, and then drag upward in the document window to display page 2.
4 With the Hand tool still selected, click the page and hold the mouse button down to display a view rectangle.
![]() Tip
Tip
When you’re using the Selection tool, you can press the spacebar to temporarily access the Hand tool. When you’re using the Type tool, press the Alt (Windows) or Option (Mac OS) key to use the Hand tool.
• Drag the rectangle to view a different area of the page or a different page.
• Release the mouse button to display the area that the view rectangle encompasses.
• When the view rectangle is displayed, press the arrow keys on the keyboard to increase and decrease the rectangle’s size.

5 Double-click the Hand tool in the Tools panel to fit the page in the window.
Using context menus
In addition to the menus at the top of your screen, you can use context menus to display commands relevant to the active tool or selection. To display context menus, position the pointer over a selected object or anywhere in the document window and click with the right mouse button (Windows) or press Control and hold down the mouse button (Mac OS).
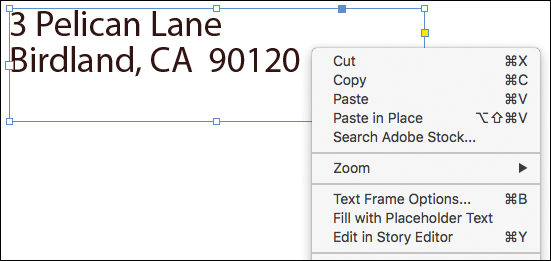
1 Using the Selection tool (![]() ), click any object on the page, such as the text frame containing the postcard’s address starting with “3 Pelican Lane.”
), click any object on the page, such as the text frame containing the postcard’s address starting with “3 Pelican Lane.”
![]() Tip
Tip
You can display a context menu when entering or editing text. The Type context menu lets you insert special characters, check spelling, and perform other text-related tasks.
2 Right-click (Windows) or Control-click (Mac OS) the text frame. Note what options are available; a partial list is shown here.
3 Select different types of objects on the page and display their context menus to see what commands are available.
Using panel menus
Most panels have additional panel-specific options. Clicking the panel menu button displays a menu with additional commands and options for the selected panel.
In this exercise, you will change the display of the Swatches panel.
![]() Note
Note
If necessary, click the double arrow (![]() ) in its title bar to expand the Swatches panel.
) in its title bar to expand the Swatches panel.
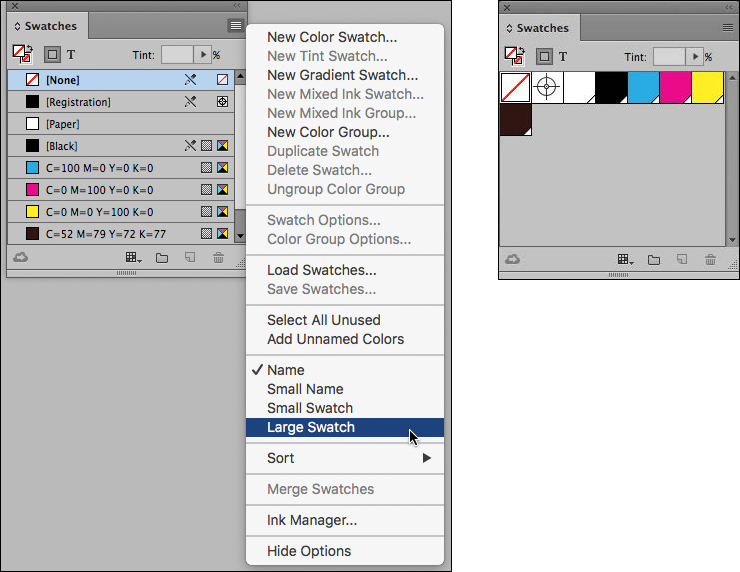
1 Choose Window > Color > Swatches to display the Swatches panel. Drag the Swatches panel out of the dock at the right to create a free-floating panel.
2 In the upper-right corner of the Swatches panel, click the panel menu button (![]() ) to display the panel menu.
) to display the panel menu.
You can use the Swatches panel menu to create new color swatches, load swatches from another document, and more.
3 Choose Large Swatch from the Swatches panel menu.
Modifying interface preferences
You can customize the InDesign interface by changing the overall color, the way various tools work, and how the panels are configured through preferences. Some settings in the Preferences dialog box affect the application (InDesign itself), while others affect only the active document. If you change the document-specific preferences while no documents are open, the changes affect all new documents (without affecting existing documents). Here, you will look at Interface preferences, which affect the application.
![]() Note
Note
The screen captures in this book show the Medium Light interface. You can use any color theme that you prefer.
1 Choose Edit > Preferences > Interface (Windows) or InDesign CC > Preferences > Interface (Mac OS) to customize the appearance of InDesign.
2 Choose Light from the Color Theme menu to see the lighter interface look.
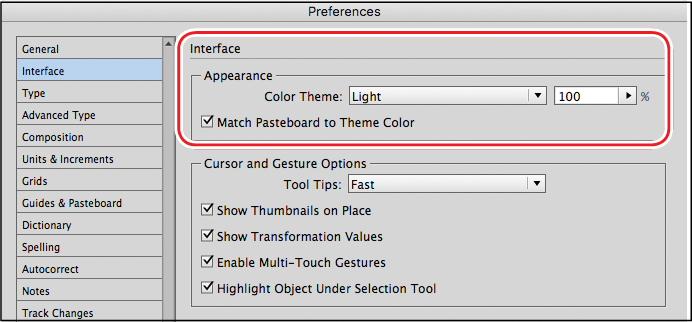
3 Experiment with the other options, and then choose the default, Medium Dark, again.
4 Click through the panels in the Preferences dialog box to see other options for customizing InDesign. For example, the Display Performance preference lets you specify how images display in all your InDesign documents (Fast, Typical, or High Quality).
![]() Tip
Tip
If your computer has a compatible GPU card, InDesign automatically displays documents using the GPU and sets the default Display Performance to High Quality.
• You changed the Display Performance at the beginning of this exercise through the View menu, but the change is temporary and not saved with the document.
• Changing this preference when no documents are open would affect all documents.
5 When you are finished reviewing Preferences, click OK.
Exploring on your own
Now that you have explored the work area, try some of the following tasks using either the 01_Introduction.indd document or your own document.
![]() Tip
Tip
For complete and up-to-date information about using InDesign panels, tools, and other application features, use the Help menu and the Search box in the Application bar.
• Choose Window > Utilities > Tool Hints to display information about the selected tool. Select various tools to learn more about them.
• Choose Window > Editorial > Notes to display the Notes panel group, which includes the Assignments panel and the Track Changes panel. You can use these panels to collaborate on documents.
• Learn more about existing key commands and how you can change them by exploring the Keyboard Shortcuts dialog box (Edit > Keyboard Shortcuts).
• Review the menu configurations and how you can edit them in the Menu Customization dialog box (Edit > Menus).
• Try organizing your panels to meet your needs, and create your own workspace by choosing Window > Workspace > New Workspace.
Review questions
1 What are some ways you can change the magnification of a document?
2 How do you select tools in InDesign?
3 What are three ways to display a panel?
4 How do you create a panel group?
Review answers
1 You can choose commands from the View menu to zoom in, zoom out, fit the page to the window, and more. You can also use the Zoom tool in the Tools panel and click or drag over a document to enlarge or reduce the view. In addition, you can use keyboard shortcuts to increase or reduce the magnification. You can also use the Zoom Level box in the Application bar.
2 You can click to select a tool in the Tools panel. Or, if the Type tool is not selected, you can press the tool’s keyboard shortcut. For example, you can press V to select the Selection tool from the keyboard; press and hold the keyboard shortcut to temporarily select the tool. You select hidden tools by positioning the pointer over a tool in the Tools panel and holding down the mouse button. When the menu appears, select the tool.
3 To make a panel appear, click its icon, click its tab, or choose its name from the Window menu. For example, choose Window > Object & Layout > Align. You can also access type-specific panels from the Type menu. For example, choose Type > Glyphs.
4 Drag a panel off the dock to create a free-floating panel. Drag the tab of any other panel into the tab bar of the new, free-floating panel. A panel group can be moved and resized as one panel.