
Using an implicit intent to display the photo page is easy and effective. But what if you do not want your app to open the browser?
Often, you want to display web content within your own activities instead of heading off to the browser. You may want to display HTML that you generate yourself, or you may want to lock down the browser somehow. For apps that include help documentation, it is common to implement it as a web page so that it is easy to update. Opening a web browser to a help web page does not look professional, and it prevents you from customizing behavior or integrating that web page into your own UI.
When you want to present web content within your own UI, you use the WebView class. We are calling this the “harder” way here, but it is pretty darned easy. (Anything is hard compared to using implicit intents.)
The first step is to create a new activity and fragment to display the WebView. Start, as usual, by defining a layout file called res/layout/fragment_photo_page.xml. Make ConstraintLayout the top-level layout. In the Design view, drag a WebView into the ConstraintLayout as a child. (You will find WebView under the Widgets section.)
Once the WebView is added, add a constraint for every side to its parent. That gives you the following constraints:
-
from the top of the WebView to the top of its parent
-
from the bottom of the WebView to the bottom of its parent
-
from the left of the WebView to the left of its parent
-
from the right of the WebView to the right of its parent
Finally, change the height and width to Match Constraint and change all the margins to 0.
Oh, and give your WebView an ID: web_view.
You may be thinking, “That ConstraintLayout is not useful.” True enough – for the moment. You will fill it out later in the chapter with additional “chrome.”
Next, get the rudiments of your fragment set up. Create PhotoPageFragment as a subclass of the VisibleFragment class you created in Chapter 28. You will need to inflate your layout file, extract your WebView from it, and forward along the URL to display as a fragment argument.
Listing 29.4 Setting up your web browser fragment (PhotoPageFragment.kt)
private const val ARG_URI = "photo_page_url"

class PhotoPageFragment : VisibleFragment() {

    private lateinit var uri: Uri
    private lateinit var webView: WebView

    override fun onCreate(savedInstanceState: Bundle?) {
        super.onCreate(savedInstanceState)

        uri = arguments?.getParcelable(ARG_URI) ?: Uri.EMPTY
    }

    override fun onCreateView(
        inflater: LayoutInflater,
        container: ViewGroup?,
        savedInstanceState: Bundle?
    ): View? {
        val view = inflater.inflate(R.layout.fragment_photo_page, container, false)

        webView = view.findViewById(R.id.web_view)

        return view
    }

    companion object {
        fun newInstance(uri: Uri): PhotoPageFragment {
            return PhotoPageFragment().apply {
                arguments = Bundle().apply {
                    putParcelable(ARG_URI, uri)
                }
            }
        }
    }
}
For now, this is little more than a skeleton. You will fill it out a bit more in a moment. But first, create PhotoPageActivity to host your new Fragment.
Listing 29.5 Creating a web activity (PhotoPageActivity.kt)
class PhotoPageActivity : AppCompatActivity() {

    override fun onCreate(savedInstanceState: Bundle?) {
        super.onCreate(savedInstanceState)
        setContentView(R.layout.activity_photo_page)

        val fm = supportFragmentManager
        val currentFragment = fm.findFragmentById(R.id.fragment_container)

        if (currentFragment == null) {
            val fragment = PhotoPageFragment.newInstance(intent.data)
            fm.beginTransaction()
                .add(R.id.fragment_container, fragment)
                .commit()
        }
    }

    companion object {
        fun newIntent(context: Context, photoPageUri: Uri): Intent {
            return Intent(context, PhotoPageActivity::class.java).apply {
                data = photoPageUri
            }
        }
    }
}
Create the missing res/layout/activity_photo_page.xml layout file and add a FrameLayout with an ID of fragment_container.
Listing 29.6 Adding an activity layout (res/layout/activity_photo_page.xml)
<?xml version="1.0" encoding="utf-8"?>
<FrameLayout
        xmlns:android="http://schemas.android.com/apk/res/android"
        android:id="@+id/fragment_container"
        android:layout_width="match_parent"
        android:layout_height="match_parent"/>
Now, switch up your code in PhotoGalleryFragment to launch your new activity instead of the implicit intent.
Listing 29.7 Switching to launch your activity (PhotoGalleryFragment.kt)
class PhotoGalleryFragment : VisibleFragment() {
    ...
    private inner class PhotoHolder(private val itemImageView: ImageView)
        : RecyclerView.ViewHolder(itemImageView),
            View.OnClickListener {
        ...
        override fun onClick(view: View) {
            val intent = Intent(Intent.ACTION_VIEW, galleryItem.photoPageUri)
            val intent = PhotoPageActivity
                .newIntent(requireContext(), galleryItem.photoPageUri)
            startActivity(intent)
        }
    }
    ...
}
And, finally, add your new activity to the manifest.
Listing 29.8 Adding your activity to the manifest (manifests/AndroidManifest.xml)
<manifest ... >
    ...
    <application
        ... >
        <activity android:name=".PhotoGalleryActivity">
            ...
        </activity>
        <activity android:name=".PhotoPageActivity"/>
        <receiver android:name=".NotificationReceiver"
                  ... >
            ...
        </receiver>
    </application>

</manifest>
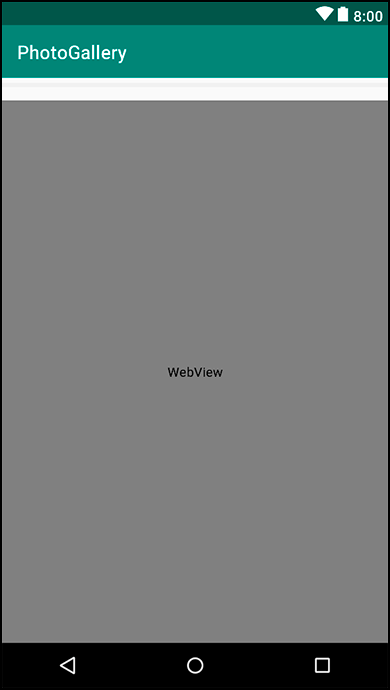
Run PhotoGallery and press on a picture. You should see a new empty activity pop up.
OK, now to get to the meat and actually make your fragment do something. You need to do three things to make your WebView successfully display a Flickr photo page. The first one is straightforward – you need to tell it what URL to load.
The second thing you need to do is enable JavaScript.
By default, JavaScript is off.
You do not always need to have it on, but for Flickr, you do.
(If you run Android Lint, it gives you a warning for doing this.
It is worried about cross-site scripting attacks.
You can suppress this Lint warning by annotating onCreateView(…) with @SuppressLint("SetJavaScriptEnabled").)
Finally, you need to provide a default implementation of a class called WebViewClient. WebViewClient is used to respond to rendering events on a WebView. We will discuss this class a bit more after you enter the code.
Make these changes in PhotoPageFragment.
Listing 29.9 Loading the URL into WebView (PhotoPageFragment.kt)
class PhotoPageFragment : VisibleFragment() {
    ...
    @SuppressLint("SetJavaScriptEnabled")
    override fun onCreateView(
        inflater: LayoutInflater,
        container: ViewGroup?,
        savedInstanceState: Bundle?
    ): View? {
        val view = inflater.inflate(R.layout.fragment_photo_page, container, false)

        webView = view.findViewById(R.id.web_view)
        webView.settings.javaScriptEnabled = true
        webView.webViewClient = WebViewClient()
        webView.loadUrl(uri.toString())

        return view
    }
    ...
}
Loading the URL has to be done after configuring the WebView, so you do that last.
Before that, you turn JavaScript on by accessing the settings property to get an instance of WebSettings and then setting WebSettings.javaScriptEnabled = true.
WebSettings is the first of the three ways you can modify your WebView.
It has various properties you can set, like the user agent string and text size.
After that, you add a WebViewClient to your WebView. To know why, let us first address what happens without a WebViewClient.
A new URL can be loaded in a couple of different ways: The page can tell you to go to another URL on its own (a redirect), or the user can click on a link. Without a WebViewClient, WebView will ask the activity manager to find an appropriate activity to load the new URL.
This is not what you want to have happen. Many sites (including Flickr’s photo pages) immediately redirect to a mobile version of the same site when you load them from a phone browser. There is not much point to making your own view of the page if it is going to fire an implicit intent anyway when that happens.
If, on the other hand, you provide your own WebViewClient to your WebView, the process works differently. Instead of asking the activity manager what to do, it asks your WebViewClient. And in the default WebViewClient implementation, it says, “Go load the URL yourself!” So the page will appear in your WebView.
Run PhotoGallery, press an item, and you should see the item’s photo page displayed in the WebView (like the image on the right in Figure 29.1).
Since you are taking the time to create your own WebView, spruce it up a bit by adding a progress bar and updating the toolbar’s subtitle with the title of the loaded page. These decorations and the UI outside of the WebView are referred to as chrome (not to be confused with the Google Chrome web browser). Crack open fragment_photo_page.xml once again.
In the Design view, drag in a ProgressBar as a second child for your ConstraintLayout. Use the ProgressBar (Horizontal) version of ProgressBar. Delete the WebView’s top constraint, and then set its height to Fixed so that you can easily work with its constraint handles.
With that done, create the following additional constraints:
-
from the ProgressBar to the top, right, and left of its parent
-
from the WebView’s top to the bottom of the ProgressBar
With that done, change the height of the WebView back to Match Constraint, change the ProgressBar’s height to wrap_content, and change the ProgressBar’s width to Match Constraint.
Finally, select the ProgressBar and move your attention to the attributes pane. Change the visibility to gone and change the tool visibility to visible. Rename its ID to progress_bar. Your result will look like Figure 29.2.
To hook up the ProgressBar, you will use the second callback on WebView, which is WebChromeClient. WebViewClient is an interface for responding to rendering events; WebChromeClient is an event interface for reacting to events that should change elements of chrome around the browser. This includes JavaScript alerts, favicons, and of course updates for loading progress and the title of the current page.
Hook it up in onCreateView(…).
Listing 29.10 Using WebChromeClient (PhotoPageFragment.kt)
class PhotoPageFragment : VisibleFragment() {

    private lateinit var uri: Uri
    private lateinit var webView: WebView
    private lateinit var progressBar: ProgressBar
    ...
    @SuppressLint("SetJavaScriptEnabled")
    override fun onCreateView(
        inflater: LayoutInflater,
        container: ViewGroup?,
        savedInstanceState: Bundle?
    ): View? {
        val view = inflater.inflate(R.layout.fragment_photo_page, container, false)

        progressBar = view.findViewById(R.id.progress_bar)
        progressBar.max = 100

        webView = view.findViewById(R.id.web_view)
        webView.settings.javaScriptEnabled = true
        webView.webChromeClient = object : WebChromeClient() {
            override fun onProgressChanged(webView: WebView, newProgress: Int) {
                if (newProgress == 100) {
                    progressBar.visibility = View.GONE
                } else {
                    progressBar.visibility = View.VISIBLE
                    progressBar.progress = newProgress
                }
            }

            override fun onReceivedTitle(view: WebView?, title: String?) {
                (activity as AppCompatActivity).supportActionBar?.subtitle = title
            }
        }
        webView.webViewClient = WebViewClient()
        webView.loadUrl(uri.toString())

        return view
    }
    ...
}
Progress updates and title updates each have their own callback function, onProgressChanged(WebView, Int) and onReceivedTitle(WebView, String). The progress you receive from onProgressChanged(WebView, Int) is an integer from 0 to 100. If it is 100, you know that the page is done loading, so you hide the ProgressBar by setting its visibility to View.GONE.
Run PhotoGallery to test your changes. It should look like Figure 29.3.
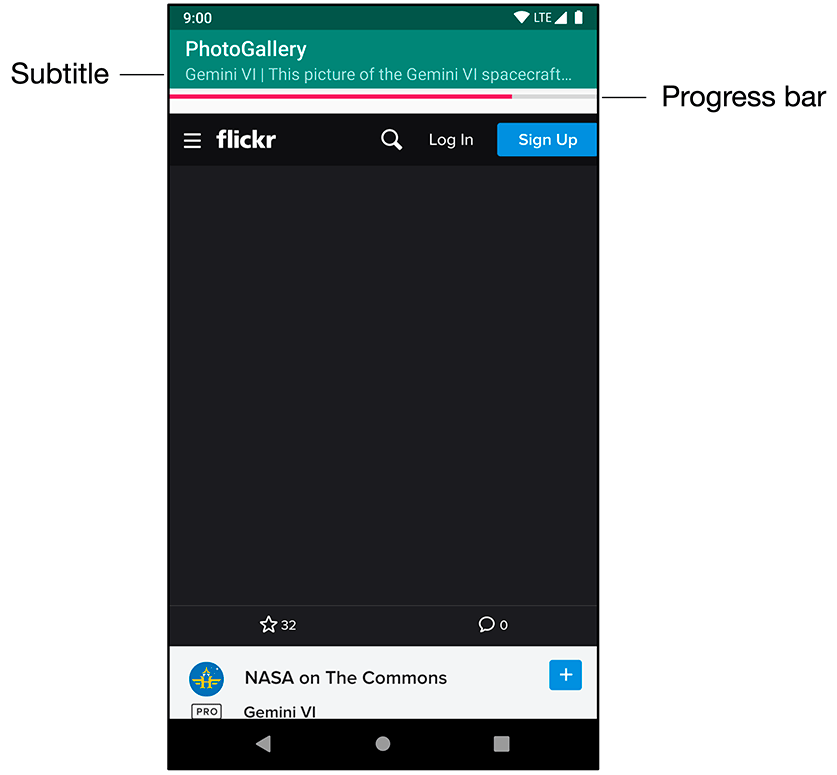
When you press on a photo, PhotoPageActivity pops up. A progress bar displays as the page loads, and a subtitle reflecting the title received in onReceivedTitle(…) appears in the toolbar. Once the page is loaded, the progress bar disappears.