
3
Transformation and distortion

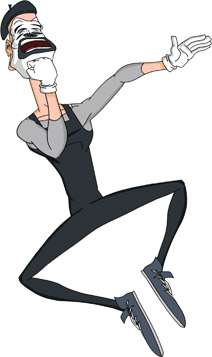
■ The most basic of objects, the cube, can be brought to life using just the Free Transform tool. With a little rotating and distorting, you can easily create an animation that gives an otherwise boring subject some life and personality. The same techniques can be applied to almost any object, including characters.
SQUASH, STRETCH, BULGE - WHAT DO ALL THESE transformations have in common? Hint: it’s not how you felt after eating that second baked bean burrito. Answer: it’s the Free Transform tool, the single most efficient and versatile tool Flash offers, and it will prove to be one of the most used tools in your daily animation workflow. This chapter examines various ways of using the transform tools to edit drawings and animate them.
Distorting bitmaps
AS A DESIGNER AND animator, I frequently use the Free Transform tool in Flash. It is the most multifaceted tool in the toolbox and is critical to the transformation and distortion of objects.
Free Transform is perfect for scaling, rotating, shearing and distorting your images. Free Transform is also used to edit the center point of instances of symbols. You can also use it to transform imported bitmaps or graphics created with the Flash drawing tools.
There are a variety of modifier keys used with the Free Transform tool that allow you to transform objects in different ways, as we will discuss here.
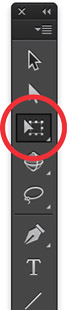
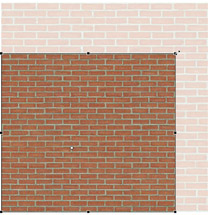
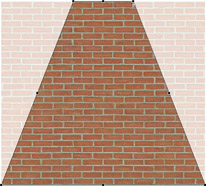
1 Enter Free Transform mode by selecting the Free Transform tool in the toolbox or by pressing the keyboard shortcut ![]() . Let’s start by transforming an imported bitmap image.
. Let’s start by transforming an imported bitmap image.
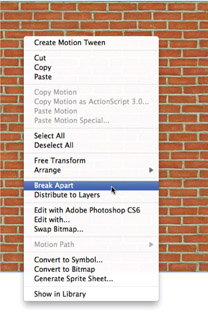
2 Break apart your imported image ![]() before transforming it. If you want, you can convert it to a Drawing Object (Modify > Combine Objects > Union).
before transforming it. If you want, you can convert it to a Drawing Object (Modify > Combine Objects > Union).
3 When you drag any of the four corner handles, you will scale the object. The corner you drag will move while the opposite corner will remain stationary. Hold down the ![]() key to scale based on the object’s center.
key to scale based on the object’s center.
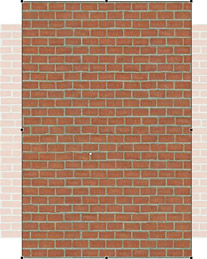
4 If you grab any of the four center side handles, you will scale the object horizontally or vertically which is great for squashing and stretching the object.
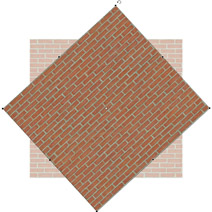
5 Grab one of the corner handles to rotate the object. Hold down ![]() to constrain the rotation to 45 degree increments. Hold down
to constrain the rotation to 45 degree increments. Hold down ![]() to hinge the object at the opposite corner.
to hinge the object at the opposite corner.
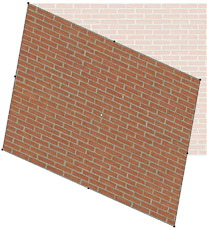
6 Position the cursor outside the bounding box between the handles and drag to shear the object. Hold down ![]() to shear based on the center of the object.
to shear based on the center of the object.
7 Hold down ![]()
![]() and drag a corner handle to distort the object’s perspective equally on both sides. Unfortunately, Flash does not distort the image but crops it instead.
and drag a corner handle to distort the object’s perspective equally on both sides. Unfortunately, Flash does not distort the image but crops it instead.
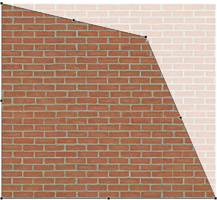
8 Hold down ![]() to distort the object in a freeform manner. But unfortunately again, Flash doesn’t truly distort a bitmap image but rather, crops it.
to distort the object in a freeform manner. But unfortunately again, Flash doesn’t truly distort a bitmap image but rather, crops it.
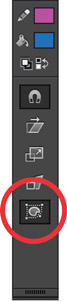
9 Select the Envelope tool (sub-selection of the Free Transform tool). The Envelope modifier lets you warp and distort objects.
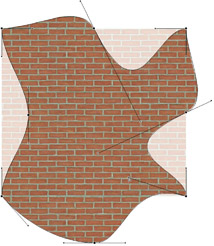
10 Drag the points and tangent handles to modify the envelope. Changes made to the envelope will affect the shape but not the bitmap image itself.
Hot Tip

Some of the Free Transform tool features cannot modify instances of symbols, sounds, video objects or text. If you want to warp or distort text, make sure to break apart the text field into raw shapes first.
The Envelope tool
ANDREA CHARACTER: COPYRIGHT MUDBUBBLE LLC
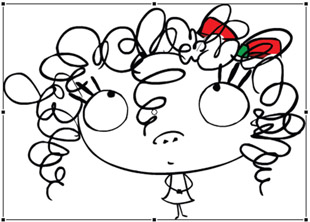
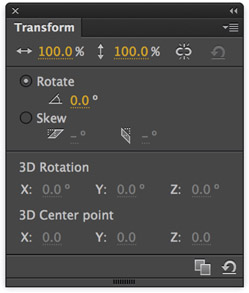
WHEN USING THE FREE TRANSFORM tool with raw vector objects, the Distort and Envelope subselection tools become available. Using these tools is where you can really have some fun warping and deforming shapes as if they were clay. Think of how your reflection looks in a fun house mirror, and you’ll start to get an idea as to what these tools are useful for. If you need to be precise with how your images are scaled, rotated or skewed, use the Transform panel to type in your values for the respective transformation.
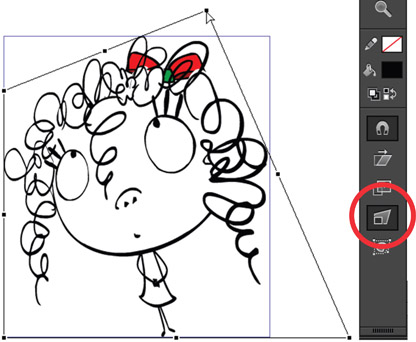
1 Enter Free Transform mode by selecting the Free Transform tool in the toolbox or by pressing the keyboard shortcut ![]() . Select the Distort subselection tool at the bottom of the toolbox. Click and drag any of the corner handles to distort your shape.
. Select the Distort subselection tool at the bottom of the toolbox. Click and drag any of the corner handles to distort your shape.
2 The Distort tool is useful for manipulating the perspective of a shape by clicking and dragging the corner handles.
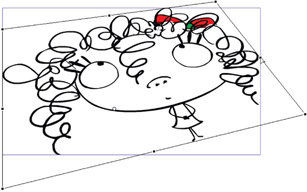
3 Hold down the ![]() key while dragging a corner handle to constrain the adjoining corner an equal distance and in the opposite direction from each other. Think of it as tapering your shape.
key while dragging a corner handle to constrain the adjoining corner an equal distance and in the opposite direction from each other. Think of it as tapering your shape.
4 The Envelope modifier is great for warping and distorting shapes. When you select the Envelope subselection tool, you will notice multiple handles attached to the bounding box. Manipulating these handles will affect the shape contained within. Click and drag a corner handle to start warping your shape.
5 Drag any of the eight tangent handles to warp your shape in almost any direction. These tangent handles are located at each corner and along both horizontal and vertical sides as well.
6 You can move any of the points to a new location to further warp your shape. But be careful, once you click outside of the selected shape, the transformation will end. You can select it again and continue to warp and distort it, but the previous point and tangent positions will be lost.
Hot Tip

Holding down ![]() when dragging a corner point will lock the tangent handles to its current position. Holding down the same keys while dragging one of the side handles will constrain that entire side and all its points.
when dragging a corner point will lock the tangent handles to its current position. Holding down the same keys while dragging one of the side handles will constrain that entire side and all its points.
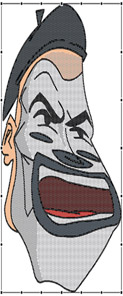
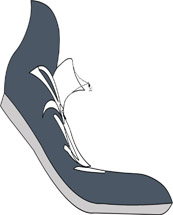
Warping
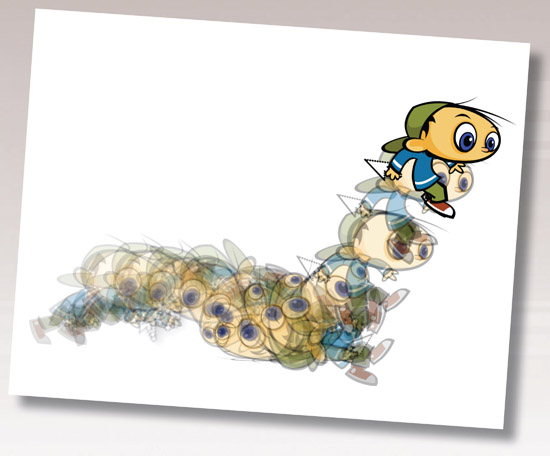
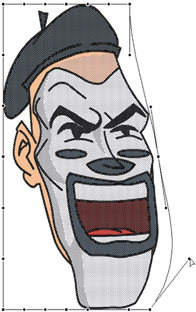
EVIL MIME CHARACTER: YAHOO! SUPER MESSENGERS
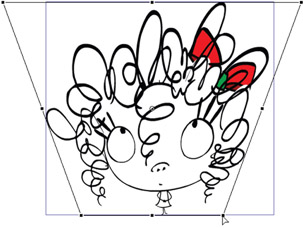
THE ENVELOPE TOOL CAN help shave some time off your production schedule. In this case, the Envelope tool was used to deform the head of the Evil Mime character to represent the effect of being hit by a self-imposed upper-cut. Sure, the entire head could have been drawn, but not often do we have the luxury of time when a deadline is looming. It was much easier to start with the head already drawn and warp it to suit our needs.
1 Duplicate the artwork of the head by creating a new keyframe in the head symbol. Select the entire head and the Free Transform tool ![]() , then select the Envelope subselection tool.
, then select the Envelope subselection tool.
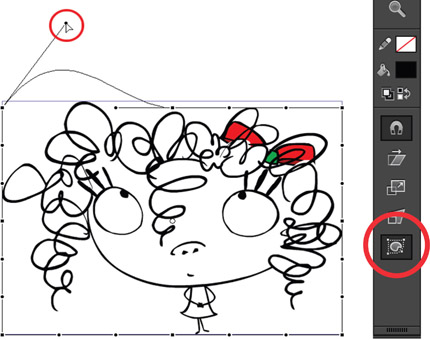
2 Using the Envelope tool, you can move the handles to deform the relative area of the head.
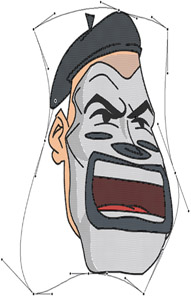
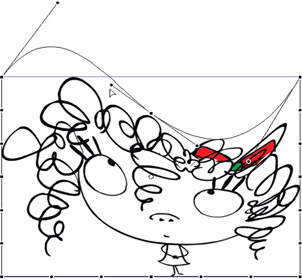
3 Continue to push and pull the Envelope’s anchor points and control handles to deform the shape to your liking.
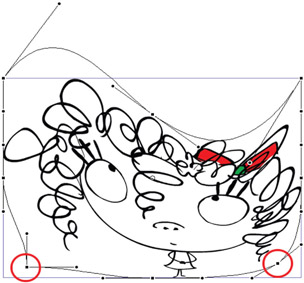
4 You can restart the envelope process by deselecting the artwork and selecting the Envelope tool again. When you reselect the Envelope tool it will reset anchors and handles which will allow you to distort your image further.

5 Don’t be afraid to manually go back into the artwork and adjust your linework using the Selection tool. Often it’s your own eye that is the best tool for the job.

6 Here’s the hand drawn in Flash using the Line tool. You may find the need for a variation of this same illustration and need to make it quickly.
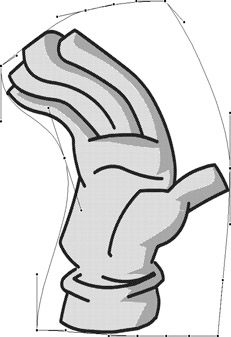
7 Using the Envelope tool allows you to quickly distort the drawing into a different shape.
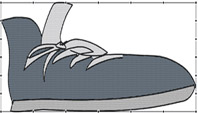
8 Here’s the foot in its default state. Depending on your animation, you may need several feet in different shapes.
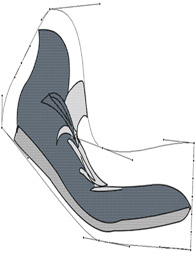
9 Once again, the Envelope tool gets the job done, quickly and efficiently.
10 Don’t rely completely on the transform tools. In most cases, they only go so far. You may want to further refine the details of your image manually by using the drawing tools.
Hot Tip

Don’t rely on the Envelope tool for everything. In a situation like this, where a complex shape is being warped, you will probably find that upon ending your transformation you will need to refine your shapes manually by using the Selection tool or any of the drawing tools.
Card flip
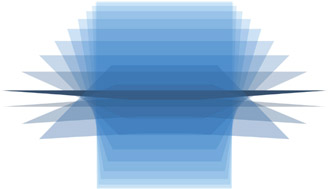
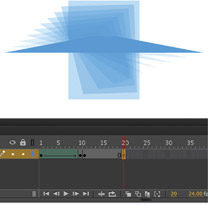
A POPULAR ANIMATION REQUEST on the Flash public forums is how to animate a flat card rotating or flipping 360 degrees. What makes this animation often difficult to understand is the initial approach to actually creating it. It is easy to assume, since Flash is a two-dimensional program, adding a third dimension simply is not possible unless the object is redrawn manually one frame at a time. But with Flash, it’s all in the approach, and it doesn’t have to be taken literally. Two dimensions are plenty to work within for this animated effect.

1 Start with a simple rectangle with no stroke around it. Add a second keyframe on frame 10. Select the Free Transform tool ![]() and then the Distort subselection tool.
and then the Distort subselection tool.
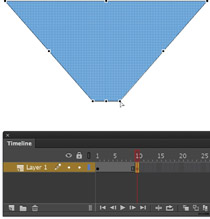
2 Hold down the ![]() key and pull a top corner point away from the shape. With the
key and pull a top corner point away from the shape. With the ![]() key still pressed, pull a bottom corner in the opposite direction.
key still pressed, pull a bottom corner in the opposite direction.
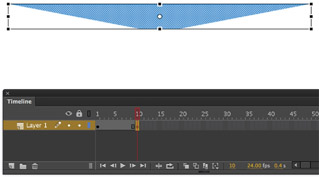
3 Click outside the shape to end the transformation. Select it again, hold down the ![]() key and drag the bottom middle handle upward. The
key and drag the bottom middle handle upward. The ![]() key will constrain the shape vertically.
key will constrain the shape vertically.
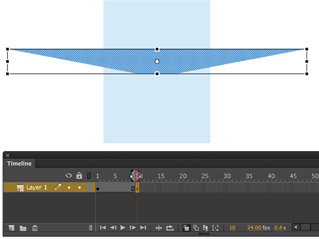
4 Turn on the Onionskin tool, so you can see the previous frame. Position the newly transformed shape so that it is centered over the original shape seen through the onionskin.

5 In Flash CC you have the ability to apply a Shape tween from the context menu in the timeline. So go ahead and apply one.
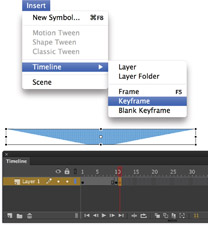
6 Now that you have the first half of the animation, you need to create the second half. Select frame 11 and insert a keyframe.
7 Modify the shape in frame 11 by flipping it vertically.
8 Select the keyframe in frame 1 and copy the frame ![]()
![]() . Next, select frame 20 and paste the frame
. Next, select frame 20 and paste the frame ![]()
![]() .
.
9 Apply a Shape tween to the latter half of your frames. You may experience a misbehaving tween like I did when writing this topic. Let’s fix it.
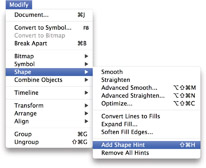
10 Let’s add some shape hints to correct the problem. Select the first frame in the faulty tween and then go to Modify > Shape > Add Shape Hint ![]() .
.
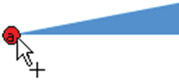
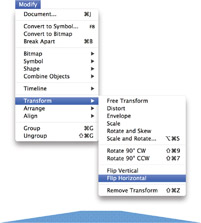
11 Drag the red “a” hint to one of the corners of your shape until it snaps.

12 Go to the last keyframe in your tween and drag the green “a” hint to the same respective corner. Repeat this procedure again for the opposite corner.
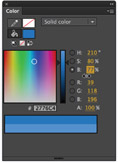
13 The final visual effect is to mix a slightly darker version of the color of the card, and then use it to fill the shapes in frames 10 and 11.
14 The card will not only tween its shape but also its color from light to dark. This color change makes for a convincing three-dimensional effect.
Hot Tip

While writing this topic, I experienced a common weakness with Shape tweens in Flash. Due to the nature of vectors and how Flash tries to calculate what it thinks you want to achieve, sometimes the tween implodes or twists in ways we never anticipated. Shape hints exist for this very reason and they are easy to learn about in the Flash Help docs. An alternative solution for this example would be to convert frames 1-10 to keyframes, copy and paste them in frames 11-20 and then reverse them.
3D Rotation
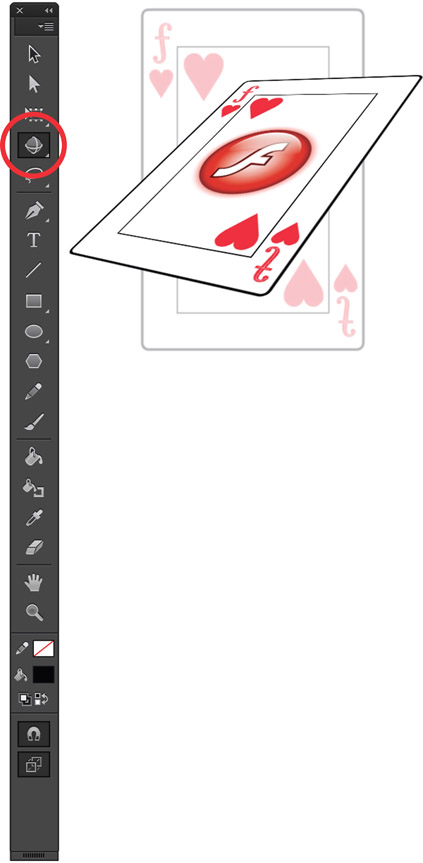
ILLUSTRATION: CHRIS GEORGENES
THE PREVIOUS CARD FLIP example demonstrates how to transform a vector shape with the Free Transform tool and “Classic Tweens.” Adobe Flash CC provides tools to simplify the same process. The 3D Rotation tool lets you transform objects not only along the X and Y axes but the Z axis as well.
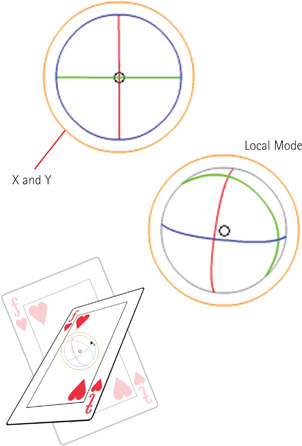
1 The 3D Rotation tool ![]() rotates Movie Clip instances in 3D space. A 3D rotation control appears on top of selected objects on the Stage. The X control is red, the Y control is green and the Z control is blue. Use the orange free rotate control to rotate around the X and Y axes at the same time.
rotates Movie Clip instances in 3D space. A 3D rotation control appears on top of selected objects on the Stage. The X control is red, the Y control is green and the Z control is blue. Use the orange free rotate control to rotate around the X and Y axes at the same time.
The default mode of the 3D Rotation tool is global. Rotating an object in global 3D space is the same as moving it relative to the Stage. Rotating an object in local 3D space is the same as moving it relative to its parent Movie Clip if it has one. To toggle the 3D Rotation tool between global and local modes, click the Global toggle button in the Options section of the Tools panel while the 3D Rotation tool is selected. You can temporarily toggle the mode from global to local by pressing the ![]() key while dragging with the 3D Rotation tool.
key while dragging with the 3D Rotation tool.
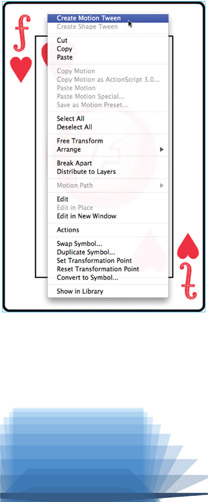
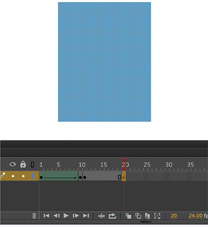
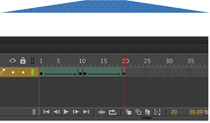
2 The first thing to do is to right-click over the Movie Clip and select Create Motion Tween. Flash CC will automatically insert frames based on the document frame rate to achieve a full second in the Timeline. This document is set to 24fps, therefore the duration of my motion tween is 24 frames.
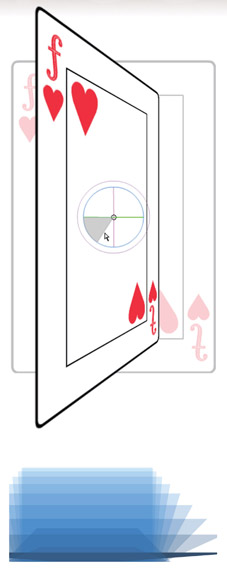
3 Position the frame marker on frame 12. Select the 3D Rotation tool ![]() . Click on the instance of the card and notice the 3D rotation controller that appears on top of the symbol. Click inside the 3D control and drag along the Y axis to rotate the card in 3D space. Notice that Flash has inserted a keyframe automatically for you.
. Click on the instance of the card and notice the 3D rotation controller that appears on top of the symbol. Click inside the 3D control and drag along the Y axis to rotate the card in 3D space. Notice that Flash has inserted a keyframe automatically for you.

4 Position the frame marker on the last frame and continue to rotate the Movie Clip along its Y axis in 3D space until it is 180 degrees from its original orientation. Repeat these steps as often as needed depending on the number of rotations you want to animate.
5 If you want to extend the Motion tween in the layer without affecting the existing keyframes, simply hold down the ![]() key while dragging the right edge of the tween. Another way to do the same thing is to click on a frame further down the Timeline and press the F5 key to insert frames up to the selected frame.
key while dragging the right edge of the tween. Another way to do the same thing is to click on a frame further down the Timeline and press the F5 key to insert frames up to the selected frame.
Hot Tip


Press the ![]() key to toggle between global and local mode.
key to toggle between global and local mode.
Butterfly
BUTTERFLY ILLUSTRATION: CHRIS GEORGENES
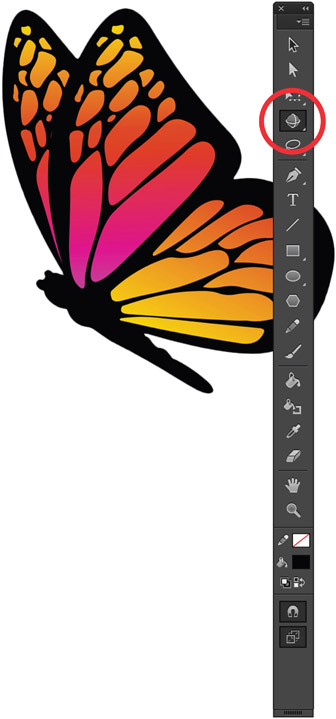
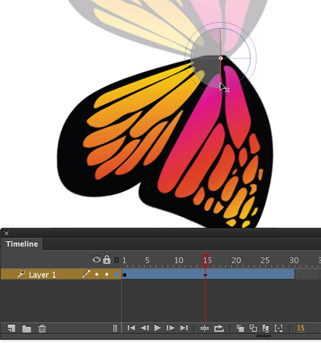
IN OLDER versions of Flash the butterfly’s wings were animated using the Distort tool (subselection of the Free Transform tool). With the 3D tools in Flash CC, however, it is much more efficient to use the 3D Rotation tool for the flapping wing animation. Here I have converted the original wing graphic to a Movie Clip symbol and applied a motion tween using the new Motion Model. The advantages of using the 3D Rotation tool for this animation are faster results and a smaller file size. The smaller file size is on account of using motion tweens and several instances of the same symbol. Previous methods required each frame to be re-drawn, resulting in a frame-by-frame animation using raw vector art for each keyframe which created larger file sizes since each frame contained all new data that needed to be loaded sequentially when viewing online.

1 Convert the wing into a Movie Clip symbol twice so that you end up with a movie clip inside a movie clip. You will want to animate the wing inside a symbol, so a 2nd instance can be used for the other wing later.
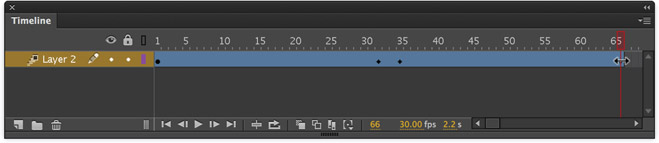
Select the 3D Rotation tool ![]() . Click on the instance of the wing and notice the 3D rotation controller that appears on top of the symbol. Reposition the controller by dragging it to a new location. The controller’s position determines its center point. Right click over the symbol and select Create Motion Tween. Flash will automatically insert frames based on the document frame rate to achieve a full second in the Timeline. This document is set to play back at 30fps, therefore the duration of my motion tween is 30 frames. The speed of the animation can be easily changed by dragging the right edge of the motion tween left or right.
. Click on the instance of the wing and notice the 3D rotation controller that appears on top of the symbol. Reposition the controller by dragging it to a new location. The controller’s position determines its center point. Right click over the symbol and select Create Motion Tween. Flash will automatically insert frames based on the document frame rate to achieve a full second in the Timeline. This document is set to play back at 30fps, therefore the duration of my motion tween is 30 frames. The speed of the animation can be easily changed by dragging the right edge of the motion tween left or right.
2 Position the frame marker about mid-way between frames 1 and 30 (frame 15 will work). Click inside the 3D control and drag along the X axis until the wing is 180 degrees from its original position. Notice that Flash has inserted a keyframe automatically for you.
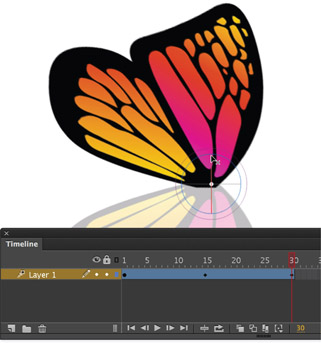
3 Position the frame marker on the last frame in the tween. Drag along the X axis inside the 3D control until the wing is back in its original position. Play back your timeline by pressing the ![]() key to see the wing flapping along the X axis.
key to see the wing flapping along the X axis.
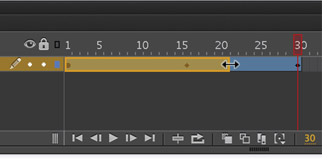
4 To adjust the speed of the wing animation, click and drag the leading edge of the motion span. Here I’ve decreased the length of the Motion span which increases the speed of the animation.
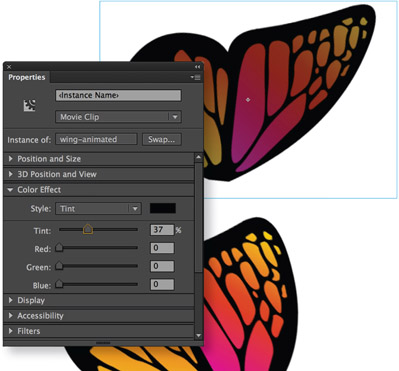
5 Copy and paste ![]() the movie clip containing the wing animation to use as the 2nd wing on a new layer below all existing layers. Select it and using the Tint color effect in the Properties panel, darken it slightly to provide a sense of depth.
the movie clip containing the wing animation to use as the 2nd wing on a new layer below all existing layers. Select it and using the Tint color effect in the Properties panel, darken it slightly to provide a sense of depth.

6 Create a body shape, align the wings and publish your movie to see the butterfly take flight. To add some depth to the butterfly, move the back wing to the right a few pixels and skew it slightly. You can also move the front wing to the left and skew that a little also.
Hot Tip

Double-click the center point of the 3D control to move it back to the center of the selected Movie Clip.
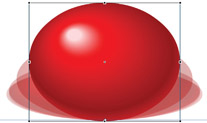
Squash and stretch

CHARACTER: JOE CORRAO
SQUASH AND STRETCH IS A TRADITIONAL technique that is widely used to give animations more realism and weight. When a moving object comes in contact with a stationary object, it will deform on impact unless it is completely rigid. It’s important to remember that no matter how much an object squashes or stretches, it always maintains the same amount of volume. The amount of squash and stretch depends on how much flexibility your object has. Traditional animation usually contains exaggerated amounts of squash and stretch. A good example of squashing and stretching is a bouncing ball. When it hits the ground, it actually deforms and gets squashed. It will then become stretched as it propels itself upwards. With a little Motion tweening and frame-by-frame animation in Flash, we can achieve convincing realism with relatively little effort.
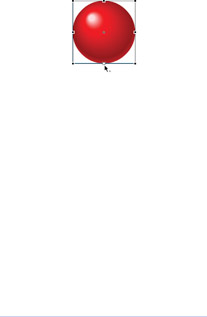
1 Start with the object in its highest position. Convert it to a symbol and then edit its center point using the Free Transform tool ![]() . Move the center point to the center of the bottom edge.
. Move the center point to the center of the bottom edge.
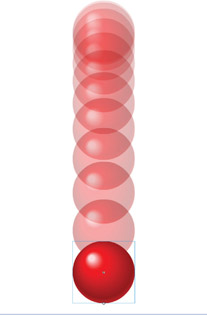
2 Insert a second keyframe further down your timeline and position the ball vertically just above the horizontal guide. Apply a Motion tween with Easing set to “-100” (ease in).
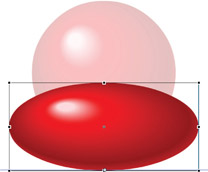
3 In the next frame, insert a keyframe and turn on the Onionskin tool. Use the Free Transform tool to scale the ball, so it becomes wider and shorter. It’s important to keep the volume of the ball consistent.
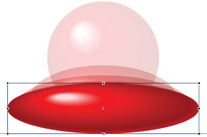
4 Insert another keyframe about four or five frames further down the Timeline. Squash and stretch the ball even more. Apply a Motion tween and set the Easing to “100” (ease out).
5 Insert another keyframe a few frames down your Timeline and transform your ball in the opposite direction. Make sure it still has some deformation applied to it.
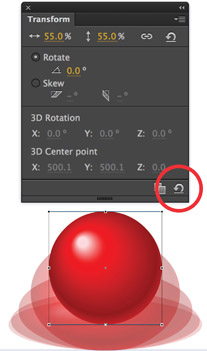
6 Start the ball’s ascent by inserting yet another keyframe and removing all transformations. The Transform panel has a Remove Transform button to make this a one-click solution.

7 Copy the first frame and paste it as your last frame to position the ball at the end of your Timeline in the exact same position as it started. Apply a Motion tween and set the Easing to “100” (ease out).
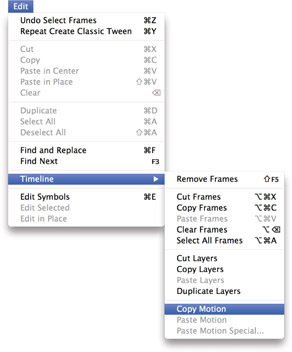
8 Flash CC offers a way to reuse animations. Copy Motion allows a Classic tween, its frames and symbol information to be pasted to another object. Select all the frames in your squash and stretch animation. Select Edit > Timeline > Copy Motion.
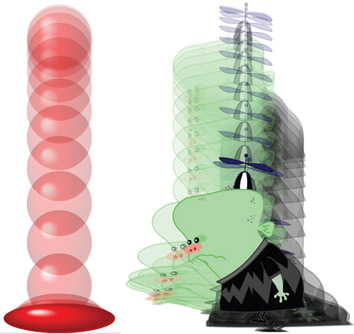
9 Insert a new layer and create (or drag from the library) a new symbol to the stage. Select this new symbol and go to Edit > Timeline > Paste Motion. Your additional symbol will now have the same exact span of frames, Motion tweens, easing and transformations. Thanks to Joe Corrao for contributing the character above (joecorrao.com).
Hot Tip

Save and reuse animations using Motion Tweens and right-clicking over the tween span and selecting Save as Motion Preset in Flash CC. It’s also a good idea to keep all your most used animations in a single FLA document, so they are easier to locate.
A moment of clarity
I REMEMBER THE MOMENT HOW, AS AN ARTIST, I COULD MAKE MY MARK on the world. It took me over 6 years to figure it out exactly how.
It began in 1989 when I graduated from the Hartford Art School (Connecticut) with a major in printmaking with a minor in Art History. I took enough Illustration classes to constitute a double major. The result: a portfolio filled with static lithographs, etchings and a multitude of illustrations of varied mediums. Animation didn’t exist in the curriculum and therefore was never an option. I never considered animation as a skill I would even be good at.
After graduating, I pounded the pavement with portfolio in hand, knocking on as many doors as I could. With the exception of a handful of interviews, having no experience did not get me very far. The Internet didn’t really exist back then, at least not as we know it today. The term “home PC” wasn’t invented yet, and I was stuck with a book filled with analog images that represented four hard years as an artist and hardly anyone to show it to.
After six years of countless random jobs (Jeep mechanic, restaurant manager, Boston Water & Sewer Commission, etc…), I became aware of a local education software company that was producing a new animated series on Comedy Central. On a Monday morning I walked in the front door of this software company, gave my portfolio to the receptionist and told her I’d be back on Friday to pick it up. I turned around and walked out the door.
A month later, they hired me to work on an animated pilot for Dreamworks. At that time, the company used an old DOS-based animation program called Animator Pro (Autodesk) that soon became obsolete. We turned to Flash, and little did I realize the impact it would have on my career. Initially we were using Flash to animate broadcast shows. We didn’t have a clue how to use it for the web until we got a deal to produce an animated series for a popular website called shockwave.com (now atom.com). I was put in charge of this project and had to ramp up my knowledge of Flash very quickly. During this time, my contact at Shockwave asked if I could speak at the Flashforward conference in New York City. I agreed without knowing exactly what that meant.

I drove the 3 hours from Boston to NYC the day of my session. I shared the stage with two brothers, Gregg and Evan Spiridellis, who had just started a small company in NYC called JibJab (ever heard of it?). We became fast friends and remain so even to this day.
That evening was the Flash Forward Film Festival, held in a huge theater with a very large screen that displayed the best use of Flash in several categories. Awards were being given and the excitement in the air was palpable. I never anticipated that a software program could generate such a buzz. I was witness to a culture being born, an entire society of Flash users who shared a common bond as if it were some secret handshake or cryptic language. And there I was, standing in the middle of their nest, surrounded by the frenetic buzzing and energy derived from this program.
It was my first experience seeing the best of the web being celebrated on a huge stage, and it suddenly all made sense to me why I was there, what I was involved with and what I had to do. It was my first moment of clarity.
To describe the image of me standing in the back of the theater and watching this phenomenon transpire, recall the scene from The Blues Brothers film where John Belushi is in the church chanting “The band!” as he is struck by a holy beam of light through the church window. That was me. I knew from that moment on what I needed to do. I drove home as my head was spinning with ideas about how I was going to use Flash as my canvas to create and display my art to the world (or at least anyone willing to go online and look at it). It was a 3-hour drive, and I never even turned on the radio the whole way.