10
Interactivity
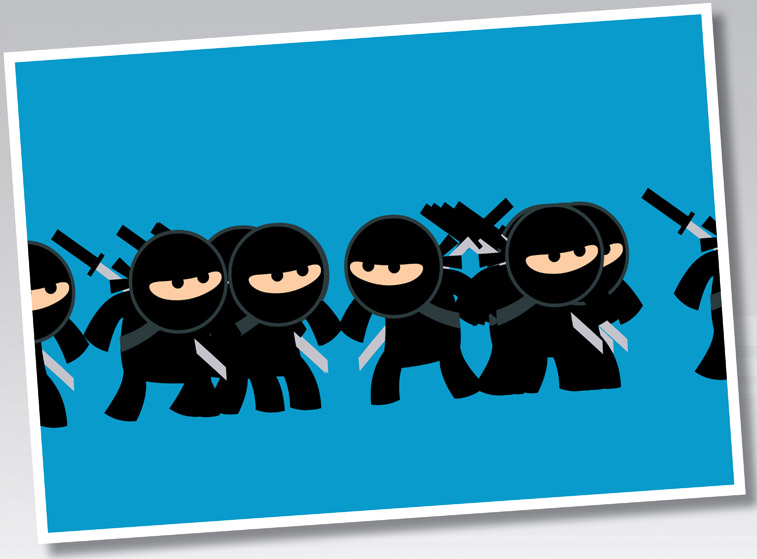
■ This chapter is divided into 6 stages. Stage 1 will show you how to dynamically create a character that can be controlled to run left, right and jump. In subsequent stages you will then add more characters, interactivity, parallax scrolling, particle effects, sound and even add touch controls for mobile devices
ALL OF THIS DESIGN AND ANIMATION IS FUN, BUT that’s only one side of the Flash authoring experience. Interactivity is an entirely different, yet complementary side of Flash that when combined with design, makes for a compelling experience.
This chapter features a step-by-step process of how to design and code a game entirely within Flash CC. Thanks to my talented friend David Crawford we will show you how to create a character that can be controlled in real time using keyboard shortcuts and ultimately how to build a complete interactive game.
David Crawford is the brain child behind PercyPea Ltd., a company that specializes in advanced online, single and multiplayer, Facebook and iPhone game development, with games reaching hundreds of millions of players.

Stage 1
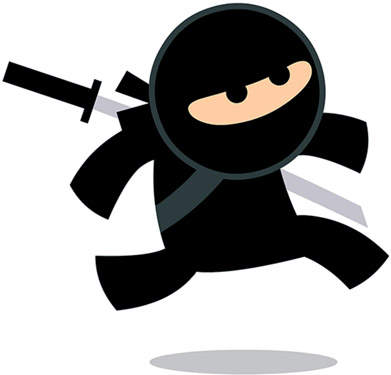
STAGE 1 WILL SHOW you how to set up a Movie Clip symbol with your animated character and how to include ActionScript to spawn multiple instances of this symbol. In addition we will add ActionScript that provides the viewer the ability to control one of the Movie Clips with keyboard commands. Press the left arrow key and the character will run to the left. Press the right arrow key and the character will run to the right. Press the space bar and the character will jump. You will create all of this interactivity using a single FLA file to keep things as simple as possible for non-developers. In later stages we will add more advanced features, but for now let’s keep it simple.
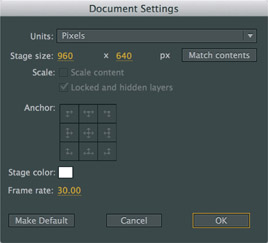
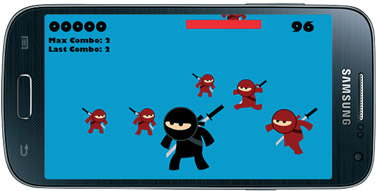
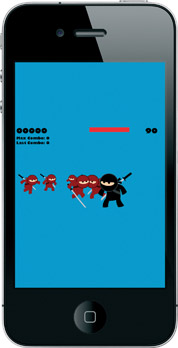
1 Start with creating new 960x640 FLA. This resolution is the native iPhone4 screen size. It’s also a reasonably good size for a web-based game (well maybe a bit too large, but not to worry, the game will scale nicely).
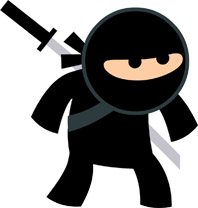
2 Create new Movie Clip for your character. For future coding ease, make the Movie Clip so that the 0,0 center point of the Movie Clip is at ground level and pretty much in the center of the symbol. If the center point is at the bottom and center, the character won’t move too much when we flip him horizontally.
If you would prefer you can use ‘stage0.fla’ from the companion website which contains our pre-animated Ninja. If you use this file rather than creating your own, simply jump to Step 7.
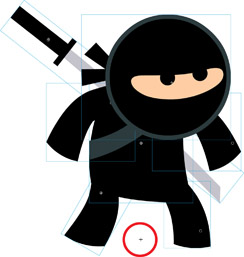
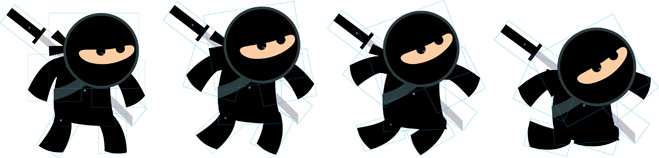
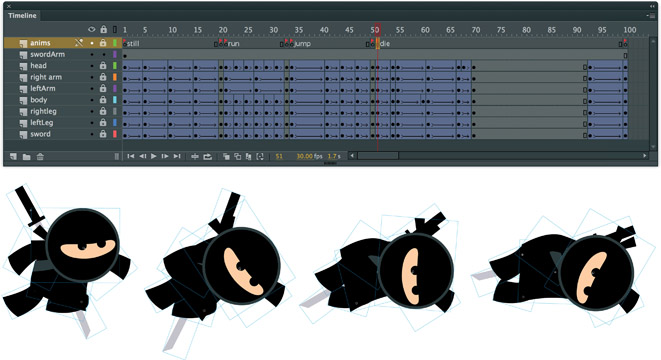
3 Draw your character with each body part inside it’s own movieclip on it’s own layer. Before animating, give each body part an instance name (using the properties panel), ‘head’, ‘body’, ‘rightarm’, ‘leftarm’, ‘rightleg’, ‘leftleg’ and ‘sword’. Note the cross hairs that represent the center point of the symbol near the character’s feet are located as instructed in the previous step.
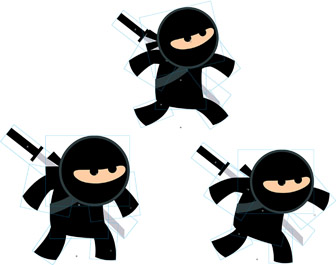
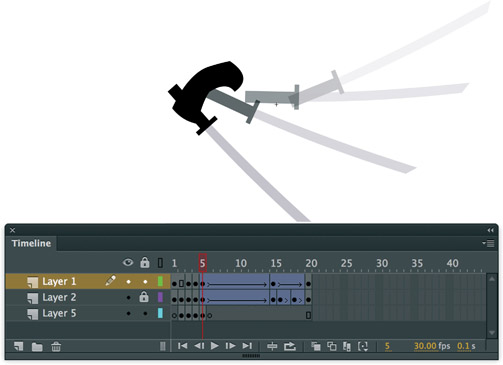
4 Create three animations: a still, run and jump. You can use tweens, keyframes or a combination of both. Most importantly, make sure the start and end frames are the same for each animation that needs to loop.
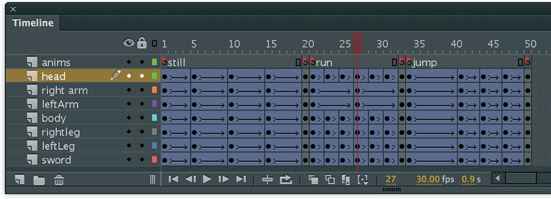
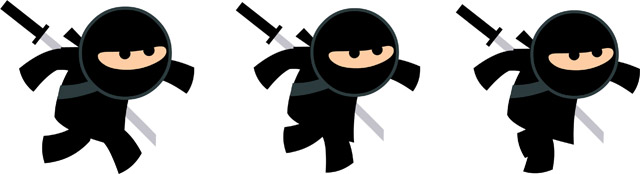
5 The Movie Clip timeline contains 3 animations: still, run and jump. Even though the first animation is still, there is some subtle motion of the character moving slightly back and forth. This state is often referred to as an idle animation and used for whenever the character is stationary. The subtle motion provides the illusion of breathing or resting which looks more realistic, especially if your character is required to run a lot in what may be a side scrolling game.
6 Create a new layer above all other layers and insert blank keyframes at the beginning and end of each animation cycle. In frame 1 add the label still and in the last frame of the still animation add the label still_end. Repeat these steps by adding labels to the other 2 animation cycles with descriptive names such as run, run_ end, jump and jump_end. These labels will be used to control each animation dynamically when ActionScript is added later on.
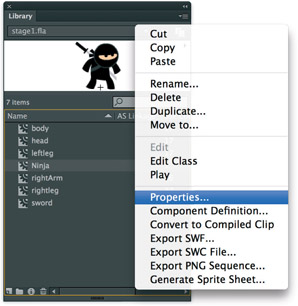
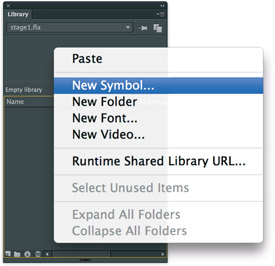
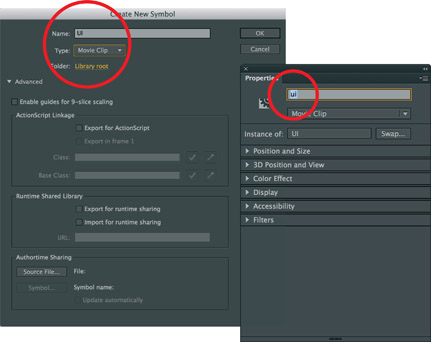
7 In the library is the Ninja Movie Clip. Right-click over it and select Properties from the context menu.
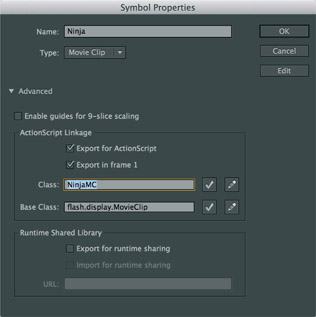
8 Open Advanced options and click the Export for ActionScript. By default the Class name will match the name of our Movie Clip, however let’s change that to NinjaMC. Assigning a Class name for ActionScript linkage automatically sets up the Properties of the Movie Clips so that we can access it via ActionScript and place as many instances of the ninja on screen as desired. Because we are now going to place the character on the screen programmatically, make sure you don’t have your ninja already on screen in the main timeline.
Hot Tip

Entering a Class name to a Movie Clip requires right-clicking over the Movie Clip in the library, clicking Advanced and subsequently clicking the “Export for ActionScript” checkbox. A quicker way of assigning a Class name for export to ActionScript is to double-click in the empty space in the “AS Linkage” column next to the Movie Clip in the library. You can then immediately type in the Class name you want to use and the appropriate check boxes will have been ticked automatically.
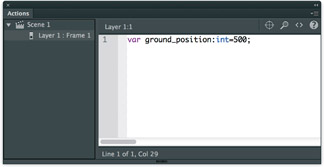
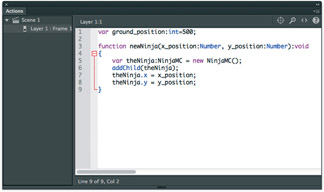
9 In your main scene, which should be a nice big empty stage, add the first line of code into frame 1. Open the Actions panel by going to Window > Actions. Click on the empty keyframe in frame 1 in the timeline and type the following code into the Actions panel:
var ground_position:int=500;
This code defines where the character will be placed on the stage when the file is published to the SWF format and played in the Flash Player.
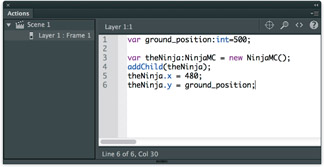
10 Let’s add the code that will generate the character from the Movie Clip in the Library:
var theNinja:NinjaMC = new NinjaMC();
addChild(theNinja);
theNinja.x = 480;
theNinja.y = ground_position;

11 Test the Flash movie by going to Control > Test Movie > In Flash Professional. You should now see theNinja in the middle of the screen, playing through all of his animations. So far, so good. Let’s add more ninjas!
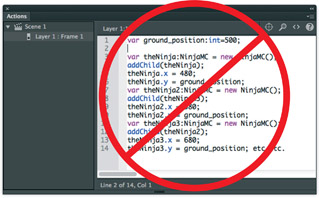
12 As intuitive as it may seem, instead of taking the previous code and duplicating it for each new ninja we want on the screen, let’s make the code into a nice simple Function that we only need to write once. The Function will allow us to call upon it as many times as we want. The above image shows how not to write code that duplicates the character. It’s not necessarily wrong; there are better and more efficient ways to use ActionScript.
13 We will create a newNinja Function that provides us with the ability to create an instance of our NinjaMC Class and then tell it where on the stage it should be positioned. We will set up the function so that we can add some values to it.
function newNinja(x_position:Number, y_
position:Number):void
{
var theNinja:NinjaMC = new NinjaMC();
addChild(theNinja);
theNinja.x = x_position;
theNinja.y = y_position;
}
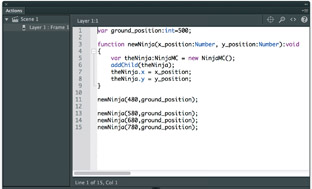
14 To call the function, we just need to write the line
newNinja(480,ground_position);
For every new ninja, we could then add:
newNinja(580,ground_position);
newNinja(680,ground_position);
newNinja(780,ground_position);
But once again, there’s a more efficient way to add multiple instances of this Movie Clip in the next step.
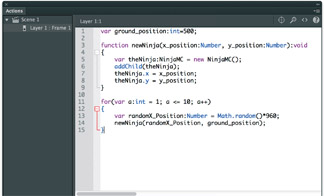
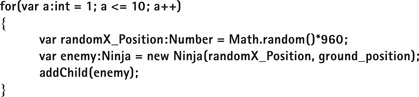
15 Add the following code that creates a convenient loop that will add 10 ninjas and place them at a random x position on the stage.
for(var a:int = 1; a<=10; a++) {
var randomX_Position:Number = Math.random()*960;
newNinja(randomX_Position, ground_position);
}
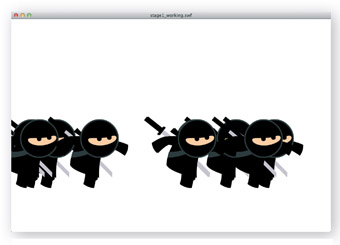
Test the movie to see the code spawn 10 instances of the Movie Clip containing the character playing through each of the animations inside its timeline.
16 But we don’t want the animations to loop like this! Let’s continue by making the still animation simply loop by itself. To loop just the still animation, we will need to control the Movie Clips’ timeline – more specifically, the frames in between the still and still_end frame labels.
Hot Tip

When creating a function we can set up values that get passed to it. In the case of our newNinja function we pass to it × and y position values for our ninjas.
The function itself calls them x_position and y_position and simply assigns them to our new ninja as × and y coordinates.
When we call the function we pass a random number for the x_position but the same ground_position value for the y_position. Changing only the x_position means all our ninjas will have the same y position, but it will be very unlikely that any share the same × position.

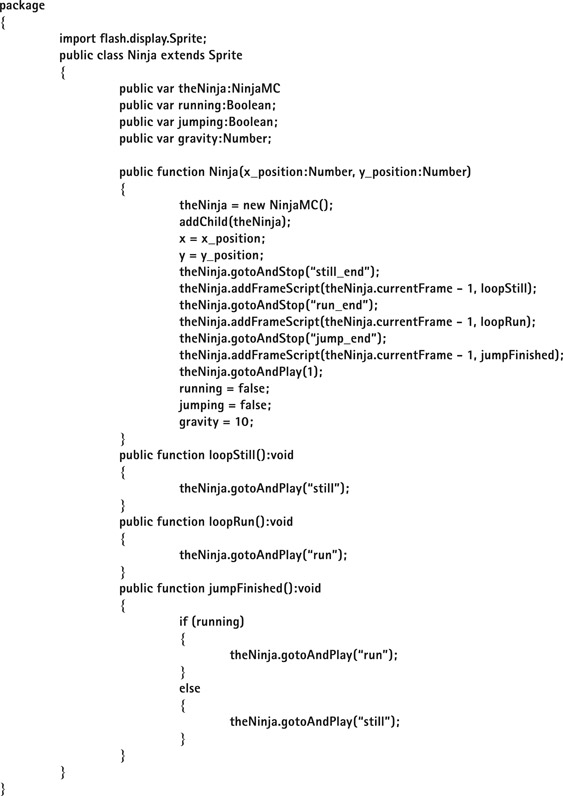
IN OUR NEWNINJA FUNCTION, WE NEED TO ADD some code to the Ninja itself to automatically loop its animation when it reaches the end of the timeline inside the Ninja symbol. There is an undocumented feature in Flash where we can add function calls at certain frames. When using this method, frame numbers actually start from 0, rather than 1 as in the timeline, so you need to remember to always subtract 1 from the frame number where you want to go to.
Furthermore, we actually want to go to the frame labeled still_end, so we can’t very well say goto “till_end”- 1, as that will just confuse poor flash.
Thankfully there is a quick fix; we simply tell our NinjaMC to go to the frame still_end then grab the real frame number for that frame, subtract 1 from it, and use the addFrameScript command with that number. The command addFrameScript unfortunately doesn’t allow you to pass values into functions, so we can’t directly call the gotoAndPlay command passing in still, but a simple fix is to give our ninja a new function, which doesnt need any values to be passed but then simply calls gotoAndPlay(“still”);.
Finally, we then add a bit of code to set the ninja back to playing its animation from the first frame.
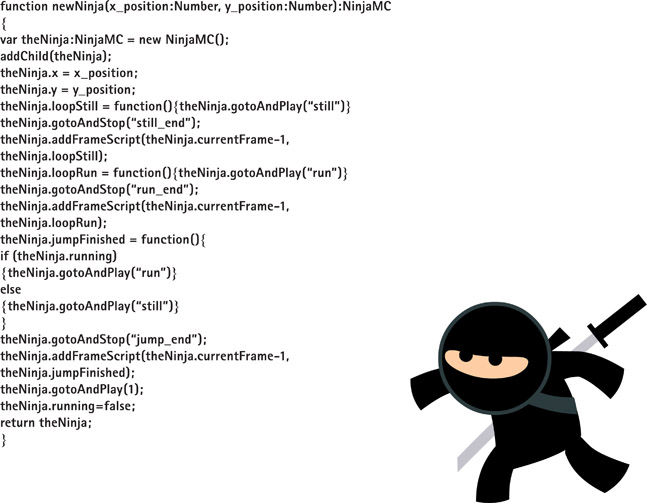
17 So our newNinja function should look like this:
function newNinja(x_position:Number, y_position:Number):void
{
var theNinja:NinjaMC = new NinjaMC();
addChild(theNinja);
theNinja.x = x_position;
theNinja.y = y_position;
theNinja.loopStill = function(){theNinja.gotoAndPlay(“still”)}
theNinja.gotoAndStop(“still_end”);
theNinja.addFrameScript(theNinja.currentFrame-1,
theNinja.loopStill);
theNinja.gotoAndPlay(1);
}
18 But what about the run and jump parts of our animation? For the run, we simply do something very similar to the still:
theNinja.loopRun = function(){theNinja.
gotoAndPlay(“run”)}
theNinja.gotoAndStop(“run_end”);
theNinja.addFrameScript(theNinja.currentFrame-1,
theNinja.loopRun);
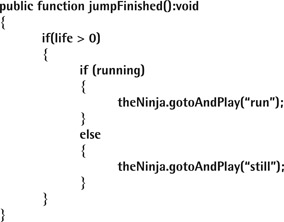
19 For the jump though, this isn’t a looping animation, and when it’s finished, we need to go back to either still or run animations. We will give our ninja a new property called running, which later we will set to be either true or false, and jump will simply check that value.
theNinja.jumpFinished = function(){
if (theNinja.running)
{theNinja.gotoAndPlay(”run”)}
else
{theNinja.gotoAndPlay(”still”)}
} theNinja.gotoAndStop(“jump_end”);
theNinja.addFrameScript(theNinja.currentFrame-1,
theNinja.jumpFinished);
20 We squeeze the above run and jump lines in before the gotoAndPlay(1) line, and at the bottom put in theNinja. running=false;
theNinja.jumpFinished = function(){
if (theNinja.running)
{theNinja.gotoAndPlay(theNinja,”run”)}
else
{theNinja.gotoAndPlay(theNinja,”still”)}
} theNinja.gotoAndStop(“jump_end”);
theNinja.addFrameScript(theNinja.currentFrame-1,
theNinja.jumpFinished);
theNinja.running=false;
21 So now we have 10 ninjas on screen all looping their still animations and also set up to loop their run animations and return to either still or run from their jump animation. But what good is it if we don’t know which of the 10 ninjas is you, the player? No good at all. Back where we created our newNinja function, you will see the word:void at the end of the first line. This first line tells Flash that when the function is called not to bother returning any information. We can easily change it so that instead we actually return that particular ninja we have just created.
Hot Tip

Not only can functions be used to perform a little section of code over and over again, they can also be set up to return bits of information we may want.
On this page we are setting up our newNinja function to simply return the reference to the new ninja we have just created.
On the next page we will see how we can use this reference to pick out our own personal ninja from the crowd.
22 Now, after the loop of 10 ninjas, we can have an extra line where we create our 11th ninja, player. From this point forward our ninja will always be known as player to the rest of the code.
var player:NinjaMC = newNinja(480,ground_position);
23 Now let’s make our ninja move! Each key on your keyboard has its own unique keyCode, for example the left cursor key’s code is 37. We don’t need to know these codes, as we can look them up in Flash’s built in Keyboard Class. The left cursor key is Keyboard.LEFT. There are lots of ways to assign key press actions to each key. I like to use a simple Array;
var keyPressedActions:Array = new Array();
24 We then map function calls to the keys:
keyPressedActions[Keyboard.LEFT] = moveLeft;
keyPressedActions[Keyboard.RIGHT] = moveRight;
25 We also need an array for when our keys are released
var keyReleasedActions:Array = new Array();
keyReleasedActions[Keyboard.LEFT] = stopMoving;
keyReleasedActions[Keyboard.RIGHT]= stopMoving;
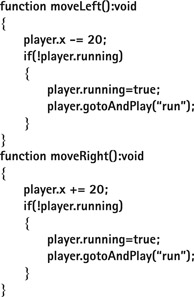
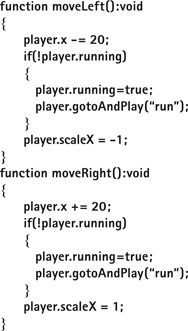
26 We now need to create our functions that we’ve already started to assign to key presses. For now, in our move left and move right functions we’ll simply subtract 20 pixels from the player’s Ninjas × position when moving left, and add 20 when moving right. We’ll also rememberto set the running property to true, so when it comes to jumping we’ll know if it’s a run, jump or a still jump. You’ll see that we also tell our Ninja movieclip to go to (and play) the run animation. We only tell it to run if the ninja previously wasn’t running, otherwise the code would always go to the first frame of the run animation and not loop.
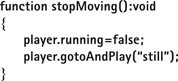
27 Our stopMoving function simply sets our ninja to go back to the still animation and also marks that it is no longer running.
28 We need to tell Flash to listen for key presses. Then depending on the key that is pressed, get the ninja to do something. We also need Flash to listen for when that key is then released to then stop the ninja from whatever it was doing. So… we add two listeners!
stage.addEventListener(KeyboardEvent.KEY_DOWN, keyPressed);
stage.addEventListener(KeyboardEvent.KEY_UP, keyReleased);
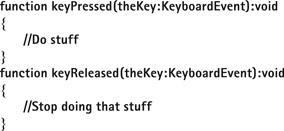
29 We then need to make the keyPressed and keyReleased functions; we will populate them shortly
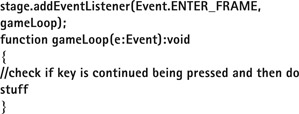
30 Typically, when a user presses a key, they expect to start doing something; while the key is held down, continue doing that something; then when the key is released, stop doing that something. For example, pressing and holding the right arrow key, you would expect your ninja to move right and continue to do so until you release the right arrow. So how can we make the ninja start, continue to stop with just the above press and release functions, when we don’t have a hold function too? We can’t! We now create possibly the most important piece of code for our game – what we will call the gameLoop. We will listen for a special event called ENTER_FRAME which actually gets dispatched every single frame – so many, many times per second (depending on your swf frame rate, of course!).
31 So we have our 3 listeners that will handle the keyboard: pressed, continued being pressed (our game loop) and released. For simplicity, we are going to actually deal with pressed and released. We will simply record which key was pressed and then delete that recording when we release. To keep track of which key is pressed, we make another new array to record or store that information. Place this line of code up above your keyPressed function.
var keys:Array = new Array();
32 We then modify our keyPressed function as follows:
function keyPressed(theKey:KeyboardEvent):void
{
keys[theKey.keyCode] = true;
}
and keyReleased function to this:
function keyReleased(theKey:KeyboardEvent):void
{
delete keys[theKey.keyCode];
if(keyReleasedActions[theKey.keyCode])
keyReleasedActions[theKey.keyCode]();
}
Hot Tip

The ENTER_ FRAME event is a powerful event to use.
Each and every frame of your 12, 24, 60 or even 120 frames per second that you set your swf to publish will dispatch this event.
By listening to it you can then run code to move and animate things just as if you had animated them using keyframes on the timline.
It’s possible to create just one listener for this event to handle all possible looping code in your game.
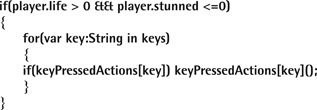
33 You will notice the keyReleased function has an extra line which is needed to call our keyReleasedAction immediately. We don’t have to call the keyPressedAction when we press the key, as our gameLoop handles that. In our gameLoop code, we examine our key’s array to see if any of the values are true (ie, a key has been recorded that it is pressed and still down) and then trigger the corresponding keyPressedActions. Because we are storing function references in our keyPressedActions Array, we can trigger these functions by simply putting () at the end.
function gameLoop(e:Event):void
{
for(var key:String in keys)
{
if(keyPressedActions[key]) keyPressedActions[key]();
}
}
34 You should now be able to test your game and move your ninja! So what’s the first problem we see when moving our ninja left and right? That’s right, he doesn’t face left (assuming we drew him facing right by default). Thankfully the fix is simple. We flip the ninja horizontally via code when moving left and back again when moving right. To flip him, we adjust the Ninja’s scaleX property: -1 means flip it, 1 means default. Our moveRight and moveLeft functions become:
35 Let’s add jumping! First we need to understand what a “jump” really is. In the real world, we are constantly pulled down by gravity. By jumping, we are exerting a force from the floor and fighting with the pull of gravity. Once our feet have left the floor, we have no ability to continue to fight gravity, so eventually it wins and pulls as back down. Currently in our game, we have no concept of gravity. Our ninjas all look like they are on the ground simply because we’ve position them all at the same y value, using our ground_position variable. So the first thing’s first, let’s actually emulate gravity! Don’t worry if physics isn’t your favorite subject; we’re going to keep things very simple and not accurately simulate real-world gravity. Back in our newNinja function, we are going to add a new variable to our ninjas:
theNinja.gravity = 10;
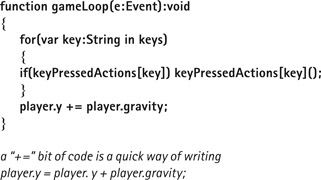
36 We now go to our gameLoop function and code it so that this gravity value is constantly added to our players y position (eg, the player is always pulled down screen by the gravity, each frame/loop).
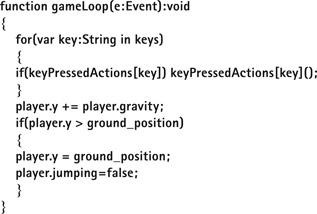
37 Now, the trouble is, because we already get our player to start off at our ground_position of 500. If we test the game, we see our player fall off into oblivion. We therefore add another bit of code to make sure that our player ninja never can go lower than the ground. We also will tell our player ninja that it is not jumping (because we know it is on the ground).
38 Of course now when we test the game, it looks like nothing has happened now as our ninja starts at ground level anyway. Let’s add our jump function! First, let’s assign a key to perform the jump command. Let’s use the A key.
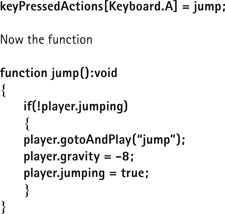
To help keep the code organized, we add this block up near the moveleft and moveright functions, and also set the keyPressedAction for A with our two left and right settings.
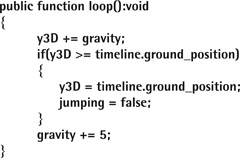
39 Finally, you see that we are setting our ninja’s gravity from the default 10, to -8. We come to this value because it’s half the number of frames in our jump animation (more on this below). There’s one extra thing we now need to do; setting the ninja’s gravity to -8 means that in each game loop 8 is subtracted from the player’s y position therefore causing the ninja to float upwards. To correct the floating, we simply add an extra line at the end of the game loop:
player.gravity += 1;
This single line of code means that for each loop, the gravity value gets greater by 1 and eventually becomes a positive number which therefore will start moving the ninja back down to earth. Increasing the gravity value by 1 and starting the gravity setting at -8 when we jump means that gravity will be 8 by the time the ninja is back on the ground. The gravity setting will have changed a total of 16 times which matches our frame count of the jump animation.
40 If we test the game, we will see now the ninja does jump, however, it is a puny and weak jump. To give our ninja more vigor, we just need to play around with the 1 value at the end of player.gravity+=1 and the -8 value that is set when we press jump. The rule is if we double the -8 value, then also double the 1 value. However, you will also find that you may want to change these values independently if you find that your ninja’s jump animation is actually over too soon or carries on after he’s landed. Alternatively, here is when you can adjust your ninja jump animation so that it fits better. For our ninja with a 16 frame jump animation, let’s try
player.gravity =- 40;
and
player.gravity += 5;
Perfect!:)
Hot Tip

In the jump function in steps 37 and 38 we use a new property of our player, “jumping”. This property is so that when we press our key to jump, the jump only happens once, rather than constantly while the key is held down. We just need to set player.jumping back to false when the ninja has landed, as only then do we want him to be able to jump again.
41 The full code for stage 1 looks like this:
var ground_position=500;
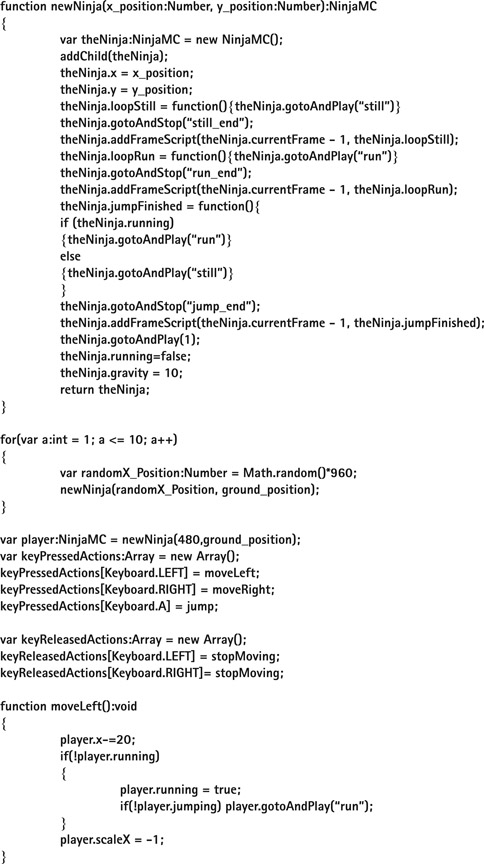
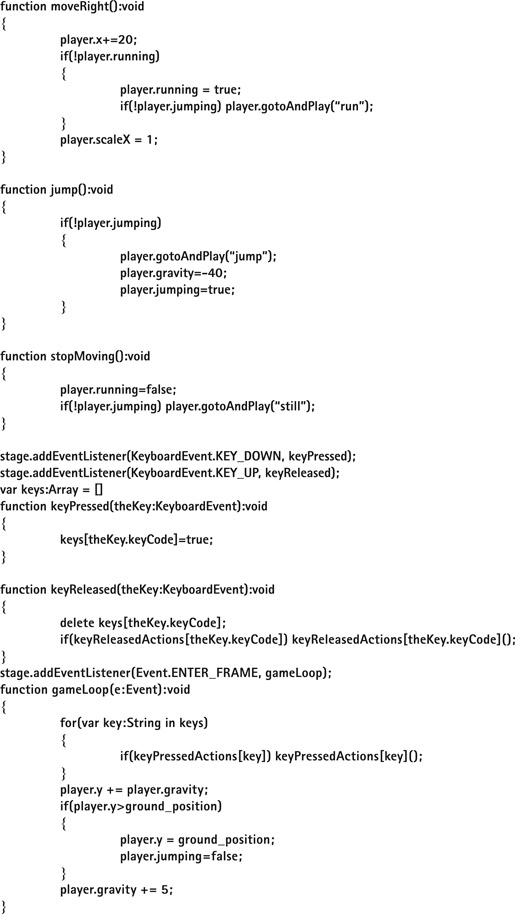
Stage 1 is now complete!

Hot Tip

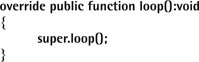
One final change that we make, as shown in the code on this page, is to modify our moveRight and moveLeft function so that our player ninja only does gotoAndPlay to run our animation if it’s not actually jumping.
Stage 2
SO! WE’VE COMPLETED STAGE 1. WE KNOW how to take our animated character, attach multiple copies of it to the stage via code, add basic code to control its animations, reference one in particular and make it a playable character.
But we’re still a long way off making a full game, and there are some things we’ll have to do first to our existing code before continuing in our quest.
Right now, we stand at around 120 lines of code, give or take a few empty line spaces. We have a system set up to listen for keystrokes and an easy way to assign different functions and commands to those keys. We also have a nice GameLoop that is set up to manage everything. If we continue down this path, we are going to end up with many more lines of code which will become harder and harder to manage. So, we are going to separate out our code into different files, files which are known as Classes.
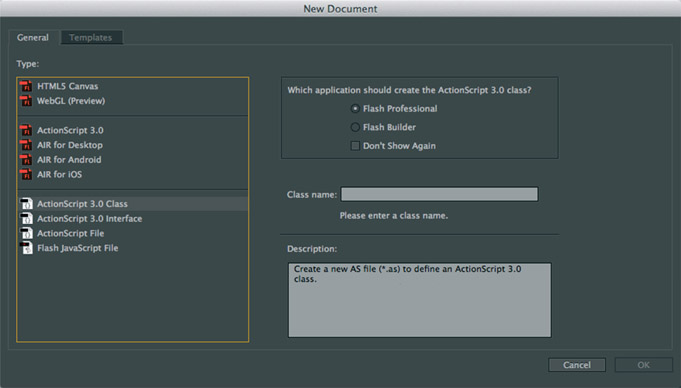
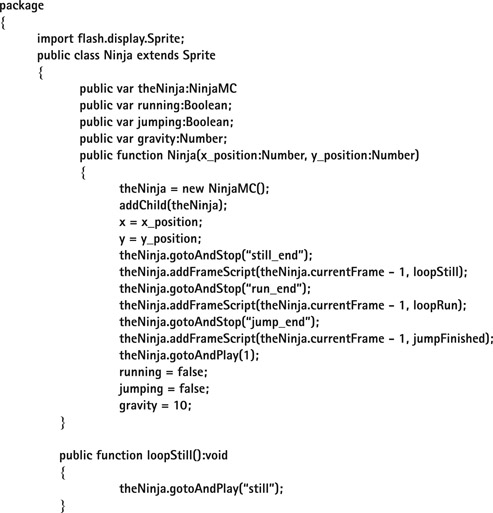
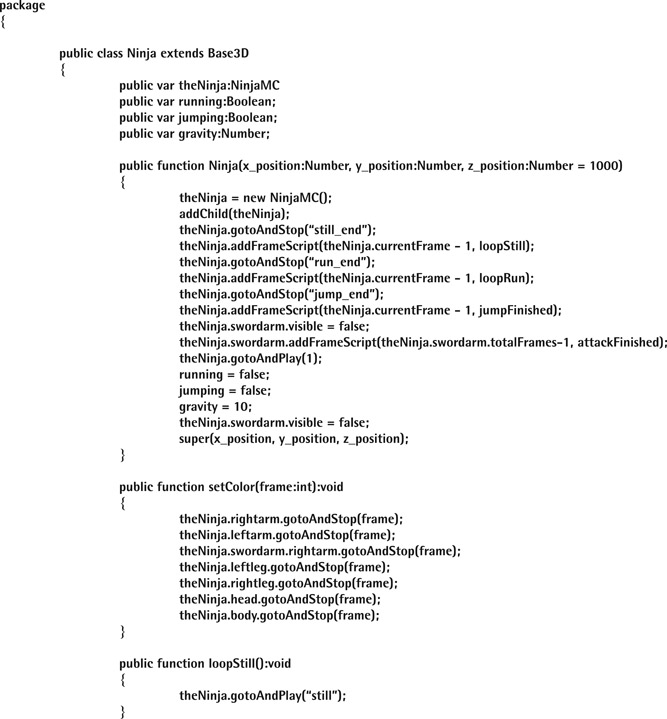
1 Our first Class! Go to File > New > ActionScript 3.0 Class, name it Ninja and save it in same directory as the FLA file we created in stage 1.
2 Now for the Ninja Class equivalent of our new Ninja function. It’s very similar, however a few places are changed over the function method in stage 1. Put this code into our new class:
Hot Tip

You will notice that in front of all our variables and functions inside our class, we have a new word “public.” This word which means that the variable or function can be reached from any part of our code such as our gameloop for example.
Although we won’t be doing it in the course of making this game, it’s also possible to use the word “private” instead of “public.” Making a variable or function private prevents other parts of code outside of the class from accessing our values and more importantly changing them when perhaps we don’t want them changed.
3 In Stage 1, in the main FLA timeline code we have the following line:
var player:NinjaMC = newNinja(480, ground_position);
With our new Class, let’s change this line to be these two lines:
var player:Ninja = new Ninja(480, ground_position);
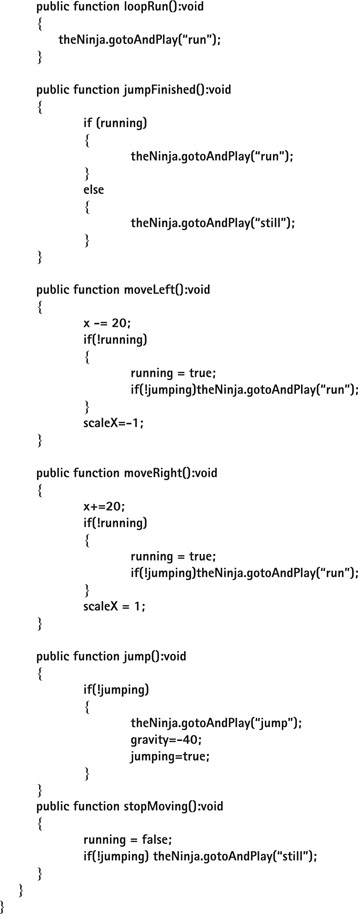
addChild(player);
Let’s also change our code that creates the 10 other ninjas to this:
4 What we will do now, is move our moveLeft, moveRight, stopMoving and jump functions to the new Ninja Class. We can cut them from the timeline as they will be no longer needed there and paste them into our Ninja class beneath the jumpFinished function. We need to add public before each function and remove most of the player. references. The ones which are player.gotoAndPlay however, we will replace with theNinja.gotoAndPlay.
With these functions inside our Ninja Class, we need to make some minor modifications to our keyPressedActions and keyReleasedActions arrays.
Simply stick player. in front of all the function names, ie:
keyPressedActions[Keyboard.LEFT] = moveLeft;
becomes:-
keyPressedActions[Keyboard.LEFT] = player.moveLeft;
Hot Tip

In Stage 1, although we weren’t directly using classes, our NinjaMC in the library is actually a Class. Those eagle eyed will have spotted in the Symbol Properties panel that it uses a Base Class of “MovieClip.”
The MovieClip Class is known as a Dynamic Class which means you don’t have to “declare” the variables and functions that you want to add to it.
With our new Ninja Class, we do have to declare these values. Declaring them actually gives a nice performance boost though, as well as makes our code easier to manage and test, so it’s a good thing.
SO, THAT WAS A CLASS EXAMPLE. However, because we want our ninja to exist in a 3D world, the Class is going to be a little bit different. Our Ninja Class isn’t actually finished and won’t work currently, but we will leave it for now because first of all we’re going to set up our pseudo 3D engine. The first thing to create for any self respecting 3D engine is a Camera! For our game and engine, we just need a very simple camera with just 3 properties: an X, a Y, and a perspective. variable. Despite having a 3D engine, we won’t need a Z property as our Camera will never move into or away from our game (although for those brave enough feel free to add this value and we’ll drop some hints along the way as to how you could use it).
5 We create a new Camera Class. Note: we call our × and y properties x3D and y3D for reasons to be explained later.
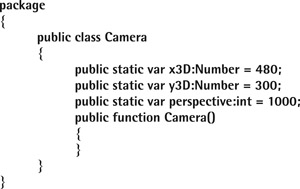
As with our new Ninja Class, save this Camera Class into the same folder as our FLA.
Note that there is an important term “static” used when declaring our 3 properties/variables. In simple terms, what doesn’t change about a static property or variable is its memory location which makes it easier for the rest of our code to access these values.
This book isn’t about coding ethics, so that explanation is all you need to know for now.
By default, we set our × value to 480 because this is half of our flash game’s width. For the y value, we use 300 because our ground_position is still 500. If we use 500 for the camera too, it will be as if the camera is actually sitting right on the ground and mean we’re actually looking at our ninja’s feet which is fine from a distance but not when the ninja comes up close. At 300 we’re just above our ninja’s head. Perspective is a magical 1000. Why? Because 1000 works well.
In stage 1, we just allowed left and right movement of our ninja, along the X axis, and jumping, using the Y axis. However, in the full game, we want to move our ninja into and out of the environment along the Z axis, using the up and down keys. As our ninja moves into the environment, he gets smaller giving a 3D effect.
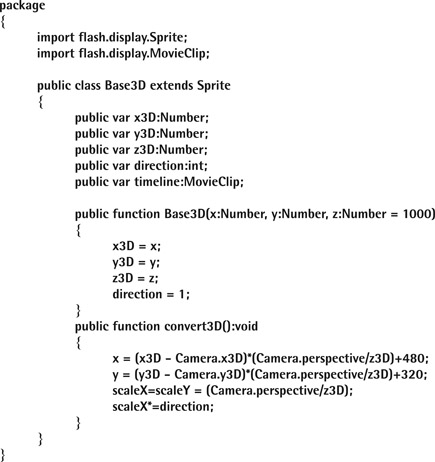
It’s not just our ninja that will have this 3D effect but pretty much all of the characters and objects in the game. Therefore, we want to code this 3D effect just once and allow all Classes to be able to use it if needed. We create a new Class which will be used as a base for all our other classes: ninjas, blood splats, bunnies, etc.
Because we are now using a 3D world, we need to add the z coordinate. What’s more, because our ninja will appear to be moving slower across the screen when he is far off in the distance, we no longer directly move the × and y values of our ninja. So we need some new × and y variables along with our z. We will use x3D, y3D and z3D.
So let’s create our new Class that all (or at least most of) our in-game objects will use as their Base. For this reason, we will call the Class Base3D.
We extend Sprite so that we can incorporate the native features for the Sprite object, ie, its × and y values, the ability to scale it, add it to stage, etc.
6 Because in our 3D world our objects will be scaled (using scaleX and scaleY properties) when they move in and out of the background, we can no longer set scaleX to be 1 or -1 depending on if we want our ninja to face right or left. Therefore we will create a new variable called direction.
In the convert3D function of this class, those brave could try and combine their Camera z3D with the three z3D values if they felt up to the challenge.
Again we will save this class in the same folder as our FLA.
The convert3D function is where the magic happens. This function takes the x, y and z 3D values of our object (in this case the Ninja) and converts them to on screen × and y coordinates, as well as scaling the Ninja to give the illusion of depth. See how our new value direction is used right at the end to affect the scaleX value which in turn will “flip” the ninja horizontally if needed.
Finally, there’s a timeline variable, defined as a MovieClip. We will want our Ninjas (and other Classes that extend Base3D) to be able to easily reference variables we still store in the timeline. This timeline variable will become our timeline reference to be able to look up variables such as ground_position in our main FLA’s timeline.
Now that we have our Base3D class, let’s go back to our Ninja Class and modify it to make use of Base3D.
In our Ninja Class, change the line towards the top:
public class Ninja extends Sprite
to be:
public class Ninja extends Base3D
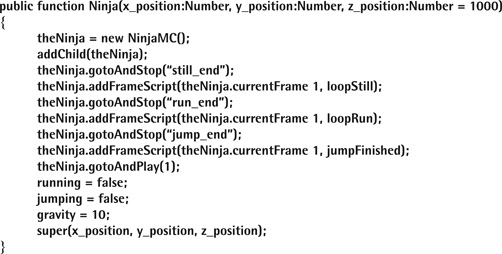
Because Base3D manages our × and y coordinates, we can delete these lines from the Ninja Class. We also modify the default Ninja function to include z_position; we can even set it by default to be the Camara.perspective value, 1000. By setting it to 1000, it means our Ninja will be the exact same size as if we weren’t using 3D at all. I know that sounds a bit pointless, but bear with me to find out why.
Finally, because the code in Base3D needs to do something too, we add this line at the end of the Ninja function:
super(x_position, y_position, z_position);
Hot Tip

Every Class that we will make must be saved with the same filename that the Class is called. It also must contain a function that matches the Class name too.
You will see our Ninja.as file is our Ninja Class with a Ninja function. Our Base3D.as file is our Base3D Class with a Base3D function.
This Class name function is the first bit of code that will get run when you create a new instance of the class.
As you will see with Camera though, the function doesn’t neccesarily have to do anything.
7 So the Ninja function of our Ninja Class now looks like this:
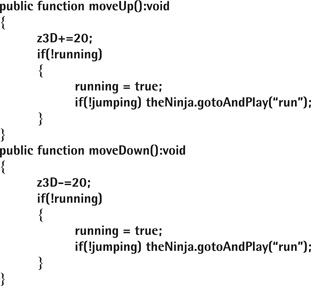
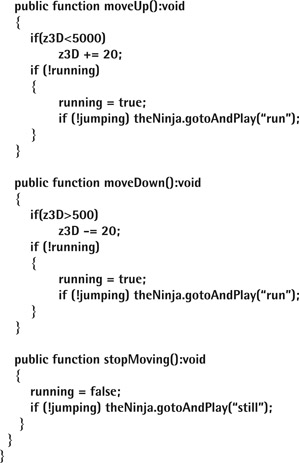
8 We also need to swap out our adjustments to x in the moveLeft and moveRight functions to be the new x3D. Remember we also have the new direction variable in Base3D, so we will swap the scaleX = 1 and scaleX = -1 lines to be direction = 1 and direction = -1. Now we add moveDown and moveUp functions to our Ninja Class which are very similar to the moveLeft and moveRight, but instead of adjusting x3D we adjust z3D. Don’t worry about direction as no horizontal flipping needs to happen here.
9 We’ve finished changing our Ninja Class for now. Make sure you have saved it, and then let’s go back to the main code in our timeline of our FLA and add some keyboard actions to call our new moveUp and moveDown functions.
var keyPressedActions:Array = new Array();
keyPressedActions[Keyboard.LEFT] = player.moveLeft;
keyPressedActions[Keyboard.RIGHT] = player.moveRight;
keyPressedActions[Keyboard.UP] = player.moveUp;
keyPressedActions[Keyboard.DOWN] = player.moveDown;
keyPressedActions[Keyboard.A] = player.jump;
var keyReleasedActions:Array = new Array();
keyReleasedActions[Keyboard.LEFT] = player.stopMoving;
keyReleasedActions[Keyboard.RIGHT]= player.stopMoving;
keyReleasedActions[Keyboard.UP] = player.stopMoving;
keyReleasedActions[Keyboard.DOWN]= player.stopMoving;
10 Next we need to modify our gravity code to affect y3D of player, instead of .y.

11 However, now that we have our Ninja Class extending Base3D, which in turn has the timeline reference. We no longer need Step 10’s bit of code to happen in the main gameLoop. We need to create a new loop function inside our Ninja Class, and move the gravity stuff from our main gameLoop to our Ninja’s internal loop. So actually, let’s replace all that code in step 10 with this single line:
player.loop();
Then inside our Ninja Class, add the code:
12 The last thing we need to do now, is when we create our player in the timeline, we just add:
player.timeline = this;
Finally, to test our 3D effect we actually need to call our convert3D function on our ninja. We also need to call convert3D on our 10 enemy ninjas too which is currently very hard, because in our for loop where we create the 10 ninjas, we don’t actually store any easy reference to them, so that we can later call their convert3D function in the same way as we could call player.convert3D for our player. So we will come up with a solution. Due to the way our engine works, we know we need to call convert3D to all of our on-screen 3D objects (ninjas). Therefore, we will create a new Array to store these objects. We will call our array Objects3D as unfortunately we can’t name an array starting with a number.
Right at the top of our timeline code add:
var objects3D:Array = new Array();
13 Then we modify our for loop for adding our enemies:
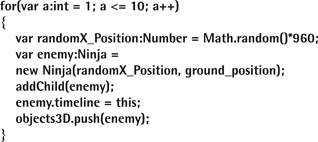
As with our player, we pass the enemy a reference to our main timeline, so they too can look up variables.
The final addition to our timeline code, after we create player is to add:
objects3D.push(player);

14 At the bottom of the gameLoop function after the player.loop() line, add the following 4 lines of code:
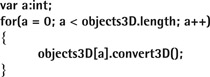
Now test your game, and after all this extra code we’ve done you should see everything looks pretty much exactly like stage1.… um… OK… so what’s the point of all this extra code? Don’t worry, we’ve not wasted time. Try using the down arrow key to control your ninja. You will see you can now move him closer to the camera. Use the up arrow key and he’ll move further away. There is of course one problem. As you move your ninja further away from the camera, he doesn’t visually move behind the enemy ninjas, rather he just gets smaller.
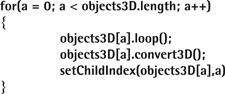
15 We need to now add some depth management. The method we will use isn’t the most optimized, but it is the most simple and does the job well. In the gameLoop function before our for loop from step 14, where we call convert3D(), we need to sort all our 3D Objects by their depth which just happens to be their z value (z3D). The z3D value is a Numeric value, and we want to sort it from highest to lowest (descending), so we add the single line of code:
objects3D.sortOn(“z3D”, Array.NUMERIC | Array.DESCENDING);
Now, inside our new for loop from step 14, immediately underneath the objects3D[a].convert3D(); line, we add:
setChildIndex(objects3D[a],a)
This line sets the display ordering of our ninjas to the stage so that the ones in the distance are drawn first and the rest on top. Test the movie now, and you will see you can run in front and behind the ninjas. Yay. But uh oh! You may notice that some of our ninjas flicker. This flickering happens because they all have the same z3D value at the moment, so when we do our array sort sometimes ninja 1 will be in front of ninja 2, and other times ninja 2 will be in front of ninja 1. Don’t worry. We will fix this later by giving our ninjas their own z3D position. In the final game, it’s very unlikely two ninjas will share the same z3D position and be close enough to overlap, so it won’t be a problem.
16 Let’s add the ability of the camera to track our Player if he runs off screen. In the Camera Class, underneath the empty Camera function, add:
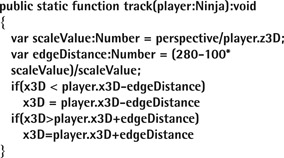
Then in our gameLoop just after the player.loop() line and before the objects3D.sortOn line put:
Camera.track(player);
17 The second to last thing we need to sort with our ninja is that we need to limit how close to the camera he can come and also how far off into the distance he can run. You may have spotted that if you keep down pressed, your ninja will not only run straight to the camera, but then somehow do a magic trick and start running on an invisible ceiling away from the camera. Not good. Let’s fix it! In the Ninja Class, in the moveUp function where we have z3D+=20 we add a little if statement beforehand:
if(z3D<5000)
z3D+=20;
and in moveDown:
if(z3D>500)
z3D-=20;
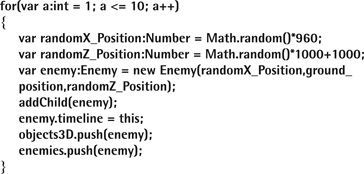
18 To complete this stage, we are going to position our enemy ninjas at different depths. In our timeline code, in the for loop where we create our 10 ninjas, let’s change and add the new randomZ_Position line and modify the line that creates the ninjas so that the complete for loop looks like this:

Stage 2 is now complete!


Stage 3

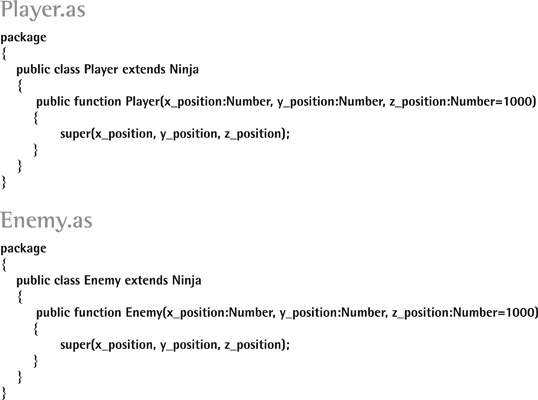
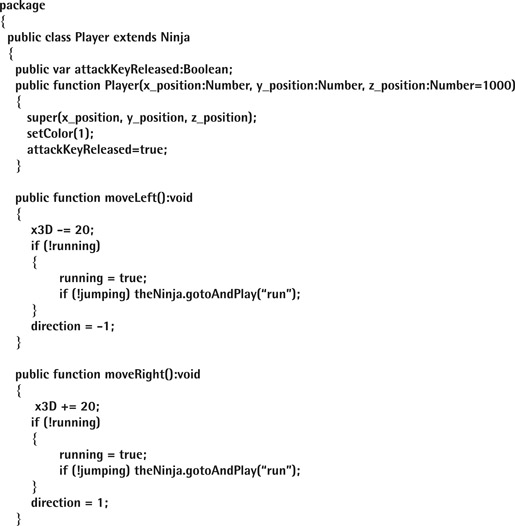
CURRENTLY BOTH OUR enemy and player Ninjas use the same Ninja.as Class. Up until this point, using the same class has worked fine. However, we now are going to add some differences to our Ninjas, both visually and code-wise. In the same way as our Ninja Class extends Base3D but adds lots of extra functionality, we can make two new Classes, one Player and one Enemy, which both extend our Ninja Class but then add even more functionality.
1 Let’s start stage 3 by making 2 new identical classes, the only difference being their class names. As always, save these in the same folder as your FLA:
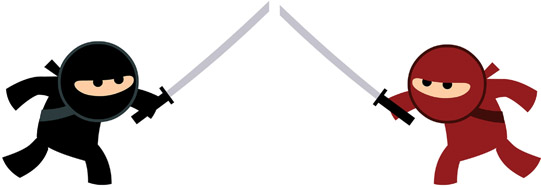
2 Let’s differentiate the enemies from the hero ninja visually. We will keep our hero ninja in black but make our enemy ninjas red. The easiest way to assign different colors is to use 2 keyframes inside each of our ninja body parts. In the second keyframe we will fill the body parts in with red.
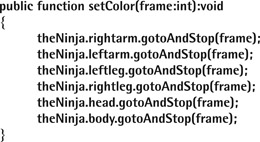
3 Now, when we test the game all our ninjas, including our player, will flash rapidly between colors. So, let’s go to our main Ninja Class and add the function below. Because both our new layer and Enemy Classes extend our Ninja Class, they will be able to have access to this function:
4 Next, inside our main Player function in the new Player.as Class, we add the line:
setColor(1);
In our Enemy Class, in our main Enemy function simply put:
setColor(2);

5 We need to now make use of our new Player and Ninja sub-Classes. Let’s go back to the timeline and change our code a little to make new Player and new Enemy Instances instead of just new Ninjas.
Change our line where we create our player to the following:
var player:Player = new Player(480, ground_position);
6 We also need to change our for loop that creates our 10 Enemy Ninjas:
Also note, we’ve added an additional line of code. We now store a reference to our enemy in new array called enemies which of course needs creating first. So add the code to create this array just above our for loop. You should know how to create an Array on your own now. The reason we will create this new enemies array is so that when it comes to attacking, we just look in this array, rather than our complete objects3D array, to determine which (if any) enemies we will face.
7 Now, we actually have some bits of code still in our Ninja Class that our Enemy Class doesn’t need to worry about, so these should really be moved to just our Player Class. These are the movement functions. Cut and Paste these functions and their code from the Ninja Class into our Player Class:
- moveLeft
- moveRight
- moveUp
- moveDown
- stopMoving
Having fun yet? In the next step we’ll start adding ninjas that will attack our hero ninja!
Hot Tip

If you have been using the Ninja MovieClip provided in the stage0.fla, you will notice that that there is no leftarm symbol in the library.
Instead the Ninja’s left arm is actually the exact same Movie Clip as the rightarm, but mirrored horizontally.
By giving it the instance name of leftarm it means that as far as our code is concerned, it’s a completely separate object from the rightarm.
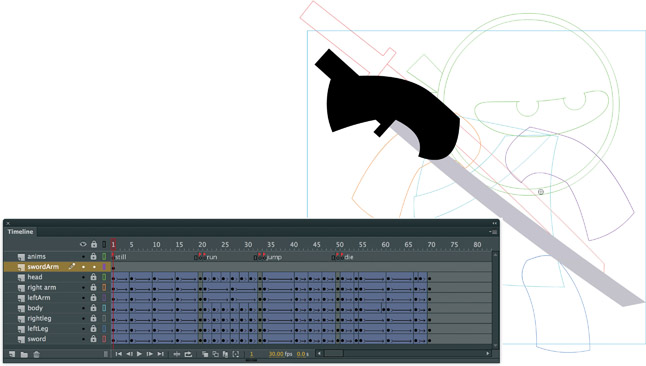
8 Currently our Ninja MovieClip has 3 animation states. Still, Run and Jump. In each of these states, we want it to be possible to perform an attack. One option could be to make 3 new animations, using the originals as a basis: StillAttack, RunAttack and JumpAttack. However… what if we start an attack while still and then start running while the attack is still happening? Or what if we are running and press attack when the ninja steps onto his right foot, and then the next time, we want to start the attack when he’s stepped onto his left foot? To think about and then make animations for all the possible combinations will take a lot of time. What’s more, there would be a lot of code to correctly display the animation. So, we come up with a trick! We give our Ninja a 3rd arm! This arm is complete with sword and contains a 20 frame animation of the arm reaching for the sword, swinging it and then putting the sword away with extra blur for effect.
9 We place this 3rd Arm MovieClip which we will give the instance name swordarm, in roughly the same place inside our Ninja MovieClip as the rightarm. With code, we now make sure that we only show either the rightarm or swordarm and never both (thus never making our ninja appear to have 3 arms). Also, we need to hide the sword on our ninjas back when the swordarm is in swing. In our main Ninja Class inside the Ninja function, let’s add the following line of code:
theNinja.swordarm.visible = false;
10 When our ninja jumps, we can see that if we keep our A key down, our ninja will constantly jump which is perfectly fine.
However, with attacking we want the player to work for that attack and not have the ninja constantly swinging his sword if you just keep the S key down. Therefore, we will only trigger the next sword swing if the game has detected that the player has released the attack key after the previous sword swing.
Because this code is only related to our Player and not Enemies (they won’t be controlled via the keyboard), we add a new variable to our Player class, attackKeyReleased, and then set it to be true. So our Player Class will now look like this:

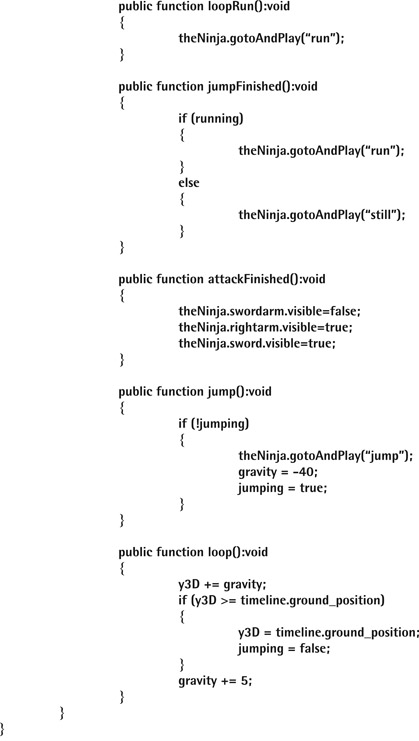
11 In the next two steps we are going to modify our Ninja Class to add support for attacking.
When our Ninja performs an attack, we need to remember to hide the normal rightarm and show the new swordarm. Likewise, when the attack animation is over we need to hide the swordarm and show the rightarm again. We also need to hide and show the sword on the Ninja’s back appropriately.
So we add addFrameScript, a function call to the last keyframe of our swordarm animation so that we can change the visibilities. We make a new attackfinished function that makes the swordarm invisible and the rightarm and sword visible.
Currently our complete Ninja Class should look like the following:

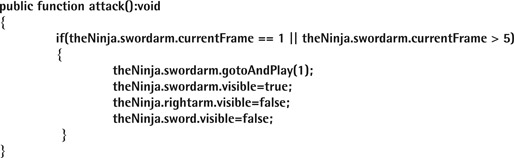
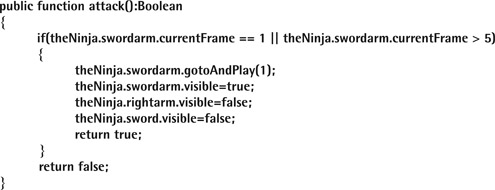
12 Because we will want both our Player and Enemies to be able to attack, we add our attack function to the Ninja Class. In this function, because the first 5 frames of the swordarm animation are the actual attack part and the remaining frames are a much slower animation of the ninja putting the sword away, we actually want our ninja to be able to reattack after frame 5. So we check to see if the swordarm animation is currently either on the first frame or on a frame after frame 5, before animating the sword attack. In the same way that our attackFinished function hides our swordarm and shows our normal rightarm and sword, the attack function hides the rightarm and sword and shows the swordarm. We also tell the swordarm to play the animation from frame 1.
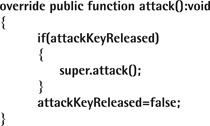
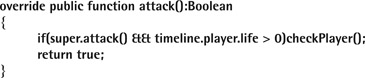
13 So both our enemies and player now can attack, but we actually need some extra code for our Player to check if they are allowed to attack (have they let go of the attack key). Instead of rewriting a complete attack function in our Player Class, we can use the special keyword override which means we can then add some extra code to the function that already exists in our Ninja Class. The other special keyword used is super which means that we then perform all the code that exists in the Ninja Class attack function. Add this code to your Player Class:
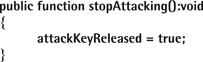
14 Finally we need to add to our Player Class a stopAttacking function. This function sets our attackKeyReleased Boolean to true which means that our code will allow us to attack again.
Of course, what good are attack and stopAttacking functions if we have no keyboard command to trigger them? In our main timeline code, we add keyPressedAction and keyReleasedAction. You should know where to place these:
keyPressedActions[Keyboard.S] = player.attack;
keyReleasedActions[Keyboard.S]= player.stopAttacking;
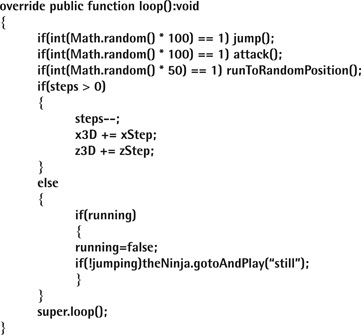
15 Now let’s start working with the enemy! Currently we are only calling loop on our ninja player. We now want to get all the enemy ninjas doing new things too, so we need to start calling loop for them. We already have a bit of code that loops through all of our Objects and runs a command on them convert3D, we can delete our player.loop line and add objects3D[a].loop(); in our for loop, like so:
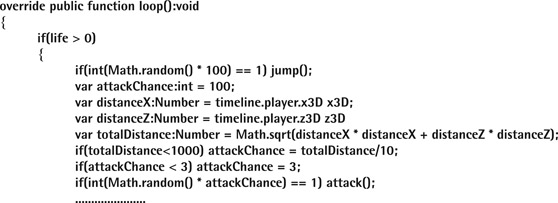
16 Give the enemy a brain! We know that Enemy extends Ninja and that Ninja has a function in it called loop which gets called every frame. Currently this function just handles gravity. However, we can add extra features to this function, features just for our Enemies, just like we did with our Player attack function in Step 13. So in our Enemy Class, add this:
17The super.loop means that we keep running our loop function with gravity-related code in our Ninja Class, rather than getting rid of it all together. But let’s add some new code that will be unique to our enemies.

18 The code in the previous step is basically saying that there is a 1 in 100 chance the enemy will decide to jump. Let’s add this line in too:
if(int(Math.random() * 100) == 1) attack();
If we test our game we’ll see that we have red, random sword-swinging, jumping enemy ninjas. Yay.
19 But what about movement!? We need our enemy to decide on where he wants to run to and then make steps towards getting there. First of all, we need to add 3 new variables to the top of our Enemy Class:
public var steps:int;
public var xStep:Number;
public var zStep:Number;
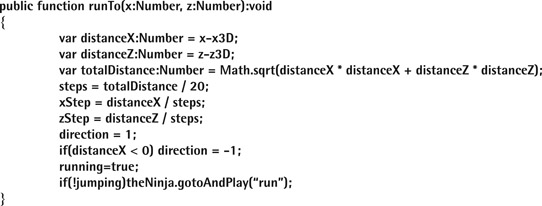
20 Let’s make a new runTo function inside our Enemy Class.
public function runTo(x:Number, z:Number):void
{
}
Note that we pass x and z (not y, as y is for jumping) to our runTo function.
21 Let’s say our enemy ninja is currently standing at 100, 100 in x, z coordinates. And we want to tell him to runTo(500, 200), possibly because that’s where our player is. First of all we have to work out the distance from where our enemy currently is to where he wants to go. We need a bit of Pythagorean Theorem. Inside our new runTo function, we add:
var distanceX:Number = x-x3D;
var distanceZ:Number = z-z3D;
var totalDistance:Number = Math.sqrt(distanceX * distanceX + distanceZ * distanceZ);
Hot Tip

In the code in Step 12, you will notice || in the line. This symbol is not the number eleven, instead it represents the word “or.” In our attack function we are telling Flash to perform the commands if the swordarm is on frame 1, “or” the “swordarm” is on a frame greater than 5.
Sometimes you will see && instead of ||, which means “and.”
22 Now that we know the totalDistance our enemy has to run, we can work out how many steps it will take him to get there. For now we are going to use a speed value of 20 (literally, moving 20 pixels per gameLoop) which is the same as our player Ninja. Continue putting this code inside our runTo function:
steps = totalDistance / 20;
We know how many steps our ninja will need to take to get from 100,100 to 500,200, so we then use that to work out each step (or distance) in × and z he will need to make per gameLoop:
xStep = distanceX / steps;
zStep = distanceZ / steps;
23 Finally, we need to work out which direction our enemy should be facing when moving:
direction = 1;
if(distanceX < 0) direction = -1;
and then set his animation to running
running=true;
if(!jumping)theNinja.gotoAndPlay(“run”);
24 So our complete runTo function:

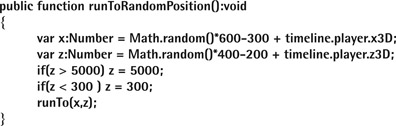
25 Since our enemy can runTo somewhere, let’s actually tell him where to run. Make a function called runToRandomPosition. We always want our ninjas to be close to the player, so we make sure the random position the enemy runs includes our players x3D and z3D coordinates. We then make sure our Enemy won’t run too close or far from the camera. Finally we call the runTo function.
26 Just like the jump and attack, we add the line to our loop function. Note this time we just use 50, instead of 100 giving a 1 in 50 chance our Enemy will choose to run somewhere. We also want to only choose a new position to run too, if our Ninja isn’t mid-jump.
if(int(Math.random() * 50) == 1 && !jumping) runToRandomPosition();

27 We need to continue modifying our loop function to get our Enemy to take these new steps we have. We also need to tell our enemy ninja to go back to its still animation if it’s taken all its steps and arrived at its goal. We only go to still if the enemy isn’t also jumping.
Our loop function is now:
28 Currently all our attack function does is handle the sword swinging. We don’t yet see if the swing will hit an enemy (or if the enemy’s swing will hit the player). Before we can check for a hit, we are going to add some extra variables to our Ninja Class to simulate some very basic physics, namely, when a Ninja is attacked, we want it to be pushed away by the force of the sword swing. At the top of our Ninja Class, add these two lines:
public var forceX:Number = 0;
public var forceZ:Number = 0;
Then at the bottom of our loop function, we put:
x3D += forceX;
z3D += forceZ;
forceX *= .8;
forceZ *= .8;
Hot Tip

Creating a force variable and then using the multiplication assignment operator means that whatever the force was, is now reduced to 80%.
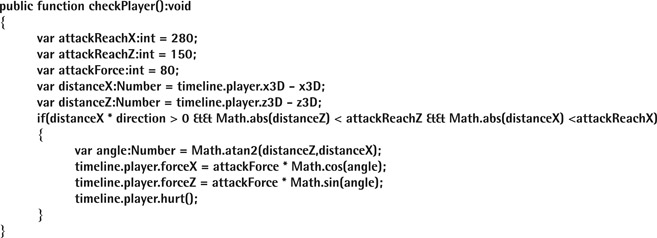
29 Let’s apply these forces to our enemies if our player successfully hits them. We loop through our enemies array in the timeline and test for all ninjas within a certain distance from the player. The ones that are close enough, we then affect their force. Place this code in our Player Class.
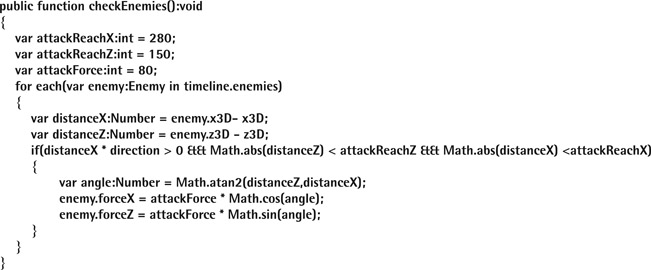
The distanceX * direction > 0 check in our if statement means we only look for ninjas our player is facing (not those close behind).
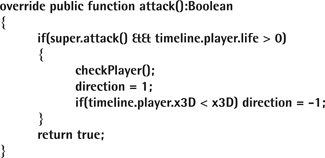
30 We need to checkEnemies when we know an attack has been performed. In our Ninja Class, we need to modify our attack function slightly so that it will return a true or false value depending on if the attack (sword swing) was made successfully.

31 We now modify the attack function in the Player Class again:


32 Remember where we limited the Ninjas z3D value so that it couldn’t go less than 300 or more than 500? Since we are now using forceZ it’s possible that the ninjas could exceed these values. We need to add some more code to our loop function of the Ninja class so that the Ninjas appear to bounce off of this boundary. Note we shall also only reduce our force variables if our ninja is on the ground.

33 We can physically hit the enemy ninjas, but they never die. To be able to die you first need to live. Let’s give the Ninja Class “life.” We will also stun our Ninjas for a short time when we hit them so that ultimately they can’t immediately hit us back as that would be mean! Make a second new variable stunned:
public var life:int;
public var stunned:int;
While we are in the Ninja Class in our loop function add:
stunned--;
Now in Enemy class in the main Enemy function add:
life = 3;
We’ll give our Player life too. A higher value makes him
tougher, so in the Player Class in the main function add:
life = 20;
In the checkEnemies function of the player, let’s add a function call just below our enemy.force lines:
enemy.hurt();
34 Go back to the Ninja Class, and we will add our new hurt function:

Now add the “dead” function. In case our ninja was attacking when it died, we hide the swordarm and make the right arm and separate sword visible.


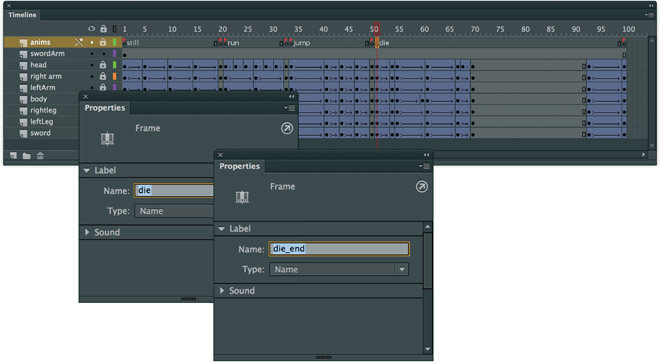
35 We don’t have a death animation, so we’ll need to make one. Just a simple animation of our ninja falling over will suffice. If you make the animation fade out at the end, your ninja will disappear nicely. This fade can be handled via code, but a Motion Tween works just as well. The death animation was created using keyframes poses and Classic Tweens. No new assets for the ninja were necessary as the death animation uses the same body parts. Just animate the ninja collapsing to his knees first before keeling over and eventually lying flat against the ground. You may find the use of keyframes works better than Motion Tweens or a combination of both. There’s no right or wrong way to create this animation. Use your imagination and come up with something unique if you’d prefer.
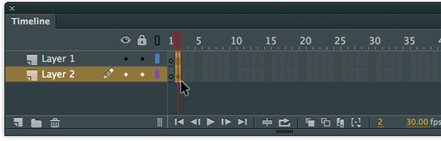
36 As with the other animations, we need the frame labels die at the beginning of the death animation and then die_end in the final frame of the animation. As shown below, a new layer was created just for Frame Labels to reside. Having a dedicated layer for labels is just for file management purposes.
37 Because we have a new animation sequence in our ninja, we need to add the following 2 lines of code to our Ninja Class, place them just below the other addFrameScript lines in our main function:
theNinja.gotoAndStop(“die_end”);
theNinja.addFrameScript(theNinja.currentFrame-1, dieFinished);
Then the following function:
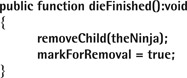
The function removeChild removes the MovieClip from wherever it is sitting. We remove both theNinja MovieClip but not the actual Ninja Class just yet. Instead we mark it for removal. The markForRemoval is a new variable we haven’t used before and want to define in our Base3D Class:
public var markForRemoval:Boolean;
38 Rather than removing Class instances straight away when we no long need them, it’s often good practice to do a “tidy up” of your instances right at the end of the main game loop. There should be no other code running associated with those class instances, and therefore you are less likely to get any bugs when removing them. To remove everything that has markForRemoval set to “true,” we add a new for loop right at the bottom of our gameLoop in the timeline:
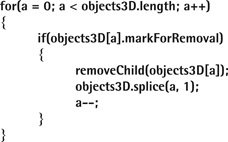
When the ninja dies, not only does he visually disappear from the stage, but he gets removed from the objects3D array which means there is no longer any loop or convert3D code running for this Ninja. Because we have now removed all references to this Ninja, Flash will free up some of the memory used and your game will continue to perform well.
Hot Tip

If you make the animation fade out at the end where the ninja is in his last frame of dying, your ninja will disappear nicely. This fade can be handled via code, but we aren’t going to do that as it’s just as easy to apply a Motion tween and some alpha to make him disapear.
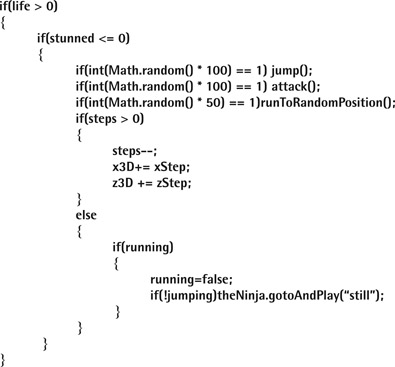
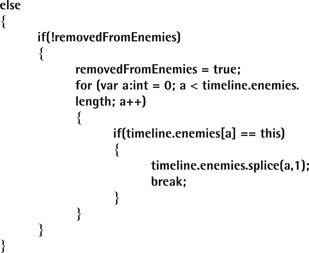
39 When our Enemy has no life or when he is stunned, we don’t want him to still randomly decide if he wants to jump, run, attack etc. In the Enemy Class we add 2 if statements around this code in the loop function:
40 When our Enemy has died, we need to remove it from the enemies array so that our player can no longer hit/attack it. To remove it, in the Enemy Class we add a new variable:
public var removedFromEnemies:Boolean;
In our loop function where we already have the if(life>0) statement add the following after it:
41 If you kill an enemy when he is jumping, we don’t want the run or still animation to be played when he falls to the ground. So we put the if statement in our Ninja Class too:
42 Although our Player can’t get hurt yet, let’s make sure that if he has no life or if he is stunned, he no longer can be controlled. It’s best if we actually go to where the keys are pressed in our main timeline’s gameLoop:
43 We also need to put an if statment in the Players stopMoving function too:


44 To be fair to our enemies, let’s allow our player to get hurt. Similar to how our Player hits an Enemy, we can get our Enemy to hit our Player. In our Enemy Class, we override the attack function just like in the Player Class but call a checkPlayer function instead. We only call this function if we know our player still has life left:
45 Our checkPlayer function will be very similar to check Enemies. The only difference is that we don’t do the for loop as there’s only one player to check:


46 Having 10 enemies all running around at the start of a game is a bit exessive. Let’s ease the Player into the game by starting with just one enemy. Back in our main timeline we are going to delete all our code for adding the 10 enemies (the entire for loop). Then, after we create our player, put in this code:
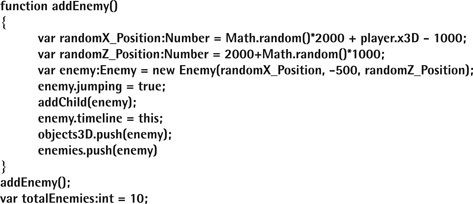
47 Notice how we’ve changed the code a little? Enemies will now start far away in the background as well as in the air which is why we set jumping to be “true.” Creating enemies this way gives them the nice effect of “dropping in” to give the player a little warning. We also now have a totalEnemies variable. In our main gameLoop we can check if we have less enemies on screen than the total allowed (totalEnemies). If the number of enemies starts to drop off we can randomly add new enemies as needed. Add this code right at the top of the gameLoop:

48 Not to be insulting but the enemy Ninjas are a bit dumb. They currently attack randomly regardless of their location on screen, and they don’t make any extra effort to aim their attacks at your player. Currently they operate on a 1 in 100 chance of deciding to attack. We’ll leave the decision making up to them but code it so that when they get closer to the player the chance of attack increases. In the loop function in the Enemy Class we work out the distance the enemy is from the player. If that distance is less than 1000, we will divide that distance by 10 (that way we never get above our 1 in 100 chance). Then we’ll use that value attackChance, when determining if the enemy should attack. We’ll do a quick check to make sure that chance is never less than 1 in 3:
49 It would be a good idea to make sure the enemy is facing our player when they attack:
Stage 3 is now complete!


Stage 4
SO WE HAVE THE BASICS OF A GAME!
You can attack and die as can your enemies attack and die. Let’s keep going and add some UI elements!
But we have a slight problem. In our code we do some depth sorting on our ninjas so that when they are in the foreground they are above the ninjas in the background. This depth sorting uses the setChildIndex command to put each ninja in the correct order, typically putting them on top of everything else in the game.
If we start to put our UI elements on the stage, when we run the game our ninjas will be placed on top of them. What we really want is for the UI elements to always be on top of the ninjas. We could run some code in our gameLoop to always call setChildIndex on each of our UI elements after the depth sorting for the ninjas. However this method is a little messy and there is an easy trick for better separation of the game from the UI. We can make 2 MovieClips, one called “game” and one called “ui.” From this point forward we make sure that all of our game objects (our ninjas) are initially added to our game MovieClip via addChild and all our UI objects are inside “ui.” We then place “game” on our stage first and then “ui” on top. No more worrying about having to change the childIndex of our UI elements.
1 Because we will visually want to edit our UI, let’s create the instance of the Movie Clip the normal Flash way by using the Library panel’s drop-down menu. Create a new empty MovieClip called ui and place it in a new Layer on the stage at 0,0 in x and y coordinates. Give it the instance name ui.
2 In the timeline code above everything else, add these 3 lines of code:
var game:MovieClip = new MovieClip();
addChild(game);
addChild(ui);
Because our ui is already created and on stage we call the addChild command to make sure it’s on top of our game MovieClip.
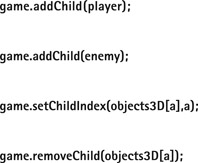
3 There are four places where we need to reference our new game MovieClip. In our two addChild lines for the player and the enemy, then where we call setChildIndex(objects3D[a],a); and finally where we call removeChild.
Find those 4 lines in our main timeline code and change them to the following:
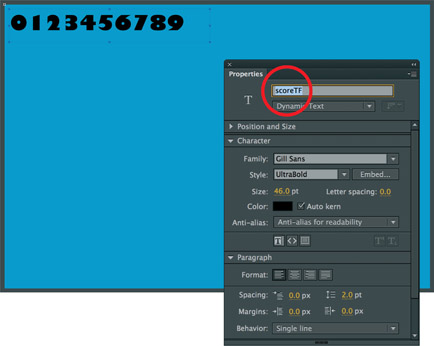
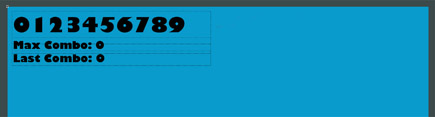
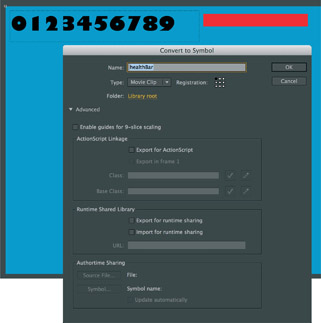
4 Let’s now add the UI. The first thing we need to do is add a text field to our ui Movie Clip to show the score. “Edit in Place” the ui MovieClip and create a new dynamic textfield in the top left of screen. Select a large font and add the instance name scoreTF (which stands for score TextField). If you type 0123456789 into the text field, we can be sure the font will be embedded easily.
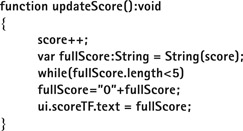
5 In your timeline code add the following:
var score:int = 0;
ui.scoreTF.text=“00000”;
And then we add a new updateScore function:
6 In our Player.as Class let’s call updateScore after our enemy.hurt line in the checkEnemies function. Remember we need “timeline” first:
timeline.updateScore();
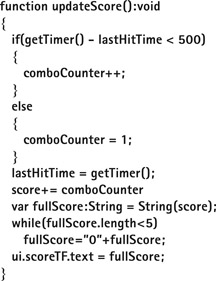
Whenever we hit an enemy, our score increases by 1. But let’s make it more fun. Let’s add a basic combo scoring system where if we hit enemies in quick succession, we get more points for each new hit. Back in the main timeline, we add 3 new variables:
var comboCounter:int = 0;
var lastHitTime:int = 0;
var maxCombo:int = 0;
Hot Tip

Entering a Class name to a MovieClip requires right-clicking over the MovieClip in the library, clicking Advanced and subsequently clicking the “Export for ActionScript” checkbox. A quicker way of adding a class is to double-click in the empty space in the ‘AS Linkage’ column next to the Movie Clip in the library. You can then immediately type in the Class name you want to use and the appropriate check boxes will have been ticked automatically.
7 Let’s now modify our updateScore function:
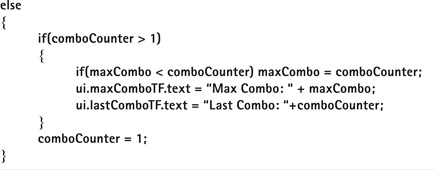
8 Let’s add 2 more text fields to our ui MovieClip using the same font as the score: 1 textfield to show our last combo and a 2nd to show our maximum combo. Give these 2 text fields instance names of lastComboTF and maxComboTF and type into them “Max Combo: 0” and “Last Combo: 0.” We don’t need to include numerals 1 through 9 as they are already embedded in the score text field. Let’s modify the updateScore function again. This time where we have comboCounter = 1 we add these lines before it:
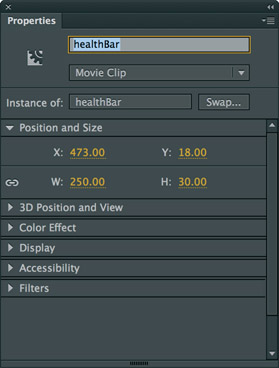
9 Let’s add a health bar for our player. Inside our UI MovieClip make a new MovieClip with a red rectangle and place it along the top of the screen. Name the MovieClip healthBar and make sure the anchor point is on the left somewhere (either top, bottom or center).
10 Select the healthBar MovieClip and give it the instance name healthBar.
11 In gameLoop we’ll add an extra line of code:
ui.healthBar.scaleX = 1/20*player.life;
We use 20 because that is our player’s maximum life.
12 Finally we’re going to add a timer countdown. In the top right of the ui MovieClip, add a final text field and name it countdownTF

13 In our timeline add a new variable:
var timer:Number=99;
and in our game loop add:
timer -= 1/30;
ui.countdownTF.text = String(Math.ceil(timer));
Our game will run at 30fps. For each frame we subtract a 30th of the time. So what happens when time runs out or we run out of health? Yes, game over!

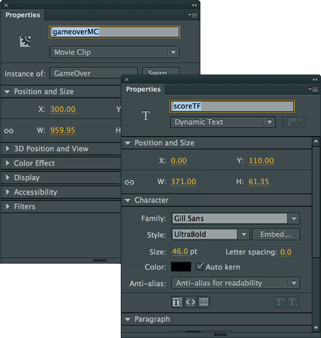
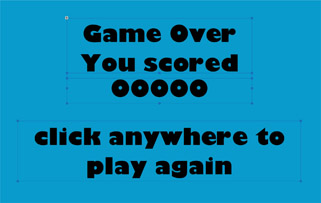
14 Make a new MovieClip inside our ui called “gameover.” Give it an instance name gameoverMC and place three text fields inside it. The 1st and 3rd can be static text fields while the 2nd will be dynamic for showing the score. Give this dynamic text field an instance name of scoreTF.

15 The first textfield can say something like “Game Over, You scored” and be placed above or next to your dynamic text field.
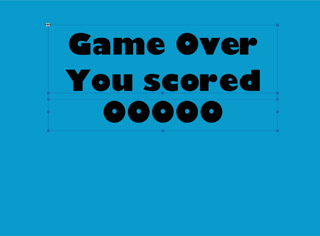
16 Then underneath the score, the 3rd text field can say “click anywhere to play again” or something similar. Note, I’ve put a large blue rectangle containing 80% alpha behind my text so that you can read the black font easily (otherwise it will clash with our player ninja).
17 Back in our timeline code, we want to make sure this gameover MovieClip isn’t visible when the game starts.
ui.gameoverMC.visible = false;
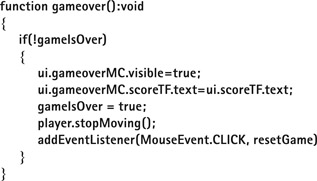
We also want a new variable to tell the code whether or not the game is over. For example, we don’t want the player to be able to continue to attack once gameover() has been called.
var gameIsOver:Boolean = false;
All we then need to do is adjust our if statement in the game loop to also check to see if gameIsOver is not true:
if(player.life > 0 && player.stunned <= 0 && !gameIsOver)
18 Let’s create our gameover function which we can add to the bottom of our main timeline code:
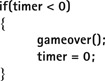
19 We need to call that function when our player dies and when the time runs out. For a timer in our game loop after we have the line timer-= 1/30, we add these lines:
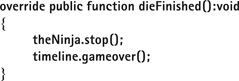
For a gameover when our player dies, we’re going to be a little clever. In our Player Class, we’re going to override our dieFinished function from Ninja but not super() it, meaning all the code will be ignored. We will just call timeline.gameover(). This cheat means that our Player instance is never actually removed from the game. Instead, we will be reusing it when the user clicks to start a new game. If we don’t remove the Player instance, then we don’t have to reassign all the keyboardActions.
In the Player class let’s add the following code:
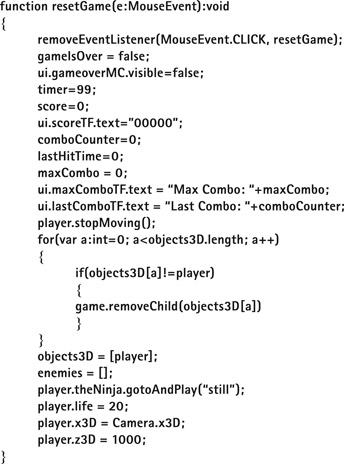
20 Back to the timeline you’ll notice our gameover function calls resetGame when you click the mouse, but we don’t have a resetGame function! Basically this function needs to reset everything back to the first time you start the game: 20 health, 99 seconds, 0 points, 0 enemies etc. It’s kind of a cleanup function. The only thing we don’t clean up is Player as we reposition him and revive him:


THERE ARE SEVERAL WAYS TO handle the preloading of Flash files, and countless tutorials exist on the web as to how to create them. Given that preloading plays a relatively small part of our game, let’s not get too complicated with animated bars and percentages. For this example we’ll just show a little bit of text to inform the player that their game is indeed loading. You can always come back to this preloader and add a looping animation if you prefer, but it’s not necessary.
1 In our main Timeline, currently we have placed everything in frame 1. Our code, our UI and even our Classes in the library are set up to be exported on frame 1. To make room on our Timeline for a preloader, select the 2 keyframes on our layers, and drag them to frame 2. Frame 1 should now be empty.
2 Add a text field to the stage in frame 1 and type the text “loading…” into it
There’s nothing preventing you from creating a looping animation in a MovieClip instead of or alongside the text field above. Often we see preloaders with various spinning graphics to indicate something is being loaded. Whatever you decide to create should be as small as possible as not to bloat the file size and defeat the purpose of the preloader.
3 In our code layer, which is in frame 2, just add at the top a stop(); command:
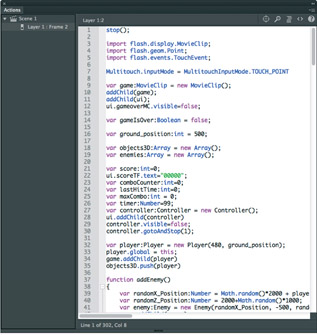
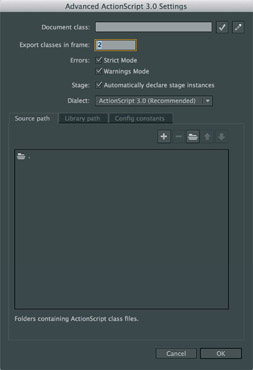
4 Finally, go to File > ActionScript Settings, and change the 1 in “Export classes” input field to the value of 2. Now when a user starts the game, frame 1 will load quickly, showing the user that the rest of the game is loading. When the load is complete, frame 2, and therefore the game, will start automatically.
5 Stage 4 is complete. At this point you have a pretty cool game built entirely in Adobe Flash. In Stage 5 we will add support for touch controls, so the game will work on mobile devices (Android and iOS). Finally, in Stage 6 we will add sounds, a background and a cool Particle System.
Stage 4 is now complete!


Stage 5
ANDROID AND IOS! THE INITIAL CHUNK OF code we need to add when dealing with both iOS and Android apps is support for when the app is in the background. By default AIR apps slow down to 4fps when minimized which means that slowly but surely the player will get beaten up if you suddenly have to answer a phone call mid-play. We need to get the game to listen out for when it’s been minimized and maxmized, in other words deactivated and activated. We then pause it or unpause it appropriately.
1 First, let’s add the ability to pause the game. In our main Timeline code create a new variable: var paused:Boolean = false;

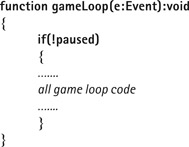
2 Because we know that everything that happens is executed or triggered from within the main gameLoop, we add an if statement around everything:
3 We add our listeners (a good place would be to put them with the other listeners)
stage.addEventListener(Event.DEACTIVATE, deactivate)
stage.addEventListener(Event.ACTIVATE, activate)
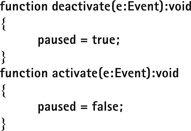
and their functions:
4 We’re going to cover three different types of touch controls here. A simple “tap” for attacking, a “drag” for moving and a “swipe” for jumping. We are going to add three new listeners to handle each of these, but first we need to enable MultiTouch control. Add this line into the Timeline code: Multitouch.inputMode = MultitouchInputMode.TOUCH_POINT;
5 Next let’s add your listeners. For code neatness and organization, add these near to our existing keyPressed/keyReleased listeners:
stage.addEventListener(TouchEvent.TOUCH_BEGIN, touchDown);
stage.addEventListener(TouchEvent.TOUCH_MOVE, touchMoving);
stage.addEventListener(TouchEvent.TOUCH_END, touchUp);
6 We are going to use two new Arrays to store data on each touch that is made. The first Array will store the time that the touch was made. The second Array will record the Y coordinate of the touch. Both of these arrays will be used when working out whether an upward swipe has been made, in which case we’ll make our ninja jump.
var timeTouched:Array = new Array();
var touchPointsY:Array = new Array();
7 For movement we will need three things: two “point” objects that store × and y coordinates of our initial touch and where we move that to. Because we can make multiple touches at once, we add a new variable that keeps track of which touch is our movement touch.
var touchPoint:Point = new Point();
var movePoint:Point = new Point();
var movingTouch:int = -1;
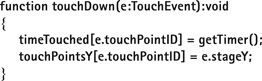
8 For jumping we first add our touchDown, which records the time and y value (stageY) of our touch:

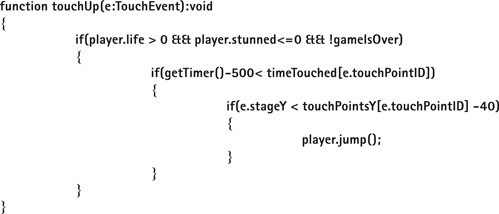
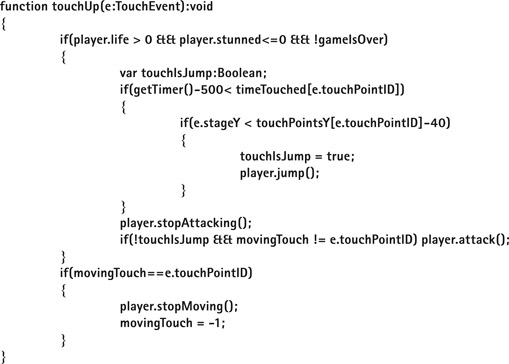
9 Then we create our touchUp function. We check to see if the touch has been released within 500ms (half of a second) of it first being made and if it’s released at a y position of more than 40 pixels higher than it was started. A quick vertical swipe would achieve this and when triggered, we make our Player jump. We need to reuse our if statement found in the gameLoop to make sure we only allow this jump to happen if our Player is still alive, isn’t stunned or if the time hasn’t run out.
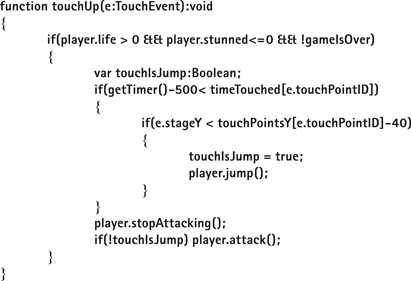
10 We also want to handle our attack in the touchUp event too. If we handle it in touchDown, then we wouldn’t actually know if the touch was the start of a swipe for jumping or an attack. In the touchUp function, we add a temporary variable to record if the touch was for jumping or not. We set this to true at the same point of telling our Player to jump. We only then call player. attack() if touchIsJump is not true. Note: we also call player.stopAttacking(), if you remember, stopAttacking is normally called to make sure that the gamer has released the attack key when playing on a computer. As a touchUp is the same as releasing a key, we call it here as well.
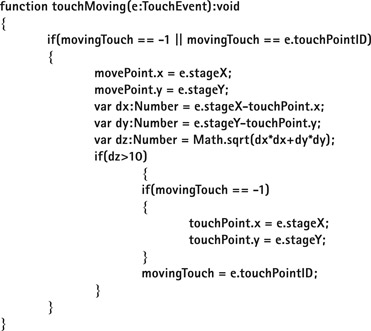
11 On to moving. In this game we do something unusual. Rather than having set controls on the screen, we allow movement control to happen from any touch point on the screen. If our gamer places their finger or thumb anywhere on the touchscreen and then starts to move it around, our on-screen game pad appears and our gamer can make the player move up, down, left or right. Of course while we play the game, we will make multiple touches to the screen for attacking, jumping and moving. So we only want one of these touches to create the Directional pad (dpad) that allows thumb-operated control of player movement. We therefore find the first touch that seems to be treated as a movement and assign the id value for this touch to our movingTouch variable. To work out if a touch appears to be a movement-type touch, we measure the distance from where the touch was started to where it is now. If it’s more than 10 pixels, it’s likely the player wants to use this touch as the controller. We add our touchMoving function:

12 We need to update out touchUp function so that movement is stopped. Note that if the movement is being stopped, we don’t do the attack:

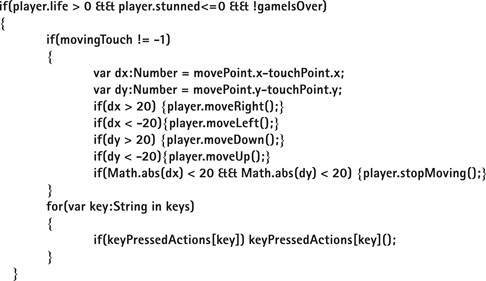
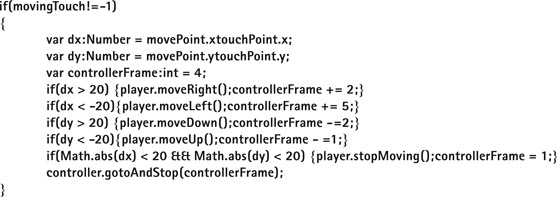
13 Finally, inside our gameloop we need to handle the player movement, so just before our for loop for checking the keyPressedActions add these new lines:
14 We currently have movement, attacking and jumping all handled by the touch screen. The last thing to do is to add our visual control pad. Make a new MovieClip and draw a classic Nintendo Entertainment System-style cross control pad in it. Make sure the center of the cross is the center of the MovieClip. Give it an AS Linkage name “Controller.” Give the MovieClip 9 different frames. The first frame will be still (no direction pressed), then the subsequent frames need to be as follows:
- Frame 2 = down
- Frame 3 = up
- Frame 4 = down right
- Frame 5 = up right
- Frame 6 = right
- Frame 7 = down left
- Frame 8 = up left
- Frame 9 = left
15 The frame numbers have a slightly random ordering as opposed to creating frames of the dpad being pressed in a clockwise type motion. Assigning directions to different frames means we can more easily choose which frame to show with code, which we shall come to in a bit.
First though, we need to add our controller MovieClip to our UI. We add it at the start of our timeline code, but we make the MovieClip invisible as we only want to show it when the gamer is touching the screen.
var controller:Controller = new Controller();
ui.addChild(controller)
controller.visible = false;
controller.gotoAndStop(1);
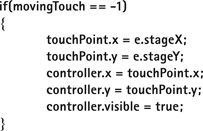
16 In our touchMoving function where we set our touchPoint × and y values, we add 3 lines:
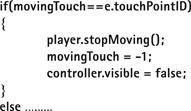
17 Then to make the controller invisible again, we modify the touchUp function:

18 Finally, to set the correct frame (direction) for the controller, we modify gameLoop again:

19 Let’s test our game on a touch device! This section doesn’t go into creating your icons or submitting the compiled game to an app store. We’re going to keep it simple and test locally, meaning on your own computer. You can choose between testing on an iOS or Android device. Android testing is the easier option because Flash CC compiles much quicker for Android than it does for iOS, and it’s free and easier to set up. Apple iOS development has a $99 annual charge from Apple whereas Google Play requires only a $25 registration fee. But it’s still free to test your app with the Android OS by simply connecting your Android device to your computer.
Up until now when we’ve been testing our game for the default Flash Player. Let’s change the default testing platform by going to File > Publish Settings and change the target drop down to AIR 3.6 for Android.
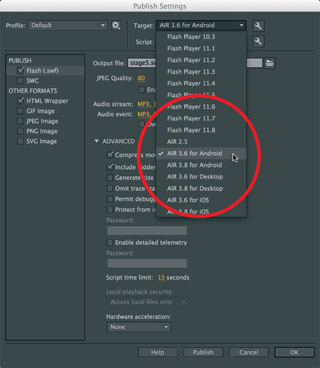
20 Click the little settings button next to the Target drop-down menu represented by the little wrench icon. In the General tab you can leave the default Output file and App name as it is. In the App ID field enter:
com.mydomainname.ninja
(I used com.percypea.ninja).
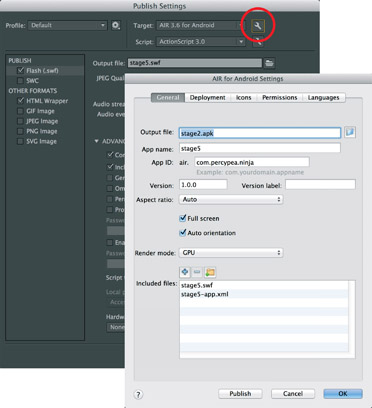
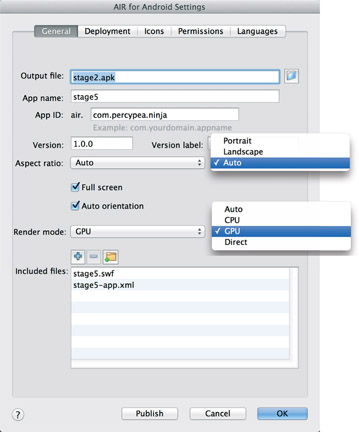
21 You can choose between Portrait, Landscape or Auto from the Aspect ratio drop-down menu. You can select Full screen as well as Auto orientation using the tick boxes. We’ve selected Auto in the drop-down menu and ticked Auto orientation for our game. This setting means the user can choose to play in landscape or portrait, and due to the nature of our game, either works well. The most important thing here is to set Render mode to GPU. Because we use vectors in our game and no fancy filter effects or features not supported by GPU mode, this render mode gets us the best performance/frame rate out of our Android device. This render mode is also the case with iOS. If you were to use Starling or another Stage3D engine, you would use direct instead here. CPU mode would be used if you found some of your visuals don’t look correct in GPU. Thankfully, all of ours do.
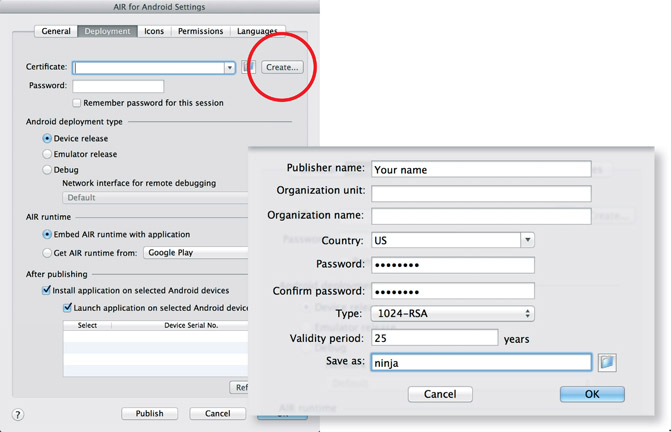
22 The Deployment tab is the most important tab for testing. Click the Create button, fill out the fields and add a password in the Password field. Specify a location where you want to save your file to and then click OK. Whatever password you used when creating the certificate, just type it into the password box back in the Deployment tab. Leaving deployment type as Device release is fine as we aren’t going to be doing any real debugging.

23 Embedding the AIR runtime with the application adds 9.4MB to the file size of the app. Our app would only be around 60KB without the AIR runtime, so this file size is comparatively huge and makes it very tempting not to Embed it. If it’s not embedded and the user doesn’t have AIR already, they should automatically be taken to the Google Play store and given the option to download AIR. We are going to embed it in our game so that the end user won’t have to worry about this step. Also, not all Android devices have access to the Google Play store.
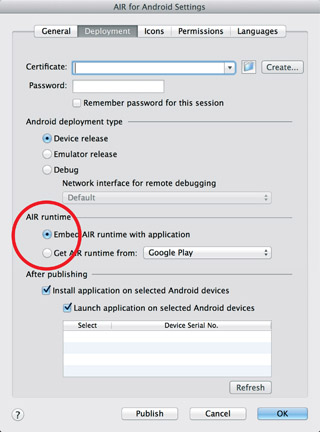
24 Back to our Deployment panel, if you have your Android device connected to your computer, you can select to install and launch it directly after it’s compiled. Select Publish and you should have your game running on your Android device with touch controls fully integrated!
Testing devices on iOS works exactly the same way, but you’ll need a P12 Certificate for iOS distribution which is harder to get. You’ll need to be registered with Apple as a developer, get the UDID for your iDevice and add it to your Apple developer account. We won’t provide details as to how to become an iOS developer as that information can be found by going to apple.com. We also don’t want you to spend $99 just to test your game on an iOS device since you can test for free on an Android device. If you want to learn more about becoming an iOS developer you can visit these links below.
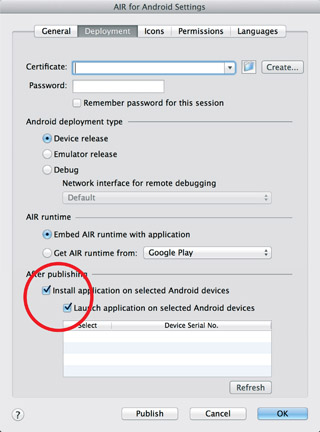
https://developer.apple.com/support/technical/certificates
http://www.adobe.com/devnet/air/articles/packaging-air-apps-ios.html
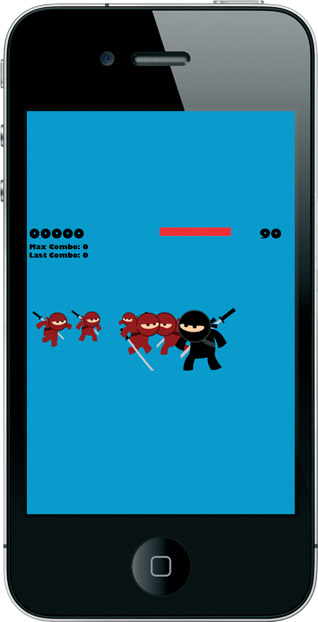
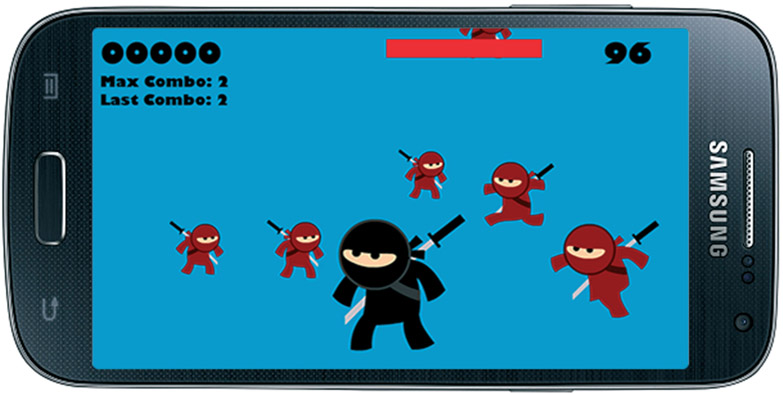
Stage 5 is now complete!


Stage 6
MUSIC, SOUND AND visual effects! Currently our player can attack enemies and our enemies can attack the player, but other than that there’s no visual effect to enhance the attack. This section will show you how to add some blood splatters as well as sound effects and music. A huge special thanks goes out to Tom McCaren of www.tommccaren.co.uk for graciously designing the awesome sound effects and music for this game. Tom is a talented UK-based sound designer and composer working primarily in the gaming industry.
1 Let’s add some blood! Rather than have code in our timeline to set up and add our blood particles, in the same way that we add our enemy ninjas we are going to create a manager class. Make a new ActionScript 3.0 Class file and call it ParticleManager. This class is our first one that will need to have a Timeline reference, but it also doesn’t extend our Base3D class. So we need to create a new timeline variable and pass it the timeline when we initiate it. The code to put into this class is in Step 2, but first, back in our main timeline code, add this single line of code:
var particleManager:ParticleManager = new ParticleManager(this);
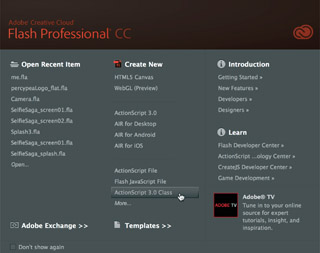
2 In our new ParticleManager Class file add the following code:
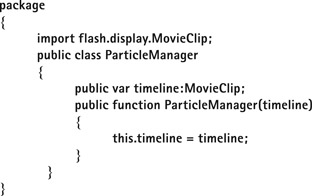
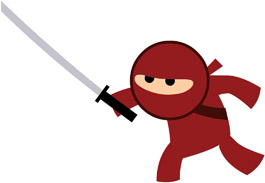
3 Let’s create our Blood Class (Blood.as). This Class will extend Base3D as we want our particle to be in our 3D world:
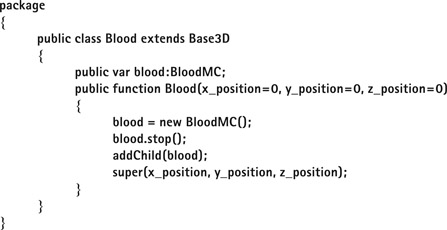

4 Finally we need to create our Blood MovieClip (BloodMC) in our library. In the FLA make a new MovieClip and inside it create an animated blob of blood. This blob should be just a looping animation that doesn’t move except for some kind of oscillating effect. In the Stage6.fla included with the downloaded example files, you can find this symbol in the file’s Library panel. Open the blood symbol and play the timeline animation to see the animated effect. The overall movement of the blood during game-play will be handled via code. Make sure it has the AS Linkage name BloodMC by right-clicking over the symbol in the Library panel and selecting Properties. In the Advanced section type BloodMC in the Class input field.
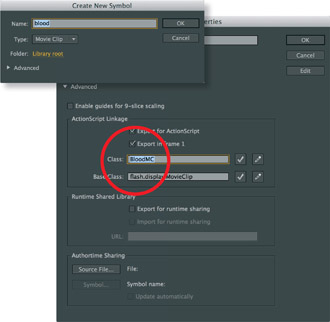
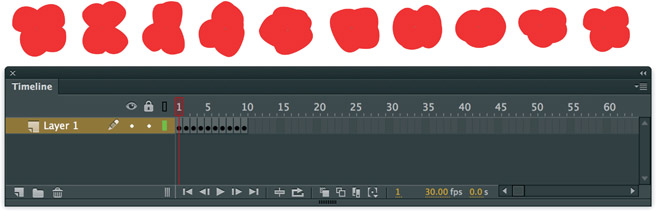

5 Why are we using a ParticleManager rather than adding our blood to the game area in the same way as we add our Ninjas? With our blood we want to be able to add several blood drops at a time and possibly end up having close to 50 particles on screen at once. At the same time we want to manage the number of particles on screen for performance reasons. Finally, initiating a Class and an addChild function to the stage can cause performance issues if we do it a lot at once So this ParticleManager will work around these performance issues. First of all, we do what is termed as Object Pooling. Let’s decide that the maximum blood particles we want on the screen at any time is 50. We can now create all 50 blood instances right at the start of the game and then store them in our “pool” to easily grab and show them via code when needed. In our ParticleManager add this code:
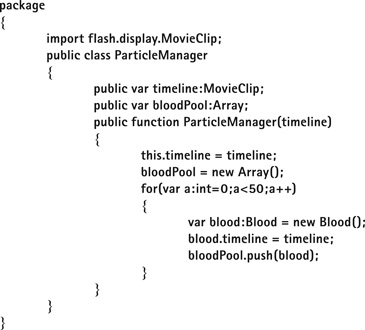
6 We now want to add two functions: one to take the blood particles from our bloodPool and display them on screen and the other to remove them again and put them back into our bloodPool to be able to be reused. The first function addBlood will be created so that we can tell the particleManager how many blood particles to add along with where to add them in our 3D world. The shift() command means we “shift” the first item (in this case a Blood drop) out of the bloodPool. We then call a function called init which we have yet to create in our Blood Class. Finally, we check to see if we are already using that blood particle, and if not, we push that blood particle into our main objects3D array so that its loop function (also not yet created) can be called and so that it will be positioned in our world:
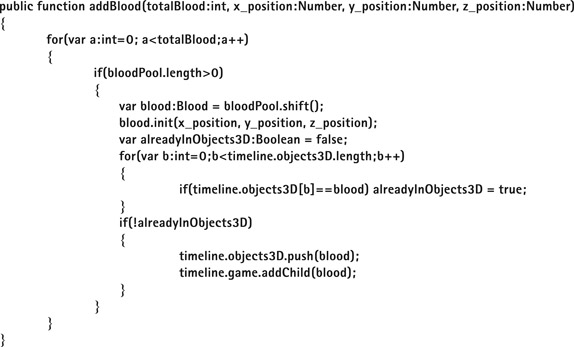
7 The removeParticle function is a little simpler. It marks our blood particle for removal so that our main code loop knows to remove it from screen and then pushes it back into the pool. Although in this tutorial we won’t add any more particles to the game, the ParticleManager is actually coded to handle more than just our blood particles, so we look up which particlePool is the one where we push our particle back into.
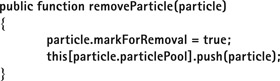
8 Let’s update our Blood class now. First add some new variables to the class. The three velocity variables are going to be our speed in each direction for the blood particle. The y_velocity is actually the same as our “gravity” value for the ninjas. The particlePool is the reference our particleManager uses to know which pool is where the particle is in. The fadeOut boolean is used to determine if the blood particle should be fading out or not, and the waitForFade is a value we use as a little timer before the fade out happens.
public var x_velocity:Number;
public var y_velocity:Number;
public var z_velocity:Number;
public var particlePool:String = “bloodPool”;
public var fadeOut:Boolean;
public var waitForFade:int;
9 We then add our init function to the Blood Class. The init function is also like a reset function. Because this blood instance gets reused from our bloodPool, properties like its alpha and animation need to be reset:
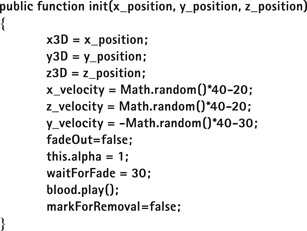

10 Finally, our main loop code gets added to the Blood Class. While the blood particle is still in the air, we adjust its x, y and z position by the velocities (we also adjust the y_velocity in the exact same way as we adjust the gravity value in our Ninja Class). Then if the blood particle hits the floor, we make its animation stop and tell it to fadeOut. The fadeOut part of the code first of all reduces our waitForFade timer. When it is less than 0 it reduces the alpha of our blood until it is less than .1 (10%). Then we call the removeParticle function from the particleManager.
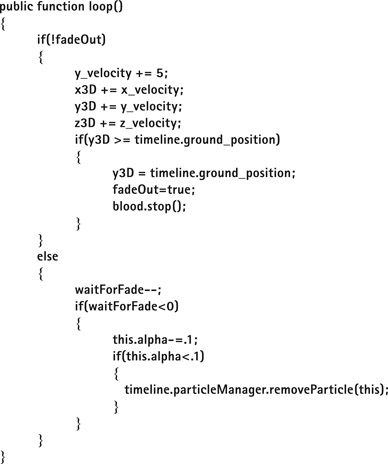
11 We have our particleManger and blood particle complete, so let’s create some blood! In our Ninja Class you will remember that we have a hurt function. Let’s add these two lines inside that function: var totalBlood:int=Math.random()*3+3; timeline.particleManager.addBlood(totalBlood, x3D, y3D-100, z3D);
So we determine that we want between three and five Blood particles (Math.random()*3 will be 0, 1 or 2 when made into an int). And we position them at our ninjas x3d, y3d and z3D values. Note we actually subtract 100 from the y3D value because y3D is at the ninja’s feet. Blood Complete! Feel free to increase the totalBlood value for more gore. If you increase it too much though, you will notice that some attacks give no (or very little) blood. This result is because you’ve got all the particles from your Blood Pool on screen already and have to wait until they’ve gone back in for reuse. A solution is to start with more than 50 particles but beware of the performance impact!
12 In our game we’ll just have one background which will repeat as you move left to right (and right to left). Make a Graphic symbol (not a MovieClip) called backgroundImage in your main fla and create a lovely background. Make sure this background is wider than your screen area (ideally by at least 30%). Making it wider is necessary because not all mobile handsets/tablets are created equal, and some will have wider screens than others. Remember we’re currently working on a screen that matches the iPhone 4 which certainly isn’t even the widest iPhone screen, let alone handset screen.
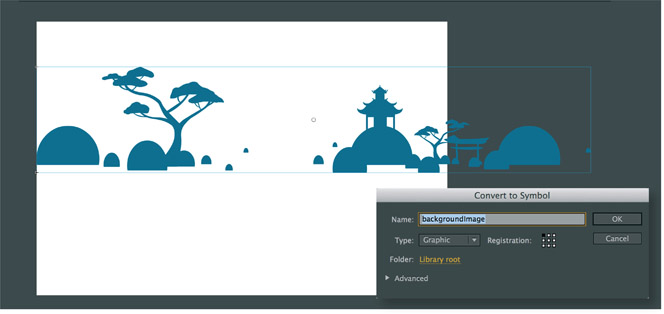
13 Make a new empty MovieClip called “background” and place two copies of your backgroundImage in it side by side. Make sure that these two copies are aligned to the left edge and bottom edge of the MovieClip. The reason we place two copies next to each other is because if we only had one backgroundImage, eventually we would get to the end of it when we keep scrolling it to the left (or right). By having two copies, the second backgroundImage looks like it’s the start (or repeat) of the the first backgroundImage. We then use some clever code to make sure we never go past this second copy. Rather we jump back enough pixels so the camera shows the first background again and our player never notices. Magic!
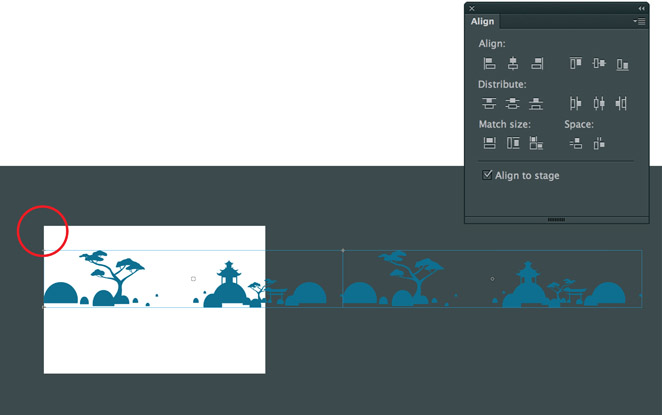

14 We have our twobackgroundImage Graphic symbols inside our background MovieClip. Manually place our background into the game by dragging an instance of it from the Library panel to the stage. Make a new layer for it below the UI and put it in the second keyframe. Give it the instance name background.
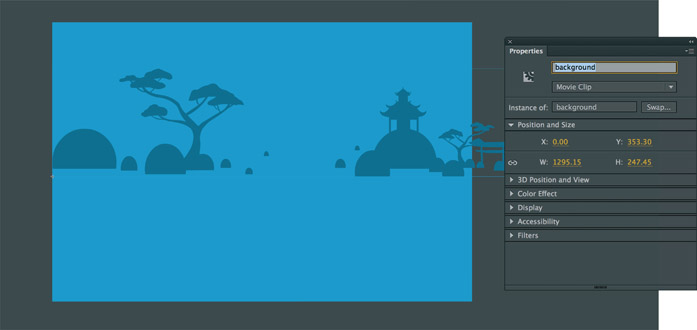
15 Set the “x” value of the MovieClip to 0, although this isn’t really that important. What is important is the y value which we need to set to 353.3. Why this strange value, I hear you ask? Well our background won’t be controlled by our 3D code that controls all other movement; however, it does need to look like part of our 3D scene. So to get the 353.3 value, we pretend that our background has a z3D value of 6000 (remember our Ninjas can’t go beyond 5000). We also know that it sits on the ground_position of 500. Finally, we know that all our other 3D objects have their y coordinate worked out with this line:
y = (y3D Camera. y3D)*(Camera.perspective/z3D)+320;
If we plug in our background values to that equation, we’ll get:
y = (500 Camera. y3D)*(Camera.perspective/6000)+320
Which after reminding ourselves what our Camera.y3D and Camera. perspective values are gives 353.3. Now in fairness, we could quite easily get away with just 353 or even 354, but there’s no harm in using 353.3. So y is worked out. In our game we don’t ever adjust Camera.y3D (ie pan the camera up and down), so we won’t have to worry about moving the background up and down either. However, “x” we do want to move.
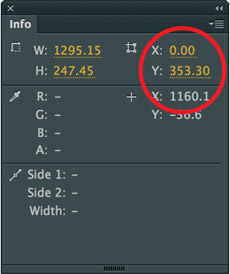
16 let’s make a function in our main timeline code. Feel free to place it anywhere, though I have it directly beneath the gameLoop function:
function moveBackground()
{
}
17 Inside our gameLoop itself just after we call the Camera. track(player) command and before objects3D.sortOn is where to call our new function:
Camera.track(player);
moveBackground();
objects3D.sortOn([“z3D”,”uniqueID”], Array.NUMERIC | Array.DESCENDING);
18 Let’s have a quick reminder of our equation for all our other 3D objects starting with x: x = (x3D-Camera.x3D)*(Camera.perspective/z3D)+480;
19 We’ve put our background at 0 currently, so we can remove x3D from the equation. We also don’t need to worry about that +480 at the end really, as we know we want our background to loop as we move and are not really that worried about where it starts in relation to the game. So we simplify it a little and create this:
function moveBackground()
{
background.x = -Camera.x3D*(Camera.perspective/6000);
}
20 If you actually test your game now, you should see your background move at the correct speed and fit nicely in our 3D world. However, it won’t loop/repeat. The fix is to keep moving the background by half its width (remember you have 2 background images next to each other, so half the width is 1 complete image) in the correct direction. So we add these 2 lines:

21 If you test now, your background should loop seamlessly. And to the untrained eye, it all looks perfect. Sadly, it’s not quite as simple as that. On your computer, on an iPhone 4 which has the resolution of 960x640 or on any device which has the same screen ratio the background will look correct. However, on an iPhone 5 where we have a wider screen we will actually see a gap occasionally on the left hand side where the background hasn’t correctly wrapped itself. This gap is because our Flash game scales itself so that it fits onto any size screen. Scaling is a very handy feature as it means our UI and enemies will always show, no matter the screen size or orientation. On wider screens the user gets to see more of the game, so they have the benefit of possibly seeing more attacking ninjas that would perhaps be off screen on an iPhone 4. It is because they can see more of the sides that they then see the missing piece of the background because the coordinate 0,0 is no longer right on the left hand side of the screen; rather extra space has been added there, so the coordinates go into negative numbers. For example, on an iPhone 4 with a screen size of 960x640 the coordinate 0,0 will be the top left. This is because our game is also 960x640 in Flash and therefore no scaling has to be done. The iPhone 5’s screen is 1136x640. Our game automatically gets centered on the screen which means there is an extra 88 pixels to both the left and the right. We’ll call these our leftMargin and our rightMargin although we won’t mention the right again. However, because of the 88 pixel leftMargin, the coordinate -88,0 is actually the top left of the screen on an iPhone 5 in landscape mode.

22 We need to modify our moveBackground function to account for whether the screen is more widescreen than an iPhone 4. We work out what our leftMargin is. There are many, many different screen ratios, so it’s no good just knowing what each screen is. We need a way to work it out. First of all we work out the screen ratio of our phone/handset.
var screenRatio = stage.fullScreenWidth/stage.fullScreenHeight;
23 We know our default screen ratio is 1.5 (960/640). We only need to worry about whether the leftMargin ratio is bigger than 1.5:
var leftMargin:int = 0;
if(screenRatio>1.5) leftMargin = 640*(1.5-screenRatio)/2;
24 We can use the leftMargin in our while loops:
while(background.x<-background.width/2+leftMargin) background.x += background.width/2;
while(background.x>leftMargin) background.x =background.width/2;
25 Almost there! There is one other slight issue. We want the web version of our game to be able to be distributed to gaming portals, but not all of them will embed it in their site at the correct ratio. However, because the web game won’t be fullscreen, we can’t use the fullScreenWidth and fullScreenHeight properties to work out our screenRatio. Instead we have to use the stageWidth and stageHeight properties. We look at our stage displayState property to see if the game is running in fullscreen (on a device) or not (web). The bad news is because our game is created using scaling (so that it will scale to fit any device nicely and the UI stays centered etc.), stageWidth and stageHeight always return 960 and 640, our default width and height, no matter what size the portal has made the game on their website. However, there is an easy solution. We sneakily tell Flash that we don’t want to have scaling any more, which then cheats Flash into working correctly and being able to accurately get stageWidth and stageHeight. We then quickly work out the screenRatio and then tell Flash, “Sorry, we actually do want scaling after all.” So finally, our moveBackground function becomes this:
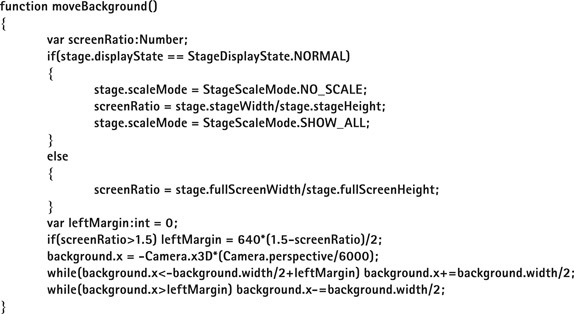

Music & Sound Effects
26 Go to www.howtocheatinflash.com and download the ZIP file containing all of the example files for this book. In the Chapter 10 folder you will find all of the sound effects and music for this game courtesy of talented sound designer Tom McCaren of www.tommccaren.co.uk. Import all of the sound effects and music into the library and give them AS Linkage names. We will use Linkage names that start with SFX (even for the music) so that it’s easy to remember they are Sound Classes.
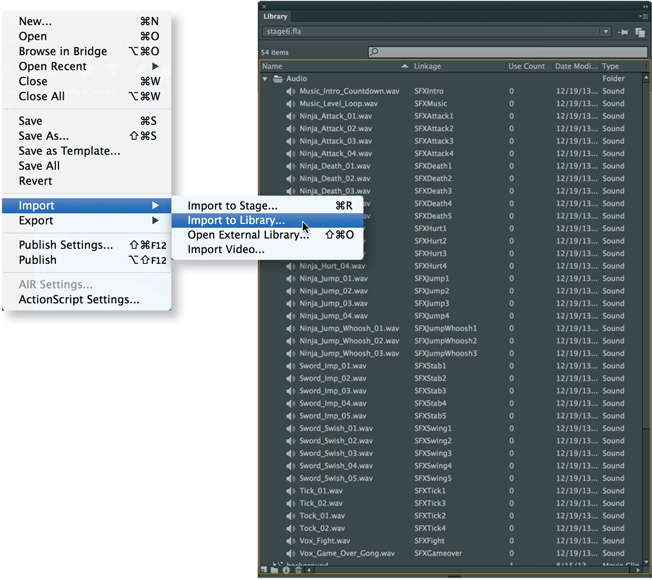
Hot Tip

For organization purposes, create a new folder within your Library (using the upper right corner drop-down menu) for all imported audio files. As seen in Step 26, all imported sound files are in a folder named “Audio.” Organizing files using folders helps keep your Library clean and organized.
27 By default, when we publish a swf file, Flash will use relatively poor audio quality settings. You can change these in File > Publish Settings. For web games I find that MP3, 64 kbps, Mono gives a good balance between quality and file size.
If publishing for mobile though, particularly on older devices, it’s actually best to select Disable from the Compression option in Sound Settings. Disabling this option will drastically increase your app file size but will give the best performance in terms of playing audio.
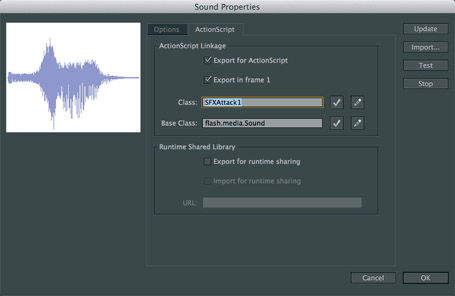
28 Give or take a few empty lines, we’re getting close to 300 lines of code in our Timeline now. This amount of code is over double to what we had at the start of Stage 2 when we decided to use Classes. What we’re going to do now will be very frowned upon by most developers. In fact they will already be gnashing their teeth at our use of the Timeline to house code. But for simplicity’s sake we’re going to add a new layer in our Timeline, name it Audio Code and add more code into it.
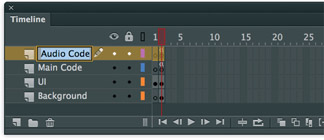
29 You may have noticed that for a lot of the sounds, there are multiple versions, 4–5 of each sound. We use multiple versions to give a slight variation on each sound effect so that the audio doesn’t become too repetitive to the player. Let’s start with the simple sounds though, the ones with only one version. In the new Audio Code layer, add the code:
var intro:SFXIntro = new SFXIntro();
var fight:SFXFight = new SFXFight();
var gameoverSFX:SFXGameover = new SFXGameover();
var music:SFXMusic = new SFXMusic();
var musicChannel:SoundChannel;
This initial block of code has initiated but won’t start playing 4 sounds, three sound effects and one music track. The last line sets up a SoundChannel.
30 In AS3 whenever a sound is played, a new sound channel is created. Once soundchannel is created, we have more control over the sound. We can monitor it, stop it, check it to see if the sound has finished or adjust the volume of the sound as it is playing. As soon as the introSFX has finished and also on Android devices if the game is minimized, we need to make sure the music stops. So let’s start the audio!
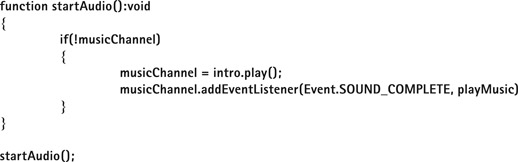

31 We create a startAudio function that starts playing our 3, 2, 1 countdown intro sound effect, but then also adds a listener to that sound channel to see when it is complete. When that happens it will call the playMusic function which we need to write:
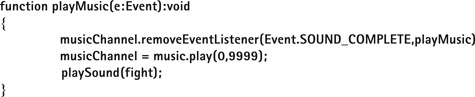
This function tells the musicChannel we don’t need to worry about listening for when the sound has completed playing. Notice the 9999, in the music.play() command. This number tells the sound to repeat 9999 times before stopping. This setting is potentially a bug as it will eventually mean our music will stop playing if someone plays the game long enough, but as our music track is almost a minute long that’s over 150 hours of looping music – pretty much a week. So it’s not something we need to worry about, especially as we’ll restart the music after our 99 second gameplay time anyway.

32 Note the last line of our playMusic function is a call to a new function playSound. Let’s add to that:
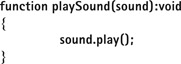
We should be able to test our game, hear the intro countdown with music start and have the intro followed seamlessly by the full music track and also the fight sound effect.
33 Let’s get more complicated. Underneath our line var musicChannel:SoundChannel; add:
var swordSounds:Array = new Array();
swordSounds.push(new SFXSwing1());
swordSounds.push(new SFXSwing2());
swordSounds.push(new SFXSwing3());
swordSounds.push(new SFXSwing4());
swordSounds.push(new SFXSwing5());
What we have done is made a small Array containing 5 Sword Swinging sound effects. Let’s add a function that will play one of them:
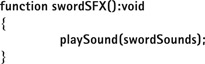
34 Our playSound function is expecting a normal sound to play() but we are passing it an Array of 5 sounds. So let’s modify our playSound function:

What we have done is checked to see if what is being passed is an Array, and if it is, then it selects one of the sounds at random from within the Array to play.
35 Finally, we need to call our swordSFX function from somewhere. Let’s open up our Player.as Class. In our checkEnemies function at the bottom before the closing } add:
timeline.swordSFX();
A sword sound should be played whenever you swing your sword.
36 But why do we call the swordSFX from Player.as and not from Ninja.as in our attack function? Surely that would then mean that both the player and the enemy ninjas make use of our lovely sword swing sound effect. Well, we want our swordSFX to only play if the sword does not hit an enemy. If it hits an enemy we want a different set of sound effects to play.
There are 3 different types of sounds we will want to play depending on what happens when we swing our sword: the normal swish which we’ll call type 0, an impact when we hit an enemy which we’ll call type 1 and a death sound if that hit is the final blow which we’ll call type 2. In our Player Class, at the top of our checkEnemies function before the “for each” line add:
var swordSFXType:int = 0;
37 Then after our enemy.hurt() line inside the for loop and before the timeline.updateScore(), insert the
following code:
enemy.hurt();
if(enemy.life>0) swordSFXType = 1;
else swordSFXType = 2;
timeline.updateScore();
38 We then modify our timeline.swordSFX() line to become:
timeline.swordSFX(swordSFXType,this);
Not only do we pass our swordSFX function the type of effect to play, but we also pass it “this” which is our Player character. Why? Find out in Step 40!


39 Back to our Audio Loop layer in the main timeline. First let’s add our stab, hurt and death sounds:
var stabSounds:Array = new Array();
stabSounds.push(new SFXStab1());
stabSounds.push(new SFXStab2());
stabSounds.push(new SFXStab3());
stabSounds.push(new SFXStab4());
stabSounds.push(new SFXStab5());
var hurtSounds:Array = new Array();
hurtSounds.push(new SFXHurt1());
hurtSounds.push(new SFXHurt2());
hurtSounds.push(new SFXHurt3());
hurtSounds.push(new SFXHurt4());
var deathSounds:Array = new Array();
deathSounds.push(new SFXDeath1());
deathSounds.push(new SFXDeath2());
deathSounds.push(new SFXDeath3());
deathSounds.push(new SFXDeath4());
deathSounds.push(new SFXDeath5());
40 Then let’s modify our swordSFX function:
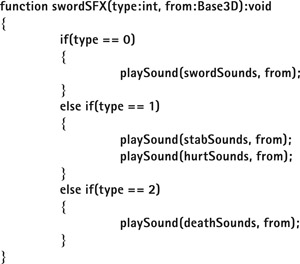
Notice that if the sound effect type is 1, meaning that your sword has connected to an enemy but not killed them, we play two different sounds: the sword stab sound as well as a hurt ouch sound.
41 We need to modify our playSound function again to handle this new from object which if you remember is our Player But first, why do we actually want to know where the sound is being triggered? Because, as our player moves away from the camera we want the sound effect to be quieter. So the playSound function needs to know how far an object is from the camera and adjust the volume of the sound accordingly. First we need to create a volume controller from a SoundTransform Object as we use it to transform sound. At the top of your Audio Code, place
var volumeController:SoundTransform = new SoundTransform();
Let’s modify playSound to make use of it:

Because playSound is also called with our Fight SFX which isn’t associated with a Ninja, we need to allow for our from variable to be nonexistant (or null). Our new line checks how whether the sound comes from from. If so, it sets the volume to be default which is 1. If the sound has come from a Ninja, we use the z3D value of that Ninja to work out the volume.
42 If you test it now, one thing you will notice is that the death sounds aren’t quite so loud compared to the other sounds. We could take these audio files into some audio editing software to increase their volume and then reimport into flash, but let’s give them a volume boost from within Flash itself. Modify the playSound function yet again, to be this:
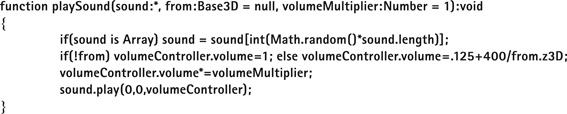
Then go up to our swordSFX function and change the deathSounds line to be:
playSound(deathSounds,from,3);
This code will make deathSounds play three times their volume which should certainly be loud enough to be heard above any other sounds.
43 We have sound effects associated with our player, but what about the enemies? Open Enemy.as and find the checkPlayer function, and we mirror what we have done to Player.as:
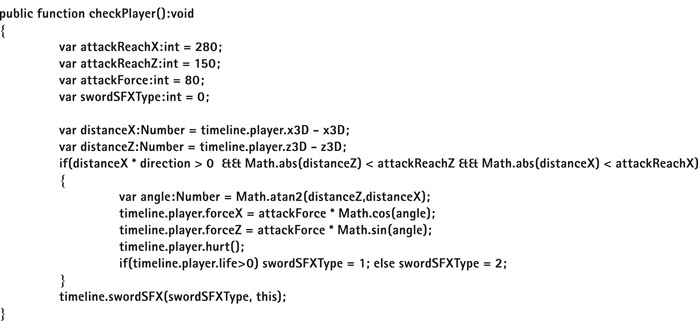

44 There are two final things we need to do for the swordSFX. You may notice that if you run away from the enemies, you still hear them loud and clear. So we make a new function to determine if the sound effects for the enemies are allowed. Add this code to the bottom of the Audio Code layer:


45 And finally, let’s add a bit of extra random sound to the attack, a nice occasional grunt from a Ninja as he swings his sword. The below code shows both the check to see if a SFX is allowed and the new line which gives a 1 in 3 chance to add a grunt (attack sound):
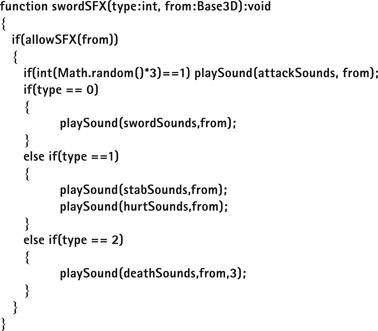
46 For attackSounds, we have a new array:
var attackSounds:Array = new Array()
attackSounds.push(new SFXAttack1());
attackSounds.push(new SFXAttack2());
attackSounds.push(new SFXAttack3());
attackSounds.push(new SFXAttack4());
47 Now we need one more type of sound for both our player and enemy ninjas: a jump sound. As with the sword sound, we have a 1 in 3 chance for a jump type grunt sound to play too. Unlike sword though, we don’t need to have a type. Because our whoosh sounds are quite loud, we actually use a value of .4 for the volumeMultiplier to reduce the sound. This reduces the sound volume to 40% for the jump whoosh sounds.
var jumpSounds:Array = new Array()
jumpSounds.push(new SFXJump1());
jumpSounds.push(new SFXJump2());
jumpSounds.push(new SFXJump3());
jumpSounds.push(new SFXJump4());
var jumpWhooshSounds:Array = new Array();
jumpWhooshSounds.push(new SFXJumpWhoosh1());
jumpWhooshSounds.push(new SFXJumpWhoosh2());
jumpWhooshSounds.push(new SFXJumpWhoosh3());
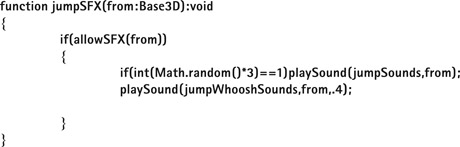
48 Because we don’t need to work out the type of jump sound as we did the sword sound, we can put the trigger for the jumpSFX in our main Ninja.as Class so both the Player and Enemy can trigger it. Open up Ninja.as, and in the jump() function above the Ninja.gotoAndPlay(“jump”); line add:
timeline.jumpSFX(this);
49 There are two more types of sounds we want to include, a game over and ticking clock noises for the last 10 seconds remaining. We already have our gameoverSFX sound initiated, and we already have a function in our main code layer that gets called when gameover happens, so we modify this function to include two lines:
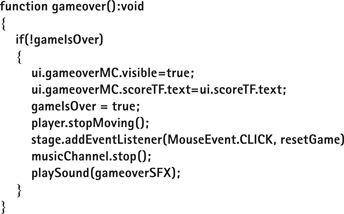
Note that the first line will stop our music from playing as we don’t want that to continue. The second line plays our gameoverSFX.

50 We then need to make sure we start the music again when the user hits “try again.” At the end of our resetGame function, add these two lines:
musicChannel=null
startAudio();
51 The Tick sounds are a little more complicated. Back in our Audio Code layer, add the following to initiate the 4 tick sound effects and a little counter that we will use to determine which of the 4 ticks to play for each of the remaining 10 seconds: var tick1:SFXTick1 = new SFXTick1();
var tick2:SFXTick2 = new SFXTick2();
var tick3:SFXTick3 = new SFXTick3();
var tick4:SFXTick4 = new SFXTick4();
var tickCounter:int = 1;
Then add a tickSound function:
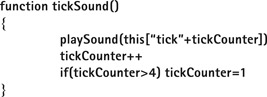
52 To trigger the tickSound on each second, in the Main Code Layer we go down to the line timer-=1/30; and sandwich it between these lines:
var oldTimer:int=timer;
timer-=1/30;
if(Math.ceil(timer)<10 && int(timer)!=oldTimer) tickSound();
If we didn’t use oldTimer then we would get a tick sound happening on every single frame which would be 30 times for every one second.
53 There’s one last tweak for sounds. As previously mentioned on Android devices when the game is minimized, the music still plays which we don’t want. So add this function to our Audio Code Layer:
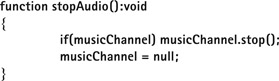
54 In our Main Code Layer, add to the existing deactivate function:
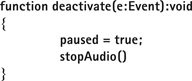
55 And then add to our activate function:

Congratulations! If all went well, you were able to build an interactive game complete with animation, particle effects, sound effects and music using Adobe Flash CC! Feel free to use this game example as a template and get creative! By changing the graphics and code, you could easily expand upon what we’ve already started.
This chapter would not have been possible if not for the amazing work and dedication from David Crawford himself. Not only did he write the code and set up the Flash files, he painstakingly documented each step for this book. Without his talent and efforts, this example may not have been possible.
Special thanks goes out to Tom McCaren as well for his awesome sound effects and music. Tom brought this fun little game to a whole new level with his sound design, and I can’t thank him enough.
As for the ninja, we have our own plans to continue working on this game by adding exploding bunnies, more animations, effects and maybe even levels.
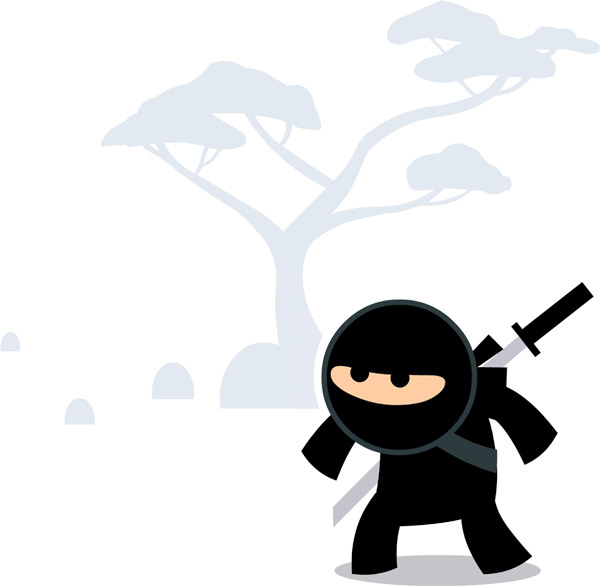

Thank you
BEING THE AUTHOR OF THIS BOOK HAS BEEN THE MOST HUMBLING experience of my design and animation career. Focal Press asked me to write How to Cheat in Adobe Flash CS3 back in 2006. Five editions and seven years later, nobody is more surprised than I am at the longevity of this series and the number of readers who have embraced it. Tens of thousands of copies are in the hands of Flash hobbyists and professionals worldwide, and several schools and educators have even adopted How to Cheat in Adobe Flash as part of their animation curriculum.
When I was asked to write this series, I considered my options and sought advice from several author friends. What was I getting myself into? Was it a good move financially? How much of my time would it take? Their advice was honest:
“Don’t write the book for money. Instructional, how-to books don’t typically generate much income because they don’t sell enough and have a very short shelf life.”
“Write the book because you love to write.”
“Be prepared to write for long hours. Then be prepared to write some more.”
“Write the book if you love to teach.”
For me, writing this book wasn’t about the time or money. It was about sharing all of my techniques and experiences that have made me a better designer and animator. I’m lucky for the opportunity to have a career as an artist and, this book represents all that I am thankful for.
Between writing every chapter, creating each example, designing every cover and laying out each page, I easily regard How to Cheat in Adobe Flash as the biggest accomplishment of my career. More meaningfully, this book is also my biggest artistic success based on how well received it has been from all of you.
Thank you all for your emails, tweets, Facebook messages and in some very special cases, actual handwritten letters. They are all reminders that every minute spent, every sacrifice made and every hour of sleep lost have all been worth it.
Thank you for reading.