
CHAPTER 6
Camera Exposure and Handling
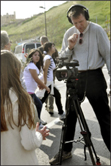
▲ Measuring Light. A memorial service was held for Deputy Game Warden Ernest Berry, who had been murdered in pursuit of a poacher. Left on automatic, the camera’s light meter would have measured the brightness of the sky and produced an underexposed picture.

(Jeffrey D. Allred, Desert News)
This symbol indicates when to go to the Video journalism website for either links to more information or to a story cited in the text. Each reference will be listed according to chapter and page number. Links to stories will include their titles and, when available, images corresponding to those in the book. Bookmark the following URL, and you’re all set to go: http://www.kobreguide.com/content/videojournalism.
When you first enter a dark room, everything appears black. Then your pupils open and your eyes gradually adapt to the darkness. Now you can begin to see details in the room that were at first obscured. Your eyes have temporarily become more light sensitive. When you go out again into bright light, you are temporarily blinded and can’t see immediately because there is too much light coming into your open pupils. However, they quickly close down to handle the initial jolt of light, and your eyes become less sensitive until they adjust completely to the situation.
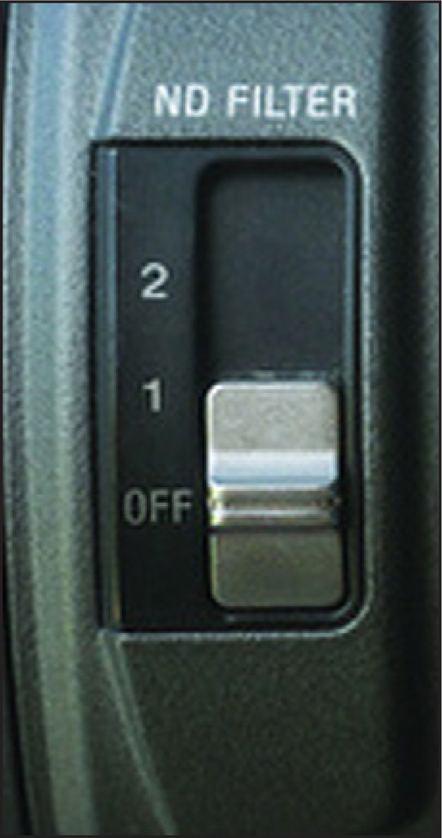
▶ Electronic neutral-density. (ND) gray filters are built into this camera’s lens. The user must change them manually when necessary. With a message on the LCD screen or viewfinder, the camera often signals an alert when to add these neutral density, colorless filters.
When you go from a well lit to a darkly lit room—and back again—your pupils adjust very quickly. They automatically change in size to let in more or less light. In addition to a change in pupil size, your eyes actually change chemically to adjust to light levels over time.
The automatic exposure function of a video or still camera operates in a manner similar to how your own eyes work. A video camera set to automatic exposure lets in more or less light by physically opening up or closing down the lens’s iris depending on the brightness of the scene. Some less-expensive video cameras adjust to different light levels by cleverly changing the electronic sensor’s sensitivity or “gain” in a manner parallel to the way the eye becomes more light-sensitive in a dark room and less light-sensitive in a bright room.
Top video cameras handle brightness using both methods. They change the diameter of the iris, as well as adjust the sensitivity of the electronic gain.
AUTOEXPOSURE WORKS MOST OF THE TIME
The autoexposure feature of many video cameras is amazingly accurate. Travis Fox, who shot many video stories for the Washington Post and who freelances for Frontline now, sets his camera on automatic “Iris Priority.” This setting lets the camera adjust exposure automatically by changing the iris of the lens. He likes working in this manner. “If I have a lot of back light, rather than adjust exposure I prefer to rotate my angle,” he says. The video camera may not be able handle the intense brightness. Even if the camera or you have closed down the iris as small as it will go, the scene may still be too bright. Some cameras have a built-in neutral-density (ND) filter to reduce brightness. Think of a neutral density filter as gray, colorless sunglasses for a lens. ND filters cut the total amount of light entering the camera. If the camera has built-in ND filters, a message usually appears on the LCD or viewfinder screen indicating how much filtration is necessary and which filter to select.
▲Neutral Density Filter. When you shoot in a very bright situation: the beach, the ski slope or sometimes just in the street on a sunny day, you may need to add a neutral density filter to reduce the scene’s overall brightness so that the camera can correctly expose the images.
(Photo by Ken Kobré
Whether it’s a physical filter or an electronic adjustment, remember to remove the neutral density filter when moving to a darker environment.
MANUAL EXPOSURE FOR MORE CONTROL
“While it is true that most professional lenses do have ‘auto iris,’ pros don’t use them 99 percent of the time,” says veteran television shooter John Goheen of Terranova Pictures.
It’s true that although autoexposure works remarkably well, it has limitations, such as in bright backlight. Because the camera’s electronics can’t read your mind or anticipate your personal vision for the shot, however, many cameras do allow overriding autoexposure.
If you see that the image is too light or too dark, you can adjust its brightness. Some video and hybrid SLR cameras require switching the camera to manual exposure (if available) to change the amount of brightness.
As you shoot more, you will discover when the camera can think for itself and when it requires human intervention. The camera’s automatic features usually do a good job but they cannot anticipate your creative desires.
LIGHT BEHIND THE SUBJECT
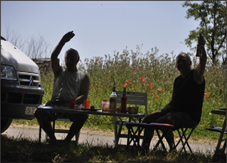
If your subjects are picnickers in shade with a bright blue sky behind them, the video camera is likely to respond to the brighter background and underexpose the picnickers, turning your subjects into silhouettes. After all, the camera does not know whether you want to correctly expose the bright background or the shade-sheltered pair.
Sometimes a silhouette is perfect. Other times you want to lighten your subjects so that you can see details in their faces as well as what’s on their plates. Many cameras have a specific “backlight-button” that will let in more light (or increase the gain) and better expose your happy picnickers. When you change venues, always remember to turn off the backlight-button compensation feature.
On automatic, the camera does not know how dark and moody you might want the overall look and feel of the footage. The camera does not know when you want a silhouette and when your want detail in the shadows. Only you can make those artistic choices—and this kind of creative input requires manually controlling the camera. You are the artist, journalist, producer, and photographer. You can’t blame poor footage on your equipment.
Zebra Patterns Show Overexposure
Some higher-end video cameras have a special overexposure protection aid called “zebra patterns” that visually indicate any part of the picture that will appear washed out.
The zebra option ensures you don’t overexpose a scene. With the zebra option on, you can manually adjust the iris when the pattern is visible in highlighted areas, and back off until the pattern vanishes. If you are taking pictures of a snow-capped mountain and the 100 percent zebra stripes appear over the whitest area, you need to decrease the exposure until the zebra pattern disappears.
The 70 percent zebra is primarily used for interview shots to properly expose facial skin tones. With Caucasian skin highlights, the camera operator adjusts the camera’s iris so the 70 percent zebra pattern appears on the highlighted areas of the subject’s face. Typically, in a well-exposed interview shot, zebra lines will show up on the forehead, nose, and cheekbones. With a little practice, you become quite adept at setting exposure for faces with this tool. Darker-skinned faces will display a smaller version of the same pattern; very light-skinned faces will display larger highlight zones showing the zebra pattern. You simply need to mentally adjust for the skin type of the face you are shooting. At 70 percent, the wavy lines over white items in the scene, like a stack of paper, a white blouse, or a reflection on stainless steel, are acceptable.
Tip
In your desire to avoid overexposure, do not attempt to eliminate all zebra stripes. In general, a few highlights in the brightest part of the image, such as reflections off a mirror or from silverware, are often desirable.
DEALING WITH DARKNESS
Less-expensive video cameras offer no exposure options. What you see on the screen is what you get. The camera is doing the best it can. Unfortunately, the best it can do is not always good enough in low light because lower-end cameras cannot pick up detail in shadowy areas. Where there should be detail, the cameras instead records noise. (See figure below.)
▲ Overexposure Warning. With the zebra pattern feature turned on, a series of slanted lines will indicate the danger areas. These lines are just visual cues, not part of the final image. With the camera set at 100 percent zebra, the areas with undulating stripes will be completely washed out when the final footage is viewed.

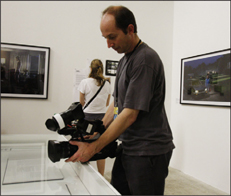
◀ Low Light. In some situations, such as shooting inside a dramatically lit memorial, autoexposure may not bring the image’s brightness to an acceptable level. Notice the colored green and purple specs in the enlargement. These specs occur when the image is underexposed and are called “noise.” They tend to make the image look degraded.
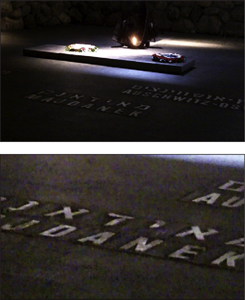
(Photo by Ken Kobré)
WHEN THE PICTURE ON THE SCREEN IS TOO DARK … WHAT TO DO?
1 Manually dial open the lens’ iris to its maximum size.
2 Zoom the lens out until it reaches its widest angle.
3 Make sure any the neutral density (ND) filters are turned off.
4 Manually increase the electronic sensitivity gain to its highest level.
5 Last resort: slow down the shutter speed.
Many higher-end cameras allow the adjustment of some settings to compensate for low light. Usually, the camera adjusts the brightness level by changing the size of the lens’ iris. However, you can also alter the brightness of a picture by changing the electronic sensitivity of the image sensor. As mentioned earlier, this electronic sleight of hand is called adjusting the gain. Some cameras allow setting the gain manually to a higher level. Cranking up the gain does increase the sensitivity of the sensor, but it can also introduce more noise into the footage. Sometimes, of course, a little noise is the necessary trade-off for capturing footage in low light.
Tip
Changing “gain” means essentially the same thing as changing the ISO on your digital still camera. In both situations, you are electronically changing the sensitivity of the camera’s sensor.
As a last resort in very low light conditions, some cameras allow manually reducing the shutter speed to admit additional light to register on the image sensor. The shutter speed of a video camera usually opens and closes in 1/60 of a second per frame. Reducing the shutter speed to 1/30 of a second can work, but 1/15 of a second or slower is likely to produce blurry images with what’s called shutter lag. The shutter lag is a ghostlike image that appears to be trailing behind the primary picture, almost like a specter. This happens particularly when the subject is moving or you are panning the camera. Although reducing the shutter speed results in brighter video, a jumpy, stroboscopic effect may result if there is any action.
Most pros don’t recommend changing a video camera’s shutter speed. Yet despite the somewhat questionable special effect that changing shutter speed may cause, there are occasions—primarily very low-light news and documentary situations—in which imperfect video is better than no video at all. Learn more about, shutter speed and stroboscopic effect. ![]()
WHEN AUTOMATIC EVERYTHING MAKES SENSE
Should you shoot using automatic settings, or should you always manually adjust the settings on your camera like the veteran TV pros? On cameras like the ultra-small pocket-video cameras, point-and-shoot cameras, or cell-phone cameras, the manufacturer has solved the problem for you by making the equipment completely automatic. If you are shooting with one of these, you can stop reading here.
Most higher-end cameras offer a range of manual and automatic controls. So when are you better off adjusting settings manually? And when can you relax and let the camera do the driving?
Professionals usually recommend shooting video stories using the manual settings as often as possible. And the pros are right, of course. Practice shooting your camera on the manual settings whenever possible. But here’s a little secret: the auto controls in the latest sophisticated cameras are remarkable—for sound level, brightness, color balance, and even focus. So clever are some of these cameras’ automatic settings that sometimes the camera’s choices are actually better than yours might be. This can be true even when you have enough time to set the controls yourself. Using automatic, you can be reasonably assured of having usable video footage without glaring brightness changes or dropped sound that can’t be corrected during postproduction editing.
It’s not easy for the solitary videojournalist to carry on an intelligent interview with follow-up questions while simultaneously fidgeting with focus, exposure, and sound levels. When you’re alone in the field trying to do it all, the auto button on a good high-end camera is your best friend.
When people see your video story, they won’t turn to their friends and say, “That was shot on automatic or that was shot on manual.” Whether they’re excited or bored by your piece, they are more likely to comment on its content or its storytelling success or failure. Unless the exposure is glaringly off, people won’t comment on whether you pushed auto or manual buttons. If shooting on automatic allows you to concentrate on what your characters are saying or helps you to observe and record what they are doing, by all means, go for automatic.
KEEP IT STEADY
Okay, admit it. You love the freedom of shooting video without a tripod. Go ahead, shout it from the rooftops.
Now, let’s talk about why you should be using a tripod. It’s a fact. Human hands are an unsteady substitute for solid tripods.
Nothing screams “Amateur!” louder than shaky footage onscreen. An otherwise stationary interview subject who appears to be weaving and bouncing on the screen is a sure-fire signal that the videojournalist was handholding the camera—and it’s a sure-fire way to make viewers feel seasick without boarding a boat.
▲ Tripod. To eliminate camera shake, use a tripod whenever possible.
(Photo by Ken Kobré)
Use a tripod (“sticks” in video lingo) when shooting:
• A building with distinct lines
• A seated or standing subject giving a long interview
• A pan or tilt of a scene
• A close-up of a fixed object
• Anything shot with a telephoto lens
• Anytime you can
See a short online video on using a tripod, “The tripod: Three legs are better than two hands”. ![]()
Tripods do hamper flexibility and can interfere with experimentation, but footage shot on a tripod simply looks more professional.
◀ Tripod for Interviews. Always use a tripod for interviews so that the subject’s face looks stable in the final video.
(Photo by Betsy Brill)
Specialized lenses, electronic camera options, or editing software can’t yet solve all the problems of shaky footage.
“I always ask myself, ‘What is motivating me to go handheld?’” says Lisa Berglund, senior producer at World Vision. “Am I doing it because I’m lazy, or because the action is moving around me and I fear I will miss the moment if I stay on the tripod?”
Berglund’s question to herself is good one to ask yourself, too: “Why am I shooting handheld?” The general rule is to keep the video camera on a tripod whenever possible for an interview. But if you’re going down a street, in a moving procession with your subject, chasing after a mom trailing her toddler, or in a news situation such as a demonstration, a riot or a war, viewers will probably not find the handheld camera movement disturbing.
Checklist for using a tripod
• Make sure your horizons are straight.
• Take your hands off the camera during the shoot. Fiddling with the controls while shooting defeats the reason for using a tripod.
• Always keep your eye on the viewfinder or LCD screen to know what is going on in your shot.
• Turn off image stabilization.
Note that image stabilization (IS) and vibration reduction (VR) lenses look for vibrations in your camera in order to reduce blurry pictures. However, if they don’t experience any camera movement, like when you are using a tripod, these features can actually cause the image to appear to have apparent camera shake. That is why camera manufacturers, in what seems to be counterintuitive advice but is not, recommend turning off this feature when your camera is on a tripod.
The Search for Tripod Nirvana
Here’s the dilemma. The heavier the tripod, the more stable it will be, which is ideal. Unfortunately, the heavier it is, the less likely you are to haul the thing along with you when you are on a shoot and need it.
A solid tripod reduces the chance of the camera blowing over in the wind. Its substantial weight reduces wiggle when you pan, zoom or tilt. However, the weightier the tripod, the less convenient it is for lugging—and the more likely it will be left at home. One idea is to outfit your tripod with a sling strap that allows you to carry it on your back and keep your hands free.
▲ Small tabletop tripods like the GorillaPod help to stabilize small video cameras but won’t work well with larger models.
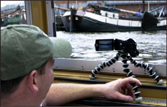
(Photo by Betsy Brill)
Just remember that any tripod, regardless of its heft, is better than no tripod at all.
Compromise: select a tripod strong enough to hold your camera but light enough that you won’t mind carrying it on a long hike. When you find the perfect balance, you will have reached tripod nirvana.
Other Desirable Features for a Tripod
Aside from finding a tripod that is not too heavy or too light—but just right—you might need one with a fluid head. A fluid head allows smoothly panning or tilting the video camera. Fluid tripod heads offer a certain amount of resistance as you push the tripod handle that helps keep the camera steady as you rotate from one direction to another. It takes some practice. But in the long run, a fluid head is a valuable feature for shooting video.
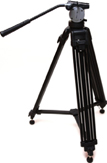
▲ Tripods come in all sizes. Be careful to buy one that is strong enough to hold your camera but light enough to lug around for many hours.
A built-in spirit bubble level helps you set up the camera so that it is level with the horizon. Adjust the tripod head until the bubble is in the middle of its glass container. This should ensure that the footage will be level with the horizon.
A quick-release plate allows easy and quick removal of the camera from the tripod—useful when action develops while the camera is on the tripod and you need to get it off fast to handhold a shot.
Tip
Remember to turn vibration reduction (VR)/image stabilization (IS) off when using a tripod. Under VR or IS, the lens will behave abnormally if it is expecting normal movement but getting none.
Monopod
Think of a monopod as a single tripod leg with a mount on top. The camera attaches to the monopod just as it does to a tripod. A monopod extends and collapses like a tripod leg. It is lighter than a tripod, and many videographers find it useful for stabilizing the camera in fast-moving or crowded situations.
A camera mounted on a monopod can be easily braced against your body. With the camera on the monopod at its shortest length, brace the monopod against your stomach—into your belt if you’re wearing one. Your body, your arms, and the monopod create a perfect triangle. You are likely to find that in certain circumstances where using a tripod isn’t feasible, this tactic will help stabilize the camera and at the same time relieve the weight from your back and arms during long shoots.
▲ A monopod is one-third as good as a three-legged tripod but does help stabilize the camera by eliminating vertical motion.

(Photo by Ken Kobré)
▲ Use a monopod in your belt or waistband for long interviews (careful on this one!) to help stabilize the camera and give your arms some assistance.
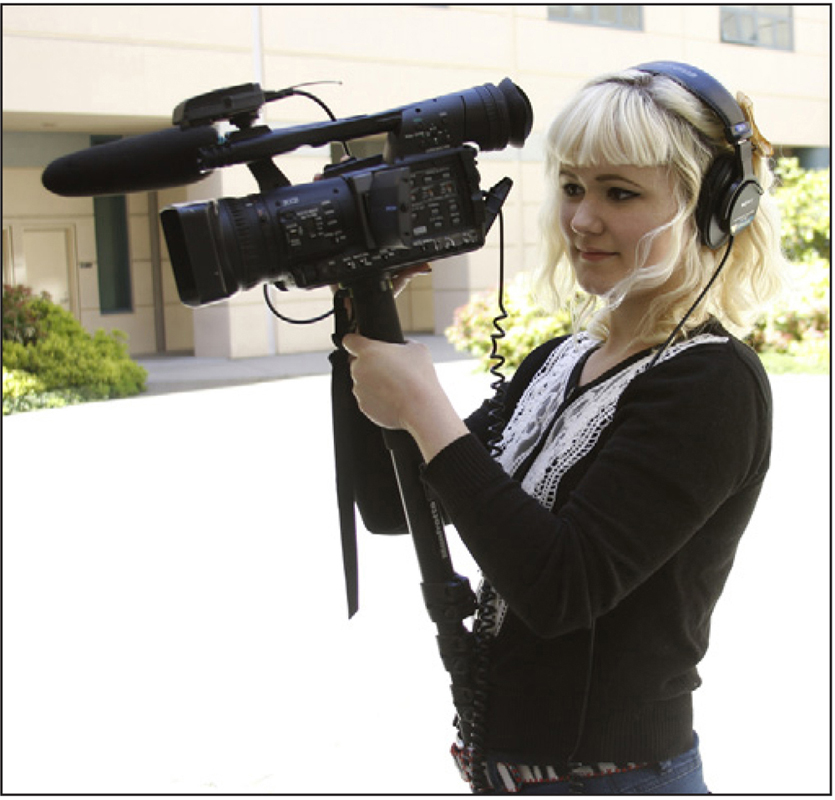
(Photo by Ken Kobré)
Even when handholding the camera, leaving it attached to the monopod at its shortest length can help compensate for the camera’s swing while shooting. The monopod serves as a counter balance to the camera and acts a bit like a poor man’s Steadicam—the fancy rig used by Hollywood photographers to steady the camera during handheld movie shoots.
The “Crane Shot” on the Fly
When you can’t find a high perch or you forgot to bring a ladder or a crane:
• Attach the video camera to the monopod.
• Flip out the LCD screen and point it down.
• Press the start button.
• Extend the monopod to its full length.
• Hold up the monopod-camera as high as you can. Rest it in your belt if you’re wearing one.
• Frame the shot, with the camera held high, by looking at the LCD screen high above you.
• Lower the camera when finished and turn it off with the on/off button.
You will have captured a high-angle “crane shot” and given your video a “Hollywood” look. Although it’s no substitute for a three-legged tripod or an actual movie crane, a monopod is a relatively cheap, convenient way to stabilize the camera that does not hamper freedom of movement.
▲ The Crane Shot. Hollywood movies almost always end with a shot taken from a crane that lifts the camera high into the sky. By attaching the camera to the monopod and extending the monopod to its full length, you can give your documentary the same effect. You can still view through the LCD screen, but you have to bring the camera down to eye level to start and stop the recording with most cameras.

Because the camera is extended on a single pole above your head, the top-heavy rig will tend to sway and be difficult to stabilize. Shoot a lot of footage and discard the jerky images during editing while preserving those that add drama. (Photo by Ken Kobré)
STABILIZING THE HANDHELD VIDEO CAMERA
At some time in your career you will need a tripod but be without one. What to do?
HOW TO SHOOT HANDHELD (IF YOU MUST!)
LOOK FOR A SOLID SURFACE
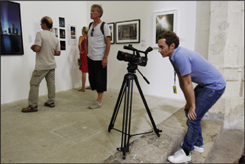
To avoid camera shake—without a tripod—try to stabilize your camera on the ground or on any other solid surface. (Photo by Ken Kobré)
• Keep your lens zoomed to its widest angle.
• Brace the elbow of the arm holding the camera tight against your body.
• Plant both feet comfortably and lower your center of gravity slightly.
• Steady yourself against a wall, fence, post, or other stable surface, if available.
• Avoid zooming.
Resourceful videojournalists have found a number of creative substitutes that work in a pinch. Try resting the video camera on back of a chair, on the ground, on a bean bag, on a table, or, in fact, on any stable item you find that will help cut down the shakes. Bracing the camera on just about anything stable will help reduce jumpy footage and produce a more professional-looking image.
LAST RESORT FOR SHAKY SHOTS
Using an editing program’s image stabilization feature, if available, can help reduce some of the amateurish, often disturbing effects of handheld shooting. If you’ve shot from a car window, for example, running the resulting footage through image stabilization software can smooth out the ride a bit—but don’t count on it for the full journey.