
CHAPTER 8
Recording Sound
▲ Sound of Gun Fire. Although you probably can imagine the sound of the guns firing at this traditional wine festival in the village of Montfort, France, the impact would be much stronger if you could hear the actual blasts.
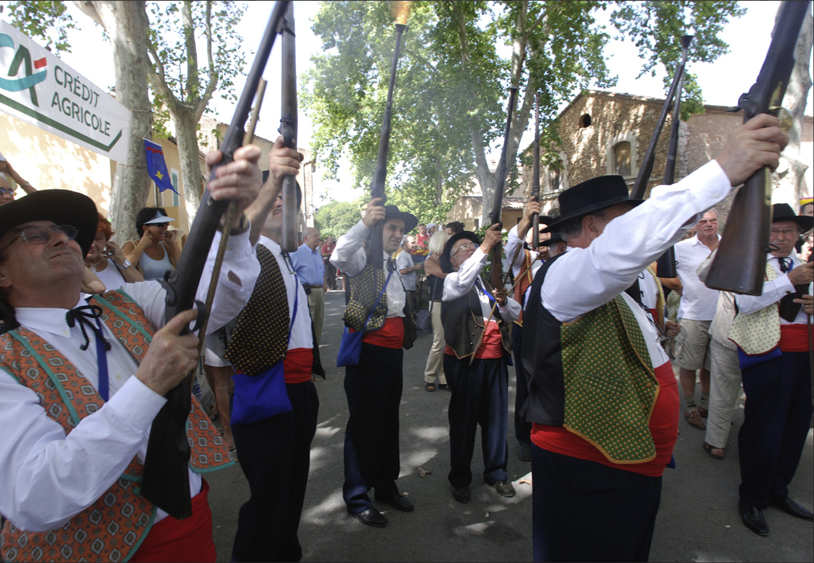
(Photo by Ken Kobré)
This symbol indicates when to go to the Videojournalism website for either links to more information or to a story cited in the text. Each reference will be listed according to chapter and page number. Links to stories will include their titles and, when available, images corresponding to those in the book. Bookmark the following URL, and you’re all set to go: http://www.kobreguide.com/content/videojournalism.
When it comes to video and multimedia, sound is king. You’re reading this statement written by a visual guy who started out as a professional photojournalist and who wrote the book on becoming a photojournalist.
But even I have to admit that in the world of multimedia and videojournalism, sound is the most important element … not pictures.
Allow me to repeat that. For multimedia and videojournalism, sound is the most important element.
SOUND IS VITAL TO UNDERSTANDING
“If you close your eyes while watching a news program like 60 Minutes, you will find that you can absorb the story with no problem. The images enhance the story, but it is the sound that is vital to understanding,” says Dirck Halstead, a digital video pioneer whose workshops train photojournalists transitioning from still to video storytelling and whose website, DigitalJournalist.org, provides a wealth of information for multimedia and video producers.![]()
The corollary to Halstead’s observation is that if you turn off the sound and only watch the images, the piece won’t hold your interest for long. Few video stories stand on their images alone.
Recall a recent film you saw in a theatre. How did you describe the movie to friends? Did you go into ecstasies about the lighting of a great scene that occurred 45 minutes into the movie?
More than likely, you outlined the movie’s plot. Told the story. It’s the sound that provides the narrative—the plot drives the story.
Because of and thanks to the sound, the storyline holds your attention and provides information that you will remember. Pictures merely adorn and intensify what the story wants to say. Of course, images carry an emotional punch that enhances the piece. But images alone are not enough make a video story work.
“Great sound is the glue that holds everything together. Sound is crucial to the success of any film project be it documentary, slideshow, or even a short web clip,” says Lisa Berglund, senior producer at World Vision, also an NPPA Ernie Crisp Television Photographer of the Year. “Videographers often underestimate the power of sound—not only the power it has to make a good project into an extraordinary piece of work, but also its power to undermine and even ruin the strongest of stories”.
Beyond Picture Captions
The use of audio opens up rich possibilities that are unavailable when publishing pictures in a printed newspaper or magazine. In print, textual information about the photograph is often limited to a terse caption. When they have the opportunity to speak in their own voices, characters can recall their history as well as explain their plans for the future. Audio interviews give images context and help to explain why an event is taking place. Natural sound provides texture and communicates a sense of place.
Kim Komenich, a winner of the Pulitzer Prize for his still images and an early adopter of multimedia and video, says that interviews and the recording of natural sound can even explore abstract concepts. “One perfect word might be worth a thousand pictures,” he says.
NATURAL SOUND IS NATURALLY … BETTER
Natural sound, also called nat sound or ambient sound, is any sound other than a formal interview. Nat sound includes conversations and dialog and also casual sounds from the environment.
Stop for a moment. Listen to what you can hear right now. You may hear a computer hum, a radio or television playing somewhere, people talking in another room, the wind blowing, cars passing by, a baby crying, your own fingers on the keyboard.
Natural sound lets viewers share what the character is hearing. Complete stories with clear nat sound allow the pictures, dialog, and sound captured on location to tell the story. The sounds bring viewers into a room when events are unfolding in real time. This nat sound type of documentary lets viewers draw their own conclusions without benefit of a voiceover narrator.
When your characters actually forget about the mic (microphone, pronounced “mike”)—and they can and will—the natural dialog that evolves on its own can provide the richest form of sound for a documentary.
Using wireless and shotgun mics that pick up a narrow cone of sound allows you to record— relatively unobtrusively—comments and interactions that reveal mood, define personality, and give an audience spontaneous bursts of information rather than the sometimes stiff responses elicited in a formal interview.
Sound of the Environment
Remember to record relevant background sounds like water wheels, rushing streams, grinding gears, and so on. If, for only a moment or two, viewers feel as if they are on the farm, in the slaughterhouse, or on the street where your story takes place, you have succeeded.
Here’s a little assignment. Watch Associated Press photographer Julie Jacobson’s story about the Coney Island roller coaster—but turn off the sound. Now watch it again with the sound on. Which version brings you into the story most effectively?
◀ Coney Island’s Cyclone turns 80 years old.![]()

(Julie Jacobson, Associated Press)
American radio programs such as This American Life (PRI) and All Things Considered (NPR) provide excellent examples of the power of natural sound. With nary an image, the background sounds of everyday life often play behind the words of the main subject in these stories. Occasionally, they also fill the pauses between verbal exchanges in an interview. As a result, these audio-only pieces manage to become shockingly visual to the listener.
Note how natural sound is used in the short documentary “One for the Birds.” In this story, a person who records birdsongs meets an artist who “sees” sound. It’s all about listening to natural sound.![]()
Sound of Voices. For a three-part multimedia series for the Los Angeles Times titled “The Lifeline,” photographer Rick Loomis and reporter David Zucchino recorded the actual words of wounded soldiers in Iraq who were calling home to tell their families what had happened to them.
The team also recorded some of the doctors during surgery. The natural sound of doctors, medics, and patients talking, backed by the clangor and clamor of a busy operating room gives the piece an authenticity that would have been missing in a formal voice-over interview.
“I cried,” wrote one Times reader on the outlet’s website, “when I watched and listened to the words scribbled by a wounded soldier. The poor man had a tube inserted in his throat that prevented him from speaking. His message was being communicated to his family back home by a nurse via telephone”.
There can be drawbacks to natural sound. Information can spill out haphazardly, too rapidly, or in highly emotional bursts. When this kind of thing happens, it may require the addition of supporting material via a voice-over narration.
▼ The Lifeline. Here the reader hears a nurse make a call for an injured soldier who cannot speak.![]()
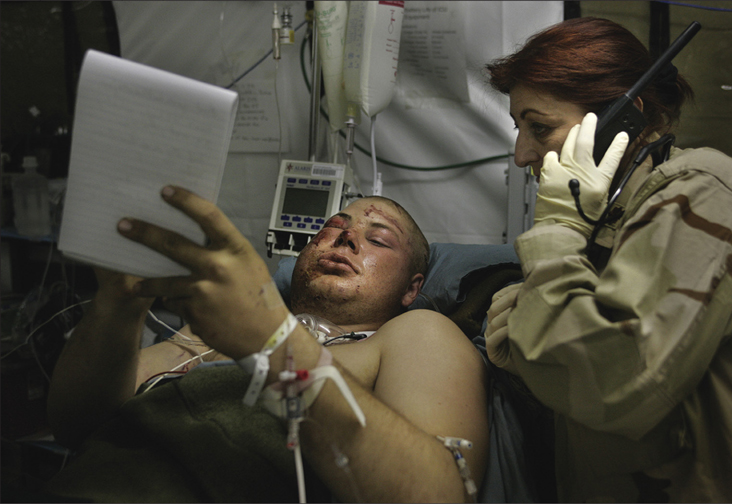
(Photo by Rick Loomis, Los Angeles Times)
Audio as Opener
Natural sound segments are useful as “establishers.” Many documentaries start or are “established” using a segment that places viewers in the midst of some action, whereby they get the sense they are actually experiencing what’s going on.
▶ Cloistered for Christ. Twenty-three nuns live a cloistered life behind the walls of Santa Catalina Monastery in the heart of Arequipa, Peru. Listen for how the producers used natural sound to start this video.![]()

(Kate Lord, Andrea Ballocchi and Nick Vidinsky, University of North Carolina, Chapel Hill)
In an extensive documentary about White City in southern Peru, students from the University of North Carolina and the Universidad Católica de Santa Maria used the ambient sound of nuns praying to introduce “Cloistered for Christ,” a multimedia piece about women living apart from society.
Collecting Nat Sound
As your character moves about—even if the action seems to have gone dull—continue to record. You might capture some seemingly mundane—but actually telling—moments of the person’s life. With a careful choice of sufficient recorded nat sound comments, viewers can feel personally involved in the unfolding of an unguarded day. Viewers like to make their observations based on what they see and what they hear. Without a voice-over narrator authority figure explaining what is happening, viewers can draw their own conclusions.
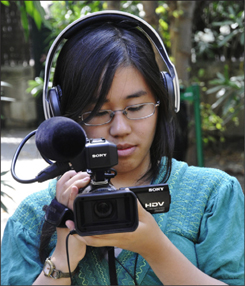
▼ Capturing Sound and Pictures Simultaneously. Pete Souza, a still photographer for the Chicago Tribune at the time, and later the White House photographer for President Barack Obama, followed then-Senator Obama’s trip to Africa but was unable to mic him wirelessly. While Souza concentrated on shooting stills, the Tribune reporter with him handled the recorder to capture natural sound.
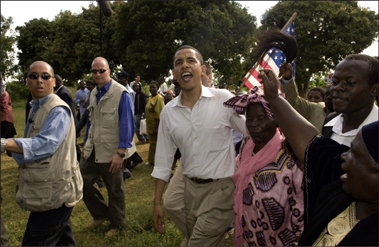
(Photo by Peter Souza, Chicago Tribune)
Tip
It is always a good idea to record sound for about a minute while no one is talking. This minute of what is called “room tone,” whether recorded indoors or outdoors, will come in handy when you edit. You might have to remove a distracting noise from the audio track, or insert a still photograph, but you will need something to replace the missing audio underneath the new images. You can use “room tone” to accomplish this. Without the room tone, the audio track would go completely dead. With “room tone,” you will have just enough low-volume noise for the audio track to sound quiet but normal.
AUDIO TOOLS OF THE TRADE
In addition to using the built-in audio recorder found in video cameras and in hybrid digital cameras with video capability, you can also use a handheld audio recorder to capture sound. If you record sound this way, you can add it to your multimedia piece in postproduction.
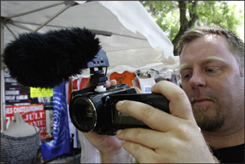
▲ A “dead cat,” or windscreen, covers the mic of a handheld recorder to cut down noise from the wind. Note the journalist’s earphones, which allow monitoring and, if necessary, correcting for any problems with the sound being captured.
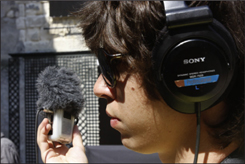
(Photo by Ken Kobré)
Using Handheld Audio Recorders
Storytellers shooting stills for multimedia use handheld audio recorders to capture interviews and natural sound of high quality. Videojournalists sometimes use these devices in lieu of a second camera, placing a recorder in one place to collect sound at a consistent level while shooting video elsewhere. For example, using this method, if you are recording a band with a handheld recorder, the recorded band music will remain at the same audio level even if you continue shooting outside the hall where the performance is taking place. You can then edit the music and visuals together later.
Handheld devices store the sound on the recorder’s internal memory or on a solid-state flash memory card like those used in most digital cameras.
Digital audio files can usually be downloaded directly onto a computer or transferred via the flash memory card. The recorder’s internal drive or flash drive’s capacity determines the amount of audio that can be recorded at one time.
Audio-in and audio-out ports on handheld audio recorders also allow the addition of external microphones or even headphones for monitoring sound quality.
The most desirable feature on these devices is their ability to determine quality. When the choice is available, select 16 bits as the sample size and 48kHz as the sample rate, which is the standard for audio to stream on the Internet.
Types of Handheld Audio Recorders
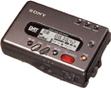
◀ Digital Audio Tape (DAT) recorders are expensive and relatively fragile. DAT recorders have been used widely in professional broadcasting due to their ability to render high-quality sound. Typically, they can also transfer recordings to a computer digitally.
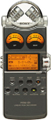
◀ Solid-state recorders, already less expensive than DAT recorders, are coming down in price. These devices can record sound onto memory cards, such as Secure Digital (SD) and Compact Flash (CF) cards. They compress sound on the fly into formats of your choice. This saves storage space for longer recording sessions. The recorded sound can then be downloaded directly to a computer.
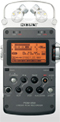
◀ Hard-disk recorders capture compressed or uncompressed sound onto high-capacity disk drives inside the recorder. This digital sound must then be copied from the recorder onto more permanent media, such as a CD or a computer hard drive.
Other Recording Options
If you just need to do a voice-over for your narration, consider using your laptop computer. In the field, though, you will likely select a device that can record both video and audio at the same time. These devices include anything from a smart phone to an expensive dedicated video camera. Each tool has its advantages and disadvantages. Smart phones are convenient, but without external mics, they can’t capture crisp sound. Full-featured video cameras deliver impeccable quality but are cumbersome to lug around. When choosing your equipment, weigh all the variables for the job at hand before you make your final selection.
Note: If you have a choice, always select 16 bits as the sample size and 48kHz as the sample rate to capture the highest-quality sound with your recording device, whether it’s a laptop, cell phone, pocket video, hybrid camera, or small or large video camera.
◀ Your own computer can be transformed into a sound studio. You can easily record your own voice using the computer’s built-in mic or, if it has the capability to accept one, an external microphone.![]()

◀ Your smart phone, in a pinch, can record audio. Some phones even accept external mics.![]()
![]()
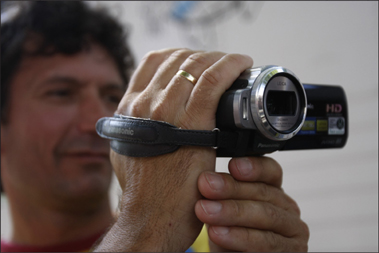
◀ Pocket video cameras record sound, and some accept external microphones that make them far more versatile for shooting video stories.
![]()
◀ DSLR cameras can record audio and video. Many have both a built-in mic and the capability to accept an external mic.

◀ Some small video cameras will accept external mics but only a few include a way to monitor the sound directly with headphones.

◀ Higher-end video cameras include manual control of sound levels and essential audio-in and audio-out ports for adding external microphones and headphones.

With some computers, you can even attach a high-quality external microphone. Beware that the sockets of some laptops that accept external microphone can add noise to the recording and possibly be too insensitive for professional microphones to work well. If your computer has this problem, you can add an audio box. Audio boxes typically contain a microphone pre- amplifier and an analog-to-digital converter. The box plugs directly into the computer and then the microphone plugs into the box. Now the mic will deliver the sound you have been looking for. Check out Internet tutorials on recording sound.
When considering a handheld recorder or camera, look for one with an XLR socket, as this option provides a secure connection with a ground wire that reduces undesirable static interference. Recorders and cameras with two XLR microphone sockets offer a significant advantage by allowing placement of microphones on two subjects at the same time or the use of a shotgun mic and wireless mic simultaneously.
RECORDING SOUND WITH THE VIDEO CAMERA’S BUILT-IN MIC
The built-in mic on cell phones, video, and hybrid SLR cameras will work for picking up music from a loudspeaker, the general ambient sound of a party indoors, or the rushing water of a stream outdoors. But for recording interviews or dialog, a built-in microphone simply cannot capture professional-quality sound.
▲ Built-in microphones, regardless of the cost of the camera, rarely capture pristine, clear sound.
(Photo by Ken Kobré)
• Quality: Built-in microphones are notoriously of inferior quality. Knowing that most pros are going to add external mics anyway, manufacturers invest very little in their cameras’ built-in microphones.
• Design: Most built-in mics are designed to pick up sound all around the camera. If you are trying to record a person in front of you who is speaking, any ambient noise elsewhere in the room is likely to interfere.
• Using the built-in mic in a pinch: What if you’re stuck and have to use a built-in camera mic for an interview? The best approach is to record your interview in as quiet a place as you can find and position the camera and its built-in microphone as close to your subject as possible. Then, don’t move the camera with its mic during the interview.
• Get closer: All microphones, built-in or external, work best when close to the source of a sound. Keep in mind that if you do back away from your subject for a medium or overall shot, the internal mic also will be that much farther away from source of the sound. As you back away, the sound will naturally fade. That, quite simply, is basic physics and there is no way around that problem with a built-in mic.
Recording Sound with a Hybrid Camera
Most hybrid cameras that record video and sound in addition to still pictures do not provide a socket that accepts headphones. The cameras’ inability to accept headphones makes it impossible to detect extraneous noise or to determine whether the camera is even recording the audio.
Also, hybrid cameras often don’t offer a means of manually controlling the sound. The hybrids relegate sound control to an automatic gain control (AGC) feature built into the camera’s electronics. (More on AGC coming up.)
If you’re working with an SLR that does have an audio-in port, select a mic with an XLR connection for best quality and lowest susceptibility to noise interference.
▶ This pre-amp will take the signal from a microphone with an XLR plug (three-pronged) and adapt it for a mini jack (small 1/8th-inch plug) that goes into your camera.
Whether you use a mic with an XLR or a 1/8-inch connection, you may need a “pre-amp” adapter box to boost the quality of the sound coming in through the mic.
Attach the pre-amp box either to the bottom of your camera using the tripod socket or to the top of your camera under the rails of the hot shoe where an external flash normally goes. Now plug the pre-amp into the camera’s audio-out port and the microphone to the pre-amp. This bulky and somewhat expensive combination of mic and pre-amp box will produce professional-quality sound even with a hybrid camera. With some pre-amps, you can adjust the volume level as well as monitor the audio with headphones.
Another solution for recording sound with a hybrid camera is to use a high-quality handheld recorder as the go-between. With an external mic connected to a handheld recorder and the recorder connected to the camera, the camera captures the sound gathered by the mic. The handheld recorder allows volume control that is impossible with the hybrid alone. Also, headphones can be attached to the handheld recorder, which will allow you to monitor the quality and the volume of the sound. See more on recording sound while shooting with a DSLR.![]()
Record sound and video but sync later. Many handheld audio recorders have exceptionally good mics, so some videojournalists prefer to capture audio with a handheld recorder that is not connected to their hybrid or video camera. They prefer to sync the sound later. Using a recorder apart from the camera allows placing the device close to the source of the sound. During editing, the hybrid camera’s video and the recorder’s audio can be synced together.
The key to syncing the camera and handheld recorder is to simultaneously record some kind of reference audio on each device. Even if it isn’t used in the final piece, the reference audio can be used to sync the externally recorded sound back to the video from your camera. During editing, you would use a plug-in for Apple’s Final Cut Pro, such as PluralEyes, that can automatically sync the audio back to your video.
As hybrid cameras evolve, they will become more “video-like” and eventually will include features that allow you to easily plug in an external mic, directly adjust sound levels, and monitor sound with headphones.
A MICROPHONE FOR EVERY OCCASION
So you now know that the best way to record audio is to use an external microphone. Your choice of the right mic will make a tremendous difference in the quality of sound for your documentaries. In fact, even professional videographers will tell you that the quality of the microphone can be more crucial than the quality of the camera itself.
Whether used with a handheld audio recorder or a video camera, condenser and dynamic microphones are typical choices for best quality recording.
To record top-quality sound, expect to pay top dollar. The more expensive mics from respected manufacturers such as Beyer, Sennheiser, Tram, Sony, Audio Technica, or Lec-trosonic do a much better job than lower-priced competitors.
But price is not the only consideration. Each microphone has certain fidelity characteristics for the bass and treble sounds. Compare different mics by testing them with the same recorder or camera, then listening to the results.
MICROPHONE TYPES
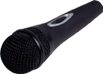
Dynamic Microphone
▶ Dynamic microphones or handheld mics are used by many news correspondents for one-on-one interviews. The dynamic mic collects but does not amplify sound. This type of microphone, also called a “stick,” is a decent choice for voice-overs. For cleanest sound, hold it close to the speaker’s or your mouth—at a distance of about the width of your first.
Condenser Microphone
▶ Condenser microphones, such as the “shotgun” mic shown here, are preferred by videojournalists. They require batteries to boost the audio signal level. These mics pick up softer sounds than do dynamic mics, but on the downside, can also collect more general ambient room noise. They can be used directly on the camera to pick up general sound and candid dialog or used handheld for interviews.
![]()
A unidirectional condenser microphone such as the shotgun mic is a good choice for the voice-over. The shotgun mic has a narrow pickup pattern, which cancels out a lot of extraneous sounds. To be effective, this type of microphone needs to be aimed directly at the speaker’s mouth but at least 4 to 6 inches away to prevent the audio from becoming distorted and unusable.
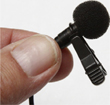
Lavalier Microphone
▶ The lavalier microphone (lav or lapel mic) is a small mic used for video recording. This microphone is great for interviews because it mostly picks up the voice of the subject while blending in some of the environmental sounds. However, for recording a voice-over narration, its omnidirectional pickup pattern makes it less than optimal. In a quiet environment, it should produce adequate sound for the voice-over. But hold it gingerly or clip it on your shirt to prevent handling noise. For best sound, speak over top of it, not directly into it.
The tiny lavalier or lav mic can be attached directly to an audio recorder or video camera via a cable, or it can transmit sound wirelessly via a transmitter attached to the subject’s belt or other clothing. The best—and more expensive—lavs pick up the sound in what is called a cardioid, or heart-shaped, pattern. This pattern is ideal for interviews. With the lav clipped to a subject’s shirt, the little microphone will record clear dialog without picking up much ambient noise around the person. Most lav mics are condenser-type microphones and need batteries.
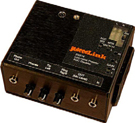
▲ The wireless lavalier mic on the left is attached to a sender. The signal is transmitted to the wireless receiver on the right, which can be plugged into a video camera (or handheld recorder).
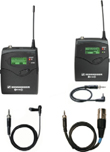
Lav mics come in two varieties, one with a cord and the other cordless. Each type has a small clip for attaching to collars, ties, or other clothing.
With the wired lav mic, run the cord from inside the subject’s clothing and out to the video camera. The wireless mic also has a cord that must be hidden under the subject’s clothing and is attached to a wireless transmitter worn by the subject in a pocket, on a belt, or attached to a skirt or pants. The transmitter sends a signal carrying the sound to a receiver mounted on the video camera.
Lav mics are condenser-type microphones and need batteries.
Lavalier + Wireless Transmitter. Here is what a wireless transmitter outfit consists of: the lavalier mic connected via a wire to a body-pack transmitter and a receiver that conveys what is recorded to a camera or audio recorder. The audio signal travels from the mic via the wire to the transmitter, which operates like a miniature radio station. The signal from the transmitter travels over the airwaves to the receiver. The receiver itself is plugged into a camera or a handheld audio recorder.
A good wireless system frees a subject to move naturally and the photographer or videojournalist to concentrate on capturing candid interactions.
Although manufacturers are hesitant to state an arbitrary distance limit for their equipment, a good wireless mic and receiver seem to work efficiently within a 75-foot range. Be aware, though, that the wireless signal is subject to interference from both television and cell phone signals.
And keep in mind also that when it comes to microphones and wireless systems, you get what you pay for. “I don’t skimp on my mics, and especially not my wireless,” says World Vision’s Lisa Berglund. “I have had numerous friends buy less expensive wireless systems to save money and they all have regretted it”.
Other considerations: Ultra High Frequency (UHF) transmitters have a greater range than those with Very High Frequency (VHF). UHF transmitters are also less susceptible to electrical interference than VHF transmitters.
Beware of cheaper VHF wireless mics for recording professional sound for your video or multimedia documentaries. You are likely to find that the VHF transmitters produce poor sound quality, and their propensity to pick up noise from other electronic equipment will prove more frustrating than not having a wireless mic at all.
Most wireless mics can broadcast using several channels. The cheaper models have from four to sixteen channels; the more expensive have a hundred or more.
“Wireless mics are a fantastic option,” says Jesse Garnier, former web services manager for the Associated Press, “but they are very susceptible to interference, static, and particularly cellphone signals. Stress-test all of your equipment to identify the kinds of situations that might cause problems and could force you to switch to wired microphones”.
Microphone Recording Patterns
Omnidirectional. Omnidirectional mics find every sound, including those whispered by the videojournalist behind the camera—annoying chatter known as camera talk. The on-camera built-in microphone in SLR cameras and video cameras is usually omnidirectional, meaning that it will pick up sound from every direction.
Most lavalier mics are omnidirectional, but placed close to the subject’s mouth, they work well for interviews.
▼ Boom. A sound engineer using an omnidirectional mic has attached it to a boom to pick up crowd sounds. In an emergency, a solo videojournalist with access to a boom pole might ask a friend to hold the boom and mic.
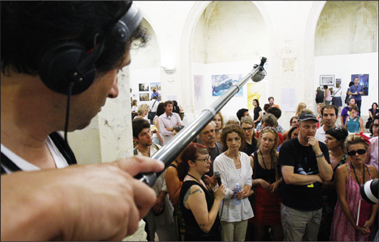
(Photo by Ken Kobré)
Unidirectional. Unidirectional microphones pick up sound mostly from the direction in which the microphone is pointed. Unidirectional microphones come in two varieties: cardioid and hypercardioid. A cardioid mic picks up sound in a heart-shaped pattern. Most of the sound the mic picks up comes from the direction in which the mic is pointed. But some of the sound also comes from the left and the right of where the mic is aimed. A hypercardioid mic, also called a “shotgun” mic, picks up sound from a much narrower area. It records right where the mic is aimed.
You can handhold a unidirectional mic, mount it on a camera or suspend it from a portable pole called a boom. Booms are lightweight and collapsible. Nonetheless, a separate person has to hold the boom. Unidirectional mics do not—despite what you may have seen in the movies—have a supernatural ability to record conversations hundreds of feet away.
HOW TO USE A MICROPHONE
Shotgun Mic
A unidirectional mic collects sound in the pattern of a widening cone. When filming at a gathering, for example, the microphone will record the voice of the person directly in front of the mic; but it will also pick up the more garbled sounds of people in the same path behind the speaker.
The shotgun’s reach is limited by the loudness of a certain voice in contrast to the background sound. For example, the shotgun mic will pick up a solitary subject’s voice even if the person is 10 or 15 feet away. If, however, the same person is at a noisy party, his or her voice will no longer be distinct at the same distance.
Also, keep in mind that if a shotgun microphone is attached to the camera and it’s necessary to move the camera to photograph action elsewhere, you may find yourself turning the microphone away from your principal speaker. This change in orientation would naturally cause an unfortunate drop in the sound level of the speaker’s voice.
Aiming the Mic. A poorly aimed shotgun mic attached to the camera can actually miss the subject’s voice and instead amplify background noise behind the person.
You can take the shotgun mic off the camera to use it for interviews. Just be careful that you aim it accurately toward your own mouth when you ask questions and toward the mouth of your interviewee for the responses.
Lavalier Mic
Placing the Lav. Positioning a lavalier mic about two buttons below an interviewee’s collar is standard practice. To attach a lav mic to a subject, first bring the cord up through the person’s shirt so that it won’t show in photos or video footage. Although lavalier mics themselves are well hidden in Hollywood movies, letting the mic show is accepted practice in documentaries. Most people are accustomed to seeing the tiny black sensor clipped to a subject’s lapel or T-shirt and aren’t suffering under any illusion that the subject is unaware of the mic and camera. Install the lav mic in such a way that it will not rub against the subject’s clothing. The friction of the mic against fabric can cause a scratching sound.
▲ Limiting the Sound Pickup. The shotgun mic, in use on this camera, has a hypercardioid (narrow) pickup beam. The camera will record primarily the sound produced directly in front of it. By monitoring the sound with headphones that cover his ears, the videojournalist hears the sound exactly as it is being recorded.
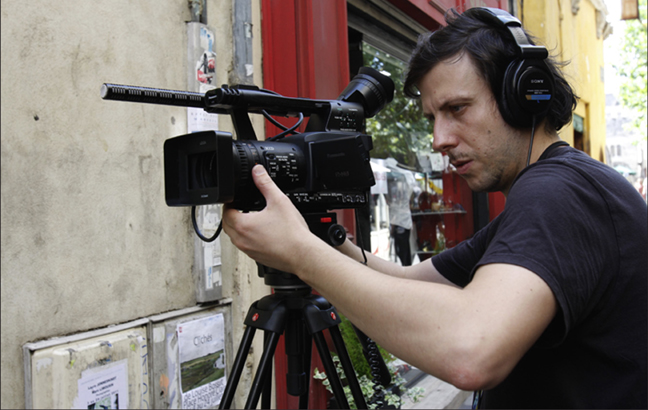
(Photo by Ken Kobré)
▼ Attaching the Lavalier. John Goheen prepares to place a wireless lavalier mic on a small boy.
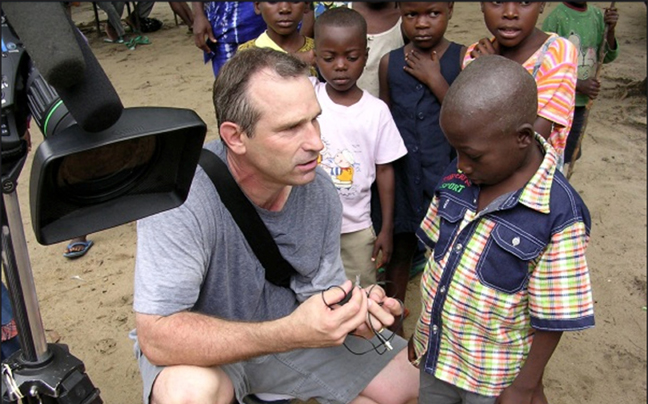
With the lav clipped to a subject’s shirt, the microphone will record clear dialog without picking up much ambient noise around the person. Even if the person wearing the mic turns his or her head while speaking, the microphone tends to pick up only sound that is near.
If you are interviewing two people and have only one lav mic, locate it on the collar of one subject but on the side nearest the other person. If the subjects are sitting or standing close together, the mic will usually pick up the sound of both voices.
When in the field, it’s important to confirm that the channel on the mic and transmitter match the channel on the receiver. If you’re getting interference from other microphones or from TV transmissions, change channels on both the transmitter and the receiver. You will know right away if there is any interference because you will be wearing headphones and will hear static.
Lav with handheld recorder. A lav mic is also an option for multimedia producers recording a subject with a handheld audio recorder while shooting still pictures. Attach the lav mic to the audio recorder and put the recorder itself in the subject’s pocket. With the recorder and mic on the subject, you are free to move about naturally, unimpeded by the necessity of holding an audio recorder or a microphone in your hand. The downside of this setup is that there’s no way to use headphones to monitor the quality of the sound the recorder is picking up. Also, unless the recorder is voice-activated, you will record a lot of dead air.
Lav = freedom. A wireless mic system with headphones is the ultimate choice for multimedia and video documentary makers. It’s an expensive option, but the wireless system allows both subject and photographer easy, natural movement. And for the multimedia maker shooting stills, it allows monitoring sound.
“I rely extensively on wireless mics,” says Goheen of Terranova Pictures. “I actually have access to at least four and sometimes five mics on my camera at any one time … and I am not using a mixer … this is not the norm, of course … but it suggests how much value I put into gathering audio. The wireless mic is a great tool to use for capturing all kinds of sounds … not just interviews. I have miked trees and fence posts in order to capture the crisp chirps of birds, or placed it on a flagpole to get the flapping sound from the flags. You name it … I’ve put the mic anywhere there was sound to be captured”.
When people are free to move about, they often forget about the wireless mic. They automatically become less inhibited about being recorded and thus act more natural and spontaneous. Another advantage to this system is that you are wearing headphones and will therefore be able to hear and record your subject talking at a distance—even around the corner or down the hall.
ESSENTIAL ACCESORIES FOR RECORDING SOUND
In addition to choosing the right microphone, you also need some other essential accessories to help you capture high-quality sound for your projects.
WINDSCREEN
Whichever microphone you choose, always use a windscreen when you are outside. Windscreens help keep wind noise out of your recordings. Even a lav mic usually comes with a tiny windscreen. The windscreen for a shotgun mic is called a “dead cat” or “fuzzy sock.” This very hairy version of a windscreen is highly effective at reducing wind noise. A shotgun mic covered with a windscreen should be mounted in shock mounts that attach to the camera or to the boom, advises John Hewitt, emeritus professor of video documentary at San Francisco State University. “If you handhold a mic, even the friction from your hand on the barrel of the mic can add noise to the recording”.
▲ Windscreen. A windscreen placed over a microphone cuts down noise from passing air currents.
Headphones
“Not wearing headphones is akin to shooting an image without looking through the viewfinder,” warns multimedia expert Brian Storm. “We’ve all shot from the hip now and then. But would you do an environmental portrait that way?”
Headphones are the only way to truly monitor what the microphone is picking up. If you’re not wearing headphones, you simply won’t hear the quality of the sound coming in or even know whether your equipment is working.
“I find that without headphones, you can’t hear the good sounds that will help mold your story, nor can you hear the bad sounds that could be hindering it,” says World Vision’s Lisa Berglund. “Capturing great sound is equally as important as making sure you are aware of the bad sounds like white noise (an air conditioner, refrigerator, ticking clock, for example), airplanes, car alarms, cell phone interference, generators or wireless cutting out”.
Earbuds and light headphones do allow you to hear interference such as a crackle from a loose wire connection. But these small headphones also let in environmental sounds that aren’t necessarily being recorded. That alone can make your work more frustrating.
The more isolating, larger headphones cut off most outside sound so that all you are hearing is the audio actually being picked up by the mic. Headphones are bulkier than earbuds but provide a better measure of the quality of sound being recorded.
On most handheld recorders as well as on medium- to high-priced video cameras, you will find an audio-out socket that will accept the cable jack from headphones. There are a number of different-sized sockets that are standard in the industry including sub-mini, mini, 1/8-inch, and others. If your headphone doesn’t fit the outlet on your device, buy a converter to reduce or enlarge the jack size.
RIDING GAIN ON YOUR MICS
Whether you are pointing a shotgun mic to collect natural sound or you have attached a discreet lavalier mic to your subject’s shirt collar, you must constantly monitor the quality of the sound being recorded.
▲ Headphones: don’t leave home without them.

▲ Listening through the headphones monitors the dialog as well as the audio for any undesirable interference.
(Photo by Ken Kobré)
Spend a moment recording some small talk with your subject, or have the subject recite the ABCs or a favorite poem. Then listen to the selection before starting the interview or the shoot. This delay may be a bit awkward, but it may also save you from recording an unusable interview.
What to Listen For
When recording an interview, you obviously will be listening to what your subject is saying. But you also must pay attention to all of the following technical considerations so that your subject’s words are not drowned out by extraneous snaps, crackles, and pops.
Listen for:
• Scratching sounds caused by the lav mic’s contact with the subject’s clothing. Adjust the mic to avoid this interference.
• Irritating or interfering sounds from nearby music, an air conditioner system turning on or off, or a refrigerator’s buzz. You might actually have to switch off the radio, squelch the air conditioner, or unplug the refrigerator.
• Unclear subject’s voice. If the voice is not crystal clear, make sure the mic is near enough to the person’s mouth.
• Low volume. Check to see whether the volume is sufficiently loud. You may need to adjust the audio levels.
• Static caused by loose audio cables. If this is the case, you need to verify the connections and check to see whether a wire has come loose or is broken.
Controlling Volume
The best way to ensure good sound is to know how to set and monitor the volume control on your video camera. As with other camera controls, you have a choice of manual or automatic, each with its advantages and disadvantages.
Manual volume control: “riding gain.” Some cameras have audio volume meters that may appear on the LCD screen or in the viewfinder. These allow you to see if the volume is staying within a usable range. Monitoring the meter can be difficult when trying to shoot and record sound simultaneously, but it’s essential to capturing usable audio.
▸ Digital Audio Display. Try to keep the sound level between –25 and –12 decibels. Avoid letting the sound level reach the red zone.

Beware of some inexpensive to intermediate camera audiometers. Some overmodulate by equalizing all the loud and soft segments. Others don’t show the sound level at all. On some cameras, it’s difficult to see the sound level, especially when all the controls are on a flip-out LCD menu.
Professional videojournalists often set the audio level by hand, using a volume meter located either on the camera itself or on the LCD screen. The volume meter displays the sound level. In this way, they can constantly monitor the sound level and adjust it throughout the recording session. In fact, in feature-length documentaries, a person separate from the videographer handles the microphones and monitors the sound. But if you are a one-man-band, you alone will be shooting and monitoring sound.
A decibel (dB) is the unit used to measure the intensity of a sound. Meters measure decibels from –30 (very quiet) to +6 (off-the-scale loud). Some meters show the dB level in numbers. Others just indicate the ideal volume level and the blow-out zone.
To produce the least noisy recording, set the recording volume to peak at –12 dB. This is to avoid “clipping” or seriously distorting the high end of the signal. Do not let the sound level go too high or too low. Once the sound level hits the “danger zone”—usually above 0 dB, the sound fidelity cannot be recaptured in the editing process. “Always record a little low,” says Goheen of Terranova Pictures. “You will more than likely be able to boost the level in editing but if you overmodulate—i.e., have the volume level too high—there is nothing one can do to correct the distortion.” When the original was barely audible, bringing up the volume level later in an editing program is less than satisfactory. When recording an interview, have the subject speak in a natural voice and set the volume level high but not so high that it goes over 0 dB. Then leave it alone, says Goheen. You will need to change it only if the person becomes noticeably quieter or starts to shout during the interview.
Adjusting the sound volume while on the move can be a challenge for the backpack journalist—who is simultaneously busy framing the shot, adjusting the focal length of the lens, and making sure the exposure and focus are okay, not to mention conducting a thoughtful interview with good follow-up questions. This juggling act takes practice.
SIX SOUND RULES
1 When placing the mic, closer is always better.
2 You can’t hear problems without headphones.
3 Monitor volume controls and stay within limits.
4 Listen for annoying sounds in order to eliminate them or wait for them to end:
• Unwanted radio music
• Television
• Airplanes or vehicles
• Machines or appliances
• Construction
• Alarms or sirens
• Unrelated conversation
5 Always start by recording one minute of room tone (no dialog; no one speaking).
6 Continue to record important dialog even if the picture is poor. You can split the audio and video tracks later and use only the relevant sound with other images in your final video.
▴ In this three-person video crew, the soundman stands off camera. He aims the shotgun mic at the end of a boom pole toward the correspondent.
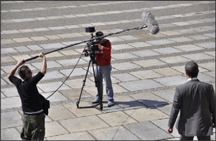
(Photo by Betsy Brill)
Automatic volume control. Even skilled video shooters often forgo full control over sound by relying on the camera’s automatic volume control features. Automatic gain control (AGC), also called automatic level control (ALC), is the term describing the camera’s sound level monitoring system.
AGC strives to record all sound within a fixed volume range. When a sound is very loud, AGC softens it; when a sound is very soft, AGC tries to boost it. In effect, AGC limits the volume’s dynamic range to an acceptable level that the camera is capable of handling.
However, because AGC is always striving toward the middle, it’s likely to amplify ambient sound when no one is speaking or to subdue the sound of an emphatic interviewee. When recording something like music with quiet and loud passages, the AGC will tend to compress the dynamic range by making the quiet passages louder and the loud passages quieter—not what Beethoven had in mind at all.
Also, depending on the model of your camera or audio recorder, AGC can produce strange quirks. For example, when a person resumes speaking after a pause, the first words may be over-amplified until the AGC finds a comfortable level.
Yet on many cameras and recorders, AGC produces remarkably consistent volume levels without any tweaking during the recording session. If you’re working alone in the role of backpack videojournalist, consider putting the audio on automatic and leaving the driving to the device.
▾ Automatic gain control (AGC) automatically suppresses any extraordinarily loud noises such as the sound of a gunshot.

(Photo by Ken Kobré)