15. Audio, Video, and MediaKit
The iPhone is a media master; its built-in iPod features expertly handle both audio and video. The iPhone SDK exposes that functionality to developers. A rich suite of classes simplifies media handling via playback, search, and recording. This chapter introduces recipes that use those classes, presenting media to your users and letting your users interact with that media. You see how to build audio and video viewers as well as audio and video recorders. You discover how to browse the iPod library and how to choose what items to play. The recipes you’re about to encounter provide step-by-step demonstrations showing how to add these media-rich features to your own apps.
Recipe: Playing Audio with AVAudioPlayer
As its name suggests, the AVAudioPlayer class plays back audio data. It provides a simple-to-use class that offers numerous features, several of which are highlighted in Figure 15-1. With this class, you can load audio, play it, pause it, stop it, monitor average and peak levels, adjust the playback volume, and set and detect the current playback time. All these features are available with little associated development cost. As you are about to see, the AVAudioPlayer class provides a solid API.
Figure 15-1 The features highlighted in this screenshot were built with a single class, AVAudioPlayer. This class provides time monitoring (in the title bar center), sound levels (average and peak), scrubbing and volume sliders, and play/pause control (at the right of the title bar).

Initializing an Audio Player
The audio playback features provided by AVAudioPlayer take little effort to implement in your code. Apple has provided an uncomplicated class that’s streamlined for loading and playing files.
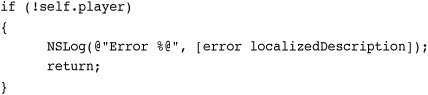
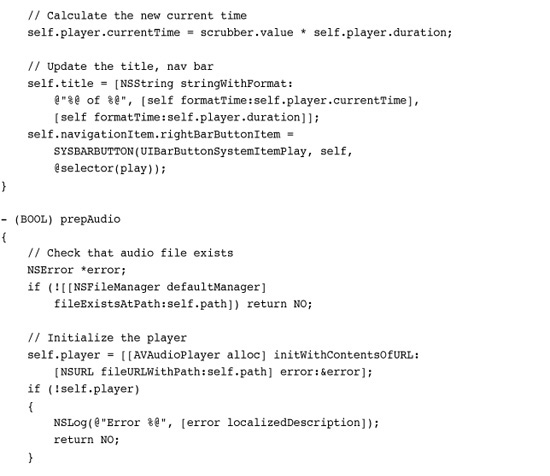
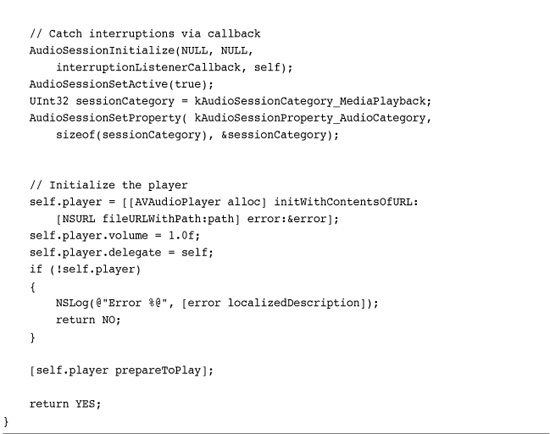
To begin, create your player and initialize it, either with data or with the contents of a local URL. This snippet uses a file URL to point to an audio file. It reports any error involved in creating and setting up the player. You can also initialize a player with data that’s already stored in memory using initWithData:error:. That’s handy for when you’ve already read data into memory (such as during an audio chat) rather than reading from a file stored on the device.
![]()
Once you’ve initialized the player, prepare it for playback. Calling prepareToPlay ensures that when you are ready to play the audio, that playback starts as quickly as possible. The call preloads the player’s buffers and initializes the audio playback hardware.
[self.player prepareToPlay];
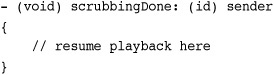
Pause playback at any time by calling pause. Pausing does not affect the player’s currentTime property. You can resume playback from that point by calling play again.
Halt playback entirely with stop. Stopping playback undoes the buffered setup you initially established with prepareToPlay. It does not, however, set the current time back to 0.0; you can pick up from where you left off by calling play again, just as you would with pause. You may experience starting delays as the player reloads its buffers.
Monitoring Audio Levels
When you intend to monitor audio levels, start by setting the meteringEnabled property. Enabling metering lets you check levels as you play back or record audio.
self.player.meteringEnabled = YES;
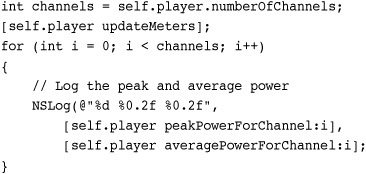
The AVAudioPlayer class provides feedback for average and peak power, which you can retrieve on a per-channel basis. Query the player for the number of available channels (via the numberOfChannels property) and then request each power level by supplying a channel index. A mono signal uses channel 0, as does the left channel for a stereo recording.
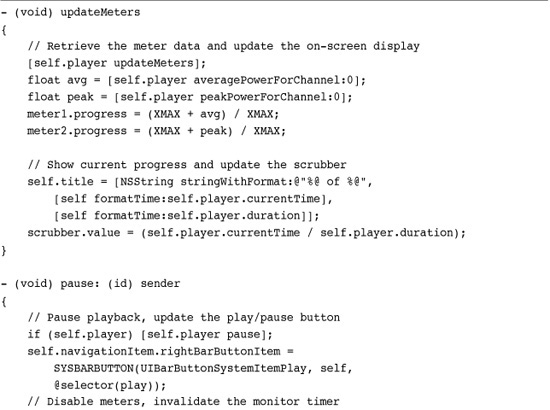
In addition to enabling metering as a whole, you need to call updateMeters each time you want to test your levels; this AV player method updates the current meter levels. Once you’ve done so, use the peakPowerForChannel: and averagePowerForChannel: methods to read those levels. Recipe 15-7, later in this chapter, shows the details of what’s likely going on under the hood in the player when it requests those power levels. You can see that code request the meter levels and then extract either the peak or average power. The AVAudioPlayer class hides those details, simplifying access to these values.
The AVAudioPlayer measures power in Decibels, which is supplied in floating-point format. Decibels use a logarithmic scale to measure sound intensity. Power values range from 0 dB at the highest to some negative value representing less-than-maximum power. The lower the number (and they are all negative), the weaker the signal will be.
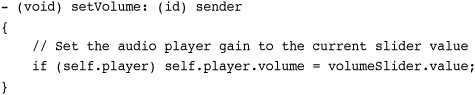
To query the audio player gain (i.e., its “volume”), use the volume property. This property also returns a floating-point number, here between 0.0 and 1.0, and applies specifically to the player volume rather than the system audio volume. You can set this property as well as read it. This snippet can be used with a target-action pair to update the volume when the user manipulates an onscreen volume slider.
Playback Progress and Scrubbing
Two properties, currentTime and duration, monitor the playback progress of your audio. To find the current playback percentage, divide the current time by the total audio duration.
progress = self.player.currentTime / self.player.duration;
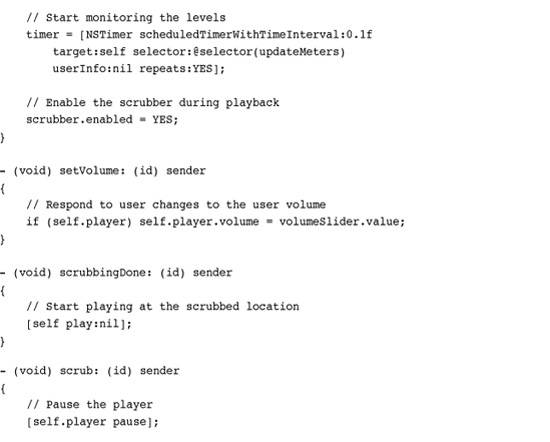
When you want to scrub your audio, that is, let your user select the current playback position within the audio track, make sure to pause playback. The AVAudioPlayer class is not built to provide audio-based scrubbing hints. Instead, wait until the scrubbing finishes to begin playback at the new location.
Make sure to implement at least two target-action pairs if you base your scrubber on a standard UISlider. For the first target-action item, mask UIControlEventTouchDown with UIControlEventValueChanged. These event types allow you to catch the start of a user scrub and whenever the value changes. Respond to these events by pausing the audio player and provide some visual feedback for the newly selected time.

For the second target-action pair, this mask of three values—UIControlEventTouchUpInside | UIControlEventTouchUpOutside | UIControlEventCancel—allows you to catch release events and touch interruptions. Upon release, you want to start playing at the new time set by the user’s scrubbing.
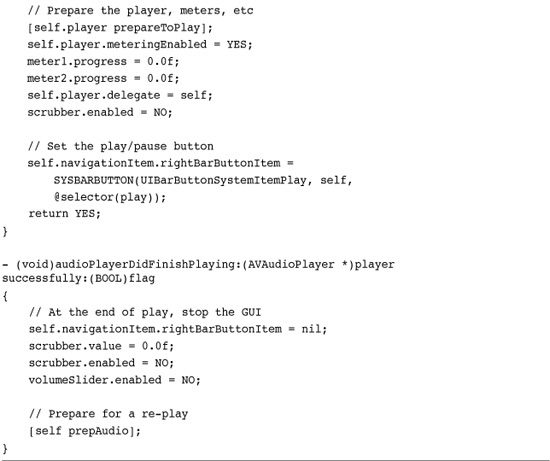
Catching the End of Playback
Detect the end of playback by setting the player’s delegate and catching the audioPlayerDidFinishPlaying:successfully: delegate callback. That method is a great place to clean up any details like reverting the pause button back to a play button. Apple provides several system bar button items specifically for media playback. They are
• UIBarButtonSystemItemPause
• UIBarButtonSystemItemRewind
• UIBarButtonSystemItemFastForward
The rewind and fast forward buttons provide the double-arrowed icons that are normally used to move playback to a previous or next item in a playback queue. You could also use them to revert to the start of a track or progress to its end. Unfortunately, the Stop system item is an X, used for stopping an ongoing load operation and not the standard filled square used on many consumer devices for stopping playback or a recording.
Recipe 15-1 puts all these pieces together to create the unified interface you saw in Figure 15-1. Here, the user can select audio, start playing it back, pause it, adjust its volume, scrub, and so forth.
Recipe 15-1 Playing Back Audio with AVAudioPlayer

Get This Recipe’s Code
To get the code used for this recipe, go to http://github.com/erica/iphone-3.0-cookbook-, or if you’ve downloaded the disk image containing all of the sample code from the book, go to the folder for Chapter 15 and open the project for this recipe.
The XMAX approach you see here is a bit of a hack. It uses an arbitrary maximum value to estimate the dynamic range of the input levels. Unlike direct Audio Queue calls (that return a float value between 0.0 and 1.0), the decibel levels here have to be approximated to set a progress view value for live feedback. Feel free to adjust the XMAX values to best fit your tests during development.
Recipe: Looping Audio
Loops help present ambient background audio. You can use a loop to play an audio snippet several times or play it continuously. Recipe 15-2 demonstrates an audio loop that plays only during the presentation of a particular video controller, providing an aural backdrop for that controller.
Recipe 15-2 Creating Ambient Audio Through Looping

Get This Recipe’s Code
To get the code used for this recipe, go to http://github.com/erica/iphone-3.0-cookbook-, or if you’ve downloaded the disk image containing all of the sample code from the book, go to the folder for Chapter 15 and open the project for this recipe.
You set the number of times an audio plays before the playback ends. A high number (like 999999) essentially provides for an unlimited number of loops. For example, a 4-second loop would take more than 1,000 hours to play back fully with a loop number that high.

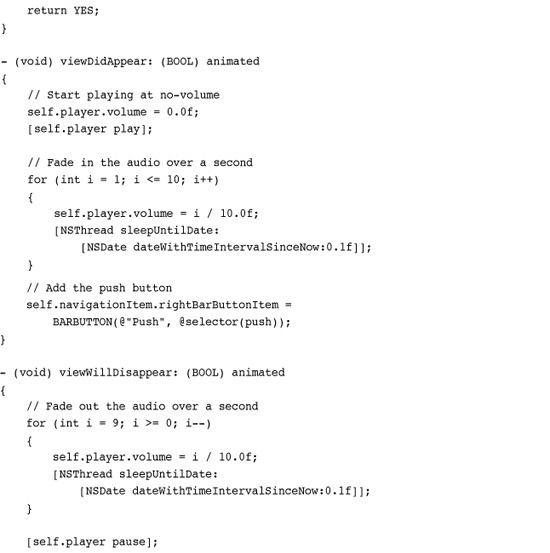
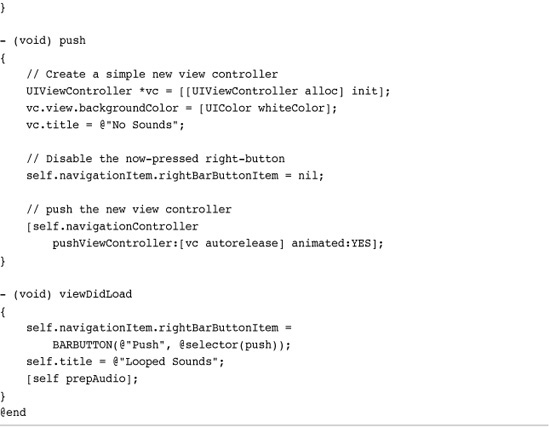
Recipe 15-2 uses looped audio for its primary view controller. Whenever its view is onscreen the loop plays in the background. Hopefully you choose a loop that’s unobtrusive, that sets the mood for your application, and that smoothly transitions from the end of playback to the beginning.
This recipe uses a fading effect to introduce and hide the audio. It fades the loop into hearing when the view appears and fades it out when the view disappears. It accomplishes this with a simple approach. A loop iterates through volume levels, from 0.0 to 1.0 on appearing, and 1.0 down to 0.0 on disappearing. A call to NSThread’s built-in sleep functionality adds the time delays (a tenth of a second between each volume change) without affecting the audio playback.
Recipe: Handling Audio Interruptions
When users receive phone calls during audio playback, that audio fades away. The standard answer/decline screen appears. As this happens, AVAudioPlayer delegates receive the audioPlayerBeginInterruption: callback that is shown in Recipe 15-3. The audio session deactivates, and the player pauses. You cannot restart playback until the interruption ends.
Recipe 15-3 Storing the Interruption Time for Later Pickup

Get This Recipe’s Code
To get the code used for this recipe, go to http://github.com/erica/iphone-3.0-cookbook-, or if you’ve downloaded the disk image containing all of the sample code from the book, go to the folder for Chapter 15 and open the project for this recipe.
Should the user accept the call, the application terminates, and the application delegate receives an applicationWillResignActive: callback. When the call ends, the application relaunches (with an applicationDidBecomeActive: callback). If the user declines the call or if the call ends without an answer, the delegate is instead sent audioPlayerEndInterruption:. You can resume playback from this method.
If it is vital that playback resumes after accepting a call, and the application needs to relaunch, you can save the current time as shown in Recipe 15-3. The viewDidLoad method in this recipe checks for a stored interruption value in the user defaults. When it finds one, it uses this to set the current time for resuming playback.
This approach takes into account the fact that the application relaunches rather than resumes after the call finishes. You do not receive the end interruption callback when the user accepts a call.
Recipe: Audio That Ignores Sleep
Locking an iPhone by pressing the sleep/wake button causes an iPhone or iPod to experience the same interruption events that occur with phone calls. When the unit locks, the AVAudioPlayer issues an interruption callback. The audio fades away and stops playback. On unlock, the audioPlayerEndInterruption: callback triggers and the audio playback continues from where it left off. Try testing Recipe 15-3 by locking and unlocking an iPhone to see this behavior in action.
When you need your audio to continue playing regardless of whether a user locks a phone, respond by updating the current audio session. Audio sessions set the context for an application’s audio, providing direct control over the playback hardware.
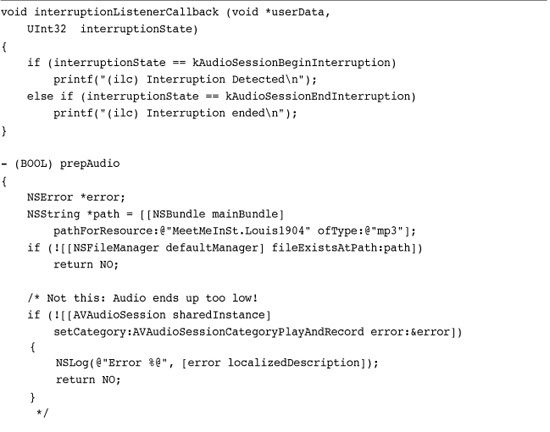
To keep playing audio, you need to use a session style that doesn’t respond to autolock. For example, you might use a play and record session:
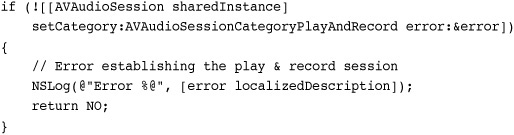
Add this snippet to your code before you allocate a new player and sure enough, your audio will ignore lock events. You can tap the sleep/wake button, causing your iPhone screen to go black. The audio will continue to play.
There’s a problem though. When you use a play and record session, the iPhone automatically lowers the volume on speaker output. This is by design. Lowering the playback volume avoids feedback loops when a user records audio at the same time as playing audio back. That’s great for two-way voice chat but bad news for general playback when you need a full range of audio levels.
Recipe 15-4 presents a workaround that preserves the audio dynamic range while ignoring lock events. It calls a low-level C-language audio session function to set the session category. The “media” playback category it uses is not available as a standard AVAudioSession constant. That is why you need this alternative approach. Like play and record, a media session ignores sleep/wake button events and continues playback, but unlike play and record, it provides full volume playback.
Recipe 15-4 Creating Full-Volume Lock-Resistant Audio Playback
Get This Recipe’s Code
To get the code used for this recipe, go to http://github.com/erica/iphone-3.0-cookbook-, or if you’ve downloaded the disk image containing all of the sample code from the book, go to the folder for Chapter 15 and open the project for this recipe.
When initializing the audio session in this manner, you supply a callback function rather than a method. Recipe 15-4 demonstrates this by implementing interruptionListenerCallback(), a basic skeleton. Since all interruptions are already caught in the delegate code from Recipe 15-3, this function simply adds a couple of print statements. You may omit those if you want.
When phone calls arrive, the delegate callbacks from Recipe 15-3 handle the interruption and possible relaunch of the application. However, the application never responds to lock/unlock events. You can see this in action by running the sample code and testing for the five primary interruption configurations: call answered, call declined, call ignored, lock, and unlock. By changing the audio session type, those callbacks are no longer generated and the audio remains unaffected by the sleep/wake button.
Recipe: Recording Audio
The AVAudioRecorder class simplifies audio recording in your applications. It provides the same API friendliness as AVAudioPlayer, along with similar feedback properties. Together, these two classes leverage development for many standard application audio tasks.
Start your recordings by establishing an AVAudioSession. Use a play and record session if you intend to switch between recording and playback in the same application. Use a simple record session (via AVAudioSessionCategoryRecord) otherwise. Once you have a session, you can check its inputIsAvailable property. This property indicates that the current device has access to a microphone.

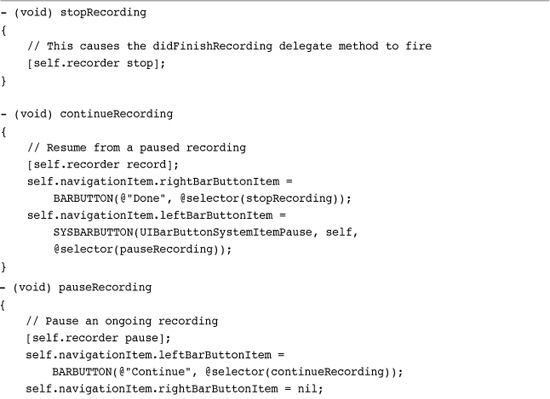
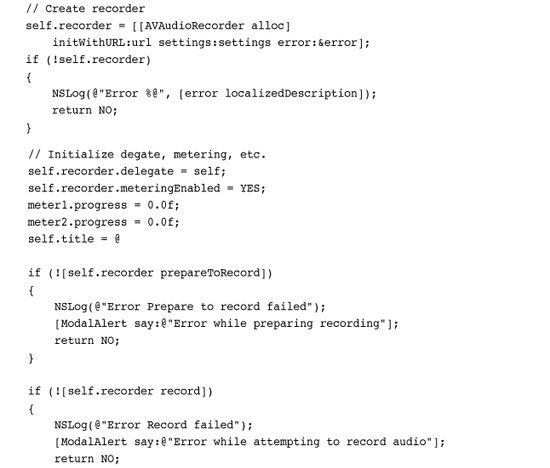
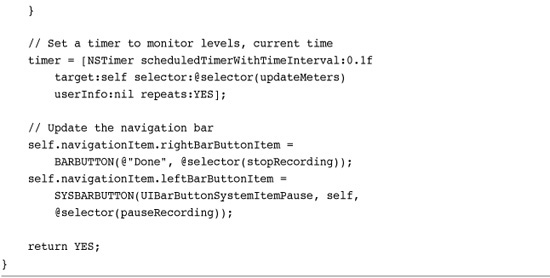
Recipe 15-5 demonstrates the next step after creating the session. It sets up the recorder and provides methods for pausing, resuming, and stopping the recording.
Recipe 15-5 Audio Recording with AVAudioRecorder
Get This Recipe’s Code
To get the code used for this recipe, go to http://github.com/erica/iphone-3.0-cookbook-, or if you’ve downloaded the disk image containing all of the sample code from the book, go to the folder for Chapter 15 and open the project for this recipe.
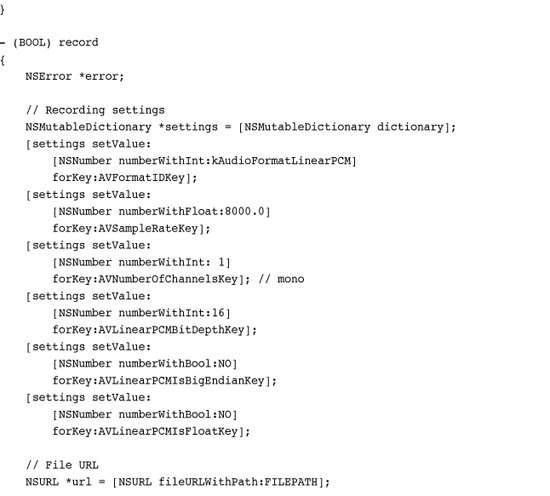
To start recording, it creates a settings dictionary and populates it with keys and values that describe how the recording should be sampled. This example uses mono Linear PCM sampled 8000 times a second, a fairly low sample rate. Here are a few points about customizing formats. Unfortunately, Apple does not offer a best practice guide for audio settings at this time.
• Set AVNumberOfChannelsKey to 1 for mono audio, 2 for stereo.
• Audio formats (AVFormatIDKey) that work well on the iPhone include kAudioFormatLinearPCM (very large files) and kAudioFormatAppleIMA4 (compact files).
• Standard AVSampleRateKey sampling rates include 8000, 11025, 22050, and 44100.
• For the linear PCM-only bit depth (AVLinearPCMBitDepthKey), use either 16 or 32 bits.
The code allocates a new AV and initializes it with both a file URL and the settings dictionary. Once created, this code sets the recorder’s delegate and enables metering. Metering for AVAudioRecorder instances works like metering for AVAudioPlayer instances, as was demonstrated in Recipe 15-3. You must update the meter before requesting average and peak power levels.
This method uses the same XMAX approach to create an approximate dynamic range for the feedback meters that was shown in Recipe 15-1. Feel free to adjust XMAX to best match the actual dynamic range for your application.
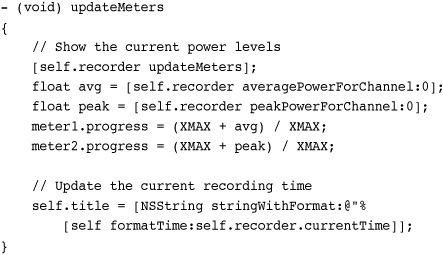
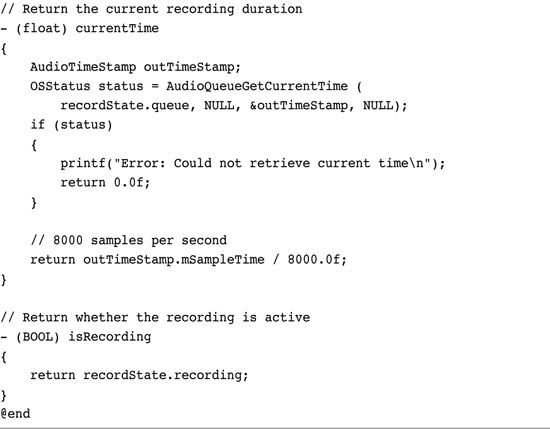
This code also tracks the recording’s currentTime. When you pause a recording, the current time stays still until you resume. Basically, the current time indicates the recording duration to date.
When you’re ready to proceed with the recording, use prepareToRecord and then start the recording with record. Issue pause to take a break in recording; resume again with another call to record. The recording picks up where it left off. To finish a recording, use stop. This produces a callback to audioRecorderDidFinishRecording:successfully:. That’s where you can clean up your interface and finalize any recording details.
Recipe: Recording Audio with Audio Queues
In addition to the AVAudioPlayer class, Audio Queues can handle recording and playing tasks in your applications. Audio Queues were needed for recording before the AVAudioRecorder class debuted. Using queues directly helps demonstrate what’s going on under the hood of the AVAudioRecorder class.
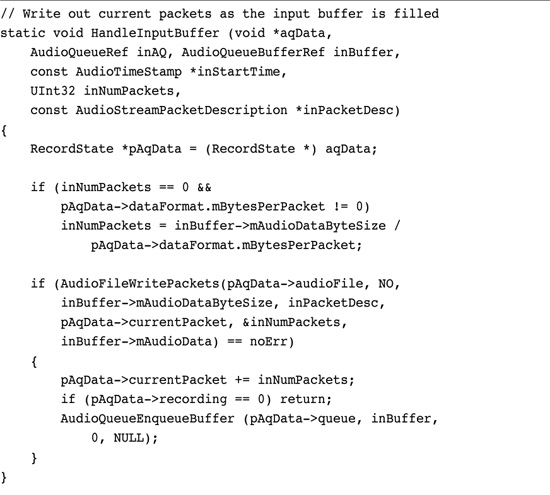
Recipe 15-6 records audio at the Audio Queue level, providing a taste of the C-style functions and callbacks used. This code is heavily based on Apple sample code and specifically showcases functionality that is hidden behind the AVAudioRecorder wrapper.
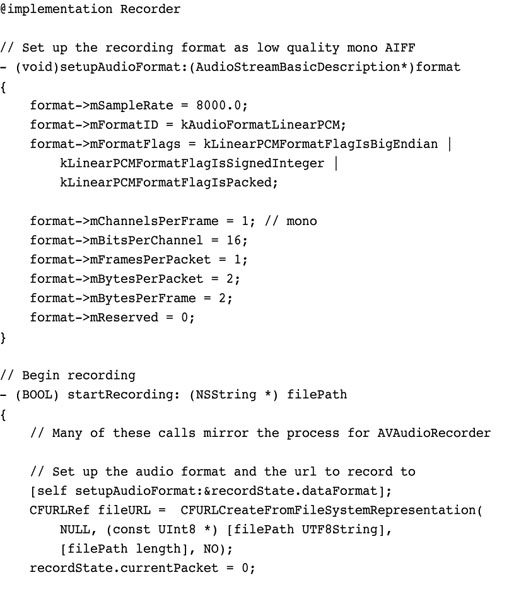
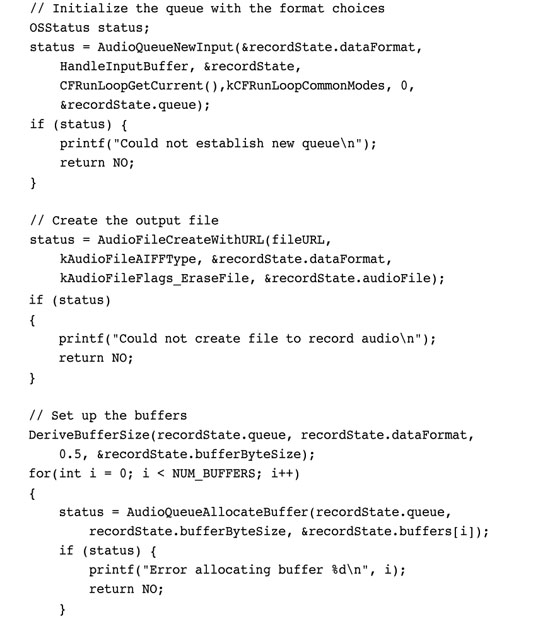
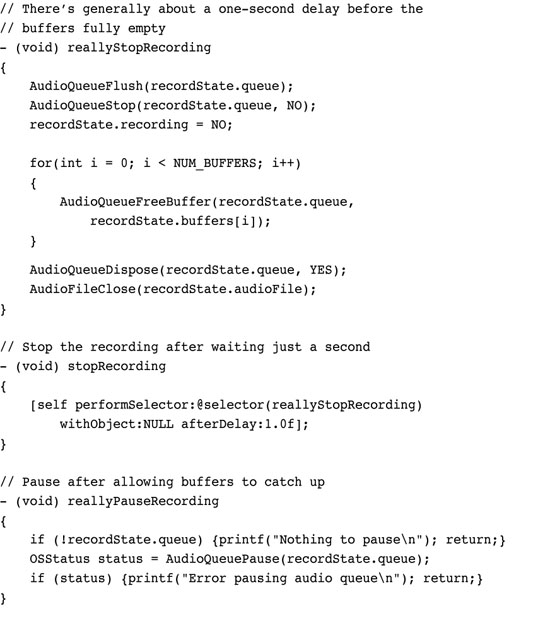
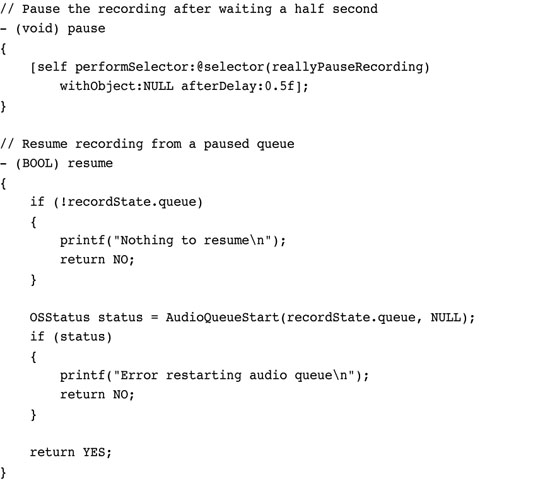
Recipe 15-6 Recording with Audio Queues: The Recorder.m Implementation


Get This Recipe’s Code
To get the code used for this recipe, go to http://github.com/erica/iphone-3.0-cookbook-, or if you’ve downloaded the disk image containing all of the sample code from the book, go to the folder for Chapter 15 and open the project for this recipe.
The settings used in Recipe 15-6’s setupAudioFormat: method have been tested and work reliably on the iPhone. It’s easy, however, to mess up these parameters when trying to customize your audio quality. If you don’t have the parameters set up just right, the queue may fail with little feedback. Google provides copious settings examples.
Note
Interested in learning more about other approaches for iPhone audio? iPhone developer Ben Britten has posted a nice introduction to OpenAL audio on the iPhone at http://benbritten.com/blog/2008/11/06/openal-sound-on-the-iphone/. OpenAL offers a multidimensional, positional audio API.
Recipe: Playing Video with the Media Player
The MPMoviePlayerController class simplifies video display in your applications. This class, which is part of the MediaPlayer framework, plays by its own rules. You do not push it onto a navigation stack. You do not invoke it modally. Instead, you create it and tell it to play. It takes control of the screen, offering the controls shown in Figure 15-2.
Figure 15-2 The full-screen media player interface offers extensive user control over video playback. This is the same video interface used in the iPod and YouTube applications. (This screenshot is from a public domain Betty Boop cartoon, courtesy of the Internet Archive at archive.org.)

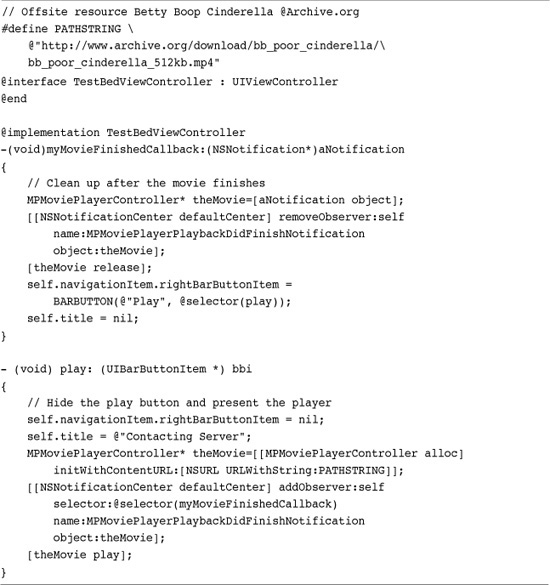
To regain control, subscribe your application to the MPMoviePlayerPlaybackDidFinishNotification notification. This notification is sent under two circumstances: when playback naturally ends, or when the user taps Done. Using the class couldn’t be simpler. Allocate a new instance of the MPMoviePlayer class, initialize it with a URL, and tell it to play. Release the player when the playback ends.
Recipe 15-7 includes two methods. One starts playback; the other cleans up when playback ends. This exact code can be used to play back either video or audio. Just provide a source URL pointing to a supported file type. Supported file types include MOV, MP4, MPV, M4V, and 3GP, as well as MP3, AIFF, and M4A, among others.
Recipe 15-7 Playing Back Videos Using the MPMoviePlayer
Get This Recipe’s Code
To get the code used for this recipe, go to http://github.com/erica/iphone-3.0-cookbook-, or if you’ve downloaded the disk image containing all of the sample code from the book, go to the folder for Chapter 15 and open the project for this recipe.
This code uses an off-phone resource via an external URL. Be aware that such connections can be slow (and possibly nonexistent) so prepare for possible lags during playback. Local file URLs (as shown previously in Recipe 15-1) produce more reliable playback for video and audio resources.
Unfortunately, the MPMoviePlayer object offers limited API control. If you need to loop a movie, you can restart playback after catching the finish notification, as shown here.

This causes a visual hiccup between the time the movie first ends and then starts up again. You want to take this into account, perhaps overlaying your main GUI with a black view. Users may need to tap the play button again. While you can limit user interaction with the movie by setting the player’s movieControlMode to a no-interaction or volume-only mode, these modes hide the play button from the user.
Note
Recipe 13-7 demonstrated how to fully (and asynchronously) download a file from a remote server before playing back that movie.
Recipe: Recording Video
Before you can record video, you must detect whether the device supports camera-based video recording. Checking for an onboard camera, such as those in the first generation and 3G iPhones, is not sufficient. Only the 3GS and newer units provide video recording capabilities. Perform two checks: first, that a camera is available, and second, that the available capture types includes video. The following method performs those checks.
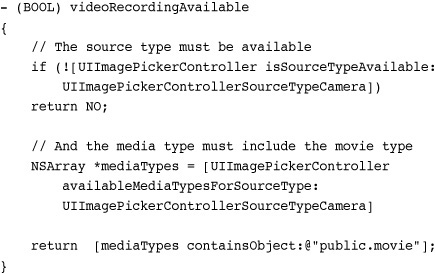
Note that this method searches for a public.movie media type using a constant string. At some point in the future of the iPhone SDK, you should be able to use the kUTTypeMovie constant instead. These types are defined in the MobileCoreServices public framework in UTCoreTypes.h.
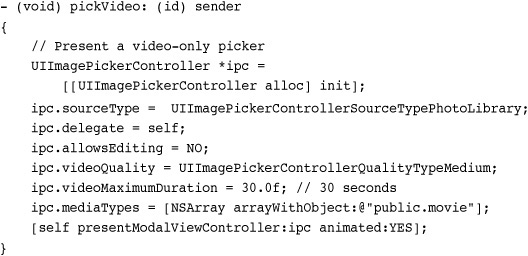
As Recipe 15-8 demonstrates, recording video proves to be similar to capturing still images with the onboard camera. You allocate and initialize a new image picker, set its delegate, select whether to allow editing, and present it.
Recipe 15-8 Using UIImagePickerController to Record Video

Get This Recipe’s Code
To get the code used for this recipe, go to http://github.com/erica/iphone-3.0-cookbook-, or if you’ve downloaded the disk image containing all of the sample code from the book, go to the folder for Chapter 15 and open the project for this recipe.
Unlike still image capture, you must set three key properties. First, select a video quality. Recipe 15-8 uses a medium quality, but you can also choose high or low. Second, specify a maximum video duration in seconds. Recipe 15-8 allows the user to record up to 30 seconds of video. (The maximum can range up to 10 minutes using the video image picker.) Finally, set the media type array for the picker to a one-object list using the movie media type. You can include public.image to provide the user with the option to switch between still and video capture, as highlighted in Figure 15-3.
Figure 15-3 Developers may specify one or more media types for the image picker controller. The screenshot on the left demonstrates a video-only capture. The right screenshot shows a picker that supports both image and video capture.

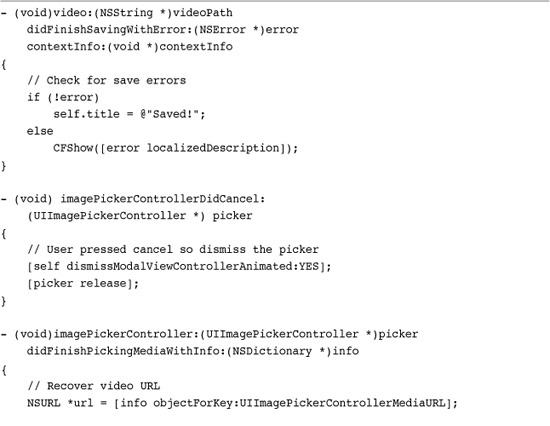
By setting the allowsEditing property to YES, you permit users to use the built-in video editor to trim their clips before saving or otherwise working with that data. Whether you allow editing or not, when the user finishes the video capture, the standard image picker callbacks inform the delegate.
With video, you retrieve a URL instead of the actual data. As Recipe 15-8 demonstrates, you should check whether that video is compatible with the built-in album before attempting to save. If it is, you may save it using the UISaveVideoAtPathToSavedPhotosAlbum() function. Examples of incompatible clips include MPEG-4 videos downloaded from the Internet Archive (http://archive.org) that you might want to add to your photo album. These files are not album compatible.
Recipe: Picking and Editing Video
The mediaTypes property used in Recipe 15-8 affects media selection as well as media capture. To request a picker that presents video assets only, create a photo library picker and use a media array that consists of a single public.movie string. The following method creates a video-only picker.
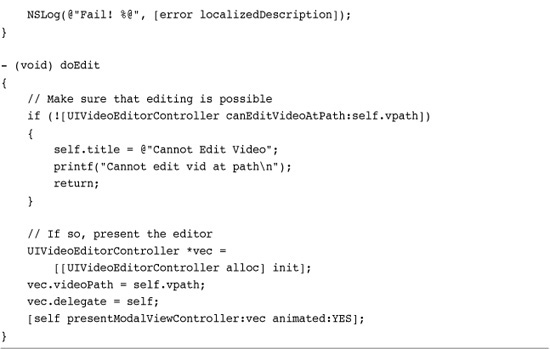
To edit an already-existing video, start by checking that the video asset can be modified as shown in Recipe 15-9. Call the UIVideoEditorController class method canEditVideoAtPath:. This returns a Boolean value that indicates whether the video is compatible with the editor controller.
Recipe 15-9 Using the Video Editor Controller
Get This Recipe’s Code
To get the code used for this recipe, go to http://github.com/erica/iphone-3.0-cookbook-, or if you’ve downloaded the disk image containing all of the sample code from the book, go to the folder for Chapter 15 and open the project for this recipe.
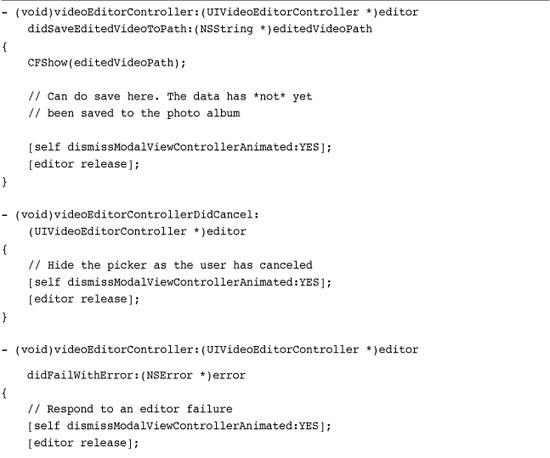
If it is, you can allocate a new editor, set its delegate and videoPath properties, and present it. The editor uses a set of delegate callbacks that are similar to but not identical to the ones used by the UIImagePickerController class. Callbacks include methods for success, failure, and user cancellation.
When a user has finished editing the video, the controller saves that video to a temporary path and calls videoEditorController:didSaveEditedVideoToPath:. That path resides in the application sandbox’s tmp folder. If you do nothing with the data, it will be deleted the next time the iPhone reboots. You can, however, save that data either locally into the sandbox’s Documents folder or into the shared iPhone photo album. To do so, follow the example shown in Recipe 15-8. Regardless of which callback is sent, it’s up to you to dismiss the editor and release it.
Recipe: Picking Audio with the MPMediaPickerController
The MPMediaPickerController class provides an audio equivalent for the image-picking facilities of the UIImagePickerController class. It allows users to choose an item or items from their music library including music, podcasts, and audio books. The standard iPod-style interface allows users to browse via playlists, artists, songs, albums, and more.
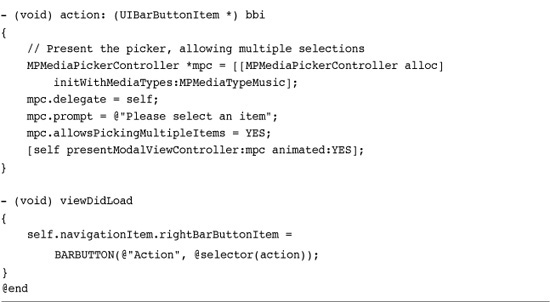
To use this class, allocate a new picker and initialize it with the kinds of media to be used. You can choose from MPMediaTypeMusic, MPMediaTypePodcast, MPMediaTypeAudioBook, MPMediaTypeAnyAudio, and MPMediaTypeAny. These are flags and can be or’ed together to form a mask.
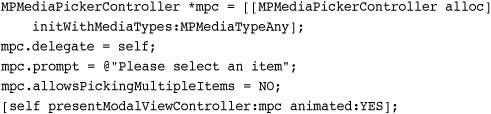
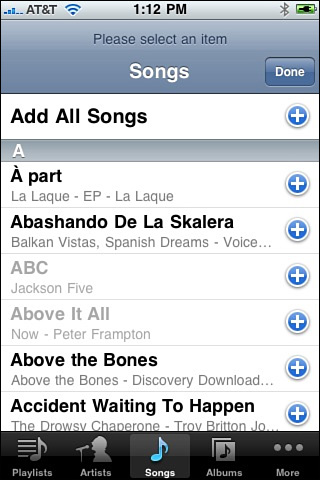
Next, set a delegate and optionally set a prompt. The prompt is text that appears at the top of the media picker, as shown in Figure 15-4. When you choose to allow multiple item selection, the Cancel button on the standard picker is replaced by the label Done. Normally, the dialog ends when a user taps a track. With multiple selection, users can keep picking items until they press the Done button. Selected items are updated to use gray labels.
Figure 15-4 In this multiple selection media picker, already selected items appear in gray (see ABC and Above It All). Users tap Done when finished. In the normal selection picker, the Done button is replaced by Cancel, allowing users to leave without selecting an item. An optional prompt field (here, Please Select an Item) appears above the normal picker elements.
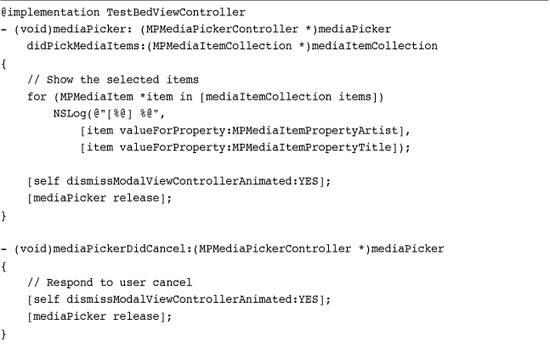
The mediaPicker:didPickMediaItems: delegate callback handles the completion of a user selection. The MPMediaItemCollection instance that is passed as a parameter can be enumerated by accessing its items. Each item is a member of the MPMediaItem class and can be queried for its properties, as shown in Recipe 15-10. Recipe 15-10 uses a media picker to select multiple music tracks. It logs the items the user selected by artist and title.
Recipe 15-10 Selecting Music Items from the iPod Library
Get This Recipe’s Code
To get the code used for this recipe, go to http://github.com/erica/iphone-3.0-cookbook-, or if you’ve downloaded the disk image containing all of the sample code from the book, go to the folder for Chapter 15 and open the project for this recipe.
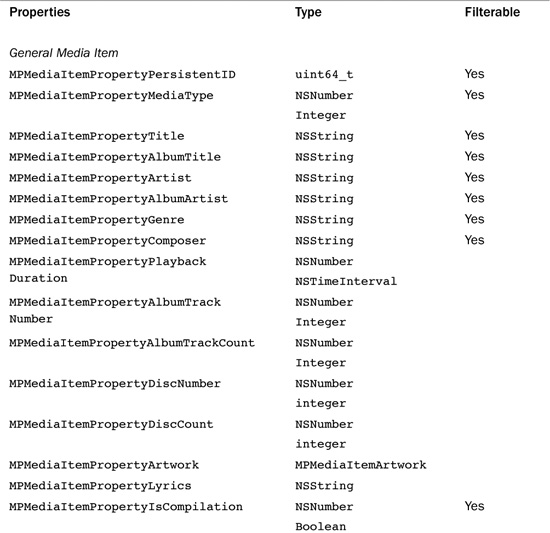
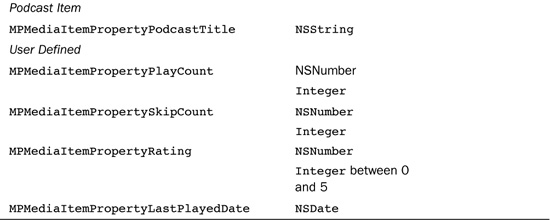
Table 15-1 lists the available properties for media items, the type they return and whether they can be used to construct a media property predicate. Building queries and using predicates is discussed in Recipe 15-11.
Table 15-1 Media Item Properties
Recipe 15-11 Demonstrating the Choke Time for Media Queries

Get This Recipe’s Code
To get the code used for this recipe, go to http://github.com/erica/iphone-3.0-cookbook-, or if you’ve downloaded the disk image containing all of the sample code from the book, go to the folder for Chapter 15 and open the project for this recipe.
Creating a Media Query
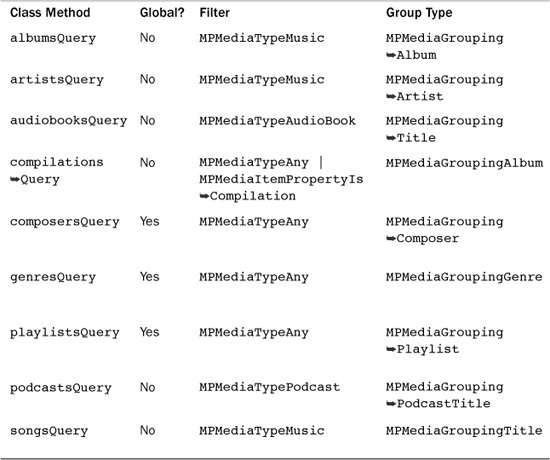
Media Queries allow you to filter your iPod library contents, limiting the scope of your search. Table 15-2 lists the nine class methods that MPMediaQuery provides for predefined searches. Each query type controls the grouping of the data returned. Each collection is organized as tracks by album, or by artist, or by audio book, and so on.
This approach reflects the way that iTunes works on the desktop. In iTunes, you select a column to organize your results, but you search by entering text into the application’s Search field.
Building a Query
Count the number of albums in your library using an album query. This snippet creates that query and then retrieves an array, each item of which represents a single album. These album items are collections of individual media items. A collection may contain a single track or many.

Many iPhone users have extensive media collections often containing hundreds or thousands of albums, let alone individual tracks. A simple query like this one may take several seconds to run and return a data structure that represents the entire library.
A search using a different query type allows returns collections organized by that type. You can use a similar approach to recover the number of artists, songs, composers, and so on.
Using Predicates
A media property predicate efficiently filters the items returned by a query. For example, you might want to find only those songs whose title matches the phrase “road.” The following snippet creates a new songs query and adds a filter predicate to search for that phrase. The predicate is constructed with a value (the search phrase), a property (searching the song title), and a comparison type (in this case “contains”). Use MPMediaPredicateComparisonEqualTo for exact matches and MPMediaPredicateComparisonContains for substring matching.

Note
If you’d rather use regular predicates with your media collections than media property predicates, I have created an MPMediaItem properties category (http://github.com/erica/MPMediaItem-Properties). This category allows you to apply standard NSPredicate queries against collections, such as those returned by a multiple-item selection picker.
Handling Speed Issues
The preceding snippet runs slowly. Recovering property values takes far more time than you might expect, up to a second each on a large library on a modern iPhone 3GS or third generation iPod touch, the fastest available iPhone devices at the time this book was written. There’s no apparent reason for why a property query should take much time at all or why these property retrievals might be choked or affected by library size.
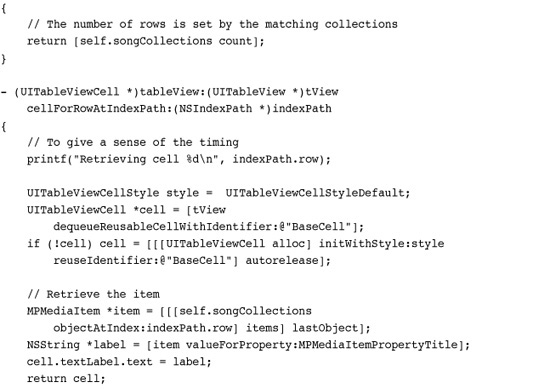
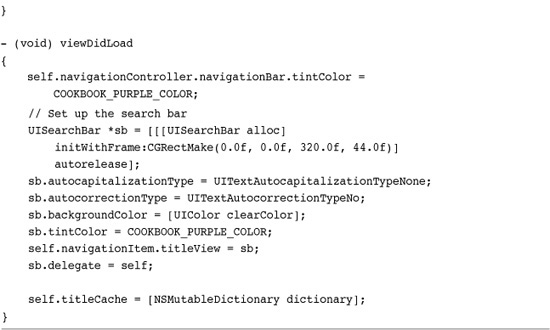
Delays make it hard to use these kinds of queries to provide a data source for a table view. Recipe 15-11 shows this problem in action. It builds a list of song titles from a user search. Even using a cache to avoid recovering already-used cell titles, the recipe demonstrates that creating your own pickers is impractical for now due to speed issues.
Unless Apple greatly speeds up data recovery, you’re better off using the built-in MPMediaPickerController class to retrieve individual MPMediaItems.
Recipe: Using the MPMusicPlayerController
Cocoa Touch includes a simple-to-use music player class that works seamlessly with media collections. Despite what its name implies, the MPMusicPlayerController class is not a view controller. It provides no onscreen elements for playing back music. Instead, it offers an abstract controller that handles playing and pausing music.
It publishes optional notifications when its playback state changes. The class offers two shared instances, the iPodMusicPlayer and an applicationMusicPlayer. Always use the former. It provides reliable state change feedback, which you will want to catch programmatically.
Initialize the player controller by calling setQueueWithItemCollection: with an MPMediaItemCollection.
[[MPMusicPlayerController iPodMusicPlayer]
setQueueWithItemCollection:self.songs];
Alternatively, you can load a queue with a media query. For example, you might set a playlistsQuery matching a specific playlist phrase, or an artist query to search for songs by a given artist. Use setQueueWithQuery: to generate a queue from an MPMediaQuery instance.
If you want to shuffle playback, assign a value to the controller’s shuffleMode property. Choose from MPMusicShuffleModeDefault, which respects the user’s current setting, MPMusicShuffleModeOff (no shuffle), MPMusicShuffleModeSongs (song-by-song shuffle), and MPMusicShuffleModeAlbums (album-by-album shuffle). A similar set of options exists for the music’s repeatMode.
Once you set the item collection, you can play, pause, skip to the next item in the queue, go back to a previous item, and so forth. To rewind without moving back to a previous item, issue skipToBeginning. You can also seek within the currently playing item, moving the playback point forward or backward.
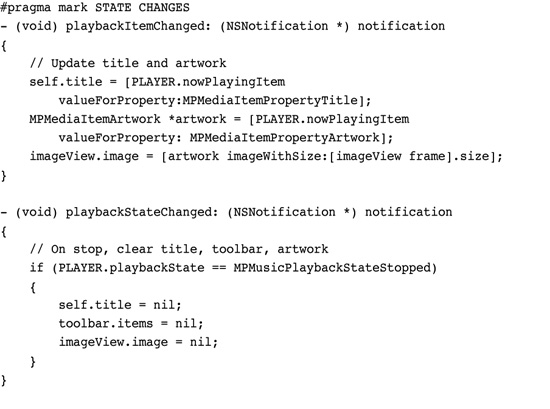
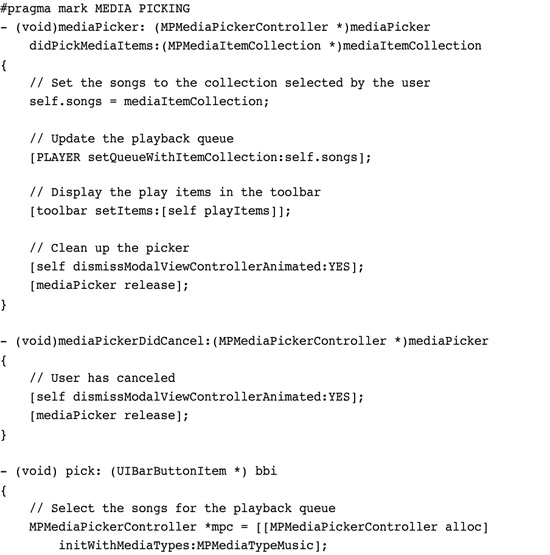
Recipe 15-12 offers a simple media player that shows the currently playing song (along with its artwork, if available). When run, the user selects a group of items using an MPMediaPickerController. This item collection is returned and assigned to the player, which begins playing back the group.
Recipe 15-12 Simple Media Playback with the iPod Music Player

Get This Recipe’s Code
To get the code used for this recipe, go to http://github.com/erica/iphone-3.0-cookbook-, or if you’ve downloaded the disk image containing all of the sample code from the book, go to the folder for Chapter 15 and open the project for this recipe.
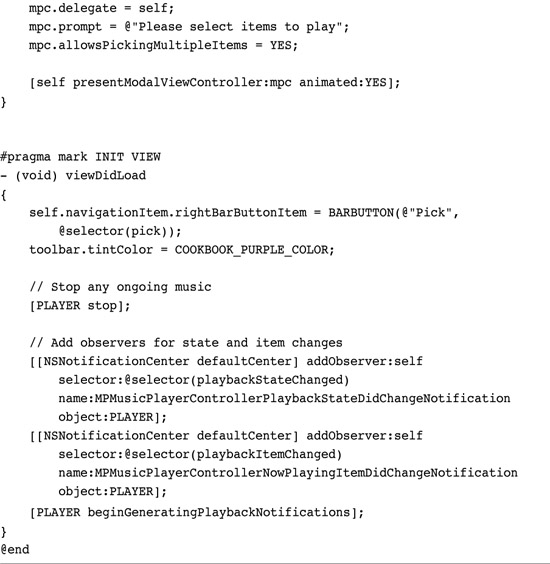
A pair of observers use the default notification center to watch for two key changes: when the current item changes and when the playback state changes. To catch these changes, you must manually request notifications. This allows you to update the interface with new “now playing” information when the playback item changes.
[[MPMusicPlayerController iPodMusicPlayer]
beginGeneratingPlaybackNotifications];
You may undo this request by issuing endGeneratingPlaybackNotifications, or you can simply allow the program to tear down all observers when the application naturally terminates. Please note that because this recipe uses iPod music player, playback continues after leaving the application unless you specifically stop it. Playback is not affected by the application teardown.

In addition to demonstrating playback control, Recipe 15-12 shows how to display album art during playback. It uses the same kind of MPItem property retrieval used in previous recipes. In this case, it queries for MPMediaItemPropertyArtwork, and if artwork is found it uses the MPMediaItemArtwork class to convert that artwork to an image of a given size.
One More Thing: Additional Movie Player Properties
The MPMoviePlayerController class that was introduced in this chapter offers a few helpful properties not covered in earlier recipes. These properties help control the way the player is presented onscreen.
The player’s backgroundColor controls the tinting of the backsplash that lies behind the movie. Normally the player appears in black, and the movie fades in when it finishes preloading. To connect the video more closely to your normal interface, you can set this property to [UIColor clearColor]. Your interface will bleed through behind the player.
Another property is the movie player’s scalingMode, which sets how the video fits within the player’s frame. By default, the player attempts to fit the video onscreen to fill at least one dimension without cropping the other. This corresponds to the MPMovieScalingModeAspectFit constant. The two other options for scaling (in addition to none, which provides no scaling) are aspect fill and normal fill. Aspect fill (MPMovieScalingModeAspectFill) fills the entire screen, while retaining the aspect ratio, clipping off portions that fall outside the display. Normal fill (MPMovieScalingModeFill) discards the aspect ratio and scales the horizontal and vertical axes independently.
When you want to control the point at which playback begins, set the initialPlaybackTime property. Taking an NSTimeInterval, this property offsets the start of the movie playback to a point that you specify. Unfortunately, you cannot directly query the player for the current time to store a pickup point for a later playback session. Hopefully Apple will address that in future SDK releases.
Summary
This chapter introduced many ways to handle audio and video media, including playback and recording. You saw recipes that worked with high-level Objective-C classes, and those that worked with lower-level C functions. You discovered local and remote data sources and read about media pickers, controllers, and more. Here are a few thoughts to take away from this chapter:
• Apple is still in the process of building its AV media playback classes. Although many of those classes seem to be preliminary or bare bones at this time, expect these to grow as subsequent firmware debuts. The AVAudioPlayer did not debut until the 2.2 firmware; the AVAudioRecorder debuted even later. Media playback and control remains a work in progress.
• When you plan to work with video, be aware of bandwidth limitations. Local phone carriers may not appreciate you burdening their networks with excessive data transfer, and that burden may affect your ability to place your application in App Store.
• Audio Queue provides powerful low-level audio routines, but they’re not for the faint of heart or for anyone who just wants a quick solution. If you need the kind of fine-grained audio control that Audio Queues bring, Apple supplies extensive documentation on achieving your goals.
• The MPMusicPlayerController provides a really simple way to interact with music from your onboard iTunes library. There is no way that I know of to access music data directly, so be sure to master both AVAudioPlayer use for local data files as well as MPMusicPlayerController for iTunes.