You can use Word's Find tool to search your document for a particular word or phrase. You can use the Replace tool to replace instances of a word or phrase with other text. For example, you may need to search through a long document to replace a reference with another name.
Find and Replace Text
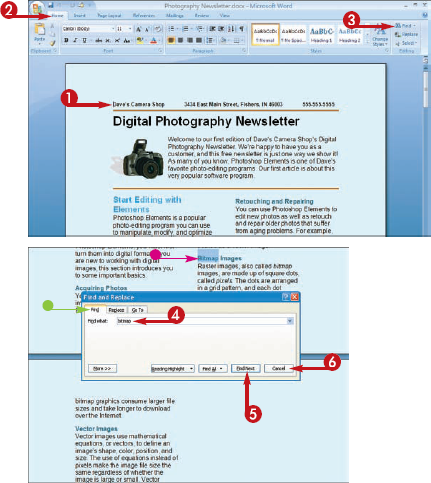
FIND TEXT
You can click Find Next again to search for the next occurrence.
Note
If Word displays a prompt box when the last occurrence is found, click OK.
REPLACE TEXT
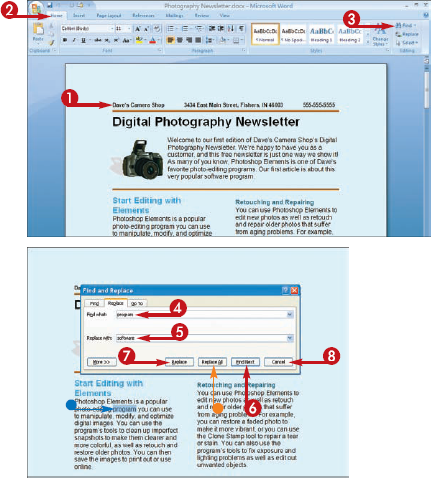
Note
If Word displays a prompt box when the last occurrence is found, click OK.
Note
Where can I find detailed search options?
You can click More in the Find and Replace dialog box to reveal additional search options that you can apply. For example, you can search for matching text case, whole words, and more. You can also search for specific formatting or special characters by clicking Format and Special. To hide the additional search options, click Less.

How can I search for and delete text?
You can search for a particular word or phrase using the Find and Replace dialog box, and remove the text completely from the document. Start by typing the text in the Find what text field. Leave the Replace with text field empty. When you activate the search, Word looks for the text and deletes it without adding new text to the document.

You can use Word's Spelling and Grammar check features to review your document for spelling and grammatical errors. Although both features are helpful, they are never a substitute for good proofreading with your own eyes. Both features can catch some errors, but not all, so you should take time to read over your documents for misspellings.
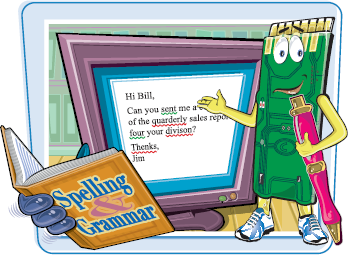
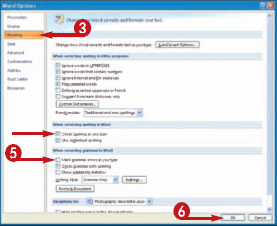
By default, Word automatically checks for spelling and grammar problems. Misspellings appear underlined with a red wavy line. Potential grammar errors are underlined with a green wavy line.
Check Spelling and Grammar
CORRECT A MISTAKE
The menu that appears shows possible corrections.
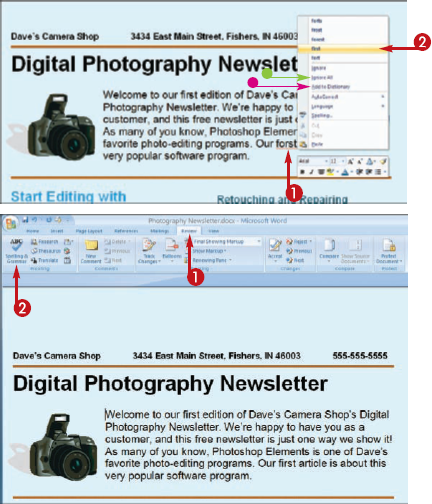
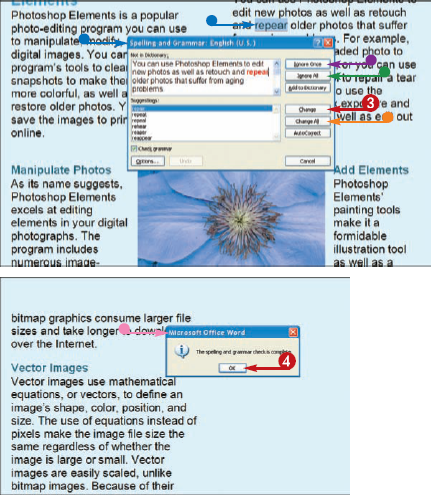
RUN THE SPELL CHECKER
To check only a section of your document, you can select the section before activating the spell check.
You may have already noticed the AutoCorrect feature working as you typed in a document. This feature performs corrections automatically. Although AutoCorrect comes with a list of preset misspellings, the list is not comprehensive. To speed up your own text entry tasks, you can add your own problem words to the list.
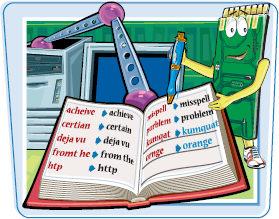
You can use the AutoCorrect feature to quickly correct words that you commonly misspell. For example, if you continually mistype the same term, you can add the word to the AutoCorrect dictionary. The next time you mistype the word, AutoCorrect fixes your mistake for you.
Work with AutoCorrect
ADD A MISSPELLING
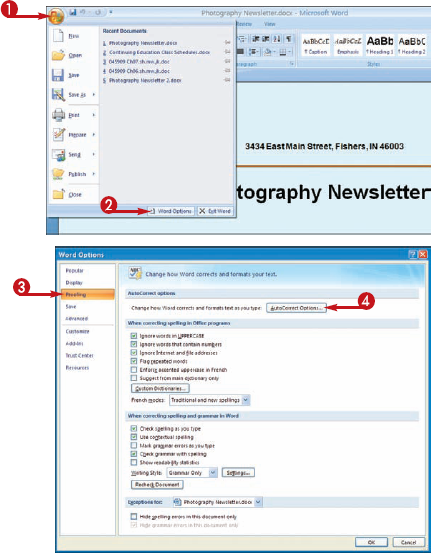
The Word Options dialog box appears.
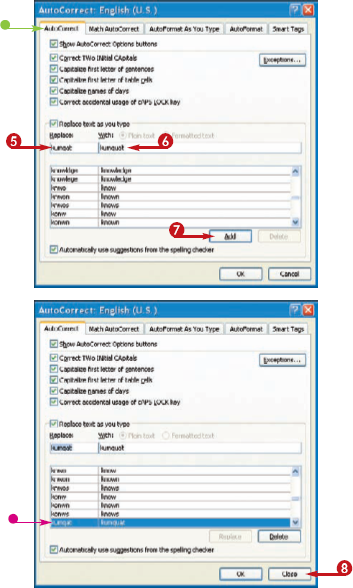
Be sure to type the word exactly as you normally misspell it.
You can repeat Steps 5 to 7 to add more words to the list, as needed.
The next time that you misspell the word, AutoCorrect corrects it for you.
Note
If you type text that you do not want to be corrected, press
Note
How do I remove or edit a word from the AutoCorrect list?
Open the AutoCorrect dialog box as shown in this task and display the utoCorrect tab. Click the word that you want to remove, and then click Delete. To edit a word, select it from the list and make your change to the Replace or With text fields. Click OK to exit the dialog box and apply your changes.
Can I customize the AutoCorrect feature?
Yes. You can select or deselect search options for AutoCorrect, such as typing two initial caps or capitalizing the first letter of a sentence. To control any of the AutoCorrect options, you must first open the AutoCorrect dialog box, as shown in the steps in this task. You can find the options in the AutoCorrect tab. You can also turn the AutoCorrect feature off by clicking the Replace text as you type box (
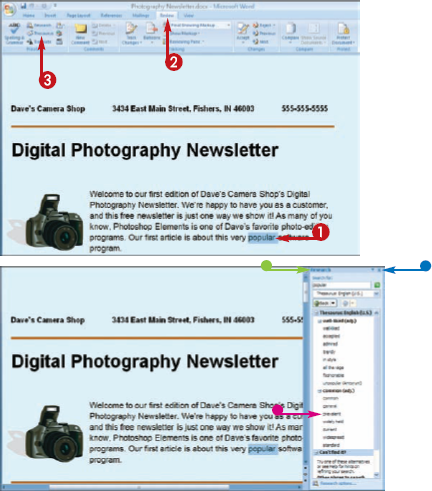
You can use the Word Thesaurus to help you find just the right word to use in your document. The Thesaurus is just one of several research tools that you can use to build better documents.
Use the Thesaurus
Check Your Document for Hidden or Personal Data
Before sending or sharing your documents with others, you can check them over for different types of hidden or personal data. When you save a document, certain hidden information, called metadata, is saved with the file. This information can include data about your company or other information that you may not want made public. By removing metadata, you can keep your file secure.

Check Your Document for Hidden or Personal Data
The Document Inspector dialog box appears.
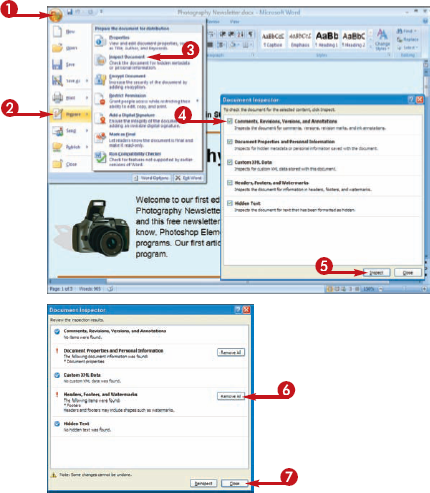
The Document Inspector checks the document and displays any inspection results.
If you work in an environment in which you share your Word documents with others, you can use the track and review features to help you keep track of who adds changes to the file. For example, you can see what edits others have made, including formatting changes and text additions or deletions.
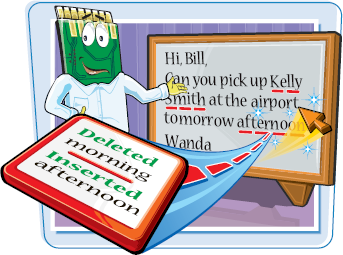
The tracking feature changes the color for each person's edits, making it easy to see who changed what in the document. When you review the document, you can choose to accept or reject the changes.
Track and Review Document Changes
TURN ON TRACKING
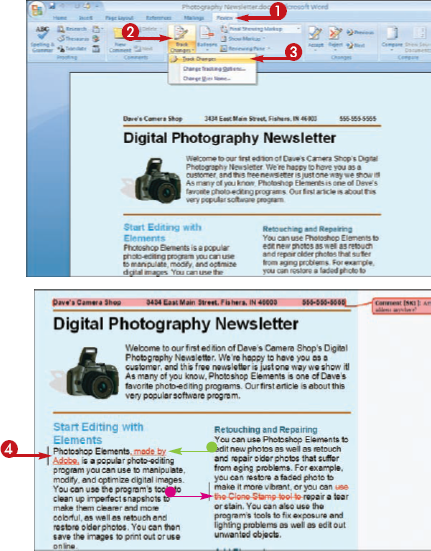
Word activates the Track Changes feature.
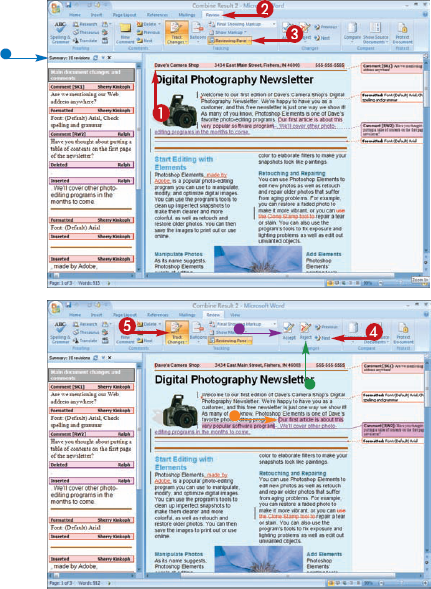
REVIEW CHANGES
The Reviewing pane shows each person's edits, including the user's name and when they added any edits and comments.
Note
How can I customize the markup options?
You can customize what color appears for your edits by using the Change Tracking Options dialog box. On the Review tab, click the Track Changes button, and then click Change Tracking Options. This opens the Track Changes dialog box, where you can make changes to the tracking color, formatting, and more.
Can I control which markup elements appear in a document?
Yes. You can click the Show Markup button on the Reviewing tab to select which elements you want to include in the review. For example, you may want to hide comments or review marks for a particular user.

You can e-mail a document without leaving the Word program. If you use Microsoft Outlook as your e-mail editor, you can use the program's features to insert e-mail addresses and send a Word document as an e-mail message.
You may need to log on to your Internet account before sending an e-mail message from Word.
E-mail a Document
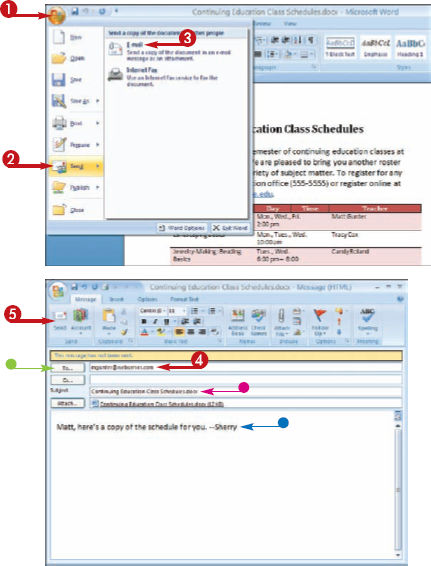
An Outlook message window appears with the current document attached.
When typing more than one e-mail address, use a semicolon (;) to separate them.
Outlook sends the message.
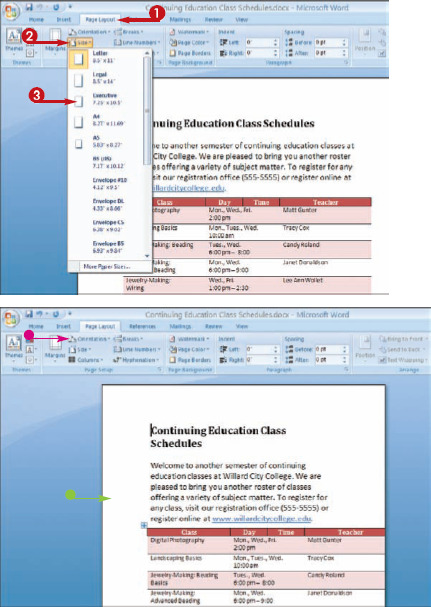
You can change the size of your document page to print to a particular size of paper. For example, if you need to print your memo on legal size paper, you can use the Page Setup dialog box to switch to the Legal or Executive paper size. By default, Word sets the paper to Letter size.
Change Paper Size
Note
To learn more about printing with Office, see Chapter 2.
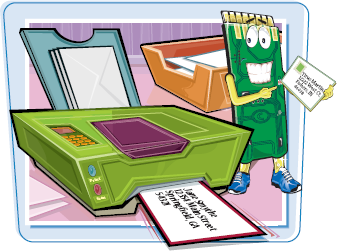
You can create instant envelopes in Word based on the information in a document. For example, when typing a letter, you can use the address from the document to create and print an envelope.
Print an Envelope
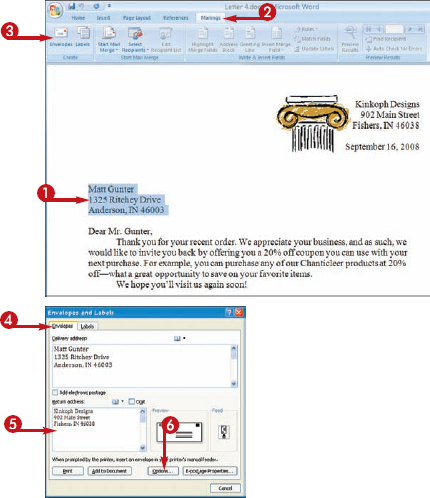
The Envelopes and Labels dialog box appears.
To accommodate preprinted envelopes, Word does not display a return address.
The Envelope Options dialog box appears, displaying the Envelope Options tab.
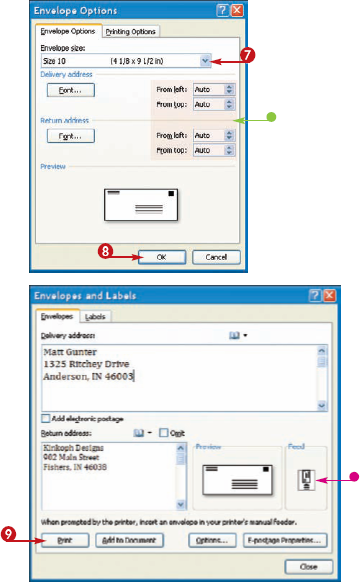
Word sends your envelope text to the printer.
Note
See your printer documentation to learn how to print envelopes
Note
Can I save the envelope information for later use?
Yes. You can save the delivery and return address information along with the document to use at a later time. Click Add to Document in the Envelopes and Labels dialog box. The next time you open the file and the dialog box, the information is already entered and ready to print.
You can use the Envelopes and Labels dialog box to print labels. From the Mailings tab on the Ribbon, click the Labels button to open the Envelopes and Labels dialog box with the Labels tab displayed. You can create an address label, and print either one or multiple copies of the label. You can choose to print the return address or the delivery address on your label. You can also choose a label type by clicking Options, and then selecting a label size from the Label Options dialog box.
