If you haven't worked much with VBA, you may want to brush up on some of the basics before tackling the later chapters in this book (Chapters 14–18). The purpose of this appendix is to provide a high-level overview of some of the fundamental concepts and techniques demonstrated in the latter chapters. Bear in mind that because the focus of this book is data analysis, this appendix provides only an introductory look at VBA. If you are interested in an in-depth look at programming Access VBA, consider picking up one of the following titles:
Beginning Access 2007 VBA, by Denise Gosnell (ISBN: 0-470-04684-8)
Access 2007 VBA Programming For Dummies, by Alan Simpson (ISBN: 0-470-04653-8)
These books offer a solid introduction to VBA that is ideal for novice Access programmers.
There is no better way to learn than hands-on experience. So instead of reading paragraph after paragraph of terms and definitions, you will cover some of the basics of VBA in 10 steps!
Have you ever found code on the Internet that you could supposedly copy and paste into Access to do something wonderful, but you didn't know where to paste it? Well, knowing where to put your code is the first step in programming. In Access, VBA code is contained in a module.
Here are the types of modules you can use:
Standard Modules: This type is the most common, letting you store code you can use anywhere within your database.
Form and Report Modules: These types of modules store code that you can only use within the form or report to which they belong.
Class Modules: These modules are for hardcore programmers who want to create and define their own custom objects.
To create a module, do the following:
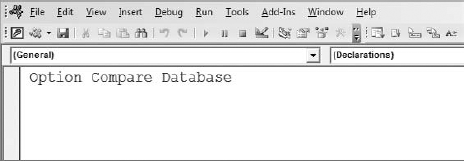
Start a new standard module by going to the application ribbon and selecting the Create tab.
From there, select the Macro dropdown menu, and then select Module if you are using Access 2007. If you are using Access 2010, the Module button is directly on the Ribbon.
At this point, your screen should look similar to Figure A-1.
A function is a set of instructions that returns a value. You can think of a function as a defined task that contains the individual actions that Access needs to perform to reach an answer or goal.
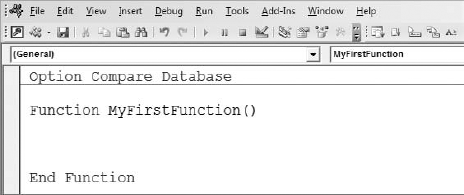
To create a function, go to the first empty line and type:
Function MyFirstFunction
This creates a new function named MyFirstFunction. After you press Enter on your keyboard, Access adds a few things to your code. As you can see in Figure A-2, a set of parentheses and the words "End Function" are added automatically.
A function's utility and purpose in life is defined in large part by its procedures. Procedures (sometimes called routines) are the actions Access takes to accomplish an objective.
For your first procedure, follow these steps:
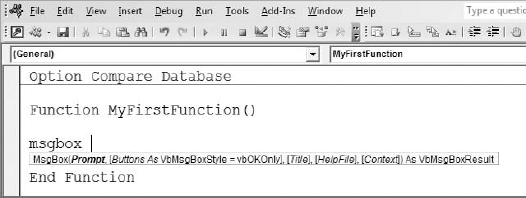
Call a message box. Type
MsgBoxFunction MyFirstFunction()
MsgBoxEnd FunctionAfter you press the space key on your keyboard, you see a tool-tip popup, shown in Figure A-3, which shows you the valid arguments for
MsgBox. This useful functionality, called IntelliSense is a kind of cheat sheet that allows you to quickly grasp the methods, properties, and arguments involved in the object or function you are working with. IntelliSense is typically activated when you enter an object or a function and then follow it with a space, open parenthesis, period, or equal sign.Finish the
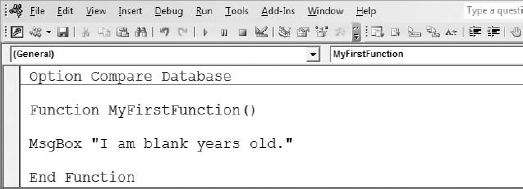
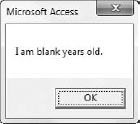
MsgBoxfunction by typingI am blank years old. At this point, your function should look like the one shown in Figure A-4.
To test your function, simply place your cursor anywhere inside the function and press the F5 key on your key board. If all goes well, you should see the message box shown in Figure A-5.
A variable is a kind of placeholder for a data type. When you declare a variable, you are telling Access to set aside memory to store a value. The amount of memory allocated depends on the data type.
Tip
To get a list of the data types available to you along with the amount of memory that each data type requires, activate Access's Help System and enter Data Type Summary in the Search for: input box.
Your next question should be, "How do I know which data type to use?" The data type itself depends on what you are trying to accomplish with the variable. For example, in this scenario, you want to declare a variable that will capture your age. Because age is a number, you use the Integer data type.
To declare a variable, you must use a Dim statement. Dim, short for dimension, explicitly lets Access know that you are declaring a variable. It is good programming practice to declare all your variables before you start your procedure.
Declare a new variable called MyAge as an Integer data type:
Function MyFirstFunction()
Dim MyAge as Integer
MsgBox "I am blank years old."
End FunctionOnce you have memory set aside for a variable, you can assign a value to it. To assign a value to a variable, simply indicate the value to which it is equal. Here are some examples:
MyVariable = 1: This assigns a 1 to the variable called MyVariable.
MyVariable = "Access": This assigns the word "Access" to MyVariable.
MyVariable = [Forms]![MainForm].[TextBox1]: This sets the value of MyVariable to equal the value in the TextBox1 control in the form called MainForm.
MyVariable = InputBox("User Input"): This sets the value of MyVariable to equal the value of a user's input using an InputBox.
In this scenario, you will use an InputBox to capture an age from a user and then pass that age to the MyAge variable. You will then pass the MyAge variable to the message box. You can see the distinct flow of information from a user to an Access message box. Your code should look similar to the code shown here.
Function MyFirstFunction() Dim MyAge as IntegerMyAge = InputBox("Enter your Age")MsgBox "I am "& MyAge & "years old."End Function
Note
The MsgBox is broken into three sections separated by ampersands (&):
"I am "(The first two words in the message)
MyAge (The variable that will return your age)
"years old." (The last two words in the message)
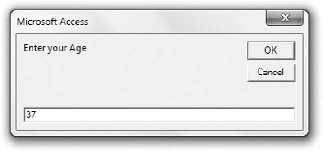
Go ahead and test your function. To do so, place your cursor anywhere inside the function and hit the F5 key on your keyboard. If you do everything correctly, you should see an input dialog box, shown in Figure A-6, asking you for your age.
You should get into the habit of compiling your code after you create it. Compiling has two major benefits. First, when you compile a procedure, Access checks your code for errors. Second, Access translates your code from the text you can read and understand to a machine language that your computer can understand. To compile your code, go to the application menu and select Debug
Now that you have built your first function, you should save it. Go to the application menu and select File
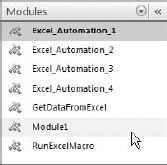
If your module is new, a dialog box activates, asking you to give your module a name. Keep the deb01fult name (Module1) and click OK. Close your module and look in the Navigation Pane shown in Figure A-7 to see it in the Modules collection.
The benefit of building your VBA procedures in standard modules is that you can run them from anywhere within your database. For example, you can run your newly created function in a macro by simply calling your function using the RunCode macro action.
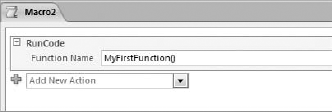
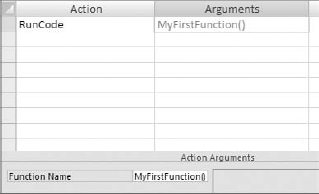
Create a new macro and add the RunCode macro action. The function name you are calling is MyFirstFunction(). When your Macro window looks like the one shown in Figure A-8, save the macro and run it.
If you are running Access 2007, your Macro window will look like Figure A-9.
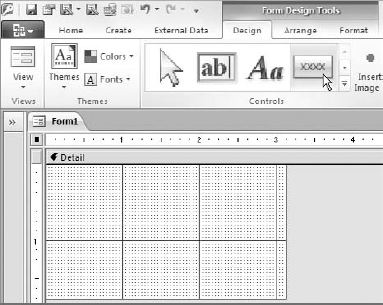
You can also call your functions from a form. Start by creating a new form. You can do this by selecting Blank Form on the Create tab, as demonstrated in Figure A-10.
On the Design tab, select View
Note
If the Command Button Wizard activates, click Cancel to close it. You do not need that wizard for this exercise.
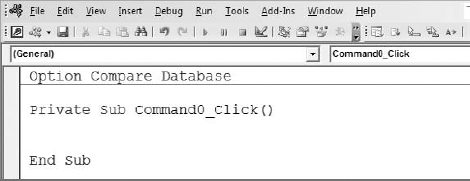
Right-click your newly created command button and select Build Event. This activates the Choose Builder dialog box. Select Code Builder, and you are taken to the form module, shown in Figure A-12. A form module serves as a container for event procedures managed and executed by the form or its controls.
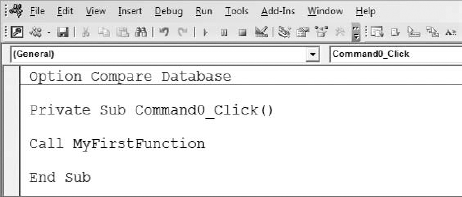
Access is an event-driven environment, which means that procedures are executed with the occurrence of certain events. For example, in Figure A-12, you will notice the procedure's name is Command0_Click(). This means that you are building a procedure for the button you added—which happens to be named Command0, and this procedure will fire when the control is clicked. You can execute your function from here by calling it. Figure A-13 demonstrates how this is done.
Now you can close the VBA editor (File
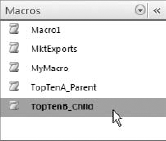
One of the most beneficial functionalities in Access is the ability to convert a macro to VBA code. To demonstrate how this is done, click Macros in the Database Window and highlight the TopTenB_Child macro, as shown in Figure A-14.
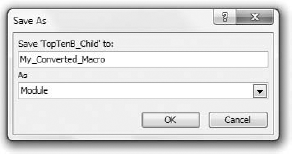
Go to the application menu and select the File
This activates the Save As dialog box. Here, you can indicate that you want to save this macro as a module and then name the module. Figure A-15 demonstrates how to fill in this dialog box.
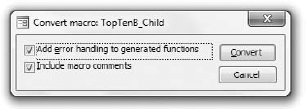
Next, the dialog box shown in Figure A-16 gives you the options of adding comments and error handling to the converted VBA. In this case, you want both, so simply click the Convert button.
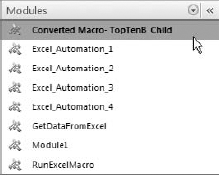
When the conversion is complete, select Modules in the Database window and click the module named Converted Macro: TopTenB_Child, as shown in Figure A-17.
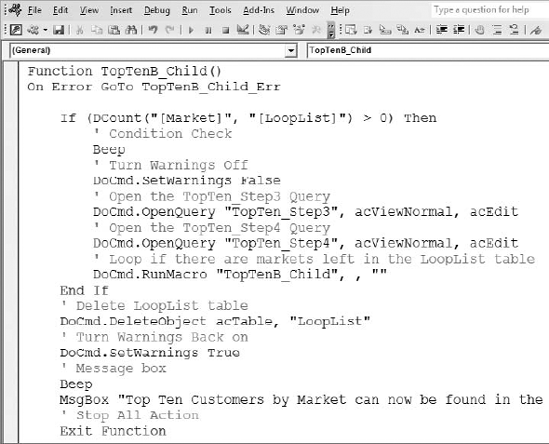
As you can see in Figure A-18, Access has converted all the macro actions in the TopTenB_Child macro to a VBA function complete with comments and error handling.
Keep in mind that this is not just a cool way to get out of writing code. This is a personal tutor! Look at Figure A-18 again. With this one converted macro, you get a firsthand look at how an If statement works, how to call queries from code, how to call macros from code, and how to handle errors. You can create a wide variety of macros and then convert them to VBA to learn about the syntax used for each action and to experiment by adding your own functionality to them. For many Access developers, this was the first step to long programming careers.

