
Chapter 7
Having Fun with Siri: Music, Podcasts, Social Networking, and More
In This Chapter
![]() Having Siri play (and even shuffle) your favorite music
Having Siri play (and even shuffle) your favorite music
![]() Controlling your music via your voice
Controlling your music via your voice
![]() Asking Siri to find and play podcasts
Asking Siri to find and play podcasts
![]() Using Siri for posting to Facebook and Twitter
Using Siri for posting to Facebook and Twitter
![]() Locating your friends via the Find My Friends service with Siri
Locating your friends via the Find My Friends service with Siri
Ah, Siri, are there no limits to your awesomeness?
Earlier chapters in this book look at the many practical ways Siri can help you out, be it finding information, e-mailing messages for you, reading your texts aloud, crunching complicated mathematical problems, or helping you find a good place to eat.
In the final two chapters of this handy guide to all things Siri, you take a look at a few of her lighter — yet still significant — abilities.
Specifically, Siri on your iPhone, iPad, or iPod touch can help you find, play, and control your music. Although having a few thousand songs in your pocket may be cool, navigating through it all could be a pain in the MP3.
And did you know that Siri can help you post to your favorite social media sites, including Facebook and Twitter? Apple recently added this functionality to Siri, so I show you how to take advantage of it. You’ll be tweeting and posting profile updates in no time.
Finally, you take a look at the Find My Friends app and find out how using your voice through Siri can help you locate your peeps in a much quicker and more intuitive manner.
So, put your feet up, lean back, and flip though this chapter on having fun with Siri. Oh, and in case you haven’t seen it yet, you’ll absolutely love the next chapter on really pushing Siri’s knowledge, humor, and resolve to the test with close to 40 ridiculously entertaining things you can try with Siri. (I know you’re tempted to flip to that chapter now, right? Resist, friend, because there’s a ton of great Siri stuff in this chapter, too.)
Siri Does Music
One of the more common uses for your smartphone is playing music. In fact, all iOS devices rock at this, if you can pardon the pun, as these devices smoothly synchronize with iTunes software on your PC or Mac. You can do this via a USB cable, Bluetooth, or even over Wi-Fi or cellular connectivity thanks to Apple’s iCloud service.
iTunes is also the world’s biggest digital music store to preview and purchase new content, which you can access on your computer or the iPhone, iPad, or iPod touch itself.
But Siri takes music management, playback, and control to the next level by letting you use your voice instead of your fingers to play a track or playlist, shuffle your tunes, pause and jump between songs, and so on.
The following sections take a look at some of the basic music management features you can try out using Siri.
Playing a particular song (or album)
Say you’re itching to hear a song in your collection that’s been stuck in your head all day. Or maybe you want to give your favorite band’s new “Greatest Hits” album a spin from beginning to end? All you need to do is ask Siri (nicely) to play an individual song or album:
1. Press and hold the Home button.
The short chime means Siri is listening for your command.
2. Tell Siri what you’d like to listen to.
In my case, I told Siri, “Play ‘One Day’.” Siri confirmed my request, and I heard and saw confirmation that “One Day” by Matisyahu was playing. (See Figures 7-1 and 7-2 — and yes, you do need the song on your iOS device to listen to it!)
That’s it! Think of a song you want to listen to and ask Siri to play it. It’s that simple.

Figure 7-1: Ask Siri what song you’d like to hear by saying “Play” first. You can also ask Siri to play an album.

Figure 7-2: After Siri confirms the request, the screen flips to the song playing.
 If your friends, family members, or colleagues don’t have an iPhone, iPad, or new iPod touch (therefore, no Siri), they might still be able to use their voice to control their music. Aptly named Voice Control, this Apple feature is bundled in the iPhone 4S, Phone 4, iPhone 3GS, and iPod touch (3rd and 4th generation). More info is at
 www.apple.com/ipodtouch/features/voice-control.html.
Siri also lets you ask to play a particular album, if you happen to have it on your iPhone, iPad, or iPod touch. For example, you can say play Adele’s album 21 or Best of the Beast, by Iron Maiden. (That’s probably the only time you’ll see Adele and Iron Maiden in the same sentence!) Just like you’d ask to play a song, you can play an album from a particular artist (or a compilation album with various artists).
Playing songs from the same artist
Siri can be used to play songs from a particular artist you like. Say you’re feeling mellow and want to kick back with some Michael Bublé or maybe chill out to some old Pink Floyd tracks? Or on the flipside, maybe you want something more upbeat to pump you up as you’re getting ready to go out on the town?
Whatever the scenario, here’s how to hear music from one artist:
1. Press and hold the Home button.
2. Begin speaking after the tone, telling Siri what artist you want to listen to.
For example, say, “Play Katy Perry,” or you can say, “Play songs by David Guetta.”
After Siri confirms your request, she’ll start playing songs by that artist. (See Figures 7-3 and 7-4.)
Playback will be random, by the way. The first time I asked Siri to play songs by David Guetta, it played “Sweat,” but the second time I asked Siri to do the same, the song “Love Is Gone” began playing.

Figure 7-3: Want to hear a particular band or artist? Tell Siri what you’re in the mood for.

Figure 7-4: After confirming your request, you’ll hear a random song by that artist.
Music and lyrics
Did you know that you can add lyrics to your music on your iPhone? Here’s how:
1. On your computer, launch your favorite search engine and type in the name of the song you have in iTunes, followed by the word “lyrics.”
You should see a few results.
2. After finding the lyrics on a website, highlight the words, right-click, and choose Copy from the contextual menu that appears (or simply press Ctrl+C on a Windows PC or ![]() +C on a Mac). But please respect copyrighted information.
+C on a Mac). But please respect copyrighted information.
3. Open iTunes on your computer, find the same song you found lyrics for, right-click the song name, and then choose Get Info from the menu that appears.
4. Click the Lyrics tab at the top of this window.
5. Paste (or press ![]() +V/Ctrl+V) the text from the website into the Lyrics window in iTunes.
+V/Ctrl+V) the text from the website into the Lyrics window in iTunes.
You should see the words appear in this window.
6. Click OK.
If you have album art for that song, the lyrics will show up on top of it when playing back on your device.
7. Synchronize your iPhone (or iPod touch) with your PC or Mac.
When you play that track on your device, you’ll see the lyrics appear on the screen. Follow along or use your finger to flick up or down to go backward or forward, respectively.
Launching a playlist using Siri
Okay, so you now know how to play a song or music from an artist, but what if you want to hear one of your playlists? Ask and you shall receive. Here’s how to pull this particular trick off:
1. Press and hold the Home button.
2. Begin talking after the familiar Siri chime, telling Siri to play a playlist, by name.
For example, say, “Play Road Trip playlist,” or “Play playlist called Dance Tunes.”
Siri confirms your selection request and launches the first song on the playlist. (See Figures 7-5 and 7-6.)

Figure 7-5: I asked Siri to play my Top 40 UK Tracks playlist.

Figure 7-6: Siri complies and starts with the first song in the playlist.
As you can see in Figures 7-5 and 7-6, you don’t have to give Siri the complete name of the playlist. A word or two is enough, and Siri will do the rest. Here, the official name of the playlist is VA (Various Artists) – Top 40 UK Tracks, but as you see, I only asked Siri to play the “UK Tracks” playlist. Cool, no?
Playing music from one genre
The fun continues. Siri can play music of a particular genre for you, if you prefer. Just tell Siri the kind of music you’re seeking — such as rock, blues, or reggae — and your personal assistant will deliver the goods.
For example:
1. Press and hold the Home button.
2. Wait for that short chime that indicates that Siri is ready to take requests.
3. Instruct Siri to play a genre of music.
You can ask in different ways, such as, “Play blues,” or “Play some hip-hop music.” (See Figures 7-7 and 7-8.)
Siri repeats your request, reaches into your music library, and begins playing some music that matches the genre.

Figure 7-7: Ask Siri to play a genre, and she’ll launch relevant tunes right away.

Figure 7-8: Siri decided to play a Jay-Z charity track when I asked for some hip-hop.
Music you buy from iTunes will already have the Genre field populated (such as Classical, Jazz, or Calypso). If you acquired your music elsewhere and imported it into iTunes, you may need to fill in the Genre field yourself. To do this, open up iTunes and then click Music at the top of the Source pane on the left so you can see what you have in your Music library. Now, right-click a song (or album) you want to add genre information to and select Get Info from the contextual menu that appears. Using the Info tab of the iTunes dialog that pops up, you can now select the genre you want from the Genre pull-down menu at the bottom left (or type in your own made-up genre, if you’re feeling creative).
Shuffling your music
Not sure what you feel like listening to? Tell Siri you want to shuffle up songs to hear them in a random order.
Okay, so this might not fare well to those enjoying a linear classical music symphony like Beethoven’s 5th or maybe a concept album by Genesis, but for those who don’t care what order the music plays in, you can shuffle it up by asking Siri to do it for you.
In fact, there are different ways to ask Siri to shuffle music. The following are a few things to consider:
![]() To ask Siri to shuffle your entire music collection: Say, “Shuffle my music.” (See Figure 7-9.)
To ask Siri to shuffle your entire music collection: Say, “Shuffle my music.” (See Figure 7-9.)
![]() To ask Siri to shuffle music from one album: Say, “Shuffle the album Viva la Vida.”
To ask Siri to shuffle music from one album: Say, “Shuffle the album Viva la Vida.”
![]() To ask Siri to shuffle music from one artist: Say, “Shuffle Coldplay.” (See Figure 7-10.)
To ask Siri to shuffle music from one artist: Say, “Shuffle Coldplay.” (See Figure 7-10.)
![]() To ask Siri to shuffle music from one playlist: Say, “Shuffle Mellow Out playlist.”
To ask Siri to shuffle music from one playlist: Say, “Shuffle Mellow Out playlist.”
![]() To ask Siri to shuffle music from a particular genre: Say “Shuffle pop.”
To ask Siri to shuffle music from a particular genre: Say “Shuffle pop.”
You get the idea! To quote LMFAO, “Everyday I’m shufflin’.” Get it? Ha, ha. Ok, sorry.
Controlling your music
After all this talk about what music you want to hear, it’s time to look at how you want to hear it. (Yes, with Siri you can now control your music playback using your voice — no big surprise there, right?)

Figure 7-9: If you’re unsure what to listen to, instruct Siri to shuffle all your tracks.
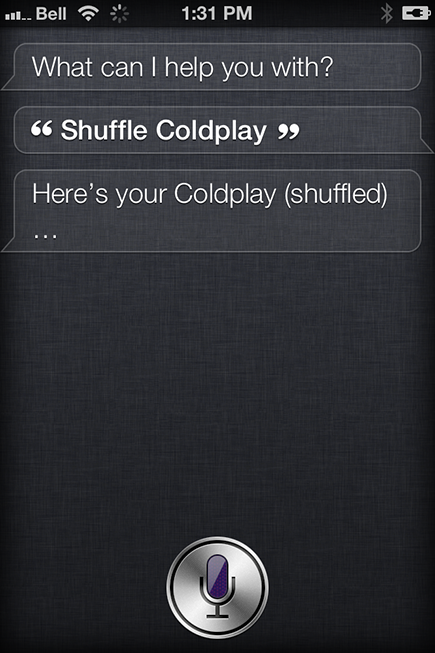
Figure 7-10: Having a Coldplay fix but don’t feel like limiting the songs to one album? Tell Siri to shuffle it up.
For example, instead of touching the controls for basic operations — such as starting and pausing playback, skipping forward or back, and so on — you can have Siri do it for you.
Here’s a short list of the commands you can give to take control over your tunes, via your voice. Press and hold the Home button and say:
“Play,” to play the track highlighted.
“Pause,” to pause the track you’re listening to.
“Skip,” to go to the next track.
“Next,” to (also) go to the next track.
“Previous song” or “Play previous song,” to have Siri play the previously played song (see Figure 7-11).
“What’s playing?” or “What song is this?” to have Siri tell you (and show you) the name of the song and artist.
“Who sings this song?” or “Who is this song by?” to find out who sings that particular song (see Figure 7-12).
“Play Similar Music” to have Siri tap into iTunes’ “Genius” feature — if you’ve already enabled it within iTunes on your computer — to come up with music on your iPhone, iPad, or iPod touch that has the same vibe as the song you’re playing now. It’s not 100 percent, mind you, but it’s fun to experiment with.
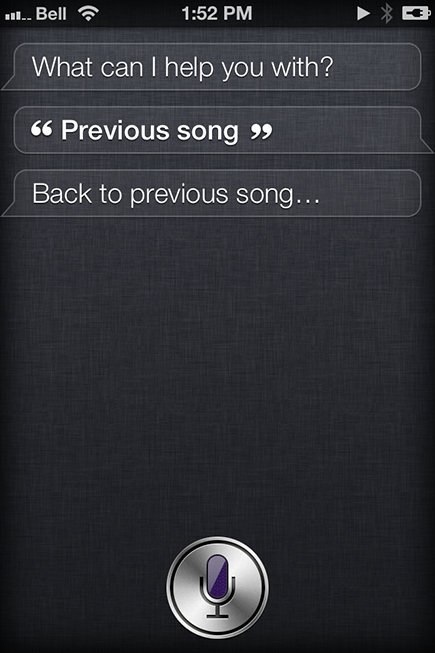
Figure 7-11: Skip back to a previous track by telling Siri what to do.
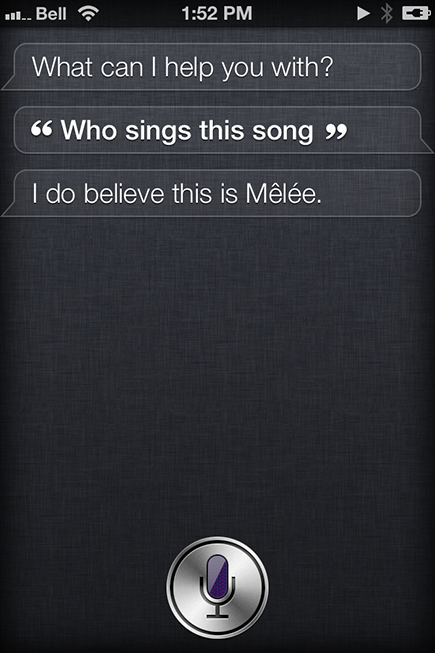
Figure 7-12: Love this song but can’t recall who sings it? Ask Siri for help!
 There are a number of ways to use Siri for music enjoyment — but you don’t always have to press and hold the Home button. Remember, in the Settings (under Siri) you can opt to call on Siri by holding the iPhone up to your ear. Or you can press and hold the small button on the white earphone cord on your iPhone, iPad, or new iPod touch; if you use a Bluetooth headset, you can press and hold the Talk button.
Play podcasts, too!
The last part of this music section is devoted to podcasts. Yep, you guessed it — Siri can help you launch your favorite audio podcasts.
All you have to do is ask Siri to play your podcasts — and it turns out you can ask to do this a couple of different ways.
For example:
1. Press and hold the Home button.
2. After the chime, tell Siri what podcast you want to listen to.
To play all your podcasts, say something like, “Play my podcasts” (see Figure 7-13); to play a specific podcast, say something like, “Play iTunes Celebrity Playlist podcast.” (See Figures 7-14 and 7-15.)
Siri confirms your request and starts playing the podcast.

Figure 7-13: Siri likes podcasts, too! Say what you’d like to listen to and then turn up the volume!
What’s that? You want to know if Siri will play a specific podcast episode from your collection? But of course!

Figure 7-14: Say “Play all podcasts” or ask for a specific one, like this.

Figure 7-15: Press the Music icon to open up the podcast window — if you want to see related visuals.
Here’s how:
1. Press and hold the Home button.
2. Tell Siri what exact podcast episode you want to listen to.
You could tell Siri to play “The Tell-Tale Heart” episode (based on the creepy Edgar Allan Poe tale) from Humphrey OTR’s Horror Stories podcast. (See Figures 7-16 and 7-17.)
Siri confirms your request and starts playing the podcast episode.

Figure 7-16: Tell Siri what podcast episode you want to hear.

Figure 7-17: Siri will take your words and look for the exact podcast episode. Success!
Posting to Social Networks
Okay, you’ve looked at how Siri can help you manage your music library, but now it’s time to shift gears and investigate how Siri can help you stay connected with those who matter.
Ah yes, social networking.
Seventy-three percent of smartphone owners use a social networking app on a daily basis and an additional 19 percent are at least weekly users, according to a summer 2012 survey conducted by Lightspeed Research.
And if you’re reading this, chances are you’re one of the many who like to check in, post, tweet, like, tag, poke, and message.
Well, now Siri lets you post directly to Facebook and Twitter, two of the most popular social networks on the planet.
Prior to Siri’s fall 2012 update, iPhone users needed to use a workaround to post tweets and Facebook status updates with their voices. It involved setting up an account with a texting option for both sites and then sending a message to post words. It was a bit of a pain, to be honest. Thankfully, Apple now lets you use Siri to post to Facebook and Twitter by using your voice.
There isn’t much more you can do than post an update, wall post, or tweet, however (see Figure 7-18), but doing so without having to type a word is incredibly fun and convenient.
 Siri’s speech-to-text transcription is quite accurate, but it’s not perfect. Therefore, be sure to check for spelling mistakes and “autocorrect” suggestions before you accept Siri to post to Facebook or Twitter! It takes a second or two to glance at the words on the screen prior to sending it out for the world to see, so be careful!
Posting to Facebook
If you’re one of the nearly 1 billion people on Facebook — yes, you read that correctly — then you might want to update your status using Siri instead of (or in addition to) typing in an update.
Figure 7-18: Siri’s Facebook functionality is limited, but perhaps Apple will add more in the months and years to come.
Before you get going, you need to ensure that you’re signed into Facebook on your iPhone, iPad, or iPod touch. Luckily, doing so is quite easy, and it’s only required once. Figure 7-19 shows what happens if you try to post to Facebook without signing in first, and Figure 7-20 shows what you’re allowing Facebook to access on your Apple device.

Figure 7-19: Ensure that you’re signed into Facebook on your iPhone, iPad, or iPod touch. Siri tells you if you’re not and shows you where to tap to start.
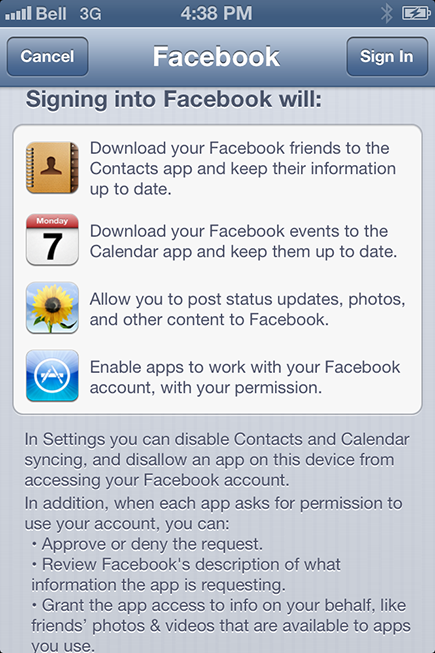
Figure 7-20: Read through what you’re giving Facebook permission to access on your iOS device, which includes contacts, calendar, apps, and photo integration.
Now you’re ready to test Siri’s Facebook support.
Status update
You can start with a status update, which essentially tells your social network what’s on your mind, where you are, or what you’re doing.
How to post a Facebook status update through Siri:
1. Press and hold the Home button on your iPhone, iPad, or iPod touch.
The familiar Siri chime sounds, and you can see the purple microphone icon await your command!
2. Tell Siri what you want to post to your Facebook status by beginning with the words “Post to Facebook.”
Say whatever you want to post to your Facebook status, which lets all your friends and family (and perhaps colleagues) see what’s on your mind. See Figure 7-21 for what you see right after you speak and Figure 7-22 when you can edit the words, if you like.
3. Review what Siri has written for you. Tap the text to make changes, if needed.
Siri will say something like “Here’s your new Facebook status. Ready to post it?”
4. Say “Yes” or tap the Post button.
Otherwise, say “No,” tap the Cancel button, or press Home to exit out of the app.

Figure 7-21: Here I tell Siri what to post as my Facebook status update. You can see what you said on your screen. Now review your words.

Figure 7-22: Tap to edit your words with your fingertips — before you post the status update.
Siri also lets you say punctuation. In Figure 7-22, for example, I verbally said “period,” “question mark,” “exclamation mark,” “comma,” and “quote” (twice). It may feel a little odd at first, but as you can see, it looks proper when typed out — which is how your friends will read it on Facebook.
You can also say to Siri “Post to Facebook,” and that’s it, to start. After a short pause, Siri asks you what you want to post as your status update. It’s just easier and faster to say the Facebook post immediately after you instruct Siri that you want to do it (for example, “Post to Facebook: Off to see the new James Bond flick tonight. Anyone want in?”).
Wall posts
A wall post on your Facebook page goes on your public wall instead of where your status update goes.
Here’s how to pull it off:
1. Press and hold the Home button on your device.
“Ding”! Ah, that Siri sound means that you’re good to go.
2. Tell Siri what you want to post to your Facebook wall, beginning with the phrase “Write on my wall” or “Post to Facebook wall.”
Now, say something you want to appear on your Facebook wall — and remember this information is public, just like your status update. (See Figures 7-23, 7-24, and 7-25 for examples.)
3. Review what Siri has written for you before you approve it.
If you like what you see and everything is spelled correctly, say “Yes,” or tap “Post.”
Want to see what you posted? You can open Facebook with your voice. Simply press and hold the Home button on your iPhone, iPad, or iPod touch and say “Open Facebook” and the next thing you know, the app will load and you’ll be looking at your Facebook profile. Neat, huh?

Figure 7-23: Tell Siri what you’d like to post to your Facebook wall. You’ll see what you said on the iPhone, iPad, or iPod touch screen.

Figure 7-24: Now take a look to ensure that it’s accurate. You can tap the words to edit them, if need be.

Figure 7-25: Here’s what it looks like on the Facebook wall (on an iPhone). Notice it says “via iOS.” Naturally, the interface will look a little different on an iPad or personal computer.
Posting to Twitter
Apple didn’t offer any Siri functionality for Twitter users during its first year (on iPhone 4S). Siri is maturing (they grow up so fast!) and is now available on multiple devices, so you can use your voice to post tweets.
In fact, you can even add a hashtag to your tweet and broadcast your location, too. But first, you need to go over the basics.
Here are the step-by-step instructions you need to follow to post to Twitter:
1. Press and hold the Home button on your iGadget.
After the chime, say “Post to Twitter,” followed by what your tweet is. See Figure 7-26 for an example.
After it’s been posted, Siri will tell you verbally, “OK, I sent it.” See Figure 7-27 for what the tweet looks like on Twitter.
2. Review what Siri wrote for you.
Siri will say something like “Here’s your tweet. Ready to send it?”
3. Say “Yes,” or tap Send.

Figure 7-26: Tell Siri what to tweet, and you’ll get a chance to preview it first.

Figure 7-27: Here’s the Twitter app on iPhone. You can see my tweet was just posted live because it’s on top. Cool, huh?
Siri will then Send your tweet to Twitter, and your followers will be able to see it right away.
Okay, so say you want to tweet something out — including your location. Twitter users know geotagging your whereabouts is optional, because you can simply tap the Location icon in your tweet to let everyone know from where your tweet originated. (Your iPhone and iPad are location-aware thanks to their GPS, cellular, and Wi-Fi radios.)
With Siri, you can post something to Twitter by using your voice and also tag your location at the same time.
All you need to do is this:
1. Press and hold the Home button on your iPhone or iPad.
After you hear Siri’s magical chime, you’re ready to tweet using your voice.
2. Say “Tweet with my location,” followed by what you want to tweet out.
See Figure 7-28 for an example.
3. Review what Siri has tweeted for your approval — before you send it to Twitter.
Look good? Sure you want to broadcast your location? Say “Yes” or “Send” to complete the task.
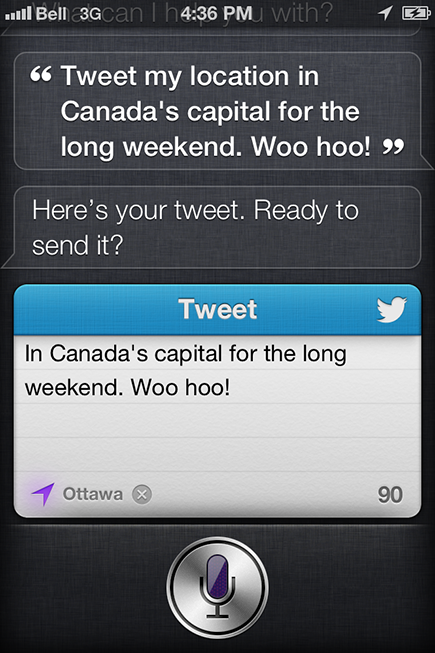
Figure 7-28: As you can see, I made a reference about being in Canada’s capital and at the bottom of the tweet it says “Ottawa.”
Adding a hashtag (#) symbol before a relevant keyword or phrase (no spaces) categorizes the tweet, so that it shows up more often in a Twitter search and joins other tweets related to that topic or keyword, like this:
Ever catch yourself telling your kids not to slam the door? #momquotes
Yes! U.S. grabbed yet another gold medal today! #2012olympics
Er, anyone know how to dry out a wet smartphone? #soembarassing
A hashtag can be used anywhere in the tweet — at the beginning, middle, or end — but most people use it at the end to put the content first.
And yes, you’re reading about it here in Siri For Dummies because you can instruct Siri to place a hashtag in your tweet, as well.
Here’s how to pull it off:
1. Press and hold the Home button on your iPhone, iPad, or iPod touch.
Begin speaking after the tone.
2. Start by saying “Tweet” or “Post to Twitter,” and say what you want posted to Twitter. At the end, say “hashtag,” followed by the keyword(s).
Within a moment, Siri shows you what you said — including the hashtag. See Figure 7-29.
3. If it looks good to you, when Siri asks you if it should be posted to Twitter, says “Yes” or tap (or say) “Send.”
Siri will tell you it’s done, and it’ll be live on Twitter.
You can combine these two Twitter-related Siri features together, such as “tweet my location,” followed by your tweet, and then say “hashtag [word or phrase].”
Not for lack of trying, but it doesn’t seem possible to add an “@” sign in a Twitter post via Siri. Twitter users often type “@,” followed by the person they want to see the post of on Twitter (such as a friend or celebrity). But if you say “at” while using Siri, it shows up in the tweet as “at” and not “@.” If you say “at sign,” it will successfully show you the symbol (@), but not put a space after your tweet — even if you say “space.” Ah well!
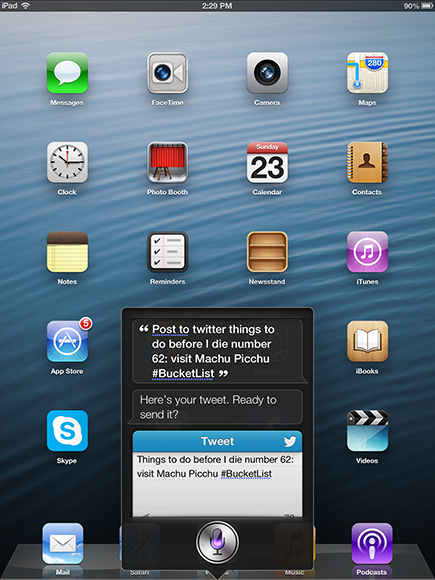
Figure 7-29: Follow your tweet with a relevant hashtag and when Siri shows it to you, you’ll see the familiar symbol (#) and the keyword(s) you used.
Using Your Voice to Find Your Friends!
Okay, with a heading like this, you might think I’m referring to yelling loudly to find where your friends are. Um, that might work at a movie theater or house party, but not when you’ve got buddies all over the state, country, or planet.
Instead, you might want to download and use Apple’s free Find My Friends app, which lets consenting users of iOS gadgets — namely, iPhone, iPad, and iPod touch owners — find one another on a map. It works on Macs, too.
Therefore, you can see who’s nearby to join you for coffee, if a colleague’s flight has landed, or if your tween-age daughter has made it home from school.
Find My Friends either taps into the device’s GPS signal to identify its geographical location or uses Wi-Fi to achieve the same effect if, say, you’re on an iPod touch or non-3G iPad model. The app requires iOS 5 or newer and an iCloud account to work — but both are free, at least.
Okay, the first step is to download the app from the App Store. Setting up the app is a cinch; with that out of the way, you’ll be able to have Siri access it for you. (You’ll find out how in a bit.)
The setup goes as follows:
1. Using your iPhone, iPad, or iPod touch, sign in to the Find My Friends app with a valid user ID and password.
This is the same info you use to download media and apps from iTunes.
Remember that Find My Friends relies on consensual users — meaning you’ll need to request permission to see someone’s information in the Find My Friends app.
2. In the new screen that appears, tap the Invite Friends tab and type in someone’s e-mail address and a personal message, if you like.
After your friend has approved the invitation on her end, you can follow her — and you can reciprocate if you like, too, if you’d like to allow them to follow you. You now see your friend represented by a colored orb on your Find My Friends map.
3. Just like when using the Maps app, you can choose a standard view with street names, satellite view, or a hybrid of the two, by tapping the Options icon in the lower right-hand corner of the screen.
Figure 7-30 shows what the map screen might look like. When you see your friend’s blip on the map, you can also read her address, tap to send a text message to her, video call her via FaceTime, or get visual (not audio) directions to where she is.

Figure 7-30: See where friends are via colored dots on a map.
If you like, you can also sort these friends in List view alphabetically or by distance (see Figure 7-31); you could then tap a name and the map will zoom into his or her precise location.

Figure 7-31: Find My Friends also has a List view to see where all your friends are at a glance.
You can also choose to share your location for a limited period of time with a group of friends, see your own location on the map, or disable the feature altogether.
Because the Find My Friends app eats up some battery power, you might want to disable it when you’re running out of juice. Or if you’re indulging in a guilty pleasure — like sneaking a bite at a fast food restaurant even though you’re on a diet, or secretly attending a Kenny G concert — you also might want to turn off Find My Friends.
Okay, so you’re all set up with Find My Friends and want to use Siri with it, yes? That way, you can simply ask where your friends are, and Siri will let you know.
Here’s how to get going:
1. Press and hold the Home button.
You’ll hear a short chime to confirm Siri is ready for verbal instruction.
2. Ask Siri a question, such as, “Where are my friends?”
Siri opens Find My Friends and does the search for you, which is much faster than you typing the instructions.
3. Glance at your screen to see who’s around and how far.
See Figure 7-32 for an example of the summary screen.
Siri will say the answer out loud and show you a summary; you can then tap to access the map and/or send the person a message like, “Hey, let’s grab a coffee.”

Figure 7-32: I blotted out some details for privacy’s sake, but here’s a look at what Find My Friends shows you.
As you’ve seen throughout these chapters, Siri is pretty quick on the uptake, so the following are a few other ways you can search for people using your voice.
Ask Siri:
![]() “Where’s Mary Smith?”
“Where’s Mary Smith?”
![]() “Is my wife at home?”
“Is my wife at home?”
![]() “Who is near me?”
“Who is near me?”
![]() “Find my sister.”
“Find my sister.”
![]() “Who is here?”
“Who is here?”