
Chapter 7
Managing Contacts
IN THIS CHAPTER
![]() Add, share, and delete contacts
Add, share, and delete contacts
![]() Sync contacts with iCloud
Sync contacts with iCloud
![]() Add information to contacts
Add information to contacts
![]() Delete contacts
Delete contacts
The Contacts app is the iPad equivalent of the dog-eared address book that used to sit by your phone. This app is simple to set up and use, and it has some powerful features beyond simply storing names, addresses, and phone numbers.
For example, you can pinpoint a contact’s address in the iPad’s Maps app. You can use your contacts to address email, Facebook messages, and Twitter tweets quickly. If you store a contact record that includes a website, you can use a link in Contacts to view that website instantly. In addition, of course, you can easily search for a contact by a variety of criteria, including how people are related to you, such as family or mutual friends, or by groups you create.
In this chapter, you discover the various features of Contacts, including how to save yourself time spent entering contact information by syncing contacts with such services as iCloud.
Add a Contact
To add a contact to Contacts:
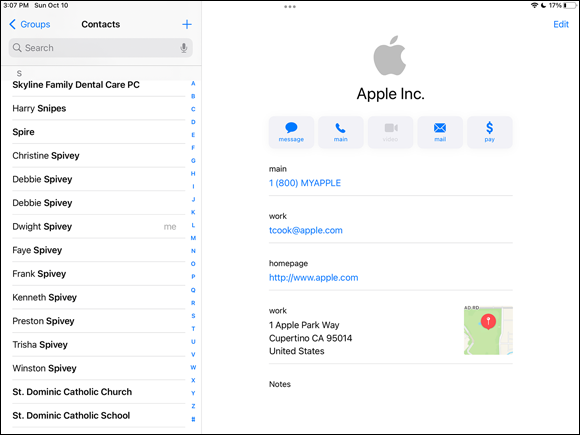
- Tap the Contacts icon on one of the Home screens. An alphabetical list of contacts appears, like the one shown in Figure 7-1.
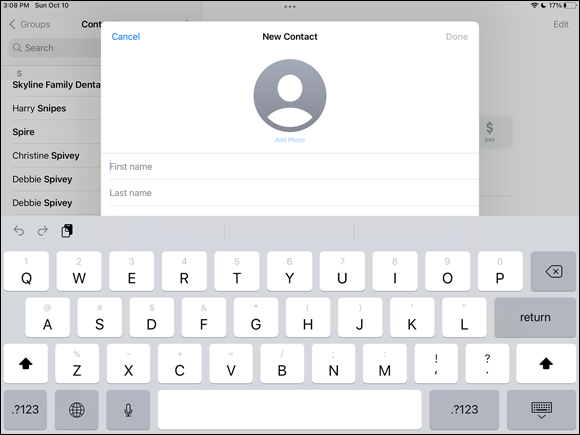
- Tap the Add button, the button with the small plus sign (+) on it in the upper-right corner of the Contacts list. A blank New Contact page opens (see Figure 7-2). Tap in any field, and the onscreen keyboard displays.
Enter any contact information you want.
 Only one of the First name, Last name, or Company fields is required, but do feel free to add as much information as you like.
- To scroll down the contact’s page and see more fields, flick up on the screen with your finger.
- If you want to add information (such as a mailing or street address), you can tap the relevant Add field, which opens additional entry fields.
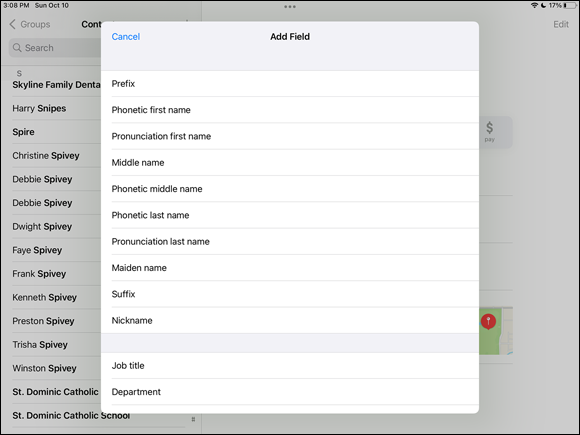
To add an information field, such as Nickname or Job Title, tap the blue Add Field button at the bottom of the page. In the Add Field dialog that appears (see Figure 7-3), choose a field to add, then populate it with the relevant info.
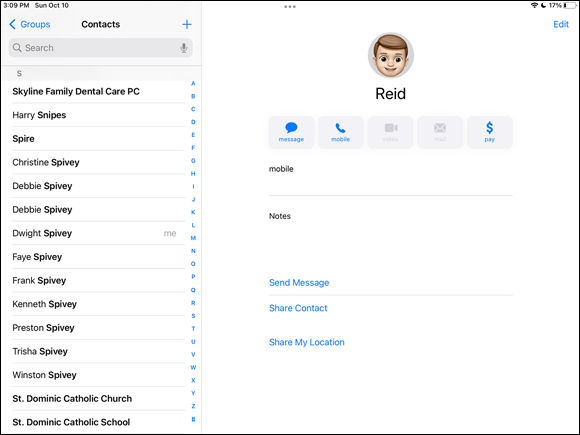
You may have to flick up or down the screen with your finger to view all the fields. If your contact has a name that’s difficult for you to pronounce, consider adding the Phonetic First Name or Phonetic Last Name field, or both, to that person’s record (refer to Step 6).- Tap the Done button in the upper-right corner when you finish making entries. The new contact appears in your address book. Tap it to see details (see Figure 7-4).
You can choose a distinct ringtone or text tone for a new contact. Just tap the Ringtone or Text Tone field in the New Contact form or when editing a contact to see a list of options. When that person calls either on the phone or via FaceTime, or texts you via SMS, MMS, or iMessage, you will recognize them from the tone that plays.
Sync Contacts with iCloud
You can use your iCloud account to sync contacts from your iPad to iCloud to back them up. These also become available to your email account, if you set one up.
Mac users can also use iTunes or Finder (if your Mac is running macOS Catalina) to sync contacts among all your Apple devices. Windows PC users also use iTunes. See Chapter 3 for more about adjusting iTunes settings.
To sync contacts with iCloud:
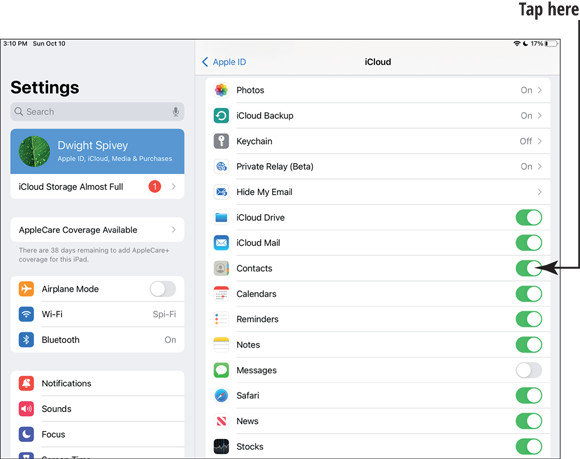
- On the Home screen, tap Settings, tap the name of your Apple ID account (at the top of the screen), and then tap iCloud.
- In the iCloud settings, shown in Figure 7-5, make sure that the On/Off switch for Contacts is set to On (green) in order to sync contacts.
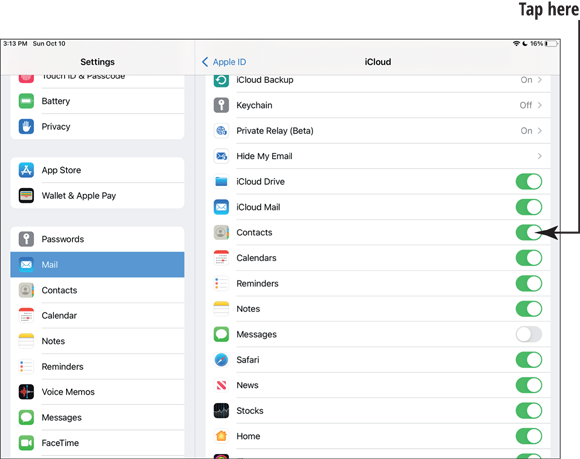
- To choose which email account to sync with (if you have more than one account set up), tap Mail in the Settings list on the left, and in the Accounts section, tap the email account you want to use (it’s usually listed as iCloud).
- In the following screen (see Figure 7-6), toggle the Contacts switch to On to merge contacts from that account via iCloud.
Assign an Image to a Contact
Assigning images to a contact can be both functional and aesthetic. To assign an image to a contact:
- With Contacts open, tap a contact to whose record you want to add an image.
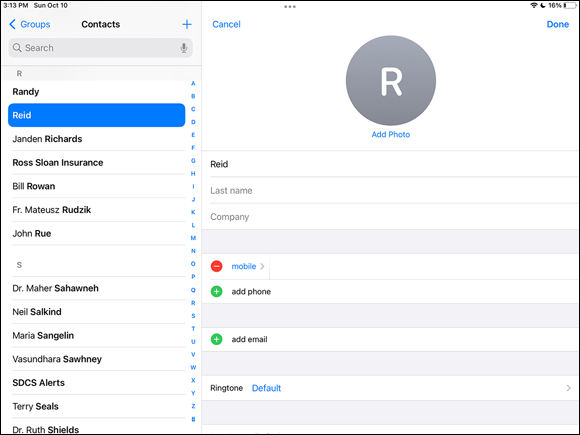
- Tap the Edit button.
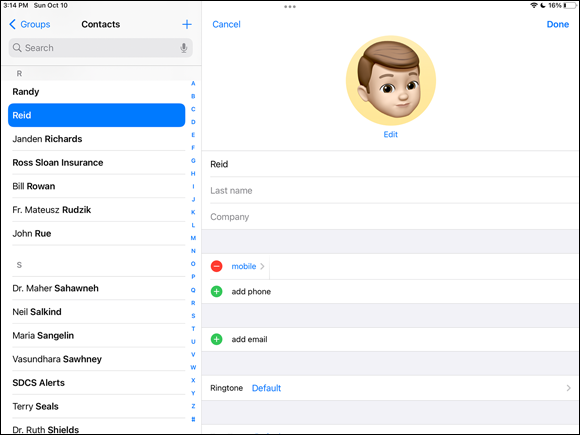
- On the Info page that appears (see Figure 7-7), tap Add Photo.
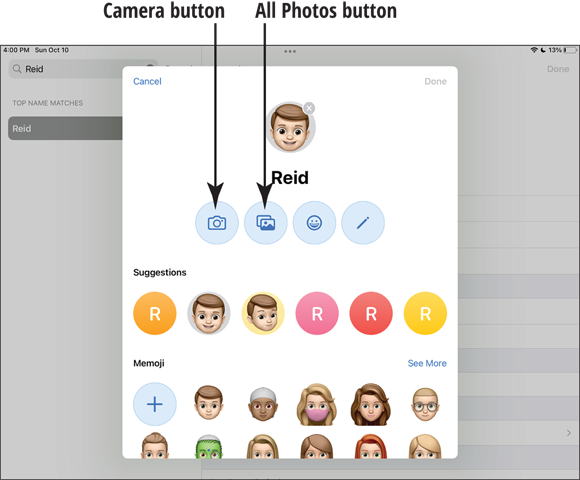
In the menu that appears, tap a suggested photo, a Memoji, or the All Photos icon (two stacked photos, shown in Figure 7-8) to choose an existing photo.
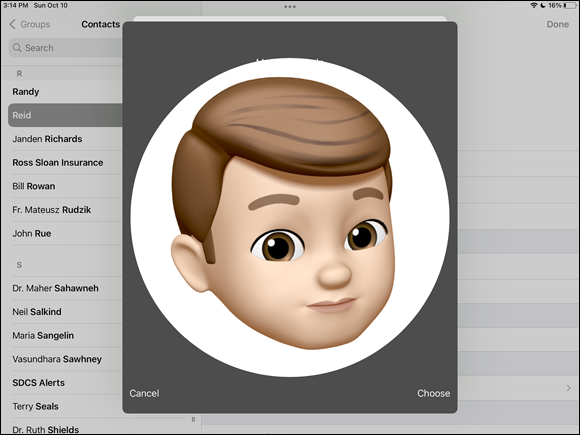
You can also tap the Camera icon to take that contact’s photo on the spot.- After you’ve selected an image, the Move and Scale dialog, shown in Figure 7-9, appears. Center the image the way you want it by dragging it with your finger. You can also pinch and unpinch your fingers on the iPad screen to shrink or expand the image.
- Tap the Choose button to use the image for this contact. If prompted, you may also select a filter to use with the image.
- Tap Done in the upper-right corner to save changes to the contact. The image appears on the contact’s Info page (see Figure 7-10).
Add Social Media Information
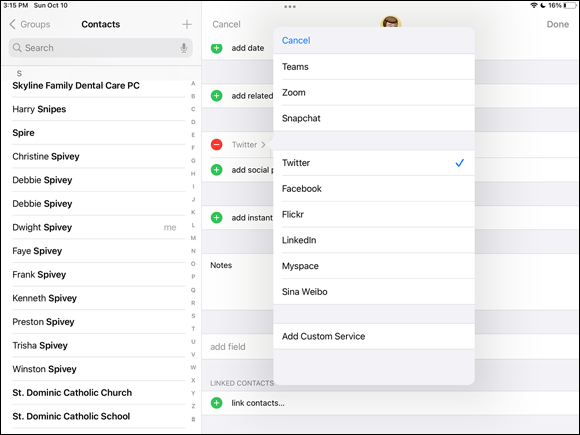
iPad users can add social media information to their Contacts so that they can quickly tweet (send a short message to) others using Twitter, comment to a contact on Facebook, and more. Some of the social media platforms available in Contacts are Twitter, Facebook, Flickr, LinkedIn, Myspace, and Sina Weibo.
To add social media information to contacts:
- Open the Contacts app.
- Tap the Edit button in the upper-right corner of the screen.
Scroll down and tap Add Social Profile.
You may add multiple social profiles if you like.- Twitter is the default service that pops up, but you can easily change it to a different service by tapping “Twitter” and selecting from the list of services (which may differ, depending on the apps you have installed on your iPad), as shown in Figure 7-11. Tap Done after you’ve selected the service you’d like to use.
- Enter the information for the social profile as needed.
- Tap Done, and the information is saved.
The social profile account is now displayed when you select the contact, and you can send tweets, Facebook messages, or what-have-you by simply tapping the username, tapping the service you want to use to contact the person, and then tapping the appropriate command (such as for Facebook posting).
Assign a Relationship Label to a Contact
You can quickly designate relationships in a contact record if those people are saved to Contacts. One great use for this feature is using Siri to simply say “FaceTime daughter” to FaceTime someone who is designated in your contact information as your daughter.
There’s a setting for Linked Contacts in the Contacts app when you’re editing a contact’s record. Using this setting isn’t like adding a relation; rather, if you have records for the same person that have been imported into Contacts from different sources, such as Google or Twitter, you can link them to show only a single contact.
To assign a relation to a contact:
- Tap a contact and then tap Edit.
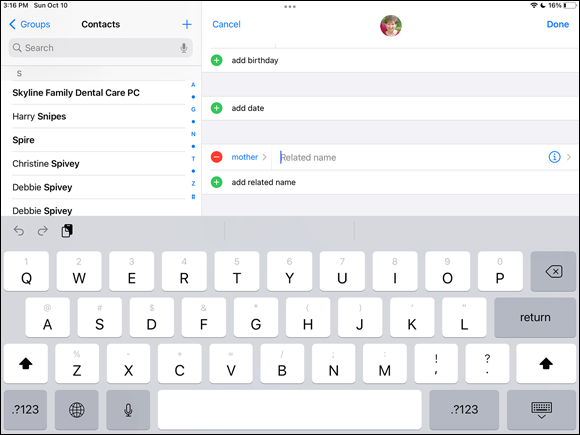
- Scroll down the record and tap Add Related Name. The field labeled Mother (see Figure 7-12) now appears. If the contact you’re looking for is indeed your mother, leave it as is; otherwise, tap Mother and select the appropriate relationship from the list provided.
- Tap the blue Information button (looks like a circle with an i) in Related Name field, and your Contacts list appears. Tap the related person’s name, and it appears in the field.
- Tap Add Related Name again and continue to add names, if needed.
- Tap Done to complete the edits.
After you add relations to a contact record, when you select the person in the Contacts main screen, all the related people for that contact are listed there.
Delete a Contact
When it’s time to remove a name or two from your Contacts, it’s easy to do:
- With Contacts open, tap the contact you want to delete.
- On the Information page (refer to Figure 7-4), tap the Edit button.
- On the Info page that displays, scroll down to the bottom of the page and then tap the Delete Contact button.
- The confirmation dialog, shown in Figure 7-13, appears; tap the Delete Contact button to confirm the deletion.
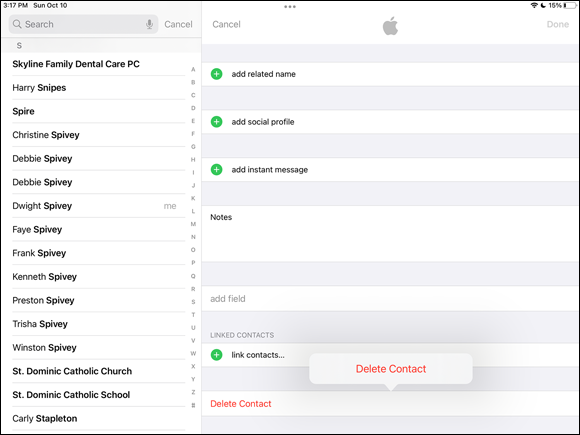
During this process, if you change your mind before you tap Delete, tap anywhere on the screen outside the confirmation dialog, and then tap the Cancel button in Step 4. Be careful: After you tap Delete, there’s no going back! Your contact is deleted from your iPad as well as from any other device that syncs to your iPad via iCloud, Google, or other means.