
Chapter 3
Using the Settings Menu
IN THIS CHAPTER
![]() Finding your way to the Settings menu
Finding your way to the Settings menu
![]() Seeing what’s in the Settings menu
Seeing what’s in the Settings menu
For many years, the Control Panel was the main management area of Windows Server operating systems. It was where you configured devices, set up time and language settings, changed the appearance of the server, worked with installed programs, and managed Windows Update and setup accessibility options.
Microsoft has made an active effort to replace the aging Control Panel with the newer Settings menu. The Settings menu breaks out settings into categories, similar to what was done in the Control Panel. However, new features for the most part are put into Settings, but not necessarily in the Control Panel. In this chapter, I explain how to access the Settings menu and where to configure items in the Settings menu.
Accessing the Settings Menu
You can access the Settings menu in two ways:
- Click the Start menu and select Settings (the gear icon).
- Right-click the Start menu and then select Settings.
The Settings menu opens and should look similar to Figure 3-1.
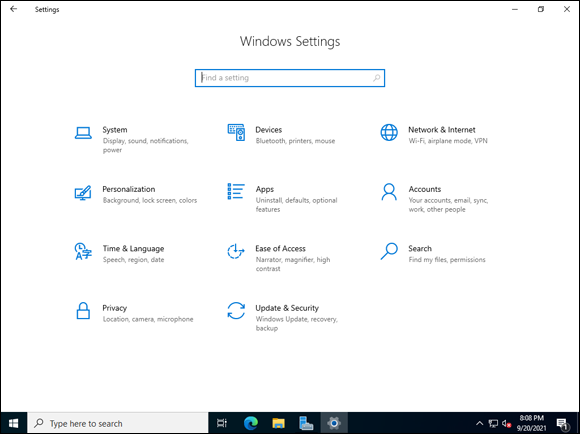
FIGURE 3-1: The Settings menu in all its glory.
Understanding Settings Menu Items
The items in the Settings menu are used to configure functionality on your server. In the following sections, I walk you through the items that are available on a fresh install of Windows Server 2022.
 The Settings menu contains the majority of your administration tools at this point and is where new features are introduced. If you’re a new system administrator, I recommend getting familiar with this menu. If you’ve been around for a while (remember when zip drives were cool?), I recommend transitioning to the Settings menu rather than continuing to use Control Panel at this point.
System
The System menu (see Figure 3-2) shows you many of the things you may want to configure on your system, including the following:
- Changing display settings
- Adjusting your sound settings
- Configuring system notifications
- Adjusting your power and sleep settings
- Accessing disk optimization utilities like disk cleanup
- Handling multiple windows (also known as multitasking)
- Configuring Remote Desktop
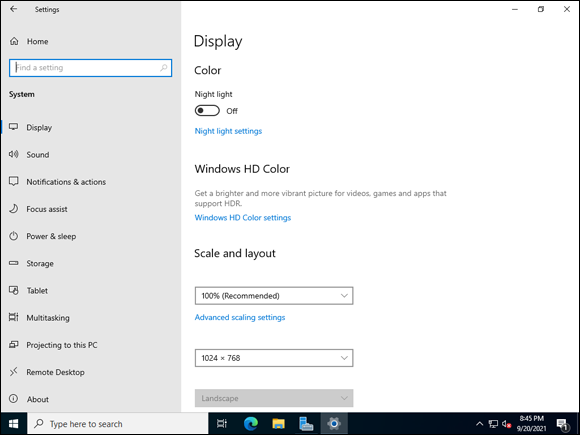
FIGURE 3-2: The System menu contains a lot of configuration choices.
Devices
The Devices menu (see Figure 3-3) is exactly what you would expect. This menu allows you to work with Bluetooth devices, printers, and scanners, as well as keyboard and mouse settings. You can also change autoplay behavior and adjust how the system communicates USB issues.
Network & Internet
The Network & Internet menu (see Figure 3-4) gives you a status on your network connection, as well as the ability to set up or configure ethernet, dial-up, virtual private network (VPN), and proxy connections.
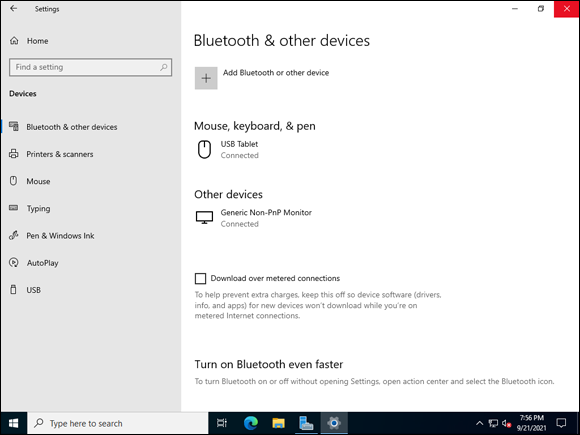
FIGURE 3-3: The Devices menu allows you to install and configure peripherals.

FIGURE 3-4: The Network & Internet menu provides options to configure server network connections.
Personalization
The Personalization menu (see Figure 3-5) allows you to make your server your own. This is where you can adjust background pictures and colors, configure the picture on the lock screen, set themes and manage fonts, as well as customize the Start and Taskbar settings.
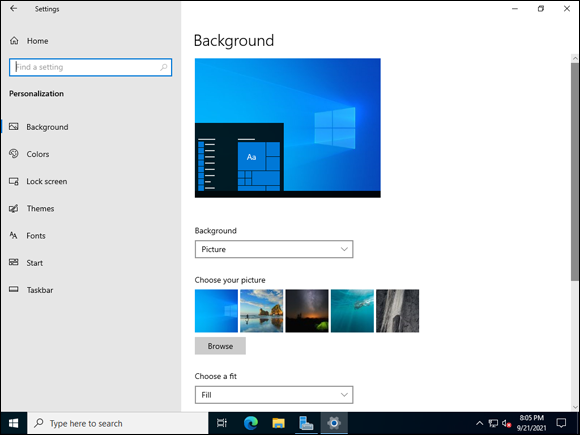
FIGURE 3-5: The Personalization menu gives you many options to make your server your own.
I can hear you saying, “Why would I adjust these things on my server. I don’t need backgrounds or custom colors on my server. That’s crazy-talk!” I’ve seen organizations use wallpapers or color schemes to provide a visual indicator that you’re on a production (red) system versus a test (green) system. They can be handy when you have multiple Remote Desktop windows open.
Apps
The Apps menu (see Figure 3-6) allows you to specify where you can install programs from, uninstall applications that are no longer needed, and choose which applications are started automatically. Additionally, if you have a website that can open in either an app or a browser, you can adjust this behavior with apps for websites.
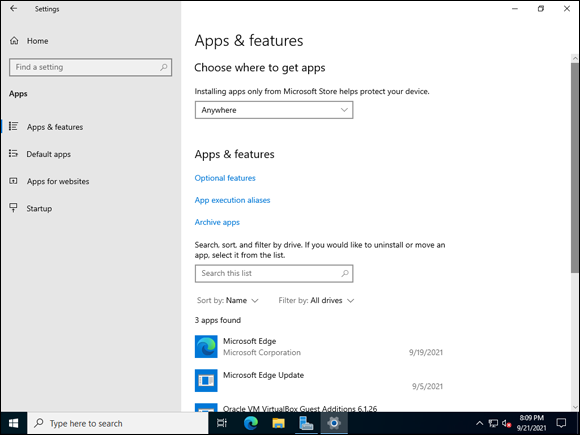
FIGURE 3-6: The Apps menu allows you to work with installed applications.
Accounts
The Accounts menu (see Figure 3-7) allows you to work with local user accounts and authentication methods. The operating system (OS) supports a number of options, including Windows Hello, physical security keys, and, of course, the traditional password scenario.
Time & Language
The Time & Language menu (see Figure 3-8) is where you can adjust the date and time. You can also adjust the region, which changes multiple settings including calendar types and date/time format. You can install new languages and set the default language to use for various services. You can also choose which voice you would like the system to use if you interact with it in that way.
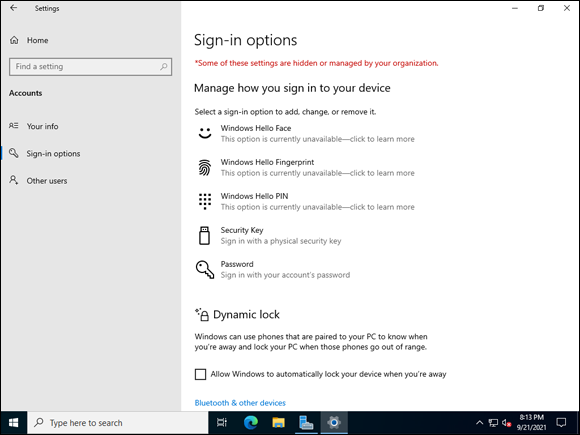
FIGURE 3-7: The Accounts menu allows you to set up various methods of authentication.
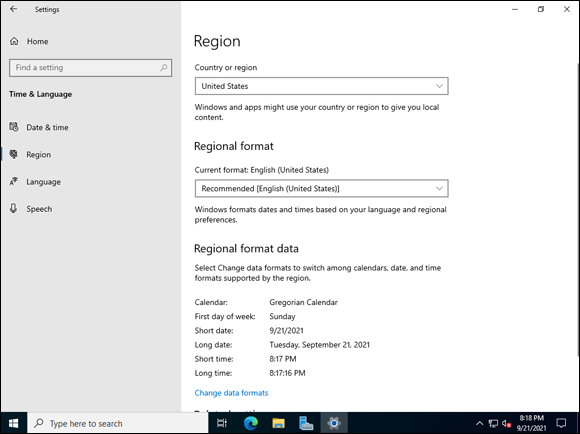
FIGURE 3-8: The Time & Language menu lets you determine how date and time should be formatted.
Ease of Access
The Ease of Access menu (see Figure 3-9) contains all the accessibility tools that are included in the Windows OS. You can do lots of different things here, such as the following:
- Optimize your experience if you’re blind or visually impaired.
- Optimize your experience if you are deaf or have hearing loss.
- Configure your mouse with larger or different-colored pointers.
- Choose different colored text cursors and manipulate the size of the text cursor.
- Adjust settings on the keyboard.
- Set up an onscreen magnifier.
- Set up a screen reader (called Narrator).
- Set up an onscreen keyboard.
- Set up high-contrast settings for visibility.
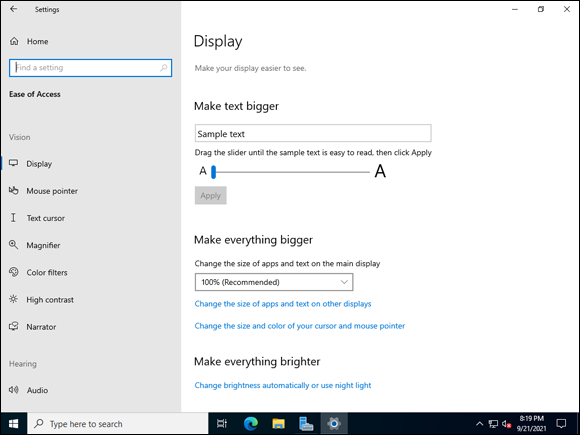
FIGURE 3-9: The Ease of Access menu allows you to configure accessibility options.
Search
The Search menu is relatively small. It allows you to change settings for SafeSearch, which protects you from unwanted images on the Internet, as well as how content is searched on your system and any linked cloud account storage.
Privacy
The Privacy menu (see Figure 3-10) is where you can adjust the permissions granted to both the OS and installed applications. It’s pretty straightforward, and there are a ton of settings you can adjust. Be sure to spend some time looking through the submenus.
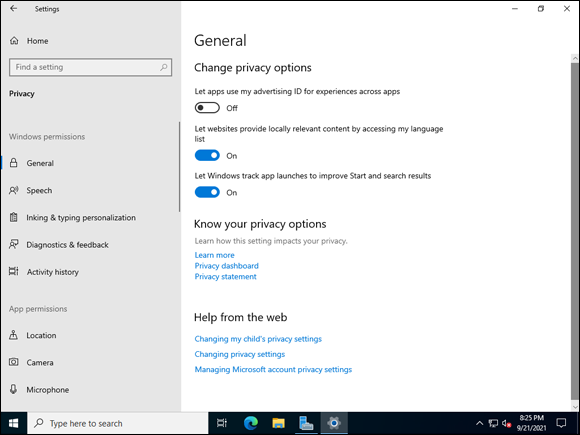
FIGURE 3-10: The Privacy menu allows you to configure tracking and advertisements in both Windows and installed applications.
Update & Security
The Update & Security menu (see Figure 3-11) is where you can configure Windows Updates and manage Windows security settings like antivirus, firewall, app and browser control, and device security. This menu also gives you access to troubleshooting utilities and recovery options. You can activate your copy of Windows and enter into development mode if that’s your happy place.
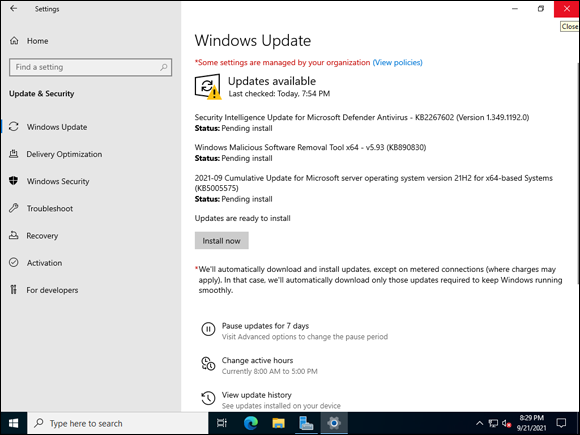
FIGURE 3-11: The Update & Security menu is where you can manage the security-related aspects of your server.