
Animation is one of the basic building blocks of any RIA, and any RIA technology need to have good animation support in order to deliver an immersive Internet experience to the end user. Animation adds liveliness to the content you are presenting and makes it far more expressive and interactive to the end user than static content.
Before going into the animation support JavaFX provides, let us first see what animation is. Animation is a process of creating and displaying a sequence of frames (or simply pictures) within a given time period to create an illusion of movement. The retina of the human eye (some psychologists argue that it's the human brain) can persist, or hold, the picture that is exposed to it for a certain time period even after the exposure to the picture has ceased. For example, you can easily recall seeing a glowing light float in your eye for some time after you look into a light source and then switch off the light. This is due to the persistence of vision, in which the retina persists the image that has been exposed to it for approximately one twenty-fifth of a second. So you can create an optical illusion of motion by presenting 24 or more frames per second (FPS) for the human eye to recognize smooth animation.
In JavaFX, animation can be achieved simply by changing the value of any variable over a specific time period. Note that this is not directly related to the UI but rather is built into the language syntax. The visual behavior of the animation is brought in through the usage of the variable whose value is changed over a timeline. If, for instance, you are changing the value of a variable x from 0 to 360 within 5 seconds, this is just a language feature and there is no UI involved until you bind this variable to, for example, a node's rotate attribute. Once it is bound, this ordinary value change transforms into a visual animation of rotating the specified node from 0 to 360 within a span of 5 seconds. If you bind the same variable to scaleX/scaleY of the node, it would be a zoom transformation instead of rotation. Technically, you can also refer to this as a state transition of your scene or node, where animation is basically a sequence of transitions of a node's state over a timeline.
Thus animation in JavaFX is independent of the UI and is a feature of the language through which you can change the value of any attribute over a timeline. Application developers have the freedom to map such value changes into a visual animation appropriately, as illustrated in our example of binding a rotate variable to the rotate attribute of a node.
JavaFX offer various animation capabilities through the APIs, available in the following packages:
Animation also uses some special operators, such as => and tween, that are built into the language. You will learn about them as you read further.
JavaFX animation can be described as keyframe animation, which is the traditional animation technique used in visual design tools. It is also considered the one of the most effective techniques for defining animation programmatically. In a keyframe animation, you constitute a series of state transitions where you define the starting and ending snapshots of your scene's state at specific points in time and leave it to the interpolation mechanism to generate the intermediate states. Interpolation is a mechanism by which the intermediate states of an animation with starting and ending states defined are calculated automatically using either a predefined algorithm or a custom algorithm that is specified explicitly. These intermediate states ensure there is a smooth transition from the beginning state to the end state, which is critical for the visual illusion of motion.
So a timeline (javafx.animation.Timeline) is defined by one or more keyframes (javafx.animation.KeyFrame), and each keyframe has a specific time and a set of values. This timeline processes the keyframes sequentially in the order specified by KeyFrame.time. The values defined by KeyFrame are interpolated to or from the targeted key values depending on the direction of the animation at the given time.
Now let us see a simple example of how to create a timeline to cause a circle to zoom in and zoom out. Listing 13-1 shows the code, and Figure 13-1 shows the output.
Example 13.1. Zooming in and out of a circle
import javafx.stage.Stage;
    import javafx.scene.Scene;
    import javafx.scene.shape.Circle;
    import javafx.scene.paint.Color;
    import javafx.animation.Timeline;
    import javafx.animation.KeyFrame;
    import javafx.animation.Interpolator;

    var rad : Number = 10.0;
    var circle : Circle =  Circle {
        centerX: 100, centerY: 100
            radius : bind rad
        fill: Color.RED
    }

    Timeline {
        repeatCount: Timeline.INDEFINITE
        keyFrames : [
            KeyFrame {
                            time : 0s
                            values : [rad => 80 tween Interpolator.LINEAR]
},
KeyFrame {
time : 2s
values : [rad => 0 tween Interpolator.LINEAR]
}
]
}.playFromStart();
Stage {
title: "Animation Example-1"
scene: Scene {
width: 200
height: 200
content: [ circle ]
}
}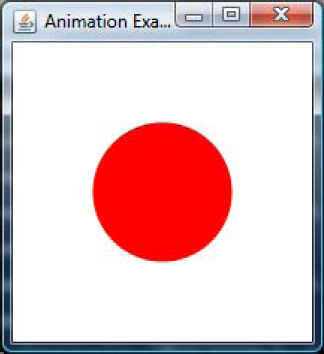
In Listing 13-1, there is a timeline defined with two keyframes. The first keyframe is a starting snapshot state, which initializes the time variable to 0 seconds and the radius of the circle to 80. The second keyframe is the ending snapshot of the state transition, where time is defined as 4 seconds and the radius value is 0. Basically, this timeline instructs JavaFX to initialize the radius of the circle to 80 at 0 seconds and, within a time period of 4 seconds, reduce the radius of the circle from 80 to 0. Then repeat this animation indefinitely. The interpolation to be used for calculating the value of radius between 0 and 4 seconds is LINEAR interpolation, which means that calculation of radius will happen at a steady rate from beginning to end.
Let us analyze the code in more detail, since there are some new operators and data types.
KeyFrame.time
This accepts a data type called Duration (javafx.lang.Duration). The Duration class accepts values in terms of time. Duration can be specified in terms of milliseconds, seconds, minutes, and so on. For example, you can express a 2½ minute value in the following ways:
Duration t = 2m + 30s;
Duration t = 2.5m;
Duration t = 2500ms;
In addition to this, there are multiple utility methods available in the Duration class to manipulate time values, convert from one type to another, add/divide/subtract one time value to/from another, and compare two duration objects. Animation uses this data type extensively since it is a time-bound feature.
=>
The => operator is a literal constructor (a shortened form) that specifies the target value for a given attribute.
tween
The tween operator denotes the type of tweening (also called inbetweening) to be used. Tweening is the process of generating intermediate frames between two given frames to give the appearance that the first frame evolves smoothly into the second one, using the appropriate interpolation mechanism. In short, tween specifies the interpolation technique to be used in the state transition, in this example Interpolator.LINEAR.
Timeline.keyFrames
As you see, Timeline.keyFrames is a sequence of keyframes, which means you are not just restricted to specifying the first and last keyframes; you define as many intermediate keyframes as you wish at each time period. Even in this example, you can specify individual keyframes for 1s, 2s, 3s, and so on —each specifying a target value for the radius.
KeyFrame.values
KeyFrame.values is also a sequence, which means you are not limited to just changing a single attribute; you can change as many attributes as you like. In this example, you could also change the centerX, centerY of the circle when changing the radius. The code for doing that would be similar to the following:
KeyFrame {
    time: 0s
    values: [rad => 80 tween LINEAR, circle.centerX => 400 tween LINEAR, circle.centerY => 200 tween LINEAR]
}
This would initialize the centerX, centerY of the circle to different values when the animation starts.
Timeline.repeatCount
This specifies the number of times you want the animation to repeat. The default value is 1, which means it will just be executed once. To change that, you can either give a specific value or say INDEFINITE, as in this example, if you want the timeline to run indefinitely. An important point to note here is that the animation repeats again from 0 seconds after reaching 4 seconds. In this example, it would mean that the value of radius changes in the following order:
10 (initial value)
First cycle: 80 (0 sec)
Second cycle: 80 (5 sec)
Third cycle: 80 (9 sec)
Note that radius suddenly changes from 0 to 80 at the beginning of every animation cycle and gradually reduces to 0 from 0 to 4 seconds.
Now let us revisit the Listing 13-1 code in detail to summarize our understanding.
The first
KeyFramedefines the initial state of the circle when the animation is about to start. So at 0 seconds,radiuswill be initialized to 80 andcirclewill be resized to the newradiusThe second
KeyFramedefines the final state of the animation, which concludes at 4 seconds. At this time, the radius of the circle should have become 0.The interpolation is
LINEAR, which meansradiusshould change at a constant rate whentimeincrements from 0 to 4th second.Timelineshould be repeated indefinitely as explained in theTimeline.repeatCountsection.The
radvalue is bound tocircle.radius, which will refresh the circle visually when theradvalue changes.
But all these are just definitions, and the timeline is not actually running. A timeline is like a movie in the sense that you will have to play it, and so we are calling the Timeline.playFromStart() function, which will play the animation from 0 seconds. There are methods available in the Timeline class to play, stop and pause the animation, which you will learn in the next section.
You will see the output as shown in Figure-13-1 and the circle will zoom out from 80 to 0 gradually in 4 seconds, after which it will suddenly zoom to the size of 80 again.
Currently the animation effect appears little jerky, because the radius resets to 80 from 0 every time a new cycle starts. Instead of this, wouldn't it be nice to zoom in the circle gradually back to 80 from 0 instead of a sudden switch? You don't need to define another keyframe to do this, and there is a built-in attribute in Timeline which does it for you:
Timeline.autoReverse
This is a Boolean value that when True indicates that the timeline should reverse its direction for every alternate cycle. It is set to False by default. Now let us assume that we have revised Listing 13-1 to set this to True, and see how the values change (following the flow given under Timeline.repeatCount):
10 (initial value)
First cycle: 80 (0 sec)
Second cycle: 0 (5 sec)
Third cycle: 80 (9 sec)
As you see, the timeline has reversed its direction for the second cycle, and radius will now gradually increase from 0 to 80, giving a smooth zooming experience. Add this attribute to Listing 13-1 and try it out yourself.
A timeline is like a movie that you can play, pause and stop, just as you do with your DVD player. Following is a brief overview of the attributes for starting and stopping a timeline:
play: Plays the timeline from the current position. This is typically used after apause, where it resumes play from the time where it was paused before.playFromStart: Plays the timeline from the beginning; that is, from 0 seconds. This must be used when you are starting the timeline for the first time and not after a pause, since typically you would want a paused timeline to resume from where it was pausedpause: Pauses the animation temporarily. Can be resumed subsequently throughplaystop: Stops the animation permanently and resets the current time position to 0.
Now let us see a simple example which demonstrates each of the playing options as applied to an animating circle. Listing 13-2 shows the code and Figure 13-2 shows the output.
Example 13.2. Play/pause/stop demonstration
import javafx.stage.Stage;
    import javafx.scene.Scene;
    import javafx.scene.shape.Circle;
    import javafx.scene.paint.Color;
    import javafx.animation.Interpolator;
    import javafx.animation.KeyFrame;
    import javafx.animation.Timeline;
    import javafx.scene.control.ToggleGroup;
    import javafx.scene.control.RadioButton;
    import javafx.scene.layout.HBox;

    var xAxis : Number = 0.0;
    def toggleGroup = ToggleGroup {};
    var timeline : Timeline;

    var playRB : RadioButton = RadioButton {
        text: "Play"
        toggleGroup: toggleGroup
    }

    var playFromStartRB : RadioButton = RadioButton {
        text: "PlayFromStart"
        toggleGroup: toggleGroup
    }

    var stopRB : RadioButton = RadioButton {
        text: "Stop"
        toggleGroup: toggleGroup
    }

    var pauseRB : RadioButton = RadioButton {
            text: "Pause"
toggleGroup: toggleGroup
}
var selectedButton = bind toggleGroup.selectedToggle on replace {
if (selectedButton == pauseRB) {
timeline.pause();
} else if (selectedButton == stopRB) {
timeline.stop();
} else if (selectedButton == playRB) {
timeline.play();
} else if (selectedButton == playFromStartRB) {
timeline.playFromStart();
}
}
var layout : HBox = HBox{
translateX : 10
translateY : 20
spacing : 10
content: [playFromStartRB, stopRB, playRB, pauseRB]
}
var circle : Circle = Circle {
centerX: 20.0
centerY: 100.0
radius: 40.0
fill: Color.BLACK
translateX: bind xAxis
}
timeline = Timeline {
keyFrames : [
KeyFrame {
time : 2s
values : xAxis => 400 tween Interpolator.EASEBOTH
}
]
autoReverse: true
repeatCount: Timeline.INDEFINITE
}
timeline.play();
Stage {
title: "play/pause/stop demo"
scene: Scene {
width: 450
height: 200
content: [ layout, circle ]
}
}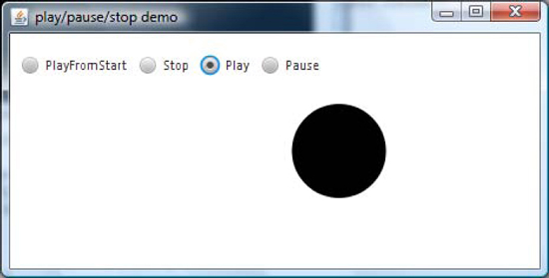
In Listing 13-2, we are animating a circle by translating it on the x-axis back and forth, as illustrated in Figure 13-2. The timeline is set with autoReverse true, and so the animation changes its direction for alternate cycles and continues indefinitely. You will notice the following behaviors with this application:
Select the Pause radio button, and animation will stop at the current position. Selecting Play subsequently will play the animation from the same position where it was stopped. On the other hand, if you select PlayFromStart after a pause, it will start from the starting position (which might be either the leftmost or the rightmost end, depending on the direction of the animation cycle at the time of the pause).
Select the Stop radio button, and animation will stop at the current position. Please note that Stop resets the current position to its initial position, so selecting Play or PlayFromStart will only start the animation from the starting position.
There are read-only variables in the Timeline class that give the current status of animation such as running or paused, and that are set when the animation is played/paused or stopped.
Another important aspect that you should notice here is that we have defined only a single keyframe, whose time value is specified as 2s (2 seconds). This is actually the end point of the timeline; the timeline will automatically synthesize a starting keyframe, whose time value will be 0 seconds if none is specified explicitly. So for keyframe 0, the value of the xAxis variable would be its initial value, which is 0 in this case. So the timeline aims to translate the circle from 0 to 400 within a span of 2 seconds.
As you have learned, a keyframe defines a snapshot of the animation at a given point in time by specifying the time and respective values of the animation at the given time. There are also additional attributes that can be defined as part of the keyframe, such as action and canSkip. This section looks at each of them in detail.
The action function of the KeyFrame class is called when the elapsed time of the animation cycle passes the specified time of the keyframe. The function is called when the elapsed time passes the specified time even if it never equaled the indicated value exactly. This function is handy when you want to execute something at the end of each keyframe.
This attribute indicates whether the timeline can skip calling the action function of the keyframe if the master timer gets behind and more than one timeline cycle is skipped between time pulses. If it is set to True, only one call to the action function will occur for each time pulse regardless of how many cycles have occurred since the last execution of the action.
Listing 13-3 and Figure 13-3 illustrate how to use the action attribute of the keyframe.
Example 13.3. KeyFrame action
import javafx.stage.*;
    import javafx.scene.shape.*;
    import javafx.scene.paint.*;
    import javafx.animation.*;
    import javafx.scene.*;
    var scaleX: Number = 1.0;
    var scaleY: Number = 1.0;
    var rotate: Number = 0;
    var timeline : Timeline;
    var scene:Scene;
    var sceneWidth = bind scene.width;
    var sceneHeight = bind scene.height;
    var colors = [Color.RED, Color.BLUE, Color.GREEN, Color.LIME, Color.BROWN,
    Color.GOLD, Color.PINK];
    var colorIndex = 0 on replace {
        if (colorIndex >= sizeof colors - 1) {
            colorIndex = 0;
            }
        }
    var fillColor = bind colors[colorIndex];
    var rect: Rectangle = Rectangle {
        x: bind sceneWidth/2 - 50
        y: bind sceneHeight/2 - 50
        width: 100
        height: 100
        fill: bind fillColor
        stroke: Color.YELLOW
        strokeWidth: 2.0
        scaleX: bind scaleX
        scaleY: bind scaleY
        rotate: bind rotate
}
var counter = 0;
timeline = Timeline {
keyFrames : [
KeyFrame {
time : 0s
values : [scaleX => 0 tween Interpolator.LINEAR,
scaleY => 0 tween Interpolator.LINEAR,
rotate => 0 tween Interpolator.LINEAR]
action: function() {
print("0 ");
colorIndex ++;
}
},
KeyFrame {
time : 3s
values : [scaleX => 1.5 tween Interpolator.LINEAR,
scaleY => 1.5 tween Interpolator.LINEAR,
rotate => 120 tween Interpolator.LINEAR]
action: function() {
print("3 ");
colorIndex ++;
}
},
KeyFrame {
time : 5s
values : [scaleX => 4.0 tween Interpolator.LINEAR,
scaleY => 4.0 tween Interpolator.LINEAR,
rotate => 360 tween Interpolator.LINEAR]
action: function() {
print("5 ");
colorIndex ++;
}
}
]
autoReverse: true
repeatCount: Timeline.INDEFINITE
}
timeline.play();
scene = Scene {
width: 400
height: 400
content: [rect]
}
Stage {
title: "KeyFrame Action demo"
scene: scene
}Output
0 3 5 3 0 3 5 3 0 3 5 3 0 3 5 ...
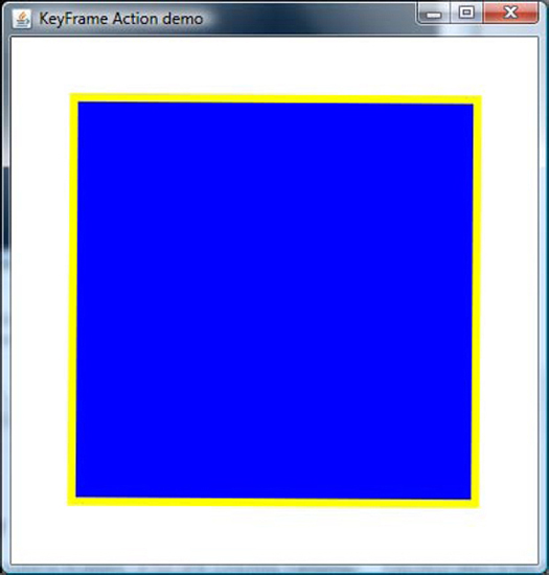
Listing 13-3 is a simple application that defines three keyframes, each of which defines a snapshot of animation with respect to the scaleX, scaleY, and rotate attributes of a rectangle. Notice that the range of value change for first two keyframes is much less than from the second to the third keyframe, and so it appears as if the animation accelerates after 3 seconds when you execute this application.
Each keyframe is defined with an action that changes the fill color of the rectangle from a set of pr-defined values and also prints out a message to indicate that the action is called. When you look at the output message printed, the timeline starts from 0s => 3s => 5s during the first cycle and then the direction of the animation reverses because autoReverse is True. So the next cycle of animation proceeds as follows: 5s => 3s => 0s. Once again the direction will be reversed at this point and will proceed in the forward direction. This continues indefinitely because repeatCount is set to Timeline.INDEFINITE. You can also visually verify the change of the rectangle's fill at every time point defined by the keyframes.
Now we can explore how canSkip fits into this paradigm. First let us see how the default behavior of canSkip works; Listing 13-4 is a version of the code from Listing 13-3, slightly modified to create a problem we might want the code to skip.
Example 13.4. KeyFrame action program modified to introduce a delay
//Preceding code is the same as Listing 13-3
    ....
    ....

    timeline = Timeline {
        keyFrames : [
            KeyFrame {
                time : 0s
                values : [scaleX => 0 tween Interpolator.LINEAR,
                         scaleY => 0 tween Interpolator.LINEAR,
                         rotate => 0 tween Interpolator.LINEAR]
                action: function() {
                    print("0s ");
                    colorIndex ++;
                }
            },
                KeyFrame {
                time : 3s
                values : [scaleX => 1.5 tween Interpolator.LINEAR,
                          scaleY => 1.5 tween Interpolator.LINEAR,
                          rotate => 120 tween Interpolator.LINEAR]
                action: function() {
                    print("3s ");
                    for (x in [1..1000]) {
                        java.lang.Thread.sleep(7);
                    }
                    colorIndex ++;
                }
            },
            KeyFrame {
                time : 5s
                values : [scaleX => 4.0 tween Interpolator.LINEAR,
                          scaleY => 4.0 tween Interpolator.LINEAR,
                          rotate => 360 tween Interpolator.LINEAR]
                action: function() {
                    print("5s ");
                    colorIndex ++;
                }
            }
        ]
        autoReverse: true
        repeatCount:  Timeline.INDEFINITE
    }
timeline.play();
// Same as listing 13-3
....
....0s 3s 5s 3s 0s 3s 5s 3s 0s 3s 5s 3s
Listing 13-4 is the same animation code you saw in Listing 13-3 but with a slight change in one of the action functions. A delay of 7000 ms is introduced in the action function of the second keyframe. The execution of the timeline begins normally with the first keyframe, but when the control completes the second keyframe and executes its action, there is an unexpected delay of 7 seconds, when the timeline is supposed to be executing the third keyframe. So the timeline is behind its own schedule because of the delay we have introduced. When the timeline comes out of the second action function and is about to continue with other keyframes, it realizes that it has to miss the next two keyframes because it is already lagging behind the actual schedule. At this time, it just skips the next two keyframes. However, if canSkip is set to False (the default value), then it cannot skip the action function of the next two keyframes. Thus it is compelled to call the next two actions, though in quick succession.
So if you are doing something important within the action of the keyframe that you don't want the timeline to skip at any cost, leave the default canSkip behavior as is and your action will not be skipped, though the keyframe may be skipped due to the time lag.
However, there could be cases where your action is pretty much tied to the modifications you are doing within your keyframe and has to be executed only when the keyframe is executed successfully and not otherwise. In such cases, you will have to set canSkip to True. Then the timeline will have the freedom to skip the action when it skips the respective keyframe because of unforeseen delays that your app may have introduced in the previous actions. Timeline delays may be introduced not just by the previous actions in all cases; sometimes they are introduced by the complex operations defined within the keyframe values as well.
Now let's see how canSkip works with a True value, by modifying Listing 13-4 to create Listing 13-5, and see how the output differs.
Example 13.5. Execution with canSkip set to True
// Preceding code is the same as Listing 13-4
    ...
    ...

    timeline = Timeline {
        keyFrames : [
            KeyFrame {
                time : 0s
                canSkip: true
                //Same as Listing 13-4
....
},
KeyFrame {
time : 3s
canSkip: true
// Same as listing 13-4
.....
},
KeyFrame {
time : 5s
canSkip: true
//Following code is the same as Listing 13-4
.....
]
autoReverse: true
repeatCount: Timeline.INDEFINITE
}
timeline.play();
// Following code is the same as listing 13-40s 3s 3s 0s 3s 5s 3s 3s 0s 3s 5s 3s
In Listing 13-5, canSkip is set to true for all the keyframes, and so the timeline can choose to skip the subsequent keyframes and associated actions if there is a time lag. This is what is reflected in the output, where you see that the palindrome model shown in the output of Listing 13-4 is broken, and some of the keyframes are indeed skipped.
Although keyframe animations are typical JavaFX objects, a special syntax is provided to make it easier to express animation than is possible with the standard object-literal syntax. The trigger clause enables you to associate an arbitrary callback with the keyframe.
Listing 13-6 illustrates how we can rewrite the code from Listing 13-1 in a simplified manner.
Example 13.6. Simplifying the syntax of the Circle Zoom program
import javafx.stage.Stage;
    import javafx.scene.Scene;
    import javafx.scene.shape.Circle;
    import javafx.scene.paint.Color;
    import javafx.animation.Timeline;
    import javafx.animation.KeyFrame;
    import javafx.animation.Interpolator;

    var rad : Number = 10.0;
    var circle : Circle =  Circle {
        centerX: 100
        centerY: 100
        radius : bind rad
            fill: Color.RED
    }

    Timeline {
        repeatCount: Timeline.INDEFINITE
autoReverse: true
keyFrames : [
at (0s) { rad => 80 tween Interpolator.LINEAR },
at (4s) { rad => 0 tween Interpolator.LINEAR }
]
}.play();
Stage {
title: "Animation Example-1"
scene: Scene {
width: 200
height: 200
content: [ circle ]
}
}The output is the same as for Listing 13-1.
In Listing 13-6, you are seeing the same application as in Listing 13-1, but the syntax for defining the keyframes is much simpler here. The time defined within the at clause is the value of the KeyFrame.time attribute that you defined in Listing 13-1, and the curly braces include the values of the keyframe.
Simplified syntax has its own limitations. If you have multiple values for the keyframe, you cannot include them within the curly braces, and you will have to define two at clauses with the same time value. Similarly, action and canSkip attributes cannot be specified when using at syntax.
So the following code snippet will not compile:
at (4s) { rotate => 400, scaleX => 5.0 } //WRONGInstead, you will have to write it as follows:
at (4s) { rotate => 400 }
at (4s) { scaleX => 5.0 }
This is not very convenient when you have multiple values to be changed in a keyframe, so it's important to choose the right syntax appropriate for your requirement.
The keyframe 0 can also be skipped with this syntax if you don't have a need to assign a different starting value for the keyframe than what is initialized.
Transitions are a set of animation classes created to lighten the burden on the developers who create animated transitional effects. These classes offer a set of predefined transitions that can be utilized by merely setting a few variables, instead of going through the creation of a series of keyframes. These classes are available in the javafx.animation.transition package and include the following set of transitions:
PathTransition
    ScaleTransition
    FadeTransition
    TranslateTransition
    RotateTransition
As you'll see, multiple transitions can be combined using parallel and sequential transitions to create complex animations. Table 13-1 lists the attributes of the Transition class you will typically have focus on to create a meaningful animation.
Table 13.1. Transition Attributes
Attribute | Description | Default Value |
|---|---|---|
| Length of the animation in time. Accepts a value in | 400 ms |
| Target node to which the transition has to be applied. | Null |
| The type of interpolation to be applied. |
|
| Direction of the alternate animation cycles. Same as |
|
| The number of cycles for which this animation has to be repeated. | 1 |
| The speed at which the animation is played. | 1 |
As you see in Table 13-1, many of the timeline attributes are applicable here, and all the transitions can be controlled just as in a keyframe animation using play/pause/playFromStart/stop methods. Transition classes can be considered a set of utility classes that offer convenience in creating transitional effects on the nodes without going through the creation of each and every keyframe.
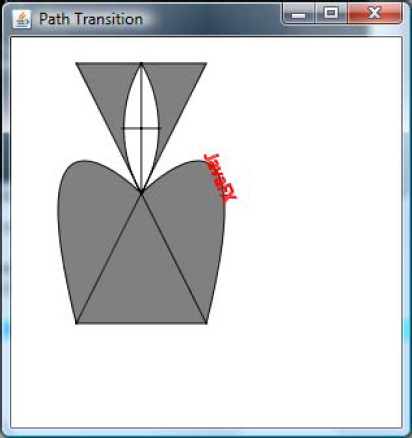
The path transition allows you to create a translation animation of a node along the given path. The translation is achieved by altering the translateX, translateY variables, but the object is moved along the geometric contour of the given path defined by the path attribute. Listing 13-7 shows an example, and Figure 13-4 illustrates its output.
Example 13.7. A path transition
import javafx.stage.Stage;
    import javafx.scene.*;
    import javafx.scene.paint.*;
    import javafx.animation.transition.*;
    import javafx.scene.shape.*;
    import javafx.scene.text.*;
    import javafx.animation.*;
var rad : Number = 10.0;
var path:Path = Path {
id: "Path"
translateX: −150
translateY: −130
fill: Color.GRAY
stroke: Color.BLACK
elements: [
MoveTo {
x: 200
y: 150
},
LineTo {
x: 300
y: 350
},LineTo {
x: 200
y: 350
},
LineTo {
x: 300
y: 150
},
LineTo {
x: 200
y: 150
},
MoveTo {
x: 250
y: 250
},
CubicCurveTo {
controlX1: 250
controlY1: 250
controlX2: 350
controlY2: 150
x: 300
y: 350
},
MoveTo {
x: 250
y: 250
},
CubicCurveTo {
controlX1: 250
controlY1: 250
controlX2: 150
controlY2: 150
x: 200
y: 350
},
MoveTo {
x: 250
y: 250
},
ArcTo {
x: 250
y: 150
radiusX: 100
radiusY: 100
xAxisRotation: 360
sweepFlag: true
},
ArcTo {
x: 250
y: 250
radiusX: 100
radiusY: 100
xAxisRotation: −360
sweepFlag: true
},
MoveTo {
x: 250
y: 150
},
VLineTo {
y: 250
},
MoveTo {
x: 235
y: 200
},
HLineTo {
x: 265
}
]
}
var node = Text {
content: "JavaFX"
fill: null
stroke: Color.RED
font: Font { size: 15 }
}
var pathTransition = PathTransition {
duration: 10s
path: AnimationPath.createFromPath(path)
repeatCount: Timeline.INDEFINITE
autoReverse: true
node: node
}pathTransition.play();
Stage {
title: "Path Transition"
scene: Scene {
width: 300
height: 300
content: [path, node]
}
}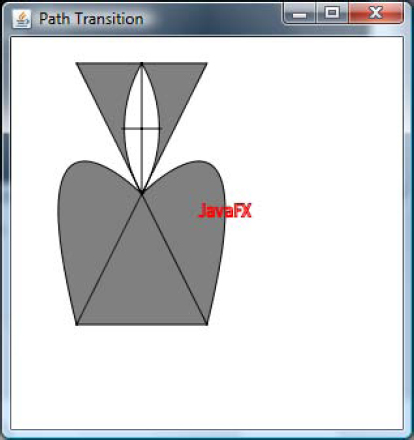
In Listing 13-7, the code demonstrates the animation of a text node along the geometric contour of a path object, which you saw in Chapter 12. A path is constructed and given to the PathTransition.path attribute through AnimationPath.createFromPath(), which creates an animation path from the specified path object. The node to the path transition has to be applied is specified in the node attribute of the path transition. Finally, both paths have been added to the scene. The animation is set with other standard animation attributes, such as duration, repeatCount, and autoReverse, which you have already seen in the previous examples. Note that the duration attribute denotes the duration of one animation cycle, not the duration of a single snapshot of the animation as defined by KeyFrame.time attribute previously.
When you run this example, the output will resemble the screen capture shown in Figure 13-4; the text will animate along the path of the given sample path. One important thing to note in this example is that orientation is set on the PathTransition, which means the orientation is defaulted to OrientationType.NONE. Thus the targeted node's rotation matrix remains unchanged along the geometric path, and so the text always stays horizontal with no rotation.
There is also a way you can apply a rotation matrix to the target node so that the node changes its orientation when it is animated along the given path, keeping the node's rotation matrix perpendicular to the path's tangent. You will see the difference if you run the next example, Listing 13-8. Your output should resemble Figure 13-5.
Example 13.8. Applying a rotation matrix to a targeted node
// Preceding code is the same as Listing 13-7
    ...
    ...

    var pathTransition = PathTransition {
        duration: 10s
        path: AnimationPath.createFromPath(path)
        repeatCount: Timeline.INDEFINITE
        autoReverse: true
        orientation: OrientationType.ORTHOGONAL_TO_TANGENT
        node: node
    }

    pathTransition.play();
    // Following code is the same as listing 13-7
    ...
    ...
In Listing 13-8, the only extra code added from Listing 13-7 is PathTransition.orientation, which is set to ORTHOGONAL_TO_TANGENT instead of implicitly to NONE (the default) as in the previous version. Compare the output shown in Figure 13-5 with Figure 13-4. You will notice that the text is now rotated in such a way that it stays perpendicular to the path's tangent.
Note
A path can be a javafx.scene.shape.Path object or an SVGPath defined by javafx.scene.shape.SVGPath, where the coordinates of the path are defined in SVG notation.
Path transition is a very powerful animation technique, as it allows you to animate a node along the contour of an arbitrary path constructed by the Path object and can be used to construct very powerful animations in JavaFX.
A scale transition allows you to zoom into or out of a node by altering its scaleX, scaleY attributes over a timeline. This approach is slightly different from the one presented in Listing 13-1, where we altered the node geometry directly by changing the radius of the circle. In a scale transition, the node geometry stays the same but a scaling transformation is applied on the node to zoom into or out of the node.
Note
A scale transformation does not alter the node geometry, and so the bounds of the node in local coordinates (boundsInLocal) remain unchanged. Only boundsInParent is altered (by the scale factor), whereas changing the radius of the node changes the node geometry and thus the boundsInLocal value as well.
A scale transformation can be done using absolute or incremental values, and absolute values always take precedence over incremental ones.
Now let us see how we can rewrite Listing 13-1 to use ScaleTransition to achieve the same effect; Listing 13-9 shows the code, and Figure 13-6 shows the output.
Example 13.9. Applying a scale transition
import javafx.stage.Stage;
    import javafx.scene.Scene;
    import javafx.scene.shape.Circle;
    import javafx.scene.paint.Color;
    import javafx.animation.*;
    import javafx.animation.transition.*;
    import javafx.animation.Interpolator;

    var rad : Number = 10.0;
    var circle : Circle =  Circle {
centerX: 100, centerY: 100
radius : bind rad
fill: Color.RED
}
var scaleTransition = ScaleTransition {
fromX: 0.0
fromY: 0.0
toX: 8.0
toY: 8.0
node: circle
duration: 4s
repeatCount: Timeline.INDEFINITE
autoReverse: true
}
scaleTransition.play();
Stage {
title: "Scale Transition"
scene: Scene {
width: 200
height: 200
content: [circle]
}
}
In Listing 13-9, we have rewritten our original code to create the same zoom effect. As in Listing 13-1, the radius of the node is increased from 0 to 80, which is equivalent to scaling the node by a factor of 8. Hence we have specified the starting scaleX,Y values as 0, 0 and the final scaleX, Y values as 8.0, 8.0 and the duration is the same 4 seconds. The transformation is applied on the node; circle and rest of the animation attributes are pretty much the same. When you run this example, you will get the same behavior as that of Listing 13-1 although the approach is different here. The scaleX, Y values of the given node change from fromX/Y to toX/toY over a time period of 4 seconds, and you don't have to explicitly bind anything to make the node scale appropriately.
Note
ScaleTransition always scales the node with respect to its center, which means that any scale animation targeted with respect to an arbitrary point on the scene has to be done through the keyframes demonstrated previously and cannot be done by the transition class.
A rotate transition is similar to a scale transition but rotates the node instead of scaling, using the node.rotate attribute. The rotation is specified in degrees and starts from fromAngle and ends with toAngle. Alternatively, you can make the transition incremental by specifying the byAngle attribute of the RotateTransition class.
A translate transition applies a translate transformation on the node through Node.translateX, Y attributes and thus translates the given node along the X,Y axis by the specified offset. You can specify either absolute values, using toX/Y, or incremental values, using byX/Y. The node will be translated along the X or Y axis appropriately.
A fade transition allows you to creating a fading effect by making the node disappear and reappear through the node.opacity attribute, whose value is altered from 0 to 1 or vice-versa. You can specify absolute values using fromValue and toValue or incremental values through byValue attributes available in the FadeTransition class.
Now let us see an example that combines various transitions to create a nice animating application. Listing 13-10 shows the code, and Figure 13-7 illustrates the output.
Example 13.10. Combining multiple transitions
import javafx.animation.*;
    import javafx.animation.transition.*;
    import javafx.scene.Group;
    import javafx.scene.image.Image;
    import javafx.scene.image.ImageView;
    import javafx.scene.input.MouseEvent;
    import javafx.scene.paint.Color;
import javafx.scene.paint.CycleMethod;
import javafx.scene.paint.RadialGradient;
import javafx.scene.paint.Stop;
import javafx.scene.Scene;
import javafx.scene.shape.ArcTo;
import javafx.scene.shape.Circle;
import javafx.scene.shape.MoveTo;
import javafx.scene.shape.Path;
import javafx.stage.Stage;
var x: Number;
var y: Number;
var stgX: Number = 0;
var stgY: Number = 0;
var scene: Scene;
var stgWidth: Number = bind scene.width;
var stgHeight: Number = bind scene.height;
var rgp: RadialGradient = RadialGradient {
centerX: 0.5
centerY: 0.5
radius: 1.0
proportional: true
cycleMethod: CycleMethod.REFLECT
stops: [
Stop {
offset: 0.0
color: Color.RED
},
Stop {
offset: 0.4
color: Color.BLACK
},
Stop {
offset: 0.7
color: Color.GRAY
}
]
}
var path: Path = Path {
fill: rgp
stroke: Color.LIGHTBLUE
strokeWidth: 2
elements: [
MoveTo {
x: 15
y: 15
},
ArcTo {x: 50
y: 10
radiusX: 20
radiusY: 20
sweepFlag: true
},
ArcTo {
x: 70
y: 20
radiusX: 20
radiusY: 20
sweepFlag: true
},
ArcTo {
x: 50
y: 60
radiusX: 20
radiusY: 20
sweepFlag: true
},
ArcTo {
x: 20
y: 50
radiusX: 10
radiusY: 5
sweepFlag: true
},
ArcTo {
x: 15
y: 15
radiusX: 10
radiusY: 10
sweepFlag: true
},
]
};
var blueCircle: Circle = Circle {
centerX: 15
centerY: 15
radius: 4
fill: Color.BLUE
}
var redCircle: Circle = Circle {
centerX: 70
centerY: 20
radius: 4
fill: Color.RED
}
var greenCircle: Circle = Circle {centerX: 20
centerY: 50
radius: 4
fill: Color.GREEN
}
var gr: Group = Group {
translateX: bind x
translateY: bind y
content: [path, blueCircle, redCircle, greenCircle]
}
var pathTransition = PathTransition {
duration: 5s
node: blueCircle
path: AnimationPath.createFromPath(path)
orientation: OrientationType.ORTHOGONAL_TO_TANGENT
repeatCount: Timeline.INDEFINITE
rate: 0.5
}
pathTransition.play();
var pathTransition1 = PathTransition {
duration: 5s
node: redCircle
path: AnimationPath.createFromPath(path)
orientation: OrientationType.ORTHOGONAL_TO_TANGENT
repeatCount: Timeline.INDEFINITE
rate: 1.0
}
pathTransition1.play();
var pathTransition2 = PathTransition {
duration: 5s
node: greenCircle
path: AnimationPath.createFromPath(path)
orientation: OrientationType.ORTHOGONAL_TO_TANGENT
repeatCount: Timeline.INDEFINITE
rate: 2.0
}
pathTransition2.play();
var xTimeline: Timeline = Timeline {
repeatCount: Timeline.INDEFINITE
autoReverse: true
keyFrames: [
at (0s) {x => scene.x},
at (7s) {x =>
stgWidth - 90 tween Interpolator.LINEAR},
]
};var yTimeline: Timeline = Timeline {
repeatCount: Timeline.INDEFINITE
autoReverse: true
keyFrames: [
at (0s) {y => scene.y},
at (4s) {y => stgHeight - 75 tween Interpolator.LINEAR},
]
};
var fadeTransition = FadeTransition {
duration: 10s
node: bind path
fromValue: 1.0
toValue: 0.2
repeatCount: Timeline.INDEFINITE
autoReverse: true
interpolate: true
}
fadeTransition.playFromStart();
var rotTransition = RotateTransition {
duration: 4s
node: bind gr
fromAngle: 0
toAngle: 360
repeatCount: Timeline.INDEFINITE
autoReverse: true
}
rotTransition.playFromStart();
scene = Scene{
fill: Color.WHITE
width: 240
height: 320
content: [ gr ]
}
Stage{
title: "Cloud"
visible: true
scene: scene
onClose: function() {
java.lang.System.exit(0);
}
}
xTimeline.play();
yTimeline.play();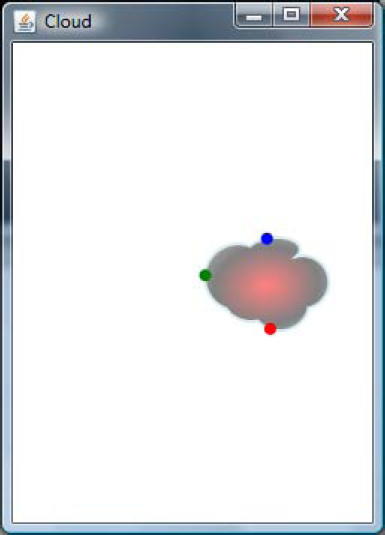
In Listing 13-10, you see an application that combines various transitions to animate an object. This example basically creates an arbitrary path that looks like a cloud and applies two transitions on the object, RotateTransition and FadeTransition. As the names suggest, RotateTransition keeps rotating the cloud object, and FadeTransition alters its opacity to create a fading effect. Apart from this, there are two other timelines that keep changing the node's translateX and translateY to keep the node moving.
In addition, there are three path animations defined along the path of the cloud object, in which three circles animate along the path. The animation rates of these three circles are set with different values so that the blue circle animates slowly, the red circle animates at medium speed, and the green circle animates quickly. When you run this application, you will notice that the red and green circles often overtake the blue circle thanks to their higher animation rates.
This application demonstrates various transitions and how to use them in conjunction with other timelines.
So far, you have seen various transitions available in JavaFX, and even begun to combine them, but now let us see how to combine these transitions in a more focused way to create advanced animation effects. In Listing 13-10, we indeed used multiple transitions together, but there is no order or dependency between the various transitions, and so they are executed in arbitrary order with no relation to one another. If we try to group the transitions in more meaningful ways, however, we soon see that there are two basic ways to do so. We can create a chain of transitional effects where one transition starts when another one completes; this is sequential in nature. On the other hand, we can also create transitions that are guaranteed to run in parallel irrespective of when the previous transition completes.
Parallel and sequential transitions are the JavaFX tools that implement this distinction. Containers themselves, they can hold other transitions and execute them in parallel or sequential order.
Our next two examples demonstrate these transition types. We'll begin with a simple example of parallel transitions: creating and animating star-shaped paths within the scene, triggered by mouse movements. Listing 13-11 shows the code, and Figure 13-8 shows its output.
Example 13.11. A demonstration of parallel transitions
import javafx.stage.Stage;
    import javafx.scene.shape.*;
    import javafx.scene.input.*;
    import javafx.scene.*;
    import javafx.animation.transition.*;
    import javafx.scene.paint.*;

    var xAxis : Integer = 0;
    var yAxis : Integer = 0;
    var scene : Scene ;
    var grp : Group = Group{};
     var star : Path ;

    var bgRect : Rectangle = Rectangle{
        width : 250
        height : 250
        focusTraversable : true
        onMouseMoved: function (e: MouseEvent): Void {
            insert star = Path{
                        elements: [
                            MoveTo {x: 24.413, y: 12.207},
                            LineTo {x: 15.979, y: 14.947},
                            LineTo {x: 15.979, y: 23.816},
                            LineTo {x: 10.766, y: 16.641},
                            LineTo {x: 2.331, y: 19.381},
                            LineTo {x: 7.544, y: 12.207},
                            LineTo {x: 2.331, y: 5.032},
                            LineTo {x: 10.766, y: 7.772},
                            LineTo {x: 15.979, y: 0.597},
                            LineTo {x: 15.979, y: 9.466},
ClosePath { },
MoveTo {x: 0, y: 0},
MoveTo {x: 24.413, y: 24.413}
]
translateX: bind e.x
translateY: bind e.y
strokeWidth: 1
fill: Color.RED
} into grp.content;
ParallelTransition {
node: star
content: [
RotateTransition { duration: 1s byAngle: 360 },
ScaleTransition { duration: 2s node: star byX: 2 byY: 2 },
FadeTransition {
duration: 3s fromValue: 1.0 toValue: 0.0
action : function(){
delete star from grp.content;
}
}
]
}.play();
}
}
Stage {
title: "Rotating and fading start"
scene: bind Scene {
content : bind [ bgRect , grp]
width: 200
height: 200
}
}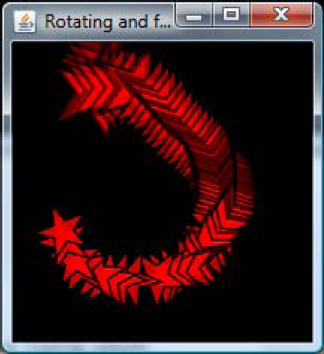
In Listing 13-11, we are creating and adding a star-shaped path to a group when the mouse is moved within a black rectangle. At the same time, we are defining a parallel transition that rotates, scales, and fades each of the stars added to the group. Because it is a parallel transition, all the transitions happen over the same time, and when you move the mouse within the black rectangle, you will notice that the stars are being created continuously and each undergoing different transformations at different times. Some shapes will be rotating, some of them will be fading out, and some of them will be zooming. There is no dependency defined among the transitions and hence you will see stars undergoing different transitions according to the time at which they were added and the time at which their parallel transition was started.
However, if we make the container transition sequential, then the stars first all appear, then rotate, then scale to the given scale factor, and finally fade out. All the transitions do not happen in parallel; instead, one transition is a dependent on the previous one, and a new transition cannot start until the previous one is complete.
You can easily see the difference by running both Listing 13-11 and the following Listing 13-12 (Figure 13-9 shows its output) and comparing their behaviors.
Example 13.12. A demonstration of sequential transitions
//Previous code is the same as Listing 13-11
            ...
            ...

            SequentialTransition {
                node: star
                content: [
                   RotateTransition { duration: 1s byAngle: 360  },
                   ScaleTransition { duration: 2s node: star byX: 2 byY: 2 },
                   FadeTransition {
                            duration: 3s fromValue: 1.0 toValue: 0.0
action : function(){
delete star from grp.content;
}
}
]
}.play();
}
}
//Following code is the same as Listing 13-11
...
...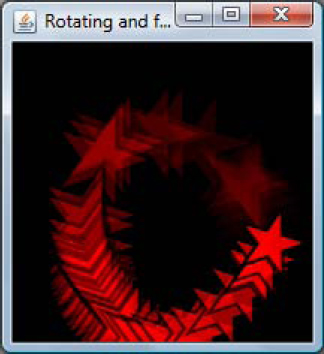
Listing-13-12 uses the same code as that of Listing 13-11, with one difference: ParallelTransition is replaced by Sequential Transition. Again, just run the two versions and watch the difference in their behavior, and you will easily understand the difference between parallel and sequential transitions.
Note
The duration, repeatCount, and autoReverse instance variables have no affect on these classes and are defined separately for each transition declared in the content variable.
Sequential and parallel transitions can be used in combination to create even more advanced visual effects. If a desired transformation cannot be implemented by a combination of any predefined animated transitions, you can override the rebuildKeyFrames() function of the Transition class to implement the keyframes that suit the logic of your application.
Animation can be defined as the change in a variable's value over a time period, and it is built into the JavaFX language syntax and independent of any UI library. Animation in JavaFX is defined through a set of keyframes (snapshots of the animation at specific times) and an enclosing timeline. This timeline can be played, paused, and stopped just like a movie played on your DVD player. Animation comes with its own operators that are handy in defining the value change and interpolation. Each keyframe can also have an action associated with it. You can use the elaborate or the simplified animation syntax depending on the complexity of your animation.
Animation also offers a set of predefined transitions that can be used to create transformational animations such as scaling, rotation, fading and translation. A node can be animated along the path of arbitrary shape using path transitions. Multiple transitions can be combined to create highly advanced visual effects, and the dependency between the transitions can be clearly defined using parallel or sequential transitions.