E-mail is the most commonly used method of business communication today, and Microsoft Dynamics CRM makes it easy to send e-mail through Outlook or via the web-based Microsoft Dynamics CRM client. However you send e-mails, it’s easy to attach them back to records—giving you a valuable history of communication on the record level.
If you are using the web client for Microsoft Dynamics CRM, you can send e-mails to your customers right from within Internet Explorer. E-mails sent from Microsoft Dynamics CRM will come from your e-mail address, and a history of the e-mail having been sent will be created on the customer record. Best of all, they’re sent using templates, so you’ll save time writing the body of the e-mail.
Outlook 2010/Internet Explorer:
On the Navigation Pane, click Sales and then Contacts. (You could also click Leads or Accounts, if you wanted to send an e-mail to a lead or account.)
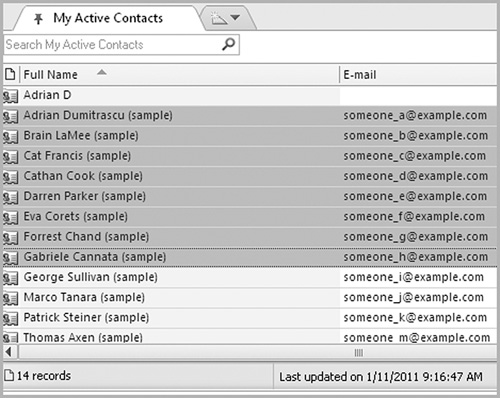
From your contact list, highlight the contact (or contacts) that should receive the direct e-mail.
In the Collaborate group of the ribbon, click the Send Direct E-mail button.
In the template list, choose a template.
Select a range of recipients. You can send to Selected records, All records on the page, or All records.
Choose a sender for your e-mail. The e-mail will appear to have been written by the sender or queue that you select.
Click Send.
Outlook 2003/2007:
On the Navigation Pane, click Sales and then Contacts. (You could also click Leads or Accounts, if you wanted to send an e-mail to a lead or account.)
From your contact list, highlight the contact (or contacts) that should receive the direct e-mail.
On the Contacts menu, click the Send Direct E-mail button.
In the template list, choose a template.
Select a range of recipients. You can send to Selected records, All records on the page, or All records.
Choose a sender for your e-mail. The e-mail will appear to have been written by the sender or queue that you select.
Click Send.
In the History area of a record, you’ll see a list of all completed activities for the record—including histories of e-mails sent. If you need to refer back to an e-mail conversation you had with a client, it’ll be faster to refer back to the client’s record. Once you start using this feature, you’ll never spend hours pouring through your Sent Items folder to find a relevant message.
Outlook 2003/2007/2010/Internet Explorer:
In the Navigation Pane, go to the record whose history you’d like to view. For example, you could click Sales in the Navigation Pane and then Customers.
Double-click a record from your list.
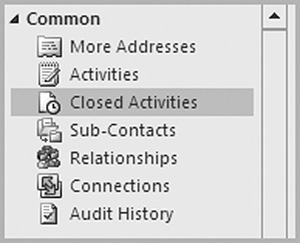
On the left, click the Closed Activities option.
A list of all e-mails sent should appear. Double-click any e-mail to see the full contents of the e-mail, including attachments.

Using the mass e-mail features in Microsoft Dynamics CRM, you can send template-based e-mails to multiple contacts in one step. The e-mails can contain field placeholders that will pull data from the customer record, so your customers will never know that they are receiving a mass e-mail.
To select mass e-mail recipients, you can either highlight contacts in a view, or you can use the Advanced Find feature to isolate specific contacts. You could also send a mass e-mail to members of a marketing list.
Outlook 2003/2007/2010/Internet Explorer:
Go to a list of customer records. Using the View drop-down, select the view that contains the customers who should be in your distribution list.
Perform the mass e-mail using the instructions on the next page.
~or~
Go to a list of customer records. Hold down the Ctrl key and highlight records that should be included in the distribution list.
Perform the mass e-mail using the instructions on the next page.

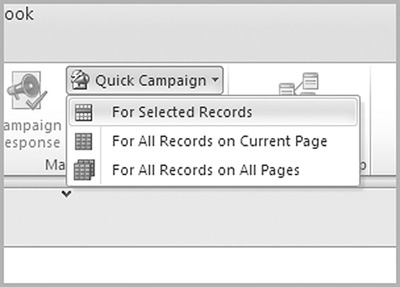
Mass e-mails are a type of campaign, and the easiest way to send a mass e-mail on-the-fly is to use the quick campaign feature. Quick campaigns are covered in more depth in Chapter 8.
Outlook 2010/Internet Explorer:
Highlight all of the records that should be included in your mass e-mail. (See the previous page for options.)
On the Add tab, in the Marketing group of the ribbon, click the Mail Merge button.
Choose E-mail as your mail merge type.
Choose a template or a blank document to start with.
Click OK.
In Word, follow the Mail Merge Wizard. In the last step, you will have the option to send the message via e-mail.
Outlook 2003/ 2007:
Highlight all of the records that should be included in your mass e-mail. (See the previous page for options.)
On the Add menu, click the Mail Merge option.
Choose E-mail as your mail merge type.
Choose a template or a blank document to start with
Click OK.
In Word, follow the Mail Merge Wizard. In the last step, you will have the option to send the message via e-mail.

Automated workflow in Microsoft Dynamics CRM allows you to monitor for events and condition changes within the database and then perform specific actions in reaction. Before attempting this task, make sure you read Chapter 18, where we talk about workflow in more detail.
As soon as a new lead is entered into the system, you want to set Microsoft Dynamics CRM to automatically send an e-mail to the relevant sales rep to let him or her know that a lead is ready in the system. Using the workflow feature, it’s easy to set this up.
Outlook 2003/2007/2010/Internet Explorer:
In the Navigation Pane, click Settings and then Processes.
On the Actions toolbar, click the New button.
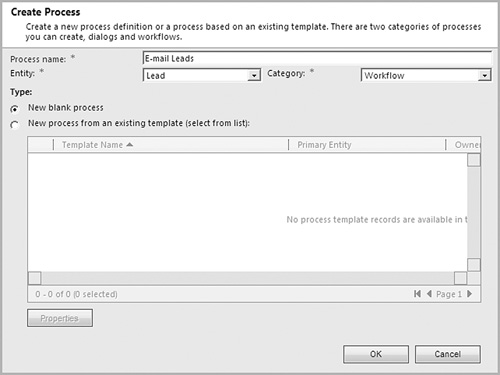
Give your Process a name, choose Lead as your entity, and select Workflow as your Category type.
Click OK.
With the default settings, the workflow will be configured to run each time a new lead is created.
On the Actions toolbar, click the Add Step drop-down and choose the Send E-mail option.
Type the description of your step, and click the Properties button to configure the e-mail. This is where you’ll add the From and To contacts, subject, and body of the e-mail message.
Click Save and Close to exit the e-mail properties.
Click Save and Close to exit the workflow screen.

