Using the case management features in Microsoft CRM, you can manage your customer service department. Cases can be linked to customer records, and they also interact with other parts of the application—like contracts, knowledge-base articles, services, and activities.
If a customer calls with a problem or concern, you can create a new case for the situation. The system will automatically assign a case number, and you can write in information about the case—like the subject, owner, title, and level of customer satisfaction. Cases remain open in the system until they are closed by one of your support technicians, and it is easy to run reports that show outstanding cases.
Outlook 2010/Internet Explorer:
In the Navigation Pane, click Service and then Cases.
On the Cases tab in the Records group of the ribbon, click the New button.
Give your case a title, customer, subject, and owner.
You can also link the case with a contract and/or contract line.
Click Save and Close.
Outlook 2003/2007:
In the Navigation Pane, click Service and then Cases.
On the Cases menu, click the New button.
Give your case a title, customer, subject, and owner.
You can also link the case with a contract and/or contract line.
Click Save and Close.

Many cases have unique circumstances, and to house that special information, you can enter notes for any case. An unlimited number of notes can be added to each case, and if you are taking over a case, it’s always a good idea to review the notes before talking with the customer.
Outlook 2003/2007/2010/Internet Explorer:
In the Navigation Pane, click Service and then Cases.
Double-click a case from the list of cases.
Click the Notes and Article form section.
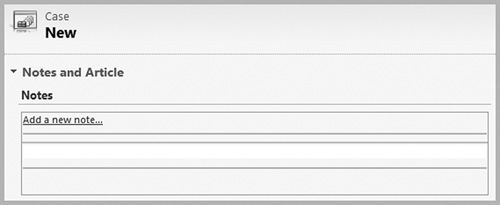
In the Notes area, click where it says Click here to enter a new note....
Type your note.
Click Save and Close.
Once cases are created, you can assign ownership for the case, resolve the case when the client has been satisfied, and track relevant information as the case progresses through your support process.
After entering a new case in the system, you can assign the case to another CRM user or queue. Let’s say you are a level 1 technician. You take all of the information about the customer’s problem over the phone, but you cannot resolve the issue. To escalate the case to a level 2 technician, you could assign the case to the level 2 queue.
Outlook 2003/2007/2010/Internet Explorer:
In the Navigation Pane, click Service and then Cases.
Double-click a case from the list of cases.
In the Collaborate group of the ribbon, click the Assign button.
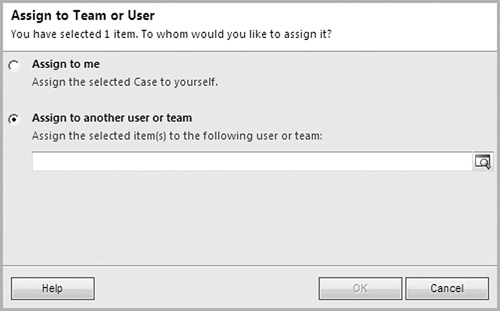
Choose the Assign to another user or team option.
Click the Lookup button to explore your list of users and teams.
Highlight a user or team and click OK.
Click OK, and then Save and Close.
After the customer has been satisfied, you can mark the case as resolved in the system. You’ll want to make sure to resolve cases as soon as they are closed to avoid having the case mistakenly show up in the Neglected Cases report.
Outlook 2003/2007/2010/Internet Explorer:
In the Navigation Pane, click Service and then Cases.
Double-click a case from the list of cases.
In the Actions group of the ribbon, click the Resolve Case button.
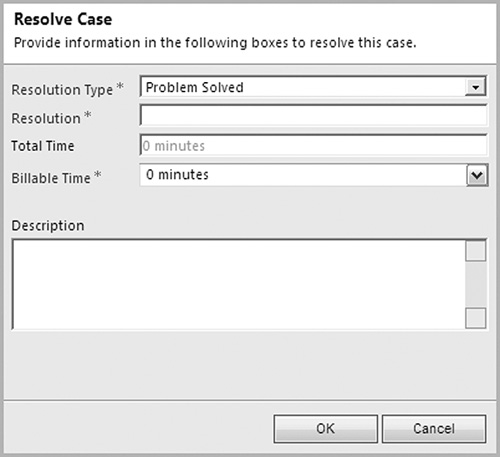
Specify the Resolution Type, Resolution, Total Time, and Total Billable Time for the case.
Add a description, if necessary.
Click OK.
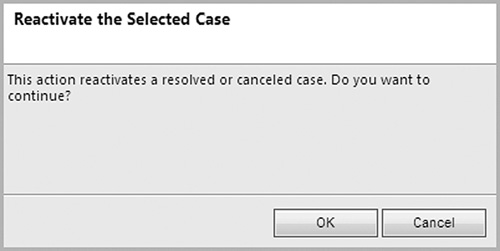
You’re on the phone with a customer, and he is satisfied with the solution you’ve offered him, so you mark the case as resolved. However, an hour later, the customer calls back and is having the same issue again. In this case, you would reactivate the existing case.
Outlook 2003/2007/2010/Internet Explorer:
In the Navigation Pane, click Service and then Cases.
From the View drop-down, choose a view that will include your resolved cases. For example, you could choose the My Resolved Cases view.
Double-click the resolved case you’d like to reactivate.
In the Actions group of the ribbon, click the Reactivate button.
Click OK.
A customer calls with a specific issue, but it’s an issue that has previously been documented in your knowledge base. By assigning the knowledge base article to the case, you can easily see the contents of the article within the case screen, and any other technicians that view the case will have the article for reference.
Outlook 2003/2007/2010/Internet Explorer:
In the Navigation Pane, click Service and then Cases.
Double-click a case from the list of cases.
Click the Notes and Article form section.
In the Knowledge Base Article section, click the Lookup button to browse for a specific knowledge-base article.
From the drop-down in the upper-right corner, select a search method. Enter your search terms, and click the Search button to find relevant articles.
Highlight the article that is relevant to the case, and click OK.

In any business, some customer service issues slip through the cracks. The neglected cases report is designed to keep that from happening. The report will show cases that have not been contacted recently. The report will show a list of cases that have not had changes to the case or related activities/notes within the time range you specify.
Outlook 2010/Internet Explorer:
In the Navigation Pane, click Service and then Cases.
If you want to run the report on a sub-set of your cases, switch to a view that just contains the cases for your report. Alternatively, you could Ctrl+ click to highlight certain records, or you could run an Advanced Find.
On the Cases tab in the Data group of the ribbon, click the Run Reports button.
Choose the Neglected Cases report.
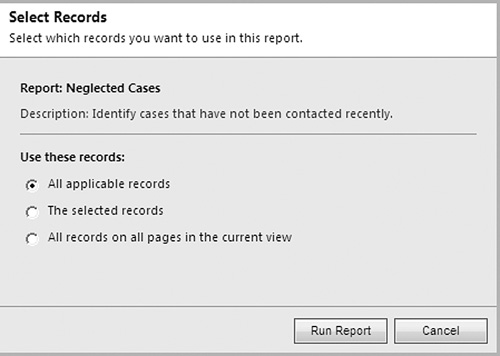
Select to run the report on all records, the selected records, or all records in the current view.
Click the Run Report button.
The graph that appears shows the number of cases grouped by the number of days neglected. Click the Show All link at the bottom of the graph to see the raw data.
Outlook 2003/2007:
In the Navigation Pane, click Service and then Cases.
If you want to run the report on a sub-set of your cases, switch to a view that just contains the cases for your report. Alternatively, you could Ctrl+ click to highlight certain records, or you could run an Advanced Find.
On the Cases menu, click the Run Reports button.
Choose the Neglected Cases report.
Select to run the report on all records, the selected records, or all records in the current view.
Click the Run Report button.
The graph that appears shows the number of cases grouped by the number of days neglected. Click the Show All link at the bottom of the graph to see the raw data.
