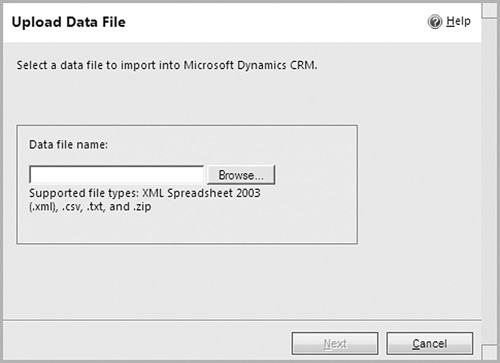
You can perform most simple imports using the Import Data Wizard. This tool, which is accessible both from within Outlook and in the Microsoft Dynamics CRM web client, will import data into any entity from a CSV file.
Using the Import Data Wizard, you can import any CSV text file. Before running an import job, it’s probably a good idea to open your data file in Excel and check the actual data to make sure it is consistent with the existing data and field structure in Microsoft Dynamics CRM.
Outlook 2010/Internet Explorer:
In the Navigation Pane, click Workplace and then Imports.
In the Records group of the ribbon, click the Import Data button.
Click the Browse button and select your data file. Also, verify the data and field delimiters. If you are importing a CSV file, the defaults should be fine. Click Next.
In the Record type field, choose the type of records you are importing. In the Data map field, choose a data map and click OK. Click Next.
Choose a record owner and select whether or not to import duplicate records. Click Next.
Specify a name for the import job, and click the Import button.
Outlook 2003/2007:
In the Navigation Pane, click Workplace and then Imports.
On the Imports menu, click the Import Data button.
Click the Browse button and select your data file. Also, verify the data and field delimiters. If you are importing a CSV file, the defaults should be fine. Click Next.
In the Record type field, choose the type of records you are importing. In the Data map field, choose a data map and click OK. (Creating a data map is covered on the next page.) Click Next.
Choose a record owner and select whether or not to import duplicate records. Click Next.
Specify a name for the import job, and click the Import button.
In addition to importing a single file in, you can also import multiple files into your CRM database. This is especially useful if you are importing a list of contacts and accounts. If you import these lists at the same time, any contacts and accounts that are linked to each other will be linked once they are imported into your CRM database.
Outlook 2010/Internet Explorer:
In the Navigation Pane, click Workplace and then Imports.
In the Records group of the ribbon, click the Import Data button.
Click the Browse button and select your data file. This should be a ZIP file that contains your multiple files.
In the Record type field, choose the type of records you are importing. In the Data map field, choose a data map and click OK. (Creating a data map is covered on the next page.) Click Next.
Choose a record owner and select whether or not to import duplicate records. Click Next.
Specify a name for the import job, and click the Import button.
Outlook 2003/2007:
In the Navigation Pane, click Workplace and then Imports.
On the Imports menu, click the Import Data button.
Click the Browse button and select your data file. This should be a ZIP file that contains your multiple files.
In the Record type field, choose the type of records you are importing. In the Data map field, choose a data map and click OK. (Creating a data map is covered on the next page.) Click Next.
Choose a record owner and select whether or not to import duplicate records. Click Next.
Specify a name for the import job, and click the Import button.
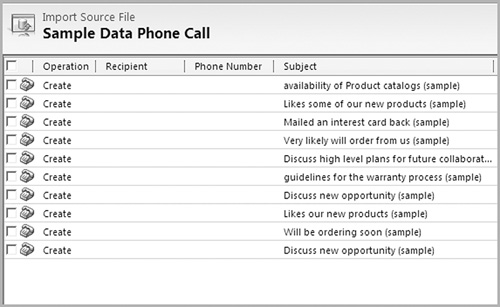
After your import job has finished, it’s a good idea to verify the records that were imported. Just double-click the import job, and you’ll see a lists of records that were successfully imported, as well as lists of items that were not imported.
Outlook 2003/2007/2010/Internet Explorer:
In the Navigation Pane, click Workplace and then Imports.
Double-click the import job you’d like to review.
On the left, click the <Records> Created option. If you imported contacts, this will say Contacts Created. If you imported leads, it will say Leads Created.
In this area, you’ll see a list of all records created as a result of the import.
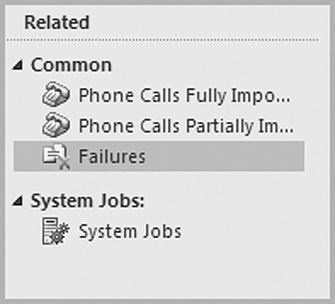
On the left, click the Failures option. This will show a list of records that were not imported for some reason. (Dealing with failures is covered later in this chapter.)
Sometimes during an import, certain records will not import properly. Maybe they are missing data in a required field? If you are importing into a picklist field, records might not import if the field value that you are importing does not exist in the picklist. If you have chosen to not import duplicate records, the import of a record might fail because the record already exists in Microsoft Dynamics CRM.
Outlook 2003/2007/2010/Internet Explorer:
In the Navigation Pane, click Workplace and then Imports.
Double-click the import job you’d like to review.
On the left, click the Failures option.
A list of failed records will appear.
On the Actions toolbar, click the Export Error Rows button to export all of the records that were not imported to a CSV file for analysis in Microsoft Excel.
After running an import, you might realize that the import produced an undesirable result. Maybe you forgot to import zip codes for contacts, or perhaps some fields were mapped incorrectly? Whatever the issue, you can easily delete all records associated with an import.
Outlook 2003/2007/2010/Internet Explorer:
In the Navigation Pane, click Workplace and then Imports.
Double-click the import job you’d like to review.
On the left, click the <Records> Created option. If you imported contacts, this will say Contacts Created. If you imported leads, it will say Leads Created.
In this area, you’ll see a list of all records created as a result of the import.
Highlight all records.
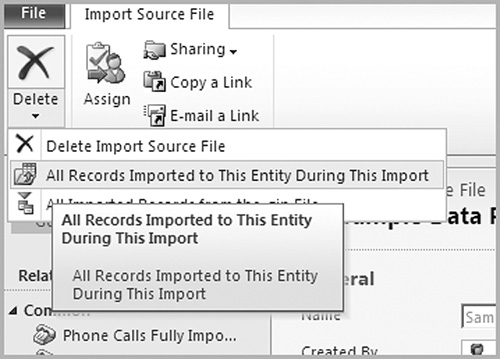
On the ribbon, click the Delete button.
Choose to either deactivate or delete the records.
There are many reasons for exporting your data from Microsoft Dynamics CRM. You may need an offsite copy of the data, or you may need to export the data for reporting purposes. You may need to export contact data to send to a mailing house. It’s easy to export any part of your Microsoft Dynamics CRM database.
The easiest way to export a single entity is with the direct export to Microsoft Excel. Whether you’re looking at contacts, leads, accounts, opportunities, cases, or any other entity, you can click the Export to Excel button to export.
Outlook 2010/Internet Explorer:
Go to any list of records in Microsoft Dynamics CRM. For example, you could:
Click Sales in the Navigation Pane and then Contacts to bring up a list of contacts.
Click Sales in the Navigation Pane and then Leads to bring up a list of leads.
Click Service in the Navigation Pane and then Cases to bring up a list of support cases.
Once you have a list of records on the screen, click the Excel button in the Data group of the ribbon.
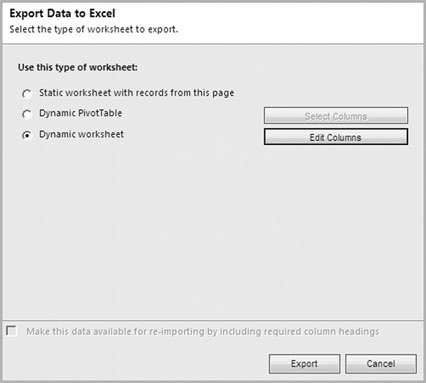
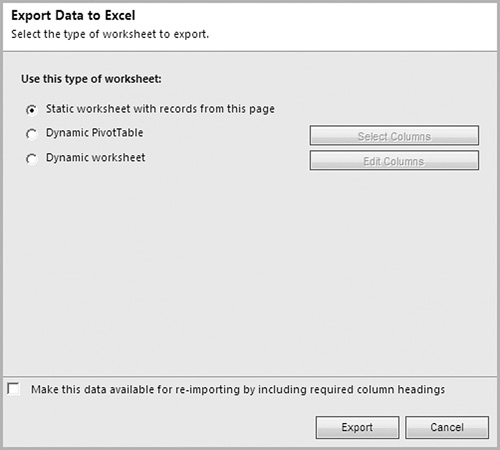
You will have the option to export static or dynamic worksheets. You can also export a dynamic pivot table.
Click the Export button.
Outlook 2003/2007:
Go to any list of records in Microsoft Dynamics CRM.
Once you have a list of records on the screen, click the Export to Excel button on the Records menu.
You will have the option to export static or dynamic worksheets. You can also export a dynamic pivot table.
Click the Export button.
You should use Excel whenever you are editing a large list of records. You can edit multiple records in CRM, but editing in Excel is very quick and easy for data cleanup. Once you have finished cleaning up your data in an Excel spreadsheet, then you can simply save and re-import the file.
Outlook 2010/Internet Explorer:
Go to any list of records in Microsoft Dynamics CRM.
Once you have a list of records on the screen, click the Excel button in the Data group of the ribbon.
Select the static worksheet option and check the option to make the data available for re-importing at the bottom of the window.
Clean up your data in the Excel spreadsheet.
Save your Excel spreadsheet as a CSV file, then re-import the file into CRM. Follow the importing records steps that are covered earlier in this chapter.
Outlook 2003/2007:
Go to any list of records in Microsoft Dynamics CRM.
Once you have a list of records on the screen, click the Export to Excel button on the Records menu.
Select the static worksheet option and check the option to make the data available for re-importing at the bottom of the window.
Clean up your data in the Excel spreadsheet.
Save your Excel spreadsheet as a CSV file, then re-import the file into CRM. Follow the importing records steps that are covered earlier in this chapter.
Don’t discount the reporting power in Microsoft Excel. Especially if you are running Microsoft Excel 2010, some of your most versatile and comprehensive reports can come from Excel spreadsheets. Because just about every entity will perform a one-click export to Excel, this is an option for reporting on most of your CRM data.
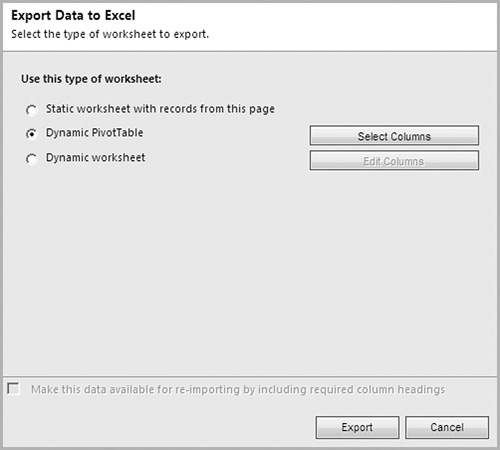
A PivotTable is an object that can be added to an Excel spreadsheet that will summarize your data independent of the original spreadsheet data. So, for example, let’s say that your original data has three columns: Company, Name, and State. The PivotTable could give a summary list of the number of companies in each state, broken down by state.
Outlook 2010/Internet Explorer:
Go to any list of records in Microsoft Dynamics CRM.
Once you have a list of records on the screen, click the Export to Excel button in the Data group of the ribbon.
You will have the option to export a dynamic PivotTable.
Click the Export button.
Outlook 2003/2007:
Go to any list of records in Microsoft Dynamics CRM. For example, you could open a list of contacts.
Once you have a list of records on the screen, click the Export to Excel button on the Records menu.
You will have the option to export a dynamic PivotTable.
Click the Export button.
In the first task in this section, you exported a static Excel spreadsheet. In that case, after the export had been performed, there was no live link between the spreadsheet and Microsoft Excel. By exporting a dynamic spreadsheet, you get the same spreadsheet, but it comes with a Refresh from CRM button on the toolbar. Click that button, and live data from the CRM database is refreshed into the spreadsheet.
Outlook 2010/Internet Explorer:
Go to any list of records in Microsoft Dynamics CRM.
Once you have a list of records on the screen, click the Export to Excel button in the Data group of the ribbon.
You will have the option to export a dynamic spreadsheet.
Click the Export button.
Outlook 2003/2007:
Go to any list of records in Microsoft Dynamics CRM. For example, you could open a list of contacts.
Once you have a list of records on the screen, click the Export to Excel button on the Records menu.
You will have the option to export a dynamic spreadsheet.
Click the Export button.
