Getting Started
As we all know, technology is constantly progressing in every aspect of our lives. With the explosion of smart phones and tablets, it was only a matter of time before televisions joined the fray as one of the next connected “smart” devices. While interactive televisions have been around for a few years, major contenders have only recently entered the market, with Android TV having been introduced in June of 2014 (albeit after the failed attempt of Google TV and the huge success of Chromecast), and Apple TV finally opening their platform to app developers in September of 2015. Given this, now is the perfect time to prepare for the next trend in app development by expanding your skillset with Android TV.
What Exactly Is Android TV?
Android TV is an interactive television platform developed by Google and released at its I/O conference in 2014. Taking what Google had learned from one of their previous attempts at entering the living room, known as Google TV, they created this operating system to be easily embedded in television sets or to allow traditional “dumb” TVs to become interactive TVs through the use of standalone set-top boxes. The new platform is a version of Android that has been optimized for television, and has access to all of the features developers are already familiar with, as well as some additional components provided through the Leanback Support library.
In addition to being able to create native applications for Android TV, the operating system also provides support for Google Cast. Google Cast is familiar to most people as the technology behind the Chromecast. This means that if your existing application supports casting, then users will still be able to use it with the Android TV, though without the full immersive experience provided by having a native Android TV app. While understanding how to develop cast enabled apps is useful, this book will focus on developing native apps for Android TV.
What to Expect from this Book
This book is intended to get you started with the Android TV platform so that you can extend existing apps or create your own to improve the living room experience of your users. You should have a basic understanding of Android development, as you will be working with adapters, fragments, activities, views, and other standard Android components. Anything covered that has been specifically introduced for Android TV will be discussed in this book, so no previous knowledge of those components is required. As you work through this book, you will create a relatively simple Android TV media application by writing each of the components in order to fully understand how the application operates. You will also build a couple of small example programs that emphasize additional APIs, such as LAN communication and reading input from the game controller, so you can start to build other applications such as games and utility programs. Along the way you will learn design concepts related to what makes the user experience different on a television compared to smart phones and tablets.
By the time you finish reading this book, you should have a firm grasp on the vocabulary associated with Android TV. Not only will you be able to create apps for the platform, but you should also be able to confidently seek out answers to your more complicated questions by understanding what you are looking for when searching through forums and the extensive, well-written Android documentation from Google.
Getting Set Up
One of the nice things about developing for Android is that the development tools can be used on most modern computer platforms, and Android TV development is no different. For coding the examples in this book, you will need a computer running Windows, Mac OS X, or Linux. This book will focus on using Android Studio as the development environment, which itself currently requires the Java Runtime Environment (JRE) and Java Development Kit (JDK). If you do not already have Android Studio, you can get it and find the official system requirements, including minimum operating system versions, for Android development by visiting https://developer.android.com/sdk/index.html, downloading Android Studio, and following the installation instructions for your operating system. At the time of this writing, the latest version of Android Studio is 1.4. During the installation process you will need to install the platform tools and APIs for at least Android 5.0 (Lollipop).
Creating a New Android TV Project
Once you have installed and set up Android Studio, you can create a sample project using the base Android TV template provided by Google. Do this by opening Android Studio and clicking on Start a New Android Studio Project under the Quick Start header.
When you arrive on the Configure Your New Project screen, set the Application Name to Hello World, the Company Domain to apress.com, and your Project Location to wherever you want to save your source code (see Figure 1-1). Once you have filled in all of the required information, click Next and you will be taken to a screen to select which form factors your app will support.
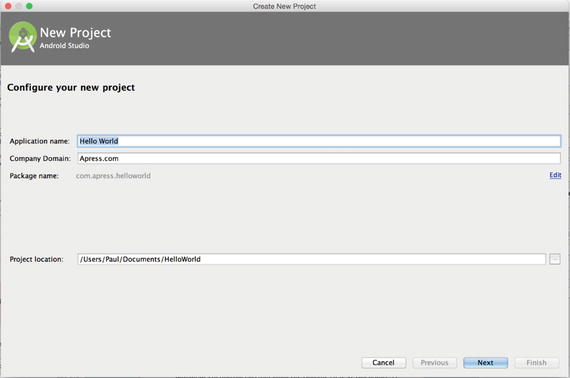
Figure 1-1. Configure your new project screen
For your Hello World application, unselect the check box next to Phone and Tablet and activate the check box next to TV. While you may have a module in your project for supporting phones and tablets, we will ignore that case for the sake of simplicity in this book. The minimum API version you will need for Android TV is at the oldest 21 (Lollipop), as Android TV was introduced with Lollipop. Figure 1-2 shows what your target Android devices screen should look like before continuing on.
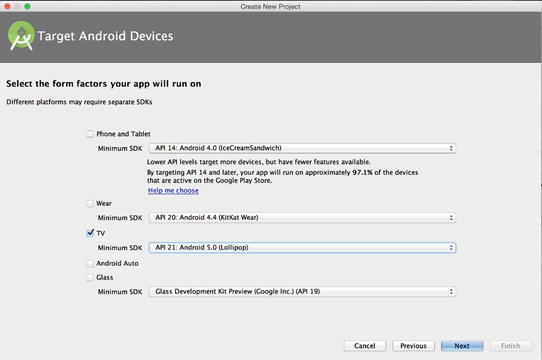
Figure 1-2. Screen for selecting form factors supported by your app
When you click Next, you’ll be taken to a screen that asks whether you want to create an empty project or a default Android TV activity, as shown in Figure 1-3. For this sample, choose the Android TV Activity option.
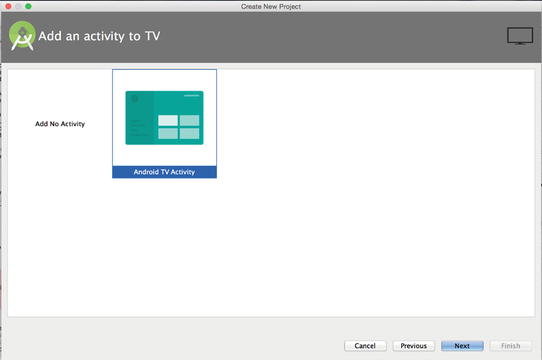
Figure 1-3. Selecting an Android TV template
The next screen you encounter will give you the option of renaming the activities, fragments, and layout files in the sample Android TV application (Figure 1-4). For this example, you can accept the default values and click Finish.
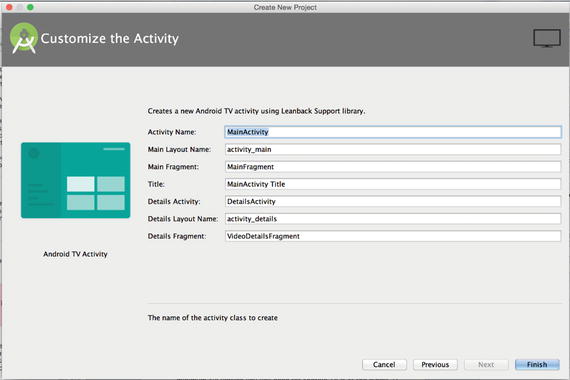
Figure 1-4. Naming your files
Android Studio will then take a moment to create the general template for your Hello World application. If you look through the source code for this application, you will notice over a dozen files just in Java. You may also notice that some of the files, such as VideoDetailsFragment.java, contain code that is deprecated, or no longer recommended for use by Google. For now, go ahead and ignore them as you will learn about the different recommended components for a media application later in this book.
Running Your Android TV App
The next step you will want to take is to run your Android TV app. As with mobile development, you can either use an emulator or install it on a physical device. In order to create an Android TV emulator, click on the AVD Manager button in the Android Studio toolbar (it will look like a phone screen with an Android head in the lower-right corner of the icon, and is the eighth button from the left in Figure 1-5).
![]()
Figure 1-5. Android Studio toolbar with AVD Manager button
Select Create Virtual Device… in the bottom-left corner of the AVD Manager dialog that appears and select the TV category from the left column. There should be multiple device profiles available to choose from, as shown in Figure 1-6, so pick any and click on Next.
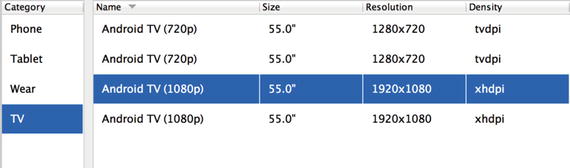
Figure 1-6. Virtual device options
The next screen should provide you with a list of system images to use for creating your base emulator. If you do not have the necessary system images on the next screen, check the Show Downloadable System Images check box. You should see something similar to Figure 1-7. Download a system image based on the Recommendation box on the right side of the screen in order to build a virtual device that will perform well on your system.
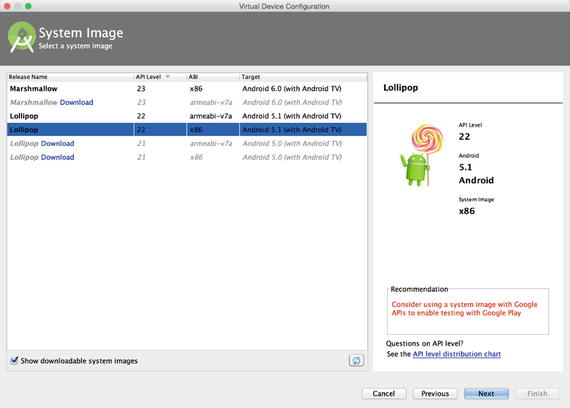
Figure 1-7. Selection of system images for the Android TV emulator
The last screen (shown in Figure 1-8) will give you the option to customize the virtual device settings. For these purposes, you can keep the defaults and click Finish to create your emulator.
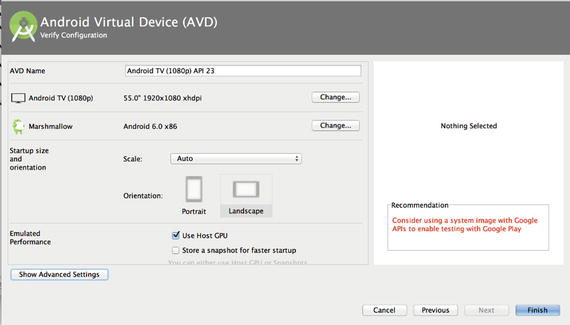
Figure 1-8. Configuring your new Android virtual device
While the emulator can be convenient, it is still best to test on a physical device. During I/O 2014, Google released a set of development devices that could be requested by developers, called the ADT-1. Once Lollipop was officially released, Google announced the Nexus Player, which is available for purchase. Other devices, such as the NVIDIA SHIELD, are also available from third-party manufacturers. As more OEMs integrate Android TV with their television sets or create set-top boxes, the selection of devices to test against will continue to grow. If you have a physical device to test with, you can simply plug the device into your computer while it is running to directly install your apps.
Now that you have a sample Hello World application created and an environment to run your application, click on the green Run arrow in the Android Studio toolbar to install your application to ensure that everything works. You should see a screen similar to Figure 1-9 when your application has launched in your emulator or on a physical Android TV device.
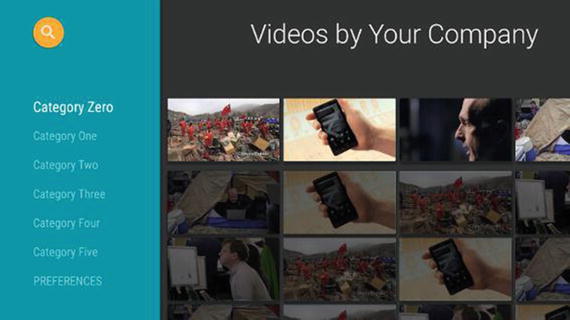
Figure 1-9. Initial screen for the Android TV template application
Summary
In this chapter you’ve taken your first steps in learning about the Android TV platform. You learned how to set up the sample Android TV project, and you created an emulator for viewing Android TV apps. In the next chapter you will learn a bit about designing your app to be useful for your users when viewed from across a room, and you will be introduced to some of the components of a media application.