If we deployed our site the way it’s currently designed, it would not be a very secure site; in fact, right now anyone could access our message queues and add data to them or hit all of our endpoints in the microservice. This could somewhat work if you were running on a home network (although still vulnerable to any one who gets on your network). In fact, we don’t even have users; this obviously would not make a great application to use in a multi-customer environment. Even as a home project, we’d be locked into one person.
REST/GraphQL layer
MQTT layer
The first layer is our endpoints exposed on the microservice to be used by either internal applications talking to each other or external entities wanting to gain information from that layer. We will be making use of the REST and GraphQL endpoints created so far. For those endpoints, we are going to add authentication checking since all of our endpoints (except health) require an authenticated user via OAuth 2, which is fairly standard for any site. For the message queues, we will use SSL certs to secure the communication between the endpoints. These will be a set of X509 certs that makes sure the traffic is not only encrypted but secured by the endpoints. Don’t worry if some of those terms are confusing; we will get into what everything means and how to glue it together in a bit.
What We Aren’t Covering
To make a truly secure site, there are many other items you want to add to your site. Security is its own department at most large companies, and they even conduct formal architecture reviews of applications to make sure they are secure. If you actually consider the data we will be storing (personal video data), security is VERY important because you wouldn’t want to have yours or customer videos exposed to the Web. We won’t be able to get into all the techniques used for an application. However, one of the biggest pieces of software large and small companies make use of is monitoring software. Monitoring software can help you determine denial-of-service attacks and other attempts to penetrate your network. In addition, they are good for triage later after an attack to determine what vulnerabilities they were attempting to exploit and what they couldn’t. There are many paid and open source solutions for this that you can explore on your own.
One of our biggest hits is our communication between the microservices will not be over TLS; it will be over plain HTTP. This is far from ideal, but I didn’t want to set up TLS communication between the endpoints in the book. In a bigger environment, this is where I’d often recommend a service mesh like Istio that can help control the flow of traffic to the services and between services in a secure manner. With tools like Istio, mutual TLS becomes automatic and is just another way to make sure your endpoint traffic is secure.
Goals
- 1.
Setting up and configuring an account with Auth0 to be used for security
- 2.
Setting up logged in communication between a user and our services
- 3.
Creating authenticated connections between microservices
- 4.
Learning how to use certificates for MQTT
- 5.
Creating self-signed certificates
- 6.
Starting up the eMQTT with self-signed certificates
- 7.
Using self-signed certificates between client and MQTT
Authenticate Endpoints
In this section, we are going to go through how to secure the endpoints in our microservices with authentication. This will allow us to prevent users or hackers from using application to read/write without authentication. In addition, this will allow us when creating media data and querying the data to know the user. For our application, we are going to use tried and true technologies to create this; we will use an Open Authorization 2.0 (OAuth 2) authorization with Auth0 providing the login portal tools. First, let’s talk a little about how we got here to use OAuth 2 and Auth0.
In the first 10–15 years of the World Wide Web’s mainstream existence, most applications were web based, and even more often those web applications were intrinsically tied to its backend servers, which had content generating the HTML itself for the application. Everything was highly coupled. We used our own databases; on our own servers, we’d create everything from scratch. This isn’t much different from days of the first computers when each manufacturer had their own languages for their own computers. Everything that was on the site was generally coded uniquely for the site. And even when we used frameworks, the storing of data was still centralized to the application. However, this model of all under one roof started to change, especially when it came to authentication.
As the use of the Internet evolved, we started to have more complex website and even mobile sites. As the Web evolved instead of creating one application that has the web code and backend code, we started to segregate out those units into their own more stand-alone parts. With the addition of mobile, this became another stand-alone application. Each of these applications still spoke to the same backend but no longer were you generating HTML from that backend. And even within the backends, they had to communicate to other servers with knowledge of the user. All of those lead us to creating a standard OAuth to allow authentication and authorization across different systems.
On the actual code for authentication, it’s hard to perform securely so that no one hacks it, and by its nature, it’s fairly generic. The login across lines of business is relatively the same. You have a login and password, as well as the ability to recover a forgotten password. I’ve implemented this myself many times, and it’s relatively repetitive. But doing it yourself, you have to constantly worry about security; what if someone were to hack your site? You would expose tons of customer emails, at which point you have to disclose embarrassingly that their info was disclosed. However, if you do not manage it on your own, you lower the risk to storing any personal identifiable data; all they have is UUIDs they can’t correlate; there is less of an embarrassment or risk. This leads to companies specializing in OAuth services with low subscription costs, and it just made more sense to spending money for it than spending time.
Authorization vs. Authentication
These two concepts go hand in hand, and we will use them throughout this section to discuss how we are going to work with securing the endpoint for a given user. However, I think it’s important not to conflate the terms and use them to understand what each is. Lets define what Authentication (AuthN) and Authorization (AuthZ) means.
Authorization
Authorization is your system that decides whether you should have access to a particular set of resources to perform tasks. This can decide whether a subject (in our case, usually the user) can access a particular endpoint and what they do. It is even used to determine whether two microservices can talk to each other; this helps securing your microservices. Authorization determines what permissions a particular subject is allowed. Most often, the system that one uses for authorization is OAuth 2.
Authentication
Authentication is the process of identifying the subject, most often a user, defining who that subject is and associating a unique identifier to them. This id will then be used to store in your databases and used as a reference when calling the application. This can be your Lightweight Directory Access Protocol (LDAP) system, your Azure AD, or even some homegrown system. Most often, the system that wraps around that interops with OAuth 2; the best implementation of such is OpenID Connect.
OAuth 2
The OAuth framework has been around since about 2006, and the OAuth 2 spec came shortly thereafter and has been in use ever since without any major changes. OAuth has become the industry standard for authorization and is developed as part of the OAuth 2 Authorization Framework.1
OAuth 2 allows applications to grant access to services and resources by using an intermediary service to authorize requests and grant user access. This allows you to enable resource access without giving unencrypted client credentials. Users can use a JSON Web Token (JWT) or an opaque token for an authorization server that can then be used to access various resources. These tokens can then be passed to various other services with an expiration date as long as the token is not expired. The client that is doing the requesting doesn’t even have to be aware at each call what resource the token belongs to.
OpenID Connect
Open Id is the authentication layer that easily sits on top of OAuth 2.2 Open ID allows you to do authentication returning JWTs that are easily usable in the OAuth 2 world. These JWTs contain claims that tell you additional information about the user. Standard properties to include are name, gender, birth date, and so on. JWTs can also be signed. If they are and you have the keys to confirm the signature, you can generally trust that data; if not, you can use the JWT to query an endpoint for this information instead.
Applying AuthZ and AuthN
Authentication is pretty standard for most applications, and you’ve probably never built an application without it even if you didn’t set it up yourself. The difference for this application might be how you are authorizing. In most applications you work with, we have a standard web portal or even a forwarded portal via your mobile application. These allow for authentication of the user through a standard username and password. And this works well on your iPhone or desktop because you have a full-size keyboard at all times. However, on most IoT devices, even with a touch screen, we won’t always want to make them type the username and password authentication out all the time. It can be time-consuming and error-prone causing a poor user experience.
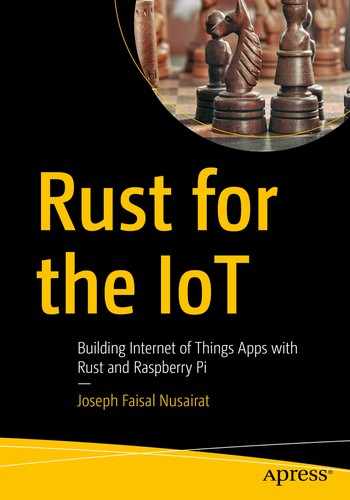
There is another way of course, and you’ve probably used it before even if you weren’t aware of it at the time, the device authentication flow. With the device flow instead of using the device to log in directly, you will use a website. What happens is the device will prompt us to log in; it will then supply a URL and device code. We will then go to the website and log in using the device code when prompted. In the meantime, our application will ping the authorization server to see if the user has been authenticated. Once the user is authenticated, the system will get a response that the user is authorized that will include an access token and optionally user token. At that point, the device will consider itself authenticated and will continue performing whatever actions it needs to to get the rest of the data.
Authorization flow with device
Auth0
When using OAuth 2 with OpenID Connect, there are multitude ways to put this all together. A common approach is to create your own Authorization system but rely on an OpenID Connect to run the authentication flow. This is common when you go to a website and you are asked to log in and you see the redirects for Google, Facebook, and so on. One of the main reasons people use this approach is security and safety. People may not trust adding their username and password to your site, but they trust another. In addition, it makes it, so you don’t have to remember the username and password for each site you use. Also it takes away the onus on you having their user data. If your site gets compromised, it’s best to have less personally identifiable data than more. However, many people still like to maintain control of their authorization needs, the OAuth 2 portion; part of the reason is because of how many frameworks are out there to easily interoperability with them.
For our application, we are going to use a provider that can handle both aspects for us, Auth0. And for our testing needs, Auth0 will be free for us to use; even in smaller limited quantities, it is still free. Auth0 allows us to choose using either the Google authentication model or its own personal database. If you want more information on the OpenID Connect system, you can go here: https://auth0.com/docs/protocols/oidc.
For our system, we are going to use Auth0’s ability to use a built-in database (this cuts back on a few extra steps we’d have to take with setting up a flow with Google). Great thing about this is we could even use an existing database in our system for importing into Auth0 if we needed to. Our examples going forward will use the Auth0 authentication/authorization endpoints to run our user management and security checkpoints. However, most of the code we are writing could work in any system; you may just have to adjust the parameters since those can differ between providers, but the general flow is the same.
Setting Up Auth0
Start

Click the START NOW for $0/month plan
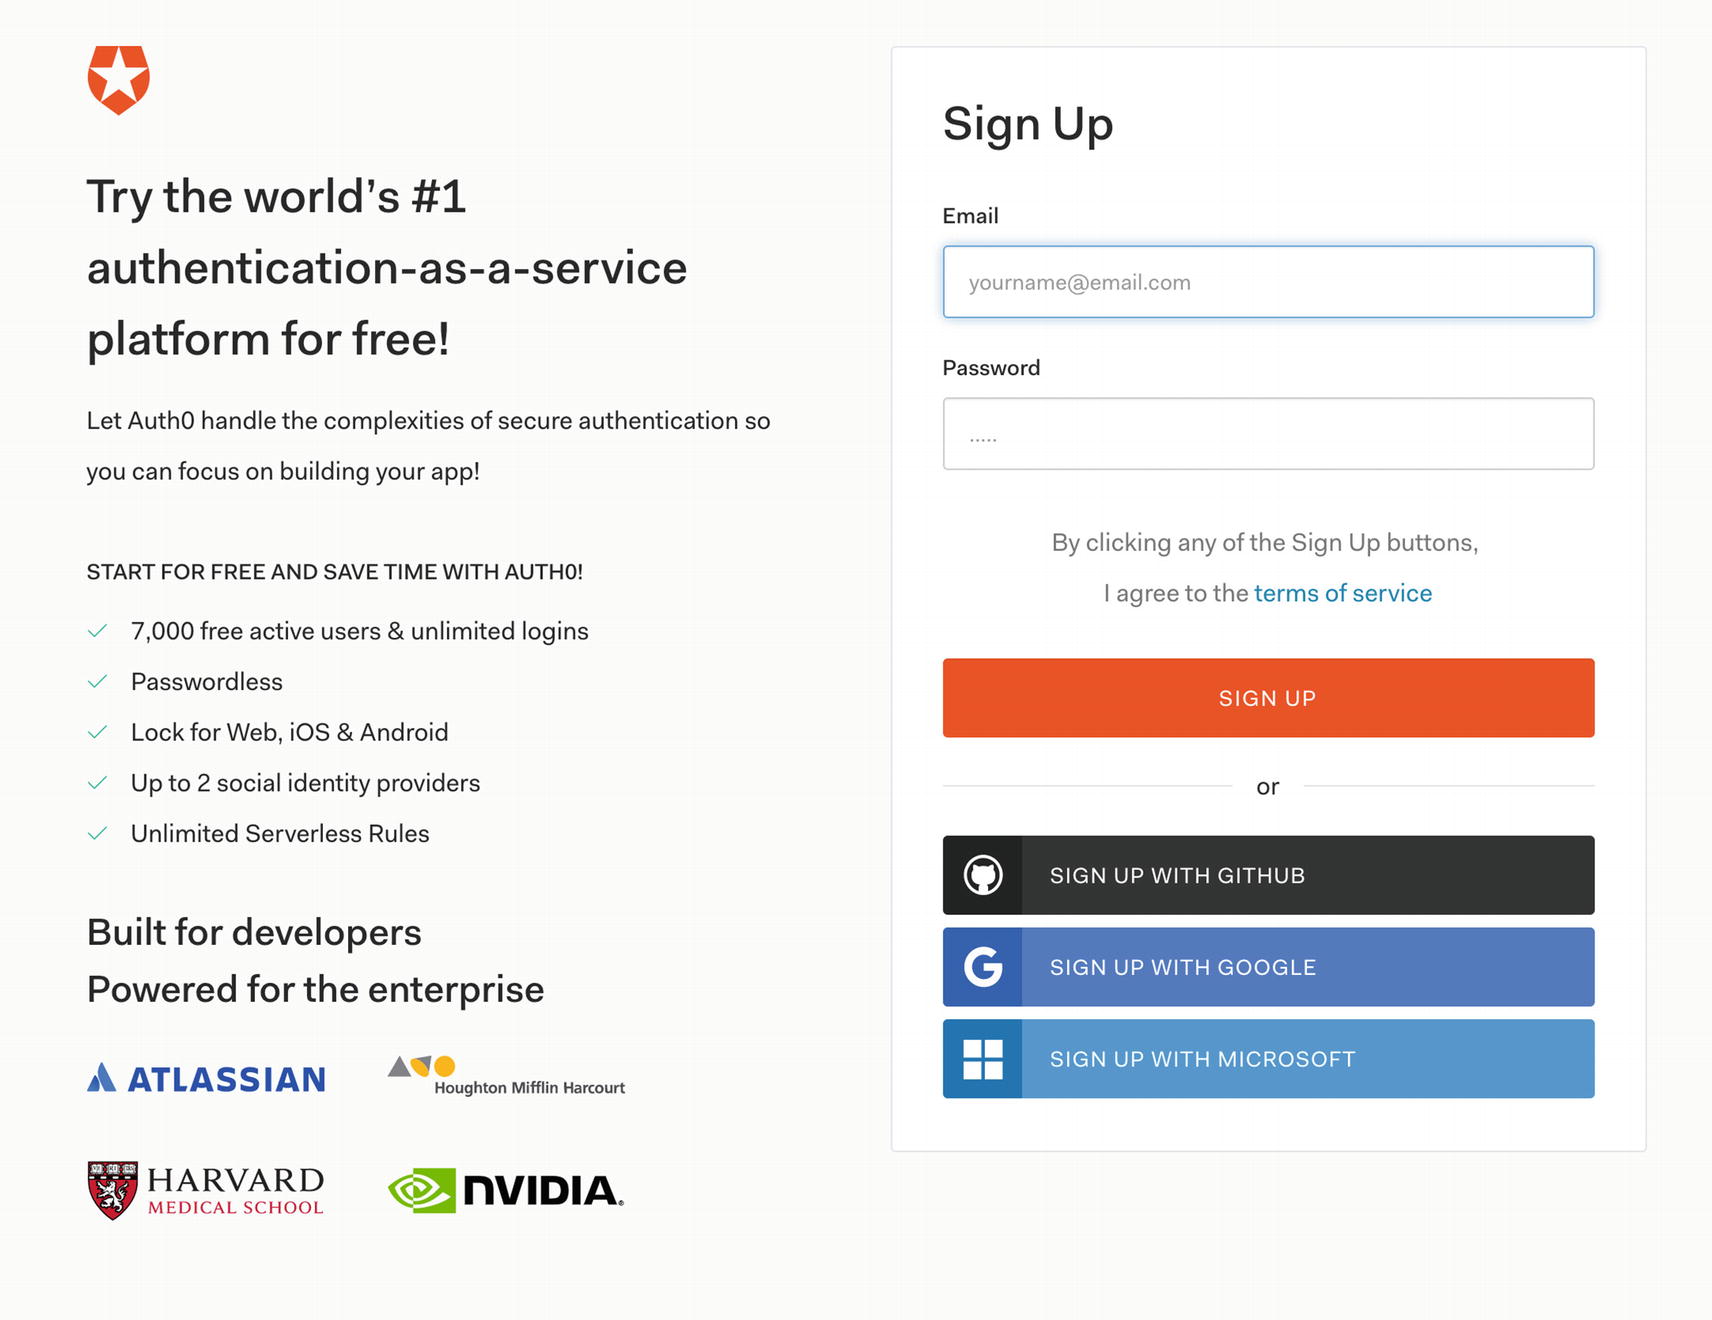
Pick our domain name and region
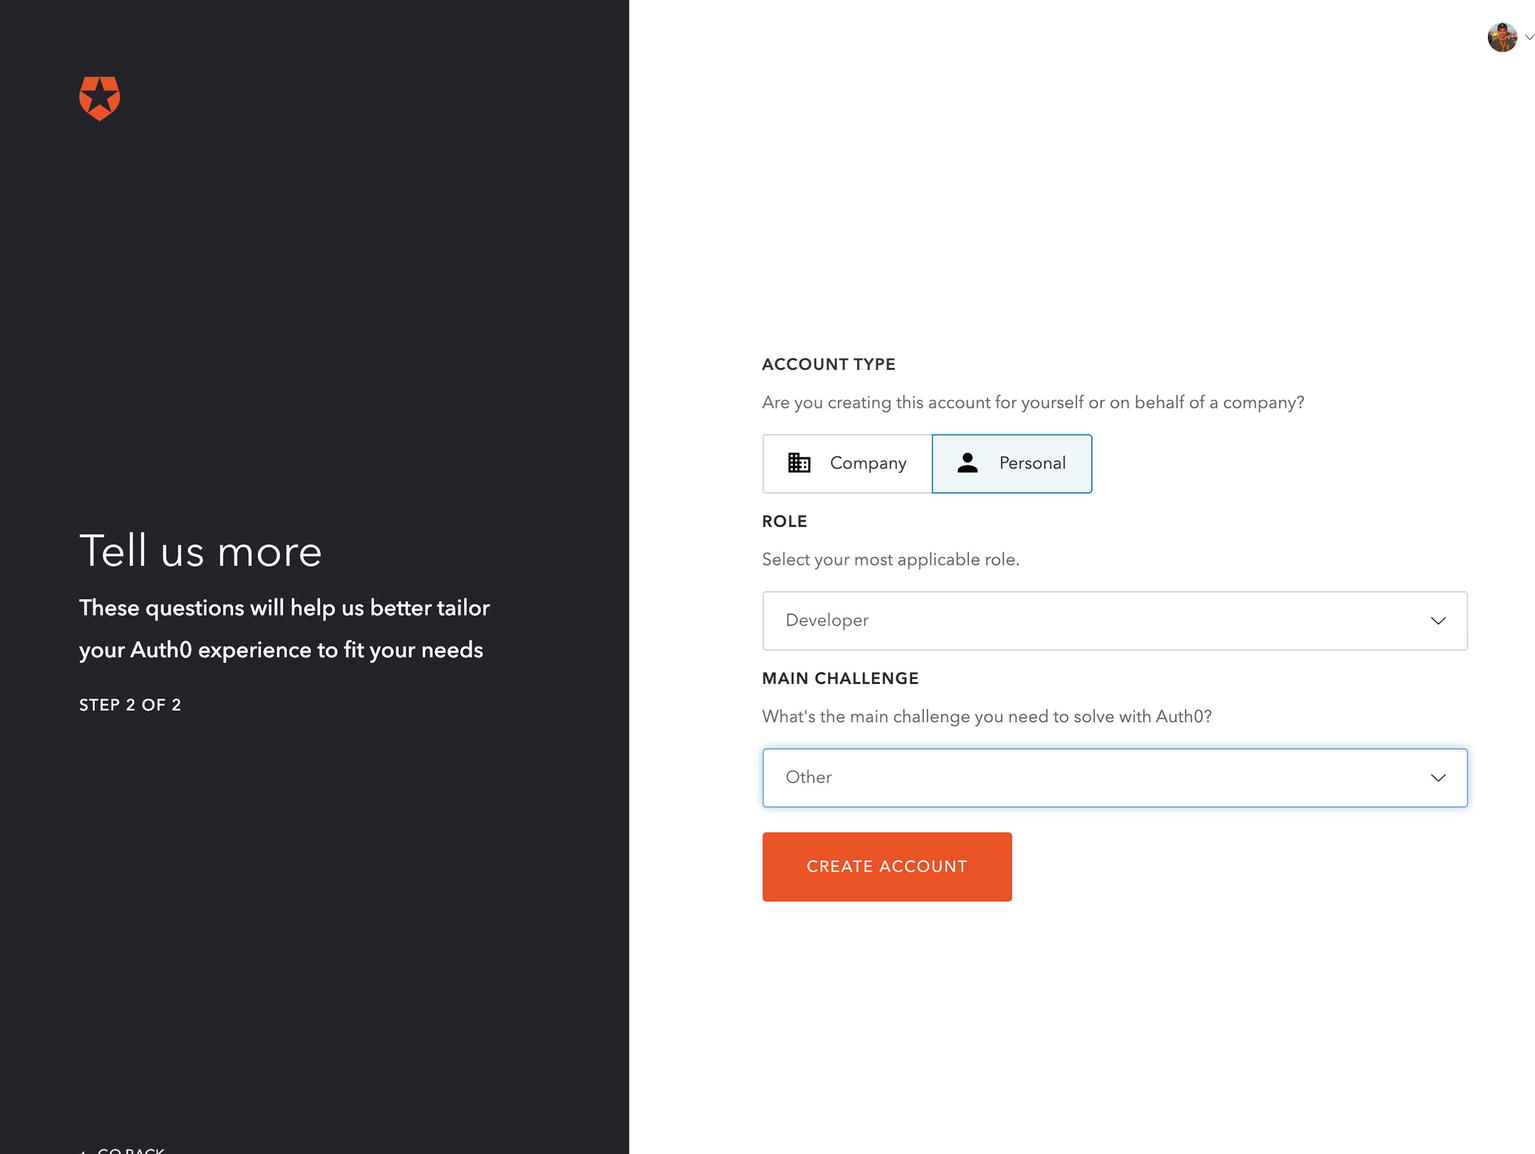
Fill in more relative information
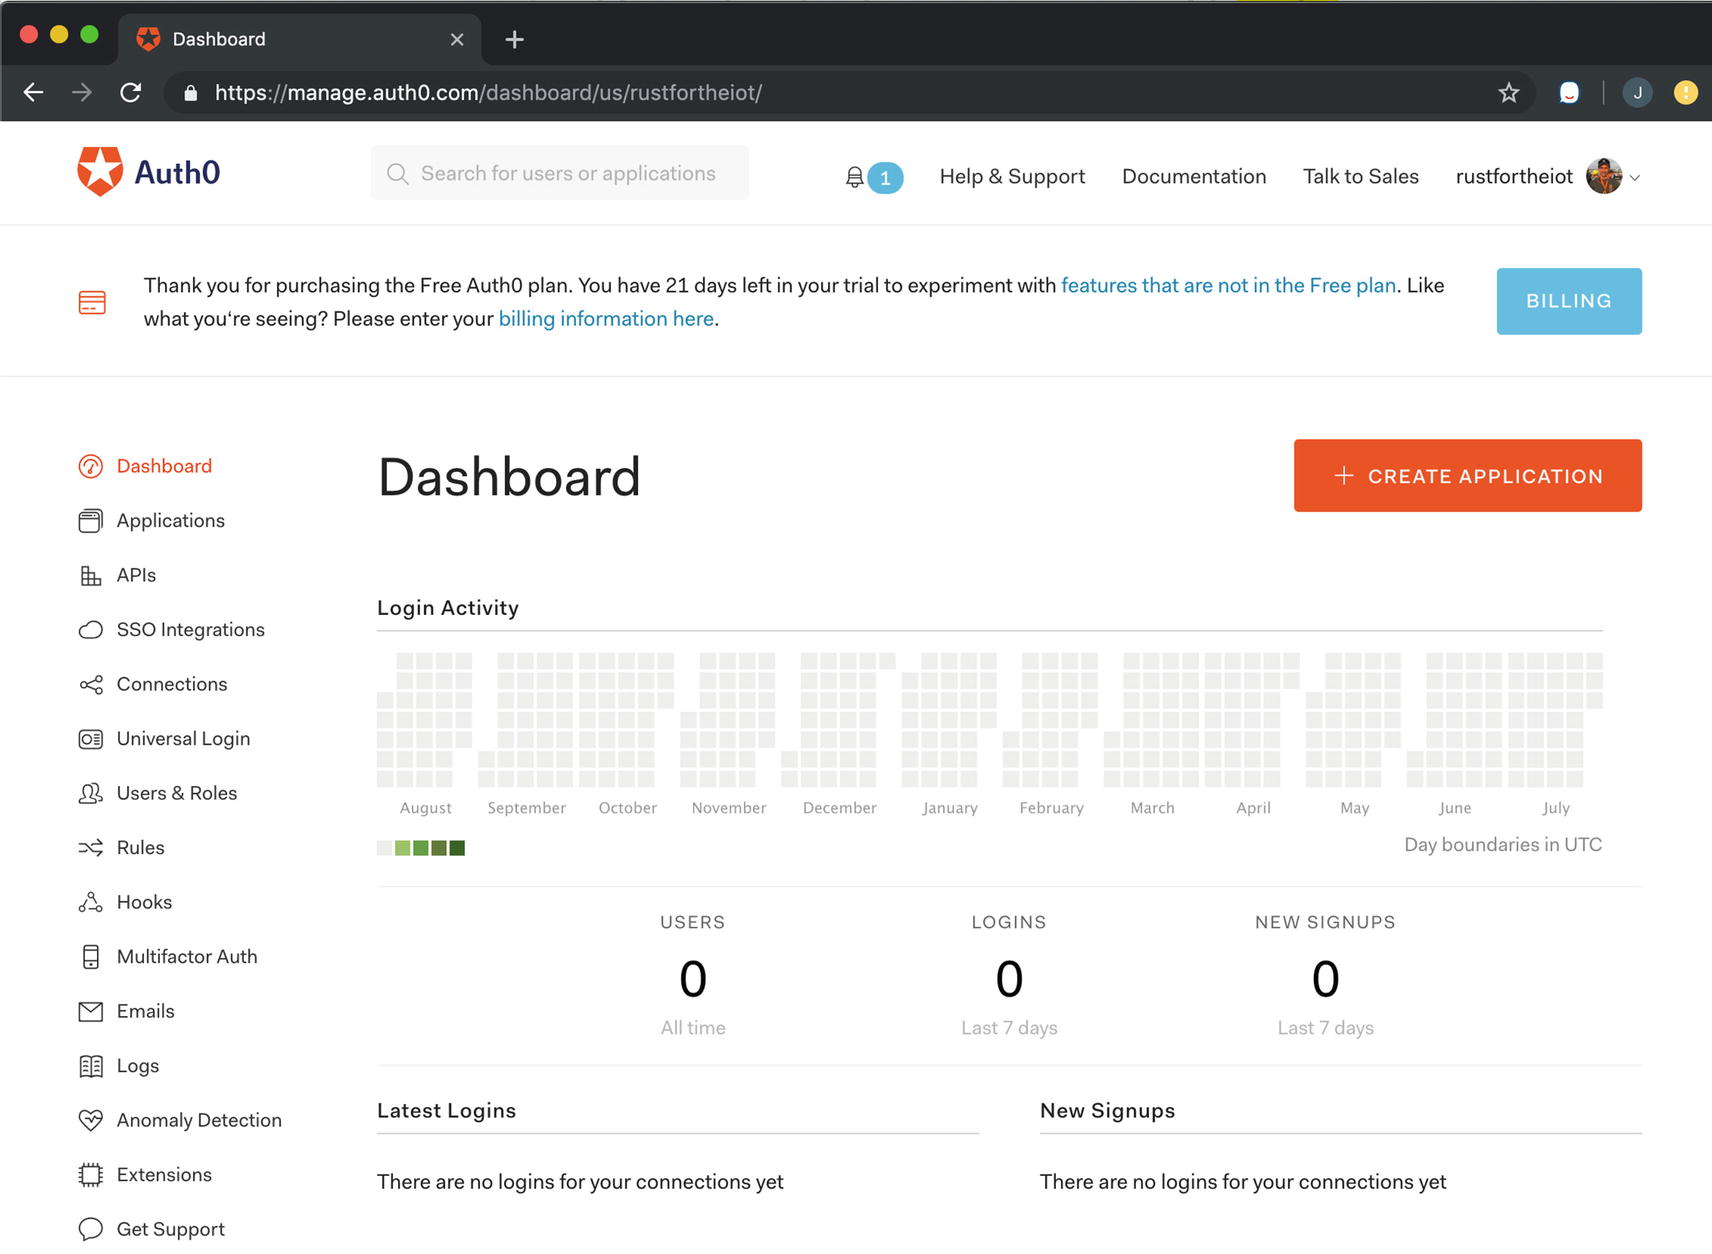
The interactive dashboard for our Auth0 managed application
At this point, we have our dashboard and a login set up but nothing that actually can interact with the application. We need to add two things: one is a user, and the other we need to add is to create an application to use. This will provide us a client id that our framework can interact with. The applications are independent of our user database, and we can have them interact with many or just a few of them. Each application allows for different types of authentication flows, from a web flow, to device flow, to service, to service communication. Let’s go through the process of creating an application that will work with device flows.
Create Authorization
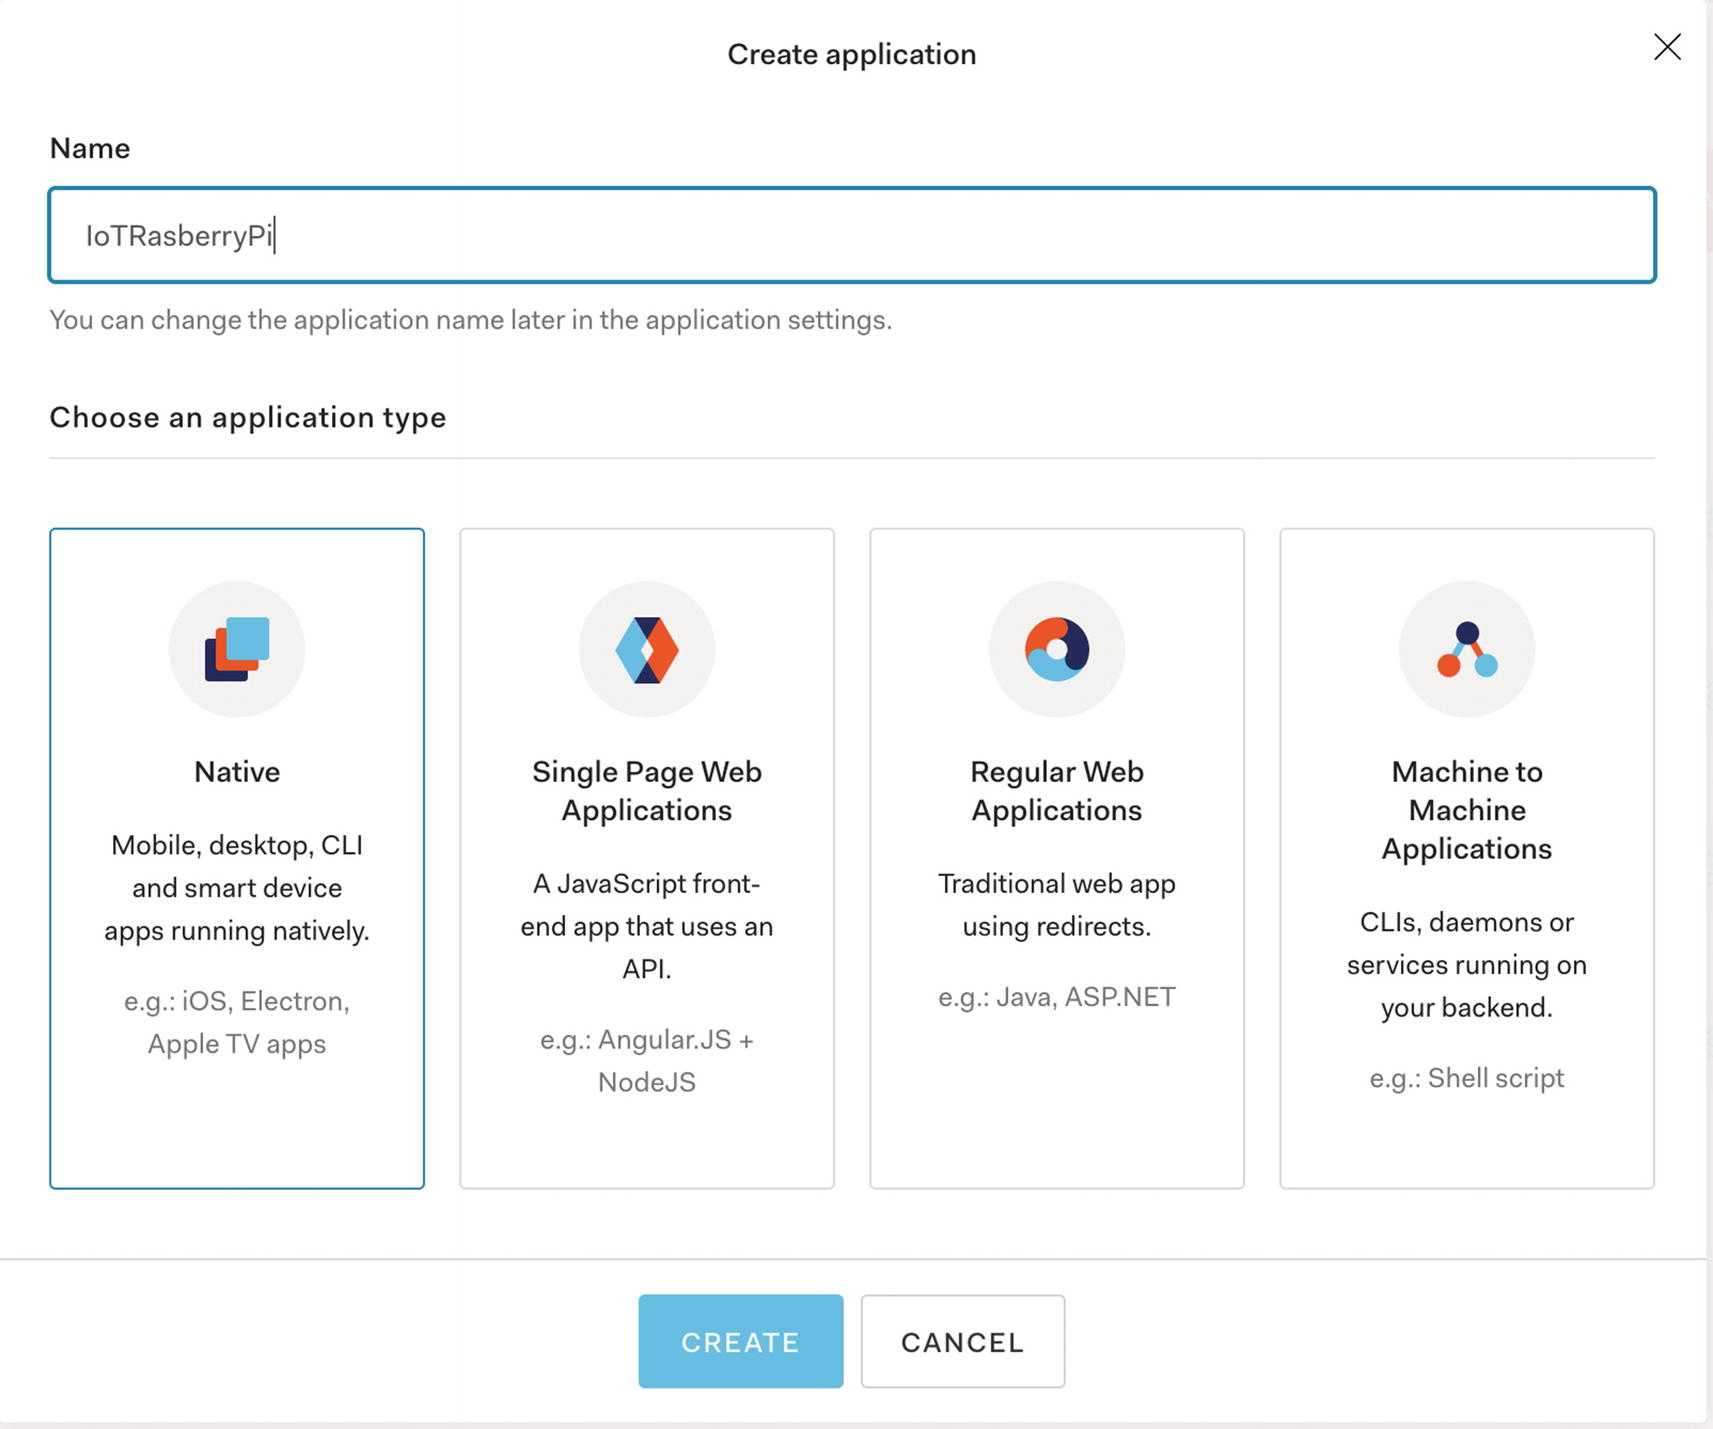
List of application types we can create
Native applications – The best way to describe these is any application that requires a login that is NOT from a website. This will be your mobile apps, Apple TV apps, and any device applications, which in our case are your IoT device apps.
Single-page web applications (SPAs) – These are your React, Angular, and any modern web application. You’d likely use this as well if you wanted a support application, but the coding of this is out of scope for our book.
Regular web applications – These are more traditional, older style applications – your Java and ASP.NET apps. Many more traditional shops would use this approach, but to be fair, the SPAs are the more common way of creating web applications these days.
Machine to machine – These are for applications in your microservice world that do not have a user associated with them. This includes any batch application that needs to access endpoints or any service-to-service calls that are allowed for unauthenticated users.
Native application created

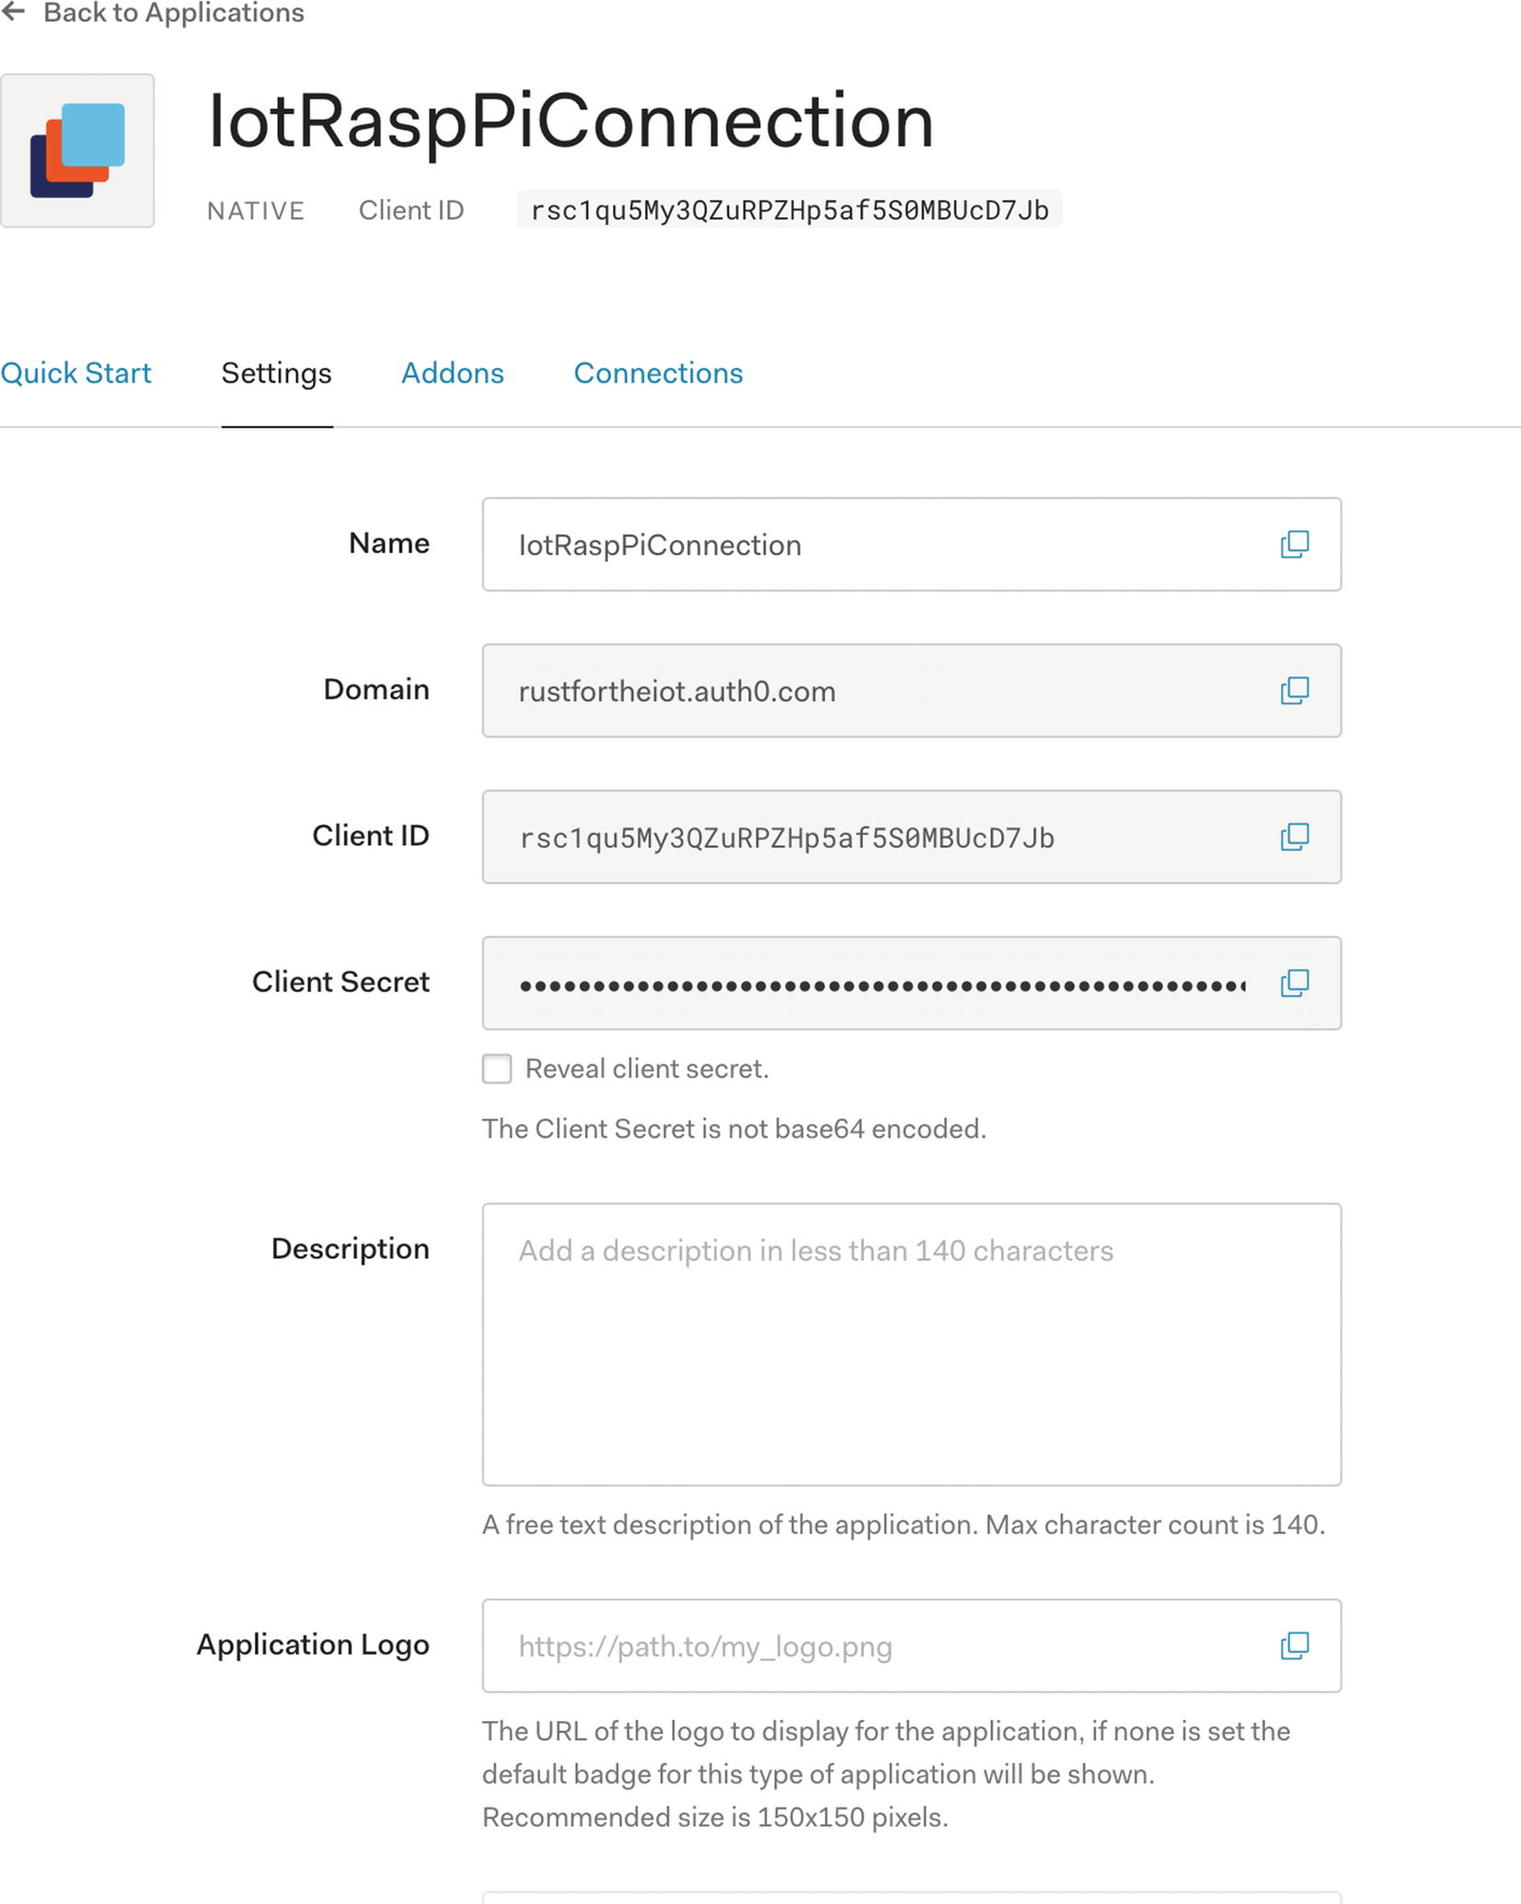
Grant Types for our native authentication
These will be different for each application type (with some overlap), but they are also what makes the applications unique to each other and the different purposes they serve. As you can see for this one, the Device Code grant will be what will allow us to use the device authorization flow as our authentication mechanism. Make sure it is selected; if not, your first query will return an error stating device code not allowed for the client.
Take note of this screen; we will circle back to it in a bit when we make our first query. For now, let’s move on to creating a user.
Create User

Users to add to

Creating a user
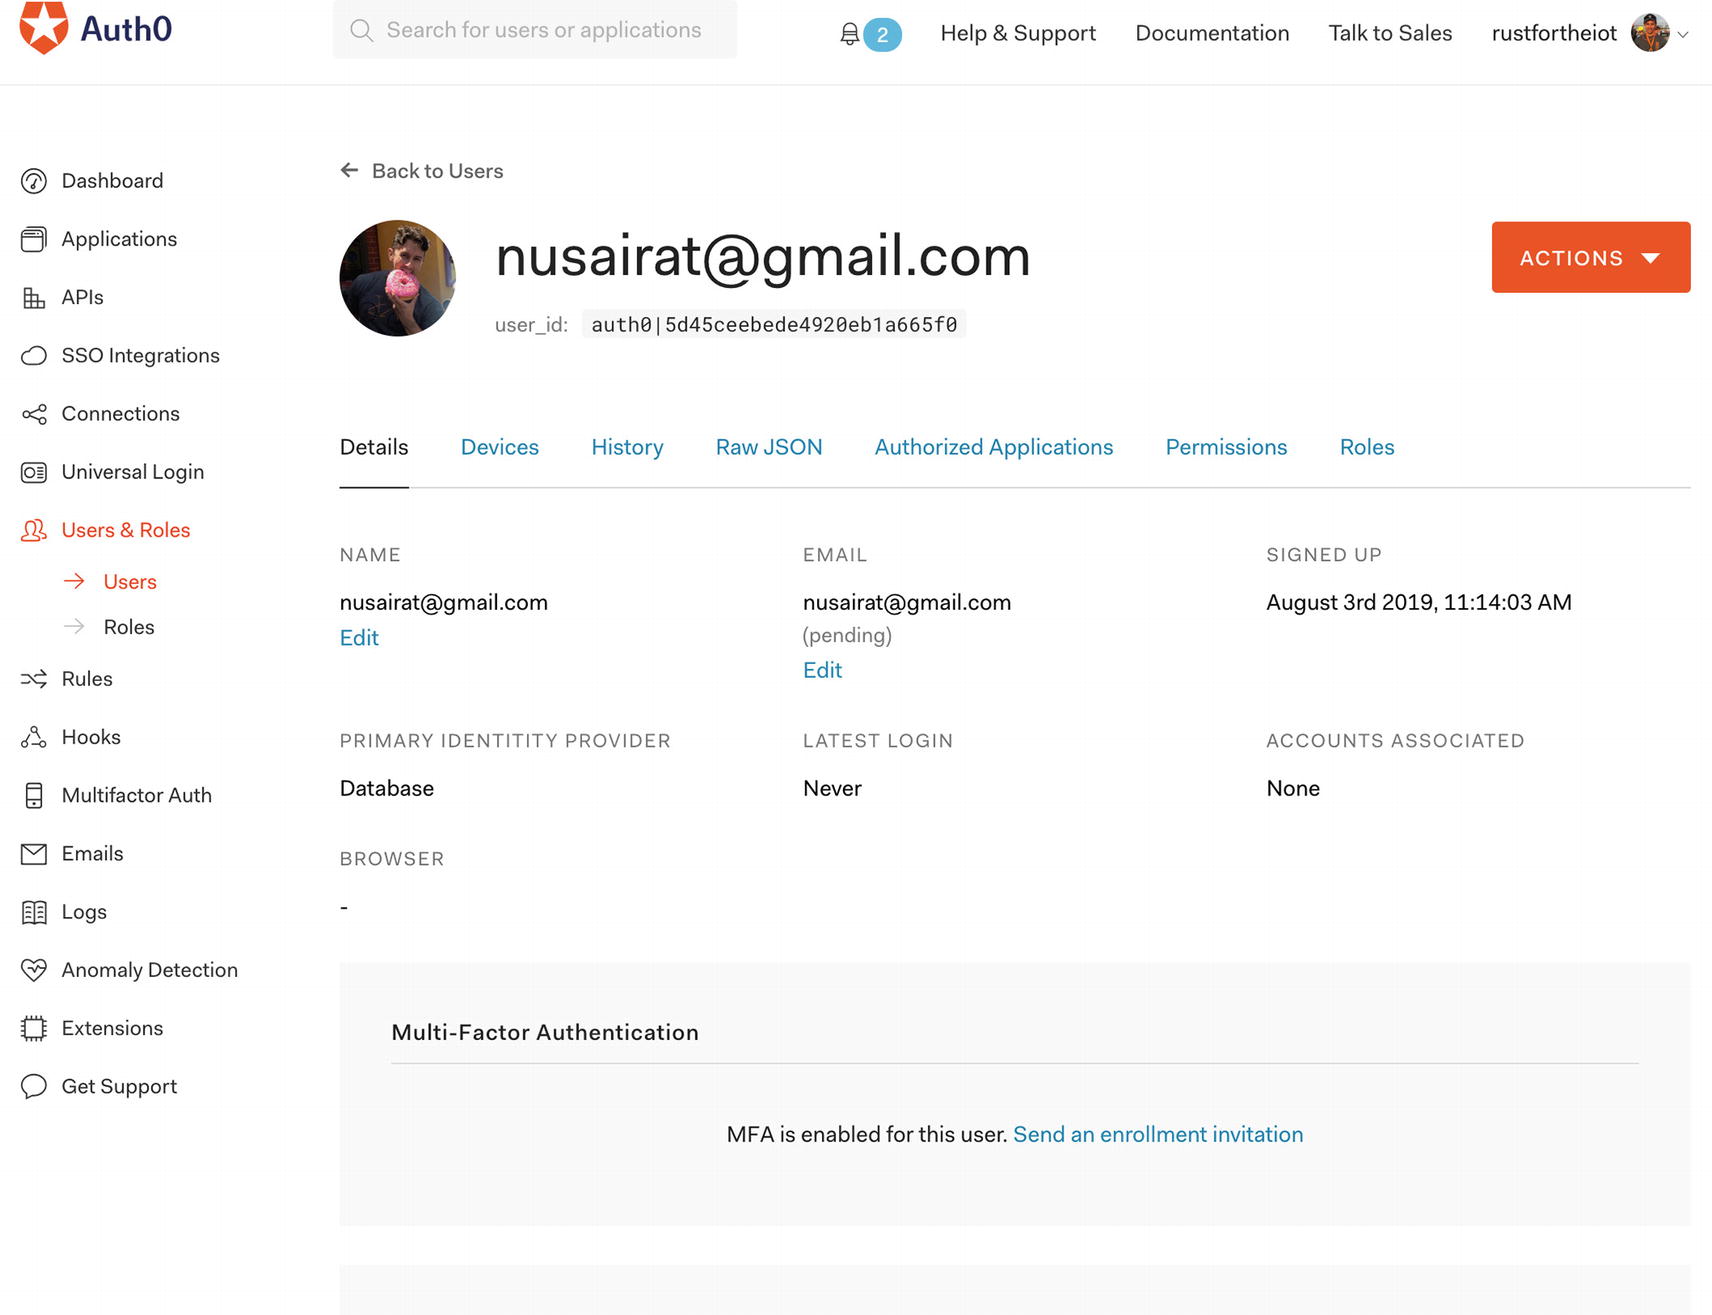
User created screen

Email verification
Now that will finish your user setup. As of right now, we have our user set up in Auth0 as well as an application set up to create Open Id authentication queries against to receive a JWT that we will be able to use for OAuth 2 interactions.
Authenticating
We haven’t focused it yet on our application, but part of what we are going to have to do is have a user associated with the records. After all, we are building this system to handle more than just our own personal device. We want this to handle a multitude of devices and users connecting to our system. What we are going to go over is how to use the command line to trigger the device flow authentication, authenticate, and then use the JWT that is returned to make subsequent user authenticated calls to our retrieval service.
Device Flow
client_id – If you recall before when I mentioned we needed to circle back to the client Id, well here is where you need it. Since we can have multiple applications at the rustfortheiot endpoint, this determines WHICH application we will choose.
scope – A space separated delineation of what type of token with what access should be created.
Variety of scopes for Auth0
Scope | Description |
|---|---|
openid | By default, this system will give us back an access token to use that can be traded in for user authentication information. But if we want a JWT that we can use that has user info in it already, supply the openid, and we will get an id_token back as well. |
offline_access | If this is going to be a longer-lived request (like with a device), we will need the ability to refresh our access token periodically; if not, the user will have to re-authenticate. This scope will have the response including a refresh_token that can be used for re-authorizing. |
profile | By default, the access_token can only be traded in for the subject; if you want the ability to gain more than that, supply the profile scope. |
If all you need though is the email, you can supply just the email scope to be able to retrieve the user info for it. |
Curl request to get a device code and URL
device_code – This is a unique code we will use for subsequent calls to the system in order to receive back the access_token and to check whether the user is logged in.
user_code – This is the code the user will type in, in the uri to recognize the device that is trying to be authenticated. This is a short code to make it easy for a person to remember to type into a web page.
verification_uri – This is the URI to go to log in with the user code.
expires_in – This is the amount of time in seconds that the user has to be able to log in before the device code expires; this is 15 minutes – plenty of time.
interval – This is the interval in seconds that you should recheck if the user has been authenticated.
verification_uri_complete – This is the complete URI for verification; this isn’t as necessary to use for a visual device authorization, but if your authorization is triggered by a text message or other means, it will be good to use to forward to the system.
The preceding device_code is used to get a status of your login; this will be what our device uses to check if the user is authenticated. We will make a call to the oauth/token to determine whether or not a user is authenticated passing in the preceding device_code and passing in a grant-type of device_code. If you recall from earlier, device_code grant type was unique to our native application, which is why we choose it.
Curl request to check if the user has been authenticated
Various response errors for OAuth token
Code | Description |
|---|---|
authorization_pending | The user has not attempted to authorize against the given user code. |
slow_down | Your application is requesting status of being authorized too much; slow down your requests. |
expired_token | The token has expired before the user has been authorized. In our case, this means there was no authorization within 15 minutes. |
access_denied | The user has been denied access to the given resource. |

Authorizing the device
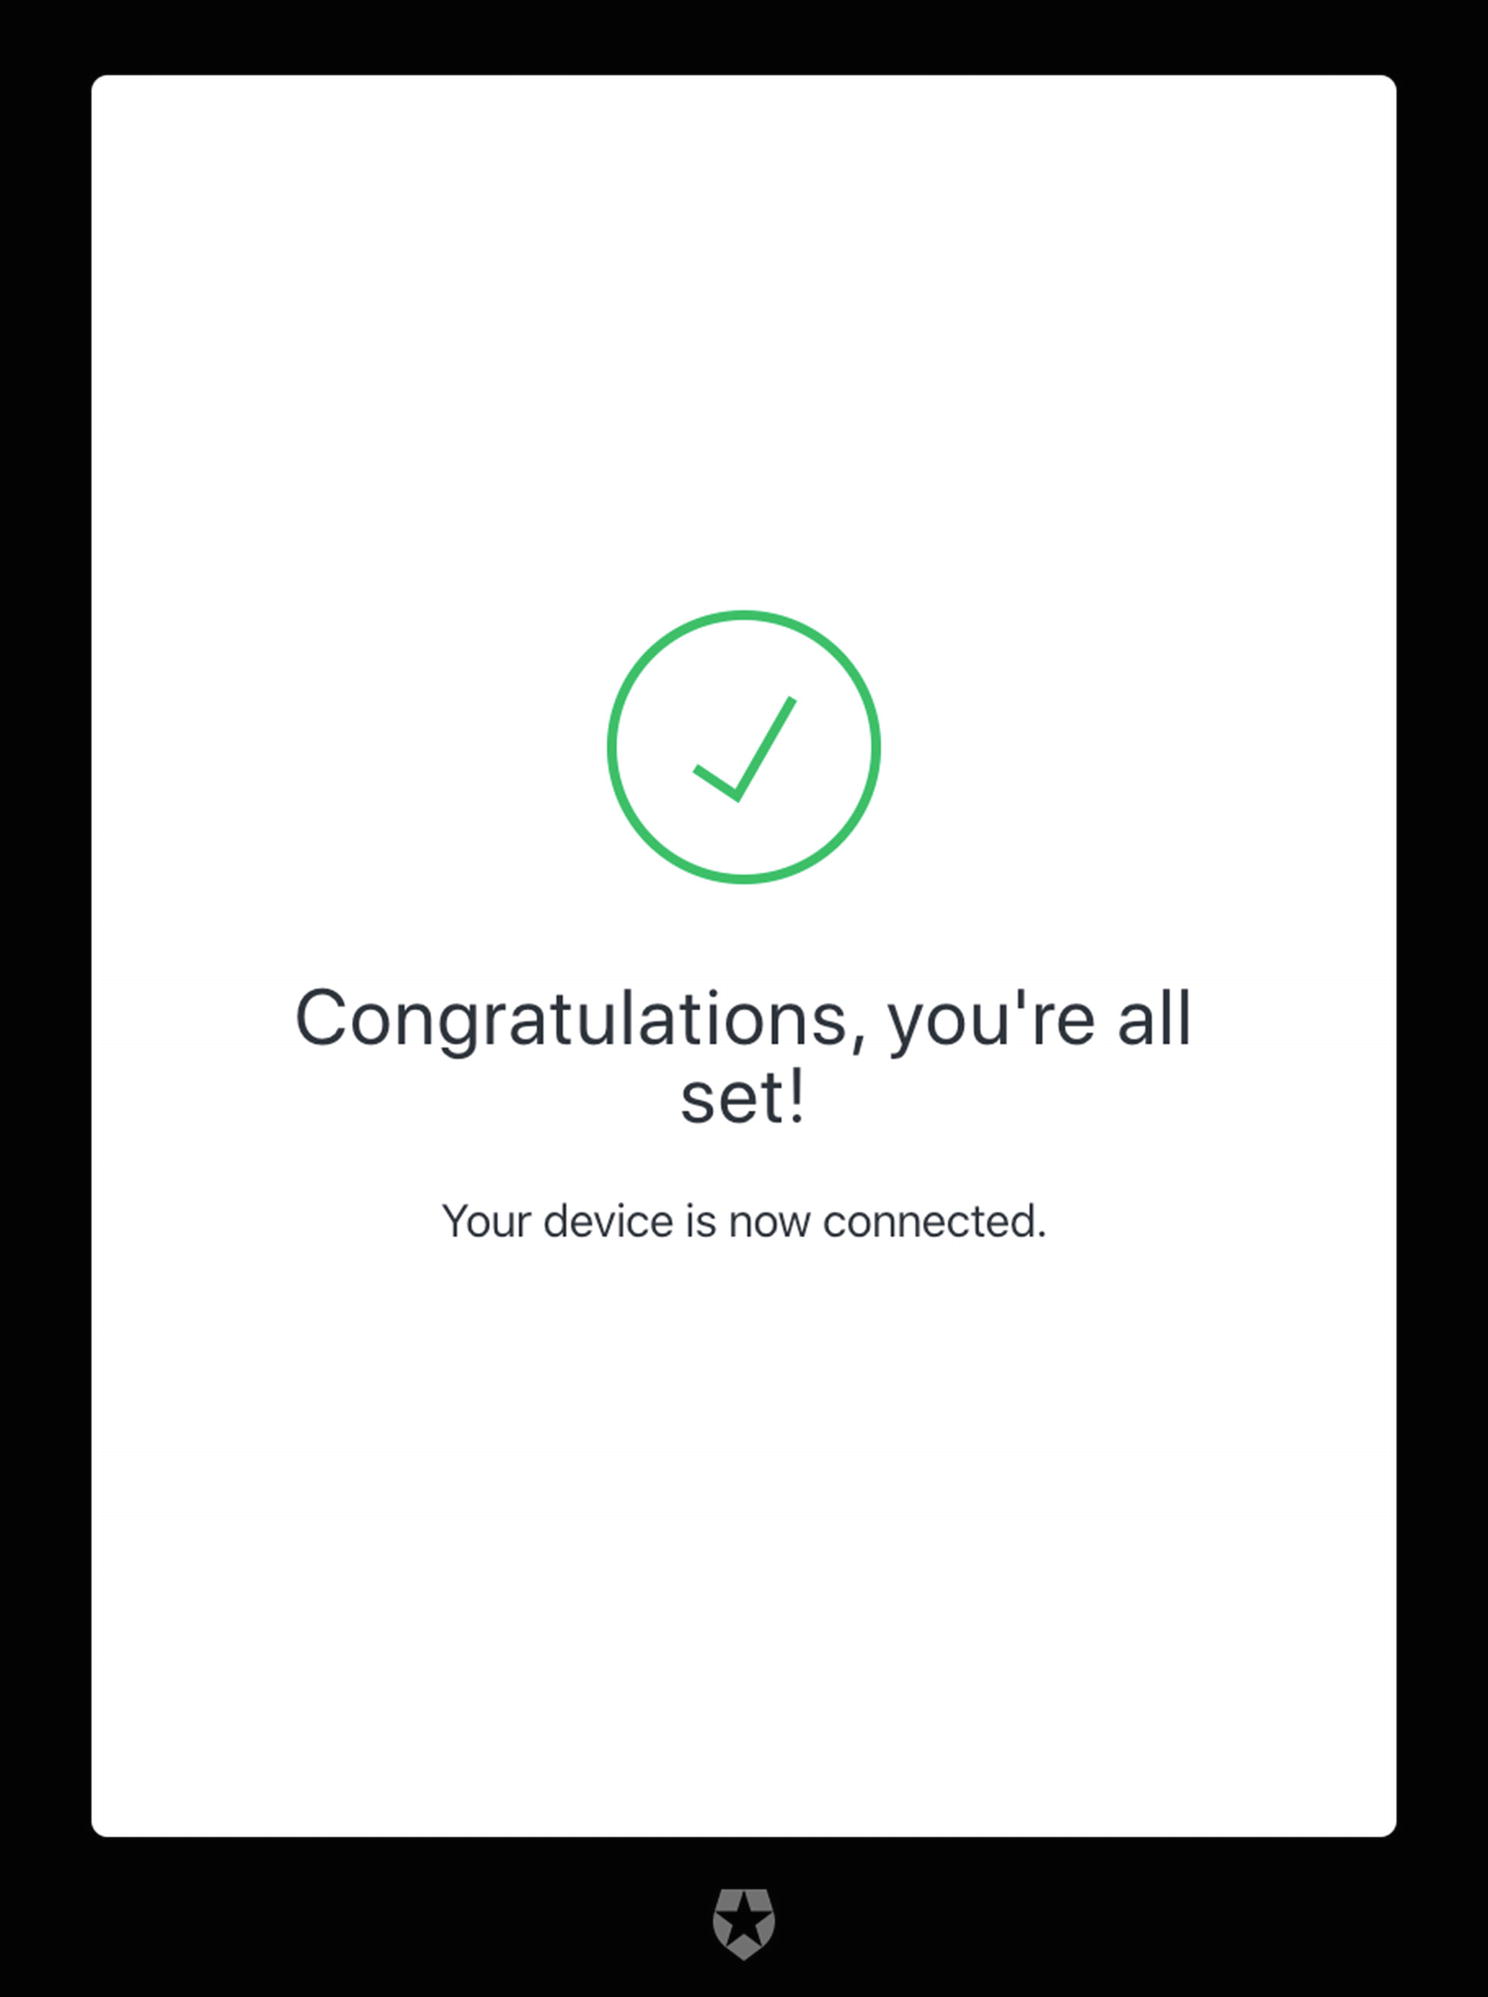
Confirming the authentication
You will notice I have added the Apress logo; for the login page, you are able to customize those screens in the dashboard of Auth0 as well.
Using the previous curl here is the new response to the authenticated system
Our tokens for authentication
Token | Description |
|---|---|
access_token | The access token is used as the token that is passed in the authorization phase to check the credentials of the calling application. Token can be used to inform the API that the bearer of the token has been authorized to access the API. |
refresh_token | When the access token has expired, the refresh token can be used to go out and obtain a new access token without being required to re-authenticate the user again. |
scope | The scopes the tokens have access to. |
id_token | The ID token is used to cache and parse the user profile information after a successful authentication. They can then use this data to personalize the user experience. |
In our token retrieval, the acccess_token has a 24-hour life (computed by the expires_in); once that hits, the application should use the refresh_token to go out and get another access_token before making any more calls to the backend system. The refreshing of the token will be handled by the framework we use, and you won’t have to code for it on your own. But we will use all these tokens in our application.
The ID token is not necessary to obtain user information; you could obtain the same information from the /userinfo endpoint by sending the access token to it; however, this saves us a call, and since this comes back from the authentication service we know, we know it’s a trusted data.
Processing the Tokens
Now that we have our tokens, what do we do with them? We can parse them and use them for access and deciding what to do with the user. For our system, all the calls will be requiring a user for each call, meaning we will need to translate the tokens to our user and use it for access. Let’s take a look at each of the tokens we have and how we are going to use them and the code for it.
ID Tokens

The decomposition of the encoded id token
- 1.
You called this from a localized microservice authentication, and this was the direct response. Hence, it wasn’t given by any middleman service.
- 2.
We can use a public key from the authentication provider in our service to guarantee this originated from the resource we suspected it to be from.
If you look back at Figure 6-4, look at “VERIFY SIGNATURE”; we have an RS256 public key for Auth0 that will be unique for your account. You can download the URL at http://rustfortheiot.auth0.com/.well-known/jwks.json (replace the rustfortheiot with your domain). We can use this key to help decode the JSON in our application with JWKS. In our code, not only will we be able to decipher the JWT to get the subject or any other fields we want, but the main thing is it guarantees the JWT came from the source we expected it to be from.
Programmatically Parse
Now being able to run curl scripts and decode from the site is all well and good for testing and to verify you have all the right permissions to make everything work. But let’s dive into some code. We’ll start with parsing an ID token with alcoholic_jwt.
Crates used to allow parsing of the User ID JWT
Parsing the user ID from the JWT
① Sets to validate the issuer against the rustfortheiot JWKS.
② Sets to validate the subject is present since we need that to get the user id.
③ Sets to validate that the token is not expired.
④ Extracts the kid portion from the token.
⑤ Uses the validations we created earlier to validate the token.
⑥ Retrieves the subject from the claim.
⑦ Returns the user id as part of the token.
⑧ Functions to retrieve the JWKS and parse it.
This code does not have to be unique for any particular tier and can be used on the backend to deliver content to a website or on our device to display the user to the screen. But let’s move on to discussing the role the access token will play.
Access Tokens
Retrieving the user data from the user info
You will notice we get more than the subject back; we also get the nickname, name, picture, and email; this is because earlier we not only asked for the openid scope but also the profile scope which brings back more details for the access token. Let’s now use this in our code to check the user id and their authorization level.
The user info retrieval does not check the authentication status, but gets the user.
Parsing the user ID from the access token
① From the header retrieves the Authorization Bearer token, making sure it exists.
② Converts the token to a string; this now would contain Bearer <access_token>.
③ Calls out to the /userinfo endpoint to trade the token for user data.
Implement Authorization Check
- 1.
Use middleware to retrieve the user id from the access token.
- 2.
Have the middleware return an error if there is no access token.
- 3.
Only have this middleware called for certain endpoints.
Creating the authorization check struct for our authorization
Creating the authorization check struct for our authorization
① The AuthorizedUser struct that will store the results of the parse tokens return.
② The middleware call that will parse the token; if an Ok is returned, we will extract the token from the success.
③ If not Ok, we will return a Json validation error back to the caller.
④ The trait that will be applied to controllers to retrieve the user id.
Modified create_links with authorization check, in file src/http.rs
As you can see, the healthz will have no extra middleware added, but our media and comments will.
Refresh Tokens
Retrieve a new set of tokens using the refresh token as a basis
Now that we have the new set of tokens, use them and set your expiration again.
You can revoke access token either via code or via the UI; you may have this as part of your application to handle situations where a device is stolen or compromised, and you want to prevent that device from talking to the services.
Much of the code you see here and curls will be incorporated when we get to Chapter 8 and start the device coding itself. But I didn’t want to overly divide up the concepts of Authorization and Authentication in two chapters. We will revisit some of these calls later, but for now, we have our authorization and authentication.
Securing MQTT
Our first pass of using MQTT for our application, we used TCP for the communication. The TCP connection to the message queue was not only not secure from an authentication perspective, but most importantly it was unencrypted. This means if anyone sniffed our packets being sent from our devices, they would see not only the packages we sent but where we send them to. And before we were using Protobuf, it meant it was even easier to view. This means anyone could not only send data as anyone, but could also receive all the topics that we are deploying revealing customer data. This would be a major breach of data.
- 1.
SSL (Secure Sockets Layer) – Like most backend application, we use SSL to create secure communication between the client and the server. To do this, we will have to create certificates for the server that the message queue server uses for running the SLL certs. In addition, we will have to create certs for each client that connects to our message queue server.
- 2.
Authentication – Another way to secure the site is to have authentication. This makes it so a particular user can only access the message queue. In fact, you can lock it down even further by only allowing the user to have access to specific topics.
There are a few ways to achieve, but essentially the two are to let the message queue application handle it or have a sidecar handle both. Letting the message queue handle it means using the tools built into the MQ for SSL and Authentication to run the SSL and Authentication. Most MQs out there, and the one we are using, have SSL handlers out of the box as well as authentication. The other way is something that will make more sense in the next chapter when we talk about deployment, and that is using a sidecar injector. A sidecar injector will run along our application and intercept all requests to the service. You can use this to force your calls to all be SSL and authenticated. This can be especially useful in the authentication realm but also if you are not entirely happy with the SSL implementation. In addition, you could replace just one or the other piece with the customization.
If you have good expertise in SSL and Authentication, then the sidecar maybe for you; however, for our implementation, we are going to stick with using MQ SSL model.
Certificates
Certificates are used to communicate and encrypt data between two endpoints so that not only can someone in the middle read the data being transmitted but also so that you can trust that who made the call was the person you thought made the call. The use of certificates has been out since the early days of the Web, but in those days, people only used them to transmit credit cards and other highly secure pieces of data. Today almost every website uses them, and since 2014, Google will give your site a higher ranking when using them. There are essentially two types of certificates, certificate authority (CA) and self-signed.
Certificate Authority (CA) vs. Self-Signed Certificates
We will be talking about using CA vs. self-signed Certificates throughout the next two chapters. By rule, we will be using CA certs for our deployed environments and self-signed for our local environments. Certificate authority certs are certificates that are generated and signed by a recognized certificate authority. The main reason to use them is a guarantee that the domain you are connecting to is truly that domain owned by the person you expect it to be that site. There are various certificate authorities you can use; we will be using letsencrypt. Letsencrypt is free for the amount of requests we would need, and most applications have easy integration into letsencrypt.
When deploying locally, we cannot use signed certificates (well easily). Signed certificates are tied to a domain that can be resolved and are designed for QA and Production testing or any deployed environment. However, we need to test locally against a local MQ and local microservices. To do that, we will use self-signed certificates that will allow us to create the certs and destroy them as needed.
You can deploy self-signed certificates to deployed environments, but then you will have to make sure your system is not enforcing that they are certificate authority signed. You will notice the use of self-signed certificates in websites when they ask you to continue on a cert that is not CA certified.
Creating Server Certificates
For us, we are going to use most of our certs that we create for our MQTT communication.
- 1.
.PEM – This is an RFC 1421 and 1424 file format. PEM stands for Privacy Enhanced Mail and came about as a way to securely send emails, but now it’s used for a great many other security chains. This is a base65 x509 certificate that either can contain the public certificate or could contain the entire certificate chain including public key, private key, and the root certificates.
- 2.
.KEY – The .key is mostly commonly used as the private key and will be formatted as PEM file containing just the private key that we should never share.
- 3.
.CSR – This is an RFC 2986 specification in a PKCS10 format. CSR stands for Certificate Signing Request and contains all the information needed to request a certificate to be signed by a certificate authority. The digitally signed certificate will be signed and returned with its public key to be used for digital certs.
Generate CA Root Certificate
Generate an RSA private key
This is the private key, the one that if this was a production system, you’d want to keep in a safe place. If someone else got a hold of that key, they could compromise your identity. Usually you use a CA provider to take care of your key that is generated.
Generate an x509 certificate
① Command to create the RustIOTRootCA cert using sha256 and creating an X509 certificate.
② Add in a few fields like the country name and state.
③ This is normally the fully qualified domain name; since we are running it from localhost, use that instead of a regular name.
The root cert is used as the start of your trust train. Certificates we generate after this will all use the Root to verify the authenticity up the chain. The Root CA can be used to generate any certificate on our site.
Message Queue Server Cert
Generate an RSA private key for the MQ
Generate a CSR for the MQ
① Command to create our CSR from the key we created previously.
② Marking the localhost since we are running this locally.
Generate the certificate for the message queue
① Command to create a x509 certificate using the previously created CSR as the basis for the request.
② The Root CA certificate authority file we created previously.
③ The private key for that CA that only the owner should have.
④ This flag creates a file containing the serial number. This number is incremented each time you sign a certificate.
⑤ Defining the file to output the certificate for the MQ to.
⑥ Defining the days this certificate is active for and the cipher to use.
There will be two files generated from this request: the EmqtIot.pem that we defined to be requested and also the RustIOTRootCA.srl serial number that we used.
At this point, we have created our Root CA and the certificate for our MQTT Cert; in addition, we no longer need the EmqttIot.csr that we created, and you can delete it now if you want. We are able to now revisit our MQTT server itself.
Updating the MQTT Server
In order to do this, we are going to have to deactivate our old MQTT server that we created since they will be sharing some port numbers. Go ahead and run docker stop mqtt-no-auth; this will turn off the previous MQTT server that did not have certificates.
For the MQTT server, we are going to make use of the certificates we just created to set up the SSL port on the MQTT server so that we can accept only SSL calls with a trusted chain. The EMQTT we are using supports the use of certificates out of the box; it will be up to us to configure them. By default, there is an EMQTT configuration file that is used when running the application, and the docker command we are using can update them with environmental variables.
We need to set two things. One is to set the certificates so that we have SSL connectivity. This will allow us to access the MQ so long as our client is using a trusted Root CA as well for communication. While this will make sure all our traffic is over SSL and thus encrypted, it would still allow anyone the ability to communicate with our endpoint as long as they had a CA certificate.
If you recall, we are also using this as a secure mechanism to control who the clients are; thus, we also need to tell the MQTT server to only accept connections with valid client-side certificates as well. Those certificates can only be generated if one has the Root CA private key, which should be just us.
Example of the properties we need to set for our certificates to work
① The private key file for the EMQTT client.
② The public certificate for the EMQTT client cert.
③ The public root CA certificate.
④ Verifies the client-side identities by their certificates.
⑤ Ensures that we only allow SSL if there is a verified client-side certificate.
- 1.
Where do we place the files for the docker container to pick up?
- 2.
How do we tell docker to update the emqtt.conf file with those properties listed in Listing 6-17?
The first is relatively easy; we can use the -v tag in docker to allow a local directory be used as mounted directory in the docker image we are running. The second requires us to use a naming convention used by the image to convert environmental variables to updates to the properties file.
Docker run to create an EMQTT server with SSL enabled and verify SSL turned on
① Added the 8883 SSL port and removed the 1883 TCP port from being exposed since we no longer want users to connect via TCP.
② Our local ~/book_certs directory can be mounted to the docker images /etc/ssl/cert.
③ Referencing the directories with escaping the files.
Attempt to subscribe with the RootCA file
The error we get is sslv3 alert handshake failure; if you receive any other error particularly certificate verify failed, that means you set up the installation of the certificate incorrectly. But let’s now get the client certificates created. This is because while our server is set up to handle certificates, our client does not have them set up yet.
Creating Client Certificates
Our final step is creating the client certificate; in the future, we will need to be able to create a client certificate for each client. And in our case, each client is the Raspberry Pi devices. Since these are connected devices and we want an ability to control subscriptions, we will make it, so the clients only last for one month at a time. This way, we can control a bit better how long the server device is able to access the server. And in theory if we were doing a monthly billing, if they stopped paying well, they wouldn’t have access after that month.
Create the client certificate from the Root CA
① Creates the private key for the client.
② Creates the CSR for the private key.
③ Creates the client PEM using the private key created and the Root CA file that was created in the server section.
Pick a slightly different subject than for your clients vs. the Root Certificate. Having the same between the client and the Root will cause issues. Of course, that said, the issuer does need to match. You can double-check the settings for the certs you created with the command openssl x509 -in <filename> -subject -issuer -noout. This will give you the subject and the issuer. The issuer should all match across certs with the clients having different subjects.
Running a mosquitto subscription with the new client certificate
Now we have a secure connection to test against and with; however, now we are going to have to update our actual code to switch from using a TCP connection to the SSL connection.
Creating Our New Message Queue Service
We have our MQ running SSL, and slightly more secured by requiring a client key to be used, and shut down the TCP access; the MQTT service we created in previous chapters will no longer work. At this point, the message queue will refuse any connections. We are going to have to convert our connection_method for the message queue to use SSL instead of TCP.
- 1.
Root CA – The root CA to the site that we created; this is the public certificate.
- 2.
Client cert – The client certificate that is generated from the public/private Root CA.
- 3.
Client key – The private key for that certificate.
Updating the MqttClientConfig; this will be in the file src/mqtt/mod.rs
Updating; this will be in the file src/mqtt/client.rs
And that is it; start up the application, and you can use the test calls we created earlier to send the files to the MQTT and read them over TLS. We now have our message queue system communicating over secure channels instead of insecure ones.
Summary
In this chapter, we covered the very basics of security. I felt authentication was critical since it drives about any Internet-based application. The integration in our layers is less than we probably should do, but good enough for demonstration purposes. You will want to add more as you continue. Same goes for MQTT, certificate-based authentication is very common even for the most basic of items. Remember, with your IoT device, when you first plug it in, you will want it to communicate with a server even without the person being authenticated. This could be to know if it’s active, if an update is required, and so on. We will do more callbacks to the authentication layer in Chapter 9 when we allow the user to authenticate with device flow on the Raspberry Pi.