So far we have seen how transformers can be used with the huggingface Transformers library at a very elementary level. We will now start to see how we can use the library for different tasks related to not just text but also audio and images.
But before we move on with this, we will introduce you to Gradio, which is a library for building UI on top of huggingface.
Gradio: An Introduction
Gradio is a web framework specially built for deploying and inferencing machine learning models. Gradio allows us to have our ML models exposed quickly over a web interface without a requirement of learning too much coding. With acquisition of Gradio, Hugging Face has moved one step ahead in providing the huggingface community an easy interface to deploy and provide UI over the huggingface models.
In this chapter we will make use of huggingface spaces , which provide us an interface to quickly deploy and provide our application (built using the huggingface APIs), a web front end that can then be used by end users to interact with our application.
Creating a Space on Hugging Face

The illustration of the hugging face screen after login. It has a menu bar open at the top right corner labeled from top to down as profile, notification, add new model, new dataset, new space, settings and sign out.
Hugging Face screen after login

A screen to create a new space. It has fields for owner, space name, and license. It also has space S D K options like streamlet, G radio, and static.
Create a new space
Provide a name for your space and choose Gradio as the SDK . Keep public as default for now for visibility and finally click the Create Space button.

A screenshot of the menu on the hugging face web. It has space specifications like owner name and likes. It has options from left to right like the app, files and version, community, and settings.
Menu on display on the huggingface web page
For most of our applications in this chapter, we will use the Files and versions and App tabs.
Click the Files and versions tab, and on the right side, we see Add file. Clicking it we can add the files needed for our application.
- 1.
app.py: This is the file that is the main code of the Gradio application.
- 2.
requirements.txt: This file has the Python dependencies needed for the app.
Hugging Face Tasks
We will start with a question and answering task.
Question and Answering
The input to the model would be a paragraph and a question from within that paragraph. The output of the model inference would be the answer to the question.
The models we use are trained on the SQuAD dataset .
The Stanford Question Answering Dataset, also known as SQuAD , is a reading comprehension dataset that is comprised of questions that were posed by crowdworkers on a set of Wikipedia articles. The answer to every question is a segment of text, also known as a span , from the corresponding reading passage, or the question may be unanswerable.
More than 100,000 question and answer pairs are included in SQuAD 1.1, which covers more than 500 different articles.
First, the RoBERTa base model is used, fine-tuned using the SQuAD 2.0 dataset. It’s been trained on question-answer pairs, including unanswerable questions, for the task of question and answering.
batch_size: 96
n_epochs: 2
max_seq_len: 386
max_query_length: 64
Start by creating a new space using the huggingface UI as explained in steps in the previous section.
Click the Files and versions tab on the UI. Create a file requirements.txt with the following content:
requirements.txt
gradio
transformers
torch
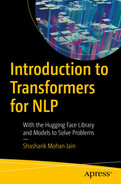
Code for app.py
A screen to commit changes in app dot p y file. It has a code at the top, and two radio buttons to commit directly to the main branch and open as a pull request. It has two fields to commit a chance.
Commit the app.py file

A screenshot of the menu on the hugging face web. It has space specifications like owner name, likes, and see logs. It has options from left to right like the app, files and version, and community.
Shows the various tabs including the “See logs” button

A screenshot of the menu on the hugging face web. It has space options like owner name, likes, see logs, and building, and in the bottom bar are the app, files and version, community, and settings.
Status of the deployment of the app
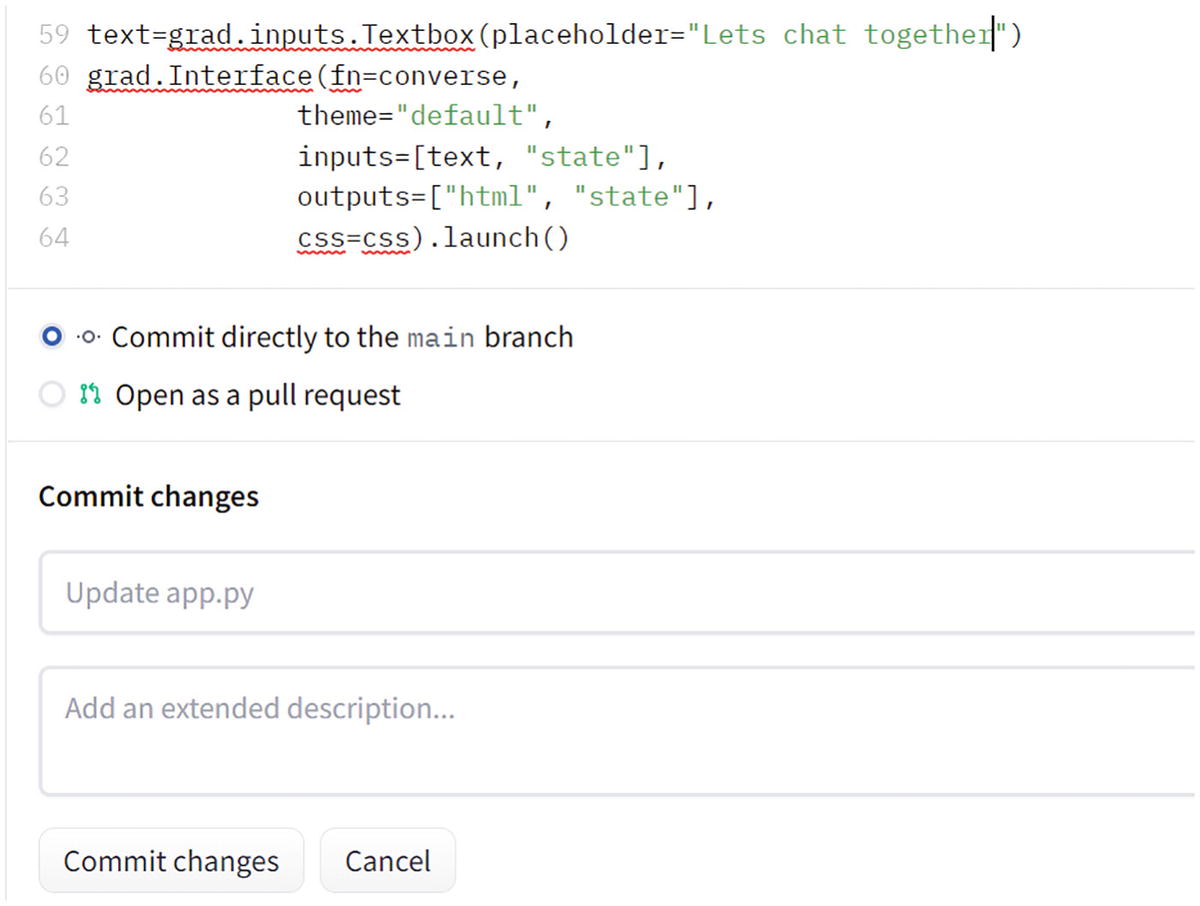
An algorithm for the building progress of the app. An image is loading from the docker library. The main commands are run pip install, MK dir app, apt-get update, and copy packages.
Shows the build progress of the app. Here, it’s loading the Docker images for creating a container

A screenshot of the menu on the hugging face web. It has space options like owner name, likes, and status running, and in the bottom bar are the app, files and version, community, and settings.
Status of the app is changed to Running now

A U I dialog box with fields for questions and context. Two buttons for clear and submit are at the bottom of the dialog box. Another dialog box with a field for output.
Question and answering UI via Gradio. Provide the input of your choice for the paragraph in the input box labeled context, and the question from that paragraph should be put in the input box labeled question
In Listing 5-2, we will try the same paragraph and question on a different model. The model we’ll use is distilbert-base-cased-distilled-squad :
requirements.txt
gradio
transformers
Code for app.py
Commit the changes and wait for the status of deployment to get green. Post that click the App tab in the menu to launch the application.

A G radio-based U I dialog box with fields for questions and context. Two buttons for clear and submit are at the bottom of the dialog box. Another dialog box with a field for output.
Shows the Q&A Gradio-based UI for BERT-based Q&A
Translation
The next task we will tackle is language translation. The idea behind this is to take input in one language and translate it to another language based on pretrained models loaded via the huggingface library.
The first model we explore here is the Helsinki-NLP/opus-mt-en-de model , which takes input in English and translates it to German.
Code
Code for app.py
requirements.txt
gradio
transformers
torch
transformers[sentencepiece]
Output
Commit the changes and wait for the status of deployment to get green. Post that click the App tab in the menu to launch the application.

A G radio U I dialog box. It has a field for text and two buttons clear and a submit at the bottom. Another dialog box shows the output.
Gradio UI for a translation task
We will now see in Listing 5-4 if we can write the same code without using the pipeline abstraction. If we remember we have done the same earlier using the Auto classes like AutoTokenizer and AutoModel. Let’s go ahead.
Code
Code for app.py
requirements.txt
gradio
transformers
torch
transformers[sentencepiece]
Commit the changes and wait for the status of deployment to get green. Post that click the App tab in the menu to launch the application.

A translation G radio U I dialog box. It has a field for text and two buttons clear and a submit at the bottom. Another dialog box shows the output.
Translation UI based on Gradio
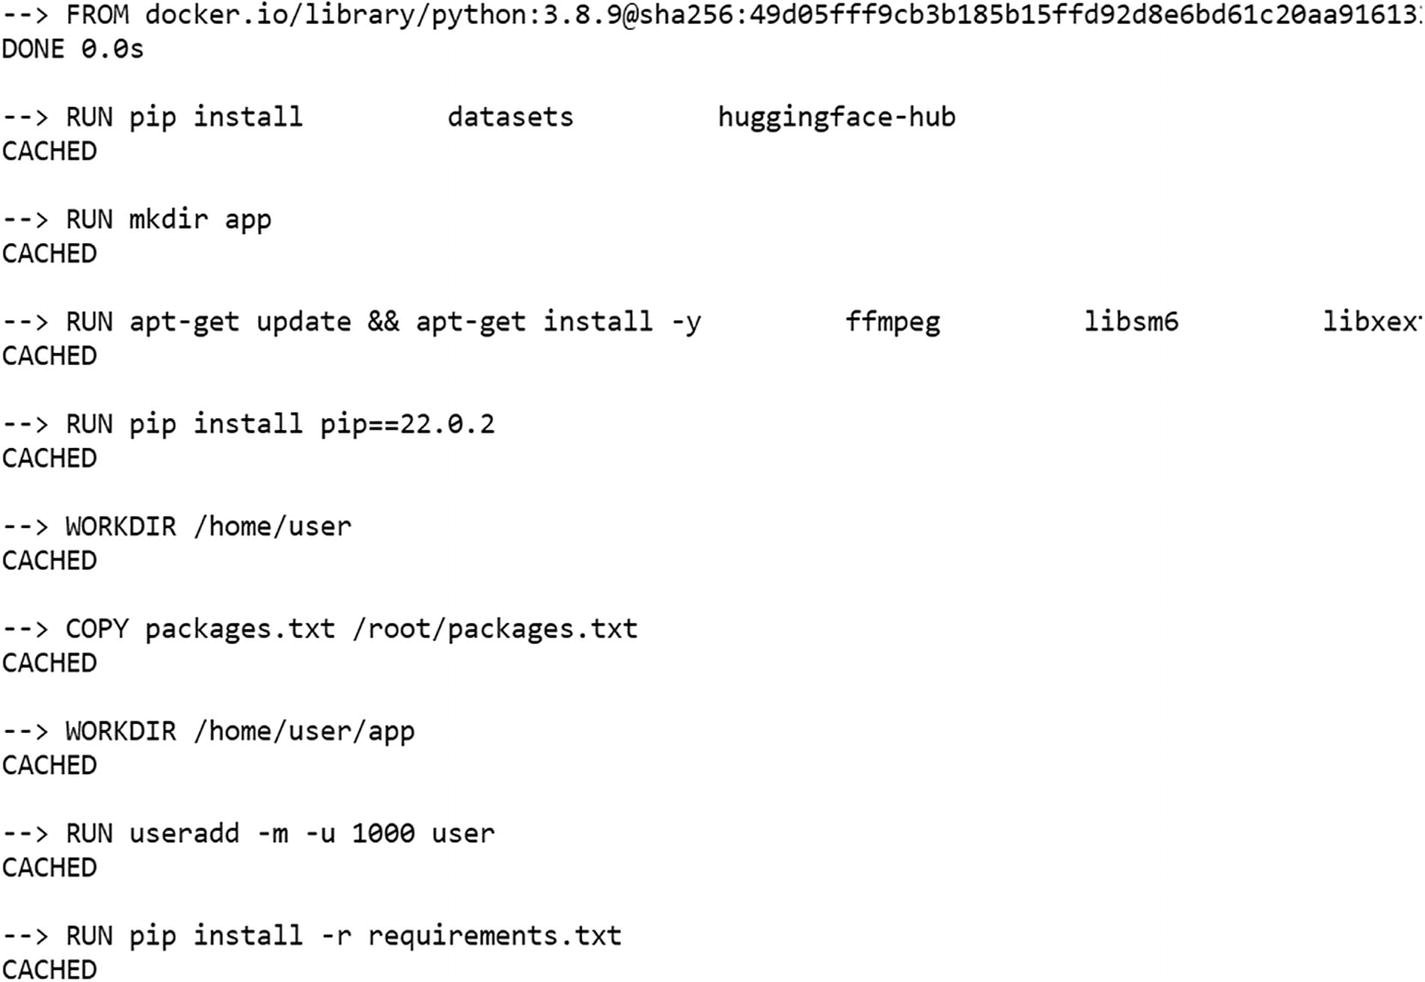
A screenshot of google Translate. Two fields for English and converted German text. A conversion sign between English and German.
Shows how Google Translate translates the same text we used for our translation app
We can see how close we are to Google’s results. This is the power of huggingface models.
To reinforce the concept, we will repeat the exercise with a different language translation. This time we take an example of English-to-French translation.
This time we take the Helsinki-NLP/opus-mt-en-fr model and try translating the same sentence we took in the preceding example, but this time to French.
First, we write the code using the pipeline abstraction.
Code
Code for app.py
requirements.txt
gradio
transformers
torch
transformers[sentencepiece]
Commit the changes and wait for the status of deployment to get green. Post that click the App tab in the menu to launch the application.

Two dialog boxes of translation U I G radio. The English dialog box has a field and two buttons clear and submit. The French dialog box also has a text field.
Translation UI using Gradio
We get the following output.
Next, we try the same without the pipeline API in Listing 5-6.
Code
Code for app.py
requirements.txt
gradio
transformers
torch
transformers[sentencepiece]
Commit the changes and wait for the status of deployment to get green. Post that click the App tab in the menu to launch the application.

Two dialog boxes of translation U I, G radio. The English dialog box has a field and two buttons clear and submit. The French dialog box also has a text field.
Gradio UI for a translation task without using the pipeline API directly

A screenshot of google Translate. Two fields for English and converted French text. A conversion sign between English and French.
Google Translate for the same text we used for our Gradio app
As we can see, the results are exactly matching. Something to cheer about.
Summary
If we are presented with lengthy documents to read, our natural inclination is to either not read them at all or skim only the most important points. Therefore, it would be very helpful to have a summary of the information to save both time and mental processing power.
In the past, however, automatically summarizing text was an impossible task. To be more specific, making an abstractive summary is a very difficult task. Abstractive summarization is more difficult than extractive summarization, which pulls key sentences from a document and combines them to form a “summary.” Because abstractive summarization involves paraphrasing words, it is also more time-consuming; however, it has the potential to produce a more polished and coherent summary.
We will be first looking at the google/pegasus-xsum model to generate the summary of some text.
Here is the code.
Code for app.py
requirements.txt
gradio
transformers
torch
transformers[sentencepiece]
Commit the changes and wait for the status of deployment to get green. Post that click the App tab in the menu to launch the application.
Two dialog boxes for summarization using G radio. The English dialog box has a field and two buttons clear and submit. The summary dialog box also has a text field.
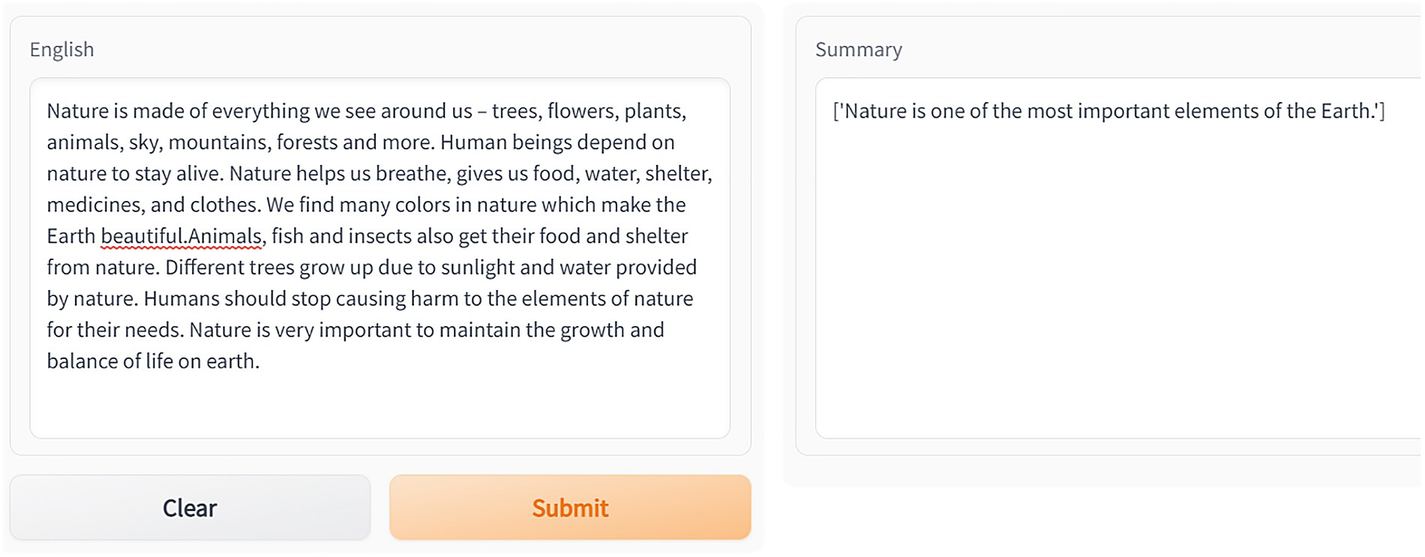
Summarization app using Gradio. Paste a para in the box labeled English, and upon submitting, the box labeled Summary will show the summary of the para text
Next, we take another text and also apply some tuning to the model with some parameters.
Code for app.py
Commit the changes and wait for the status of deployment to get green. Post that click the App tab in the menu to launch the application.

Two dialog boxes side by side for summarization using the G radio app. The English and summary dialog box has a text field each.
Summary of the text via the Gradio app
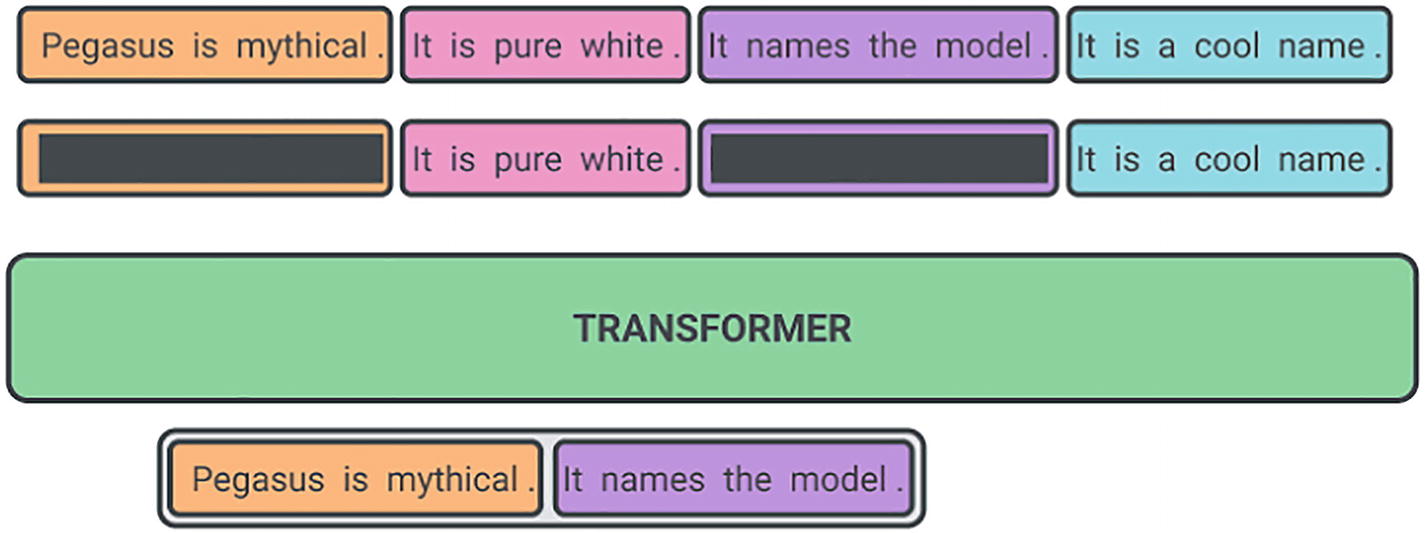
A block diagram of the google pegasus model for summarizing text. A text is written in six blocks above the transformer and converted into two blocks below the transformer.
Google Pegasus model for summarizing text Imagsource: https://1.bp.blogspot.com/-TSor4o51jGI/Xt50lkj6blI/AAAAAAAAGDs/
Text generation is accomplished through the use of beam search, which is what num beams refers to. In contrast with greedy search, which only returns the next word that is most likely to be found, this method returns the n words that are most likely to be found.
Num_return_sequences returns the number of outputs returned. In the preceding example, we gave 5 as the number of sequences.
Altering the output distribution that is computed by your neural network is one justification for making use of the temperature function . In accordance with Equation 5-1 (temperature function), it is added to the logits vector:
?? =exp(??/?)/ ∑?exp(??/?)Equation 5-1
where ? is the temperature parameter.
- a)
Sample “hard” softmax probs : [0.01,0.04,0.95]
- b)
Sample ‘soft’ softmax probs : [0.15,0.25,0.6]
In the preceding “a” is a harder distribution . Your model exhibits a high level of assurance regarding its predictions. On the other hand, you probably don’t want your model to behave in that way in most situations. For instance, if you are generating text with an RNN, you are essentially taking a sample from your output distribution and using that sampled word as your output token (and next input). If your model has a high level of self-assurance , it may generate text that is very repetitive and not very interesting. You want it to produce text with a greater variety of topics, but it won’t be able to do that because, while the sampling procedure is taking place, the majority of the probability mass will be concentrated in a few tokens, and as a result, your model will keep selecting the same small group of words over and over again. You could plug in the temperature variable to generate more diverse text and give other words a chance to be sampled as well. This would accomplish the same thing.
The exponential function is to blame for the fact that higher temperatures result in flatter distributions . This is because of how the function works. The temperature parameter places a greater amount of negative weight on larger logits than it does on smaller logits. An “increasing function” is what the exponential function is called. Therefore, if a term is already quite significant, penalizing it by a small amount would make it much smaller (in terms of percentage) than if that term was relatively minor.
For a more keen user, here is a brief about the Pegasus model.
Pegasus
During the pretraining phase of the Pegasus system , several complete sentences are deleted from the source document. The model is then tasked with retrieving these sentences. The missing sentences from the document serve as the input for such pretraining, while the document itself serves as the output. The input document is what is known as the “input document .” This is a self-supervised model without any need of annotations in the training dataset.
Zero-Shot Learning
Zero-shot learning, as the name implies, is to use a pretrained model , trained on a certain set of data, on a different set of data, which it has not seen during training. This would mean, as an example, to take some model from huggingface that is trained on a certain dataset and use it for inference on examples it has never seen before.
Zero-Shot Text Classification
Text classification is a task in natural language processing that requires the model to make predictions about the classes that the text documents belong to, as is common knowledge. In the traditional method, we are required to use a significant amount of data that has been labeled in order to train the model. Additionally, they are unable to make predictions using data that they have not seen. The use of zero-shot learning in conjunction with text classification has reached an unprecedented level of sophistication in natural language processing.
The primary objective of any model associated with the zero-shot text classification technique is to classify the text documents without employing any labeled data or without having seen any labeled text. This can be accomplished by classifying the documents without having seen any labeled text. The transformers are where the zero-shot classification implementations are most frequently found by us. There are more than 60 transformer models that function based on the zero-shot classification that are found in the huggingface library.
When we discuss zero-shot text classification , there is one additional thing that springs to mind. In the same vein as zero-shot classification is few-shot classification, which is very similar to zero-shot classification. However, in contrast with zero-shot classification, few-shot classification makes use of very few labeled samples during the training process. The implementation of the few-shot classification methods can be found in OpenAI, where the GPT3 classifier is a well-known example of a few-shot classifier.
Why We Need Zero-Shot
- 1.
There is either no data at all or only a very limited amount of data available for training (detection of the user’s intentions without receiving any data from the user).
- 2.
There are an extremely high number of classes and labels (thousands upon thousands).
- 3.
A classifier that works “out of the box,” with reduced costs for both infrastructure and development.
We will use the pipeline API first to see if we can just create a simple classifier with zero-shot learning.
Code
Code for app.py
requirements.txt
gradio
transformers
torch
transformers[sentencepiece]
Commit the changes and wait for the status of deployment to get green. Post that click the App tab in the menu to launch the application.

Two dialog boxes for zero-shot classification. The English dialog box has two fields, English and label and two buttons clear and submit. The classification dialog box also has a text field.
Zero-shot classification
We can see this text gets classified under the sports category correctly.

Two dialog boxes for zero-shot classification. The English dialog box has two fields, English and label and two buttons clear and submit. The classification dialog box also has a text field.
Another example of zero-shot classification . The box labeled Classification represents the scores/probabilities of individual classes
Another way to attain the same without the pipeline API is shown in the following.
Code
Code for app.py
requirements.txt
gradio
transformers
torch
Commit the changes and wait for the status of deployment to get green. Post that click the App tab in the menu to launch the application.

Two dialog boxes for zero-shot classification. The English dialog box has two fields, English and label, and two buttons. The other dialog box also has a field of the probability of the label is true.
Gradio app for zero-shot classification
This again classifies the text under the sports category correctly.
Text Generation Task/Models
The development of text generation models started many decades ago, which is a long time before the recent surge in interest in deep learning . Given a piece of text, models of this kind should be able to make accurate predictions about a particular word or string of words. Given a text as input, the model navigates through a search space to generate probabilities of what could be the next probable word from a joint distribution of words.
The earliest text generation models were based on Markov chains . Markov chains are like a state machine wherein using only the previous state, the next state is predicted. This is similar also to what we studied in bigrams.
Post the Markov chains, recurrent neural networks (RNNs) , which were capable of retaining a greater context of the text, were introduced. They are based on neural network architectures that are recurrent in nature. RNNs are able to retain a greater context of the text that was introduced. Nevertheless, the amount of information that these kinds of networks are able to remember is constrained, and it is also difficult to train them, which means that they are not effective at generating lengthy texts. To counter this issue with RNNs, LSTM architectures were evolved, which could capture long-term dependencies in text. Finally, we came to transformers, whose decoder architecture became popular for generative models used for generating text as an example.
In this section we will concentrate on the GPT2 model and see how we can use the huggingface APIs to consume the GPT2 model for generative tasks. This will allow us to generate text with the pretrained models and also fine-tune them if needed with a custom text dataset.
Code
Code for app.py
requirements.txt
gradio
transformers
torch
Commit the changes and wait for the status of deployment to get green. Post that click the App tab in the menu to launch the application.

Two dialog boxes for tensor generation for English text. The English dialog box has a field and two buttons clear and submit. The generated tensor dialog box also has a text field.
Tensors for the English text
Generate function
I will give another text as input and check.
Commit the changes and wait for the status of deployment to get green. Post that click the App tab in the menu to launch the application.

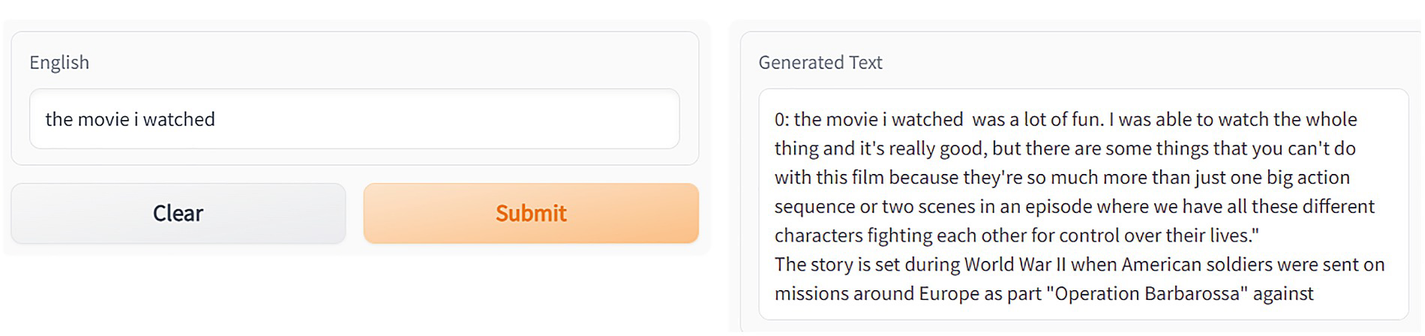
Two dialog boxes for code generation G radio app. The English dialog box has a field and two buttons clear and submit. The generated text box also has a text field.
Code generation app via Gradio
Next, we will change a simple parameter in the model.
Modified code for the generate function of app.py
Commit the changes and wait for the status of deployment to get green. Post that click the App tab in the menu to launch the application.

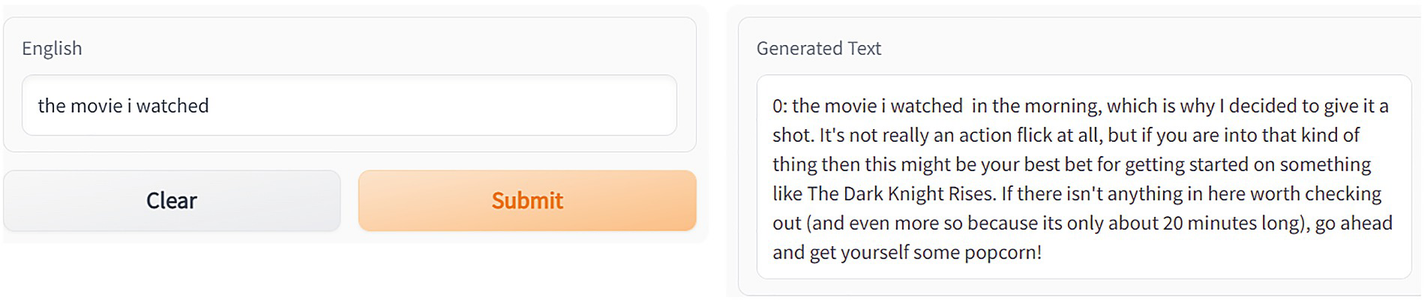
Two dialog boxes for text generation using the G radio app. The English dialog box has a field and two buttons clear and submit. The generated text dialog box also has a text field.
Text generation using Gradio
Modified code for the generate function of app.py to avoid repetition
Commit the changes and wait for the status of deployment to get green. Post that click the App tab in the menu to launch the application.
Two dialog boxes for text generation without repetition using the G radio app. The English dialog box has a field and two buttons clear and submit. The generated text dialog box also has a text field.
Text generation where the generator now avoids repetition in text
So far the search being done by the model to find the next word is based on greedy search.
It is the most straightforward approach , which entails selecting the word from all of the alternatives that has the highest probability of being correct. It is the one that is used whenever there is no specific parameter specified. This process is deterministic in nature, which means that resultant text is the same as before if we use the same parameters.
Next, we specify a parameter num_beams to perform a beam search.
Modified code for the generate function of app.py, num_beams specified
Commit the changes and wait for the status of deployment to get green. Post that click the App tab in the menu to launch the application.

Two dialog boxes for text generation using the G radio app. The English dialog box has a field and two buttons clear and submit. The generation text dialog box also has a text field.
UI showing text generation after using beam search in the generate function
The next approach we take is sampling.
Sampling is a parameter by which the next word is selected at random from the probability distribution.
Modified code for the generate function of app.py with sampling
Commit the changes and wait for the status of deployment to get green. Post that click the App tab in the menu to launch the application.

Two dialog boxes for text generation using sampling by the G radio app. The English dialog box has a field and two buttons clear and submit. The generated text dialog box also has a text field.
Gradio UI with the generate function using sampling behind the scenes
It is possible to alter the “temperature ” of the distribution in order to raise the likelihood of successfully removing a word from among the most likely candidates.
The level of greed that the generative model exhibits is proportional to the temperature.
If the temperature is low, the probabilities of sample classes other than the one with the highest log probability will be low. As a result, the model will probably output the text that is most correct, but it will be rather monotonous and contain only a small amount of variation.
If the temperature is high, the model has a greater chance of outputting different words than those with the highest probability. The generated text will feature a greater variety of topics, but there is also an increased likelihood that it will generate nonsense text and contain grammatical errors.
Modified code for the generate function of app.py with temperature setting of 1.5
Commit the changes and wait for the status of deployment to get green. Post that click the App tab in the menu to launch the application.
Two dialog boxes for text generation with generate function. The English dialog box has a field and two buttons clear and submit. The generated text dialog box also has a text field.
Text generation shown in Gradio UI with the generate function using a temperature setting of 1.5
Modified code for the generate function of app.py with temperature setting of 0.1
Commit the changes and wait for the status of deployment to get green. Post that click the App tab in the menu to launch the application.

Two dialog boxes for text generation using the G radio U I. The English dialog box has a field and two buttons clear and submit. The generated text dialog box also has a text field.
Text generation shown in Gradio UI with the generate function using a temperature setting of 0.1
To let the concepts of text generation sink in a bit more, we will take another model into consideration called the “distilgpt2 .”
Code
app.py code using the GPT2 model for text generation
requirements.txt
gradio
transformers
torch
transformers[sentencepiece]
Commit the changes and wait for the status of deployment to get green. Post that click the App tab in the menu to launch the application.

Two dialog boxes for text generation using the G P T 2 model. The English dialog box has a field and two buttons clear and submit. The generated text dialog box also has a text field.
Text generation using the GPT2 model behind the scenes
Text-to-Text Generation
In this section, we will cover text-to-text generation using the T5 model .
A transformer-based architecture that takes a text-to-text approach is referred to as T5, which stands for Text-to-Text Transfer Transformer.
In the text-to-text approach, we take a task like Q&A, classification, summarization, code generation, etc. and turn it into a problem, which provides the model with some form of input and then teaches it to generate some form of target text. This makes it possible to apply the same model, loss function, hyperparameters, and other settings to all of our varied sets of responsibilities.
- 1.
It produces a tidier version of the enormous Common Crawl dataset, which is referred to as the Colossal Cleaned Common Crawl (C4) . This dataset is approximately 100,000 times more extensive than Wikipedia.
- 2.
It prepares the body for T5 on the Common Crawl.
- 3.
It proposes rethinking each and every NLP task as a formulation of an input text to an output text.
- 4.
It demonstrates that state-of-the-art results can be achieved through fine-tuning on a variety of tasks, such as summarization, Q&A, and reading comprehension, by making use of the pretrained T5 and the text-to-text formulation.
- 5.
Additionally, the T5 team conducted an in-depth study in order to learn the most effective methods for pretraining and fine-tuning. In their paper, they detail which parameters are most important to achieving desirable results.
Code
app.py code
requirements.txt
gradio
transformers
torch
transformers[sentencepiece]
Commit the changes and wait for the status of deployment to get green. Post that click the App tab in the menu to launch the application.
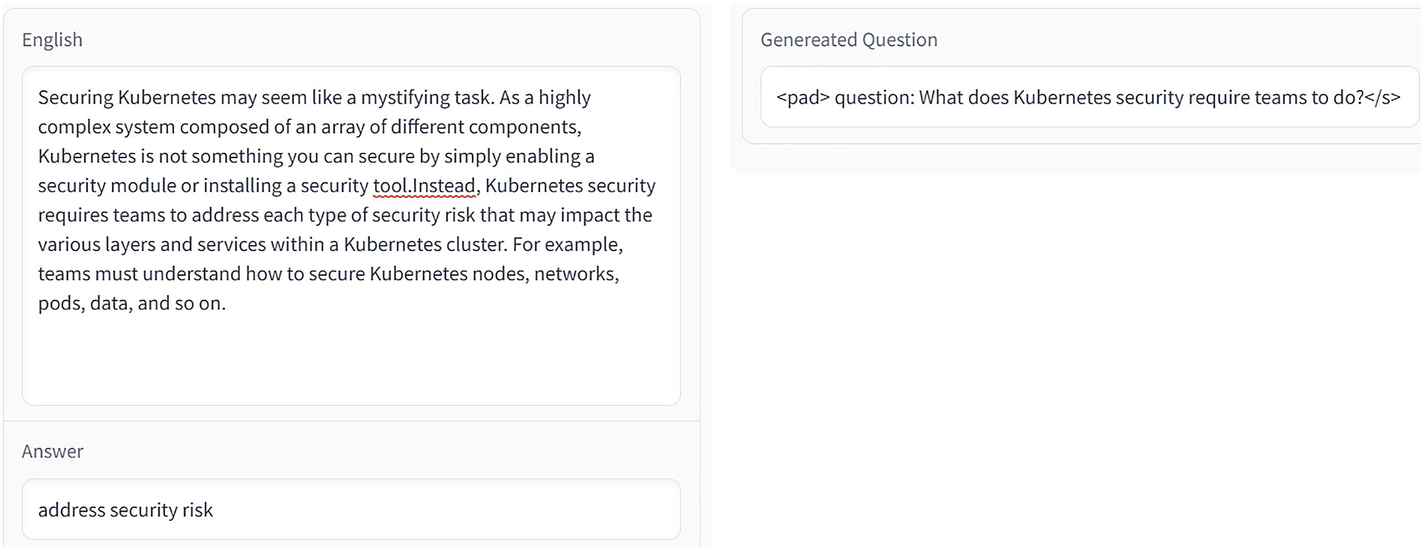
Two dialog boxes for generating questions. The English dialog box has two fields one has a paragraph and the other for an answer. The generated question dialog box also has a field with a question.
Generating questions from the para

Two dialog boxes for question generation. The English dialog box has two fields one has a paragraph and the other for an answer. The generated question dialog box also has a field with a question.
Another example of question generation from text
In same example, let’s change the answer a bit.
Now we look into another use case of T5, which is to summarize a paragraph of text.
Here is the code.
app.py code
requirements.txt
gradio
transformers
torch
transformers[sentencepiece]
Commit the changes and wait for the status of deployment to get green. Post that click the App tab in the menu to launch the application.

Two dialog boxes for text summarization using the G radio app. The paragraph dialog box has a field containing a paragraph. The summary dialog box also has a text field with one-line text.
Summarizing text using the T5 model
- 1.
Translation
- 2.
Sentiment classification
- 3.
Paraphrasing
- 4.
Classification of whether deduction of a statement from a sentence is right or not
- 5.
And a few more
We will cover a few of the above-mentioned tasks in the following.
English-to-German Using T5
As highlighted in the following code segment, we need to prefix the text with translate English to German in order to generate the corresponding German translation.
Code
app.py code
requirements.txt
gradio
transformers
torch
transformers[sentencepiece]
Commit the changes and wait for the status of deployment to get green. Post that click the App tab in the menu to launch the application.

Two dialog boxes for text translation using the T 5 model. The English dialog box has a field and two buttons clear and submit. The German translation dialog box also has a text field.
Translation using the T5 model

A screenshot of google Translate. Two fields for German and converted English text. A conversion sign between English and German.
Translation using Google Translate
This is exactly the input we gave.
Now we change the prefix to translate English to French in app.py.
app.py code
Commit the changes and wait for the status of deployment to get green. Post that click the App tab in the menu to launch the application.

Two dialog boxes for summarization using the T 5 model. The English dialog box has a field and two buttons clear and submit. The French translation dialog box also has a text field.
Another example of T5 model–based translation
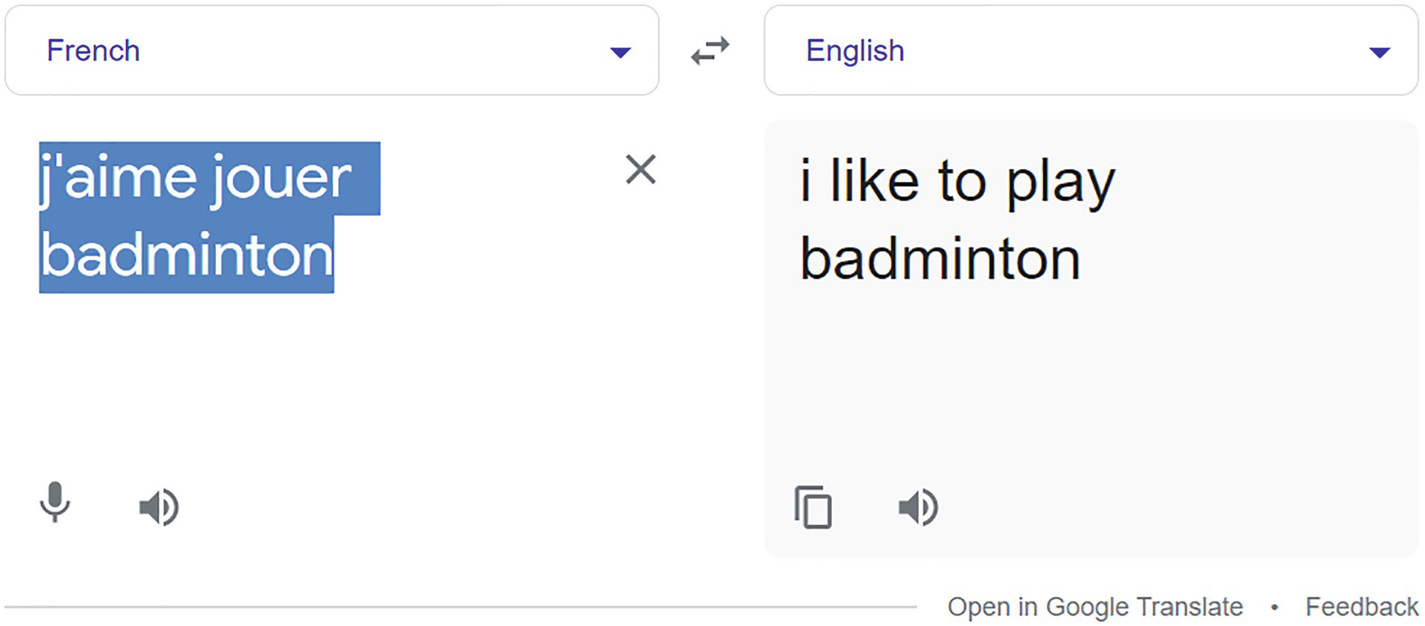
A screenshot of google Translate. Two fields for French and converted English text. A conversion sign between French and German.
Translation using Google Translate
We perform a check on Google for the same.
We can see the result is exactly as that in Google Translate.
Sentiment Analysis Task
Next, we try a sentiment classification using the T5 model.
We use the sst2 sentence prefix for doing the sentiment analysis.
Code
app.py code
requirements.txt
gradio
transformers
torch
transformers[sentencepiece]
Commit the changes and wait for the status of deployment to get green. Post that click the App tab in the menu to launch the application.
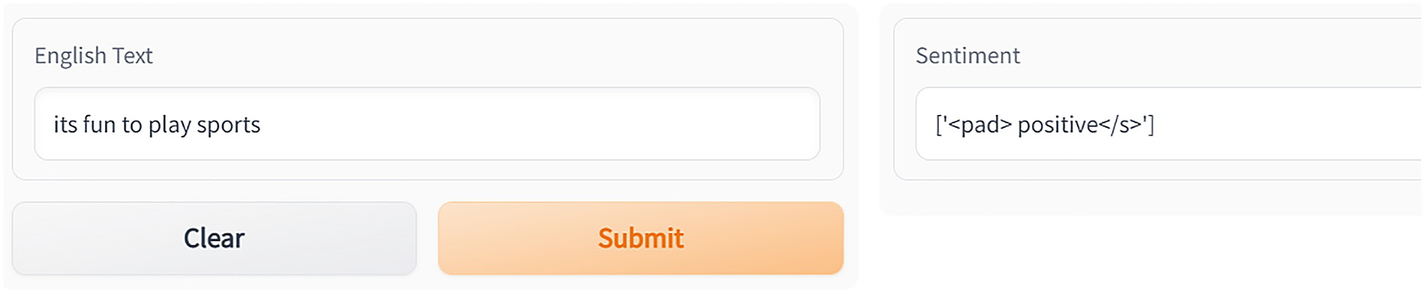
Two dialog boxes for sentiment analysis using the T 5 model. The English text dialog box has a field and two buttons clear and submit. The sentiment text dialog box field shows positive sentiment.
Sentiment analysis task using T5 – positive
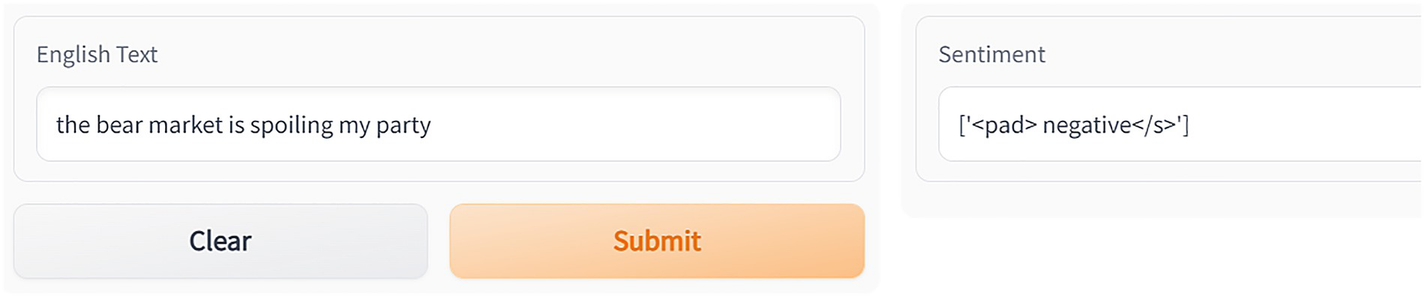
Two dialog boxes for sentiment analysis using the T 5 model. The English text dialog box has a field and two buttons clear and submit. The sentiment text dialog box field shows a negative sentiment.
Sentiment analysis task using T5 – negative
Let’s run the code again on a different text .
We get the following output.
Again you can observe how easy life becomes by just using these pretrained models on a variety of tasks.
Next we use the T5 model to check the grammatical acceptance of a text by using the cola sentence prefix as shown in the following.
Code
app.py code
requirements.txt
gradio
transformers
torch
transformers[sentencepiece]
Commit the changes and wait for the status of deployment to get green. Post that click the App tab in the menu to launch the application.

Two dialog boxes for sentence acceptability using the T 5 model. The English text dialog box has a field and two buttons clear and submit. The other dialog box also field shows acceptable.
Sentence acceptability
Sentence Paraphrasing Task
Now we check whether two sentences are paraphrases of each other using the mrpc sentence1 sentence2 prefix.
Code
app.py code
requirements.txt
gradio
transformers
torch
transformers[sentencepiece]
Commit the changes and wait for the status of deployment to get green. Post that click the App tab in the menu to launch the application.

Two dialog boxes show sentence equivalence. The first dialog box has two fields sentences 1 and 2. The other dialog box also field shows the equivalent.
Shows if sentences are equivalent or not
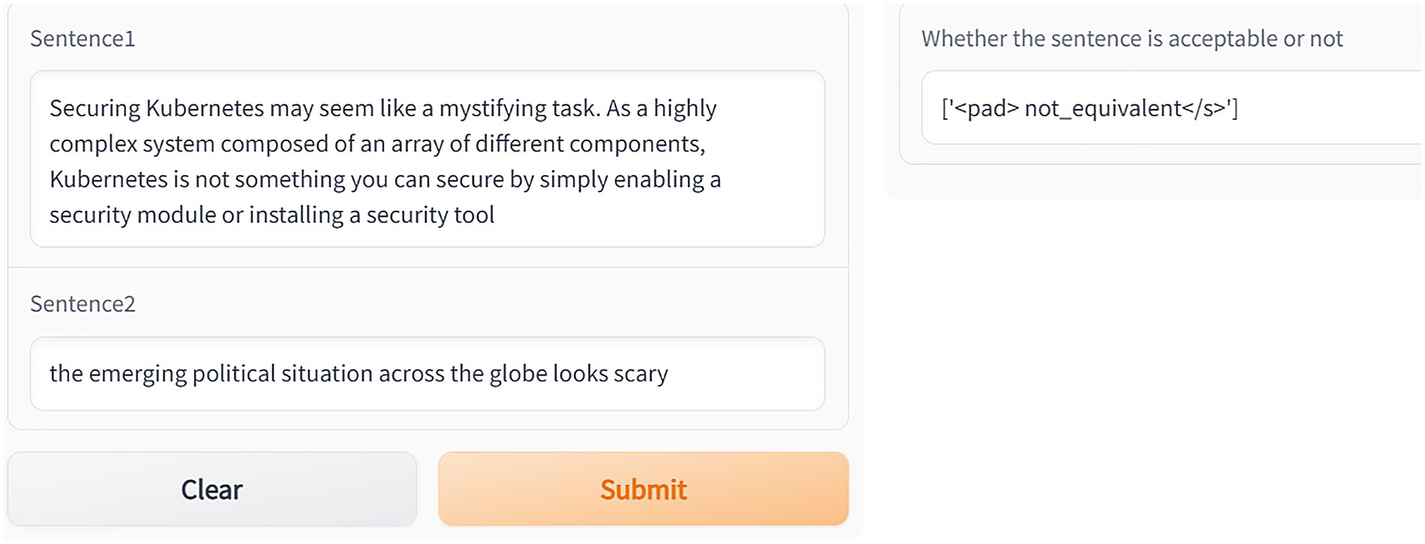
Two dialog boxes show sentence equivalence. The first dialog box has two fields sentences 1 and 2 with a clear and a submit button. The other dialog box also field shows the not equivalent.
Shows again if sentences are equivalent or not
Let’s run the same code on two entirely different sentences in the following.
We get the following output.
Next, we look into a task for checking whether a statement deduced from a text is correct or not. We again do this via the T5 model.
To achieve this we need to use the rte sentence1 sentence 2prefix as shown in the following code.
Code
app.py code
requirements.txt
gradio
transformers
torch
transformers[sentencepiece]
Commit the changes and wait for the status of deployment to get green. Post that click the App tab in the menu to launch the application.

Two dialog boxes show a sentence deductible from another sentence. The first dialog box has two fields sentences 1 and 2. The other dialog box also field shows the entailment.
Gradio app for checking whether a sentence is deductible from another sentence or not – entailment

Two dialog boxes show a sentence deductible from another sentence. The first dialog box has two fields sentences 1 and 2. The other dialog box also field shows no entailment.
Gradio app for checking whether a sentence is deductible from another sentence or not – not_entailment
Here, entailment means that sentence2 is deductible from sentence1.
Let’s provide different sentences to the same task and see what we get as output.
This gives the following output.
Here, not_entailment in the output signifies that sentence2 is not deductible from sentence1.
Moving away from T5 to the world of chatbots, we will show how easily we can develop a chatbot using huggingface APIs.
Chatbot/Dialog Bot
As a final example for this chapter, we take an example of how a simple dialog system can be built using the Transformers library.
Research in machine learning faces a formidable obstacle in the form of the construction of open-domain chatbots. While previous research has shown that scaling the neural models leads to improved results, this is not the only factor that should be considered when developing a good chatbot. A good conversation requires a lot of skills, which a chatbot needs to have to enter a seamless conversation.
These skills would entail understanding what is being conversed about and also what has been talked about in previous few sentences in the conversations. The bot should be able to handle scenarios where someone tries to trick it into out-of-context questions.
Below we showcase a simple bot named Alicia that is based on the Microsoft DialoGPT model .
Code
app.py code
requirements.txt
gradio
transformers
torch
transformers[sentencepiece]
Commit the changes and wait for the status of deployment to get green. Post that click the App tab in the menu to launch the application.
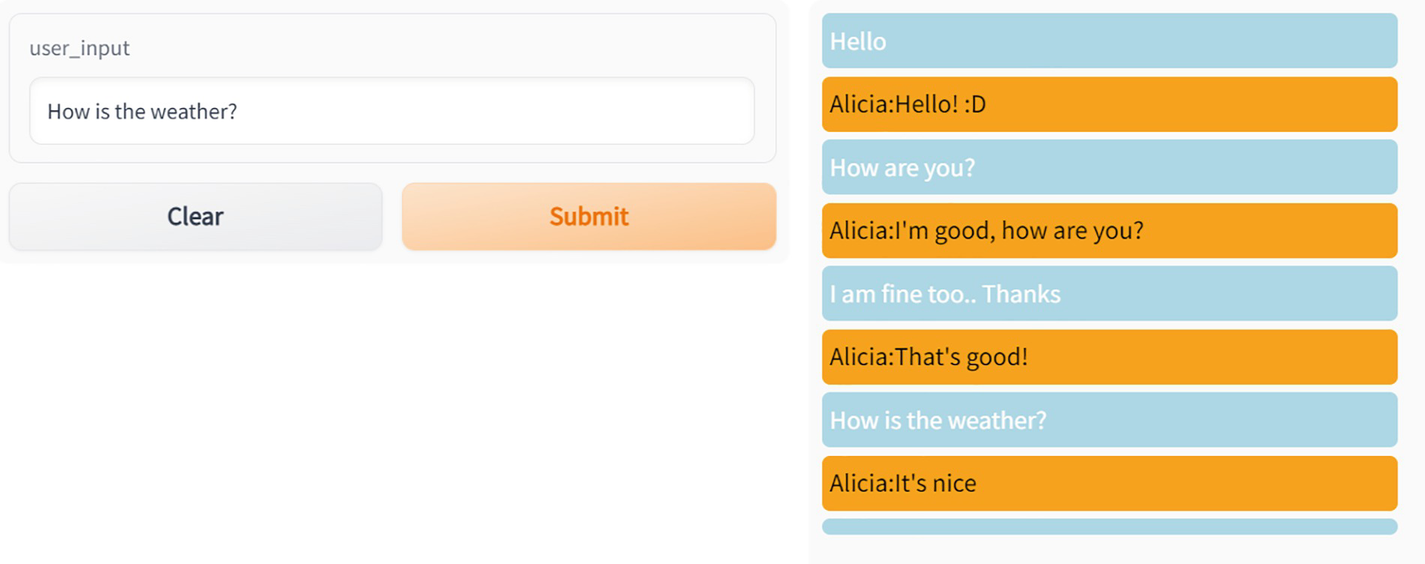
A dialog box for user input and a list of chats with a chatbot using the Microsoft Dialo G P T model. The user input dialog box has a text field and two buttons clear and submit.
Chatbot using the Microsoft DialoGPT model
Code and Code Comment Generation
Code generation is quickly becoming a hot topic in the area of natural language processing (NLP), and contrary to popular belief, this is not just hype. The OpenAI Codex model was just just made available. If you view one of the Codex demonstrations, you will be able to observe how these models will influence the development of software programming in the future. Since the pretrained models are not made available to the public, working with a Codex model can be impossible from the point of view of a researcher if the requirements go beyond simply experimenting with it using the API. Technically, it is possible to recreate Codex by using the published paper; but, in order to do so, you will need a big GPU cluster , which is something that very few people either have access to or can afford. I believe that this restriction will make it more difficult to do research. Imagine if the authors chose not to disclose the pretrained weights; the number of BERT downstream applications that would be available to us would plummet. We can only hope that Codex is not the only paradigm of code generation currently available.
In this chapter, we will get an introduction to CodeGen , an encoder-decoder code generation model that features publicly available pretraining checkpoints that you can test out right now.
CodeGen
CodeGen is a language model that converts basic English prompts into code that can be executed. Instead of writing code yourself, you describe what the code should do using natural language, and the machine writes the code for you based on what you’ve described.
In the paper “A Conversational Paradigm for Program Synthesis,” written by Erik Nijkamp, Bo Pang, Hiroaki Hayashi, Lifu Tu, Huan Wang, Yingbo Zhou, Silvio Savarese, and Caiming Xiong, there is a family of autoregressive language models for program synthesis called CodeGen. The models were first made available for download from this repository in three different pretraining data variations (NL, Multi, and Mono), as well as four different model size variants (350M, 2B, 6B, 16B).
In this chapter we look into some examples, where we can use the CodeGen model to generate code.
We will use a small CodeGen model with 350 million parameters.
Code
app.py code
requirements.txt
gradio
git+ https://github.com/huggingface/transformers.git
torch
transformers[sentencepiece]
Commit the changes and wait for the status of deployment to get green. Post that click the App tab in the menu to launch the application.

Two dialog boxes for intended text and its generated python code. The intended text field is for larger of two numbers with a clear and a submit button.
Sample code generator for finding the larger of two numbers
As we can see, the code is not fully accurate but captures the intent.

Two dialog boxes for Bubble sort text-to-code. One dialog box is for intended text with a clear and a submit button. Another for its generated python code.
Bubble sort text-to-code example
The same can be done for merge sort by modifying the app.py file (change the max_length parameter to 256).
app.py code
Commit the changes and wait for the status of deployment to get green. Post that click the App tab in the menu to launch the application.
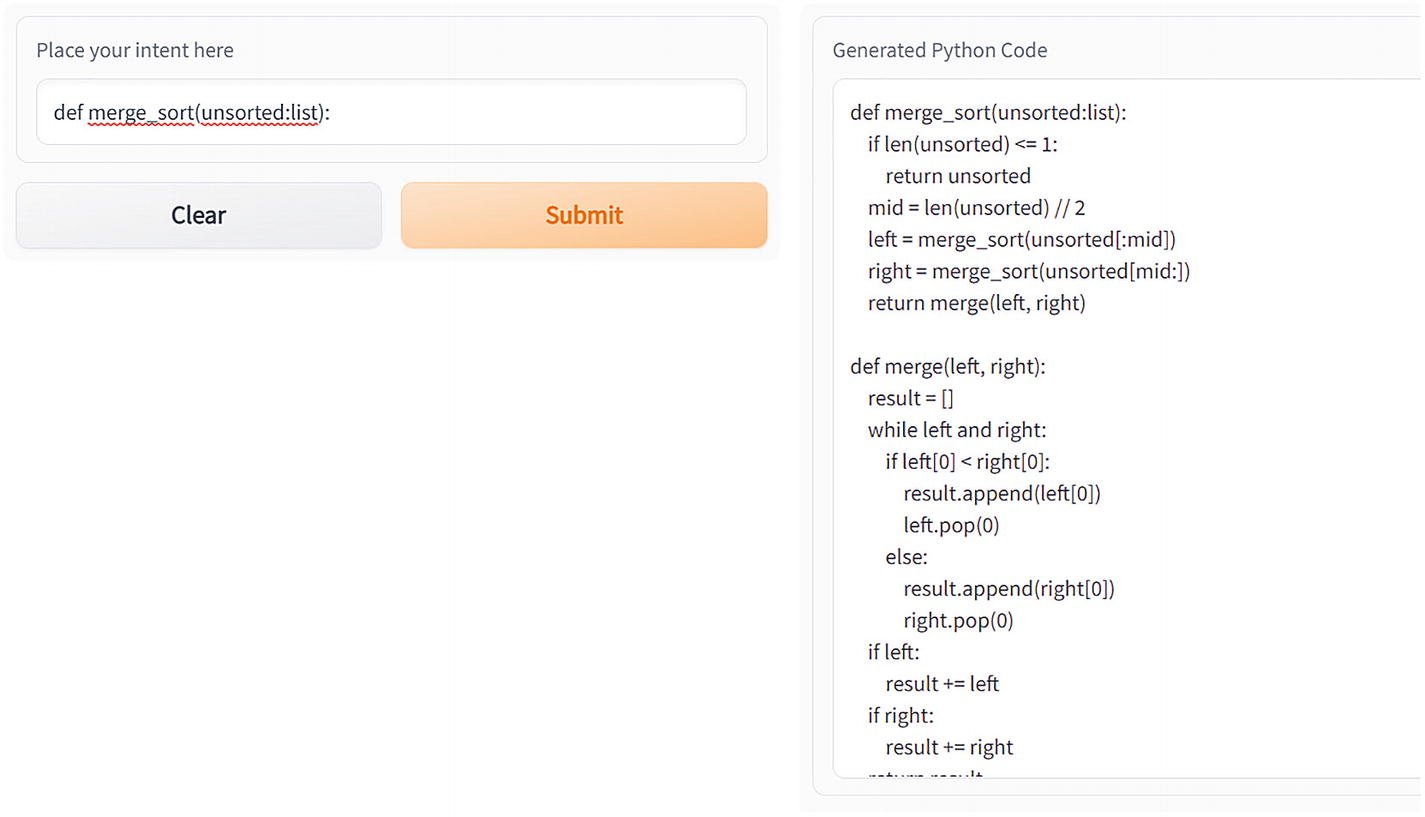
Two dialog boxes for generating code for merge sort. One dialog box is for intended text with a clear and a submit button. Another for its generated python code.
Generating code for merge sort
Code Comment Generator
The goal of this section is to have some code as input and let the model generate comments for that code. In this case we will use the Salesforce CodeT5 model, which is fine-tuned on Java code .
As its name suggests, the T5 encoder-decoder paradigm is the foundation upon which CodeT5 [1] is built. Instead of treating the source code like any other natural language (NL) text, it applies a new identifier-aware pretraining objective that capitalizes on code semantics. This is in contrast with previous code generation models, which rely on traditional pretraining methods.
The authors distributed two pretrained models : a basic model with 220 million data points and a smaller model with only 60 million data points. In addition to that, they distributed all of their fine-tuning checkpoints through their public GCP bucket. Additionally, the well-known huggingface library makes both of these pretrained models available for use.
CodeT5 is a unified pretrained encoder-decoder transformer model . The CodeT5 approach makes use of a unified framework, which not only facilitates multitask learning but also supports code interpretation and generation activities in an effortless manner.
The pretraining of CodeT5 is accomplished in a sequential manner using two separate goals. The model is optimized with an identifier-aware denoising objective during the first 100 epochs. This trains the model to distinguish between identifiers (such as variable names, function names, etc.) and specific programming language (PL) keywords (e.g., if, while, etc.). Then, optimization is performed for a total of 50 iterations utilizing a bimodal dual generation goal. As a final goal, we want to make sure that the code and the NL descriptions are more aligned with one another.
Since this example needs to download models from a non-huggingface repository (as of writing this book, the model was not updated on huggingface), we will do this example in Google Colab instead of huggingface.
Create a new notebook in Colab.
Code for comment generation from the source code file
Code that tries to generate comment for Google search code
The last result might not look good, but this can be improved by tuning the specific parameters, which I leave to you to experiment with.
Finally, these pretrained models can also be fine-tuned for specific programming languages like C, C++, etc.
Summary
In this chapter we looked into the various use cases and implementations of how transformers can be used for processing text and applying it for various tasks like classification, translation, summarization, etc. We also looked at how we can easily build a chatbot using the huggingface APIs.
In the next chapter, we look at how transformers can be applied to the area of image processing.