
Perform Post-Installation Tasks
If everything has gone as expected, your Mac is now successfully running Mojave. (If things haven’t gone as expected, flip forward to Troubleshoot Upgrade Problems.) But there are still a few tasks left to do before you get to work—or play—with your new operating system. In this chapter I cover some important initial setup and configuration activities you should get out of the way right now.
Respond to Immediate Questions
My test installations of Mojave have used various combinations of starting points, configurations, and upgrade paths. In some cases, after installing, I saw a normal desktop and nothing more. In other situations—especially when I upgraded older versions of macOS or had a lot of third-party software—I was immediately confronted with a large stack of overlapping dialogs and notifications.
Among the most common questions are requests for your user account password or Apple ID password. For example, certain apps may once again need an administrator’s authorization to make changes to your data, and various apps that use your Apple ID (including iTunes and Messages) may need you to sign in again.
Work your way through any such dialogs you see, even if they seem redundant. After that one-time process, most of them will not reappear.
Because of Mojave’s added security features, you’ll likely see a number of additional dialogs, including some you never saw in earlier versions of macOS. I discuss these next.
Accessibility Access
Apps that manipulate the user interface in one way or another to provide system enhancements and extra features may need to use Apple’s accessibility features. Examples include launchers, macro utilities, text-expansion utilities, scripting tools, and window management tools—among many others. The need to get user approval for these tools isn’t new in Mojave, but you may see more alerts like the one in Figure 10, including alerts for apps you previously granted accessibility access in an earlier version of macOS.
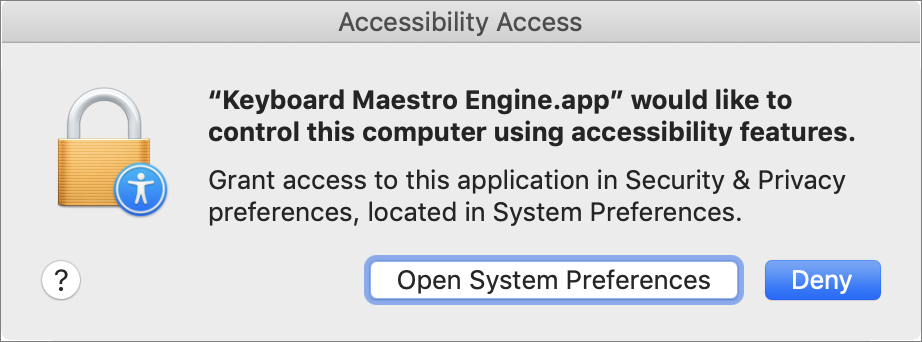
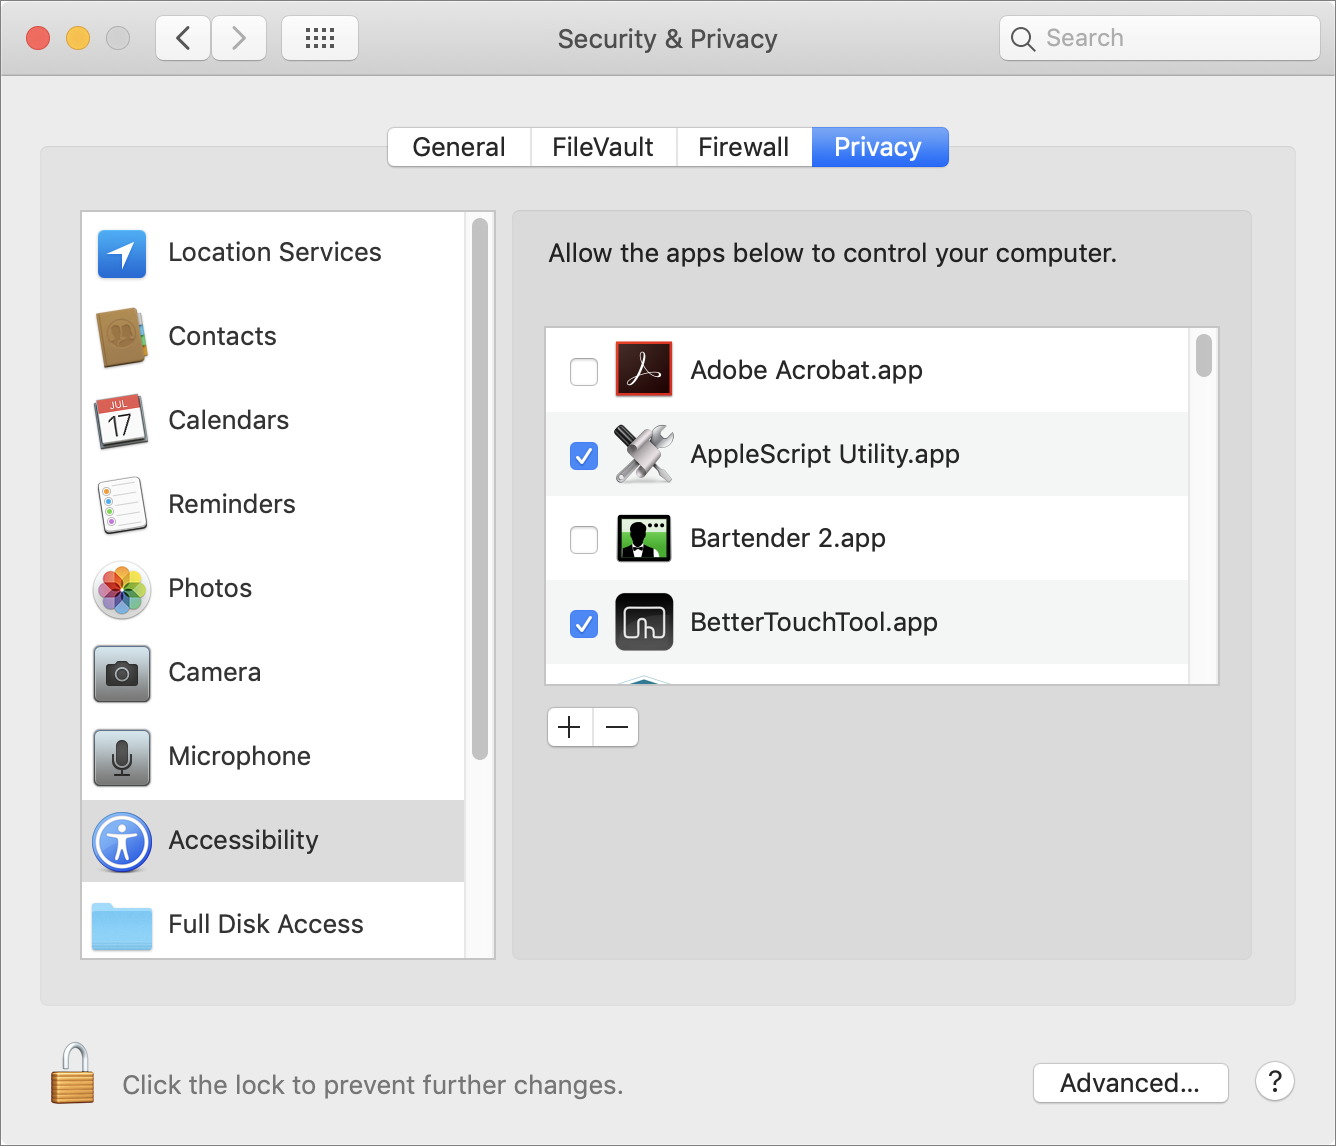
You can’t grant this type of access right in the alert dialog. Instead, you must open System Preferences (manually or by clicking the Open System Preferences button), go to Security & Privacy > Privacy, and select Accessibility in the list on the left (Figure 11). Click the lock ![]() icon at the bottom, enter your password, and click Unlock. Then select the checkbox(es) for the apps to which you want to grant access.
icon at the bottom, enter your password, and click Unlock. Then select the checkbox(es) for the apps to which you want to grant access.
Automation Access
A new category in Mojave is automation access. To ask your permission, an app displays a dialog like the one in Figure 12.
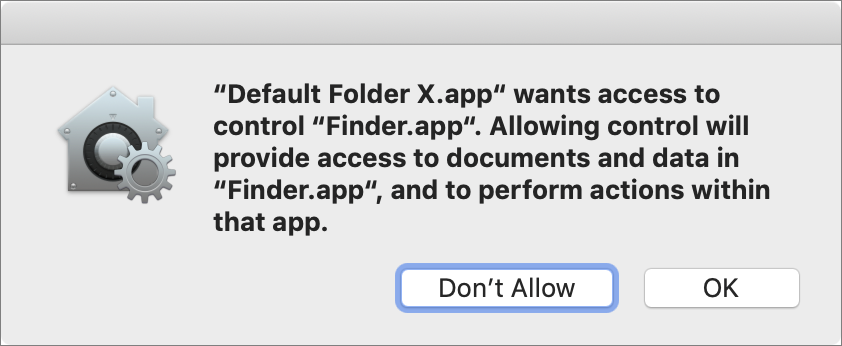
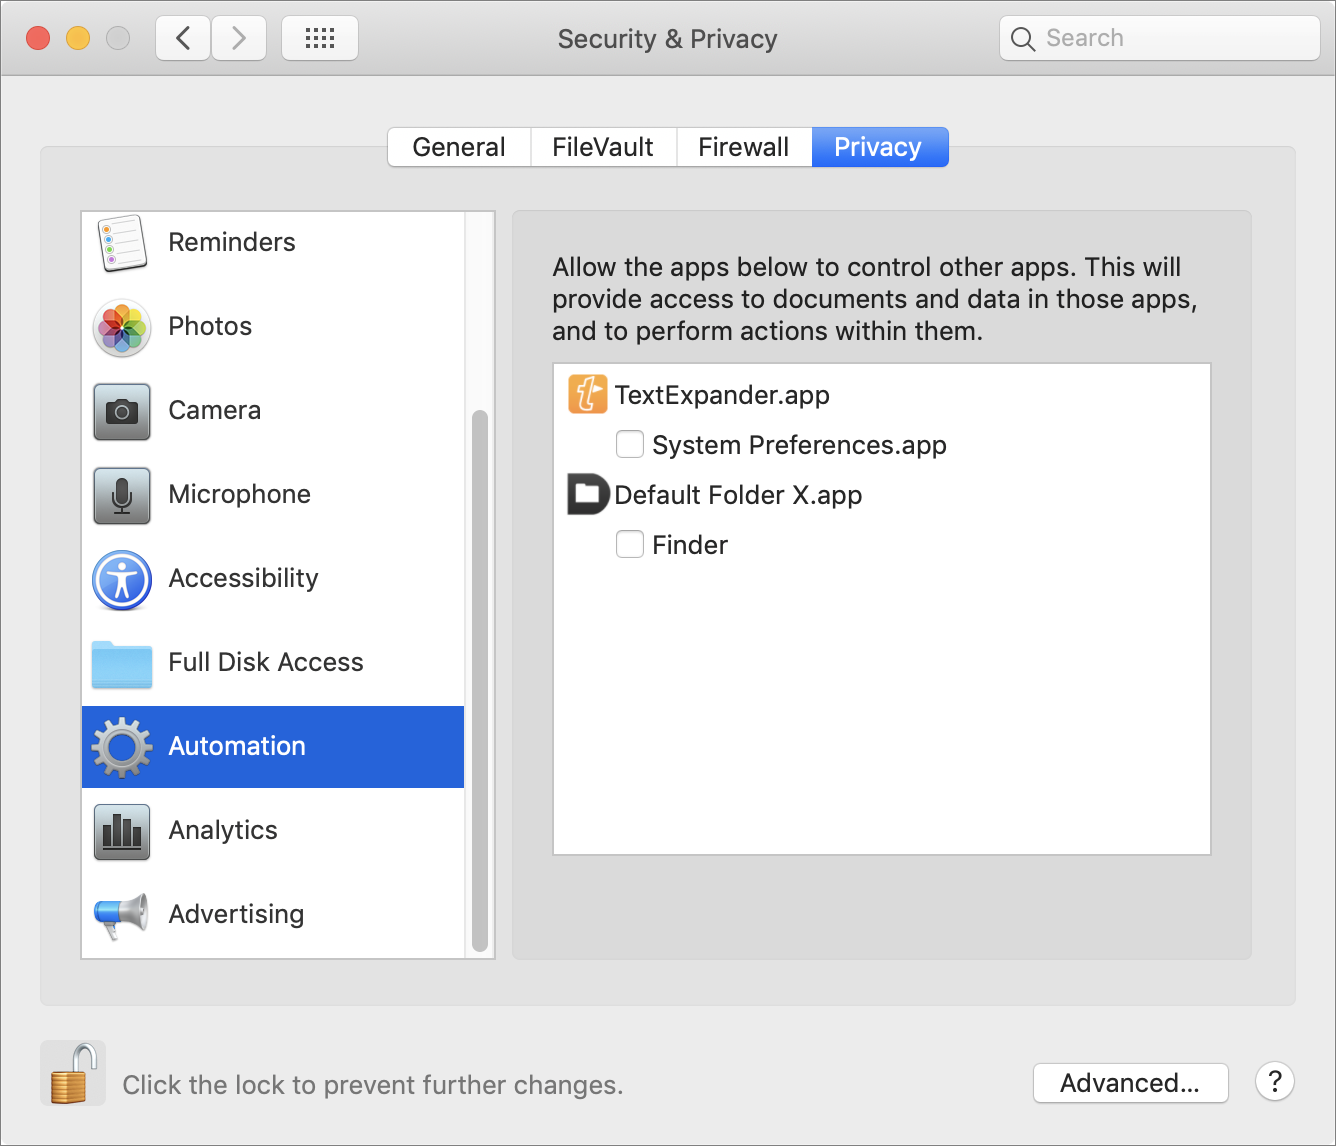
You may notice that this dialog specifies the name of an app (in this case, Finder). Any app or utility that requests automation access must do so individually for each app it wants to control. So you may see this alert multiple times per app. To grant automation access immediately, just click OK in the alert. Alternatively—or if you change your mind about an app later—go to System Preferences > Security & Privacy > Privacy > Automation (Figure 13) and check or uncheck the app(s) you permit the listed utilities to control.
Full Disk Access
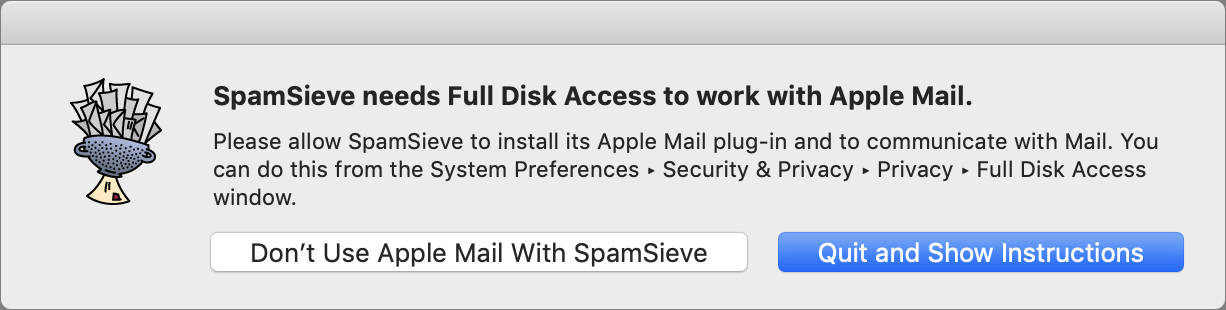
Another new privacy category in Mojave is Full Disk Access (formerly called Application Data). This isn’t merely about manipulating the user interface or automating actions within an app; this type of access gives the requesting app permission to read and modify files of a potentially sensitive nature (such as your email and messages). That may sound scary, but all it does is place an extra barrier between the bad guys (especially malware) and your important data. It’s entirely appropriate—indeed, necessary—for you to grant certain types of software access to this data. One example is a Mail plugin, such as SpamSieve, which needs access to your email in order to do its job.
If an app or utility needs access to your files, it will generally notify you in some way. There’s no single system-wide alert for this purpose, but an app may display a dialog such as the one in Figure 14.
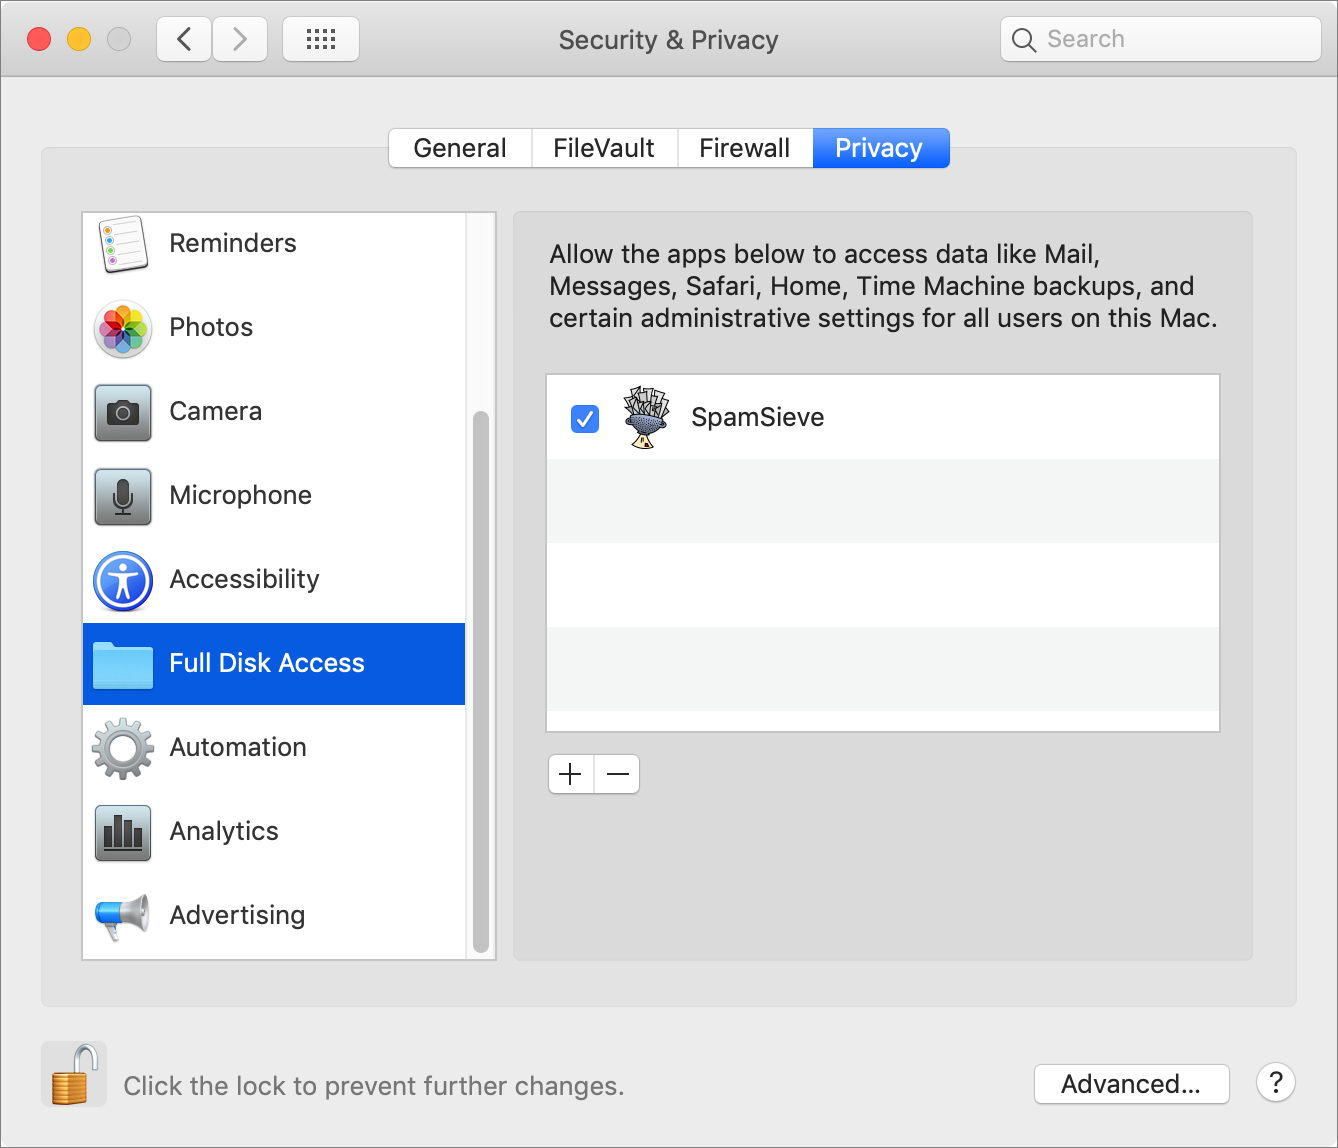
Like Accessibility Access, Full Disk Access requires you to manually pop into System Preferences. So, if an app needs this control, go to System Preferences > Security & Privacy > Privacy > Full Disk Access (Figure 15). If the app already appears in the list on the right, check the box next to it. If not, click the plus ![]() button, navigate to the app, select it, and click Open.
button, navigate to the app, select it, and click Open.
Some apps that need Full Disk Access do not notify you (at least, not in the versions shipping at publication time). Because of this, they can be completely nonfunctional until you figure out that you need to follow the above steps—and, more confusingly, figure out where to find the actual app file you need to specify. Here are some examples I’m aware of:
Backblaze: Backblaze needs Full Disk Access to back up your files, but the main Backblaze app is not what you add in System Preferences! As detailed in this blog post, you have to open the
Backblaze.bzpkgpackage in/Libraryand then drag thebzservfile to the Full Disk Access list. (Even then, some users may have to perform an additional step to make the system-wide Backblaze menu bar icon work.)Terminal: Although the Terminal app itself, and most command-line operations, work in Mojave just as they always have, some operations that use the
sudocommand (such as changing file ownership withchmod) work only if you’ve added Terminal to the list of apps in Full Disk Access. (See this discussion for more details.) Oh, and if you’re using Terminal to change ownership on a remote Mojave Mac via SSH, you’ll need to choose Go > Go to Folder in the Finder, enter/usr/sbin, and then drag the SSH daemon (/usr/sbin/sshd) to the Full Disk Access list too.
New Accounts Added
You may see a notification like the one in Figure 16. This means that, in the process of syncing your accounts via iCloud with your other Macs, Mojave found one or more email accounts that were either missing from this Mac or had different settings—and they’ve been added, but not enabled. To enable the accounts, click Continue; Mojave then opens System Preferences > Internet Accounts, where you can verify all the settings. Or, click Later to leave the newly added accounts disabled for the time being.

Handle Software Updates
The next thing you should do is to update macOS itself (and any other crucial Apple software) to the latest version. Sometimes Apple releases bug fixes and security updates almost immediately after a major upgrade, and if any such urgent updates are available, it’s in your best interest to install them right away.
In Mojave, as in every version of the Mac operating system since Mountain Lion, all updates to Apple software—including macOS itself, built-in software such as Safari and QuickTime, and optional purchases such as Final Cut Pro and Pages—are delivered through the App Store app. And, of course, you can update all the third-party apps you’ve purchased from the App Store at the same time.
In some cases, the App Store notifies you automatically of updates, but I recommend checking manually, shortly after your Mac starts up under Mojave for the first time. You can open the App Store by clicking its Dock icon, double-clicking its icon in /Applications or clicking it in Launchpad, or choosing Apple > App Store. Then click Updates in the sidebar.
Then, to update a single application, click the Update button next to it. (Apple may group multiple software updates together; if so, click the More link to see details on each one.) Or, to update all the listed apps at once, click Update All in the upper-right corner. The App Store downloads and installs the updates automatically.
In addition to installing any updates, decide how you want the App Store to handle future updates. Your Mac can check for, download, and even install updates in the background. Some people turn off all aspects of automatic updates—perhaps because they never want to be interrupted with alerts about new software, dislike the idea of anything downloading behind their backs, or need to keep an eye on a bandwidth cap. Others want all the new things right away without manual intervention and…ahem…have sufficiently robust backups that they can recover from any problems that may arise due to a buggy update.
Follow these steps to configure software updates:
Go to System Preferences > Software Update (Figure 17). macOS checks for updates, and any available updates appear at the top of the pane. To apply them, click Update Now.
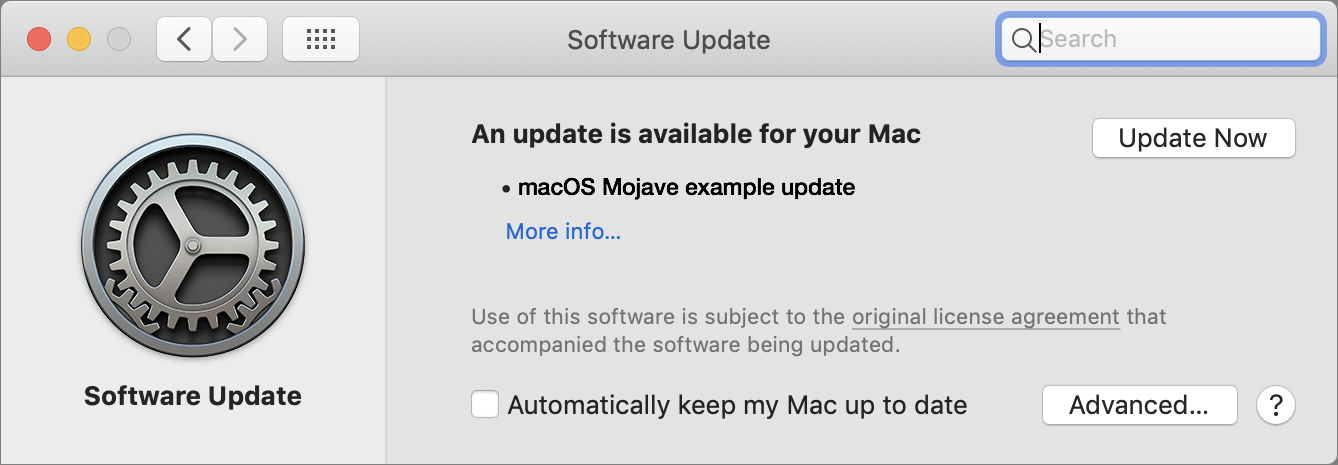
Figure 17: Configure automatic updates in the Software Update pane. To turn on all automatic updates (not the best idea, in my opinion), check “Automatically keep my Mac up to date.” Or, to specify exactly which updates you want macOS to install automatically (a much better idea), click Advanced. A dialog (Figure 18) appears.

Figure 18: Select which types of automatic updates you want in this dialog. Click the “Check for updates” checkbox (it’s checked by default) to enable or disable automatic checking. (In some situations, you must enter your password after changing this checkbox.) If it’s selected, you can also select any or all of:
Download new updates when available, which not only notifies you of updates but also downloads them for you so you can install them as soon as you’re ready (in the notification, click Install to install immediately; click Later and choose Try in an Hour, Try Tonight, or Remind Me Tomorrow from the pop-up menu to “snooze” the reminder; or click the notification itself to open the App Store and see which updates are available)
Install macOS updates, which downloads and installs updates to macOS itself—that is, macOS 10.14.x—and asks you to restart your Mac (you may be prompted for your password if you change this checkbox)
Install app updates from the App Store, which silently updates installed apps from the App Store (except those requiring a restart or other interaction)
- Install system data files and security updates, which automatically (without prompting you) installs these essential updates—but only after they’ve been available in the App Store for 3 days
Although you’re welcome to check whichever of these boxes you like, my personal preference (and recommendation) is to check all of them except “Install macOS updates” (as shown in Figure 18, above). I like having most of my software updated automatically, but for system updates, I prefer to wait until I’ve confirmed that other users aren’t experiencing any major problems with them, and then apply them when I’m ready.
Review the Incompatible Software Folder
If the Mojave installer encounters any known incompatibilities, it moves the problematic software to an Incompatible Software folder and explains what it moved on one of the final screens of Setup Assistant. (After Setup Assistant quits, you can find the Incompatible Software folder at the top level of your startup disk, at the top level of your home folder, or even in both places, depending on the location of the software that was disabled.)
This notice appears only for extensions and other low-level background software that would otherwise run automatically when you start up your Mac. As it says, the items in question are moved aside but not deleted. Whatever you do, don’t try to re-enable this software manually! Instead, contact the developer and get a version that’s compatible with Mojave, and then reinstall it.
Deal with Other Surprises
You may encounter a few other peculiarities when first using Mojave that cause some initial surprise.
Apple Mail
If you’ve been using Apple Mail through a few macOS upgrades, you may be familiar with extra steps that typically occur at this point. But Mojave makes even more changes than usual, so read on for the full story.
Importing Mail Messages
In some cases (more likely when using Plan B than Plan A—and even then, only when you’re upgrading from a pre–High Sierra system), the first time you launch Mail, a window informs you that it’s “upgrading” your mail database. This step should take no more than a few minutes, and is necessary because the Mojave version of Mail has updated the database format it uses to store information about your messages.
Mail Plugins
For many years, new versions of macOS have disabled Mail plugins, requiring users to install updated versions for compatibility. That’s still true, but more so: Apple has changed both the mechanism for enabling or disabling Mail plugins and added confusing hoops the developer (and you) must jump through to make them work.
First of all, most Mail plugins now require an external helper app (typically, one that runs in the background—either all the time, or just when Mail is open) to do the heavy lifting. That app requires access to all your Mail files (which, of course, may contain sensitive information), and although the app can display an alert informing you of this fact, you’ll have to grant this permission manually. For an example, and instructions on what to do, flip back to Full Disk Access.
But that is not all, oh no, that is not all!
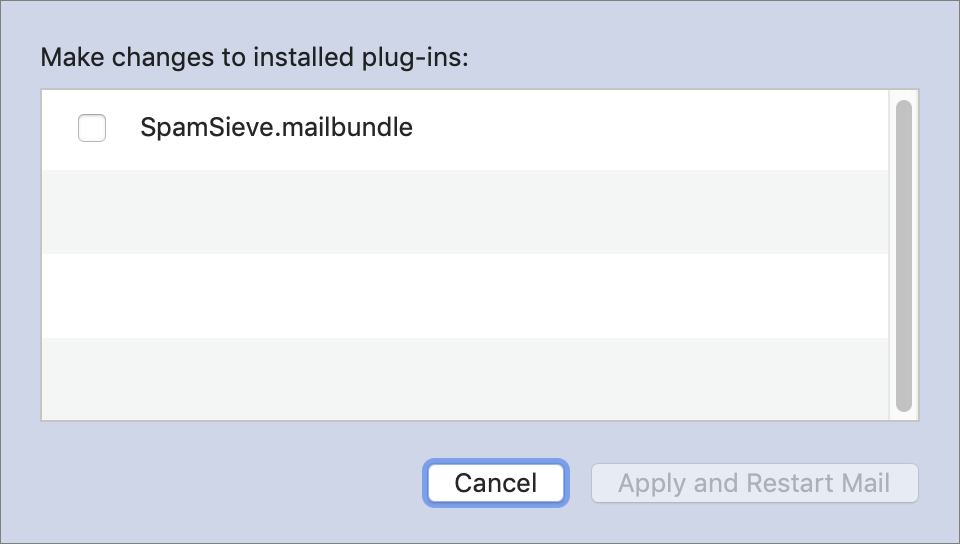
Even if you’ve given a plugin (or, more specifically, its external app) permission to access your files, you must now also enable that plugin within Mail. To do so, open Mail, go to Mail > Preferences > General, and click the Manage Plug-ins button at the bottom (Figure 19), which appears only when you have at least one plugin installed.

When you do so, Mail opens a dialog that lists all installed plugins (Figure 20). Here, select the checkbox next to any plugin you want to enable. Then click Apply and Restart Mail—which, as the name suggests, quits and restarts Mail, this time with your plugin(s) enabled.
Now then…there’s yet another gotcha. Nothing prevents you from checking the box to enable an old Mail plugin that hasn’t been updated for Mojave compatibility. If you do that, Mail may hang on launch, and now you can’t go back to that dialog to disable the plugin that’s causing problems! If this happens to you, force-quit Mail (press Option, click and hold Mail’s Dock icon, and choose Force Quit from the popover). Then go to ~/Library/Mail/Bundles and locate the offending plugin(s). Move them out of that folder (for example, into ~/Library/Mail/Bundles (Disabled) if it’s present, or onto your desktop). Then reopen Mail—and check with the plugin’s developer to see if a Mojave-compatible version is available.
Books
The app formerly known as iBooks has been renamed to Books, thus joining apps like Calendar, Contacts, Mail, Messages, Notes, Numbers, Pages, Photos, and Reminders, all of which have names that are boringly descriptive and impossible to find in a web search because they’re just generic nouns. Bah.
First-Run Alerts
After upgrading to Mojave, you may see an alert (Figure 21) the first time you open a previously installed third-party app that wasn’t downloaded from the App Store.
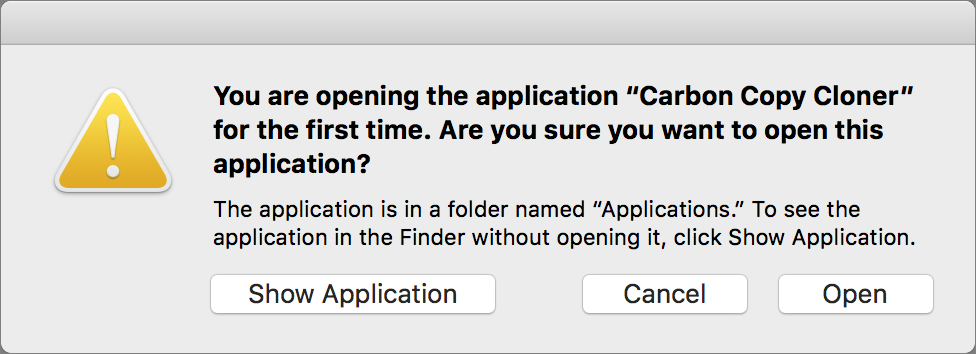
This alert doesn’t appear if you double-click the app icon, but it does if you open the app indirectly, such as by double-clicking one of its files. To confirm that you did intend to launch that app, click Open.
Safari Extensions
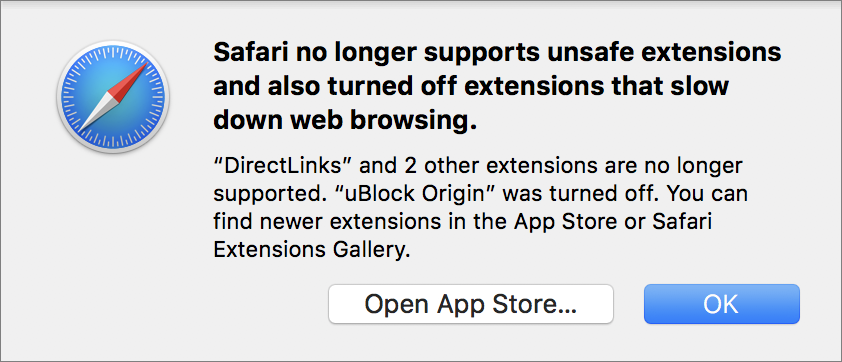
Mojave includes Safari 12, which has some significant changes. In particular, if you use any Safari extensions, you may notice some confusing and off-putting dialogs when Safari 12 first opens, like the one shown in Figure 22. The good news is that Safari has made browsing safer and more private, and reduced the opportunities for malware to affect your browsing. The bad news is that this may require effort on your part (reinstalling certain extensions, for example) and, in some cases, abandoning extensions that you previously relied on.
Safari 12 extensions behave differently in three ways (see this page on Apple’s website for details):
No developer-signed extensions: Developer-signed Safari extensions (with filenames ending in
.safariextz) are no longer supported and will be permanently disabled. “Developer-signed” basically means an extension you downloaded from an independent website, rather than directly from Apple. Unfortunately, many popular extensions fall into this category. The only extensions you can use in Safari 12 are those from either Apple’s Safari Extensions Gallery or the App Store (which now has a special category for Safari Extensions).If you use an extension that falls into this category, first see if there’s an updated version at one of the links above, or check with the developer on their plans for using one of those venues. If that doesn’t work out, you should look for an alternative, or prepare to live without that capability. I have read about a temporary workaround that you might consider trying if all else fails, but I haven’t attempted it myself and can’t say how effective or safe it may be.
Temporarily disabled performance-affecting extensions: Some extensions are disabled, even though they’re currently available from the Safari Extensions Gallery, because they could slow down your web browsing (whether or not slower performance is noticeable). Such extensions are disabled when you launch Safari, but not permanently, as in the case of developer-signed extensions. If you’re willing to live with the potential performance hit, you can re-enable them by going to Safari > Preferences > Extensions (Figure 23) and selecting the checkbox next to each extension with the alert
 icon. In the dialog that appears, click Enable to confirm your choice.
Figure 23: Select the checkbox for an extension Apple has temporarily disabled to re-enable it. Most extensions that fall into this category—if they survive the transition to the App Store—will become content blockers (which rely on external apps) instead of standalone extensions.
Deprecated Safari Extensions Gallery extensions: Although extensions from the Safari Extensions Gallery (which also have filenames ending in
.safariextz) still work for now, Apple is phasing out support for them. After December 2018, Apple will no longer accept submissions to the Safari Extensions Gallery, and at some unknown point thereafter, I expect such extensions will be disabled entirely, just like the developer-signed extensions. In other words: Apple is pushing both developers and users toward the App Store versions.
System Extension Blocking
If, after upgrading to Mojave, you install a new third-party app that includes a kernel extension (or KEXT), a warning appears to tell you that the extension won’t run unless you give it permission to run (Figure 24). This is a security feature to prevent malware from gaining low-level control of your Mac. Although it’s not new in Mojave, I mention it for those moving from pre–High Sierra systems. (You can learn more about this feature in Apple’s developer technical note User-Approved Kernel Extension Loading.)
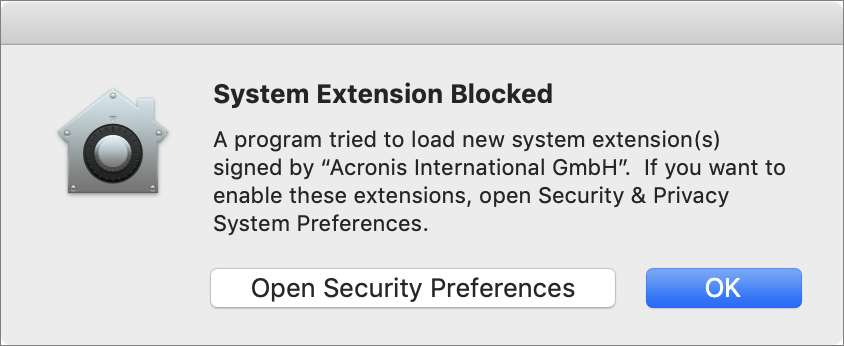
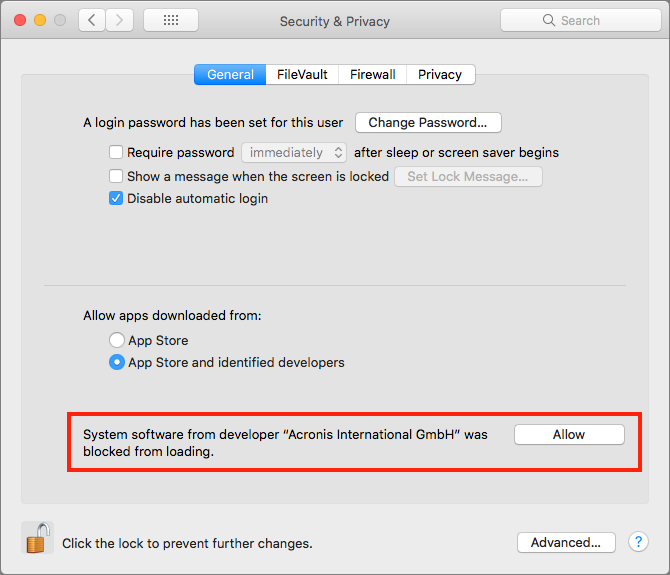
If you see this alert, click OK. To approve the new kernel extension, go to System Preferences > Security & Privacy > General, look for the notice at the bottom (Figure 25), and click Allow. (If you don’t do this within 30 minutes, the extension won’t be permitted to run, and the notice will disappear until the next time that extension tries to load—but those subsequent load attempts won’t re-trigger the warning dialog shown above.)
System Preferences Changes
Apart from a few small cosmetic changes in System Preferences, the following new or modified preferences since High Sierra may be of interest:
General: There’s a new option to choose either a Light or Dark look for the entire user interface, rather than just for the menu bar and Dock, as in High Sierra. Regardless of which choice you made during installation, you can change your mind here. You can also select any of eight accent colors, which are used in various user interface controls.
Desktop & Screen Saver: On the Desktop tab, there are new Dynamic Desktop pictures, one of which is called Mojave. With the Mojave desktop selected, use the pop-up menu at the top of the tab to choose Dynamic (in which case the picture changes its appearance during the day), Light (Still), or Dark (Still). On the Screen Saver tab, there’s a new “Use random screen saver” checkbox.
Dock: A new checkbox, “Show recent applications in the Dock,” is selected by default. Leave it selected to make recently opened apps stick in your Dock; deselect it to revert to the old behavior, in which only manually added apps stay in your Dock after you quit them.
Security & Privacy: The Privacy tab of this preference pane has several new categories:
Full Disk Access: Permits apps you select to access files on your disk, including potentially sensitive files such as email and messages; see Full Disk Access, earlier
Automation: Permits software you install to automate activities in the apps you designate; see Automation Access, earlier
Advertising: Allows you to opt out of targeted advertisements in certain Apple apps and, if you haven’t opted out, see what information Apple is using for ad targeting
Notifications: When you select an app in the Notifications pane, you’ll see a new checkbox, selected by default: “Show notification preview,” along with a pop-up menu. Check this box to show a preview of the full content (such as an email message) in its notification; and, if both this and “Show notifications on lock screen” are checked, choose either “always” or “when unlocked” from the pop-up menu to specify when these previews are shown.
iCloud: The Back to My Mac feature has been removed, meaning that Apple no longer offers a built-in way to connect directly to a remote Mac for file or screen sharing (see Glenn Fleishman’s TidBITS article Apple Abandoning Back to My Mac in Mojave for more information). However, you can now sync data from four new Mac apps across your devices: News, Stocks, Home, and Voice Memos. The first three of these have their own checkboxes in the main part of the iCloud preference pane. After you’ve recorded your first memo with Voice Memos, you can enable or disable syncing by clicking the Options button next to iCloud Drive and checking or unchecking Voice Memos.
Internet Accounts: The following services are no longer available as built-in, system-wide account types: Facebook, Flickr, LinkedIn, Twitter, and Vimeo.
Software Update: This new pane replaces the App Store pane in High Sierra and earlier, but provides much the same features as before (refer back to Handle Software Updates).
Users & Groups: A new “Allow user to reset password using Apple ID” checkbox allows you to change your mind after setting up a new account as to whether it should use a recovery key or depend on your Apple ID in case of a forgotten password. And, if you select Login Options on the left, in place of a single “Use VoiceOver in the login window” checkbox, there’s now an Accessibility Options button, which opens a dialog where you can enable or disable several accessibility features for the login window.
Accessibility: In the Keyboard category, the Accessibility Keyboard tab (which enables you to type and send keyboard commands without a physical keyboard) is completely reorganized from the High Sierra version, and includes a button to launch Panel Editor for creating custom on-screen keyboards. And the Switch Control category has several new options, including a Typing tab.
Final Software Advice
The best way to confirm that you have all your software installed and configured correctly is to try each application:
Go through your
/Applicationsfolder (including theUtilitiesfolder and anyplace else you’ve stored applications) and launch each app, one at a time. If an app uses plugins that you’re aware of, try to exercise at least one or two of them. When you’ve verified that the app works, quit it and move on to the next. Do the same with each of your third-party preference panes, by accessing them in System Preferences. (You needn’t do this all in one sitting—feel free to spread it out over several days or longer.)Make sure your important data displays correctly in the appropriate places, such as: contacts in Contacts, events in Calendars, stored email in Mail, photos and media in Photos and iTunes, and browser bookmarks in Safari.
Similarly, if you use any third-party cloud storage services (such as Dropbox, OneDrive, or Google Drive), confirm that the relevant apps are running and that your data is in sync.
If you use Unix software (including command-line tools and X11 applications), check to see that it’s still present and functional. In particular, if you manually installed anything in
/bin,/sbin, or/usr(except in/usr/local or/usr/share) in Yosemite or earlier, it will be gone—those are protected directories now, so you’ll have to reinstall those items in another location or restore them to a different directory from your backup.Also, if you use one of the following package managers, you’ll want to update it and all the binaries you’ve installed using it:
Fink: Update to the latest version. Try
fink selfupdatefirst; if that doesn’t work, download a fresh copy.Homebrew: Use
brew updateto update Homebrew itself, and thenbrew upgradeto upgrade all your packages.MacPorts: Follow these migration instructions and install the latest version.
After following these steps and using Mojave for a few days, if you haven’t discovered any missing files or software that doesn’t work, you can conclude that Mojave is working properly, and you can overwrite your just-before-upgrading bootable duplicate with a new version (remember, you turned off duplicates in Turn Off (Yes, Off) Automatic Duplicates?)—and turn automatic duplicates back on.