CHAPTER 1
Implement Windows
The 70-698 Configuring Windows 10 exam focuses on how best to install Windows 10 in a given scenario. This involves understanding how to plan and prepare to install Windows 10, along with the installation process itself. You’ll be expected to know how to configure hardware devices, how to manage device drivers, and how to perform post-installation configuration. Finally, the exam covers aspects of Windows 10 deployment that are relevant for larger organizations, all of which is covered in this chapter.
Important
Have you read page xix?
It contains valuable information regarding the skills you need to pass the exam.
Skills covered in this chapter:
Skill 1.1: Prepare for installation requirements
Windows 10 installation preparation requires careful consideration, especially when you plan to install Windows 10 on many devices in a large organization. This skill explores the installation requirements and preparation for the installation of Windows 10.
It is important to select the appropriate edition of Windows 10 for your users. Not only is Windows 10 available across many device types, including phones, tablets, laptops, and desktop computers, but it is also available in multiple editions and in both 32-bit and 64-bit versions. Be sure to choose the appropriate edition and architecture to provide the necessary feature set to your users, and remember that features such as Secure Boot, Client Hyper-V, Cortana, and others require specific hardware.
After determining which editions you want to install, consider how best to implement Windows 10. You can choose between simple interactive installations using local Windows 10 media, or you can deploy Windows 10 to your organization’s devices by using one of several deployment technologies.
Determine hardware requirements and compatibility
When planning to install Windows 10 to ensure proper functionality and adequate performance, make sure that any existing or new devices meet the minimum hardware requirements for Windows 10. It is also important to verify that existing hardware, such as printers, scanners, and other peripherals, are compatible with Windows 10. Finally, ensure that any applications in use within your organization that will be installed on Windows 10 devices are capable of running on the new operating system.
Identify hardware requirements for Windows 10
Windows 10 can run adequately on hardware of a similar specification to that which supports Windows 7. Consequently, most of the computers in use within organizations today are Windows 10 capable. However, to get the best from Windows 10, you might consider installing the operating system on the computers and devices that exceed the minimum specifications described in Table 1-1.
TABLE 1-1 Minimum hardware requirements for Windows 10
COMPONENT |
REQUIREMENT |
|---|---|
Processor |
A 1-gigahertz (GHz) or faster processor |
Memory |
1 gigabyte (GB) or RAM on 32-bit versions and 2 GB for 64-bit versions |
Hard disk space |
16 GB for 32-bit versions and 20 GB for 64-bit versions |
Graphics card |
DirectX 9 or later with a Windows Display Driver Model (WDDM) 1.0 driver |
Display resolution |
800x600 pixels |
Determine hardware compatibility for Windows 10
After you have verified that any new or existing computers on which you intend to install Windows 10 meet the minimum hardware requirements, verify that the operating system also supports any existing hardware devices and peripherals.
If you are purchasing new computers preinstalled with Windows 10, take no further action. However, if you are using existing computers, or want to attach existing hardware peripherals to your new computers, verify compatibility of these older computers and peripherals.
If you have only one or two computers and a few peripheral devices to check, the easiest, and probably quickest, solution is to visit the hardware vendor’s website and check for compatibility of these devices and peripherals. You can then download any required drivers for the version of Windows 10 32-bit or 64-bit that you intend to install.
![]() Exam Tip
Exam Tip
If the vendor does not provide a Windows 10 specific driver for its hardware, you might be able to use a driver from an earlier version of Windows, such as Windows 8.1. Note that you must still obtain 32-bit drivers for 32-bit versions of Windows 10 and 64-bit drivers for 64-bit versions of Windows 10.
Verify hardware compatibility for multiple devices
When you have many computers to install or upgrade to Windows 10, it is not feasible to visit each computer and verify device and peripheral compatibility. In this situation, consider using a tool to help determine compatibility.
The Microsoft Assessment And Planning Toolkit (MAP), shown in Figure 1-1, enables you to assess the computer devices attached to your network. MAP can be used to:
Determine feasibility to upgrade scanned devices to Windows 10.
Determine your organization’s readiness to move to Microsoft Azure or Office 365.
Plan for virtualizing workloads to Hyper-V.

FIGURE 1-1 Microsoft Assessment And Planning Toolkit
Note Download MAP
You can download MAP from the Microsoft website at: https://www.microsoft.com/download/confirmation.aspx?id=7826.
Inventory and assess your devices
After you have downloaded and installed MAP, you can perform an analysis of the devices on your network. This process does not require an agent to be installed on the target devices. Use the following procedure to analyze devices on your network for feasibility.
Launch the Microsoft Assessment And Planning Toolkit.
When prompted, create a new inventory database to store the assessment.
In the navigation pane, click the Desktop node.
In the details pane, under Scenarios, under Windows 10 Readiness, click Collect Inventory Data to open the Inventory And Assessment Wizard.
On the Inventory Scenarios page, in the Choose Your Scenario list, select the computer types that you want to analyze and then click Next. For example, select Windows Computers.
On the Discovery Methods page, select how you want to connect to the devices you are scanning. (For example, select Use Windows Networking Protocols.) Click Next.
On the Windows Networking Protocols page, examine the workgroups and domains that are discovered and listed and click Next.
On the All Computers Credentials page, enter credentials that can be used to sign in to the target devices and then click Next.
On the Credentials Order page, select the order in which your defined credentials are used to connect to devices; click Next and then click Finish.
The discovery and assessment begins, as shown in Figure 1-2.
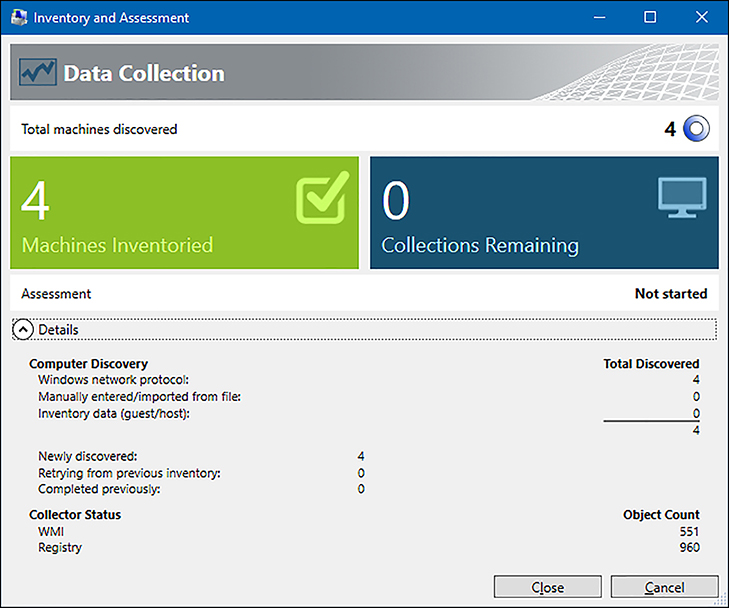
FIGURE 1-2 The Microsoft Assessment And Planning Toolkit inventory and assessment phase When assessment is complete, click Close.
Analyze the report
After collecting the inventory, view and analyze the report by performing the following procedure.
In the Microsoft Assessment And Planning Toolkit dialog box, on the Desktop node, in the details pane, under Scenarios, click Windows 10 Readiness.
Your report appears. You can choose to save the report as a Microsoft Excel spreadsheet.
Click Generate the Windows 10 Readiness Report.
Click Close after the report is generated, and the report folder opens. Double-click the listed report file to open it in Microsoft Excel, as shown in Figure 1-3.

FIGURE 1-3 Viewing the MAP assessment report in Microsoft Excel Click through the tabs to discover more details about the assessment. For example:
Use the Summary tab to see how many machines are ready for Windows 10 and how many are not.
The ClientAssessment tab shows individual machine details and identifies specific reasons for machines being assessed as not ready.
The DiscoveredApplications tab shows the applications that are installed across your organization.
After you have completed your assessment, you can determine an appropriate course of action for the machines that have been identified as not ready for Windows 10. You might decide to upgrade the hardware to meet the requirements or to replace that hardware with new machines that meet the requirements for Windows 10.
Verify application compatibility for Windows 10
In addition to ensuring that your computer is compatible with Windows 10, it is also important to verify that all your organization’s applications will run properly in Windows 10. Most applications that work correctly in Windows 7 work with little or no modification in Windows 10. However, some might experience minor issues, and others might not run properly at all.
Use the Application Compatbility Tools
You can download and use the Application Compatibility tools to help determine whether your organization’s installed applications will work correctly in Windows 10. The Application Compatibility tools include the following features.
A database of known application issues and possible mitigations.
The Compatibility Administrator, shown in Figure 1-4, can be used to create compatibility fixes to enable your applications to run properly.
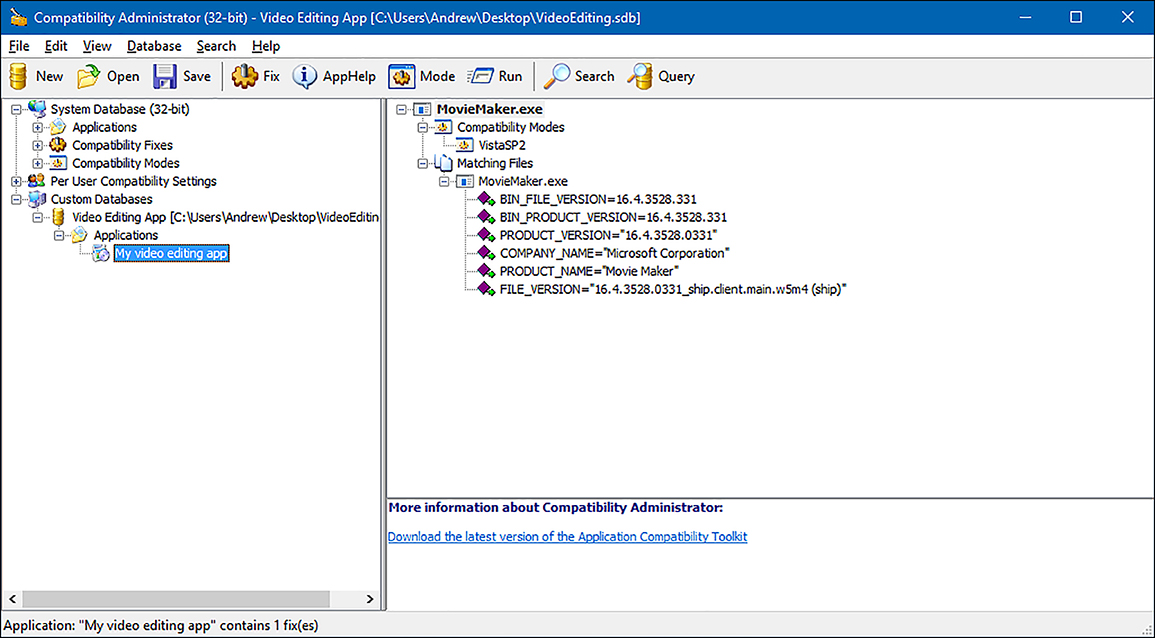
FIGURE 1-4 Analyzing and testing applications with Compatibility Administrator The Standard User Analyzer, which can help identify issues relating to running your application as a standard user.
To test and fix an application, download the Windows Assessment and Deployment Kit (Windows ADK), install the Application Compatibility tools, and then use the following procedure to test an application.
Build a Windows 10 computer that is representative of the configuration that you will use.
Install the required applications on this test workstation.
Run the applications and determine whether any have problems.
Install the Application Compatibility tools on the test workstation.
Note that when you install Windows ADK, you can choose to install the complete suite of tools, or select only the compatibility tools.
Open Compatibility Administrator. Two versions are installed, one for 32-bit application testing, and one for 64-bit application testing. Select the version appropriate to the architecture of your problematic application.
Create a custom database. This database holds information about your application during testing. In the navigation pane, under System Database, right-click Custom Databases and click New. Enter a meaningful name for your database, for example, Video Editing App.
Create a new application fix. Right-click your new database, point to Create New, and click Application Fix.
In the Create New Application Fix dialog box, enter the Name Of The Program To Be Fixed, the Name Of The Vendor Of This Program, and the Program File Location. This last entry is the executable file for your application. Click Next.
On the Compatibility Modes page, shown in Figure 1-5, you can select a compatibility mode from a list. For example, you can choose to run the application as if it were running on Windows 95 or Windows Vista (Service Pack 2). Additional compatibility modes make specific adjustments to the behavior of the app, including running in 16BitColor mode or RunAsAdmin. After selecting the modes, click Next twice and then click Finish.

FIGURE 1-5 Configuring compatibility modes for an application fix In the Compatibility Administrator console, on the toolbar, click Run, and in the Test Run Application dialog box, click OK.
Your application loads within Compatibility Administrator.
Perform a series of standard tasks with the application. When you have finished testing the application, close it. If the application did not run successfully, repeat these steps until you find settings that do work. If the application worked with your settings, click Save on the toolbar.
Specify a location and name for the application compatibility fix. These are stored as .sdb files. Click Save.
You can apply this fix file to the application within your organization by running the Sdbinst.exe command-line tool against the .sdb file. For example, at an elevated command prompt, type sdbinst.exe d: estappsvideoedit.sdb and press Enter. You can also distribute the fix by using Group Policy Objects (GPOs) in an Active Directory Domain Services (AD DS) environment.
Note Download Windows ADK
ACT is one of the tools in the Windows Assessment and Deployment Kit (Windows ADK). You can download the Windows ADK from the Microsoft website at: http://go.microsoft.com/fwlink/p/?LinkId=526740.
Mitigate issues with application compatibility
If you discover compatibility issues with any of your existing applications, you have a number of possible solutions. You can:
Use the Compatibility Administrator to apply an application compatibility fix to the problematic application; this is sometimes also referred to as a shim.
Determine whether updates exist for the application. Generally, updates are provided by software vendors for free or as part of a maintenance agreement.
Determine whether upgrading to a more recent version of the application might resolve the compatibility issue. Software vendors normally charge for software upgrades.
Build virtual machines based on an operating system environment in which the application works; for example, you can build a Windows XP guest operating system to support an old application.
Choose an upgrade or a clean installation
When considering how best to install Windows 10 on existing computers, you can choose between performing an upgrade and performing a clean installation. There are advantages and disadvantages to both approaches, and you should consider these carefully before you select a particular method.
Prepare an upgrade or migration strategy
It is important to understand the terminology used when describing the process of upgrading to Windows 10. Upgrade is often used generically to explain the licensing process of obtaining a version of Windows 10 that replaces an existing and supported upgradeable operating system, such as Windows 7 Home edition. This does not necessarily mean that you will perform an upgrade on an existing computer running Windows 7 and update that operating system to Windows 10.
When upgrading to Windows 10, you can choose between three methods. You can perform:
An in-place upgrade You can choose to update the existing operating system and perform what is called an in-place upgrade on existing hardware. User data and settings are retained. For most users, this is now the recommended procedure.
A side-by-side migration In this scenario, the source and destination computers for the upgrade are different machines. You install a new computer with Windows 10 and then migrate the data and most user settings from the earlier operating system to the new computer.
A wipe-and-load migration In this scenario, the source and destination computer are the same. You back up the user data and settings to an external location and then install Windows 10 on the user’s existing computer. Afterward, you restore user data and settings.
This section discusses all approaches to upgrading to Windows 10.
Supported upgrade paths
Performing an in-place upgrade can be the simplest option, especially when you have only a few computers to upgrade. However, you cannot perform an in-place upgrade on computers running a Windows version that does not share the same feature set as the edition of Windows 10 that you want to install.
Table 1-2 lists the supported upgrade paths based on the Windows edition.
TABLE 1-2 Supported upgrade paths to Windows 10
Earlier Windows version |
Windows 10 Home |
Windows 10 Pro |
Windows 10 Enterprise |
|---|---|---|---|
Windows 8/8.1 |
X |
|
|
Windows 8/8.1 Pro |
|
X |
|
Windows 8/8.1 Enterprise |
|
|
X |
Windows RT |
|
|
|
Windows 7 Starter |
X |
|
|
Windows 7 Home Basic |
X |
|
|
Windows 7 Home Premium |
X |
|
|
Windows 7 Professional |
|
X |
|
Windows 7 Ultimate |
|
X |
|
Windows 7 Enterprise |
|
|
X |
You will notice from Table 1-2 that direct upgrades between editions are not supported. That is, you cannot upgrade directly from Windows 7 Home to Windows 10 Enterprise.
Note Upgrading from Windows 7 Home
If you want to upgrade from Windows 7 Home to Windows 10 Enterprise, you can achieve that in a two-stage process. First, upgrade to Windows 10 Home and then upgrade to Windows 10 Enterprise.
After you have determined whether your upgrade path is supported, choose how to perform the process of upgrading to Windows 10.
Considerations for performing an in-place upgrade
When determining whether to use the in-place upgrade method to upgrade to Windows 10, consider the following factors.
It is a simple process and is ideal for small groups of computers.
It provides for rollback to the earlier version of Windows.
User and application settings and user data files are retained automatically.
Installed applications are retained; however, retained applications might not work correctly after upgrading from an earlier Windows version.
You do not need to provide for external storage space for data and settings migration.
It does not allow for edition changes and is available only on supported operating systems (see Table 1.2).
It does not provide the opportunity to start with a clean, standardized configuration.
Considerations for performing a migration
When determining whether to use one of the two migration methods to upgrade to Windows 10, consider the following factors.
You have an opportunity to create a clean installation, free from remnant files and settings.
You can reconfigure the existing disk partitions.
You can upgrade to any Windows 10 edition, irrespective of the earlier Windows edition.
Migration is a more complex process, and you must use migration tools such as User State Migration Tool (USMT) to migrate data and settings.
You require storage space for user settings and files to be migrated.
Applications are not retained, and you must manually reinstall these.
Perform an in-place upgrade to Windows 10
As you have seen, there are three ways to upgrade to Windows 10. The preferred method for small groups of computers is to use an in-place upgrade. Using an in-place upgrade enables you to retain all the users’ applications, data files, and user and application settings. During the in-place upgrade, the Windows 10 setup program automatically retains these settings.
Important Back up data files
It is important to perform a backup of user data files prior to launching an in-place upgrade to guard against possible data loss.
You perform an in-place upgrade to Windows 10 when your users will continue to use their existing computers. To perform an in-place upgrade, complete the following procedure.
Evaluate the user’s computer to determine that it meets minimum hardware requirements for Windows 10 and that Windows 10 supports all hardware.
Verify that all applications work on Windows 10.
Optionally, back up the user’s data files.
Run the Setup.exe program on the Windows 10 product DVD.
Choose Upgrade when prompted and complete the setup wizard.
Perform a migration to Windows 10
You perform a migration to Windows 10 when your users have new computers on which to install Windows 10. During the process, you perform the following high-level procedures.
Verify that all applications work on Windows 10.
If necessary, perform a clean installation of the appropriate edition of Windows 10 on the user’s new computer.
On the new computer, install all the user’s applications.
Back up the user’s data files and settings from the old computer.
Restore the user’s data files and settings on the new computer.
To perform the backup and restore of users’ data and settings, use the USMT. USMT is one of the tools in the Windows ADK.
Perform a side-by-side migration
When you opt to use the side-by-side migration strategy, illustrated in Figure 1-6, use the following procedure to complete the task.
Either obtain a computer with Windows 10 preinstalled or install Windows 10 on a new computer. When Setup.exe prompts you, choose Custom (Advanced). This is the destination computer.
Install the same applications on the destination computer as are presently on the source computer.
Create an external intermediate storage location, such as a file server shared folder, for the storage of user data and settings. This must be accessible from both the source and destination computers.
Use the USMT to collect the user’s data and settings and store them in the external intermediate store.
Use the USMT to collect the user’s data and settings from the external intermediate store and install them in the destination computer.

FIGURE 1-6 Side-by-side migration to Windows 10
Perform a wipe-and-load migration
When you opt to use the wipe-and-load migration strategy, illustrated in Figure 1-7, use the following procedure to complete the task.
Create an external storage location, such as a file server shared folder, for the storage of user data and settings.
Use the USMT to collect the user’s data and settings and store them in the external location.
Install Windows 10 on the existing computer. When Setup.exe prompts you, choose Custom (Advanced).
Reinstall the applications on the computer.
Use the USMT to restore the user’s data and settings from the external location.
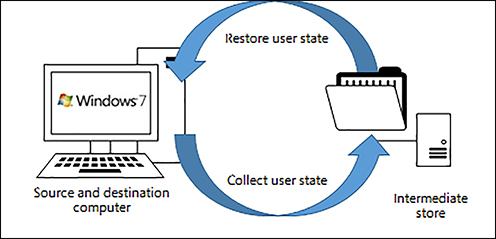
FIGURE 1-7 Wipe-and-load migration to Windows 10
Migrate user data and settings
As part of both migration strategies, you must migrate user data and settings to the destination computer. Consequently, it is important to determine where these data and settings reside and to select a tool to perform this migration.
Note Windows Easy Transfer
For a small number of computers, consider using Windows Easy Transfer to migrate user data and settings between the source and destination computer. Windows Easy Transfer is not included on Windows 10, but you can copy the required files from the C:Windows system32migwiz folder on a computer running Windows 7.
You should migrate all of the users’ local data and settings. It is not necessary to migrate server-based data because this remains accessible after the migration. User data and settings consist of the following components.
User settings This component contains all of the configuration settings specific to a particular user.
User registry The HKEY_CURRENT_USER hive of the registry contains user-specific settings.
Application data The AppData folder contains the application-related settings that are not part of the registry.
User data All user-specific folders and files are stored in subfolders beneath Documents, Favorites, Pictures, Videos, Music, and others.
You can use USMT to migrate user data and settings.
Note Roaming profiles
If your organization relies on roaming desktop profiles to synchronize user data and settings between multiple computers, it is possible that some of these data and settings are stored in the users’ roaming profiles.
Need More Review? User State Migration Tool command-line syntax
To review further details about using USMT or the syntax of the ScanState.exe and LoadState.exe commands, refer to the Microsoft website at: https://docs.microsoft.com/en-us/windows/deployment/usmt/usmt-command-line-syntax.
![]() Quick check
Quick check
Quick check answer
Determine editions by device type
Before you can deploy Windows 10 within your organization, you must select the appropriate edition of Windows 10. Your choice will be based on the form factor of the devices your users use and which specific features your users require.
Select a Windows 10 edition
Windows 10 is aimed at a wide audience of potential users, from individuals with a single device to large enterprise-level organizations with thousands of computers. The specific editions of Windows 10, listed in Table 1-3, are designed to address the varying needs of this diverse user base.
TABLE 1-3 Windows 10 editions
Edition |
Features |
|---|---|
Windows 10 Home |
Designed primarily for home users and includes similar features to those found in Windows 8.1 Home, plus:
Note that in Windows 10 Home, you cannot control updates as was possible on earlier Windows versions; these are received automatically. |
Windows 10 Pro |
Includes the same features as in Windows 10 Home but additionally provides:
In Windows 10 Pro, updates are provided by Windows Update for Business. This provides for more control over updates than with Windows 10 Home. In addition, security updates are made available more quickly. |
Windows 10 Enterprise |
Windows 10 Enterprise builds on the features of Windows 10 Pro, providing additional features of relevance to larger organizations, including:
In addition to the ability to manage updates to Windows with Windows Update for Business, Enterprise customers can also access the Long-Term Servicing Channel (LTSC) as a special deployment. |
Windows 10 Enterprise LTSC |
This specialized edition of Windows 10 Enterprise receives security and other important updates in the normal way but does not receive feature updates. This enables organizations to know that their environment does not change over time. Windows 10 Enterprise LTSC does not include:
|
Windows 10 Education |
Provides the same features as Windows 10 Enterprise but does not offer support for LTSC. Windows 10 Education is only available through academic Volume Licensing. |
Windows 10 Mobile |
Designed for phones and smaller tablets, this edition offers broadly the same feature set as the Windows 10 Home desktop edition. It includes many of the same universal Windows apps as well as a touch-optimized version of Microsoft Office. |
Windows 10 Mobile Enterprise |
This edition offers features similar to Windows 10 Mobile. Windows 10 Mobile Enterprise provides security updates more quickly. It is available only to Volume Licensing customers. |
Note Windows 10 Business edition
Microsoft also provides a special business-focused edition called Windows 10 Business edition, which is included as part of Microsoft 365 Business. To review further details about Microsoft 365 Business, visit the Microsoft website: https://docs.microsoft.com/en-us/microsoft-365/business/support/microsoft-365-business-faqs.
Microsoft has also stated its intention to release a number of Windows 10 Internet of Things (IoT) editions. IoT editions will be made available after the release of Windows 10 desktop and mobile editions.
Need More Review? Compare Windows 10 editions
To find out more about these Windows 10 editions, visit the Microsoft website at: https://www.microsoft.com/en-us/WindowsForBusiness/Compare.
Choose the 32-bit or 64-bit versions
You can choose between 32-bit and 64-bit versions of all desktop editions of Windows 10. Generally, it would be usual to choose 64-bit versions unless there is a compelling reason to use 32-bit versions, such as because your hardware does not support the 64-bit architecture.
The features described in Table 1-3 for the various editions of Windows 10 are applicable for both 32-bit and 64-bit versions. However, 64-bit versions of Windows 10 do provide a number of advantages, including:
Memory The 64 -bit versions of Windows 10 can address more physical memory than 32-bit versions. Specifically, 32-bit versions are limited to 4 GB of RAM, whereas 64-bit versions have no such limitation.
Security Features such as Kernel Patch Protection, mandatory kernel-mode driver signing, and Data Execution Prevention (DEP) are available only in 64-bit versions of Windows 10.
Client Hyper-V This feature is only available on 64-bit versions of Windows 10. Your hardware must also support second-level address translation (SLAT).
Performance The 64 -bit processors can handle more data during each CPU clock cycle. This benefit is only realized when running a 64-bit operating system.
Note 16-bit applications
The 64-bit versions of Windows 10 do not directly support 16-bit applications. If your organization has 16-bit apps, consider using Client Hyper-V to run them.
![]() Quick check
Quick check
Quick check answer
Determine requirements for particular features
A number of features in some editions of Windows 10 require specialist hardware or software configuration, and this section covers how to:
Identify hardware and configuration requirements for general Windows 10 features
Identify hardware and configuration requirements for Windows 10 security features
![]() Exam Tip
Exam Tip
It is important to know that some of the new features of Windows 10 are available only on computers and devices that support specific hardware components.
General features
These features provide for general usability and functional improvements and include:
Client Hyper-V enables you to create, manage, and run virtual machines that you can install with different guest operating systems to support, perhaps, earlier line-of-business (LOB) apps that will not run natively on Windows 10. Requirements of the Client Hyper-V feature are:
A 64-bit version of either the Windows 10 Pro or Windows 10 Enterprise edition.
A computer that supports SLAT.
Additional physical memory to support running the virtual machines. A minimum of 2 GBs of additional memory is recommended.
 Exam Tip
To use Client Hyper-V to run virtual machines, you also need additional physical memory in your computer. It is recommended to add at least 2 GB of RAM to support this feature.
Cortana You can use Cortana as a digital assistant to control Windows 10 and perform tasks such as writing email, setting reminders, and performing web searches. Because Cortana is voice-activated and controlled, your Windows 10 device requires a microphone.
Continuum Windows 10 is available on a variety of devices types and form factors. With Continuum, Microsoft endeavors to optimize the user experience across device types by detecting the hardware on your device and changing to that hardware. For example, Windows 10 determines when you are using a non-touch desktop computer and enables traditional interaction with the operating system by use of a mouse. For users of hybrid devices, such as the new Microsoft Surface Pro, when you disconnect a keyboard cover, Windows 10 switches to tablet mode. When you use Windows 10 Mobile, Continuum enables you to use a second external display and optimizes app behavior on that display.
Miracast Windows 10 uses Miracast to connect your Windows device wirelessly to an external monitor or projector. The only thing you need is a Miracast-compatible external monitor or projector.
Touch Windows 10, like Windows 8 before it, is a touch-centric operating system. Although you do not need a touch device to use Windows 10, some features are made more usable through the use of touch. To use touch, your tablet or display monitor must support touch.
OneDrive Users of OneDrive are entitled to 5 GB free online storage. OneDrive provides this storage. It is built into the Windows 10 operating system like any other type of storage, and consequently, it is easy to use. You must have a Microsoft account to use OneDrive.
Sync your settings When you use more than one Windows 10 device, it is convenient for your user settings to move with you to the new device. You can use the Sync Your Settings feature of Windows 10 to ensure that settings such as theme, Internet Explorer and Edge settings (including favorites), passwords, language, and ease of access are synchronized between your devices. You must have a Microsoft account to use this feature.
Note Active stylus support
Some touch devices have screens that support active stylus input. Active styluses provide for pressure-sensitive input and enable you to use your device for accurate note taking and drawing. Passive styluses are supported on all touch devices but do not support these more advanced features.
Security features
Windows 10 also includes a number of features that can help make your device more secure, including:
BitLocker A Trusted Platform Module (TPM) works with BitLocker to help protect against data theft and offline tampering by providing for whole-drive encryption. Requirements for BitLocker include:
A computer installed with either Windows 10 Pro or Windows 10 Enterprise.
Optionally, a TPM. Using a TPM with BitLocker enables Window to verify startup component integrity. You do not require a TPM in your computer to use BitLocker, but if you wish to use BitLocker with a TPM, the minimum requirement is TPM 1.2.
Device health attestation With the increase in use of users’ own devices, it is important to ensure that Windows 10 devices connecting to your organization meet the security and compliance requirements of your organization. Device health attestation uses measured boot data to help perform this verification. To implement device health attestation, your Windows 10 devices must have TPM 2.0.
Secure Boot When Secure Boot is enabled; you can only start the operating system by using an operating system loader that is signed using a digital certificate stored in the UEFI Secure Boot DB. This helps prevent malicious code from loading during the Windows 10 start process. Requirements for Secure Boot include:
Computer firmware that supports Unified Extensible Firmware Interface (UEFI) v2.3.1 Errata B, and for which the Microsoft Windows Certification Authority is in the UEFI signature database.
Two-factor authentication This is a process that provides for user authentication based on two factors: something the user knows, such as a password; and something the user has, such as a biometric feature (fingerprint or facial features), or a device, such as a cell phone. Requirements for two-factor authentication include:
A fingerprint reader, a cell phone, or an illuminated infrared camera.
Windows Hello, which provides a more secure and improved sign-in experience for users. It has the following requirements.
Note Windows Hello
When Windows 10 first shipped, it included two separate components: Microsoft Passport and Windows Hello. These components worked together to provide multi-factor authentication. With Windows 10 1703, to help to simplify deployment and improve supportability, these technologies are combined into a single solution called Windows Hello.
Note Windows Hello for Business
Windows Hello for Business can help administrators in large organizations more easily manage multi-factor authentication. Administrators can create policies to manage Windows Hello for Business use on Windows 10-based devices that connect to their organization’s infrastructure.
Biometric devices that support the Windows Biometric Framework, for example, an illuminated infrared camera to enable facial recognition or iris detection, or a fingerprint reader.
Virtual Secure Mode This feature moves some sensitive elements of the operating system to trustlets that run in a Hyper-V container that Windows cannot access. This helps make the operating system more secure. Currently, this is only available in the Windows 10 Enterprise edition.
Virtual Smart card This feature offers comparable security benefits in two-factor authentication to that provided by physical smart cards. Virtual smart cards require a compatible TPM (version 1.2 or later).
Identify a strategy and prepare the installation media
You can choose from among a number of methods when considering how best to install Windows 10. Generally, the size of your organization and the number of devices that you must install will determine the strategy that you select. After selecting a strategy to install Windows, you must prepare the installation media to support your strategy.
Select an installation strategy
You can choose from among a number of strategies when planning the installation of Windows 10. These strategies have different prerequisites, and some might require additional software components and configuration before you can begin installing Windows 10. Table 1-4 describes these strategies.
TABLE 1-4 Windows 10 installation strategies
Deployment option |
Description |
|---|---|
High-touch retail media deployment |
Suitable for small organizations with few devices to install with Windows 10. Requires no specialist IT skills or additional services or components. All that is required is one or more copies of the Windows 10 installation media, which can be provided on a DVD, or the appropriate files can be accessed on a USB storage device or even from a network file server shared folder. |
Low-touch deployment |
Suitable for larger organizations that intend to install a few hundred devices, using limited installer intervention. Because the strategy relies on the use of image deployment and additional services, such as Windows Deployment Services (WDS) and, optionally, Microsoft Deployment Toolkit (MDT), some specialist IT skills are also required. |
Zero-touch deployment |
For very large organizations with thousands of devices. Requires a considerable investment in IT skills to facilitate this strategy. Also requires the use of MDT and Microsoft System Center Configuration Manager to deploy Windows 10, using no installer intervention. |
Determine the appropriate installation media
Windows 10 uses an image-based installation and deployment model. So, the Windows operating system installation files are packaged in an image file that is used as an installation source during the installation process.
A default installation image, Install.wim, is provided on the installation DVD in the Sources folder. Although you can choose to use this default image, you can also configure it to create custom installation images that better suit the needs of your organization. Customizations might include:
Selecting a particular edition of Windows 10.
Choosing which Windows features are enabled.
Including Wi-Fi profiles and virtual private network (VPN) profiles.
Adding universal apps or desktop applications.
The Windows ADK contains a number of tools that you can use to create and manage Windows 10 images to support your installation needs. These are:
DISM The Deployment Image Servicing and Management (DISM) command-line tool enables you to capture, deploy, and manage Windows images. You can use the tool to manage both online and offline images.
Windows Configuration Designer This tool enables you to provision Windows 10 images; it provides both a graphical and a command-line interface.
You can then deploy these custom images to target computers within your organization that require Windows 10. You can perform this deployment in a number of ways and by using a variety of deployment technologies and tools, depending on the installation strategy you previously selected. Options include:
DVD installation You can use the default installation media, or you can use a customized image that you created. The device you are installing to requires an optical drive.
USB installation Once again, you can use the default or custom Windows images. This method is quicker, and although it does not require an optical drive, you might need to reconfigure your computer’s BIOS or UEFI firmware settings to support startup from USB.
Exam TipYou can perform an unattended installation using this method, provided an unattended answer file is present on the USB device. Answer files are discussed in the following section.
WDS deployment To use this method, Dynamic Host Configuration Protocol (DHCP) must be available to network clients on your network, and your target computers running Windows 10 must support Pre-Boot Execution Environment (PXE). Combined with unattended answer files and custom images, you can use this method to deploy multiple images to multiple computers at the same time by using multicast.
Image-based installation By starting your computer into Windows Preinstallation Environment (Windows PE), you can use DISM to apply an image locally to the target computer. Alternatively, you can use MDT and System Center 2012 R2 Configuration Manager to deploy the image and desktop apps to the target devices.
Shared network folder installation You can use Windows PE to start your computer and map a network drive to installation files and images on a network file shared folder. This is a comparatively inefficient method and has been replaced by the other methods previously described.
Windows SIM The Windows System Image Manager (Windows SIM), shown in Figure 1-8, enables you to create installation answer files for use in automated deployments. These answer files contain the configuration options used to install Windows 10. You can then:
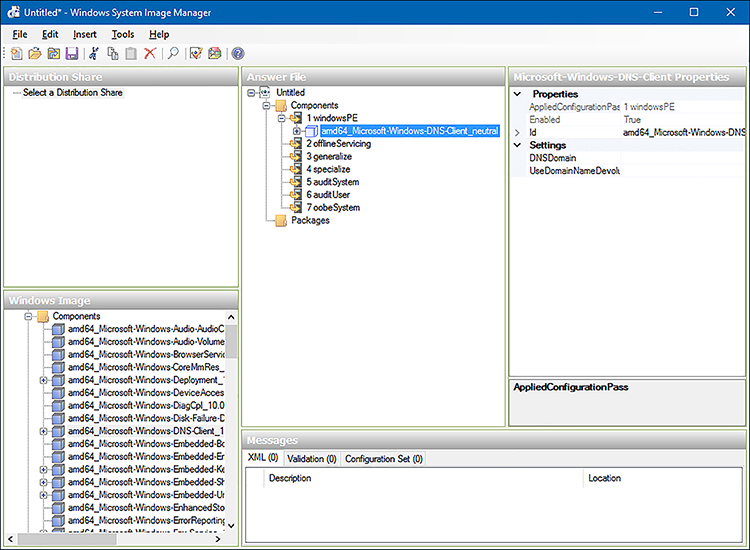
FIGURE 1-8 Windows System Image Manager Associate these answer files with a local copy of the installation media, perhaps on a USB memory stick. This provides for a semi-automated interactive installation.
Note Naming the answer file
If you copy the answer file you create by using Windows SIM to a memory stick, call the file Autounattend.xml. Windows setup knows to search for this named file in the root of the installation media.
Place the answer files on a deployment server, such as a Windows Server 2016 server running the WDS server role, together with your Windows 10 deployment images. This provides for a light-touch deployment approach.
Windows PE Windows PE is used to start a computer that is being deployed with Windows 10. It enables access to Windows file systems and is, in essence, a partial Windows operating system. You can use the generic Windows PE provided on the product DVD, or you can customize it (using tools in Windows ADK) to address your specific deployment needs. You can then launch Windows PE from a DVD or a USB memory stick or across the network, using PXE.
Configure Upgrade Readiness
You can use Upgrade Readiness to plan and perform the upgrade of your organization’s computers to Windows 10. When you use Upgrade Readiness, you gather computer, app, and driver data from your organization’s computers. You can use this data to determine Windows 10 readiness within your organization.
Note Upgrade Readiness
Upgrade Readiness is provided as part of Microsoft’s Operations Management Suite (OMS). This collection of cloud-based services is used for managing both cloud-based and on-premise environments.
To start using Upgrade Readiness, use the following procedure:
Visit the Upgrade Readiness page on the Microsoft website. Click NEW CUSTOMERS > to start the onboarding process. You can find the page here: https://docs.microsoft.com/en-us/windows/deployment/upgrade/upgrade-readiness-get-started.
Sign in to OMS. You can use either of the following to create a workspace:
A Microsoft account
A Work or School account
Note If you are already using Azure AD
If your company is using Azure Active Directory (Azure AD), use a Work or School account; this allows you to use users and groups from your Azure AD instance to manage permissions in OMS.
Create a new OMS workspace, as shown in Figure 1-9. Enter the following information, and then click CREATE:
Workspace Name
Workspace Region
Your name, email address, and phone number
Company name
Country
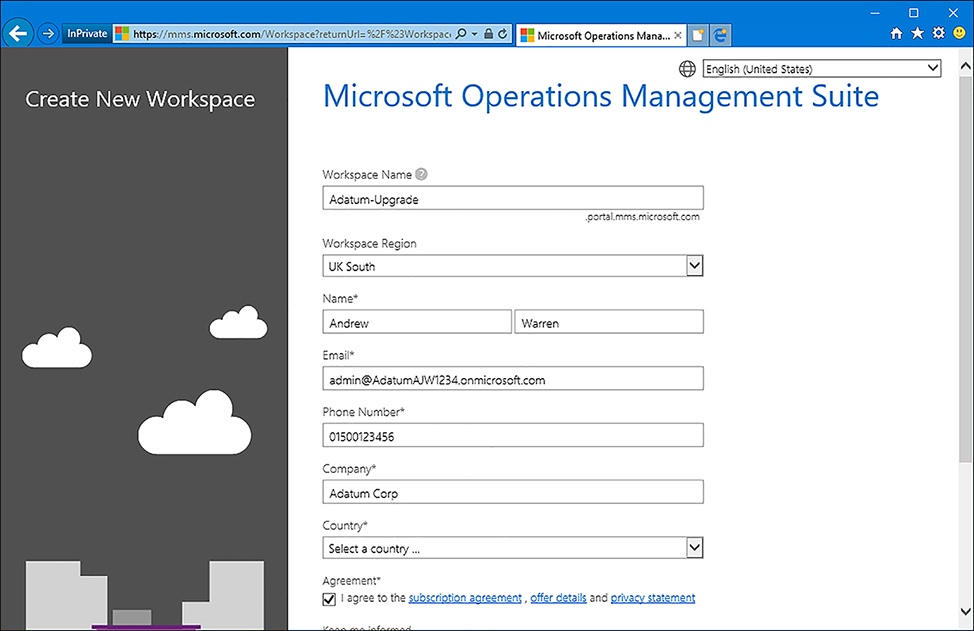
FIGURE 1-9 Configuring Upgrade Readiness in OMS
On the Link Azure Subscription page, if you already have an Azure subscription, you can link it to your workspace, as shown in Figure 1-10.
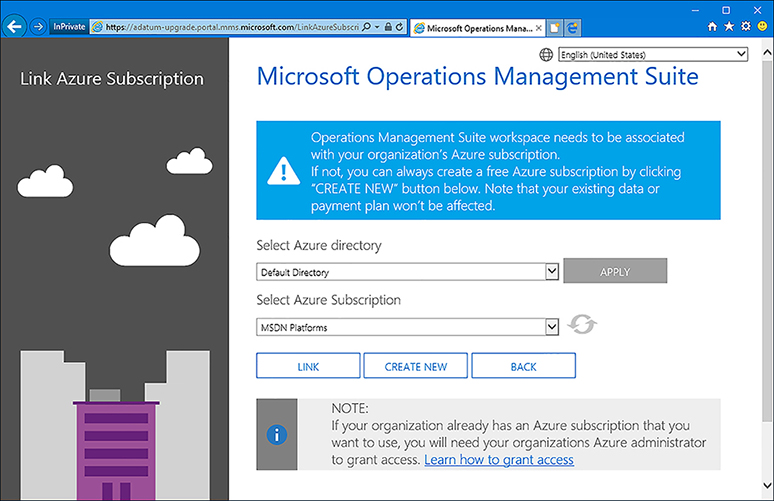
FIGURE 1-10 Linking OMS to an Azure subscription Note Create an Azure subscription
If you do not have an Azure subscription, you can create a new one or select the default OMS Azure subscription from the list.
In OMS, in the Solutions Gallery, select the Upgrade Readiness tile, as shown in Figure 1-11.
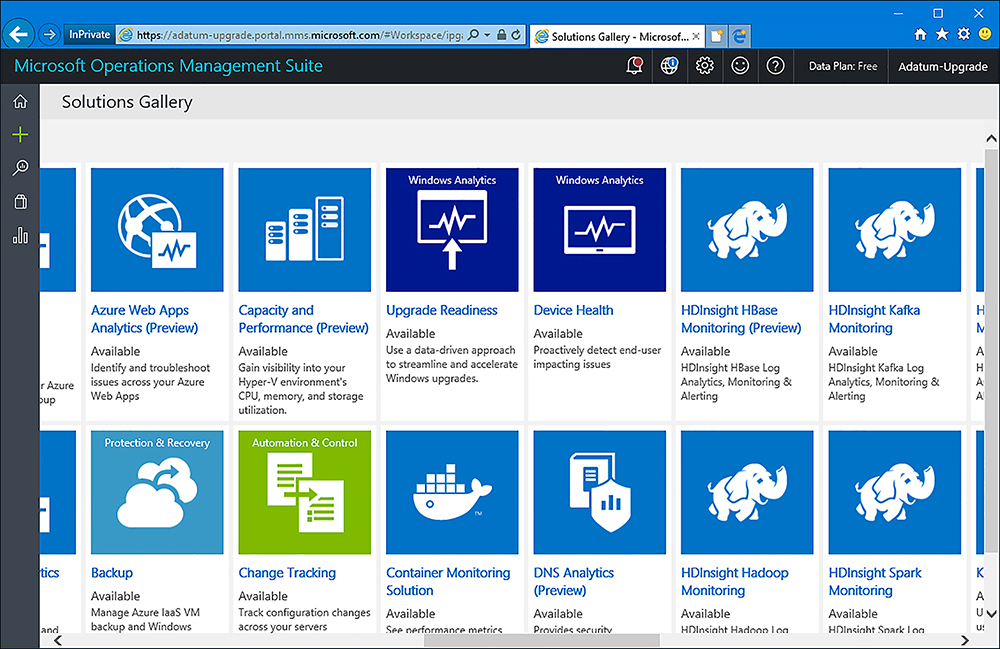
FIGURE 1-11 The solutions gallery On the solution’s details page, shown in Figure 1-12, click Add.

FIGURE 1-12 Selecting Upgrade Readiness from the gallery You can now see the solution on your workspace, as shown in Figure 1-13.
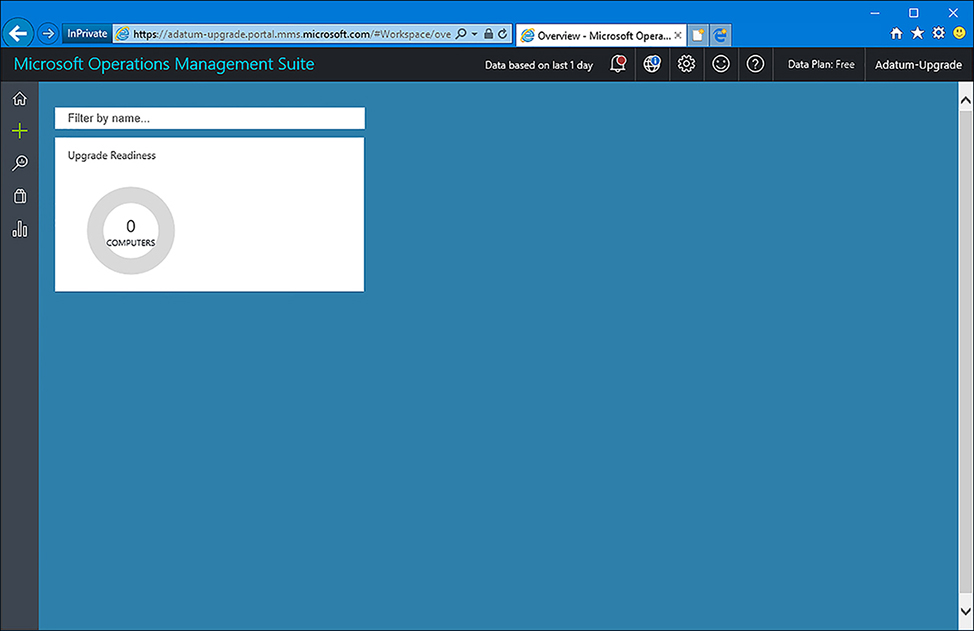
FIGURE 1-13 The workspace in Microsoft OMS Click Upgrade Readiness to configure the solution. The Settings Dashboard opens, shown in Figure 1-14.
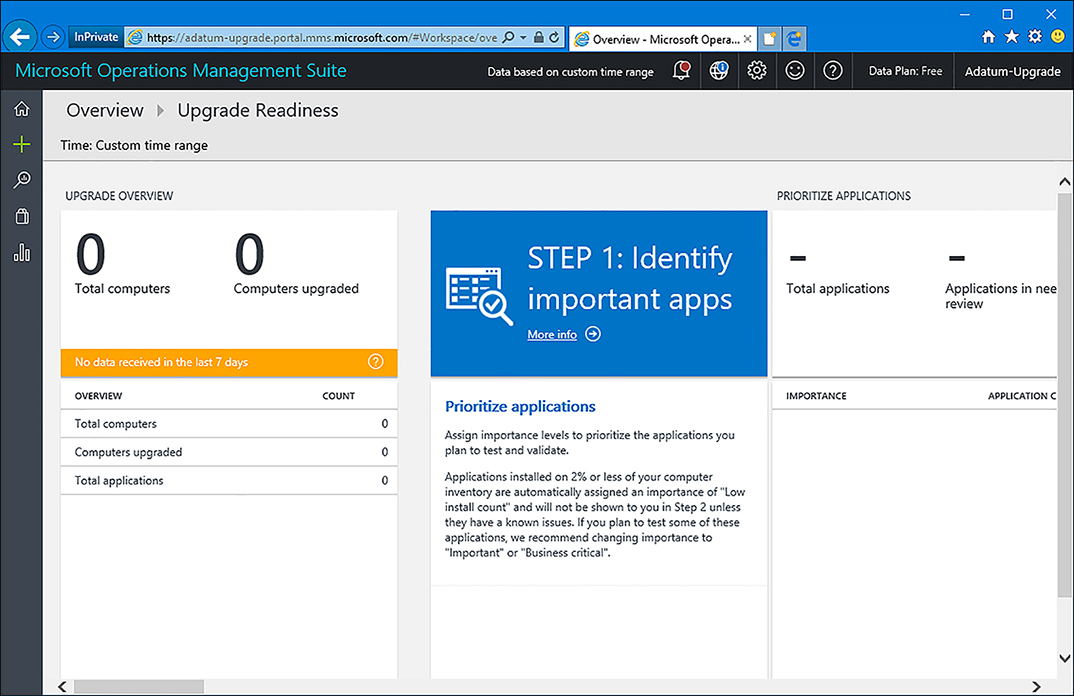
FIGURE 1-14 Starting the upgrade readiness assessment
Need More Review? Get started with Upgrade Readiness
If you want to know more about Upgrade Readiness, visit the Microsoft website: https://docs.microsoft.com/en-us/windows/deployment/upgrade/upgrade-readiness-get-started.
You can now start the process of determining your organization’s readiness for Windows 10 and related apps and drivers. The process consists of three steps:
Identify important apps You must assign an importance level to your apps to prioritize them.
Resolve issues Identify and resolve problems with your apps.
Deploy Start the upgrade.
Note Use Upgrade Readiness to manage Windows upgrades
For specific guidance on using Upgrade Readiness for these steps, refer to the Microsoft website: https://docs.microsoft.com/en-us/windows/deployment/upgrade/use-upgrade-readiness-to-manage-windows-upgrades.
Skill 1.2: Install Windows 10
It’s important to determine whether existing devices, such as desktop or laptop computers, and installed applications meet the installation requirements for Windows 10. If you plan to implement Windows 10 using existing devices, you must also consider whether to perform clean installations and then migrate user settings to those installations or perform in-place upgrades.
There are multiple methods of installing or upgrading a device with Windows 10. This skill reviews each method and focuses on the skills required to install and migrate the operating system in a number of scenarios, including native boot, installing to a virtual hard disk drive (VHD), and configuring additional regional and language support.
Perform clean installations
Although the vast majority of computers are purchased preinstalled with Windows 10, many organizations reinstall the operating system to avoid the additional software that original equipment manufacturers (OEMs) often include with their computers. This software is often referred to as bloatware and can include utilities and tools or trial versions of software such as Microsoft Office or anti-spyware software.
Installation media was covered in Skill 1.1: Prepare for installation requirements, which is required to perform a clean installation of Windows. You must configure your BIOS or UEFI to startup from your installation media, such as a USB drive. This can be achieved by modifying the BIOS or UEFI setting, or choosing a custom boot order during the startup process.
Note Firmware upgrade
Consider checking whether the motherboard manufacturer has a firmware update available. This should be applied prior to installing Windows; otherwise, upgrading the firmware after activation might require the system to fall out of activation.
There are several methods of installing Windows 10 on a device, as shown in Table 1-5, and you should familiarize yourself with each prior to taking the exam.
TABLE 1-5 Windows installation methods
Installation Method |
Description |
|---|---|
Install from DVD |
You can use the installation media provided with a retail copy of the operating system, or you can use the downloadable media obtained from the Microsoft Volume Licensing Service (MVLS) or Microsoft Developer Network (MSDN) and burn it to optical media. |
Install from USB |
Use this method to install the operating system on one computer at a time. Installation from a USB device is quicker than using a DVD. You must modify BIOS or UEFI settings to enable boot from USB. |
Install from Windows Deployment Services (Windows DS) |
Requires Windows DS and Dynamic Host Configuration Protocol (DHCP) on a Windows-based server on the network. The target computer network card must support Pre-Boot Execution Environment (PXE). Using Windows DS allows automated installation of system images and deployment of Windows to multiple computers simultaneously by using multicast. |
Install an image from Windows Preinstallation Environment (Windows PE) |
Boot the device by using Windows PE and then use one of the following deployment options.
Both MDT and SCCM are enterprise-level solutions that enable you to deploy Windows to hundreds or thousands of devices at once and configure lite-touch installation (LTI) or zero-touch installation (ZTI) for either minimal user interaction or no user interaction, respectively, during the deployment. |
Install over the network |
Start the computer by using Windows PE and connect to a copy of the installation files stored on a shared network folder. You would use this method when you are unable to use a USB device, Windows DS, MDT, or Configuration Manager. |
During a clean installation on a new hard drive, perform the following steps to install Windows 10.
Insert your installation media and start your computer.
At the Windows Setup screen, choose the appropriate regional settings and then click Next.
In the Windows Setup window, click Install Now.
On the Applicable Notices And License Terms page, accept the License Terms and click Next.
On the Which Type Of Installation Do You Want? page, choose Custom: Install Windows Only (Advanced).
On the Where Do You Want To Install Windows? page, select Drive 0 Unallocated Space and click Next.
Note Existing operating system drive
For a clean installation of Windows 10 on a device on which an operating system is already installed, erase this partition either by formatting or deleting any partitions present during the setup process.
The installation begins:
On the Let’s Start With Region. Is This Right? page, accept the regional settings.
On the Is This The Right Keyboard Layout? page, accept the keyboard layout settings
On the Let’s Connect You To A Network page, select a network connection.
On the Who’s Going To Use This PC? page, enter a user account name.
Enter and confirm a password for the user account.
Add a password hint for the user.
On the Make Cortana Your Personal Assistant? page, choose whether to enable Cortana.
On the Choose Privacy Settings For Your Device page, accept the privacy settings.
You are now signed in.
Depending on your hardware performance, Windows should complete the clean install process within 15-20 minutes, and the machine will restart several times. A device with a solid-state drive (SSD) will outperform a slower traditional hard drives with spinning platters. During the final stages of installation, the Getting Ready notification appears while Windows installs device drivers specific to the hardware.
Upgrade using installation media
If you have practiced the skills mentioned in the previous sections, you have seen that the in-place upgrade process works well. Although other methods, such as wipe-and-load, are still available, the upgrade is now the recommended deployment method Microsoft suggests for existing devices such as Windows 7 or Windows 8.1.
An enterprise will normally obtain Windows 10 media by downloading it from the Volume Licensing Center (VLC) at https://www.microsoft.com/licensing/servicecenter/default.aspx. VLC media use a generic product key during the installation process, which is activated by a KMS that is tied to the enterprise license agreement.
Alternatively, purchased retail media can be used, which can be supplied on a USB thumb drive or by a direct download from the online Microsoft Store.
Another option is to use the Media Creation Tool (MCT), which generates a ready-to-use, bootable USB flash drive or an ISO file. Media created with the MCT cannot be used for upgrading a Windows Enterprise edition client. When you run the MCT, when prompted, on the What Do You Want To Do? page, click Create Installation Media, and then click Next.
Note Media Creation Tool (MCT)
You can download the MCT at: http://go.microsoft.com/fwlink/?LinkId=691209.
If you encounter issues while upgrading, inspect the installation log file found at C:windowsPantherUnattendGCSetupAct.log. If you are trying to use the wrong media, there should be an entry such as the following:
Info [windeploy.exe] OEM license detected, will not run SetupComplete.cmd
With all upgrades, you must ensure that you have at least 2 GB RAM and enough disk space. In the exam, you might face scenarios in which the current system drive has insufficient disk space. For previous versions of Windows, recommend one of the following resolutions for Windows systems needing more space to complete the upgrade.
Run Disk CleanUp Wizard, remove any unwanted files, and empty the Recycle Bin.
Uninstall apps, files, and language packs that you do not need.
If possible, expand the volume by using the Disk Management tool.
Move personal files off the system drive and onto another drive or external drive.
If the system fails during the upgrade due to a compatibility issue, you can troubleshoot the cause by reviewing the setuperr.log found at: C:$Windows.~BTSourcesPanther setuperr.log. Some of the most common codes are shown in Table 1-6.
TABLE 1-6 Setuperr.log errors relating to upgrading
Error Code |
Description |
|---|---|
CsetupHost::Execute result = 0xC1900200 |
PC not meeting the system requirements for Windows 10 |
CsetupHost::Execute result = 0xC190020E |
Insufficient free hard drive space |
CsetupHost::Execute result = 0xC1900204 |
Wrong Windows 10 SKU or architecture |
CsetupHost::Execute result = 0xC1900210 |
No issues found |
If you want to check the system for compatibility only, you can run Setup.exe with a command-line switch, which will check for compatibility but not perform the upgrade.
An example command is:
Setup.exe /Auto Upgrade /Quiet /NoReboot /DynamicUpdate Disable /Compat ScanOnly
Windows 8.1 supports mounting an ISO disc image directly in File Explorer to enable you to download the Windows 10 ISO and upgrade without first having to create installation media such as a DVD or bootable USB. For Windows 7, you must use bootable media, extract the files contained in the ISO, or use a third-party tool to mount the ISO.
A major advantage of upgrading rather than performing a clean installation (sometimes referred to as a wipe-and-load scenario) is that all the applications, settings, and data on the PC are retained during an upgrade. This often results in a much quicker process, and the device can be returned to the user in the shortest possible time.
Need More Review? Windows 10 Enterprise: FAQ for IT professionals
This Microsoft resource is useful to obtain answers to common questions about installation for Windows 10 Enterprise. Visit: https://docs.microsoft.com/en-us/windows/deployment/planning/windows-10-enterprise-faq-itpro#administration.
As part of the upgrade, Windows 10 will check the following.
If UEFI is used, this is UEFI v2.3.1 or later if Secure Boot is used.
System Host is not configured to boot from VHD.
The system is not installed as a Portable Workspace (i.e., using Windows To Go).
Details of the setup compatibility checks can be reviewed in the log file found at: C:$WINDOWS.~BTSourcesPanthersetupact.log. The installation process proceeds in the same way as the in-place upgrade using Windows Update.
Configure native boot scenarios
You have seen that you can install Windows 10 by using either a clean installation or an upgrade. Later in this chapter, you see how to boot directly to an operating system installed inside a VHD, but first, review the boot configuration of Windows 10 and how you can modify this configuration to enable you to dual boot with other operating systems.
![]() Exam Tip
Exam Tip
Review the terms boot and system partitions, which relate to the volumes on a hard disk that Windows 10 uses to start and load the operating system. These terms have been around for many years, and they are not named intuitively. The system partition contains files required to start Windows 10. The boot partition contains Windows 10 system files.
View configuration information
You can use various tools such as Windows PowerShell, Disk Management, or BCDEdit to identify which partition is the boot or system partition. The Disk Management snap-in gives you a graphical method to view the configuration information, as follows.
Right-click the Start button and choose Disk Management.
Expand the width of the Status column.
You should now see the status of the partitions, and the drive letters, if assigned.
The system partition is indicated by (System) (no drive letter in this example).
The boot partition is indicated by (Boot) (C drive in this example, as shown in Figure 1-15).
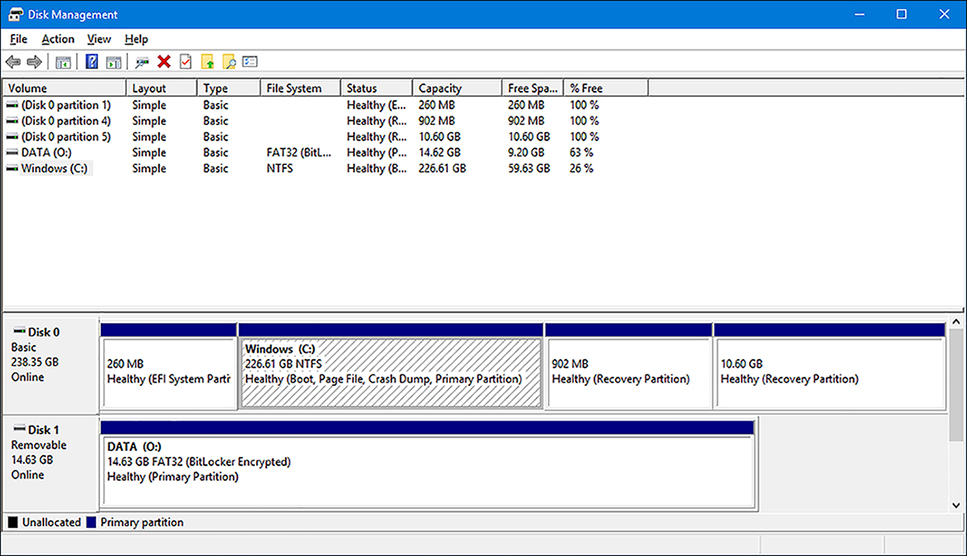
FIGURE 1-15 Boot and system partition information shown in Disk Management
In Windows PowerShell, you can use the Get-Volume -FileSystemLabel “System” cmdlet to list the system partition.
The Boot Configuration Data (BCD) Store maintains the configuration parameters for loading Windows, and the primary tool for working with the actual boot records is the command-line tool BCD Editor (Bcdedit.exe).
To view the contents of your boot configuration, use the following steps.
Open an elevated command prompt or administrative Windows PowerShell console.
Type BCDEdit /v and then press Enter.
Review the output.
In a multiple boot system, the command prompt output should be similar to the contents shown in Figure 1-16.
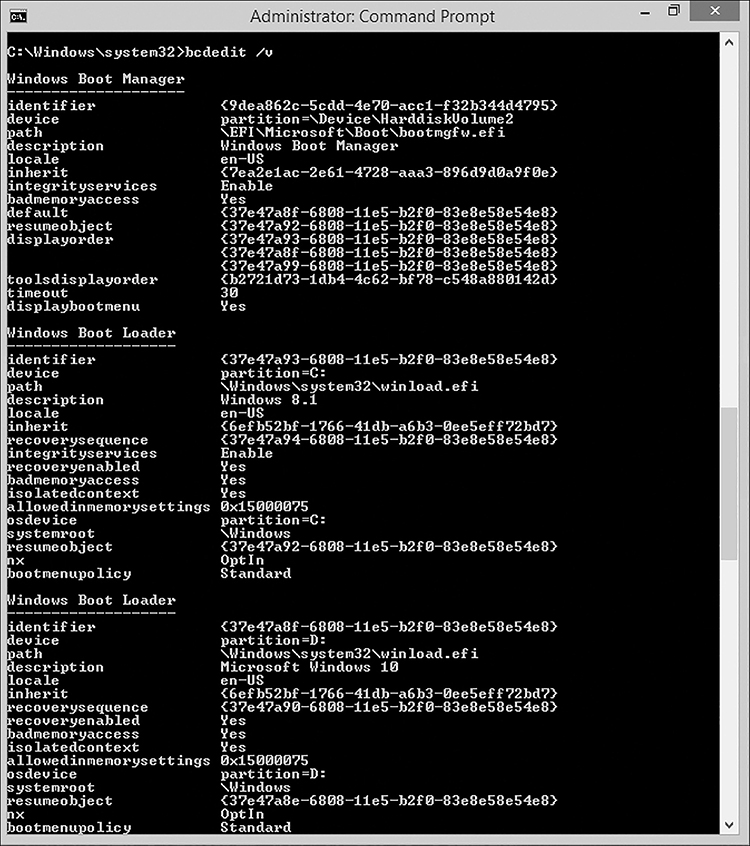
In Figure 1-16, you see the Windows Boot Manager and the Windows Boot Loader sections. The boot entries relate to a Windows 8.1 and Windows 10 description. Each operating system stored in the BCD has its own globally unique identifier (GUID). In the example shown in Figure 1-16, the two GUIDs are as follows.
Windows 8.1: {37e47a93-6808-11e5-b2f0-83e8e58e54e8}
Microsoft Windows 10: {37e47a8f-6808-11e5-b2f0-83e8e58e54e8}
If you want to change the displayed name of the operating system setting, you can use the following command.
BCDEdit /set {37e47a8f-6808-11e5-b2f0-83e8e58e54e8} description "Windows 10 1511"
Multiboot Windows
Multibooting your computer is possible with Windows 10 and enables you to install multiple operating systems on the same computer. For example, a helpdesk technician might need to support both Windows 7 and Windows 10, and must be able to switch quickly between the two operating systems. By multibooting Windows, the user can reboot and select an alternate version of Windows without needing to swap devices.
Note Multiboot versus virtual machines
It is more usual to create multiple virtual machines, each running a different operating system.
Other scenarios for implementing multiboot configuration include the following.
Testing application compatibility Earlier applications might not be compatible with a new operating system and might require access to physical rather than virtualized hardware. Issues found when testing application compatibility should be reported to your in-house software development team or a third-party independent software vendor (ISV) to resolve issues that are blocking your adoption of the new operating system.
Testing a new operating system Testing is commonly performed in a multiboot configuration. Multibooting a new operating system enables testers to test-drive it on physical devices so that you can evaluate whether it is compatible.
Multiple users By employing a multiboot configuration, one computer can be used by multiple users. So, each user will have either the same operating system version or different versions installed. When each user requires a physically different configuration, such employees can be working at different times of the day on a single PC and require special or earlier applications that are incompatible with the other user configuration.
To multiboot Windows 10, you must first install Windows 10. It is best practice to keep the operating systems on logically separate partitions on your computer. If you do not have a spare partition, create one. In the following example, you use Disk Management first to shrink the primary partition to free up space, and then you create a second partition to install Windows in a multiboot environment, using the following steps.
Type diskmgmt.msc into the Search box and press Enter.
Locate the primary partition, which is marked (Boot, Page File, Crash Dump, Primary Partition); this is normally the C drive.
Right-click the primary partition drive (C) and select Shrink Volume.
In the Shrink C: dialog box, type the size in MB to which you want to shrink the drive, such as 40960 MB, and click Shrink.
The Windows installation program formats the 40.00 GB partition.
Close Disk Management.
You are now ready to install the second operating system on the newly created partition as follows.
Insert your installation media, such as a DVD or bootable USB drive.
Reboot your system and press any key when the system detects the bootable USB drive or DVD.
After the setup program loads, proceed with the setup as for a clean installation and select the newly created Unallocated Space (40.0 GB drive in the preceding example) for the location to install Windows and click Next.
Allow the Windows installation to complete and then configure the additional version of Windows.
To switch between the two operating systems, you must reboot your system and choose your desired version of Windows in the boot menu, as shown in Figure 1-17.
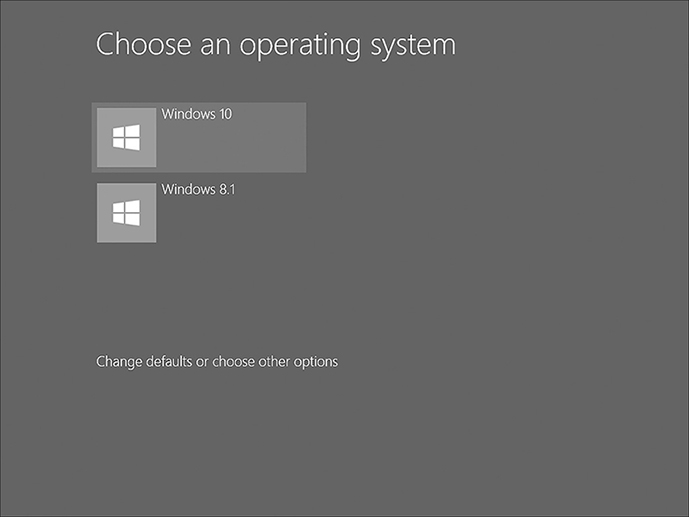
![]() Exam Tip
Exam Tip
The new advanced boot options have multiple screens and levels of options. Ensure that you have explored each tool and configured Windows 10 in a multiboot scenario before you take the exam.
Identify valid upgrade paths
To determine supported upgrade paths from earlier versions of Windows, refer to: Skill 1.1: “Prepare for installation requirements,” in the section: “Choose an upgrade or a clean installation.” Under the Prepare an upgrade or migration strategy heading, look for the Supported Upgrade Paths content.
Migrate from previous versions of Windows
When upgrading from an older operating system, it is very common for the user to be presented with a new device running the new version of Windows after the old device is removed. This can sometimes cause significant loss of productivity while the user becomes familiar with the updated operating system and reconfigures settings to their preferences.
This user personalization of the device can sometimes be overlooked within an enterprise. Consider the following examples of customization and personalization.
Desktop appearance, sounds, themes, backgrounds
Start-menu customization
Icons, file associations
Files and folders stored locally
Device and power settings
Application settings, such as autotype, template locations
Migrate applications by using User Experience Virtualization
You might have encountered occasions when users are unhappy if they lose application settings that were stored with the application or in the user profile. For example, most Outlook users appreciate the autocomplete list feature that displays suggestions for names and email addresses as you begin to type them. If the user profile is stored separately from the PC, such as on a file server, most settings can be migrated to the new device after the user logs on. If the device is standalone, the profile and application settings will not be transferred to the new PC.
Enterprises can use roaming profiles to retain some application customization, which synchronizes the profile data during logon and logoff. For a more comprehensive roaming solution for application settings, consider using User Experience Virtualization (UE-V) for Windows 10 to enable the capture and centralization of users’ application settings and Windows 10 settings.
UE-V is included in Windows 10 Enterprise edition, and includes the ability to:
Specify which application and desktop settings are to be synchronized.
Deliver the settings to users’ workstations throughout the enterprise.
Enable UE-V to record and monitor setting changes to non-Microsoft, third-party applications.
Recover settings after hardware replacement or upgrade.
Need More Review? UE-V
This resource provides more in-depth information to enterprises seeking to employ UE-V: https://technet.microsoft.com/library/dn458926.aspx.
Previous versions of Windows provided a GUI tool such as Windows Easy Transfer to assist with the transfer of settings from an old computer to the new one. Microsoft has not included Windows Easy Transfer with Windows 10 and instead recommends an in-place upgrade, which maintains all apps and settings.
Despite the unavailability of Windows Easy Transfer, Microsoft has partnered with Laplink, a third-party software reseller, to offer its tool, PCmover Express (Personal use) for free. This tool provides functionality similar to Windows Easy Transfer and assists the transfer of selected files from your old Windows-based PC to your new PC running Windows 10. You can find more information relating to PCmover Express at https://support.microsoft.com/en-us/help/4026265/windows-windows-easy-transfer-is-not-available-in-windows-10.
Perform a user state migration
When computers are being replaced or refreshed on a large scale, the loss of productivity can be significant. In this scenario, you can use the User State Migration Tool (USMT) 10.0. For systems that are not being upgraded, the USMT is available as part of the Windows ADK.
![]() Exam Tip
Exam Tip
You should always use the version of the Windows ADK for your version of Windows 10. For example, the Windows 10 Creators Update is referred to as Windows 10 1703. Ensure you download Windows ADK, version 1703, if that’s the version of Windows 10 you are deploying. At the time of writing this book, Windows 10 1709 is the current feature release. However, this book and the exam are based around Windows 10 1703.
The Windows ADK is available from the following Microsoft website at: https://developer.microsoft.com/en-us/windows/hardware/windows-assessment-deployment-kit.
User state migration is performed in two phases as follows.
Settings and data are captured (collected) from the source and stored in a secure migration store using the ScanState tool.
Captured settings and data are restored on the destination computer, using the LoadState tool.
USMT is a command-line tool that can be scripted to capture and migrate data efficiently and securely and is intended for performing large-scale automated deployments. You choose which data is captured, and these settings are stored in migration XML files as follows.
MigApp.xml
MigDocs.xml
MigUser.xml
Custom XML files that you can create
The XML files provide the migration rules that USMT needs to process.
Important Install applications
It is important to ensure that any required applications are already installed on the destination computer so that the captured app settings can be reinstated. USMT does not migrate the applications themselves, only the supported applications’ settings.
The types of data that USMT can capture and migrate are shown in Table 1-7.
TABLE 1-7 Data types accessible by USMT
Data Type |
Example |
Description |
|---|---|---|
User data |
My Documents, My Video, My Music, My Pictures, Desktop files, Start menu, Quick Launch settings, and Favorites |
Folders from each user profile. |
|
Shared Documents, Shared Video, Shared Music, Shared Desktop files, Shared Pictures, Shared Start menu, and Shared Favorites |
Folders from the Public profiles. |
|
File |
USMT searches fixed drives, collecting files that have any of the file name extensions that are defined in the configuration XML file. |
|
Access control lists (ACLs) |
USMT can migrate the ACL for specified files and folders. |
Operating system components |
Mapped network drives, network printers, folder options, users’ personal certificates, and Internet Explorer settings. |
USMT migrates most standard operating system settings. |
Supported applications settings |
Microsoft Office, Skype, Google Chrome, Adobe Acrobat Reader, Apple iTunes, and more |
USMT will migrate settings for many applications, which can be specified in the MigApp.xml file. Version of each application must match on the source and destination computers. With Microsoft Office, USMT allows migration of the settings from an earlier version of an Office application. |
Need More Review? USMT MigApp.xml supported applications
This Microsoft resource provides the list of applications that you can specify in the MigApp.xml file for USMT to migrate the settings. Visit https://technet.microsoft.com/library/hh825238.aspx.
The following settings are not migrated when you use USMT.
Local printers, hardware-related settings
Device drivers
Passwords
Customized icons for shortcuts
Shared folder permissions
Files and settings if the operating systems have different languages installed
After you have installed the USMT included in the Windows ADK, you have the following components as described in Table 1-8.
TABLE 1-8 USMT components
Component |
Description |
|---|---|
ScanState |
Scans a source computer and collects files and settings, writing them to a migration store. (The store file can be password protected and can be compressed and encrypted if required, although you cannot use the /nocompress option with the /encrypt option.) You can turn off the default compression with the /nocompress option. |
LoadState |
Migrates the files and settings from the migration store to the destination computer. |
USMTUtils |
Compresses, encrypts, and validates the migration store files. |
Migration XML files |
MigApp.xml, MigUser.xml, or MigDocs.xml files, and custom XML files USMT uses to configure the process. |
Config.xml |
Used with /genconfig to exclude data from a migration. |
Component manifests |
Controls which operating system settings are to be migrated. These manifests are specific to the operating system and are not modifiable. |
To initiate the collection of the files and settings from the source computer, use the following steps.
Ensure that you have a backup of the source computer.
Close all applications.
Run ScanState, using an account with administrative privilege and the command similar to:
ScanState \remotelocationmigrationmystore /config:config.xml / i:migdocs.xml /:migapp.xml /v:13 /l:scan.log
Run UsmtUtils with the /verify switch to ensure that the migration store is not corrupted, using UsmtUtils /verify C:mystorestorename.img.
On the destination computer, install the operating system, install any applications that were on the source computer, and then close any open applications.
Run the LoadState command, specifying the same .xml files that you used when you ran ScanState using the command similar to:
LoadState \remotelocationmigration /config:config.xml / i:migdocs.xml /i:migapp.xml /v:13 /l:load.log
Restart the device and verify whether some of the settings have changed.
Earlier, you saw that when you deploy Windows 10 on a device that contains a modern version of Windows, it creates a Windows.old folder. By using the ScanState tool, you can migrate user settings from an offline Windows system including the Windows.old folder. This can be advantageous in the following scenarios.
Improved performance if the Windows.old folder is local
Simplified end-to-end deployment process by migrating data from Windows.old by enabling the migration process to occur after the new operating system is installed
Improved success of migration because files will not be locked for editing while offline
Ability to recover and migrate data from an unbootable computer
Need More Review? USMT technical reference
Microsoft has updated the technical reference relating to USMT 10.0; you can find it at: https://docs.microsoft.com/en-us/windows/deployment/usmt/usmt-technical-reference.
Install Windows 10 to a VHD
We discussed earlier in this chapter how to multiboot Windows 10. There is a newer method of using multiple operating systems on a single device without repartitioning the drive that involves installing Windows 10 inside a virtual hard disk (VHD) that has been configured to behave as though it is natively booting. Native boot indicates that there is no parent operating system.
VHDs can be used in both a virtual (for example, Hyper-V) or physical environment. This section discusses the ability to install Windows 10 directly onto a VHD. After the initial configuration of the VHD has completed, for the purposes of normal operations, Windows will not be able to distinguish between a physical and a virtual drive.
VHD boot is still relatively new; expect to see VHD boot or Native Boot included on the exam.
Create and configure a native boot VHD
The steps required to prepare a VHD must be performed carefully; otherwise, the VHD will not be properly connected during the installation process. To prepare a native boot VHD, first create and configure it so that Windows will install into it.
Perform the following steps.
Type diskmgmt.msc into the search area or right-click the Start button and click Disk Management.
In Disk Management, click Action and then click Create VHD.
In the Create And Attach Virtual Hard Disk dialog box, provide the parameters for your VHD.
An example VHD is:
Location C:VHDWindows10vhd.vhdx.
Virtual hard disk size: 40 GB.
Virtual hard disk format: VHD.
Virtual hard disk type: Fixed size.
Click OK to create your VHD.
Because fixed type was selected, this might take several minutes to complete, and you will see the creation progress in the bottom right of the Disk Management dialog box. Your new VHD should automatically attach to the system. If it does not, you can use Disk Management to attach it.
Use Disk Management to attach a VHD
Your new VHD should automatically be attached to the system but if not, use Disk Management to attach the drive as follows.
Click Action and then click Attach VHD, browse to your new VHD, and choose the VHD to attach.
If you prefer to use the command line, you can also use the DiskPart tool and type: create vdisk file= C:VHDWindows10vhd.vhdx maximum=40960 type=fixed to achieve the same result.
Leave the VHD drive in the Not Initialized state; this updates when Windows installs to it.
Windows can now install to the VHD file.
Install Windows inside a VHD
To install Windows inside your VHD file, follow these steps.
Insert your Windows media (or ISO if you are using a virtual machine) in your computer and boot from it.
Follow the onscreen prompts, providing the appropriate information until the Where Do You Want To Install Windows screen appears.
Press Shift+F10 to launch an administrative command prompt window.
In the administrative command prompt window, type DiskPart.
In DiskPart, type List disk.
Locate the VHD disk that you have created and type select vdisk file=D:VHDWindows10vhd.vhdx. (Notice that the drive letter has been changed.)
In DiskPart, type attach vdisk and press Enter.
Type Exit to close DiskPart and then close the administrative command prompt window.
On the Where Do You Want To Install Windows page, click Refresh.
Your VHD disk should now appear.
Select the VHD drive and allow Windows to install normally.
After rebooting the machine, you should see the ability to choose an operating system during boot time. After proper configuration, Windows 10 does not differentiate between physical and virtual hard drives and behaves as if it is running natively and not virtually.
A few features are not supported when Windows 10 is booted from a VHD. These include the following.
Windows 10 does not support hibernation when started from a VHD, although sleep mode is supported.
The version of Windows 10 on the VHD cannot be upgraded to a newer version.
You cannot enable BitLocker on the Windows 10 volume contained on a native-boot VHD.
You cannot boot to Windows 10 from a VHD stored on a remote share or USB flash drive.
Only Windows 10 Enterprise and Windows 10 Education edition licensing supports starting from a VHD natively.
Need More Review? Deploy Windows on a VHD (native boot)
This Microsoft resource provides more depth to this topic: https://docs.microsoft.com/en-us/windows-hardware/manufacture/desktop/deploy-windows-on-a-vhd--native-boot.
Boot Windows 10 from VHD
Sometimes you want to multiboot your computer so that it can boot to a secondary Windows environment such as a preview version of Windows 10. You can use the multiboot procedure that you saw earlier or configure your system to boot to Windows 10 running inside a VHD. This can be the only way to multiboot if your second hard disk uses the GUID Partition Table (GPT), which is required for partitions larger than 2 terabytes (TB), because the secondary Windows environment will not install to a partition on the GPT disk.
You review how to use a virtual hard disk (VHD) to provide a boot volume that uses the MBR partition style inside a VHD located on the GPT drive. You then apply the installation image to the VHD and configure the computer to boot to the second Windows environment. Three key stages are required to configure your computer to boot from VHD.
Create an MBR-partitioned VHD
You must create a new VHD to store the Windows 10 image that will become your second Windows environment. You can use Disk Management, Windows PowerShell, or DiskPart to create VHDs in Windows 10. The Disk Management steps are as follows.
Right-click the Start button and select Disk Management from the menu.
Select Create VHD from the Action menu.
In the Create And Attach Virtual Hard Disk dialog box, specify the desired location of the VHD folder.
Specify the desired size of the created VHD.
Specify VHDX format.
Specify Fixed Size or Dynamically Expanding. (If you have the available space, choose a fixed size drive because this will provide the best performance).
After the drive is created, the VHD is automatically attached.
Locate the new VHD drive in the lower-left navigation pane, right-click the disk, and select Initialize Disk.
Specify the MBR partition style for the disk.
When the disk is initialized, right-click in the unallocated space in the pane on the right side and select New Simple Volume to launch the New Simple Volume Wizard.
Allow the volume size to be the default value and assign the drive letter V to the volume.
Format the partition as NTFS and label it VHDBoot.
Close Disk Management.
Apply the Windows Image to the VHD
Now that you have created an empty VHD for your second Windows environment, you are ready to use the DISM command-line tool to apply your Windows 10 image to the new volume. The DISM steps are as follows.
Insert or mount the installation media for the secondary environment; this can be a Windows 10 DVD, Windows 10 bootable USB drive, mounted ISO, or customized deployment image.
Right-click the Start button and select Windows PowerShell (Admin) from the menu.
Type the following command, which will apply the Install.wim file located in the Sources folder of the installation media to the VHD mounted at drive letter V:
DISM /Apply-Image /ImageFile:D:Sourcesinstall.wim /Index:1 /ApplyDir:V:
Close the Windows PowerShell (Admin) window.
Note Deployment Image Servicing And Management (DISM)
You will use the Deployment Image Servicing and Management (DISM) tool, which is part of Windows 10.
Configure boot options
With Windows 10 now applied to the VHD, you must update the boot options so that the current Windows environment is aware of the additional Windows environment on the VHD. The BCDboot command-line tool enables you to manage system partition files, including configuring the boot options. You can add your second Windows environment to the current boot menu by completing the following steps. The command-line steps using BCDBoot are as follows.
Right-click the Start button and select Windows PowerShell (Admin) from the menu.
In the Windows PowerShell window, type the following command and press Enter.
CD V:WindowsSystem32
Verify that the command prompt now displays V:WindowsSystem32.
Type the following command to configure the Windows environment on the VHD to add its boot files to the system partition for multi-boot.
BCDBoot V:Windows
Close the command prompt and restart your computer.
When the computer has restarted, you should be presented with a prompt to select between the existing operating system and the secondary Windows environment when the computer starts.
Note Boot from VHD
Only the Enterprise and Education editions of Windows 10 are licensed to boot from VHD.
Install on bootable USB
With the performance and capacity benefits achievable with USB drives, Microsoft now sells Windows 10 installation media on USB drives. You can also download the Windows 10 image, so that you can either upgrade your current Windows system or create your own bootable USB flash drive containing the Windows 10 installation media to install Windows 10 on another PC.
Install on bootable USB, using the Media Creation Tool
You saw earlier that Microsoft provides a downloadable Media Creation Tool, which enables you to generate a ready-to-use Windows 10 bootable USB flash drive. The MCT can’t be used with the Windows Enterprise edition client. One advantage of using the MCT Wizard is that it downloads the required Windows 10 edition and architecture based on your selections and copies this directly to your USB drive.
To create a bootable USB, using the MCT so that you can perform a clean installation of Windows 10, use these steps.
Download the MCT at: http://go.microsoft.com/fwlink/?LinkId=691209.
Run the Media Creation Tool.
Select Create Installation Media For Another PC.
Select the language, edition, and architecture (64-bit or 32-bit) for Windows 10 and click Next.
On the Choose Which Media To Use page, select USB Flash Drive and click Next.
On the Select A USB Flash Drive page, select your removable drive and click Next.
After the MCT has downloaded Windows 10 and copied it to your removable drive, click Finish.
The USB flash drive can now be used to install Windows 10.
Manually create a Windows 10 bootable USB
If you already have downloaded the correct edition of Windows 10, or you have other installation media, such as a DVD containing Windows 10, you can manually create a bootable USB. Insert the installation media or mount the Windows 10 ISO before performing this task.
You can manually create a bootable USB that can be used with any edition of Windows by preparing a USB removable drive, using the following steps.
Right-click the Start button and select Windows PowerShell (Admin)., confirming the User Account Control prompt.
Insert the USB drive that you want to make a bootable Windows 10 installation USB.
Type diskpart and press Enter to launch the DiskPart command-line utility.
Type listdisk to display the list of storage drives.
Identify the disk number of the USB drive that you are using; you should be able to find it by looking at the Size column.
Type select disk X to select the USB drive, where X is the disk number of your USB drive.
Type clean to erase the USB drive.
Type create partition primary to create a primary partition on the USB drive.
Type select partition 1 to select the newly created partition.
Type active to make the partition active.
Type format fs=ntfs quick to format the partition.
Type assign to instruct Windows to allocate a drive letter to the USB drive.
Type exit to leave Diskpart.
You can use the built in command line tool Xcopy to copy the contents of your mounted Windows 10 ISO or DVD to the USB drive by typing xcopy g:*.* /s/e/f h: and pressing Enter. You must change the drive letters to match your source files location (G) and removable drive (H).
Note UEFI
If your system supports UEFI, format the USB flash drive as FAT32 rather than as NTFS. To format the partition as FAT32, type format fs=fat32 quick and then press Enter.
Install additional Windows features
Similar to Windows 8.1, in Windows 10, you can add and remove Windows features as required without the need to revert to the installation media.
Use the Windows Features app
To launch the Windows Features app as shown in Figure 1-18, which allows you to turn Windows features on or off, perform one of the following three methods.
Type OptionalFeatures.exe into the search bar and press Enter.
Navigate to Control Panel > Programs > Programs And Features and select Turn Windows Features On Or Off.
Right-click the Start button and select Apps And Features and then select Programs And Features and select Turn Windows Features On Or Off.
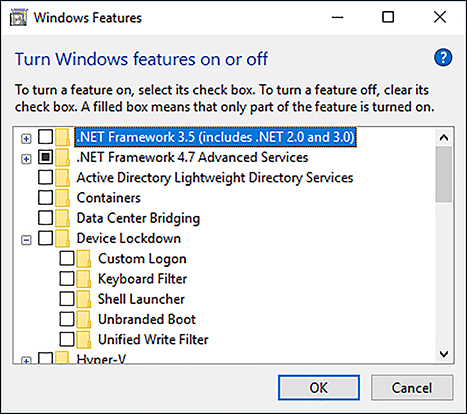
FIGURE 1-18 Turning Windows features on or off
Use DISM to add or remove Windows features
If you prefer to use the command prompt, or need to automate the process, you can also use the Deployment Image Servicing and Management (DISM) tool. DISM is a command-line tool that you use to modify Windows; it’s also included in the Windows ADK. One feature of DISM is the ability to enable or disable Windows features directly from the command prompt. The Windows installation can be online on a running operating system or offline in a WIM or VHD file.
If you are not sure of the name of the Windows feature, you can use the following command to list all the features available in the operating system.
Dism /online /Get-Features
After you know the name of the Windows feature, you can enable a specific feature by using DISM. You can use the /All argument to enable all the parent features in the same command. For example, type:
Dism /online /Enable-Feature /FeatureName:TFTP /All
Need More Review? Enable or disable Windows features by using DISM
Microsoft provides a useful technical reference relating to DISM, which can be found at https://docs.microsoft.com/en-us/windows-hardware/manufacture/desktop/dism-how-to-topics--deployment-image-servicing-and-management.
In Windows 10, you can also run DISM within Windows PowerShell or use native Windows PowerShell commands for many of the functions DISM performs.
The equivalent commands in Windows 10, using Windows PowerShell, are:
Get-WindowsOptionalFeature Online
This lists all of the features available in the operating system, and:
Enable-WindowsOptionalFeature Online FeatureName TFTP All
To disable the TFTP feature, type:
Disable-WindowsOptionalFeature Online FeatureName TFTP
Configure Windows for additional regional and language support
When Windows 10 was released, it offered support for 111 languages spanning 190 countries and regions. You can download any of the additional languages for Windows 10, which allows users to view menus, dialog boxes, and other user interface items in their preferred language.
To add an input language to your PC, perform the following steps.
Open Settings > Time & Language > Region & Language.
Under Languages, select Add A Language.
Select the language you want to use from the list, as shown in Figure 1-19.

FIGURE 1-19 Select language
Windows 10 searches Windows Update for the language and then downloads the language and installs it. Language packs are typically about 5 to 10 MB in size, but for complex languages, this can be higher. Windows displays a notification that it is adding some new features to Windows when downloading and installing the language.
After the language is installed, you can set it to be the default language for your PC or remove the language. You can also use an Options button to add additional regional keyboard layouts. Depending on the hardware of your device, other settings might also be in this Options app for configuring features such as region-specific fonts, handwriting and pen settings, typing, and optical character recognition (OCR) to your PC.
You can also use the Lpksetup command prompt to perform unattended or silent-mode language pack operations, such as:
lpksetup.exe /i * /p <path>
This example installs all language packs that are located on installation media specified in the <path> location. The full command-line options for Lpksetup.exe are shown in Table 1-9.
TABLE 1-9 Lpksetup.exe command-line options
Option |
Description |
|---|---|
/i |
Installs the specified language packs. If you do not include * or language after /i, you are asked to continue the install through the user interface (UI). |
* |
Wildcard character that represents all language packs found in language_pack_path or the directory where lpksetup.exe is located. |
Language-region |
Specifies the language pack or packs to be installed or uninstalled. |
/u |
Uninstalls the specified language packs. If you do not include * or language after /i, you are asked to continue the uninstall through the user interface (UI). |
/r |
Suppresses the need to restart after an operation is complete. |
/p language_pack_path |
Indicates the path of the language packs to install. |
/s |
Performs a silent and unattended operation that requires no user input. |
/f |
If the computer is required to restart, forces a restart even if other users are logged on to the computer. |
![]() Exam Tip
Exam Tip
The parent language is the language selected during the installation of Windows 10. The only method of changing the parent language is to reinstall Windows 10 and select a different language.
Skill 1.3: Configure devices and device drivers
Windows 10 identifies and configures hardware during the initial installation. Upon delivery of a device running Windows 10, the user will typically want to add their own hardware and peripherals such as a printer, a Bluetooth mouse, or web cam. In this section, you learn how Windows 10 installs drivers for new devices and hardware, and how you can maintain these drivers, upgrade them, and resolve driver issues that might occur.
Install devices
When you install a hardware component on Windows 10, the operating system requires a device driver to be installed so that you can use it. After it’s configured, the device driver loads automatically and is available for Windows to use. This section explains how Windows 10 automatically installs devices and locates the device driver from the Windows Component Store, from Windows Update, or directly from you.
How to install devices
For hardware to function properly, it requires special software designed for Windows 10 to communicate with it. This software is referred to as a device driver, and when Windows 10 detects new hardware, the system automatically attempts to install one of the built-in drivers included as part of the operating system, located within the Windows 10 Driver Store, or download them through Windows Update, from the Internet. New and updated hardware device drivers are regularly submitted to Microsoft by the equipment vendor for testing and cataloging. If the Windows Update feature is enabled, Windows 10 automatically detects the presence of new device drivers, downloads them, and installs them.
New hardware is typically installed automatically when it’s added to Windows 10, with the operating system detecting and identifying the new hardware through the Plug and Play feature. Windows 10 supports new hardware connected through a variety of connection methods, including USB (1.0 through 3.1), Wi-Fi, and Bluetooth. In addition to backward compatibility for existing and earlier hardware, emerging technologies such as near-field communication (NFC) and Miracast for wireless displays also have built-in support in Windows 10.
For advanced users or for managing or troubleshooting a hardware device issue, you can use Device Manager. Device Manager provides information about each device, such as the device type, device status, manufacturer, device-specific properties, and device driver information.
There are multiple ways to load the Device Manager, including:
Right-clicking the Start button and selecting Device Manager.
Typing Device Manager into Search.
Opening Control Panel, selecting Hardware And Sound, and then selecting Device Manager.
The Device Manager default view (devices by type) is shown in Figure 1-20.
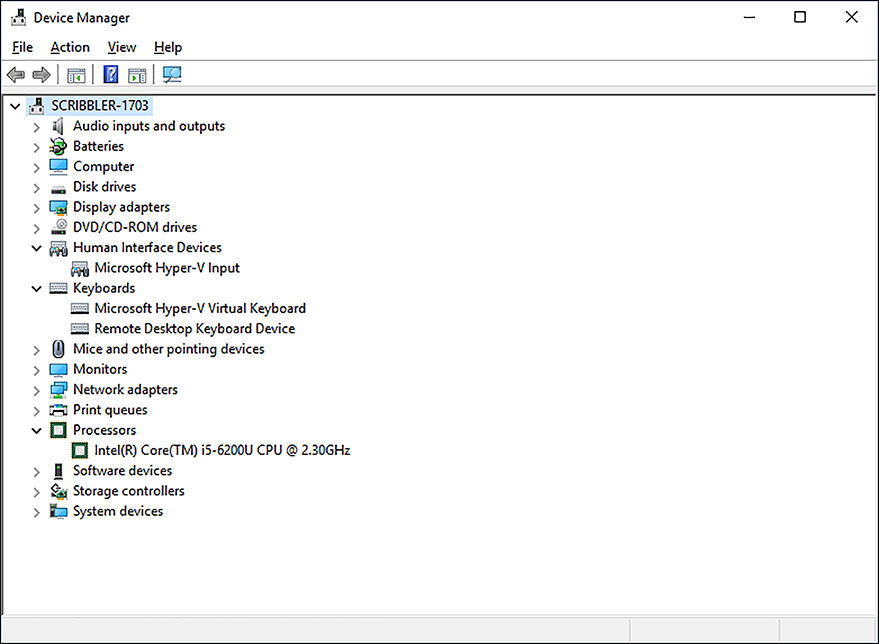
You can expand and explore each node in Device Manager and then select a device. All devices have properties, and these can be viewed by right-clicking the desired device and selecting the properties.
The Properties dialog box for a device is shown in Figure 1-21.
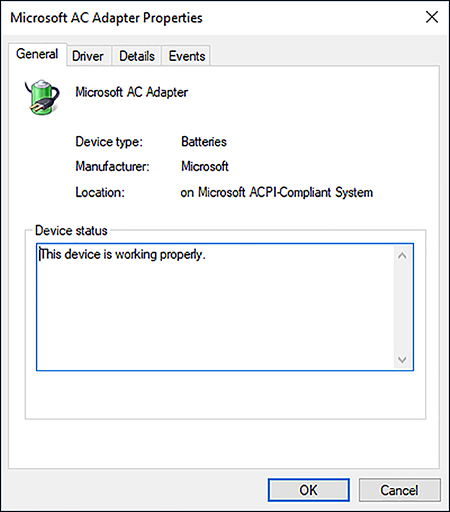
If you added a new peripheral, and Windows 10 does not immediately recognize it, first check that the device is connected properly and that no cables are damaged. You should ensure that the external device is powered on and not in sleep or standby mode. You can also open Device Manager and launch the Scan For Hardware Changes Wizard from the Action menu, which will locate previously undetected hardware and then configure it for you.
Manage devices and printers
Device Manager provides one method of managing devices within Windows 10. Another way to add and manage devices is by using the Devices And Printers app within Control Panel. This Devices And Printers app enables you to add devices and printers by clicking the menu item at the top of the screen. This launches an easy-to-use wizard that searches for devices and walks the user through the process of installing devices. You can also use the Printers & scanners tab in the Devices node of the Settings app, as shown in Figure 1-22.
After a piece of hardware is installed, you can view it in the Devices And Printers app, and Windows displays photorealistic icons to help you recognize the devices. If you click and open one of the icons, a new view appears that focuses on the device. This window is the device stage and is shown in Figure 1-23. The type of functionality found in the device stage depends on the support provided by the manufacturer of the device that is installed alongside the device driver.
Update, disable, and roll back drivers
Most computers that you’ll work with have different hardware components, such as motherboards, disk controllers, graphics cards, and network adapters. Fortunately, Windows 10 is designed to work with an extensive list of hardware devices and benefits from Plug And Play, which tries to detect new devices automatically and then installs the correct driver software.
If Windows has a problem with a device, you must troubleshoot the cause, and this can involve locating the correct or updated device drivers and installing them. In this chapter, you focus on working with devices and drivers and the corrective and preventive actions you can take to help ensure that the devices you configure are free from problems.
Update device drivers
Windows 10 automatically attempts to install a device driver and, if one is not available locally, attempts to locate one through Windows Update. For most systems, devices and their associated drivers remain constant and require no further administrative effort. In the following instances, you might need to update, disable, or reinstate a previous driver.
Windows 10 detects that a newer driver is available through Windows Update.
You want to install a newer device driver manually, typically obtained from the manufacturer’s website.
The device is not performing or functioning correctly with the current driver.
A new or beta version of a driver is causing stability issues.
To update a specific driver, select the device in Device Manager and select Update Driver Software from the context menu.
Windows 10 offers you two choices for updating the driver.
Search Automatically For Updated Driver Software.
Browse My Computer For Driver Software.
Typically, most users allow Windows to locate, download, and install an updated device driver automatically if one is available through Windows Update. This is the default method.
If you have the installation media that came with the hardware, you can use the browse feature to locate the correct driver. The Windows 10 Update Driver Software Wizard can automatically search through the subfolders in the media and locate all the relevant drivers for the device.
If you have already downloaded a specific device driver from the manufacturer, such as a video driver from NVIDIA or AMD/ATI, you might need to run the driver installation wizard included in the download files, which includes additional software besides the device driver.
If Windows determines that the current driver is the most up-to-date or best driver available, you can confirm the version number of the driver by viewing the properties of the driver in Device Manager. If you have a more recent driver that you want to use, you must manually uninstall the current driver and then manually install the more recent driver.
Prevent driver updates over metered connections
Windows 10 enables you to prevent new or updated drivers from being downloaded while the device is connected on a metered connection. You can check your settings for this behavior by completing the following steps.
Open Settings and click Devices.
On the Printers & Scanners tab, scroll down to Download Over Metered Connections.
The setting should be set to Off by default, as shown in Figure 1-24.

FIGURE 1-24 Configuring the Download Over Metered Connections setting The same setting can also be found in the Connected Device section, which is below the Other Devices section.
Close Settings.
Windows 10 should automatically detect whether your connection is metered. If you are connecting to the Internet by tethering or a Wi-Fi hotspot, you can manually configure the connection to be a metered connection by using the following steps.
Connect to the metered Wi-Fi connection.
Open Settings and choose Network & Internet.
On the Wi-Fi tab, click the connected network interface.
Under Metered Connection, select the On status for the toggle switch.
Disable individual driver updates or Windows Updates
Sometimes it is important to remove a device driver completely from the system. It might be corrupted or incompatible with your system. If Windows determines that the driver is valid and up to date, it is impossible to use another device driver while the current driver is present. To uninstall an unwanted device driver, use the following steps.
Open Device Manager.
Locate the device with the problem driver, right-click it, and choose Uninstall device.
In the Uninstall Device dialog box, click Uninstall.
If the item relates to an unwanted Windows Update, use the following steps.
Open Settings, click Update and Security, and on the Windows Update tab, click Update History.
Click Uninstall updates, and in Control Panel, on the Installed Updates page, locate and uninstall the unwanted update by selecting it from the list and then clicking Uninstall.
If the driver is reluctant to be uninstalled, try restarting the computer and attempting the procedure again. Only as a last resort should you try to delete the software manually. You can use the PnPUtil.exe command-line tool and remove the .inf files that are associated with the device as shown.
PnPUtil.exe -a -d <path to the driver> <drivername>.inf
The use of the PnPUtil.exe command-line tool is discussed later in this chapter.
Note Driver installation and removal are administrative functions
You must use administrative privileges to install or uninstall a device or driver package by using Device Manager.
Because different hardware types have different functions and features, review the tabs in the properties screen. Not all devices have the same tabs, and some devices do not offer the ability to view or modify the device driver.
Turn on or off automatic device driver installation in Device Installation Settings
Sometimes installing an updated driver can cause your computer to lose functionality, and you might decide to uninstall the driver. Windows 10 automatically attempts to reinstall the driver, which is not desirable. In this situation, you might want to turn off the automatic device driver installation setting by using the following steps.
Open Control Panel, and under Hardware And Sound, click Devices And Printers.
Under Devices, right-click the icon that represents your computer. It should have your computer name and click Device Installation Settings, as shown in Figure 1-25.
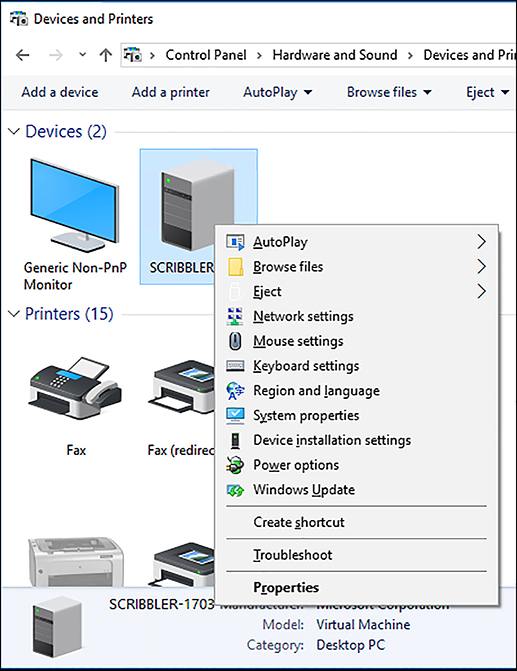
FIGURE 1-25 Disabling the automatic device driver software installation In the Device Installation Settings dialog box, choose No, (Your Device Might Not Work As Expected). Yes is the default setting.
Click Save Changes.
Perform a driver rollback
Sometimes a driver problem can cause the system to become unstable. In Device Manager, you can roll back an updated driver to its previous version. If the system allows you to start normally, you can perform this task by using the following steps.
Open Device Manager.
Right-click the device that you want to roll back and then click Properties.
In the Properties dialog box, click the Drivers tab and then click Roll Back Driver.
In the Driver Package Rollback dialog box, click Yes.
The Driver Package Rollback feature can only be used to revert to a previously updated driver. If you have not installed a later driver, the option in Device Manager will be unavailable.
Note No driver rollback for printers
Although Printers and Print queues appear in Device Manager, you cannot use Driver Package Rollback for these devices.
If your system is unstable or won’t start up properly because of a faulty driver, such as a video driver, you might need to restart the computer in Safe Mode to access Device Manager and perform the driver rollback. Windows 10 automatically detects startup failures and should boot into the advanced startup menu. To access Safe Mode, open Settings, click Update & Security, and then select the Recovery tab. Under the Advanced startup heading, click Restart now.
When your PC restarts, select Troubleshoot from the Choose An Option menu.
Select Advanced Options.
Select Startup Settings and click Restart. You see the Advanced Boot Options screen as shown in Figure 1-26.

FIGURE 1-26 Startup Settings options Select Safe Mode by pressing the 4 key.
Sign in to the system and roll back the driver as described earlier.
The rollback feature remembers only the last driver that was installed and doesn’t keep copies of multiple drivers for the same device.
Resolve driver issues
One of the most common issues with device drivers relates to users attempting to install a driver designed for an earlier operating system or a different architecture. In some cases on previous versions of Windows, it might have been possible to install a Windows 7 driver on a Windows 8 based computer, but this is not a supported operation for Windows 10 and should be avoided in a production environment. As is the case with other software installations, you can’t use a 32-bit driver for a 64-bit resource. You can’t use a 64-bit driver to communicate with a 32-bit resource, either.
In this section, you review how to disable specific device driver updates and tools you can use to verify the drivers on your system.
Disable updates
Sometimes a specific update or driver will not be compatible with your system. Although all updates and drivers should be thoroughly checked before they are made available for installation, it is almost impossible to test every combination of software and hardware that can coexist on a computer. In some configurations, the new software might produce unsatisfactory results. You saw earlier that one method to avoid this situation is to turn off updates completely.
Disabling automatic driver updates might have a more widespread effect than you want, especially if you only need to disable or prevent the installation of a single driver. To enable you to block a specific update, Microsoft has released the Show Or Hide Updates troubleshooter package, available from the Microsoft Download Center at: https://support.microsoft.com/kb/3073930.
This troubleshooter, shown in Figure 1-27, searches for available drivers and Windows updates, and then enables you to hide them, which prevents Windows from automatically installing them.
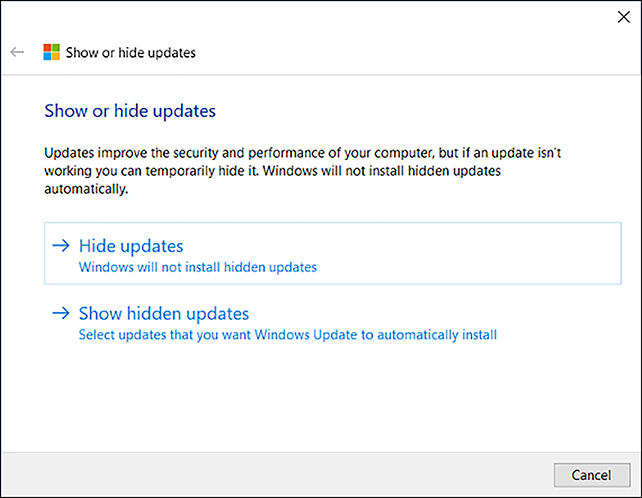
Each time you experience an issue with a driver or update that you don’t want installed, you can run this troubleshooter and select the updates that you want to disable.
Note Device Manager error troubleshooting
Device Manager marks a device that is not operating normally with a yellow exclamation point. When troubleshooting a device, you can check the error that Device Manager reports. For a detailed list of errors that Device Manager reports, see the article at https://msdn.microsoft.com/library/windows/hardware/ff541422(v=vs.85).aspx.
Use driver verification tools
If you encounter issues with drivers that seem to relate to malware or missing drivers, you can use a command-line tool called Sigverif.exe, which checks whether any drivers have been installed on the computer that have not been signed. The check can take several minutes to complete. To run this tool, perform the following steps.
Open a command prompt. (Standard user privilege level is OK.)
Type sigverif.exe and press Enter.
The File Signature Verification Tool appears.
Review the Advanced options.
Click Start and view the results, as shown in Figure 1-28.
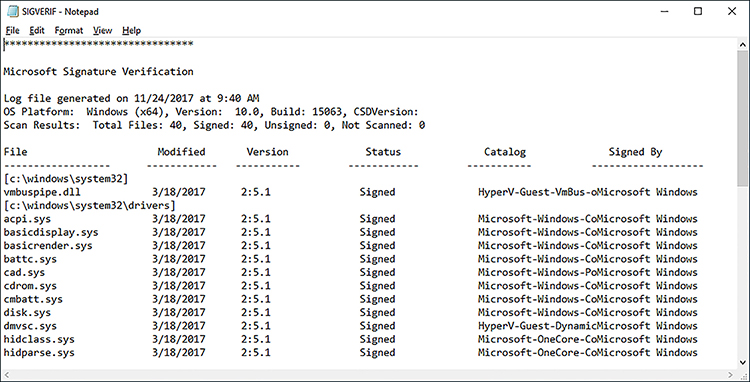
FIGURE 1-28 File Signature Verification tool output
The sigverif tool is useful if you need to locate an unsigned driver, but there is a more powerful driver verification tool built into Windows 10, called the Driver Verifier Manager.
![]() Exam Tip
Exam Tip
In the advanced settings of the Signature Verification tool is the file name of the log file, a good thing to know for the exam. Review the log file found at %SystemRoot%Sigverif.txt after the operation has completed.
With the enhanced kernel mode operation and reliance on signed drivers, Windows 10 should be less prone to frequent Stop errors. Although less likely, even signed drivers can cause problems, especially if you have an exotic combination of hardware inside your computer. If you do encounter instability then, use the built-in Driver Verifier to discover whether a faulty driver is causing the problem.
Driver Verifier Manager can help you troubleshoot, identify, and resolve common device driver problems, and you can then remove, reinstall, or roll back the offending driver with Device Manager.
To run the series of driver tests, follow these steps.
Open a command prompt (Admin), using administrative privileges.
Type verifier.exe and press Enter.
The Driver Verifier tool appears.
Review the settings in the tool.
Depending on which option you choose, you might need to restart your machine for the tool to recognize all loaded drivers.
After you have selected drivers to be tested, restart the computer, restart the application, and then select Display Information About The Currently Verified Drivers.
Driver Verifier Manager tests each specified driver at startup and then enables you to perform live test of each loaded driver by a range of tests, as shown in Figure 1-29. If it detects a problem, the tool can identify the driver, and then you can disable it.
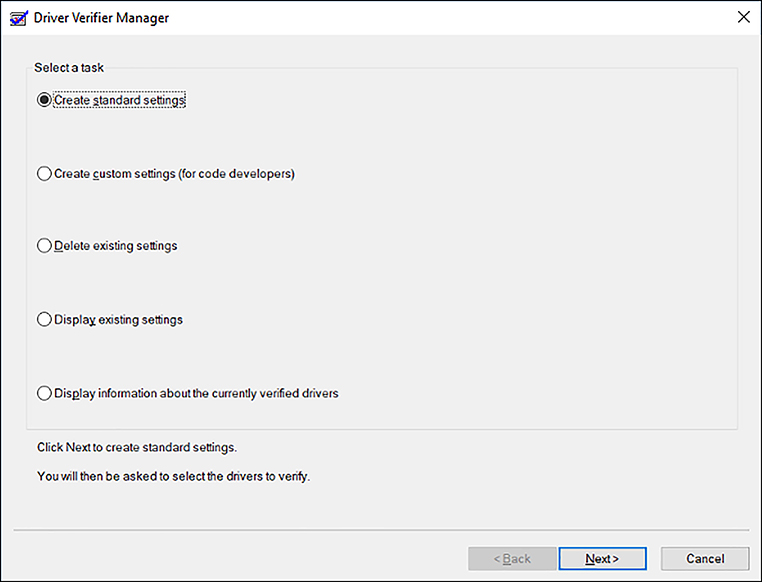
Configure driver settings
Device drivers provide Windows 10 with the information required to populate the device details that you find in Device Manager. If only a few details are available to view, the device might have been installed using the built-in driver, and you might be able to install a driver from the manufacturer’s website, which will give additional information through Device Manager.
In this section, you explore Device Manager, configure driver settings that are available for installed devices, and look at how to view and configure settings for older hardware.
View device settings
The default Device Manager screen enables users to work directly in the Properties dialog box of a device and provides information about the device that the hardware and device driver provide. The following is a review of Device Manager features that you can use to explore the available information so that you can configure the driver settings.
In Device Manager, explore these four menu options.
File This menu enables you to exit the console and optionally delete the record of the console customizations you make to the console settings.
Action This menu enables you to access the action-specific tasks relating to the highlighted hardware, including Update Driver Software, Disable, Uninstall, Scan For Hardware Changes, Add Legacy Hardware, Properties, and Help.
View This menu enables you to change how the console view displays advanced information relating to the devices listed in Device Manager. You can view devices by device type or connection or resources by type or connection. Some hardware is also hidden from normal view, and this option can be set to show hidden devices. The Customize option enables you to show or hide items within the console.
Help This menu offers access to help topics relating to Device Manager and the console, plus a link to help available online.
There are several advanced views in Device Manager that standard users do not normally use. These include the connection type and hidden device views, as follows.
Show Hidden Devices In previous versions of Windows, printers and non Plug and Play (PnP) devices could be marked by the device manufacturer as a NoDisplayClass type of device, which prevents it from automatically being displayed in the Device Manager. Devices that have been removed from the computer but whose registry entries are still present can also be found in the hidden devices list.
Devices By Type This is the default view and shows devices grouped by familiar device name such as Network Adapters, Ports, and Disk Drives. Each node can be expanded by selecting the > symbol to the left of the node name.
Devices By Connection You can view devices based on the hardware connection, such as physical or virtual.
Resources By Type Use this option to view resources organized by how they connect to system resources, including Direct Memory Access (DMA), Input/Output (IO), Interrupt Request (IRQ), and Memory. Unless your BIOS allows you to declare that you are not using a Plug And Play compliant operating system, you will not be able to modify these settings.
Resources By Connection This view is for advanced users only and is not particularly useful on a modern system. Viewing the device hardware resources by DMA, IO, IRQ, and Memory were useful for earlier versions of Windows prior to the introduction of Plug And Play, which allowed the operating system to manage automatically the resources required by devices.
Support for older hardware
Some of the advanced settings in Device Manager are seldom used, but have been retained for backward compatibility with older devices that do not support Plug And Play. Modern hardware peripherals must support Plug And Play, which allows Windows 10 to assign hardware resources automatically to new devices. If you look on the Resources tab of a device Properties dialog box in Device Manager, you see that a check box is selected indicating that Windows 10 is using automatic settings, as shown in Figure 1-30. The setting is dimmed and not changeable unless you disable the BIOS/UEFI setting, which declares that the operating system is Plug And Play compliant.
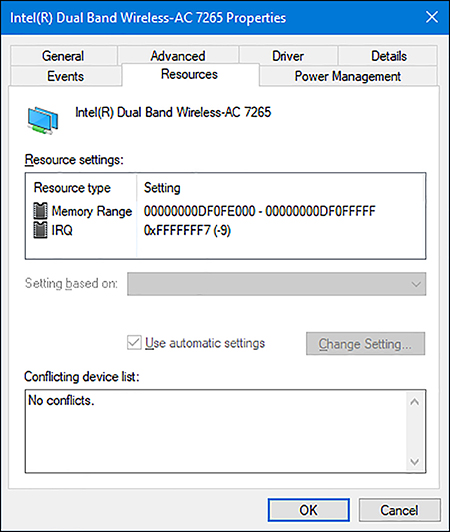
The Plug And Play standard for connecting devices to Windows is nearly two decades old. Some hardware still exists that requires the administrator to install it manually. In Device Manager, the Add Hardware Wizard enables you to install hardware that does not support Plug And Play. To install such hardware, perform the following steps.
Open Device Manager.
On the Action tab, click Add Legacy Hardware.
On the Welcome To The Add Hardware Wizard page, click Next.
Select one of these options:
Search For And Install The Hardware Automatically (Recommended)
Install The Hardware That I Manually Select From A List
Follow the wizard prompts to finish the configuration of the hardware and provide the driver when requested.
Note Non-PnP (older) devices are not shown in Windows 10
Since Windows 8 and Windows Server 2012, non-PnP devices have not been represented in Device Manager as viewable nodes.
Driver signing
One of the reasons Windows 10 is more secure than earlier versions of Windows is that kernel mode drivers must now be submitted to and digitally signed by the Windows Hardware Developer Center Dashboard portal: http://msdn.microsoft.com/en-us/windows/hardware/gg236587.aspx. Windows 10 will not load kernel mode drivers that the portal has not signed.
To ensure backward compatibility, drivers that are properly signed by a valid cross-signing certificate will continue to pass signing checks on Windows 10.
Need More Review? Driver signing changes in Windows 10
This MSDN resource provides more depth on driver signing changes in Windows 10 at https://blogs.msdn.microsoft.com/windows_hardware_certification/2016/07/26/driver-signing-changes-in-windows-10-version-1607/.
Windows 10 also introduces a new Universal Windows driver, which is designed to work on all OneCoreUAP-based editions of Windows, such as Windows 10 for desktop editions (Home, Pro, Enterprise, and Education), Windows 10 Mobile, and Windows 10 Internet of Things Core (IoT Core).
A Universal Windows driver has access to the trusted kernel and has a very limited range of the interfaces that are available to a Windows driver. OEMs can supplement the driver functionality by including additional software, but this will be external to the driver. Windows 10 security is more robust by locking down the kernel to signed drivers and encouraging developers to use the Universal Windows driver model.
For information about how to build, install, deploy, and debug a Universal Windows driver for Windows 10, see Getting Started With Universal Windows Drivers.
Need More Review? Windows 10 Universal Windows drivers
This MSDN resource provides more depth on Universal Windows drivers at: https://msdn.microsoft.com/library/windows/hardware/dn927349(v=vs.85).aspx.
If you have a specific need to install an unsigned driver, and say you are a developer and work with drivers, wanting to test the driver functionality without having to sign the driver digitally each time, you can invoke a special boot-time configuration setting that bypasses the security the Windows 10 driver enforcement model provides. To load an unsigned driver (not recommended), you can follow these steps.
Sign out of Windows 10.
On the sign in screen, click the Power button, hold down the Shift key, and click Restart.
On the Choose An Option screen, choose Troubleshoot.
Choose Advanced Options.
On the Advanced Options screen, select Startup Settings and click Restart.
Advanced Boot Options appears.
Choose Disable Driver Signature Enforcement, as shown in Figure 1-31.
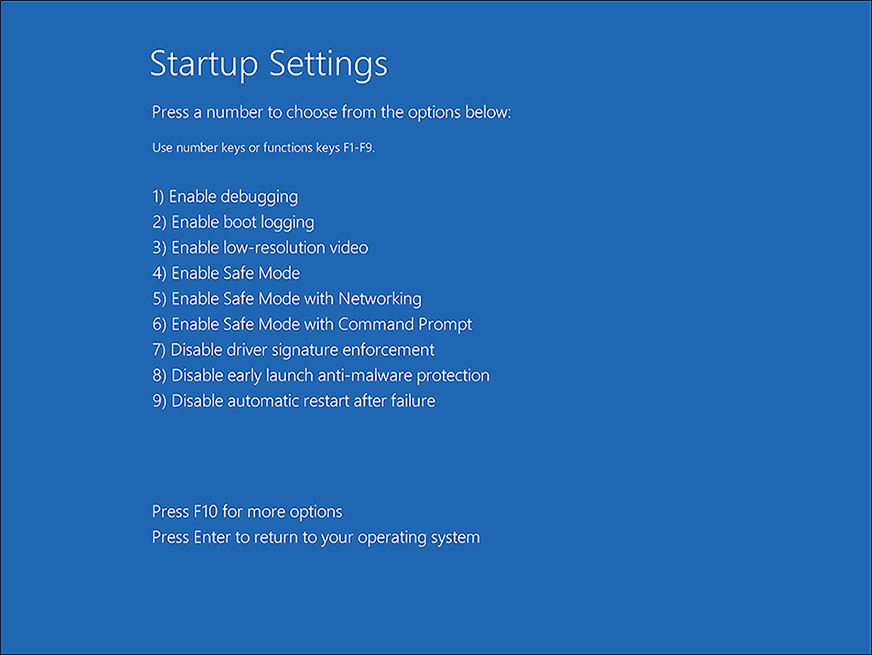
FIGURE 1-31 Disable Driver Signature Enforcement Install the unsigned driver and then restart the computer.
Manage driver packages
When device drivers are created by the original equipment manufacturer (OEM), they are deployed with the hardware in a driver package that includes all of the files and information required for Windows 10 to communicate with the hardware. You see how driver packages are managed and how to install, provision, and import driver packages on Windows 10 devices.
Use the driver store
You saw earlier that the driver package can include an information file (.inf file), any files that the .inf file references, and a .cat file that contains the digital signature for the device driver. Windows 10 uses the Driver Store to hold device drivers that have been installed or pre-staged.
All Windows 10 kernel mode drivers must be digitally signed by the Windows Hardware Developer Center Dashboard portal. Windows 10 will prevent the loading of new kernel mode drivers that are not signed by the portal. This is an important change from previous versions of Windows and will make the operating system more secure. Previously, it was possible for a hacker to gain unauthorized access to a system by using a flaw in an unsigned device driver. Ensuring that all drivers are digitally signed will remove the ability for a hacker to add or modify device driver contents.
If you are creating a custom installation image, or if you build and deploy many computers, you can speed up the driver installation process by pre-loading the Windows 10 driver store with the specific drivers for the peripheral devices that your devices will be using. When Windows 10 finds the drivers it needs in the driver store, located in %SystemRoot%System32DriverStore, it uses these local drivers and does not download them from Windows Update.
Pre-installing a driver is a two-stage process, and the first stage must be carried out with administrator credentials. You need to add the driver package to the driver store and then ensure that the hardware is attached. Windows 10 then automatically locates and installs the local driver.
There are a few ways to deploy drivers to the driver store, and the most appropriate method will depend on your physical network infrastructure, network connectivity, and among other things, the level of administrative privileges on devices.
Note Avoid deleting files from the driver store
You should take care not to delete driver packages manually from the driver store. Doing so can cause an inconsistency among the INF file, the driver store catalog, and the driver in the driver store. For more information, go to: https://msdn.microsoft.com/library/windows/hardware/ff546200(v=vs.85).aspx.
Use PnPUtil.exe to manage driver packages
To pre-stage the installation of a specific hardware device, you can install a driver manually before connecting the device by using the PnPUtil.exe command-line tool. This can be useful when distributing a laptop to a remote user who you know has a local printer or scanner. Standard users cannot normally install device drivers, but this is possible if the driver package is already in the driver store.
Run the PnPUtil.exe command by using administrative privileges, and you can use it to manage the Driver Store, adding, deleting, and listing driver packages. You saw earlier that a driver package consists of all the information Windows 10 requires to install and trust the driver, including the following.
Driver files Dynamic link library (DLL) files and files with a .SYS file extension.
Installation files Text files containing all of the information needed to install a driver. These .inf files include information such as driver name and location, driver version information, and registry information. These files are copied to the %SystemRoot%Inf directory during installation. Every installed device must have an .inf file.
Driver Catalog file Contains a cryptographic hash of each file in the driver package. These hashes are used to verify that the package was not altered after it was published (created). Digitally signing the catalog file proves the file has not been altered, because only the digital signature owner can sign the file.
Additional files These are files such as a device installation application, device icon, device property pages, and additional files.
For enhanced security, Windows 10 now uses a single kernel model across all editions of Windows 10 and is encouraging the use, of a new universal driver model. This universal .inf file is required when deploying device drivers to an offline system image, such as when building a Windows 10 Mobile system (which does not support Plug And Play).
The syntax for the PnPUtil.exe command-line tool is as follows.
PnPUtil.exe a <path to the driver> <drivername>.inf
The full list of parameters is shown in Table 1-10.
TABLE 1-10 PnPUtil.exe parameters
Parameter |
Description |
|---|---|
-a |
Adds a driver package to the driver store |
-d |
Removes a driver package from the driver store |
-e |
Lists the driver packages that are currently in the driver store |
-f |
Forces the deletion of the specified driver package from the driver store; cannot be used with the -i parameter. |
-i |
Installs the driver package on matching devices that are connected to the system. Cannot be used with the -f parameter |
/? |
Displays help |
An example command to add the INF file specified by MyDevice.inf to the driver store (located at %SystemRoot%System32DriverStore) is:
PnPUtil.exe -a C:TempMyDevice.inf
![]() Exam Tip
Exam Tip
After a driver has been added to the driver store, the driver is referenced in the store through its published name, which might be different from the driver package (.inf) name. You can review the published name by viewing the contents of the .inf file.
In addition to the PnPUtil.exe tool, you can use the following Windows PowerShell cmdlets.
Get-PnpDevice Displays information about PnP devices
Get-PnpDeviceProperty Displays detailed properties for a PnP device
Enable-PnpDevice Enables a PnP device
Disable-PnpDevice Disables a PnP device
An example Windows PowerShell command to enable the device with an instance ID of ‘USBVID_5986&;PID_0266&;MI_007&;1E5D3568&;0&;0000’ is as follows.
PS C:> Enable-PnpDevice -InstanceId 'USBVID_5986&;PID_0266&;MI_007&;1E5D3568&;0&;0000'
For more information about, or for the syntax of, any of the Windows PowerShell cmdlets, you can use the Get-Help <cmdlet name> cmdlet such as the following.
Get-Help <cmdlet name> -Examples
Download driver packages
Drivers are packaged together. Each driver package consists of all the software components that are needed for your device to work with Windows.
Most drivers are obtained directly by using built-in tools such as Windows Update, but if you are provisioning systems, you might want to deploy the PC with the required drivers already imported and configured.
Device drivers can be accessed to perform a malicious attack on your systems. Therefore, you should ensure that driver packages are sourced only from reputable locations such as the manufacturer’s own website. You should avoid third-party driver repository websites because some sites repackage drivers and include spyware or freeware products in the installation files.
The built-in Windows 10 driver packages are often just the core drivers created by your device manufacturer and provided by Microsoft through the Windows Hardware Quality Labs (WHQL), which tests and digitally signs the drivers. Video drivers often include additional software support and hardware functionality. For example, drivers sourced directly from NVIDIA or AMD for their graphics cards include the NVIDIA Control Panel or the AMD Catalyst control panel, respectively.
If you are seeking the most up-to-date or even beta version of a device driver, you must download this directly from your device manufacturer. In most cases, you will not need to upgrade your device driver after Windows 10 is installed. If everything is working properly, you probably don’t need to install extra hardware drivers.
If you are a gamer, it can be beneficial to ensure that your graphics card drivers are using the latest versions so that they support the latest PC games.
You should consider downloading new driver packages in the following scenarios.
If you play PC games Install the latest graphics drivers directly from your graphics card manufacturer because they are often required to play the latest games. Newer versions can also improve graphics performance.
When you need a hardware utility Install the latest version if the manufacturer-provided driver package includes a hardware utility, such as a network configuration tool or ink monitor for your printer.
To resolve a bug Bugs can be found in released drivers and will often be fixed in the most up-to-date version.
To install hardware manually If Windows Plug And Play does not automatically detect and install the hardware, you might need to download the driver package from the manufacturer and install the device driver.
Use Deployment Image Servicing And Management tool to add packages
You saw earlier that the Deployment Image Servicing and Management (DISM) tool is now included as part of the Windows 10 operating system. It is useful for offline image servicing. DISM is a command-line tool that you can use to maintain images and apply them with Windows Updates. It is also used to add and remove Windows features, including language packs, and to manage device drivers.
Add packages using DISM
If you have a custom Windows 10 image, you can use DISM to modify it, and the changes will be visible when you next deploy the image. This can be useful when you know that a driver has been updated since you built the deployment image. Using DISM to inject the new driver saves you from having to rebuild the whole image. Using DISM is similar to using a file compression tool such as WinRAR, whereby you add or remove new files and then WinRAR reseals the .wim, .vhd, or vhdx file ready for deployment.
When you use DISM to install a device driver to an offline image, the device driver is added to the driver store. When the image is booted, Plug And Play (PnP) runs, looks for drivers in the store, and associates them with the corresponding devices on the computer they’re being installed on.
To add drivers to an offline image by using DISM, use these steps.
Right-click the Start button and select Command Prompt (Admin).
Establish the name or index number for the image that you are servicing by typing:
Dism /Get-ImageInfo /ImageFile:C: estimagesinstall.wim
Mount the offline Windows image by typing the following.
Dism /Mount-Image /ImageFile:C: estimagesinstall.wim /Name:"Windows Offline Image" /MountDir:C: estoffline
You can now add the driver, located in the C:Drivers folder, to the image by typing:
Dism /Image:C: estoffline /Add-Driver /Driver:C:driversNew_driver.inf
If you have additional drivers in a folder, you can use the /Recurse option, which installs all the drivers from a folder and all its subfolders. To do this, type:
Dism /Image:C: estoffline /Add-Driver /Driver:c:drivers /Recurse
You can review the drivers in the Windows image by typing:
Dism /Image:C: estoffline /Get-Drivers
In the list of drivers, notice that the added drivers have been renamed Oem*.inf. This ensures that all driver files in the driver store have unique names. For example, the New_Driver1.inf and New_Driver2.inf files are renamed Oem0.inf and Oem1.inf.
To complete the operation, commit the changes and unmount the image by typing:
Dism /Unmount-Image /MountDir:C: estoffline /Commit
Need More Review? DISM
For a detailed reference for the DISM command-line options, you can visit the following website: https://docs.microsoft.com/en-us/windows-hardware/manufacture/desktop/deployment-image-servicing-and-management--dism--command-line-options.
Manage driver packages with DISM
During the life of a Windows 10 installation, the system downloads and installs multiple versions of device driver packages over time. For devices with small hard-drive capacity, be aware of how to locate and delete outdated driver packages that the system retains.
You can use the built-in Disk Cleanup tool to remove device driver packages that have been kept after newer drivers are installed.
To clean up old device drivers by using the Disk Cleanup tool, perform these steps.
Click the Start button, type Disk Cleanup, and then select the Disk Cleanup app.
In the Drive Selection dialog box, select (C:) and click OK.
On the Disk Cleanup results screen, select Clean Up System Files.
In the Drive Selection dialog box, select (C:) and click OK.
On the Disk Cleanup results screen, select Device Driver Packages and click OK.
On the Are You Sure You Want To Permanently Delete These Files page, click Delete Files.
All driver packages that were installed during the Windows 10 setup process are stored in a directory called WinSxS, the side-by-side component store. This folder contains driver packages and operating system components so that you can add devices later without having to supply device drivers. If disk space is limited, you can purge the WinSxS directory contents, because it could occupy a significant amount of disk space.
To analyze the Windows Component Store for driver packages and other files that can be deleted, you can use the DISM command by using the following steps.
Right-click the Start button, select Windows PowerShell (Admin), and type the following.
DISM /Online /Cleanup-Image /AnalyzeComponentStore
The tool analyzes your system. Typical results are shown in Figure 1-32.

FIGURE 1-32 Analyzing the Component Store (WinSxS) with DISM When the analysis is complete, you can initiate a cleanup of the Windows Component Store by typing the following command.
DISM /Online /Cleanup-Image /StartComponentCleanup /ResetBase
Important Do not delete the WinSxS folder
Do not manually delete the WinSxS directory or its contents to reclaim the space, because Windows creates many hard links from files in the WinSxS folder to locations in system folders.
Skill 1.4: Post-installation configuration
After you have installed Windows 10 and configured devices, you must configure the operating system to meet your users’ specific needs. The nature of this post-installation configuration varies, but typically includes power settings, customization of the user interface, and, where necessary, a configuration of accessibility options.
You might also configure some of the new features in Windows 10, such as Cortana and Microsoft Edge. The 70-698 Configuring Windows 10 exam also covers the configuration of the Client Hyper-V role and how to create, configure, and manage virtual machines.
Configure and customize the user interface per device type
After you have activated Windows 10, you can customize the user interface. In some respects, the Windows 10 user interface is familiar to users of Windows 7. It has a Start menu, a desktop, and a taskbar. These things all appear in Windows 7. However, because Windows 10 is designed to work across a variety of device types, including phones, tablets, and traditional desktop computers, it provides additional ways for users to interact.
As an IT pro, it is important for you to understand how to customize the Windows 10 user interface, including Start, taskbar, desktop, and notification settings. This enables you to ensure that the operating system interface meets the needs of the users in your organization.
Customize the user interface
If you’re a Windows 7 user, the most noticeable change in the user interface is the support for touch. As a consequence, much of the user interface has been redesigned to support touch actions, such as swipe and pinch. Because of these and other changes, the user interface is somewhat different from earlier versions of Windows, such as Windows 7.
Customize Start
These differences are nowhere more evident than in Start. The appearance of Start depends on your device type, for example, a tablet or desktop PC. If you are using a tablet, then by default, Start appears full screen, as shown in Figure 1-33. This is easier to navigate when using a touch device.
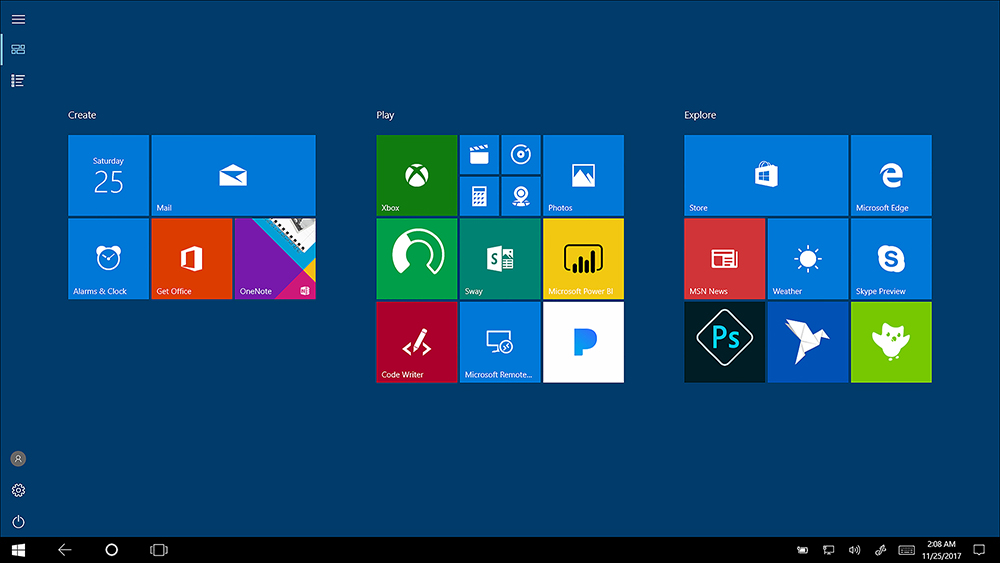
If you are using a non-touch device, then by default Windows 10 displays Start as a menu that is fairly similar to that in Windows 7, as shown in Figure 1-34. This is more easily navigable by using a mouse than by using touch.
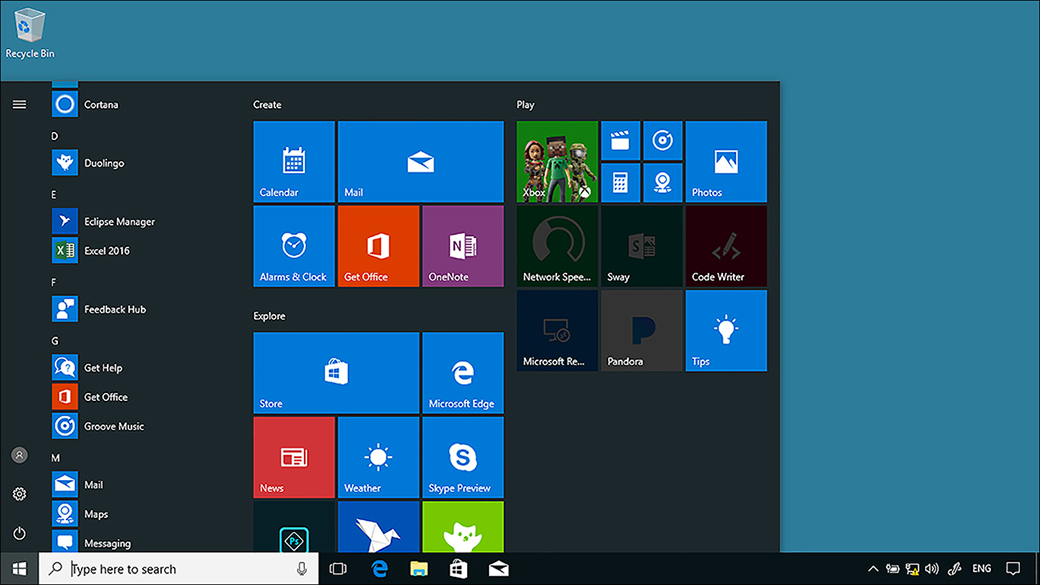
You can configure the Start menu behavior from Settings. Click Personalization and then click the Start tab. You can then select the option to Use Start Full screen, as shown in Figure 1-35.
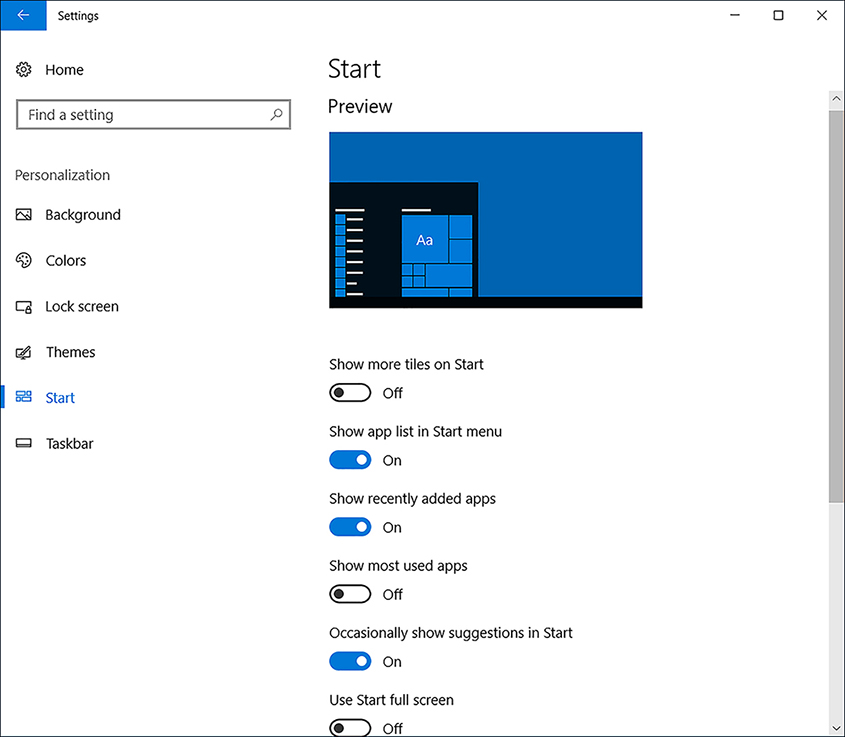
The Start customizations shown in Figure 1-35 are:
Show More Tiles on Start This setting enables you to display more tiles when Start is configured for partial-screen mode.
Show App list in Start menu Enables an alphabetical list of all apps to the left of the Start screen.
Show Recently Added Apps Any recently installed apps are marked as new in Start.
Show Most Used Apps Windows 10 tracks your app usage and lists your most frequently used apps in a Most Used Apps list in Start.
Occasionally Show Suggestions In Start This setting enables or disables app suggestions in Start.
Use Start Full Screen Enables Start to display full screen. This is more useful on a tablet device that a device with a mouse.
Show Recently Opened Items In Jump Lists On Start Or The Taskbar This setting enables Windows 10 to remember recently opened files and list those in the context menu of apps appearing in Start or on the taskbar.
Choose Which Folders Appear On Start This setting enables you to set shortcuts for the following folders on Start: File Explorer, Settings, Documents, Downloads, Music, Pictures, Videos, HomeGroup, Network, and Personal folder.
Convertible devices
Some devices, including the Microsoft Surface Pro, can switch in and out of Tablet mode with the removal and reattachment of the keyboard, or by reorienting the device. When a device switches like this, you can choose whether Windows switches to full-screen Start (tablet mode), as shown in Figure 1-36.
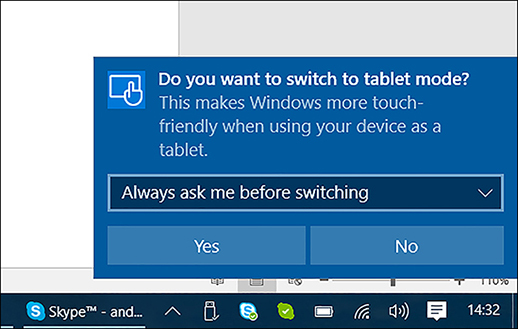
You can configure the default behavior through the Settings app. Click System and then click the Tablet Mode tab. As shown in Figure 1-37, you can then configure the following options.
When I Sign In:
Use tablet mode.
Use desktop mode.
Use the appropriate mode for my hardware.
When This Device Automatically Switches Tablet Mode On Or Off:
Don’t Ask Me And Don’t Switch.
Always Ask Me Before Switching.
Don’t Ask Me And Always Switch.
Hide app icons on the taskbar in tablet mode
Automatically hide the taskbar in tablet mode

FIGURE 1-37 Tablet mode options
Note Tablet mode
Tablet mode also changes applications so that they run full screen.
Configuring tiles
In addition to enabling or disabling Start full-screen behavior, you can also customize the application tiles that appear on Start and how those tiles look and behave. From Start, click All Apps and then right-click the appropriate app, as shown in Figure 1-38. Click Pin To Start.
When a tile is pinned to Start, you can configure it. Right-click the tile and, from the context menu, you can:
Unpin from Start.
Resize:
Choose from Small, Medium, Large, and Wide, depending on the app.
More:
If the app is a Microsoft Store app, choose from Turn Live Tile Off, Pin To Taskbar, Rate And Review, and Share.
If the app is a desktop app, choose from Pin To Taskbar, Run As Administrator, and Open File Location.
Uninstall.
Note Uninstalling desktop apps from Start
If the app you select to uninstall is a desktop app, Programs And Features opens in Control Panel. You must now manually remove the desktop app.
If your device is touch-enabled, the procedure is slightly different than when using a mouse to configure tiles. Rather than right-clicking a tile from Start, you must touch and hold a tile. Then you can unpin the tile by using the unpin icon. Use the ellipse button to access the context menu, as shown in Figure 1-39.
Grouping tiles
After you have added the required tiles to Start, you might want to group the tiles. You can perform the following actions on groups.
To create a new group of tiles, simply drag a tile to an area of unused space on Start.
To name a group, hover your mouse or tap the screen immediately above the group of tiles and then type the name for your group in the text box that appears.
To move tiles between groups, drag the required tile to the new group.
Configuring Start with Group Policy Objects
Although you can manually drag and resize tiles on Start for each computer in your organization, it is time-consuming. In an AD DS environment, you can control Start layout by using Group Policy Objects (GPOs). Figure 1-40 shows the Start Layout GPO value.

To use GPOs to control Start layout, first create an XML layout file and store the file in an accessible location such as a shared folder. The easiest way to do this is to use the following procedure.
Configure a test computer and establish the layout for Start that you want to propagate throughout your organization.
Open Windows PowerShell.
Run the export-StartLayout filename.xml cmdlet.
Copy the exported file to a shared folder.
Next, you must modify the following GPO path: User ConfigurationPoliciesAdministrative TemplatesStart Menu and TaskbarStart Layout. To do this, complete the following procedure.
Open Group Policy Management on a domain controller.
Navigate to the appropriate AD DS container, such as your domain.
Open an existing GPO for editing or create a new GPO, link it to your chosen container, and open it for editing.
Navigate to the User ConfigurationPoliciesAdministrative TemplatesStart Menu And Taskbar folder and open the Start Layout value.
Enable the value and, in the Start Layout File text box, type the full UNC path name to your XML file, for example, \LON-SVR1MarketingMarketing.XML.
Click OK and close Group Policy Management.
For the policy to be effective, users must sign out and sign back in. Alternatively, you can issue a Gpupdate.exe /force command from an elevated command prompt to force GPO propagation.
Need More Review? Customize Windows 10 Start with Group Policy
For more information about customizing Start with GPOs, visit the Microsoft website at https://docs.microsoft.com/en-us/windows/configuration/customize-windows-10-start-screens-by-using-group-policy.
In addition to the Start layout, you can control other aspects of Start with GPOs. Table 1-11 shows the elements that you can control with GPOs and the respective values to use within GPOs. Unless otherwise noted, the path for these GPO settings is User ConfigurationPoliciesAdministrative TemplatesStart Menu And Taskbar.
TABLE 1-11 Using GPOs to configure Start
Start element |
Policy |
|---|---|
User tile |
Remove Logoff on the Start menu |
Most Used |
Remove frequent programs list from the Start menu |
Suggestions |
Computer ConfigurationPoliciesAdministrative TemplatesWindows Components Cloud ContentTurn Off Microsoft Consumer Experiences |
Power |
Remove And Prevent Access To The Shut Down, Restart, Sleep, And Hibernate Commands |
All Apps |
Remove All Programs List From The Start Menu |
Jump lists |
Do Not Keep History Of Recently Opened Documents |
Start size |
Force Start To Be Either Full Screen Size Or Menu Size |
All Settings |
Prevent Changes To Taskbar And Start Menu Settings |
Customize the desktop
In addition to customizing Start to your requirements, you can configure Desktop and related settings. To configure Desktop, from Start, click Settings and then click Personalization.
From the Personalization settings app, you can configure the following settings.
Background You can select and configure a desktop background image or color.
Colors On the Color tab, you can choose a color scheme and optionally configure the following options.
Enable transparency effects.
Show accent color on the following surfaces: Start, taskbar, and action center; Title bars.
Choose the default app mode: light or dark.
Access the High contrast settings.
Lock screen From the Lock screen tab, as shown in Figure 1-41, you can select and configure a background image to display when your Windows 10 device is locked. In addition, you can:
Choose a lock screen background image.
Choose An App To Show Detailed Status, for example, Calendar.
Choose Apps To Show Quick Status, for example, Facebook, Mail, Calendar, Alarms & Clock.
Configure Cortana lock screen settings.
Show lock screen background picture On The Sign-In Screen.
Configure screen timeout settings and screen saver settings.
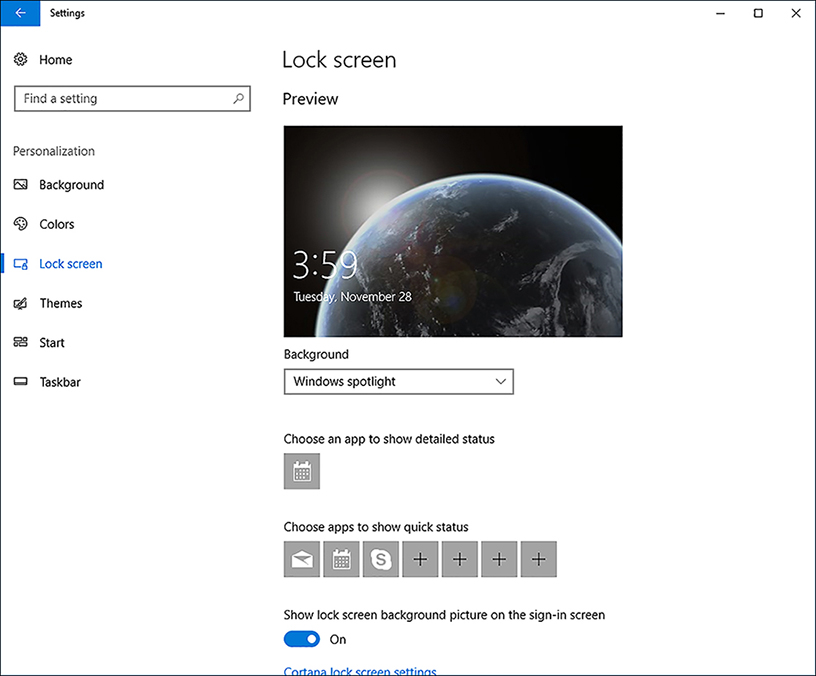
FIGURE 1-41 Customizing Lock Screen
Themes This setting enables you to configure and apply theme settings. Themes enable you to define combinations of background, color, sound, and cursor settings. You can also configure Desktop Icon settings, as shown in Figure 1-42.
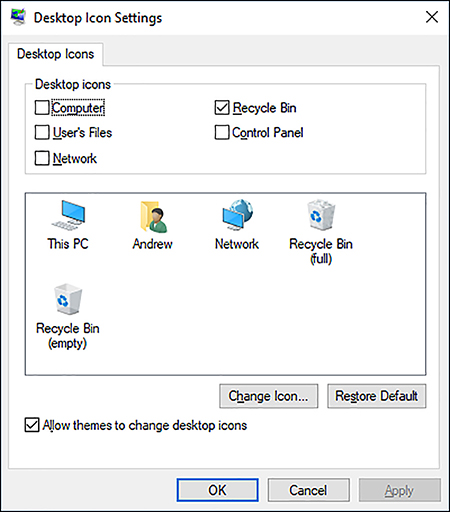
FIGURE 1-42 Configuring Desktop icon settings Start You can also configure Start settings, as previously discussed.
Taskbar From this tab, amongst other settings, you can lock the taskbar, automatically hide the taskbar when in tablet mode, use small taskbar buttons, and configure the way running tasks and apps combine on the taskbar.
Multiple desktops
Windows 10 provides support for multiple desktops. This provides a simplistic multitasking view. Rather than running apps in multiple windows on the same desktop, you can add desktops for groups of apps or individual apps.
To add a new desktop, click the Task View button on the taskbar and then click New Desktop in the lower right of the display. A new desktop is created. To switch between desktops, click the Task View button and select the appropriate desktop as shown in Figure 1-43. Note that the desktop is only present until you sign out or restart your computer.

Configure Action Center and taskbar
In Windows 10, Microsoft introduces an improved Action Center, shown in Figure 1-44. This is accessible by swiping from the right or by clicking the Notifications icon in the system tray.
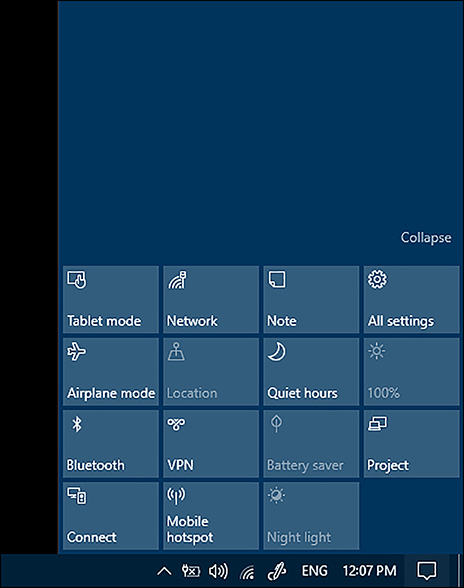
Action Center includes the following elements.
The Quick Action tiles, shown at the bottom of Figure 1-44. These are configurable.
The notifications area. You can configure how Windows notifies you of events.
Configure Quick Action tiles
The Quick Action tiles are commonly used features of the Windows 10 operating system. When the expanded view is selected, a larger number of tiles are visible. The tiles that appear in the expanded view shown in Figure 1-44 depend on your device type and orientation. For example, if your computer is not a tablet, and is not capable of converting into a tablet, the Tablet Mode tile is not available. By default, in the expanded view, the following tiles are available.
Tablet Mode Enables you to switch between tablet and desktop modes.
Rotation Lock Enables or disables the rotation lock. Normally, the display orients itself based on the orientation of your Windows 10 device, switching between landscape and portrait modes. Use this option to lock the orientation irrespective of physical orientation.
Airplane Mode Disables all internal radios in the device, including Wi-Fi and Bluetooth. This is convenient when you want to save battery in addition to when you travel on an aircraft.
All Settings Provides a convenient shortcut to Settings.
Connect Enables you to find and connect to media servers. This includes Xbox and other devices running Windows that are sharing their media files. It can also include devices such as TV set-top boxes.
Project Enables you to link your device to an external monitor or wireless display.
Battery Saver Only available when your device is running on battery alone; helps reduce power consumption. You can configure Power Options and Battery Saver in Settings.
VPN Switches to the VPN tab in the Network & Internet settings app. From there, you can set up, configure, or connect to a VPN.
Bluetooth Enable or disables the Bluetooth radio.
Brightness Enables you to control display brightness. Click this tile to step through brightness levels in increments of 25 percent.
Note Opens Microsoft OneNote and displays your default note.
WiFi Enables or disables the Wi-Fi connection.
Quiet Hours Toggles into quiet hours mode. This setting reduces the notifications you receive. You can configure Quiet Hours in Settings.
Night Light Toggles your display to remove white light. You can configure Night Light in Settings.
Location Enables or disables location services. Many services use location to customize services, such as mapping apps, for your device.
If you want to configure which tiles appear in the collapsed view, shown in Figure 1-45, from Quick Actions, click All Settings, choose System, and then click the Notifications & Actions tab.
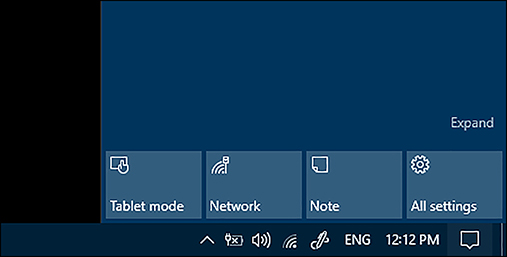
You can then use the buttons under Quick Actions to determine which tiles appear in the collapsed view, as shown in Figure 1-46.
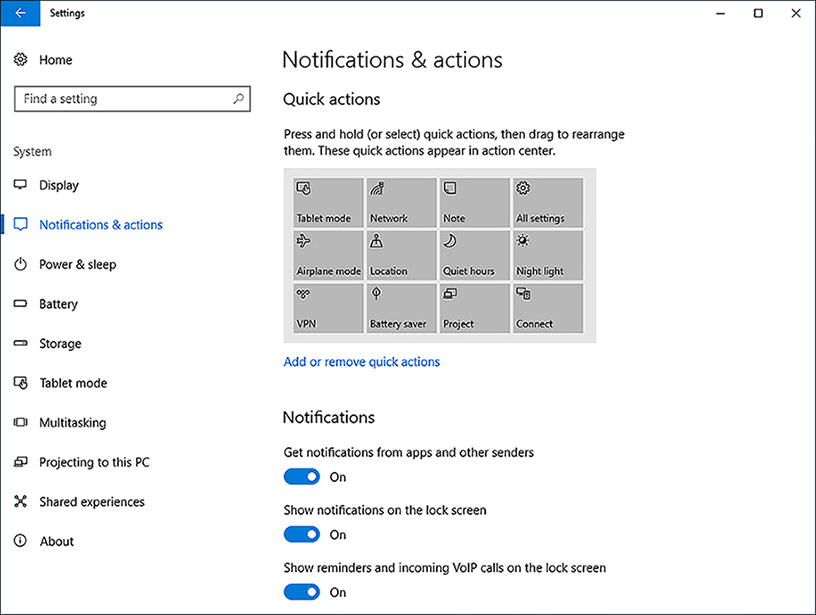
Configure notifications
When Windows 10 wants to inform you about something, it raises a notification. You can see and act on the notifications in a list shown in Action Center. To respond to a notification, click it. You can remove notifications by clicking Clear All at the top of the page.
Windows notifies you about a variety of operating system events and situations, including the need to obtain updates or perform an antivirus scan, and Windows also prompts about which actions you want to take when a new device, such as a USB memory stick, has been detected.
As shown in Figure 1-47, you can configure which notifications you receive by opening Settings. Click System and then click Notifications & Actions. Under Notifications, you can configure the following options.
Get notifications from apps and other senders.
Show Notifications On The Lock Screen.
Show Reminders And Incoming VoIP Calls On The Lock Screen.
Hide Notifications When I’m Duplicating My Screen.
Get tips, tricks, and suggestions as you use Windows.
Show me the Windows welcome experience after updates and occasionally when I sign in to highlight what’s new and suggested.
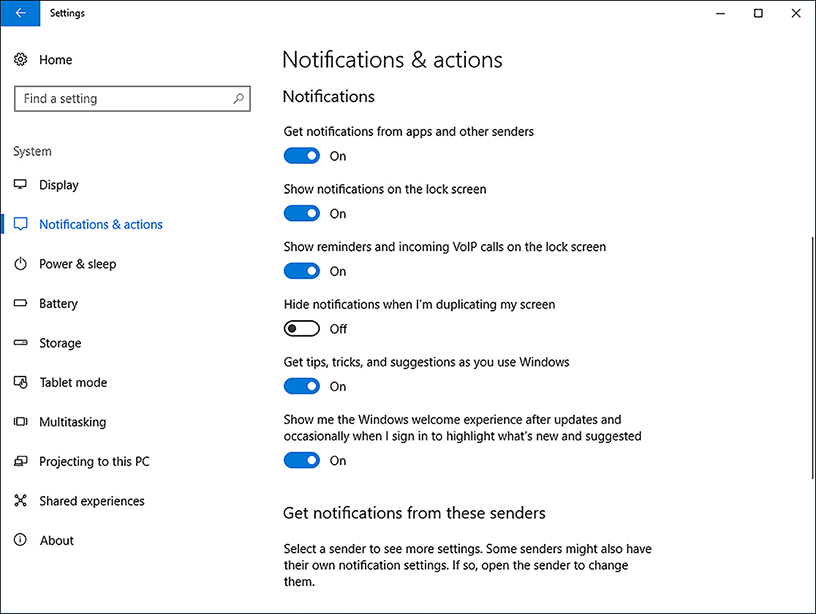
FIGURE 1-47 Configuring Windows 10 notifications
You can also configure individual apps and how they will notify you. As shown in Figure 1-48, under the Get notifications from these senders heading, enable or disable notifications for each listed app.
![]() Exam Tip
Exam Tip
You can use GPOs to disable notifications in Windows 10 Pro, Windows 10 Enterprise, and Windows 10 Education editions. Use the User ConfigurationPoliciesAdministrative TemplatesStart Menu And Taskbar node and enable the Remove Notifications And Action Center value.
Configure the taskbar
You can configure the taskbar to suit your users’ requirements. Right-click the taskbar, and then you can specify the following options, as shown in Figure 1-49.
Toolbars Define which toolbars are accessible from the taskbar. Options for which toolbars are available, based on system configuration, but include Address, Links, and Desktop.
Cortana Choose between Hidden, Show Cortana icon, and Show search box.
Show Task View button
Show Windows Ink Workspace button
Show touch keyboard button
Lock The Taskbar
FIGURE 1-49 Configuring the taskbar
For more configuration options, right-click the taskbar and then click Taskbar settings. As shown in Figure 1-50, you can then configure the following options.
Lock The Taskbar
Automatically hide the taskbar in desktop mode
Automatically hide the taskbar in tablet mode
Use Small Taskbar Buttons
Use Peek To Preview The Desktop When You Move Your Mouse To The Show Desktop Button At The End Of The Taskbar
Replace Command Prompt with Windows PowerShell in the menu when I right-click the start button or press Windows key+X
Show badges on taskbar buttons
Taskbar Location On Screen: Bottom; Left; Right; or Top
Combine Taskbar Buttons: Always, Hide Labels; When Taskbar Is Full; Never
Show Taskbar On All Displays:
Show Taskbar Buttons On: All Taskbars; Main Taskbar And Taskbar Where Window Is Open; Taskbar Where Window Is Open
Combine Buttons On Other Taskbars: Always Hide Labels; When Taskbar Is Full; Never

FIGURE 1-50 Configuring the taskbar
The Show Taskbar On All Displays options are only available if your computer has multiple displays.
As shown in Figure 1-51, you can also configure taskbar options from Settings. On the Taskbar tab in Personalization, under the Notification area heading, choose:
Select Which Icons Appear On The Taskbar. Settings include:
Always Show All Icons In The Notification Area
Power
Network
Volume
Windows Defender notification icon
Microsoft OneDrive
Location Notification
Turn System Icons On Or Off. Settings include:
Clock
Volume
Network
Power
Location
Action Center

FIGURE 1-51 Configuring the notification area
Configure accessibility options
The ability to interact easily with a computer is important for all users. Windows 10 provides a number of accessibility features to help ensure that your computer or tablet device is easy and comfortable to use, whatever your needs.
Configure and enable Ease Of Access settings
Windows 10 enables you to access and configure a number of accessibility settings by using the Ease Of Access Center. To open the Ease Of Access settings, from Start, click Settings and then click Ease Of Access.
As shown in Figure 1-52, there are seven groups of accessibility-related settings.
Narrator A screen reader that reads all screen elements, including text and buttons. After you enable this setting, you are prompted to choose a voice and then specify the individual sounds that you want to hear, for example: Read Hints For Controls And Buttons, Characters You Type, Words You Type, and so on.
Magnifier Makes things larger on the screen. When you enable this setting, you can optionally choose to invert colors, start Magnifier automatically, and enable tracking.
High Contrast This setting can make the display easier to read. Choose a High Contrast theme from the list.
Closed Captions Enables you to configure how closed captions appear in Windows apps, such as the Videos app.
Keyboard Settings that enable you to control how Windows responds to inadvertent key presses or overlong key presses.
Mouse Options that enable you to reconfigure the mouse pointer to be more clearly visible. You can also enable mouse buttons so that users can navigate with the cursor keys.
Other Options You can configure whether Windows plays animations and whether the desktop background is displayed. In addition, you can enable touch feedback so that Windows tells you when you touch the screen.
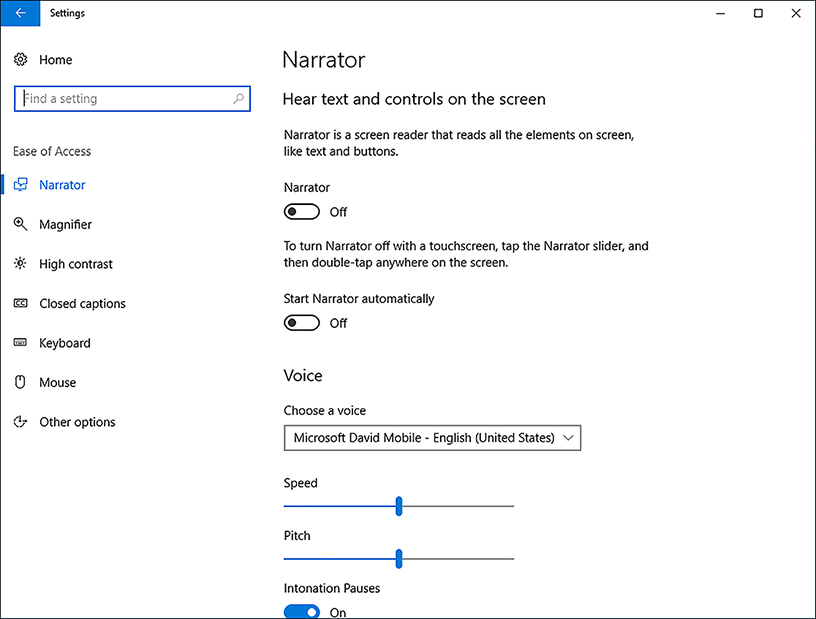
FIGURE 1-52 The Windows 10 Ease Of Access settings
Configure Cortana
Cortana is a voice-activated digital assistant in Windows 10 that can help you manage your computer and its content. For example, Cortana can remind you about events, manage appointments in your calendar, respond to voice search requests, and more. Cortana is enabled by default when you sign in to Windows 10 on your computer or phone.(see Figure 1-53)
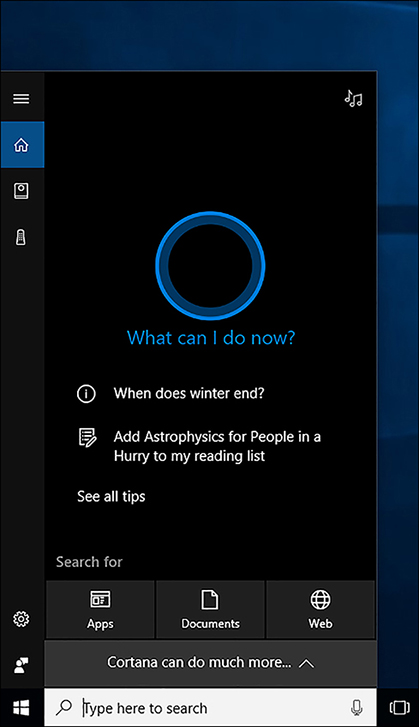
After you enable Cortana, you can configure it. Click the Cortana search icon on the taskbar, and then click the Settings icon, as shown in Figure 1-54.
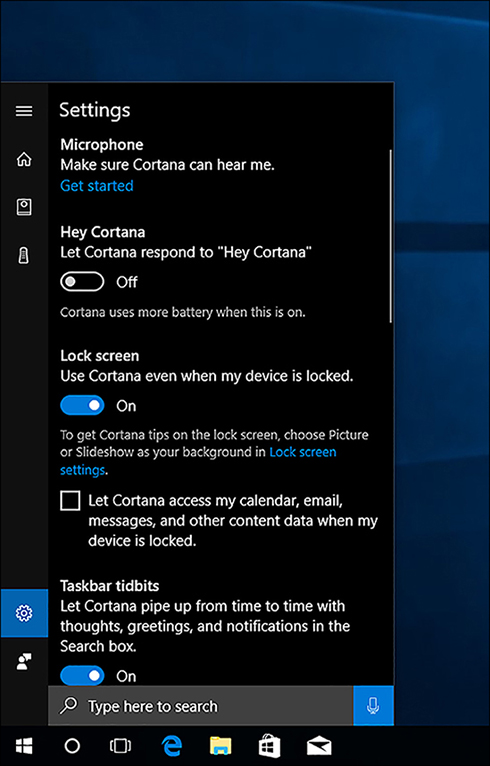
From this Settings list, you can configure the following options.
Microphone Enables you to configure your microphone for use with Cortana.
Hey Cortana If enabled, Cortana responds to the “Hey Cortana” verbal command. Because this means that Cortana is always running, it does consume power.
Lock screen Enables you to use Cortana even if your device is locked.
Let Cortana access my calendar, Email, Messages, and other content data when my device is locked Enables Cortana to access this content when locked.
Taskbar Tidbits Cortana can make suggestions in the Search box on the taskbar.
Keyboard shortcut Enables you to access Cortana using Windows key+C.
Send notifications and information between devices Let’s Cortana tell you what’s happening on your other devices.
Cortana Language Choose the language for Cortana.
My Device History Cortana can use your local device search history to optimize search results performed on local content.
SafeSearch Choose between Strict, Moderate, and Off for adult content in web searches.
Note Cortana requirements
Because Cortana is an audio-based assistant, your computer must be equipped with sound, including a microphone.
Configure Microsoft Edge
Microsoft Edge, shown in Figure 1-55, is a web browser that provides a consistent interface across device types, such as Windows 10 based tablets, laptops, and mobile phones. The interface is simple and touch-centric, making it the ideal browser for devices running Windows 10. Microsoft Edge is also available on Android devices.
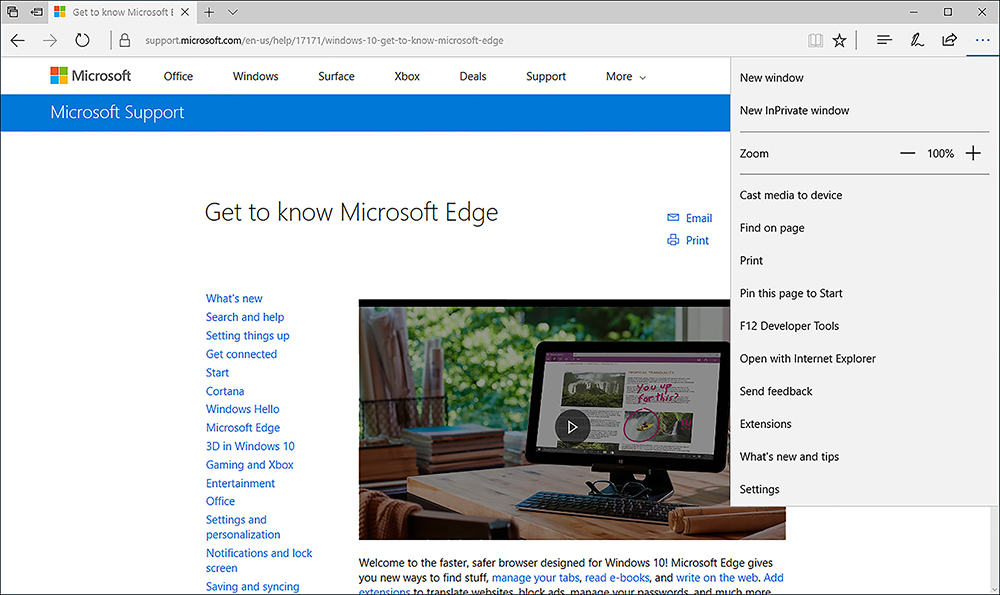
Microsoft Edge includes a number of new features not available in Internet Explorer. These are:
Reading mode, which enables you to view webpages in a simplified layout.
The Hub, a feature that consolidates several items, including:
Favorites
Reading List
Books
History
Downloads
Web Notes, which enable you to use tools to make notes, draw, write, and highlight webpages.
It is important to know how to configure Microsoft Edge, including how to migrate Favorites to this new browser, to support your organization’s users. Microsoft Edge has streamlined settings that you can easily configure from the More Actions link in the browser, as shown in Figure 1-56.
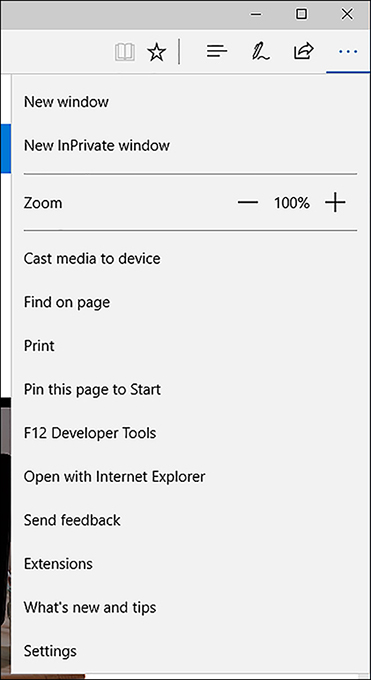
From this window, you can configure the following options.
Open a New Window Enables you to open a new browser window
Open a New InPrivate Window Provides the same privacy options enabled by InPrivate browsing in Internet Explorer
Zoom Enables you to zoom in or out on a webpage
Cast Media To Device Enables you to send content, such as a video, to wireless media devices
Find On Page Searches for content on the current webpage
Print Enables you to print the webpage
Pin This Page To Start Enables you to pin frequently accessed webpages directly to your Start page
Open With Internet Explorer Opens the current webpage in Internet Explorer. This is sometimes necessary when a webpage uses ActiveX controls.
Exam TipMicrosoft Edge does not support ActiveX controls, Browser Helper Objects, VBScript, or other earlier technology. If your users access websites that rely on these features, you can configure Microsoft Edge to switch to Internet Explorer 11 automatically when these sites are accessed, enabling you to use Microsoft Edge as your default browser. To do this, enable and configure Enterprise Mode.
Settings This provides access to:
Choose A Theme Enables you to choose between light and dark themes. The dark theme might display better in low-light situations.
Open Microsoft Edge With Enables you to specify what you see when you open Microsoft Edge, such as a specific webpage or multiple tabbed webpages.
Open New Tabs With Enables you to set how new tabs are displayed. You can configure it to match the Open With setting, or you can define another value.
Import from another Browser You can import your favorites from another web browser, such as Internet Explorer.
Show the favorites bar You can enable a list of the sites on your Favorites bar.
Clear Browsing Data Enables you to delete browsing history. You can be specific about what you want to delete.
Sync Your Favorites and Reading List Enables you to sync your Microsoft Edge settings to your other devices to provide a consistent browsing experience.
Reading Enables you to configure a view style (light, medium, or dark) and the font size.
Advanced Settings Includes several options, with the defaults shown in parenthesis:
Show The Home Button (Off).
Block Pop-Ups (On).
Use Adobe Flash Player (On).
Open Sites in Apps.
Define download location.
Proxy Setup (Automatically Detect Settings).
Notifications.
Offer To Save Passwords (On).
Manage Passwords.
Save Form Entries (On).
Have Cortana Assist Me In Microsoft Edge (Off).
Search In The Address Bar With (Bing).
Optimize taskbar web search results for screen readers (Off).
Cookies (Don’t Block Cookies).
Let Sites Save Protected Media Licenses On My Device (On).
Use Page Prediction To Speed Up Browsing, Improve Reading, And Make My Overall Experience Better (On).
Help Protect Me From Malicious Sites And Downloads With Windows Defender SmartScreen (On).
Enterprise Mode
Enterprise Mode enables you to use Microsoft Edge as your default browser but automatically switch to Internet Explorer 11 when sites requiring it are accessed. To enable and configure Enterprise Mode for Microsoft Edge, use the following procedure.
Download and install the Enterprise Mode Site List Manager tool for Windows 10 from https://www.microsoft.com/download/confirmation.aspx?id=49974.
Open the Enterprise Mode Site List Manager tool and add the URLs of any websites that are demonstrating compatibility issues with Microsoft Edge.
Click the option to open in Internet Explorer 11 for each of these sites.
Save the file to a network share.
Open the Group Policy Management console on a domain controller.
Locate and open the desired GPO to edit it.
Navigate to Computer ConfigurationPoliciesAdministrative TemplatesWindows ComponentsMicrosoft Edge.
Enable the Configure The Enterprise Mode Site List policy and then, in the Type The Location (URL) Of Your Enterprise Mode IE Website dialog box, type the location of the XML file you saved. For example, type http://localhost:8080/sites.xml.
Click OK.
Need More Review? Use Enterprise Mode to improve compatibility
To review more about using and configuring Enterprise Mode, go to the Microsoft website article at https://docs.microsoft.com/en-us/microsoft-edge/deploy/emie-to-improve-compatibility.
Configure Internet Explorer
Although Microsoft Edge is suitable for most users in most situations, Internet Explorer 11 provides backward compatibility for websites that require features currently not supported in Microsoft Edge. Because your users might use both browsers, it is important to know how to configure both Microsoft Edge and Internet Explorer.
Internet Explorer contains a number of security and privacy features that can help make browsing safer. Specifically, the InPrivate Browsing and InPrivate Filtering features help maintain user privacy, whereas SmartScreen Filter helps guard against malicious websites and malware. To help your users get the best from Internet Explorer, it is important to know how to configure these and other settings.
To access Internet Explorer settings, from Internet Explorer, click the Tools menu, as shown in Figure 1-57.
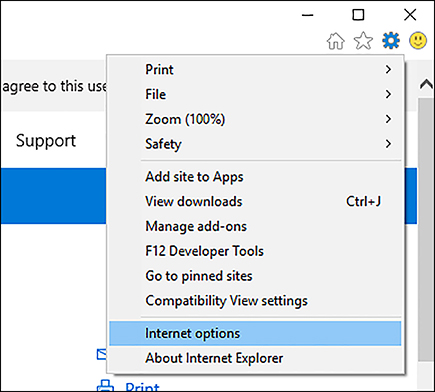
You can then choose from among the following options.
Manage Add-Ons Add-ons enable enhancements to some websites, including by providing multimedia support and enhanced content. Use this option to enable and disable add-ons.
Compatibility View Settings Most websites render well in Internet Explorer 11, but some are designed for earlier versions of Internet Explorer. If you encounter websites that do not render correctly, you can use Compatibility View settings to render the website as if using an earlier version of Internet Explorer. To render a website using an earlier version of Internet Explorer, from the Compatibility View Settings dialog box, enter the name of the website and click Add.
Exam TipYou can display all intranet sites in Compatibility View by selecting the Display intranet Sites In Compatibility View check box in the Compatibility View Settings dialog box.
Internet Options To configure additional settings, click Internet Options. This opens the dialog box shown in Figure 1-58.
FIGURE 1-58 Configuring settings in Internet Explorer
The Internet Options dialog box has the following tabs.
General Available options are:
Home Page
Startup behavior
Change How Webpages Are Displayed In Tabs
Browsing History, Including Options To Delete Elements Of Browsing History
Colors, Languages, Fonts, And Accessibility Options
Security Available options are:
You can configure the four security zones’ settings. The zones are Internet, Local intranet, Trusted Sites, and Restricted Sites. You can add or remove websites from these zones and configure the security settings for each zone.
Enable Protected Mode. Protected mode makes it more difficult for malware to be downloaded, thereby helping to protect your computer from malicious software. It is enabled by default.
Privacy Available options are:
Sites enables you to define cookie handling on a per-site basis.
Advanced enables you to define whether to accept, block, or prompt for first-party and third-party cookies.
Never Allow Websites To Request Your Physical Location.
Turn On Pop-up Blocker. This is enabled by default. The Settings button enables you to configure per-website settings for pop-up handling.
Disable Toolbars And Extensions When In Private Browsing Starts.
Content Available options are:
Certificates enables you to view your certificates and trusted publishers.
Autocomplete enables you to define autocomplete options for the address bar, forms, and usernames and passwords. You can also delete autocomplete history here.
Feeds And Web Slices enables you to define when feeds and web slices from online content are updated.
Connections Available options are:
Dial-Up and Virtual Private Network settings for connecting to the Internet.
LAN settings, including web proxy and script settings.
Programs Available options are:
Define How Internet Explorer Opens.
Manage Add-Ons.
Configure HTML Editing.
Manage File Associations.
Advanced Many options are available, enabling you to fine-tune Internet Explorer configuration and behavior.
Although you can manually configure these settings in Internet Explorer on each computer, you can also use GPOs in an AD DS domain environment to configure the settings for many computers. To configure the relevant GPO settings for Internet Explorer, open Group Policy Management and locate the appropriate GPO. Open the GPO for editing and navigate to Computer ConfigurationPoliciesAdministrative TemplatesWindows ComponentsInternet Explorer. You can then configure the appropriate values in the 11 child nodes, including values that control privacy, compatibility view, and security features. You can configure the same settings on the User Configuration node if you prefer.
Need More Review? Group Policy and Internet Explorer 11
To review further details about the GPO settings for Internet Explorer 11, refer to the Microsoft website at https://docs.microsoft.com/en-us/internet-explorer/ie11-deploy-guide/group-policy-and-ie11.
Configure Hyper-V
Client Hyper-V enables you to run virtual machines on your Windows 10 based computer. There are a number of reasons for wanting to do this, including:
Wanting to run multiple operating systems on a single computer.
Supporting older applications that do not work properly when running natively on Windows 10.
Creating a test or training environment that will not affect your production machine.
Verifying Hyper-V prerequisites
To implement Client Hyper V in Windows 10, your computer must meet the following requirements.
Operating system edition You can only enable the Client Hyper-V feature on 64-bit versions of Windows 10 Pro, Windows 10 Enterprise, or Windows 10 Education.
Processor Your Windows 10 based computer must have an x64 processor with support for the following features.
Hardware-assisted virtualization.
Data Execution Prevention (DEP).
Second-level address translation (SLAT).
Memory Your Windows 10 based host computer must have at least 4 gigabytes (GB) of physical memory to support Client Hyper-V. In addition, you should have sufficient additional memory to support the virtual machines you plan to run.
Storage Hyper-V is disk intensive. Therefore, to optimize performance, or at least to reduce bottlenecks, you must ensure that your storage subsystem is fast. Consider using solid-state drives (SSD) for storing virtual machines.
Installing the Client Hyper-V role
If your computer meets the prerequisites, install the Client Hyper-V role. Open Control Panel, click Programs And Features, and then click Turn Windows Features On Or Off.
Then, as shown in Figure 1-59, select the Hyper-V check box and click OK. Files are copied. You must restart your computer before you can manage the virtual machine.
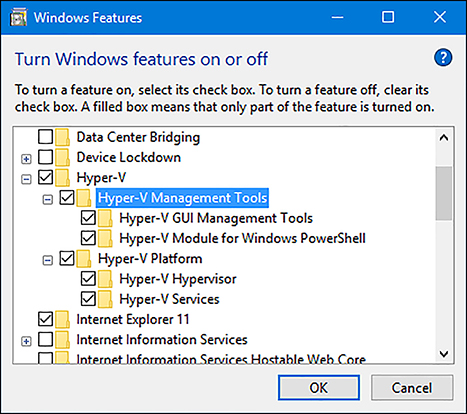
![]() Exam Tip
Exam Tip
You can also use the following Windows PowerShell cmdlet to install the Hyper-V feature: Enable-WindowsOptionalFeature -Online -FeatureName Microsoft-Hyper-V -All.
Creating and managing virtual machines
Before you can create a virtual machine, you must be familiar with the core components that comprise it. These are:
Virtual switches Virtual switches enable you to connect your virtual machines to networks. These networks can be:
Private, enabling only virtual machines connected to the same virtual switch to communicate.
Internal, so that only the virtual machines and the local host can communicate.
External, in which the virtual machines are connected to a physical network adapter in the host, potentially enabling communications with other physical or virtual devices elsewhere on your network.
Virtual hard disks You must configure one or more virtual hard disks to represent the storage that your virtual machine will use. You can select from a number of virtual hard disk formats and disk types.
Creating a virtual machine
To create a virtual machine on your Windows 10 based computer, open the Hyper-V Manager console and then, in the Action pane, click New and then click Virtual Machine. The New Virtual Machine Wizard loads. Specify the following information to create your virtual machine.
Name Enter a meaningful name for your virtual machine.
Storage Location Define the location of the configuration files for your virtual machine.
Define The Generation Of The Virtual Machine Generation 1 virtual machines support 32-bit and 64-bit guest operating systems. Generation 2 virtual machines only support 64-bit virtual machines but also support newer hardware features, including UEFI-based firmware. You cannot change the generation setting after you have created your virtual machine.
Specify The Memory Configure the amount of memory you will assign to your virtual machine, and whether you want to enable dynamic memory.
Configure A Network Connection Select from previously created network switches.
Define The Hard Disks Configure a virtual hard disk type, size, and location.
Define Installation Options Configure how you will install an operating system by connecting a physical DVD or ISO image that contains an installable operating system to your virtual machine.
Configuring settings
After you have created your virtual machine, you can configure additional settings or revise the settings you configured during the virtual machine creation, as shown in Figure 1-60. Configurable options include:
Add Hardware You can add additional hardware, including SCSI controllers, network adapters, and video controllers.
BIOS This enables you to define the startup order for your virtual machine.
Memory You can revise your virtual machine’s memory settings.
Processor Add additional processors to your virtual machine.
IDE Controllers or SCSI Controllers This setting enables you to configure the attached virtual devices, such as disks and DVD drives.
Network Adapter You can change the network adapter to a different virtual switch.
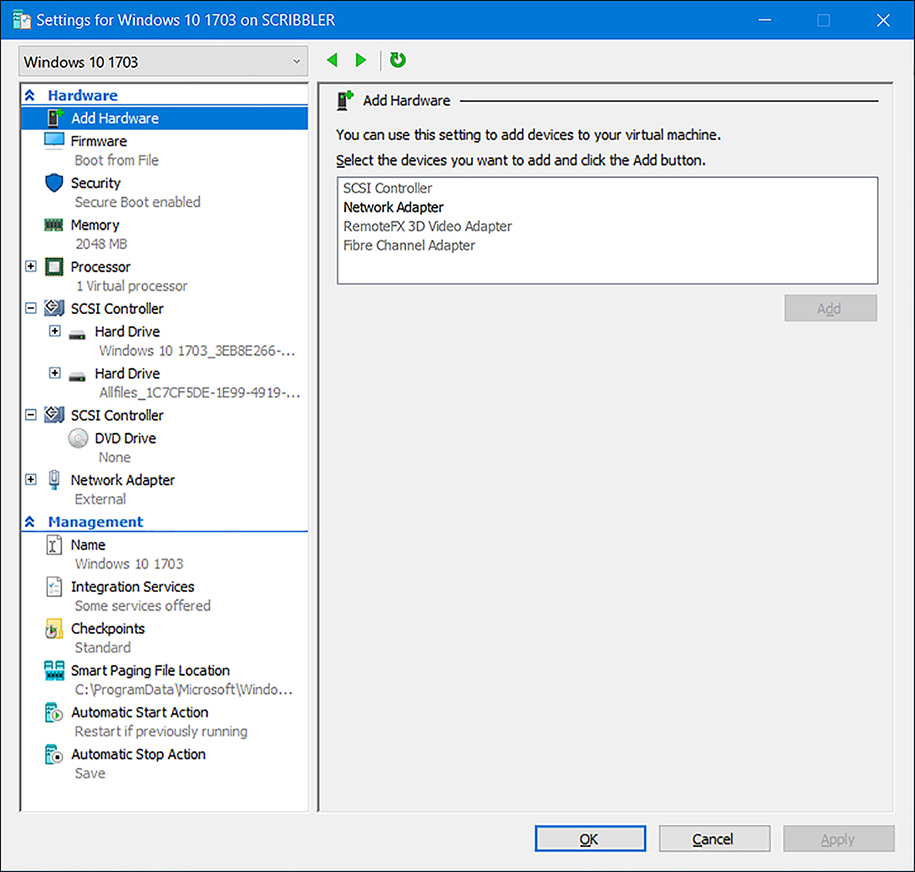
FIGURE 1-60 Settings for a virtual machine
Running virtual machines
To run a virtual machine, from the Hyper-V Manager, right-click the virtual machine that you want to start and then click Start. After it starts, you can connect to the virtual machine and interact with it just as you would a physical computer.
Managing checkpoints
One of the most useful things about Hyper-V virtual machines is the ability to create checkpoints of them; checkpoints are snapshots of a virtual machine at a point in time. You can use these to capture a configuration state. To create a checkpoint, right-click the appropriate virtual machine in Hyper-V Manager and then click Checkpoint.
After creating the checkpoint, you can operate the virtual machine as normal. When you want to return to that snapshot, right-click the virtual machine and then click Revert.
Need More Review? Hyper-V overview
To review further details about using Hyper-V, refer to the Microsoft website at https://docs.microsoft.com/en-us/virtualization/hyper-v-on-windows/index.
Configure power settings
A priority for many users of mobile devices, such as Windows 10 based tablets and laptops, is to be able to conserve battery life so that extended device use is possible. It is important to know how to configure power settings in Windows 10 to meet your users’ needs.
Configuring basic power options
You can control Windows 10 power settings in several ways. You can configure basic power options by using the Power & Sleep tab in the System settings app, as shown in Figure 1-61.
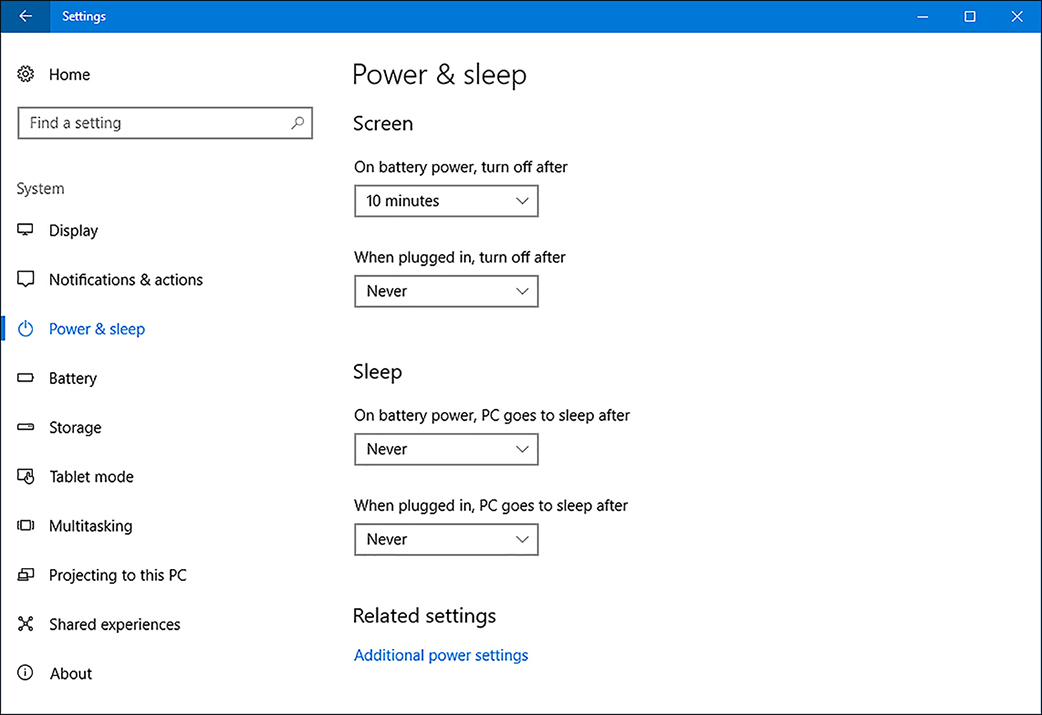
On the Power & Sleep tab, you can configure the following options.
Screen
On Battery Power, Turn Off After Select a value or choose Never.
When Plugged In, Turn Off After Select a value or choose Never.
Sleep
On Battery Power, PC Goes To Sleep After Select a value or choose Never.
When Plugged In, PC Goes To Sleep After Select a value or choose Never.
![]() Exam Tip
Exam Tip
Windows 10 Mobile does not support Power & Sleep options.
You can configure additional power options by clicking the Battery tab, as shown in Figure 1-62, and set the following options.
Battery Usage by app View battery usage over the preceding 24 hours, 48 hours, or one week.
Battery Saver Settings Configure when battery save is enabled.
More Saving Options Configure battery usage when watching movies.
FIGURE 1-62 Battery Saver options
Configuring power plans
In addition to these basic settings, Windows 10 provides a number of preconfigured power plans, as shown in Table 1-12. You can access these power plans from Settings by clicking System, Power & Sleep, and then Additional Power Settings.
TABLE 1-12 Power plans
Plan |
Power consumption |
Screen |
System activity |
|---|---|---|---|
Power Saver |
Low |
By default, the display is powered off after five minutes of inactivity. |
Saves energy by reducing system performance whenever possible. |
Balanced |
Medium |
You can configure the plan to turn off the display after a specified amount of time. |
Measures computer activity and continues to use full power to all system components currently in use. |
High Performance |
High |
This sets the screen to 100% brightness. |
Keeps the computer’s drives, memory, and processors continuously supplied with power. |
Note Power plan names
The exact names of the power plans might vary depending on the configuration of your device.
You can select from among existing power plans by clicking the desired power plan or create a new power plan by clicking Create A Power Plan. Also, you can configure basic options such as whether your device will prompt you for a password when it wakes up, and what the power buttons and lid does on your computer. To reconfigure a plan, click Change Plan Settings. You can also choose Change Advanced Power Settings to configure detailed plan settings.
![]() Exam Tip
Exam Tip
Windows 10 Mobile does not support power plans.
Skill 1.5: Implement Windows in an enterprise environment
The IT infrastructure requirements of large organizations differ from those of small organizations, and so do the required skills. These differences include the way Windows is deployed, activated, secured, and managed. This means that if you work in an enterprise-level organization, you must be familiar with some of the technologies designed to make the deployment and management of Windows 10 easier.
Provision with Windows Configuration Designer tool
You can use the Windows Configuration Designer tool, shown in Figure 1-63, to reconfigure your deployed Windows 10 devices by creating and distributing provisioning packages. You can use Windows Configuration Designer to:
View settings and policies in a Windows 10 provisioning package.
Create and manage Windows provisioning answer files.
Define applications and drivers in an answer file.
Build provisioning packages to modify existing Windows installations.
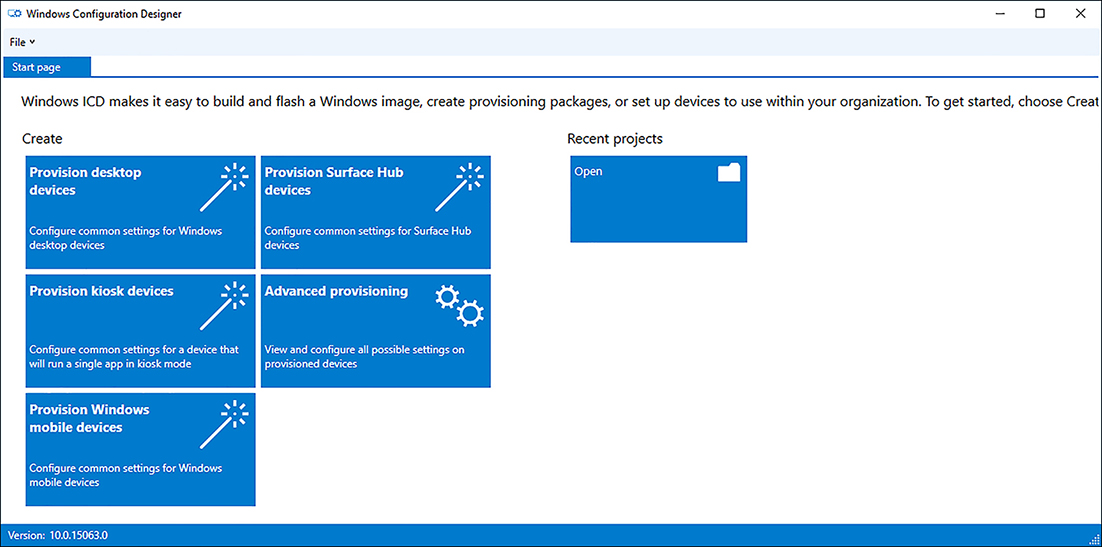
FIGURE 1-63 The Windows Configuration Designer home page
Note
Earlier versions of the Windows Configuration Designer were able to create deployment packages with which you could deploy Windows 10. This functionality no longer exists. In addition, earlier versions were referred to as Windows Imaging and Configuration Designer to reflect that functionality.
To install Windows Configuration Designer, download and install Windows ADK. After you have installed Windows Configuration Designer, use the following procedure to create a provisioning package. To start creating a new package, from the Start page in Windows Configuration Designer, click the appropriate package type. Choose from:
Provision desktop devices Provides the typical settings for Windows 10 desktop devices.
Provision kiosk devices Provides the typical settings for a device that will run a single app.
Provision Windows mobile devices Provides the typical settings for Windows 10 mobile devices.
Provision Surface Hub devices Provides the typical settings for Surface Hub devices.
Advanced provisioning Enables you to view and configure all available settings. Choose this option if you are unsure which specific package type to use.
In the New project wizard, enter a name for the project, and then click Finish. Your project’s configurable settings appear on a new tab, as shown in Figure 1-64. You can use these settings to apply customizations to the operating system after the image is applied. Settings include regional settings, certificates, user accounts, desktop personalization settings, and many more.
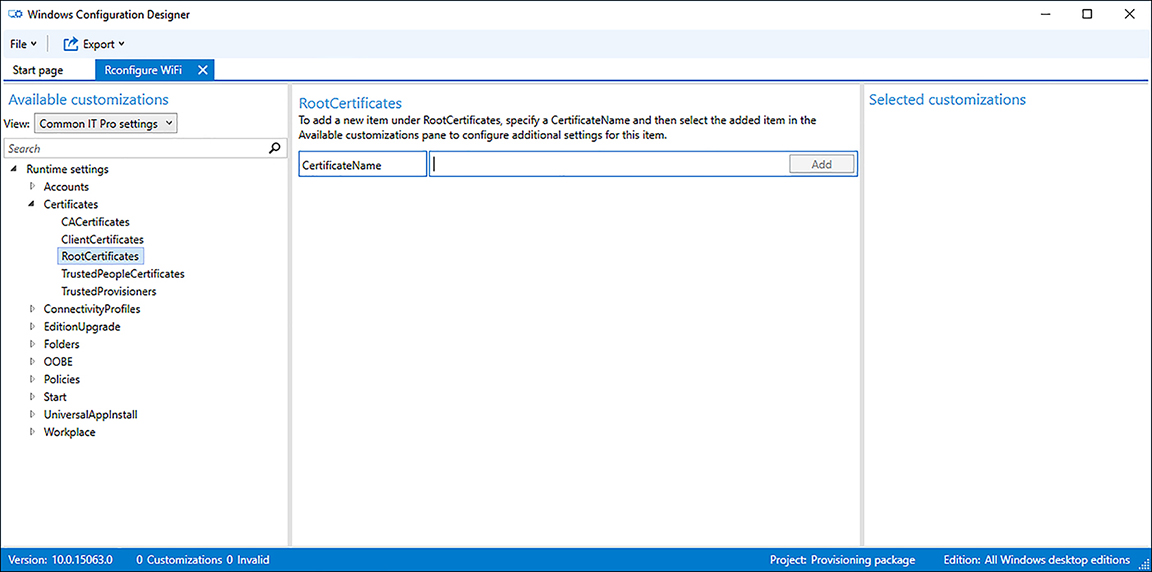
When you have completed the configuration all of your settings, you can create the media. Save the project, and then on the project tab, click Create. This creates a .ppkg file, together with related files, in a folder named after your project. You can now distribute that package by using a memory stick, script, email or other method.
Need More Review? Getting started with Windows Configuration Designer
To find out more about using Windows Configuration Designer, visit the Microsoft website at: https://docs.microsoft.com/en-us/windows/configuration/provisioning-packages/provisioning-packages.
Implement activation
Activation is a very important part of configuring and managing Microsoft products, but IT pros often overlook it. This section explores Windows 10 activation options and procedures.
Like most Microsoft products, Windows 10 requires activation. Activation verifies that your copy of Windows 10 is legitimate and that the product key you used to license your copy is valid and not currently in use on another product. Figure 1-65 shows the current activation status of a computer running Windows 10.
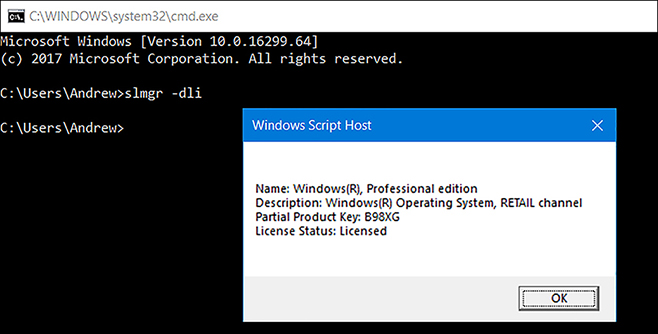
You can activate Windows 10 in a number of ways, by using an Internet-accessible service at Microsoft, by telephone, and by using bulk activation methods such as Key Management Service (KMS) and Active Directory based activation. This section explores activation and methods you can use to manage your organization’s product activation.
Select an activation method
To activate Windows 10, you might need a product key, a 25-character code. However, not all Windows 10 installations require the use of a product key to activate, relying instead on a digital entitlement. A digital entitlement is a process that automates the use of an existing product key.
You must use a product key for activation when:
You purchase Windows 10 from a retail store or authorized reseller, either as a physical product or as a digital download.
Your organization has a Microsoft volume licensing agreement for Windows 10.
You purchased a new device on which Windows 10 is preinstalled.
You do not need a product key for activation and can rely on digital entitlement when:
You upgrade to Windows 10 from a supported device running a legitimate copy of Windows 7 or Windows 8.1.
You purchase Windows 10 from the Microsoft Store.
You purchase Windows 10 Pro upgrade from the Microsoft Store.
The method you use to activate Windows 10 is determined by a number of factors, including how you obtained Windows 10 and whether your organization has a volume license agreement in place with Microsoft. The following scenarios determine how you activate Windows 10.
Retail If you purchase Windows 10 from a retail store, it comes with a unique product key. You can enter the key during or after installation to activate your copy of Windows 10.
OEM If you purchase a new computer on which Windows 10 is preinstalled, it comes with a unique product key, perhaps on a sticker attached to the computer. You can activate Windows by using this preinstalled product key.
Microsoft volume licensing Microsoft offers a number of volume licensing programs to suit different organizational sizes and needs. These programs support both Active Directory based activation and KMS.
![]() Exam Tip
Exam Tip
Retail versions of Windows 10 cannot be activated using volume licensing methods.
Implement volume activation
For large organizations with many hundreds or even thousands of devices, using manual product key entry and activation is impractical; it is both error prone and time-consuming. For these reasons, Microsoft provides three methods for volume activation. These are:
KMS You can use this Windows Server role service to activate Windows 10 in your organization’s network. Client computers connect to the KMS server to activate, thereby negating the need to connect to Microsoft for activation. It is not necessary to dedicate a server computer to perform activation through the KMS role.
Exam TipKMS is designed for organizations with either 25 (physical or virtual) client devices persistently connected to a network or organizations with five or more (physical or virtual) servers KMS requires 25 client devices running Windows 10 before activation is successful.
Active Directory based activation Any device running Windows 10 that is connected to your organization’s domain network and is using a generic volume license key (VLK) can use Active Directory based activation. Periodically, the client must reconnect to the AD DS licensing service. Therefore, for the activation to remain valid, the client device must remain part of your organization’s domain. As with KMS, you do not need to dedicate a server to the Active Directory based activation role.
Exam TipYou cannot use Active Directory based activation to activate computers running Windows 10 that are not members of your AD DS domain.
Multiple Activation Key Multiple Activation Key (MAK) uses special VLKs that can activate a specific number of devices to run Windows 10. You can distribute MAKs as part of your organization’s Windows 10 operating system image. This method is ideal for isolated client computers.
Volume Activation Services
To use either KMS or Active Directory based activation to manage your volume activations, first install the Volume Activation Services server role on Windows Server 2016. When it’s installed, you can then use either KMS or Active Directory based activation by installing one or both of the following, depending on your needs.
Active Directory based activation role service
KMS role service
After you install the required roles, activate the roles with Microsoft. This involves entering and validating a KMS host key with Microsoft, either online or by telephone.
Volume Activation Management Tool
After you have installed the necessary server roles, you can use the Volume Activation Management Tool (VAMT) to manage your organization’s volume activations centrally. Figure 1-66 shows the main console of the VAMT.
![A screen shot shows the navigation pane on the left with the Volume Activation Management Tool node selected. The details pane displays the VAMT Inventory with two products discovered. The License Overview shows Unknown as 2. The console is successfully connected to Server: [.ADK] Database: [ADK].](http://images-20200215.ebookreading.net/11/4/4/9781509307906/9781509307906__exam-ref-70-698__9781509307906__graphics__01fig66.jpg)
Note Download and install VAMT
VAMT is one of the tools in the Windows Assessment And Deployment Kit (Windows ADK). To download the Windows ADK from the Microsoft website, go to: https://docs.microsoft.com/en-us/windows-hardware/get-started/adk-install.
This includes activations, not only for Windows 10, but also for Windows Server and Microsoft Office. You can use VAMT to control activations for groups of computers running Windows 10 based on domain membership, workgroup name, IPv4 configuration, or computer names. After you have installed VAMT, you can use it to perform the following activation-related tasks.
Verify the KMS host key This enables you to set up your host for volume activations.
Discover computers and products You can discover computers and licensable products on your organization’s network.
Monitor status Collect licensing data from installed products and devices, including license state and last five characters of the product code.
Manage product keys Determine the number of activations remaining for your MAKs and install these MAKs on remote devices.
Manage and view activation data View and, if desired, export activation data for reporting purposes.
Note VAMT activation data
VAMT stores its activation data in an SQL Server database. You can see the connected database indicated in Figure 1-66.
Need More Review? Volume activation overview
To review further details about volume activations, refer to the article on the Microsoft website at: https://docs.microsoft.com/en-us/previous-versions/windows/it-pro/windows-server-2012-R2-and-2012/hh831612(v=ws.11).
Activate Windows 10
If you are using one of the volume activation methods, you do not need to perform any task on your Windows 10 based devices. However, if you are manually managing activation on Windows 10 based devices, following installation, you must complete the following procedure.
Click Start and then click Settings.
Click Update & Security.
Click Activation.
Click Change Product Key.
In the Enter A Product Key dialog box, type your 25-character product key.
On the Activate Windows page, click Next.
When prompted, click Close.
After you have activated Windows 10, you can view the activation status from Settings on the Activation tab of the Update & Security app, or you can view and manage the activation status of your Windows 10 based product by using the Slmgr.vbs command. For example, Figure 1-65 shows the result of typing the Slmgr.vbs -dli command. You can see that Windows 10 Pro is licensed properly.
Configure and optimize User Account Control
After you are signed in, it is important to ensure that your user account operates as a standard user account and is only elevated to an administrative level when needed. User Account Control (UAC) can help you control administrative privilege elevation in Windows 10.
Configure User Account Control
In earlier versions of Windows, it was necessary to sign in using an administrative account to perform administrative tasks. This often led to users signing in with administrative accounts at all times, even when performing standard user tasks, such as running apps or browsing Internet websites.
However, being signed in with administrative privileges at all times poses a security risk because it offers the possibility for malicious software to exploit administrative access to files and other resources. Windows 10 provides UAC to help mitigate this threat.
When you sign in using an administrative account, UAC limits the account’s access to that of a standard user, only elevating the account’s privileges to administrative level when required, and only after prompting the user for permissions to do so. In addition, if a user signs in with a standard user account and attempts to perform a task requiring administrative privileges, UAC can prompt the user for administrative credentials.
Standard users can perform the following tasks without requiring elevation.
Change their user account passwords.
Configure accessibility options.
Configure power options.
Install updates by using Windows Update.
Install device drivers included in the operating system or by using Windows Update.
View Windows 10 settings.
Pair Bluetooth devices.
Establish network connections, reset network adapters, and perform network diagnostics and repair.
However, the following tasks require elevation.
Install or remove apps.
Install a device driver not included in Windows or Windows Update.
Modify UAC settings.
Open Windows Firewall in Control Panel.
Add or remove user accounts.
Restore system backups.
Configure Windows Update settings.
![]() Exam Tip
Exam Tip
This is not an exhaustive list of tasks but, merely, an indication of the types of tasks requiring or not requiring elevation.
When a user performs a task requiring elevation, depending on settings, UAC can prompt the user in two ways for elevation.
Prompt for consent This prompt appears to administrators in Admin Approval Mode when they attempt to perform an administrative task. It requests approval to continue from the user.
Prompt for credentials This prompt appears to standard users when they attempt to perform an administrative task.
In Admin Approval Mode, a user signed in with an administrative account operates in the context of a standard user until a task is attempted that requires administrative privilege. At that time, the user receives the configured prompt by default, a prompt for consent.
UAC is enabled by default, but you can configure and, if necessary, disable UAC in Control Panel or use Group Policy Objects (GPOs) in an AD DS domain environment. To configure UAC in Control Panel, use the following procedure.
From Control Panel, click System and Security.
Click Change User Account Control settings.
As shown in Figure 1-67, you can use the slider bar in the Choose When To Be Notified About Changes To Your Computer dialog box to adjust the UAC settings.
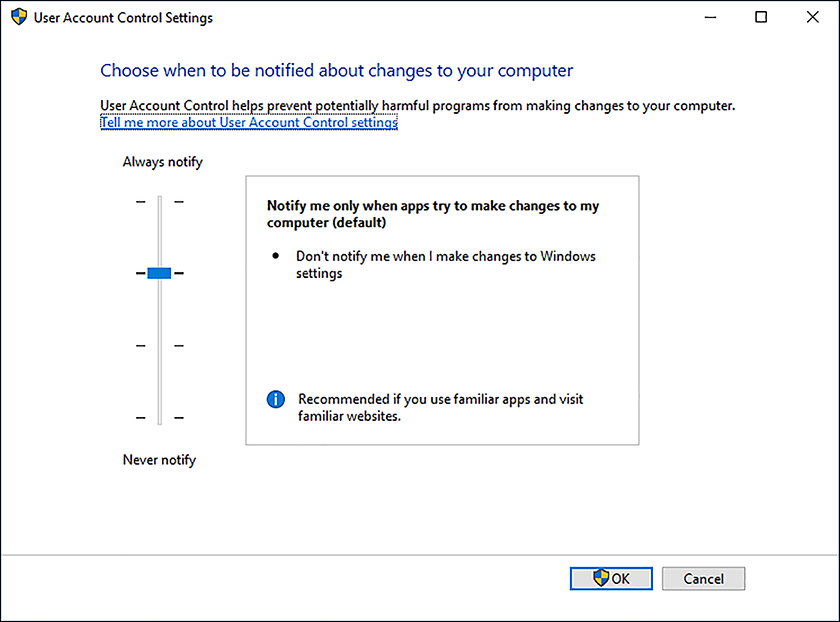
FIGURE 1-67 Configuring User Account Control prompts
The available settings are:
Never Notify Me When In this setting, UAC is disabled. Users signing in with standard accounts cannot perform administrative tasks because there is no means to prompt for credentials to perform those tasks. Users signing in with administrative accounts can perform any task requiring elevation, without a prompt for consent.
Notify Me Only When Apps Try To Make Changes To My Computer (Do Not Dim Desktop) In this mode, users are prompted, but Windows does not switch to Secure Desktop while awaiting user consent. This is less secure.
Notify Me Only When Apps Try To Make Changes To My Computer In this mode, users are prompted, and Windows switches to Secure Desktop while awaiting user consent. This is more secure.
Always Notify Me When This is the most secure but most intrusive setting. Users are prompted not only for application installations but also any time they make Windows settings changes.
Need More Review? How User Account Control works
To review further details about configuring UAC, refer to the Microsoft website at: https://docs.microsoft.com/en-us/windows/security/identity-protection/user-account-control/how-user-account-control-works.
In addition to configuring UAC settings locally, you can also use GPOs in an AD DS environment to configure and manage the UAC settings for users in the domain. On a domain controller, open Group Policy Management and locate the appropriate GPO. Open the GPO for editing and navigate to Computer Configuration Policies Windows Settings Security Settings Local Policies Security Options and then locate the settings in the details pane that have the prefix User Account Control, as shown in Figure 1-68.
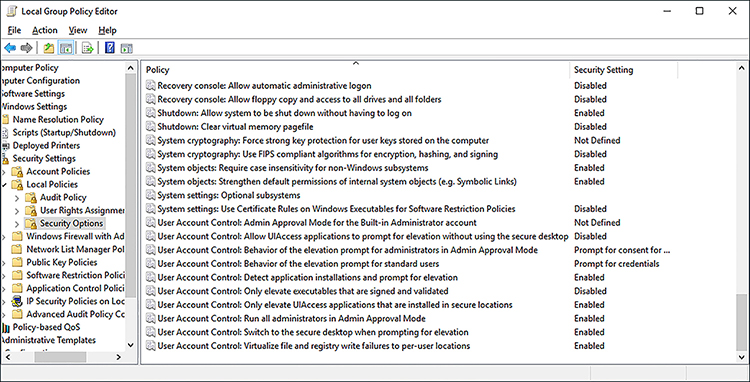
Need More Review? UAC Group Policy settings and Registry Key settings
To review further details about configuring UAC by using GPOs, refer to the Microsoft website at: https://docs.microsoft.com/en-us/previous-versions/windows/it-pro/windows-server-2008-R2-and-2008/dd835564(v=ws.10).
Configure Active Directory, including Group Policy
In this section, you review how Active Directory provides scalable management capabilities for larger organizations in relation to your domain resources. You also review how Active Directory stores computer and user objects in a secure distributed database containing containers such as organizational units (OUs). Finally, you practice installing the Active Directory server role.
Group Policy is a key technology designed to help manage and control how users use Windows 10 based computers. You know how to use local Group Policy to configure local settings on your computer, and this knowledge is valuable if you must apply the same type of settings to thousands of computers in a domain environment.
Configure Active Directory
When users log on to a computer that is a member of a domain, their logon credentials are validated by a domain controller. The role of a domain controller is to maintain a copy of the Active Directory database securely for the domain that stores a vast amount of information, including details of user accounts in the form of objects.
In addition to user objects, you can also have objects for computers, printers, groups, and other logical entities in the organization. One of the roles of a domain controller is to maintain object replication so that all domain controllers have a complete, up-to-date database of objects in the directory. When running Windows 10, you must use Pro, Enterprise, or Education editions to join a computer to a domain.
Users with a domain account are managed and authenticated by a domain controller, which uses Active Directory to organize objects, settings, and permissions logically throughout the network. In some enterprise domains, there are millions of objects. You can view, modify, and configure objects by using the Active Directory Users And Computers console, the Active Directory Administrative Center, the command line, and the Active Directory module for Windows PowerShell.
Active Directory is organized in a hierarchical nature and partitioned into the following logical components.
Site A group of TCP/IP subnets.
Forest A security boundary providing a security scope of authority for administrators who share a common Active Directory Domain Services (AD DS) domain. The first domain created is referred to as the forest root domain.
Domain Logical administrative, security, and replication boundary for users and computers that are stored in a common directory database.
Domain trees Collection of domains that are grouped in hierarchical structures and share a common root domain.
Organizational units Group objects for management, organization, and resources for easier administration, including delegation.
You should also understand the physical components that make up Active Directory.
Domain controllers Servers that contain the Active Directory databases. A domain controller stores only the information about objects located in its domain. All domain controllers are kept in sync by using replication.
Global catalog servers A domain controller that stores a full copy of all Active Directory objects in the host domain directory and a partial copy of all objects for all other domains in the forest. If you only have one domain controller, this is automatically a global catalog server also.
Operations masters Specialized domain controllers that ensure that domain controllers synchronize properly.
Read-only domain controllers (RODC) Specialized domain controllers that hold only a non-writable copy of Active Directory and are intended for use in branch offices and locations where servers are in a low physical security environment.
When you sign in to a computer in a domain, your computer locates one of the domain controllers in your local site by using DNS (SRV resource records). The SRV record identifies computers that host specific services. You can use DNS Manager on your domain controller to verify that the SRV locator resource records for your domain controller are present and that the following SRV records have been created in the following folders, as shown in Figure 1-69.
Forward Lookup Zones/_msdcs.Adatum.com/dc/_sites/Default-First-Site-Name/_tcp
Forward Lookup Zones/_msdcs.Adatum.com/dc/_tcp
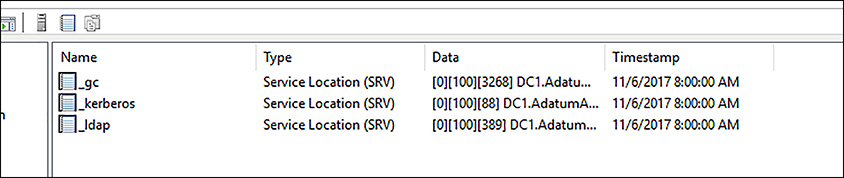
FIGURE 1-69 SRV locator resource records in DNS Manager
In these two locations, there should be an SRV record for each of the following services.
_kerberos
_ldap
To ensure that users can log on and access domain resources such as Group Policy, network file shares, and DNS, ensure that each site has two or more domain controllers for fault tolerance in case one fails.
To configure a server running Windows Server 2016 to become a domain controller, you must first install the AD DS server role and then run the Promote This Server To A Domain Controller Wizard from Server Manager. The wizard builds the Active Directory database, integrates it with DNS, and installs Active Directory tools, including the following.
Active Directory Administrative Center (ADAC)
AD DS snap-ins and command-line tools
Active Directory module for Windows PowerShell
Group Policy Management Console
Active Directory Users And Computers
Active Directory sites and services
Active Directory domains and trusts
To install Active Directory on a server running Windows Server 2016 and promote it to become a domain controller, follow these steps.
Sign in to the server as an administrator.
Open Server Manager.
On the menu, click Manage and then click Add Roles And Features.
In the Add Roles And Features Wizard, click Next three times.
On the Select Server Roles page, select the Active Directory Domain Services check box.
On the Add Features That Are Required For Active Directory Domain Services page, click Add Features and then click Next.
On the Select Features page, keep the default selection and click Next.
On the Active Directory Domain Services description page, click Next.
On the Confirm Installation Selections page, click Install.
When the installation of AD DS is finished, click Promote This Server To A Domain Controller.
On the Deployment Configuration page, select Add A New Forest, specify a Root Domain Name as Adatum.com, and click Next.
On the Domain Controller Options page, select the forest function and domain function level, select the Domain Controller capabilities as DNS, enter a Directory Services Restore Mode password, and then click Next.
On the DNS Options page, click Next.
On the Additional Options page, verify the NetBIOS name as ADATUM and then click Next.
On the Paths page, accept the default paths for the installation and click Next.
On the Review Options page, click Next.
On the Prerequisite Check page, confirm that All Prerequisites Checks Passed Successfully. Click Install.
The installation should commence and take some time. The server restarts automatically when the installation is complete.
To appreciate fully that Active Directory is a database, open File Explorer on the domain controller and locate the files that relate to the Active Directory database. By default, the database file is located at C:WindowsNTDSNtds.dit, and this is customizable during the installation of Active Directory. The folder should contain the following files and logs.
Ntds.nit The physical database file in which all Active Directory directory data is stored.
Edb.log Directory transaction log files are written prior to writing to the database. Maximum log file size is 10 MB for Active Directory.
Edb.chk File used to track which transactions in the log file have been committed to the database.
Res1.log and Res2.log files Provide temporary reserve space for additional log files if the edb.log becomes full.
Temp.edb A temporary scratch pad file for use during maintenance operations.
When Group Policy settings have been created, they are stored in the Policies subfolder in the C:WindowsSYSVOLsysvol directory, which is shared as SYSVOL across the network by the domain controller.
Use the Active Directory Administrative Center
The Active Directory Administrative Center (ADAC) is the primary GUI-based tool that you use for object-related tasks that need to be performed occasionally, typically for the administration of Active Directory in smaller environments. If you are responsible for a large environment, such as data centers, or enterprises with thousands of users, you would use the Active Directory module for Windows PowerShell, which enables you to script Active Directory administration tasks for automation purposes.
The ADAC can manage Active Directory objects, such as users, groups, computer accounts, OUs, and domains, and was designed to supersede the Active Directory Users And Computers MMC snap-in. The ADAC provides an enhanced management experience in the graphical user interface (GUI). You can still use the Active Directory Users And Computers MMC snap-in to perform common Active Directory tasks such as creating users, groups, and OUs, but for the exam, you should explore the new features in the ADAC.
Open the ADAC by using the Server Manager Tools menu, or by typing dsac.exe at the Start button, and familiarize yourself with the different user-interface features of the tool, as shown in Figure 1-70, including the following.
Breadcrumb bar Enables you to navigate to any container within Active Directory quickly by specifying the container’s path
Navigation pane Enables you to browse for objects in Active Directory by using either the list or the tree view
Management list Displays the contents of the currently selected container
Preview pane Previews information about the object or container selected in the management list
Tasks pane Enables you to perform different actions on the selected items

FIGURE 1-70 Active Directory Administrative Center
You can perform the following tasks by using ADAC.
Create new users.
Create new groups.
Create new organizational units (OUs).
Create new computer accounts.
Create new InetOrgPerson objects.
Change the focus of the tool to another domain or domain controller.
Raise the forest or domain functional level.
Enable the Active Directory Recycle Bin.
Configure fine-grained password policies.
Configure Dynamic Access Control.
To create a new user account, follow these steps.
In the Active Directory Administrative Center, right-click the appropriate organizational unit, select New, and click User.
Complete the information on the Create User properties page.
Click OK to create the new user account.
To create a new OU called Remote Staff, using the Active Directory Administrative Center, follow these steps.
Open Server Manager, click Tools, and click Active Directory Administrative Center.
In the navigation pane, click Contoso (Local) and, in the Tasks pane, click New and then click Organizational Unit.
In the Create Organizational Unit dialog box, enter Remote Staff as the name and click OK.
Close the Active Directory Administrative Center.
The Active Directory Administrative Center offers a GUI interface that is very user friendly. For example, when completing data entry, the required information is indicated with a large red asterisk.
Note ADAC Windows PowerShell History
In the ADAC, at the bottom is Windows PowerShell History. You can click the small caret at the bottom right to display the Windows PowerShell History Viewer, which displays a history of the Windows PowerShell commands that are executed when you perform administrative tasks with ADAC.
Configure Group Policy
Group Policy provides you with a proven mechanism to create rules so that you can manage users’ computers and other objects such as printers stored in Active Directory. Typically, Group Policy applies configuration settings that the organization declares are mandatory. These are pushed out to targeted groups of user accounts or computers. Standard users cannot modify a managed setting.
Group Policy in an Active Directory environment is typically managed using the Group Policy Management Console (GPMC) to create and manage policy settings, as shown in Figure 1-71. Settings that apply to users and computers are stored in Group Policy Objects (GPOs). By using Group Policy, you can deploy settings on a per-computer or per-user basis, depending on which setting is configured and which objects the GPO is assigned to, using Group Policy Management.
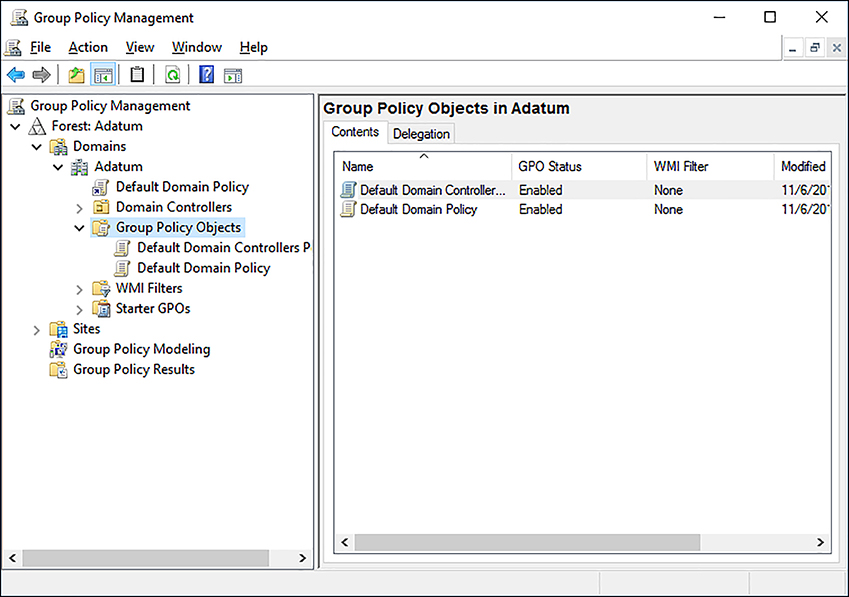
A GPO is a collection of settings that, when applied, determine how a system functions. To apply the GPO to specific computers, users, or even for everyone in the domain, you associate the policy with Active Directory containers such as sites, domains, or organizational units.
There are more than 3000 policies, and new GPOs are added regularly as new features and functionality are added to the Windows client and server operating systems. For security reasons, you should not sign in locally to a domain controller to manage Group Policy. On a Windows 10 based computer that is a member of a domain, install the Remote Server Administration Tools (RSAT) for Windows 10. RSAT enables you to manage roles and features in Windows Server 2016 remotely, including Group Policy Management.
Note Remote Server Administration Tools (RSAT) for Windows 10
The Remote Server Administration Tools for Windows 10 enable you to open tools, including Server Manager, Microsoft Management Console (MMC) snap-ins, consoles, Windows PowerShell cmdlets and providers, and command-line tools for managing roles and features that run on Windows Server. To download the RSAT tools, go to: https://www.microsoft.com/download/details.aspx?id=45520.
GPOs are separated into two sections: Computer Configuration and User Configuration, as shown in Figure 1-72. The Computer Configuration section sets policies that are applied to the computer regardless of who logs on to it. The User Configuration is used to set policies that apply to users, regardless of which computer they log on to. By default, Computer Configuration settings are applied when the computer starts and before the user logs on. The User Configuration settings are applied when the user signs in.

On client machines, the Group Policy settings are automatically refreshed every 90 minutes with a random offset of 30 minutes (giving a random range between 90 minutes and 120 minutes). Settings that relate to Security settings have an immediate effect.
Examples of Group Policy settings that are commonly applied in enterprises include:
Folder Redirection This setting enables you to redirect the content of folders to a network location; for example, the Documents folder can be redirected to the user’s home folder on a file server or to a removable SDHC card on the device.
Deploy Software You can distribute software packages and assign or publish them to a user or computer. Assigning makes the software available to install on demand by placing the app icon on the user’s Start menu when the user next logs on. Publishing software to a user makes the app available in Control Panel Programs and is often used for nonessential apps.
Running a script Scripts are commands that can be run when you log on and log off or at startup and shutdown. They are useful for cleaning up desktops when users log off, such as deleting the contents of temporary directories, mapping drives and printers, and setting environment variables.
Deploying security templates This is useful to implement consistent security settings quickly and efficiently to multiple computers based on a security template.
Group Policy preferences These are unmanaged configuration settings that you do not consider mandatory but are recommended. These settings are pushed out to users and computers but can be modified by users if they want to do so. Group Policy preferences expand the range of settings in a Group Policy Object (GPO). Examples of Group Policy preferences include Folder Options, Drive Maps, Printers, Scheduled Tasks, Services, and Start menu, presented in an easy-to-use GUI interface.
![]() Exam Tip
Exam Tip
In previous versions of Windows Server, you force a Group Policy refresh by restarting the client computer or running the gpupdate.exe command. Starting with Windows 2016 Server, you can refresh Group Policy directly from the Group Policy Management Console or by using the Invoke-Gpupdate cmdlet.
To create and apply a GPO to configure folder redirection, follow these steps.
Open Server Manager, click Tools, and click Group Policy Management.
In the Group Policy Management Console (GPMC), in the navigation pane, expand Forest: Adatum.com, expand Domains, and then expand Adatum.com.
In the navigation pane, right-click the Remote Staff OU and then click Create A GPO In This Domain And Link It Here.
In the Name text box, type Folder Redirection and then click OK.
In the GPMC, in the navigation pane, expand Remote Staff OU, right-click Folder Redirection, and then click Edit.
The Group Policy Management Editor window opens.
In the Group Policy Management Editor window, under User Configuration in the navigation pane, expand Policies, expand Windows Settings, and then expand Folder Redirection.
Right-click Documents and then click Properties.
In the Document Properties dialog box, in the Setting drop-down menu, click Basic Redirect Everyone’s Folder To The Same Location.
In the Target folder location section, in the Root Path text box, type \DC1Redirected and then click OK.
In the Warning dialog box, click Yes.
Close the Group Policy Management Editor window.
In the Group Policy Management window, verify that the GPO has been created by viewing the contents of the Scope, Details, and Settings tabs.
Close Group Policy Management.
If you do not have access to a domain controller, you can still study GPOs. Local GPOs use the same settings found in the GPMC; however, these are used to configure individual computers, whereas the GPMC can manage GPOs for distribution across one, hundreds, or thousands of computers. To manage the local settings, you can use the Local Group Policy Editor by using the gpedit.msc.
Thought experiments
In these thought experiments, demonstrate your skills and knowledge of the topics covered in this chapter. You can find the answers to these thought experiments in the next section.
Scenario 1
Adatum has 3,000 workstations currently running Windows 7 and Windows 8.1. Most of the computer hardware is of a similar specification. Adatum wants to replace Windows 7 and Windows 8.1 with a unified client operating system: Windows 10 Enterprise. All computers must be running Windows 10 Enterprise at the end of the project.
As a consultant for Adatum, answer the following questions.
What is the best method for Adatum to upgrade to Windows 10?
How could you assess the readiness for the organization’s computers to upgrade to Windows 10?
How could you determine what applications are in use throughout Adatum?
You experience a number of problems with a graphics editing package in use in the Sales department at Adatum. What could you do to resolve this?
Scenario 2
You need to upgrade company devices from Windows 8.1 Pro to Windows 10 Pro. There are 50 devices in total. Twenty-five of these devices are Surface Pro tablets. The remainder are desktop computers. Members of the software testing and development team require Hyper-V to be installed on their workstations.
You must ensure that the Surface tablets are made available to the sales team in the shortest possible time.
Answer the following questions for your manager:
How will you provision Windows 10 to the Surface tablets?
How will you make Hyper-V available to the software testing and development team?
Scenario 3
Your organization has recently recruited 20 new members to the sales team, who will work across the United States. Your manager wants to issue them the following hardware, which will be shipped to the employee’s home address directly from the online reseller.
Surface Pro tablet
Bluetooth mouse
Epson WF-3520 printer
The sales team members have standard user accounts, email accounts, and Internet access at home. You are required to ensure that the sales team members can operate the new equipment without delay and with minimal involvement of the company help desk. The organization holds its own certificate authority for creating certificates.
The company has commissioned a short introduction to Windows 10 and the functions of the Epson printer and mouse, which is available on the company intranet, by email, and offline. All users must view the training prior to using Windows 10.
Answer the following questions for your manager:
Where will you obtain the latest driver software for the mouse and printer drivers?
How will you provision the mouse and printer drivers on the Surface tablets?
Can you provision the mouse and printer drivers as one package or only separately?
How will you ensure that the users trust the provision of drivers?
How can you ensure that users are familiar with the operation of the Epson printer?
Scenario 4
The Adatum Corporation has 3,000 workstations that were recently upgraded from Windows 7 and Windows 8.1. Most of the computer hardware is of a similar specification. 64-bit versions of Windows 10 Enterprise are deployed throughout the organization. All computers are part of the Adatum.com AD DS domain. A number of organizational units (OUs) exist within AD DS to represent the departments within the organization, such as Sales, Marketing, and Research.
Some of your users want a standardized Start layout. These users are all in the Marketing department, and their computers and user accounts all exist in the Marketing OU in the Adatum.com AD DS domain.
Users in the Research department run an older application that won’t run properly on Windows 10. You envisage using the Client Hyper-V feature to run these applications.
As a consultant for Adatum, answer the following questions.
How might you easily configure these users’ Start layouts?
What are the requirements for Client Hyper-V?
Because the applications communicate with physical servers on the network, what type of network switch might you use?
Scenario 5
You work in support at Adatum. You are responsible for managing devices throughout the organization. Answer the following questions about enterprise management in the Adatum organization.
One of the remote users, Luke, uses a Bluetooth headset device when working from his home office. He is frustrated that each time he tries to pair the headset, User Account Control requires him to call the help desk to allow the pairing to complete. How can you help him while ensuring that Luke operates with the least privilege?
A number of remote users work away from home often. They have asked whether they can store personal photos, music, and videos on their SDHC cards on their Surface 4 Pro tablets. Management has agreed. How can you ensure that their personal media files are not stored on the company file servers?
You have made several changes to the Group Policy Object (GPO) that affects remote users only. Two of the remote users have not been affected by the GPO. What could be the issue?
Thought experiment answers
This section provides the solutions for the tasks included in the thought experiment.
Scenario 1
An in-place upgrade is the most straightforward option and is the preferred method.
You could use the MAP toolkit to assess computer readiness. The MAP report identifies the computers that do not meet the hardware or software requirements for Windows 10.
The MAP toolkit also reports on installed applications on inventoried computers.
If an application does not work in Windows 10, you can use the Application Compatibility Tools found in the Windows ADK to help manage application compatibility. This enables you to determine the cause of the problem and create a compatibility fix for the application. You can then distribute the fix throughout the organization by using Group Policy Objects (GPOs).
Scenario 2
The Surface tablets already contain a modern operating system that can be upgraded to Windows 10. The quickest method of provisioning Windows 10 would be to insert a USB drive containing the Windows 10 ISO or installation files and run Setup.exe. You could upgrade by using Windows Update, but this would not be the quickest method.
Answers might vary. The software testing and development team should run the OptionalFeatures.exe or type Turn Windows features on or off in the search area. After the Turn Windows Features On Or Off screen appears, select Hyper-V and click OK. If the team members do not have the necessary administrative privileges, they should ask the help desk to enable this setting for them. Another possible solution would be to turn the Hyper-V feature on using the DISM command: DISM /online /Enable-Feature /FeatureName: Microsoft-Hyper-V.
Scenario 3
You would use the media and device driver supplied with the hardware equipment or download the latest version from the manufacturer’s official website.
You would create a provisioning package with the Windows Configuration Designer, export the .ppkg files, and deploy these to the users by email, postal mail, or an intranet site. The users could then run the provisioning packages on their devices. If they required further assistance, they could call the help desk.
You can use the Windows Configuration Designer to create provisioning packages that deploy single or multiple customizations to Windows 10.
You would use only digitally signed device drivers and, additionally, digitally sign the provisioning package with the organizational certificate authority.
You should ask each member of the remote sales team to access the company intranet site and review the short introduction to Windows 10 and the functions of the Epson printer that will be available there. You could also ensure that they are aware of Device Stage for the Epson printer.
Scenario 4
To create a standard layout for Start, create a test workstation and configure Start as required. Export the Start layout by using the export-StartLayout Windows PowerShell cmdlet. Save the XML layout file to a shared folder. Configure a GPO linked to the Marketing OU to identify the location of the XML layout file by editing the User ConfigurationAdministrative TemplatesStart Menu and TaskbarStart Layout setting in the GPO.
Client Hyper-V has the following requirements: The computer must be running a 64-bit version of Windows 10 Pro, Windows 10 Enterprise, or Windows 10 Education. The computer must have at least 4 GB of physical memory and support hardware-assisted virtualization, DEP, and SLAT.
Use an external network switch when the virtual machines need to communicate with computers elsewhere on the physical network.
Scenario 5
You need to review the UAC settings on Luke’s computer. The default UAC setting enables a standard user to pair Bluetooth devices with the computer without receiving a UAC prompt. You suspect that the UAC has been set at the most restrictive level; it needs to be set at the default, Notify Me Only When Apps Try To Make Changes To My Computer (Default) setting.
You could create a folder redirection Group Policy that redirects remote users’ music, photos, and videos folders to the local SDHC storage card. Each time a remote user browses to or saves to these locations, they are automatically redirected to the SDHC card.
Computers and users only receive the refreshed Group Policy every 90 minutes (plus 30 minutes random offset). You could wait a little longer to see whether the computers automatically receive the policy. If other computers have received the GPO setting, it is unlikely that the server side of the setting is the issue. You should instruct the users to log off and log back on to their computers, which should then apply the up-to-date GPO. If this does not trigger the updated policy, you should investigate network connectivity because the two computers might be using cached credentials to log on; they might not be connecting to the domain controller and receiving the GPO.
Chapter summary
The Windows 10 hardware requirements are similar to those for Windows 8.1.
You can use the MAP toolkit to assess your organization’s hardware readiness for Windows 10.
The ACT enables you to test application compatibility with Windows 10 and, where necessary, create compatibility fixes for problematic applications.
You can choose between three upgrade strategies: in-place, side-by-side, and wipe-and-load.
Different Windows 10 editions provide different feature sets, based on an organization’s needs.
Some features of Windows 10 require special hardware or additional configuration.
You can use a number of tools in Windows ADK, including the Windows Configuration Designer, to customize, and distribute Windows 10 settings for deployment throughout your organization.
There are multiple methods of obtaining Windows 10, including clean installs and upgrading a prior version of Windows.
Windows 10 can be multi-booted with other operating systems.
You can install Windows 10 in a VHD, which behaves like a native-booted operating system.
You can migrate user and application settings from one device to another, using the USMT.
USMT uses ScanState and LoadState to migrate data and can use compression or encryption during the migration process.
You can add or remove Windows features by using Control Panel, DISM, or Windows PowerShell.
Device Manager is the primary tool for installing and managing devices.
Device And Printers and Device Stage offer visual alternatives to Device Manager.
Windows Update automatically updates device drivers.
To install or pre-stage device drivers manually, use the PnPUtil command-line tool.
Updated device drivers that are not stable can be rolled back to the previous version.
You can use the File Signature Verification tool (Sigverif.exe) to check that all drivers are digitally signed and DISM to manage driver packages for offline images.
Plug And Play is the feature that enables Windows to detect and install the correct device driver automatically for the attached hardware.
Driver signing is enforced in Windows 10 and protects system security.
Windows Configuration Designer generates provisioning packages with the .ppkg file extension, which can customize Windows 10.
Customize the Start menu, desktop, taskbar, and notification settings individually or by using XML templates and GPOs.
The Ease Of Access Center contains a variety of tools and settings that you can use to ensure that Windows 10 is easy and comfortable for all your users to use.
Cortana can be customized to provide specific digital assistance for your users.
Microsoft Edge is a cross-platform web browser for Windows 10 that supports touch devices better.
On 64-bit versions of Windows 10 Pro, Enterprise, and Education, you can enable the Client Hyper-V feature to create and run virtual machines.
Windows 10 provides several ways to manage power settings, thereby extending the battery life of your users’ devices.
Build and deploy provisioning packages with Windows Configuration Designer.
Microsoft provides a number of ways to manage Windows 10 volume activation.
User Account Control helps protect the operating system from unauthorized configuration changes and app installations.
Active Directory is a sophisticated database that maintains details of objects such as users, groups, computers, and associated information within the enterprise.
The Active Directory Administrative Center provides a user-friendly GUI tool for managing administrative tasks in smaller Active Directory environments.
You can configure most Windows 10 settings by using GPOs in an AD DS environment.
Group Policy preferences are useful for pushing out unmanaged configuration settings that users can modify if they choose.