4
Comparative Thinking
Have you ever concentrated so hard on getting a challenging part of your drawing completed that you forgot to keep track of the overall picture and ran out of room? Did you end up sacrificing the top of the subject's head or cutting off part of his legs to make him fit? Did your still life arrangement ever look like a weed trimmer had whacked off the top because you drew the vase too large and didn't leave room for the flowers? It can happen so easily!
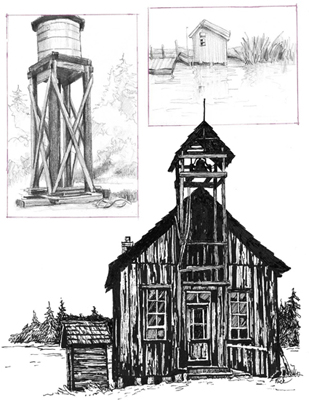
Study the pencil sketch of the water tower on the facing page (top left). The support posts and braces were tricky to draw and took a lot of time and effort. They look pretty good, but the top of the tower ended up out of the scene. It wasn't planned that way — the tower just seemed to grow taller the more I fussed with it.
Almost as frustrating as the drawings that grow too large are the subjects that are sketched so small that they are overwhelmed by the empty space surrounding them. The little fishing shack on the facing page (top right) is so small that it looks like part of the background rather than the center of interest. Actually, it was supposed to be bigger; it just didn't come out that way.
Fitting the subject onto the drawing surface so that it fills the area intended for it, no more and no less, can be challenging. In fact, many an eraser has been worn down trying to achieve a nice fit. Yet with a little pre-planning and some size comparisons, you can learn to maintain proportional control over your drawings. The ink drawing of the rustic old western schoolhouse on the facing page did not fit neatly into its corner space by accident. I marked the area I wanted it to take up and scaled it into place. While I was at it, I used comparative thinking to make sure that all the parts of the building remained in proportion to each other. The best part is that it's not hard; you merely have to open your eyes to a new way of looking at your subject. To find out how it works, turn the page.
demonstration
FINDING THE MID-POINT IN THE HEIGHT OF A SUBJECT
The subject of this demonstration is the little reference sketch of the lighthouse at right. The objective is to draw it to scale on a larger piece of paper and still maintain the fun and freedom of doing it freehand.
The first step in the process is to determine where the mid-point is in the height of the lighthouse. You might ask, “Why not use a ruler and be done with it?” That's a good question, with several answers.
If you learn to depend on a ruler, then you will have to have one with you whenever you go out to sketch.
Working with a ruler and the division of numbers is more of an architectural endeavor than a sketching process. It can detract from the fun and creativity of the drawing.
But most important, finding the mid-point by sight and instinct, and then confirming your guess, will train your mind and eye to make accurate comparisons.

Reference sketch
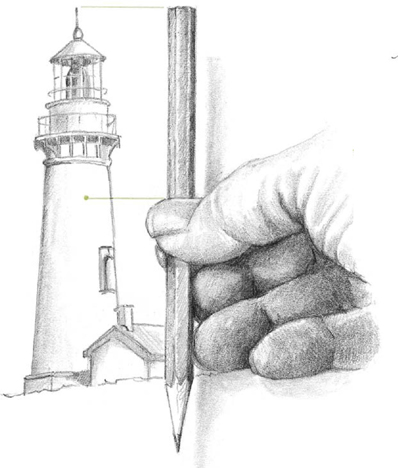
1 Using the reference sketch above as you r subject, take a guess at where the mid-point is in the height of the lighthouse and mark it with a light pencil dot. Hold a pencil or any straight stick-like object so it is vertical and the top is even with the top of the lighthouse. Move your thumbnail so it is even with your perceived mid-point, where you placed you r pencil dot.
Some mid-points are harder to determine than others due to the shape of the object you are working with. In some instances, it may be easier to mark the total height of the object with your thumbnail on the pencil and guess the halfway point of the designated length of the pencil. However you choose to do it, training your eye to determine mid-points is a valuable skill worth developing.
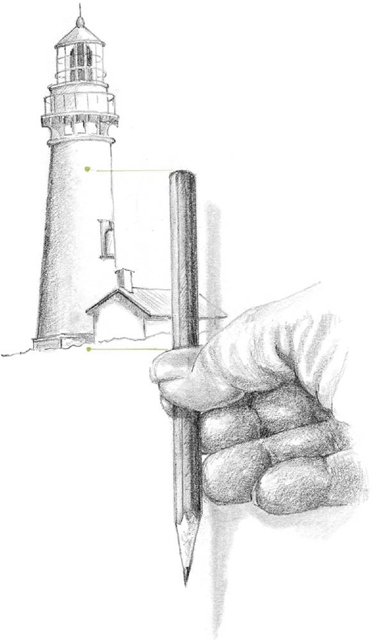
2 Without moving you r thumbnail, slide the pencil down so the top of it is lined up with the mid-point mark. Check and see what your thumbnail is lined up with. If it is even with the base of the lighthouse, your mid-point guess was correct! If your thumbnail is above the base of the lighthou se, then your mid-point guess was a little high. If your thumbnail rests below the base, then your mid-point mark is too low.
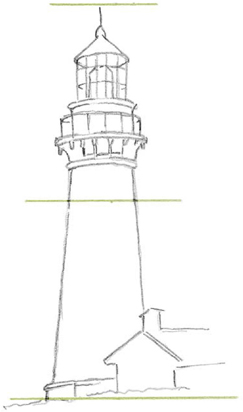
3 Once the lighthouse has been divided into two equal upper and lower sections, draw straight horizontal lines across the top, middle and bottom. Does it appear that the lower half is longer? That's an optical illusion! Measure with a ruler and you 'll see that both sections are indeed equal. Now you can begin drawing the lighthouse to scale on a new drawing surface.
PRACTICE EXERCISE
Scaling the Subject to Fit the Paper
When the subject is very tall, like the lighthouse, it is beneficial to divide it into fourths as shown in the sketch at right. This gives the eye more reference points. This process is similar to the grid method of rescaling the size of a drawing, but is faster and far less rigid. To divide the subject into four sections, divide it in half first and then re-divide the top and bottom sections.
![]()
Top
![]()
Top quarter
![]()
Mid-point
![]()
Bottom quarter
![]()
Bottom
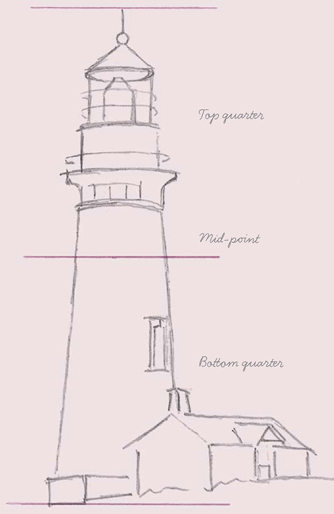
First, on your drawing paper, decide how much space you want the subject to take up. It can be scaled either up or down using this method. Mark the top and bottom with a light pencil line. The example at left is marked with double lines at top and bottom just to keep better track of what's what. Find the mid-point and mark it with a pencil line. Do the same with the quarter marks if they are being used.
Now it's time to make some visual comparisons between the divided subject and the divided drawing surface. Keep in mind that each section on the paper can only contain its allotted amount of the drawing. Adding more or less to each section will throw the overall drawing out of proportion.
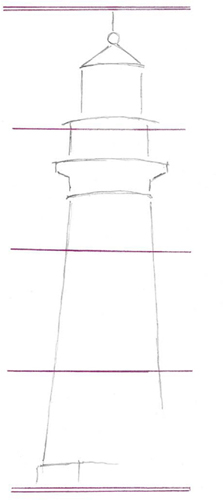
Second, begin blocking in the lighthouse using simple geometric shapes and restated lines, as shown at left. Work lightly, keeping a constant vigil on what belongs in each section. If you sketch the contents of a section too large or too small, correct it right away. It's much easier to redraw one section than the whole drawing.
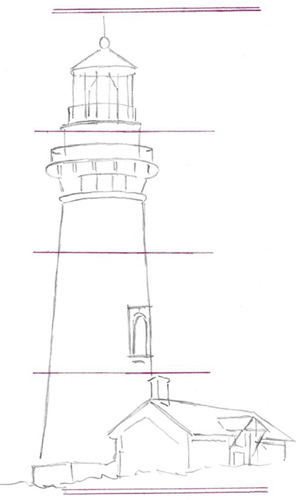
Finally, once you have all the parts blocked into their proper location and everything actually fitting together, the drawing can be refined and details added. This comparison process will become a spontaneous part of your drawing skills as you practice and develop it.
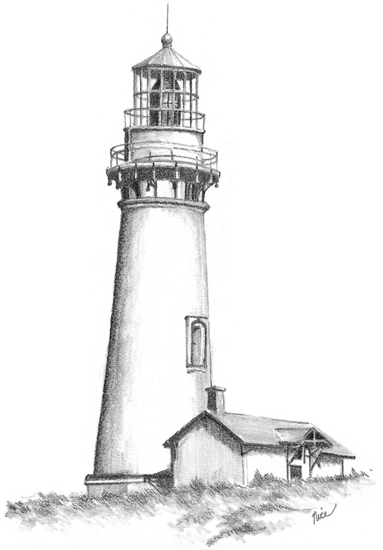
This full page, 8 × 10-inch (20 × 25cm) version of the lighthouse sketch was drawn in a larger scale using the method demonstrated on the previous pages. It was finished using a 7B pencil and blended using a tortillion.
Working from a Photograph
When working from a photograph, draw division lines beside it on a piece of scratch paper so the photo is not damaged. Another option is to draw grid lines on a piece of clear acetate and lay it on top of the photo. This pre-made set of grid lines can be used over and over again.
For field studies or when working from a live setup, sight in the subject behind your pencil (or your thumb if you wish to look very artsy) and estimate where the mid-point is. This plein air method is less accurate, but still helpful in gaining a better understanding of the height of the subject.

Reference photo of a rooster, with division lines drawn beside it.
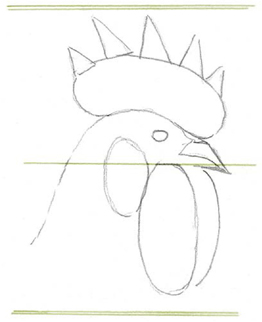
Simple shapes are used to block the rooster into place.
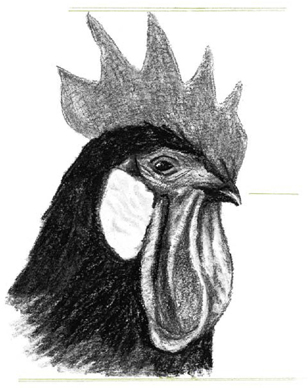
The completed rooster drawing, finished using a charcoal pencil.
demonstration
FINDING THE MID-POINT IN THE LENGTH OF A SUBJECT
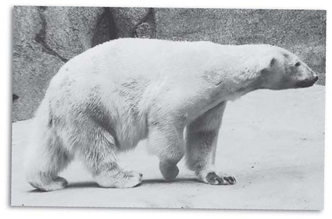
Finding the half-way point in the length of the subject is just as important as documenting the mid-point of its height, especially if you're working in a horizontal landscape format. Knowing both points will allow you to draw your subject squarely where you want it. The procedure is the same for both, but when you are estimating the mid-point of the length, you will be working horizontally. The subject for this demonstration is a polar bear I photographed at the zoo.
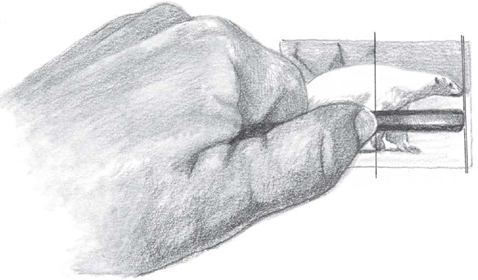
1 Estimate where you believe the mid-point is and mark it with a pencil dot. Place the end of the pencil on the farthest-reaching part of the polar bear on the right (indicated with a double pencil line), and line up your thumbnail with the mid-point.
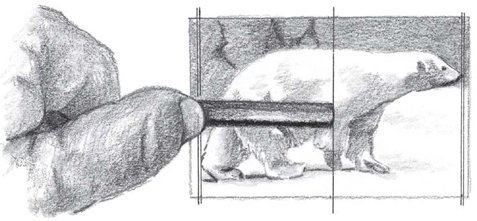
2 Shift the end of the pencil to the mid-point without moving your thumbnail and see if your thumbnail lines up with the portion of the bear farthest to the left. If it does, you have found the mid-point.

3 Decide how much roo m on the drawing surface you wish the subject to take up and mark both ends and the mid-point lightly in pencil. Use simple shapes to block in the bear, paying close attention to how much room each portion should take up and where it is positioned in relation to the mid-point and both ends.
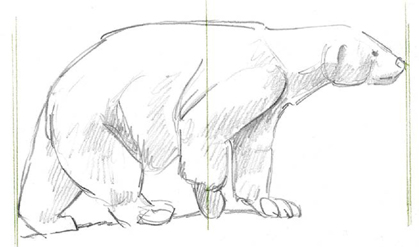
4 Refine the drawing, making corrections and adding details and shadows.
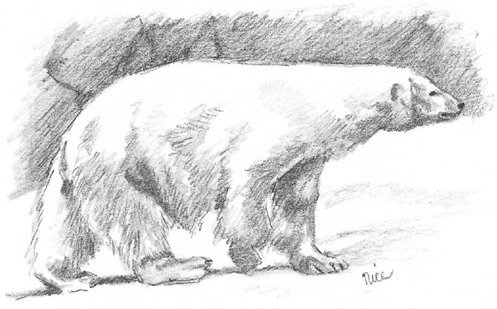
5 The finished drawing is shaded with a 5B pencil. Note how the dark background forms the outline of the polar bear's back.
Making Size Comparisons
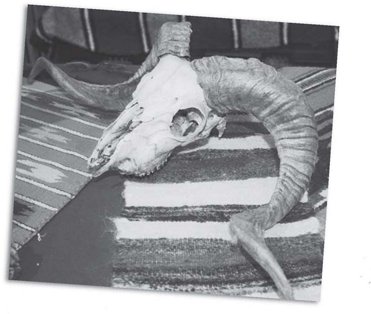
During the drawing process, it can be a problem maintaining proportional integrity between the various parts of the subject. Study the reference photo at right of the ram's skull and horns, and the two sketches below. In each drawing the skull is out of proportion to the horns. Without the photo to compare to, the sketches don't look bad, but they are far from an accurate portrayal.
In the pencil sketch, the skull is under-sized. The animal it represents would have a difficult time supporting the large set of horns. The drawing is a little less than believable and only works if the artist is trying to make an exaggerated statement.
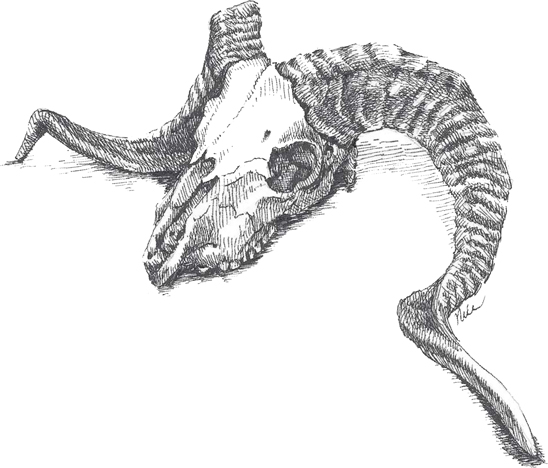
The size of the skull compared to the size of the horns is believable in the pen and ink sketch. However, because the horns are drawn on a smaller skull-to-horn ratio than the ones in the photo, they have lost some of their magnificence. The ink sketch horns are only average.
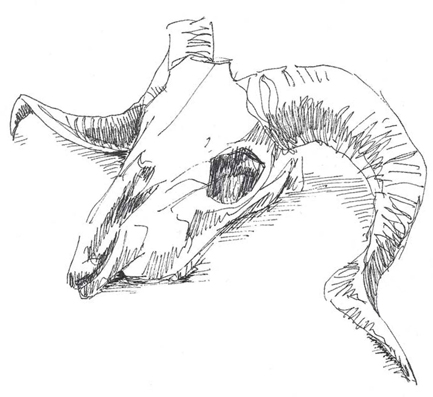
Pen and ink sketch
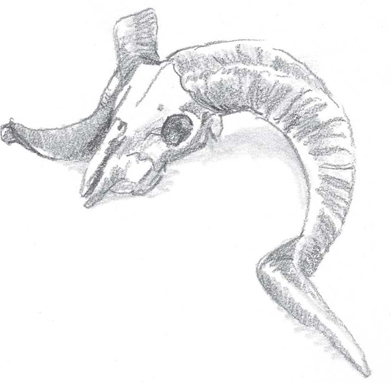
Pencil sketch
By making some size comparisons between the various parts of the subject, you can learn to see the subject better and gain proportional control over its components.
Start by choosing a smaller part of the subject that has a centered, blocky shape. A head is a good choice if one is working with a person or animal. For this exercise we will use the animal skull.
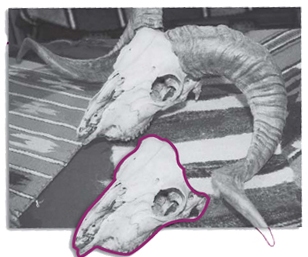
First, using the “thumbnail-on-the-pencil” method of measuring as described, mark the height of the skull. Slide the pencil down with your thumbnail still marking the height, until it's even with the lower tip of the horn. As you can see, one skull fits into the space.
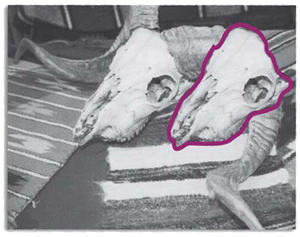
Next, use a pencil and your thumbnail to mark the width of the skull through the eye socket horizontally across. Slide the pencil to the right with your thumbnail still in place, and see how many skull-widths fit into the space between the first skull and the outer edge of the horn. As seen in the photo above, it's just under a skull's width.
Keeping these comparisons in mind, I made a preliminary pencil sketch, checked to make sure the proportions were accurate on my drawing, and finished it using a .25mm technical pen and India ink.
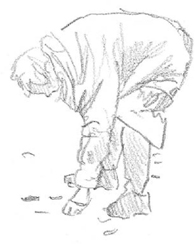
HEAD TO BODY COMPARISONS
In preparation for a drawing, I studied and made size comparisons in the photograph of the beachcomber. First I determined the mid-point of her height and width, shown as dotted lines on the photo below. That information will help me place her exactly where I want her on the drawing surface. Next I made some comparisons of her head size to her body size using the thumbnail-on-the-pencil method, shown to the left and below the photo. I discovered that her body position is approximately 4½ heads high from her back to the tip of her fingers. From the crown of her head to her posterior, she is approximately 3![]() heads wide. The trunk is 2 heads tall and 2
heads wide. The trunk is 2 heads tall and 2![]() heads wide.
heads wide.
Taking the time to make these head-to-body comparisons helped me see the subject with the eye of an artist, casting aside any preconceived ideas. With this information, I am ready to start drawing her in proportion.

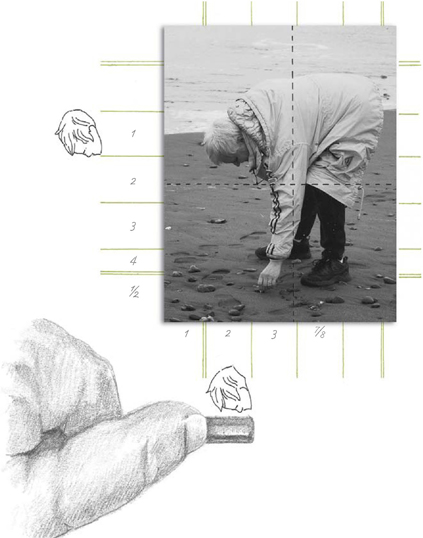
On the drawing surface I decided the space I wanted the beachcomber to take up, keeping in mind her dimensions in head-widths. I marked this area with double lines. The mid-points are indicated with single lines. These guidelines, which in actuality need only be marked very lightly, will help me block in the subject proportionally correct.
I will start with the trunk and head. Once they are drawn in the proper size and location, according to the guidelines, the rest of the body is much easier to rough in.
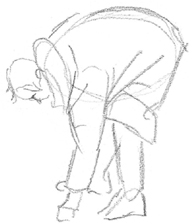
Here the drawing is starting to be refined from basic shapes into a person.
The form is established and shading has been added.
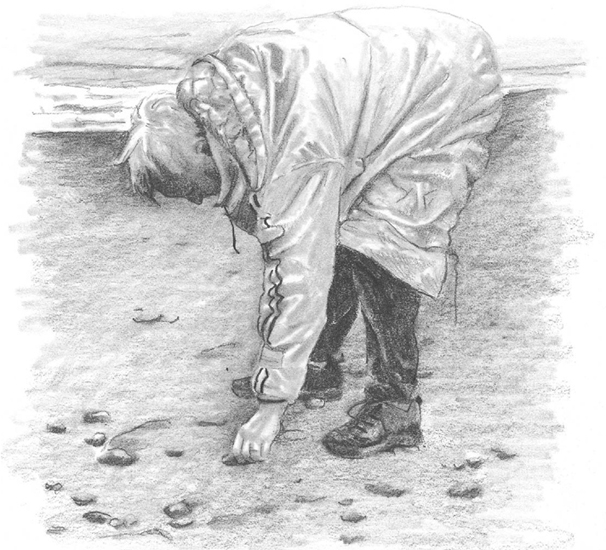
The finished drawing is worked with a 5B pencil and shaded with a tortillion. The shade work on the beachcomber is either lighter or darker than the beach to establish a defining edge.
Making Quick Sketches
Quick sketches are often made from hurried observations. With practice, you can catch a pretty good likeness of a subject with just a few moments of study. However, the more time you take in making comparative observations, the better the sketch will be.
The subject for the quick sketches below is the photo of an old enamel pan sitting on a fence. The first sketch was done with minimal study of the photo. It catches the essence of the subject and is readily identified as being a cooking pan. However, the dimensions are off. The handle is too short and the pan is too short and wide. The angle of the fence rail it's sitting on is too steep.
In the second sketch, more time was taken to study the subject. Mid-points were quickly estimated and the length of the handle was compared to the width of the pan. The results were a more accurate drawing.
More comparative thinking was done in the third sketch. The height of the pan was compared to its width, and key angles and curves were studied with a calculating eye. Although it is still a quick sketch, made in just a few minutes, the third sketch is the most accurate.
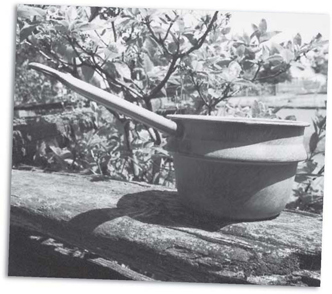
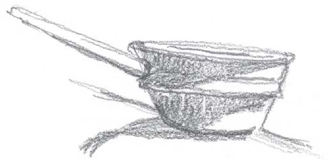
First sketch
Second sketch
Third sketch
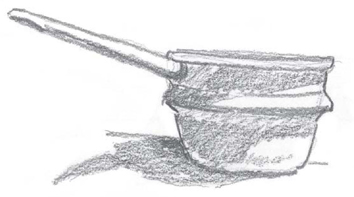
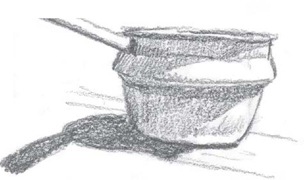
PRACTICE EXERCISE
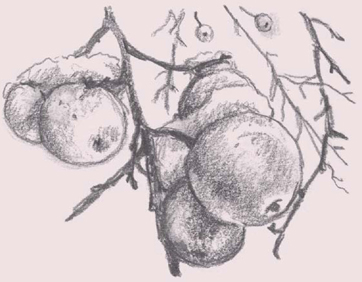
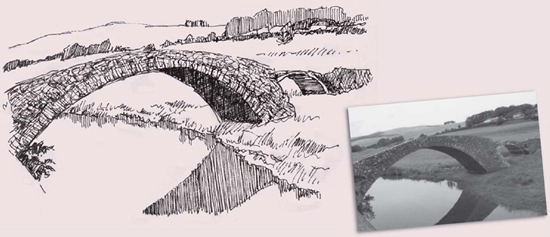
Use the photos of the snow-covered apples and the old stone bridge as your subjects and make some spontaneous quick sketches. Then study the elements that make up each subject, making some size and placement comparisons. Sketch them again. Do you see any improvement?
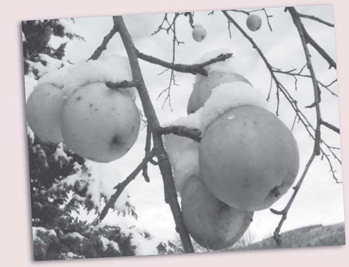
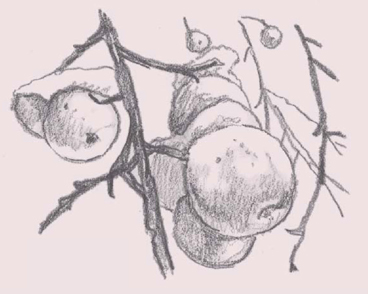
Good
Better
demonstration
DRAWING SYMMETRICAL OBJECTS
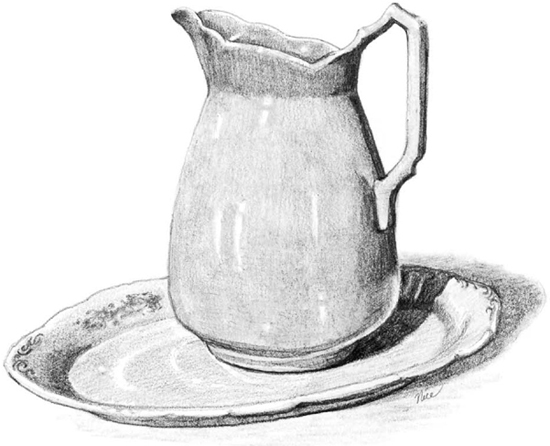
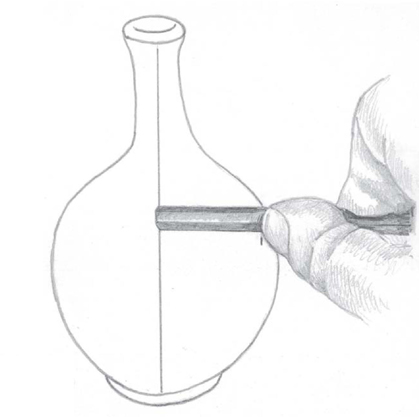
Hand-sketching a symmetrical object so that the right and left side are mirror images of each other is not an easy task. One is usually more adept at drawing lines and curves on one side of the symmetrical form than on the other. The result often looks a little mismatched, like the ceramic vase shown at right. To bring an object into symmetrical balance, follow the easy steps demonstrated here.
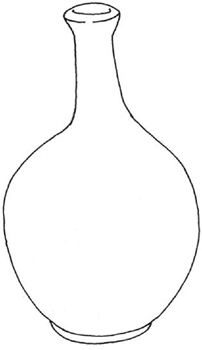
Curves are mismatched
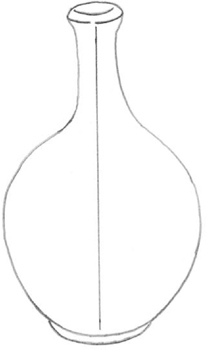
1 Draw a light pencil line through the center of the vase. Decide which side of the form looks the most accurate. I've chosen the left side. We'll refer to the most accurate side as the “model.”
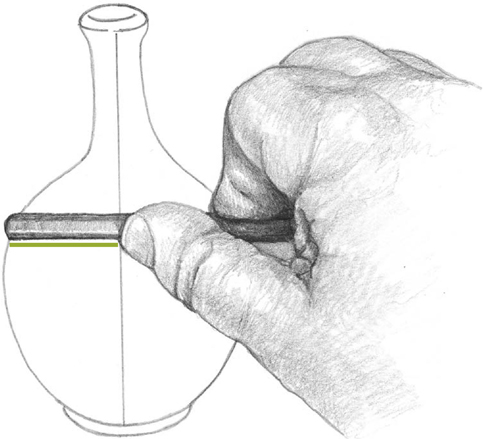
2 Working on the model side of the object, line up the end of a pencil with a selected spot located along the outer edge. Place your thumbnail on the pencil so that it lines up with the center mark.
3 Without moving you r thumbnail from its position, slide the pencil horizontally across the paper until the end lines up with the center line. Where you r thumbnail now rests should be the outer edge of the vase. However, it may actually be inside or outside the edge line. Make a light pencil tick mark where your thumbnail actually rests.
4 Repeat steps 2 and 3 just above and just below the spot you tick-marked. Add more tick marks as you go, mapping the right side of the vase to match the model side.

5 When the mapping is finished, unite the tick marks by a single line and erase the old edge. The vase should now appear symmetrical.
PRACTICE EXERCISE
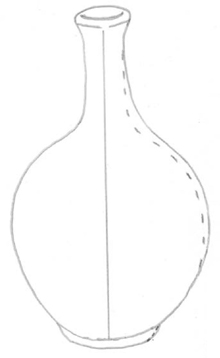
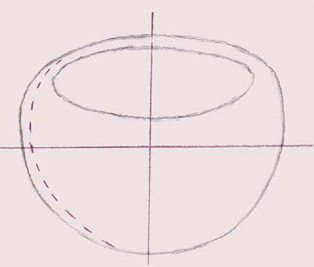
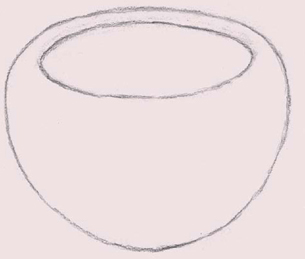
The subject for this exercise is a fairly symmetrical piece of Southwest Indian pottery. Begin by estimating the mid-point of the height and width of the pot. Also study its overall form.
First, start with lightly drawn double pencil lines to indicate the space the pot should take up, considering that it is just a little wider at its mid-point than it is high. Rough in the shape of the pot with a pencil.
To correct the asymmetrical sides, use the right side as the model and measure across, using the thumbnail-and-pencil method of comparison demonstrated. Place tick marks to indicate where the left edge should actually be in order to make it symmetrical.
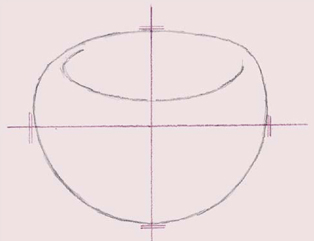
Unite the tick marks into a solid line and erase the old, incorrect edge. The pot should now look symmetrical.
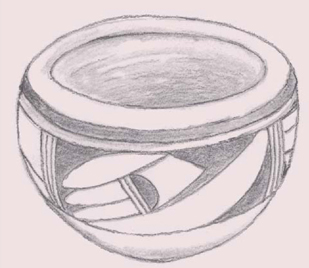
The decorative pattern on the pottery can now be added, along with the shade work on the inside.
This is the same piece of Native American pottery drawn step-by-step on the facing page. However, before the detail work was begun, a pinecone and a string of Indian trade beads were sketched in place to make a more interesting composition. Feel free to add your own embellishments to this still life and see what you can make out of it. I used 2B and 7B pencils, and a paper stub to create the shading.
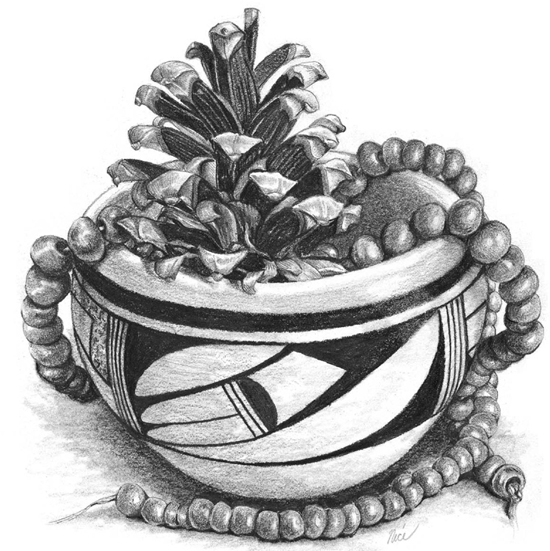
Figure A
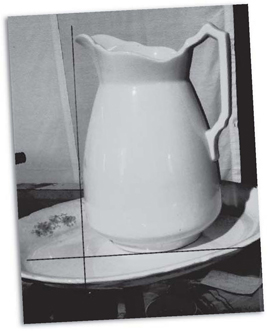
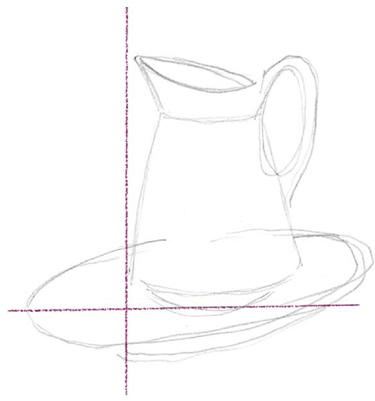
Figure B