
SharePoint has become quite a complex product in its latest releases, from starting out as a portal solution to becoming a complete collaboration platform for businesses. SharePoint can be seen as a web application, and it primarily uses HTTP and HTTPS protocols for delivering content to the users. With SharePoint 2013, there have also been some changes in how it operates. For example, Microsoft has introduced a new distributed cache system, which allows a frontend web server to store a login token in memory. This token is also available for other frontend web servers in the farm. This means that we do not need to set up persistency, as all of the authentication tokens are stored in the cache of the web servers. Also, SharePoint 2013 supports SSL offloading, which means that we can use NetScaler to handle SSL traffic and thereby reduce the load on the SharePoint servers by allowing them to respond only on HTTP.
Lastly, as SharePoint has a conception of what is seen as an internal and a public URL (known as alternate access mappings), we need to configure this as well when we set up load balancing so that SharePoint knows that we have set up a new public URL for the site. We start by adding the frontend SharePoint web servers to the server list by going to Traffic Management | Load Balancing | Servers. Next, we need to create a service or service group, where we add the servers and bind them to port 80 and protocol HTTP. Then, we add an HTTP monitor to the services, and click on Create.
Note
There is also a way to create a custom monitor that actually monitors if a user can authenticate on the SharePoint site. You can read more about this at http://support.citrix.com/article/CTX126201.
Now, we need to create a load-balanced service. Here, we need to bind the services we created earlier, and assign a name, IP address, protocol (SSL), and port (443). We also need to bind a certificate, which can be done in the SSL Settings pane.
After we are done creating the load-balanced service, we need to make some changes in SharePoint. We have to configure public URLs under Farm Settings | Alternate Access Mappings in SharePoint. You can read more about this at http://technet.microsoft.com/en-us/library/cc263208.aspx. Now, we have successfully created a load-balanced SharePoint service.
One thing that is important to note is that NetScaler has a feature called AppExpert. AppExpert allows for simplified deployment of service. This includes load balancing rules, caching rules, compression, redirect, and so on. Citrix has created a template for SharePoint 2013 that we can use with AppExpert. The template can be found at http://www.citrix.com/static/appexpert/appexpert-template.html.
An important point to note is that AppExpert templates are based upon default settings from Citrix and require tuning before being used in a production environment. This feature is available under the AppExpert pane. From there, we need to import the template by clicking on Import AppExpert Template, which we have downloaded from the URL mentioned earlier. So, we have to import the deployment and the template file, and then give it an application name. By default, it is called SharePoint 2013. Next, go to AppExpert | Applications. It will list the application name that was created earlier and also the different services that make up the SharePoint 2013 site, as shown in the following screenshot:
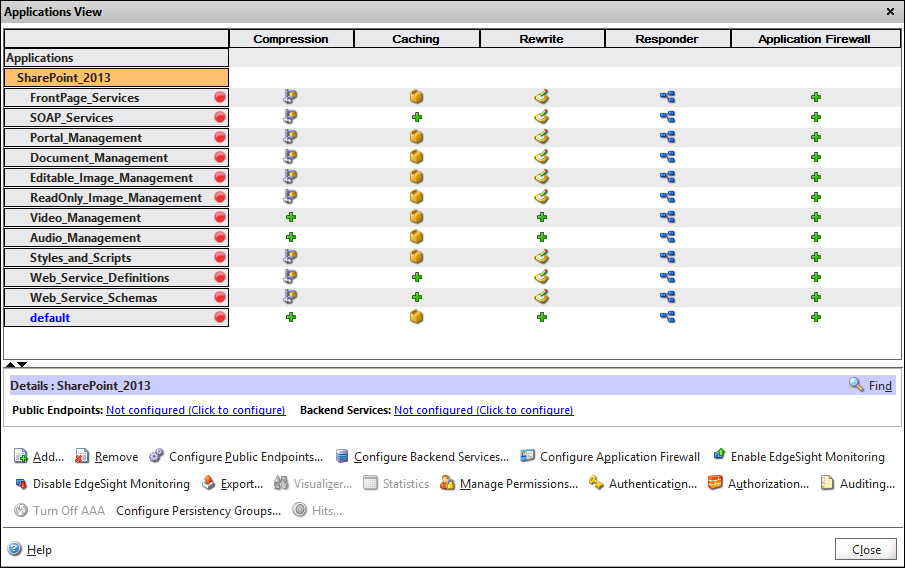
The different services are listed as a subgroup of the application. We can define public endpoint for each of the services or for the whole application. The same goes for backend services. We can define which backend servers should have each of the services. For larger deployments, we will have the different services scattered across different backend servers; however, for a small deployment, it might be the same. So, all we need to do is create a public endpoint on the SharePoint 2013 application level (which is going to create a load-balanced VIP server), and configure backend services, which bind the load-balanced service to the backend servers. The only thing we need to do first is add the backend servers to the server list.